FLUX Tools Outpainting Inpainting Fill Redux Depth and Canny Ultimate Tutorial Guide with SwarmUI
FLUX Tools Outpainting, Inpainting (Fill), Redux, Depth & Canny Ultimate Tutorial Guide with SwarmUI
Full tutorial link > https://www.youtube.com/watch?v=hewDdVJEqOQ
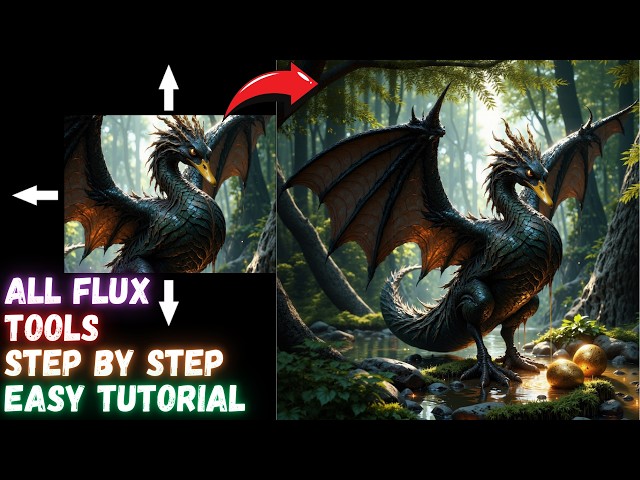











FLUX.1 Tools by BlackForestLabs changed the #AI field forever. They became the number 1 Open Source community provider after this massive release. In this tutorial, I will show you step by step how use FLUX.1 Fill model (inpainting model) to do perfect outpainting (yes this model used for outpainting) and inpainting. Moreover, I will show all features of FLUX Redux model to do style transfer / re-imagine 1 and more than 1 images combination. Furthermore, I will show you step by step how to convert input image into Depth or Canny maps and then how to use them on #FLUX Depth and Canny models. Both LoRA and full checkpoints of FLUX Depth and Canny.
🔗 Full Instructions, Configs, Installers, Information and Links Shared Post (the one used in the tutorial - Public - no-paywall)
Preparation of this tutorial took more than 1 week and this will be the very best and easiest to follow tutorial since it is made with famous #SwarmUI. SwarmUI is as easy and as advanced as Automatic1111 SD Web UI. Biggest advantage of SwarmUI is that, it uses ComfyUI as a back-end. Therefore, It is extremely fast, VRAM optimized and supports all of the newest SOTA models as soon as they are published.
So in this tutorial I will show you how to setup SwarmUI and FLUX Dev tools on your Windows Computer, Massed Compute, RunPod and Kaggle. I will step by step explanatin and show you every tips and tricks that you need to properly do style transfer, re-imagine, inpaint, outpaint, depth and canny with FLUX.
Video Chapters
00:00:00 Introduction to step by step FLUX Dev Tools tutorial
00:02:21 Windows: main part of the tutorial for learning everything about SwarmUI and FLUX Tools
00:03:20 How to do a fresh install and update of SwarmUI
00:04:45 How to set automatic back-end update enabled for ComfyUI
00:05:09 How to update your existing SwarmUI and ComfyUI back-end into the latest version properly
00:05:45 How to download newest FLUX Tools models (Redux, Fill, Depth, Canny)
00:06:50 Updated features and mind blowing speed of SwarmUI Unified Model Downloader
00:08:38 How to start SwarmUI again after the installation
00:09:59 How to use Redux (style transfer and re-imagine) FLUX Tool model
00:10:55 How and when Image Prompt screen appears on SwarmUI
00:11:35 How exactly Model Apply Start works
00:12:45 How to see / follow what is actually happening - see logs
00:13:22 How to use Grid system to find best parameters / settings for your usage case
00:14:21 How to use FLUX Redux model to combine multiple images into a new image - style transfer
00:15:34 How to use automatic face inpainting to improve face quality and consistency with face
YOLO model and segment feature
00:17:10 Merging 3 images at once into a new image with FLUX Redux adapter model
00:19:01 How to use FLUX Canny and Depth models
00:19:21 Beginning to show how to super easy use FLUX Canny model
00:21:20 Pay extreme attention to the aspect ratios when using Canny or Depth model
00:24:32 How to use Canny LoRA model
00:25:18 How to use FLUX Depth model
00:26:50 How to use FLUX inpainting (FLUX.1 Fill) model for inpainting task
00:27:33 How to properly use image editor of SwarmUI for inpainting
00:29:05 Best configs of FLUX fill model inpainting
00:30:28 How to make grid comparison to find best parameters for your case
00:30:57 How to remove / erase masking to fix the mask
00:31:51 Full guide for how to outpaint / expand images better than all paid apps for free with FLUX Fill model
00:34:35 Which prompting strategy works better for out-painting images
00:38:55 Where to find and follow us (SECourses) on Discord, Reddit, LinkedIn and GitHub
00:40:01 Massed Compute install and setup
00:40:43 Selecting SECourses image and using our 0.31$ coupon (50% lower price)
00:42:25 Setup ThinLinc client and connect cloud Massed Compute machine and synch and transfer your files
00:45:24 How to update existing SwarmUI and download new FLUX Tools on Massed Compute
00:49:08 How much time downloading over 80 GB of models takes on Massed Compute
00:49:18 How to start SwarmUI on a shared link to use it in your computer, phone, table but run in Massed Compute
00:49:55 How to utilize multiple GPUs in SwarmUI - e.g. dual GPU setup
00:50:40 How to terminate machine to not use any credits
00:51:05 RunPod install and setup for FLUX Tools and SwarmUI
00:52:28 Which template to use on RunPod for SwarmUI and FLUX Tools
00:52:56 How to set a RunPod port to connect via RunPod port based proxy system through your browser on any device
00:53:51 How to install SwarmUI on RunPod - fresh installation
00:55:52 How to install onnxruntime on RunPod to fix onnxruntime error that you get
00:56:21 How to download new FLUX Tools models on RunPod for SwarmUI
00:59:27 How to start using SwarmUI after FLUX Tools models downloaded and all installed, refresh models
01:00:27 Kaggle install and setup for FLUX Tools and SwarmUI
-
00:00:00 Greetings everyone. Today I am going to show you how to use the newest FLUX models on SwarmUI very
-
00:00:05 easily with the maximum performance and the quality and the best configurations.
-
00:00:11 I will begin with showing the FLUX Redux model, re-imagine input images like this case. Moreover,
-
00:00:18 I will show you how to combine multiple images with FLUX Redux model and re-imagine them like
-
00:00:25 this case. Input images are 3 images and this is the output of combining 3 images with the FLUX
-
00:00:30 Redux model. Furthermore, I will show you how to convert any image into a Canny map, then use the
-
00:00:36 FLUX Canny model and generate new images from the input images like this one. This is an amazing
-
00:00:42 image. Moreover, I will show you how to convert any input image into the depth map then use the
-
00:00:49 FLUX Depth model and generate new images based on the depth of that input image. Furthermore,
-
00:00:55 I will show you how to do in-painting properly and in-paint any part of any image with such an
-
00:01:02 amazing quality that you have never seen before with the inpainting inpainting model of the FLUX
-
00:01:07 Tools. And finally, I will show you how to do outpainting properly. This was something that
-
00:01:13 I have been waiting for. The outpainting quality of the FLUX Dev is non-challenged. There is no
-
00:01:20 other even paid services to outpaint like this one. And this is all running locally
-
00:01:26 on your computer. What if you are a GPU poor, if you don't have a powerful GPU? Don't worry,
-
00:01:32 I will show you how to install and set up SwarmUI with FLUX Tools on RunPod,
-
00:01:37 on Massed Compute, which is my favorite platform with amazing price and amazing speed. And finally,
-
00:01:45 I will show you how to use SwarmUI and FLUX Tools on a free Kaggle account. If you don't want to pay
-
00:01:52 to the RunPod or Massed Compute, Kaggle is way to go. This tutorial will be a public tutorial,
-
00:01:58 you will be able to learn how to use FLUX Tools totally free without any paid content,
-
00:02:03 without any paywall. And I will also show how to generate grids to find the best hyperparameters
-
00:02:10 for your cases. I already have prepared some best hyperparameters. But when you learn how to use the
-
00:02:16 grid system of the SwarmUI, you will get even better images. So as usual, I have prepared an
-
00:02:23 amazing public post. This post is 100% public. You don't even need to login into the Patreon,
-
00:02:31 register into Patreon to see this post. As I promised, this is going to be a fully public
-
00:02:36 tutorial. I have updated my SwarmUI playlist. So click this link. And if you are new to the
-
00:02:44 SwarmUI, you can watch them from beginning to the end. This is the oldest one. This is the newest
-
00:02:50 one. And each one of them is a public tutorial. Since there weren't any changes. For installation
-
00:02:57 and setup of the SwarmUI, I recommend you to watch these tutorials. Because I am going to
-
00:03:03 make this one, the one you are watching right now, shorter than the other ones at the installation
-
00:03:10 part. They are also individually linked here. So I will quickly begin with installation and update
-
00:03:18 if you already have SwarmUI. The files that you need are located in the attachments. Moreover,
-
00:03:26 I will show how to use the FLUX tools, how to download models and install on RunPod and
-
00:03:32 Massed Compute as well. However, I am not going to show how to use at that part of the tutorial.
-
00:03:39 So to learn how to use FLUX tools, you need to watch this part. This Windows usage part. Then
-
00:03:46 you can look at the Massed Compute and RunPod part to how to install them. So the Windows installer
-
00:03:54 is here. You see Windows Installer bat file. Remember, to be able to use SwarmUI on Windows,
-
00:04:00 you need to have .NET 8 from here installed. So I am going to install into R drive into swarm_tools
-
00:04:08 folder. Double click. More info run anyway. It will automatically start the installation.
-
00:04:13 This is same as other tutorials so it will be fast. I agree. Customize settings. Modern
-
00:04:19 dark. Just yourself on this PC. ComfyUI local. I am not going to download anything. Next. Yes,
-
00:04:26 I am sure. Install now. So the installation is getting completed. In the logs you can always see
-
00:04:32 what it is doing. It is installing the necessary libraries in the initial install. And there is one
-
00:04:39 very important thing. In the backends. In the ComfyUI. It is automatically added here. You
-
00:04:45 should have always update to have always updated ComfyUI backend. Because I am getting a lot of
-
00:04:53 complaints that the newest models are not working because their ComfyUI back-end is not updated. So
-
00:04:59 when this option is selected it is going to update the ComfyUI backend to the latest version whenever
-
00:05:06 you restart your SwarmUI. So the installation has been completed. Now I will show how to update your
-
00:05:12 existing SwarmUI installation before beginning this tutorial. It is inside here. Enter inside
-
00:05:19 the SwarmUI installed folder and double-click start the windows update.bat file. It will update
-
00:05:25 the SwarmUI to the latest version. Moreover, if your ComfyUI is not automatically updated for any
-
00:05:32 reason, in the ComfyUI update folder you will see ComfyUI update.bat file. Double-click it. It will
-
00:05:39 update it to the latest version. Now the SwarmUI is ready. To use the FLUX Tools, what you need?
-
00:05:46 You need to download the FLUX Tools models. 28 November update. Which files you need? Whichever
-
00:05:53 you want to use. But I recommend to download all of them and test all of them. So the FLUX.1 Redux
-
00:06:00 dev file goes into this folder. The other one goes into this and this one goes into this. However,
-
00:06:06 I recommend to use SwarmUI unified downloader which I am going to use. So click here. I am
-
00:06:12 keeping this downloader very up to date and I am adding the models as you request them. Go to the
-
00:06:19 bottom attachments. Download the latest zip file. Move that zip file into the parent folder of your
-
00:06:27 SwarmUI folder like this. Right-click and extract all. I am going to extract. So you see they are
-
00:06:33 extracted into a new folder. So right-click and cut them. Move them into here. This folder. Then
-
00:06:40 you are ready. So double-click Windows download models.bat file. More info run anyway. It will
-
00:06:47 list you all of the possible options. So for this tutorial what I am going to do is. I am going to
-
00:06:53 use FP16. It will be automatically casted into FP8 when I am using because my GPU is not sufficient.
-
00:06:59 So option 1 comma. However if you have RAM limited you should download the FP8 FLUX dev model. The
-
00:07:07 scaled may not work with the newest FLUX tools. So you should download option 10 if you don't have
-
00:07:15 64 GB of RAM memory. Then I am going to download FP8 version of the T5. This is scaled version as
-
00:07:22 you are seeing. Option 6. Then I am going to download the newest FLUX tools. They are all
-
00:07:29 here as you are seeing. Option 13, 14, 15, 16, 17, and 18. You can also download the automatic face
-
00:07:39 inpainting yolo model which is here. Option 11. And we are ready. Then hit enter and it will start
-
00:07:46 downloading all of the models with the maximum possible speed of your internet connection. I
-
00:07:53 have optimized the installer for this task. You see it is downloading with over 150 megabytes
-
00:07:59 per second. This is on my personal computer. If you are installing on the cloud services it is
-
00:08:05 even over 1000 megabytes per second. So it depends on your internet speed and your hard drive speed.
-
00:08:12 But this will download with the maximum possible speed. It is not like downloading from your
-
00:08:18 browser. This will be way faster way way faster. Okay. So all of the models have been downloaded
-
00:08:25 under 20 minutes. Folder verified. Downloads have been completed. Now we are ready to start
-
00:08:32 using the FLUX tools with the SwarmUI locally on our Windows computer. So close this. Go back to
-
00:08:39 your SwarmUI installation. This is the folder and to launch the SwarmUI we are going to use launch
-
00:08:45 windows.bat file as usual. It is going to start the SwarmUI. So we are both updated to the latest
-
00:08:53 version of SwarmUI and the ComfyUI backend. And we have downloaded the FLUX tool models and the
-
00:09:00 FLUX dev model. I'm also hopefully going to add FP8 version of these FLUX tools when they become
-
00:09:07 available. FP8 version is especially important for low RAM users. Because otherwise it will load into
-
00:09:16 RAM memory and then it will cast it into the FP8 and it will take time if you don't have a high RAM
-
00:09:23 memory. So I'm going to begin with showing you how to use the FLUX Redux models. As I have shown, I
-
00:09:32 have made a lot of a lot of research over 3 days, hundreds, thousands of images. So I have prepared
-
00:09:40 best working configurations. They are inside the SwarmUI unified downloader. You see best working
-
00:09:47 configurations. If you don't want to watch this tutorial you can just look at this file to see
-
00:09:53 the best configurations. So I'm going to use this image to generate similar images as a beginning.
-
00:09:59 How are you going to use the FLUX redux model? Drag and drop the image into the prompt bar here.
-
00:10:06 So you see, I have dragged and dropped the image that I want to use as a base into the prompt bar
-
00:10:13 like this. Not init image or anything else. CFG scale is 1. The sampling I let them default. It
-
00:10:20 works best. However, I find that FLUX guidance scale 6 is working best. This is what I recommend.
-
00:10:28 And turn off the init image. We are not using it. Control let everything is turned off. In
-
00:10:34 the advanced sampling, since I have lower VRAM, I am going to make the precision as FP8. So it
-
00:10:43 is going to convert the base model into the FP8 on my GPU, but if you are using it on a high VRAM GPU
-
00:10:51 like 48GB I recommend FP16. And after I did load image into here as a prompt, you will see that
-
00:10:59 a new screen appeared. Image prompting. You see it is enabled. So in here we are going to
-
00:11:05 select FLUX.1 Redux dev.safetensor file. This is super important. Base model is FLUX dev and
-
00:11:12 this is the style model. Now which style model merge strength you need? I find that 0.4, 0.5,
-
00:11:22 and 0.6 are the best ones. I cannot say which one will work best. So I recommend to test all three
-
00:11:29 of them. I usually find that 0.6 is working best. But you need to compare. Model apply start. This
-
00:11:37 is super important. Since it is percentage based but it only can works with integers
-
00:11:42 because it is depending on the steps count. You need to calculate which step you want to start.
-
00:11:48 If you want to start with the step 1 then you can enter something like this. It will start
-
00:11:53 with the step 1. If you want to start with the step 2 and if you are doing 40 steps then it is
-
00:11:59 2 over 40. So it is this value. If you set this model apply start at this, it is going to start
-
00:12:07 at the step 2. However I find that starting model start at 0 is working better. So it is up to you.
-
00:12:13 You can compare it. Like enter 0.01. It will start at the step 1. If you enter 0.05 it will start at
-
00:12:22 the step 2 according to the number of steps you are doing. But I find that 0 is better.
-
00:12:29 And finally we need to define our prompt. What we want to generate similar image to
-
00:12:35 this. I am going to generate a dragon bird. Something like this. And the seed is random.
-
00:12:42 Let's generate the first image. So if you want to follow what is happening. Go to the server. Go to
-
00:12:48 the logs. Go to the debug from view. And you will see what is happening. It is downloading
-
00:12:53 the clip vision automatically since this is first time running on a fresh installation.
-
00:12:59 It started the generation. I have RTX 3090 and it was 1.6 seconds per it. If you have RTX 4090 it
-
00:13:08 would be like 3 times faster. So this is the image generated. I think it is looking pretty pretty
-
00:13:16 amazing. So as I said. To be sure which style model merge strength is best. You can use this.
-
00:13:23 It is so easy. Go to the tools. Grid Generator. And enter here: Style Model Merge Strength. So
-
00:13:31 try 0.4, 0.5, 0.6. And generate a grid. You can also give a name. Like test1. And generate grid.
-
00:13:40 OK. So the grid generation has been completed. Click here to open it also from loadgrid config.
-
00:13:46 You can select Load grid config and open. Let's open. So the grid is here. The first one is 0.4.
-
00:13:54 This is the generation. 0.5. And 0.6. So you can compare. You can pick the best one. In this case,
-
00:14:02 I think the best working one is 0.5. Because I see some errors in the other two. Like here. Or
-
00:14:11 here. So I like the 0.5 best. But it is up to you. Whatever you want. And also I have entered a very
-
00:14:19 very basic prompt. Second usage case of the Redux is combining multiple images. So I am opening a
-
00:14:28 new tab. And I am going to combine three images. So the first image will be this one. This is an
-
00:14:34 image that I have generated with my trained model. So I am going to combine this image with a style
-
00:14:41 image. Move it here. Then. I am going to move the style image which is this one. However to keep the
-
00:14:49 face consistency. I am going to use the trained model as a base model. Which is here. This one.
-
00:14:57 And if you wonder how you can train yourself with such quality. This is the tutorial that
-
00:15:03 you need to watch. Watch this tutorial. And you will be amazingly train yourself and generate
-
00:15:10 amazing quality images as that one. So what else I need. When combining styles you need to prompt
-
00:15:17 them accordingly. So this is a real image. A person. And this is an anime style image. So
-
00:15:24 this is the anime style image that I am going to use. Therefore I am going to say anime ohwx man
-
00:15:31 in a jungle. Then I am going to inpaint the face. For inpainting face I am going to use YOLO model.
-
00:15:39 Segment YOLO. And the model that I am going to use is man face. The values is like 0.6, 0.5. So the
-
00:15:50 0.6 is how much denoise I want to have. And I am going to say anime ohwx man. The image prompting
-
00:15:58 is ready. It is selected. Let's make the strength as 0.5. Everything else is same as before. And now
-
00:16:06 we are ready to generate. So hit generate and just wait. Okay. The image has been generated. However,
-
00:16:13 you see that I have changed the YOLO face segmentation model because the other one
-
00:16:21 gave an error. I have reported that. So I have used the classic after detailer trained YOLO face
-
00:16:30 model. This face model information exists in the main post that I have shown you in the beginning.
-
00:16:38 So here the image that has been generated. If the resemblance is not that great. You can modify your
-
00:16:45 prompt. You can generate more images. Or you can even use the variation seed and set it like 0.05.
-
00:16:54 So it is going to change the image only 5%. So you know the drill. You need to generate more
-
00:17:00 images to get the perfect accuracy. It is still very decent. However, it can be way better if I
-
00:17:06 want and if I generate more images. So what about merging 3 images at once? The logic is totally
-
00:17:16 same. All you need to do is adding the third image. You see. Now I can merge 3 images. You
-
00:17:23 don't even need to change the prompt. But you can also change the prompt. So let's make the
-
00:17:28 seed minus 1 to get a random one. And I am going to add the car to the prompt with a car. Since
-
00:17:37 this is anime, these two styles are anime, I am adding the anime word here. And let's generate
-
00:17:43 again. To see how it is going to merge 3 images into the one image with the FLUX Redux. As you
-
00:17:50 combine more images, the speed drops. Currently it is 2.25. It was 1.97 when there were 2 images.
-
00:18:00 By the way, this YOLO model is also automatically downloaded by the SwarmUI Unified Downloader that
-
00:18:07 I have made. Currently inpainting the face. It is already good. But it is going to be better. So if
-
00:18:13 your face is better initially, you will get even more better image when you inpaint the face. So
-
00:18:21 the base initial image that you get matters most. And the image has been generated. As you can see,
-
00:18:29 all 3 images are now merged into a single new concept. And this was the third image
-
00:18:37 that we have used. When you pay attention, you will notice that the third image is also
-
00:18:43 excellently put and combined into the image. So, you see this was its style, its environment. And
-
00:18:51 we can see that environment is put there into the final composition of the image. So you can
-
00:18:57 even combine more images. This is how the Redux model works. Now it is time to move how to use
-
00:19:04 the FLUX Canny DEV model and the FLUX Depth DEV model. You can also use their LoRAs, however,
-
00:19:12 their LoRAs are extremely low quality, so I don't recommend to use them. I compared them,
-
00:19:19 but I will still show them how to use. Let's begin with using the FLUX Canny model. And finally,
-
00:19:27 after those two, I am going to show how to do inpainting and outpainting. So keep watching.
-
00:19:33 To use the FLUX Canny dev model, we need a Canny preprocessed image. And also, we need to select
-
00:19:40 the accurate model. So let's open a new tab. And I am going to load the FLUX Canny dev model load
-
00:19:46 now. When you select it, it will also load it when you generate. But I'm just speeding up the things.
-
00:19:52 And you see the image prompt has been disappeared. So as I said, you need to have preprocessed
-
00:19:59 Canny image. How we gonna do it? To be able to do it, I am going to use ControlNet of the SwarmUI.
-
00:20:07 So the ControlNet is here. First of all, you need to have installed ControlNet preprocessor.
-
00:20:12 Because we are going to use the preprocessor of the ControlNet. Click this. And it will ask you.
-
00:20:17 Click OK. It is going to install and make it ready. You can watch the status from the logs
-
00:20:24 as usual with the debug option. You will see what it is doing. And it is installing the ControlNet
-
00:20:30 preprocessor right now. So let's just wait until the backend has been loaded. If it doesn't load,
-
00:20:36 you just can restart. But it usually works. OK. So it has been installed. Now. First, choose the
-
00:20:44 file that you want to use as a Canny model. So I am going to use this dragon bird, duck bird,
-
00:20:51 whatever you can call it. Then, which preprocessor is best? So I have compared the preprocessors and
-
00:20:58 I find that Pyre Canny preprocessor is working best. After selecting it, click preview. And it
-
00:21:05 will generate the preprocessed Canny preprocessed image. It will first download the preprocessor,
-
00:21:11 then it will preprocess it, so it will take some time. And also always it will load the
-
00:21:16 model first. OK. So this is the preprocessed image. There is one another very crucial thing
-
00:21:22 that you need to be careful of when you are generating the preprocessed Canny or depth image
-
00:21:28 for the FLUX tools models. You see this image, this input image has 3 to 2 aspect
-
00:21:34 ratio. Therefore. If I generate the Canny map or depth map with aspect ratio of 1 to 1,
-
00:21:41 let's see what happens. So I'm going to select the Canny preprocessor from here, this one,
-
00:21:46 and preview. And let's see the result. And this is the result. So you see that image turned into
-
00:21:54 this one. This is looking very bad. So how to fix it? Pay attention to the aspect ratio here
-
00:21:59 or the resolution and select the aspect ratio if it exists here. Or set custom resolution to the
-
00:22:07 any resolution that you need. So since this is 3 to 2, I make it 3 to 2 and I will preview and
-
00:22:13 generate again. And you will notice that the newly generated Canny image is way better. So this was 1
-
00:22:20 to 1 and this is 3 to 2. You see 3 to 2 is looking way better, way more accurate. This applies to the
-
00:22:28 depth preprocessor as well. So pay attention to the input image aspect ratio when you are using
-
00:22:37 preprocessors to generate Canny or depth map to use them inside FLUX tools. And this is the depth
-
00:22:44 map of the same image with 3 to 2. Now we are not going to use the ControlNet. We are going
-
00:22:51 to use this as an input image. So drag and drop it into here and then use as init. Then turn off the
-
00:23:00 ControlNet. Don't forget it. It doesn't work with ControlNet. And you will see the init image is
-
00:23:05 ready. Now what you need to do is set this as init image creativity 1. Don't forget that. And you
-
00:23:12 don't need to change anything else here. I have compared everything. All of this information is
-
00:23:18 shared in this txt file. Then what else you need to do? You need to set the FLUX CFG scale to 30.
-
00:23:28 Like this. This scroller will go up to 10 but you can type it here as 30. And that's it. This
-
00:23:35 is working best. I have compared all of them. Don't worry. And let's generate an image but
-
00:23:42 let's first write our prompt a dragon bird like this. Ok generate. Now it is going to generate an
-
00:23:49 image based on this. Because this is used as an init image and the FLUX canny model is selected.
-
00:23:56 The generation speed is even faster than the regular dev model. You see 1.35 seconds per
-
00:24:04 it. And the image has been generated. This is the generated image. It's a decent quality compared
-
00:24:10 to the simple prompt that we have entered. And more importantly this was the base image. You see
-
00:24:18 it is matching it very accurately when you think about how canny model works. So it is keeping the
-
00:24:24 structure, the environment. It's a pretty accurate image. And when we use the LoRA model now you will
-
00:24:31 see the difference. So to be able to use the LoRA model I am going to use the same seed parameter
-
00:24:37 here. And I am going to select FLUX 1 dev. I am going to go to LoRAs and I am going to select
-
00:24:43 FLUX canny dev LoRA. Which LoRA strength you should use. Unfortunately none of them is working
-
00:24:50 very good but let's use like 0.97 and generate. So remember as a model we select FLUX 1 dev and
-
00:25:00 as a LoRA we select the canny dev LoRA. LoRA canny is also exactly same speed there is no speed delay
-
00:25:08 added when we are using it. And this is the image of the LoRA canny. Unfortunately it is very bad
-
00:25:15 therefore I do not recommend it. Now how we are going to use the FLUX depth model. So let's cancel
-
00:25:22 this LoRA. Let's go to the models and let's select the FLUX depth. You see here depth dev model. You
-
00:25:30 can also see the selected model here. Right click and load now. To be able to use the depth model
-
00:25:35 we need to have depth image. So to get the depth image I am also going to use the ControlNet again.
-
00:25:42 Go to ControlNet and select the preprocessor depth. You see there are several depths I have
-
00:25:48 compared all of them. The depth anything and depth anything version 2 working best. Let's go with
-
00:25:54 depth anything version 2. This is a little bit more accurate. Click preview. First time it will
-
00:26:01 download the depth model then it will generate the preview as usual. So the depth mask of the
-
00:26:08 image has been generated. Drag and drop it here and use as init. Then turn off the ControlNet.
-
00:26:15 So what is changing? Nothing. Everything is same as the FLUX canny. And let's generate
-
00:26:22 the image and let's see the output of the depth model. The speed of depth model is same. You see
-
00:26:28 1.35 second IT on RTX 3090 Ti. Okay so the image has been generated and depth model is working way
-
00:26:37 better way way better than the canny model. So this is how you use depth and canny models of
-
00:26:44 the FLUX tools. Now as a next step I am going to show the FLUX inpainting. As an inpainting model
-
00:26:51 we are going to use FLUX 1 fill dev model here. This one. Load now. You see the fill dev model
-
00:26:57 is selected. This is used for both inpainting and outpainting of the images. Now this part is really
-
00:27:05 important because the interface of the SwarmUI is a little bit harder to use for image inpainting
-
00:27:12 or image editing overall. But I am going to show you everything. Don't worry. So first of all we
-
00:27:19 need to choose our editing image. To choose your editing image I am going to use this image as an
-
00:27:25 example. You see this was for Invoke AI. This was also generated with my DreamBooth / Fine-tuned
-
00:27:32 model. So click edit image and it will open the image editor window. So I am using my mouse wheel.
-
00:27:42 You really need your mouse wheel otherwise it will be super hard. You see the orange window here it
-
00:27:49 is the camera. So for inpainting it is pretty straightforward. You need to have mask here. So
-
00:27:56 select this mask. Make sure that it is selected the mask here. Then you need to use paint brush
-
00:28:03 and mask the part where you are going to inpaint. Remember this is totally dependent on your input
-
00:28:10 image resolution. Therefore if your input image is high resolution it is going to use huge amount
-
00:28:15 of VRAM. Don't forget that. All right. Then what we are going to do is let's make the seed random
-
00:28:22 and I am going to select the paint brush. You see there is now new icons at the bottom. Which
-
00:28:29 is radius. I am going to make the radius bigger and I will zoom with my mouse wheel. And I am
-
00:28:36 going to mask it like this. Select the paint brush again and mask all the area that you want. You can
-
00:28:41 make a perfect mask this is up to you. Now we are ready to do inpainting. What you want to inpaint
-
00:28:48 I am going to inpaint into like this. SwarmUI text on a board. Like this. SwarmUI text on a
-
00:28:56 board. You can also add some prompts. Like. Let's say glowing and burning. SwarmUI text. So what
-
00:29:03 else we need to change. Again the FLUX guidance scale is 30 for inpainting. Init image creativity
-
00:29:11 is 1. And what else we need. None of these are selected. And let's use a certain seed because I
-
00:29:18 am going to test something else and show you it's a newest feature. Okay 40 steps. And the sampling
-
00:29:25 is default. And init image creativity is 1. And the FLUX guidance scale is 30. So these are the
-
00:29:32 best settings as you are seeing right now. Let's generate. The inpainting speed is also same as
-
00:29:38 you are seeing. And the inpainted image has been generated. It only inpainted the masked area as
-
00:29:46 you are seeing right now. Okay to show the other example which is mask shrink growth which lets the
-
00:29:53 AI to use the surrounding area more accurately. I am going to inpaint my hair. So let's brush my
-
00:30:02 hair. This will be a good example. Okay let's make it this. Okay let's control-z. Okay. Okay let's
-
00:30:11 mask the hair as much as possible. When you are holding the control key with your mouse wheel you
-
00:30:17 can change the radius like this. Okay let's make the hair like red hair. Something like this. And
-
00:30:24 let's generate an image then I will try the mask shrink growth. Actually let's make a comparison.
-
00:30:30 So red hair and go to the tools. Go to the grid and let's change the mask shrink growth from here.
-
00:30:38 So let's search for mask shrink growth. Let's try this as 0 versus like 128. Shrink test. If you
-
00:30:48 get something like this it is not important and generate grid. Let's see what we are going to get.
-
00:30:54 Oh by the way we didn't remove this masking. So let's just interrupt all sessions. And to
-
00:31:00 unmask it there is erasers radius let's erase this mask now generate grid. Don't forget we'll see the
-
00:31:07 masks on the screen here. Yeah I know it's hard to see but the mask will be here on your screen. Okay
-
00:31:13 the grid has been completed let's open it and let's see the difference. So this is mask shrink
-
00:31:19 growth is 0 and this is 128 and when I look at the difference I think 128 is looking more natural as
-
00:31:29 you are seeing right now. So it is up to you. You can always make comparisons and see which one is
-
00:31:35 working better but I like it. It is really really cool and this is based on the mask that we have
-
00:31:42 made and it is really looking natural if you ask my opinion. So it is up to you. You can compare
-
00:31:49 and see which one is working better. So finally I am going to show you how to outpaint the images.
-
00:31:56 Which is one of the most important one. So let's open a new page. For this one we are using FLUX
-
00:32:02 1 fill dev model. Because this is both inpainting and outpainting. I will show the example on this
-
00:32:08 image. So drag it and drop it that image here and I will use as init. You can also pick the
-
00:32:15 init image from choose file from here. Init image creativity is set 1. This is important. These
-
00:32:21 other options are not making any difference with init image that I have found. FLUX guidance scale
-
00:32:28 is again 30 and the more steps you do you get better results. I have tested that. So we are
-
00:32:34 going to do edit image again and this yellow part is our camera. So to outpaint it I need
-
00:32:44 to move this image out of the camera so it will fill the empty camera area. How am I going to do
-
00:32:52 that? First of all I need to select the image from here. You see I have selected the image. Go to the
-
00:32:57 move and then drag and drop the image out of the camera like this. So I am going to zoom in and I
-
00:33:04 will be sure that it is properly positioned like this. Okay. So you can even outpaint like 40%,
-
00:33:11 45%. You can also do small steps. Small steps would work better. But I just noticed that this
-
00:33:18 is not the image that I wanted to outpaint this was already outpainted. Which one was the init
-
00:33:25 image that I wanted to use. It was this one. This was the original image. So let's click edit image
-
00:33:32 again and let's click the move and select the image. Let's move it. Sorry that this will be
-
00:33:38 like two times showing but you understand the logic. Okay and here. Okay let's zoom in. Okay.
-
00:33:46 Yeah I know it is not that so easy but I am going to outpaint it like 50% right now. Then how we
-
00:33:53 are going to outpaint? Click mask and select the paint brush. Set your radius and mask this corner
-
00:34:03 area. Yeah I know it is hard to make a straight line. It is not that important. And that's it. Now
-
00:34:08 you are ready. A bird dragon. So we can make this random seed or whatever we want. I will
-
00:34:15 generate like 8 images. The FLUX guidance scale is 30 as we set and the image creativity is 1.
-
00:34:22 Then are we ready? Yes. Make sure that the grid is not selected. Generate. Now it will generate
-
00:34:28 8 images. Alright the generations has been completed and there are several very important
-
00:34:35 things. The first generations that I have made with a bird dragon generated unwanted objects
-
00:34:43 like this. Why? Because we are really expanding the picture hugely. Huge percentage. Therefore,
-
00:34:52 it is adding unwanted objects like this. If you define the prompt with an extreme details. I mean
-
00:35:00 something like this. I have used the chat GPT to generate this. Then it is adding additional
-
00:35:07 good images as well. If you are looking something like this. Yes you can use. However. If you want
-
00:35:13 to make the image generation something like this. Like this. Like this. I mean look at this. This
-
00:35:20 is just perfect. You can not get this in the paid Photoshop, in Midjourney, wherever, whichever the
-
00:35:28 platform or other model you are using. All of them is just perfect. Just amazing. So the key to get
-
00:35:35 this is not using any prompt. Just empty. When you leave it empty, the FLUX is amazingly generating
-
00:35:45 the rest of the image. Just perfect. Just amazing. So pick the best one that you liked. I mean all of
-
00:35:51 them is just amazing. I can use every one of them. So I am going to use this one. However this image
-
00:35:57 is now incomplete. It is not like the full image. So how we gonna make it full? Drag and drop this
-
00:36:05 image into this area. And then click these three dots and click store full canvas to history. Then
-
00:36:14 it will make it a complete image like this. Just purely amazing. Now you can continue expanding
-
00:36:21 from right from top and make this image fully complete. So to do that, we need to click X and
-
00:36:28 click edit image and the process is exactly same. Select the image. Click move. Let's move it a
-
00:36:36 little bit bottom like this to expand it. But you see that it is just extremely powerful to expand
-
00:36:43 in any direction. So let's make it expand like this. Then select mask. Click paint tool. Mask the
-
00:36:52 border like this. And continue generating images without any prompt. And it will automatically
-
00:36:59 expand our image. This is just mind blowing quality. You see it started the expansion. And it
-
00:37:07 is already looking good from the preview image. I can see that. If you don't like the preview of the
-
00:37:13 image, you don't need to wait fully. Just click this X icon. And it will cancel the generation as
-
00:37:19 you are seeing right now. Then click generate and it will continue generating. So I will show one
-
00:37:25 more time how we were making the final image. Drag and drop to the camera view. Click three
-
00:37:31 dots. Store full canvas to history. Then the image is ready. Let's just download the image more and
-
00:37:39 download. So from what to this image. Original starting image was this one. So let's see them in
-
00:37:47 the same image. Like this. This image. Into this image. Zoom in. Okay. Magnificent. So this was the
-
00:37:55 original image. And this is the final image. Look at the expansion. There is no such outpainting
-
00:38:02 exists as good as this one. We have outpainted the image into the perfect quality image. The
-
00:38:09 environment. The wings. I mean it is just perfect. From this image to this image. I mean look at this
-
00:38:17 quality. Look at this outpainting. This image. To this image. It is just mind-blowing. This
-
00:38:23 image. To this image. Now we have seen everything regarding the FLUX tools. The usage is exactly
-
00:38:31 same on RunPod and Massed Compute. First, I will show how to install and start using on Massed
-
00:38:38 Compute. Then I will show how to install and start using on RunPod. I am not going to repeat the
-
00:38:44 parts that I have shown in the Windows tutorial. So it is mandatory to use the Windows tutorial
-
00:38:51 part. Now we will begin with installing on Massed Compute. Before starting the Massed Compute part,
-
00:38:57 at the top of our main post, if you join our Discord, I appreciate that you see our Discord
-
00:39:04 link is here, when you click it, you will see our Discord page, we have over 9000 members and I am
-
00:39:10 replying every member, whether they are Patreon supporter or not. Also, if you go to Stable
-
00:39:15 Diffusion and Generative AI GitHub repository from this link, I appreciate that if you Star it,
-
00:39:22 if you Fork it, and if you Watch it. If you also sponsor me, I would appreciate that. Moreover,
-
00:39:28 we have a Reddit, you see the link is here, click it. And if you follow our Reddit, I appreciate
-
00:39:34 that very much. Please become follower, subscriber of our Reddit page, because I am sharing so much
-
00:39:41 information here. And finally, you can follow my LinkedIn account here. So you see this is
-
00:39:48 my LinkedIn account, when you open my LinkedIn account, you will see my account, you can follow
-
00:39:55 me on here as well. I appreciate that. Now we are beginning the cloud part of the tutorial. Okay, we
-
00:40:02 are starting to cloud part of the tutorial. This part is especially useful for people who doesn't
-
00:40:09 have a powerful GPU and who wants to scale their generation speed. So type Massed Compute, search
-
00:40:16 for Massed Compute Instructions. The instructions of the Massed Compute is here, the installation is
-
00:40:22 exactly the same, the initial installation, only the FLUX tools will be different. I recommend you
-
00:40:28 to use this link to sign up, I appreciate that. So after signing up, you can go to the billing and
-
00:40:35 set your billing. You see the billing is here, set like $10 and $10 here, it is up to you to
-
00:40:41 set. Once you have the setup, go to the deploy and in here we are going to select our category
-
00:40:48 creator and we are going to select SECourses. This is our image. This is the most important
-
00:40:54 part. What I recommend is RTX A6000 GPU and our coupon, which is SECourses and then make the GPU
-
00:41:03 quantity according to your needs. If you select 1, it will work fine. If you select 2, you can speed
-
00:41:08 up your generation 2x. So select 1 and deploy. And verify. And then click deploy. However, there are
-
00:41:15 no available GPU right now because Massed Compute is extremely popular because of the features it
-
00:41:22 has. However, I am talking with the team and they are going to add more GPUs hopefully very soon.
-
00:41:27 Alternatively, you can use the ALT config if it is available. It only has lesser RAM memory. The
-
00:41:34 coupon works and it is $0.30 per hour after the coupon applied. If it is also not available, you
-
00:41:39 can use other GPUs. Like L40s if it is available or L40. So you can use any of them. However,
-
00:41:47 the coupon will work only with RTX A6000 ALT config and RTX A6000. So currently I am going to
-
00:41:53 use RTX A6000 NVLink. There is 1 available GPU. The coupon will not work on that unfortunately.
-
00:42:01 And click deploy. So once the machine has been generated, it will start initialization part.
-
00:42:07 We are updating our image. Hopefully very soon it will be up-to-date with CUDA latest version,
-
00:42:14 the latest drivers, latest installations. And the initialization part will become way faster.
-
00:42:20 We are working on that. So when you are watching this tutorial, hopefully it will be way faster to
-
00:42:24 initialize. And to connect the initialized virtual machine, the cloud machine, we are going to use
-
00:42:30 the ThinLinc client. It is here. Click that link. If you did set up this, you are ready. But if you
-
00:42:36 didn't, download according to your platform. You see you can use it on the Windows, Mac,
-
00:42:40 Linux, wherever you are using. After download, just click on it. Click yes. Click next. Click
-
00:42:47 next. Install. That's it. And click finish. Now with the ThinLinc client to connect, if you
-
00:42:53 want to synchronize the small files between your computer and the Massed Compute virtual machine,
-
00:42:59 click options. Go to the local devices, uncheck all, and just check the drives, details. In here,
-
00:43:05 remove whatever is available. Click add. So you are going to add an existing folder from your
-
00:43:11 computer. You can also copy paste the folder path to here, which I recommend. So generate
-
00:43:16 a folder in one of your drives. For example, I have generated this folder. I copy this,
-
00:43:22 paste it here. Then I will select the permission read and write so it can work both way, upload and
-
00:43:27 download and click OK. As an optimization, if your ThinLinc client is working slow,
-
00:43:33 uncheck this, select tight, select custom, 9, allow JPEG compression 0, and set the color level
-
00:43:40 medium and SSH compression. This is the speed of your ThinLinc client slightly, however, it will
-
00:43:46 reduce the quality of the image. So I'm going to make this auto select for now. And just like this.
-
00:43:52 And OK. Now we need to wait initialization to be completed. One of the advantages of
-
00:43:57 the Massed Compute is that not only the devices are great, the speed is great, but also our image
-
00:44:03 is specially crafted. It has all the things that you need, like SwarmUI automatically installed,
-
00:44:09 one trainer automatically installed. Forge web UI automatically installed. And many other things.
-
00:44:13 We are adding things that you are demanding from us. We also have some base model automatically
-
00:44:20 installed. It is coming up with the image you are going to see in a moment. And hopefully we
-
00:44:25 are going to update it even into a better version very soon. So the machine has been initialized.
-
00:44:31 So copy the IP address, paste it here like this. You see, copy the username, paste it here like
-
00:44:37 this and copy the password and paste here then connect. Click continue. Click start. And we are
-
00:44:44 into ThinLinc client. What if, if you want to turn off your computer and connect again, just
-
00:44:49 click X and turn off the ThinLinc client. Open the ThinLinc client again and copy the password
-
00:44:55 again. It will remember the last settings. Do not click end existing session because it is going to
-
00:45:01 terminate all of the running applications. You will not lose the existing data on the server,
-
00:45:07 but all the running applications will be terminated. You only need that option when
-
00:45:11 you are having synchronization problems or when you are not able to access the machine. So this
-
00:45:17 is the interface. This is going to get updated. It is going to become better. The SwarmUI is already
-
00:45:23 installed. So to update the SwarmUI, first run this one. You see, this is for update. When you
-
00:45:30 hover your mouse, you will see that it is run stable SwarmUI update. It says stable SwarmUI,
-
00:45:35 but it is the latest SwarmUI. So double click it. It will update the SwarmUI to the latest version.
-
00:45:41 Also it will update the ComfyUI backend to the latest version since it is automatically selected.
-
00:45:46 Just wait. And it will take less than one minute. Yes, it is updated and started. You see the Massed
-
00:45:52 Compute advantage is huge and we are keeping this image updated, not like the RunPod. However, I am
-
00:45:58 not going to use it inside the ThinLinc client. I am going to use it from my computer. To do that, I
-
00:46:04 will start it from here. But first, let's download FLUX Tools models. You can download the FLUX tools
-
00:46:11 models from these links as I have shown in the beginning of the tutorial. However, I recommend
-
00:46:16 your SwarmUI unified downloader. You see it is here. Click it. Go to the very bottom of the post
-
00:46:21 where you will see the attachments. This is the link. It is here. Download it. Move the downloaded
-
00:46:25 attachment into your synchronization folder wherever you have set. It is inside here. You can
-
00:46:30 also download this directly in the ThinLinc client as well. It is up to you. But I recommend to use
-
00:46:35 synchronization for smaller files. Because it is working fast. So how you are going to access that
-
00:46:40 file? Open the home button from here. Go to thin drives. Go to the shared folder. This is shared
-
00:46:46 between your computer and the cloud machine. Then where is the downloader? The SwarmUI downloader
-
00:46:51 is here. It is the latest version. Move it into the downloads. Never use anything inside this
-
00:46:57 synchronization folder. Always copy them into the machine like this. Into the download sfolder.
-
00:47:03 Right click. Extract here. Enter inside the folder. All of my scripts are in here. They have
-
00:47:08 the same format. Open the Massed Compute download instructions txt file. Then copy this command.
-
00:47:14 This is the command that you need. Copy it. Ctrl C. Open a terminal here. You see three dots
-
00:47:20 icon inside the folder. That is important. Open terminal. Right click and paste. And it will give
-
00:47:26 you all the options that you want to download. So if you want to replicate exactly as I did in the
-
00:47:33 Windows tutorial. What you need? Option 1. Since this is a big machine with 48 GBs of GPU you can
-
00:47:40 download FP16 versions. Then the option 5. Then the option 11. If you want to download the YOLO
-
00:47:47 models for face segmentation and auto inpainting the face. Then 13, 14, 15, 16, 17. Actually you
-
00:47:56 don't need LoRA here because it is way lower quality but it is up to you if you want to use
-
00:48:01 them on a different base model 16, 17, and 18. Now look at the download speed. You will be shocked
-
00:48:09 by the speed. It is mind-blowingly fast. We are seeing right now over 600MB per second. Sometimes
-
00:48:18 800MB. So you see it is going to take less than 1 minute to download 24GB of the base model. This is
-
00:48:26 why I like the Massed Compute. They are just the highest quality cloud service that you can find.
-
00:48:33 They are also very responsive. They also have staff members in our discord. We can also chat
-
00:48:37 with them. We can complain to them. We can ask questions to them. And they are really really
-
00:48:43 helpful. So you see the base FLUX1 dev model took only 38 seconds to download. 24GB of file only
-
00:48:51 downloaded in 38 seconds. So you can become ready in less than 2 minutes after the machine has been
-
00:48:59 initialized. This is why the Massed Compute is the number one. And we are almost done. We are
-
00:49:03 downloading the latest models. So the models have been downloaded. It took less than let's calculate
-
00:49:10 3 minutes. All of the models are downloaded. I am going to start the SwarmUI on the shared link.
-
00:49:17 You see in the left bottom there is run cloudflare stable SwarmUI. This is going to start the SwarmUI
-
00:49:24 on cloudflare. We are going to see a link here. Let me zoom. Okay you see here. This is the link
-
00:49:30 that you need to start. Click this link. It will open a new page like this. Then copy this link and
-
00:49:38 move back to your computer. So now I can use the SwarmUI in my computer browser. But it will run
-
00:49:46 on the Massed Compute. The rest is exactly same as the Windows tutorial part. There is only one
-
00:49:53 difference that I recommend. Since this is a dual gpu. Add another ComfyUI backend to be able to
-
00:49:59 generate multiple images. Copy this. Click ComfyUI self starting. Click ok. And paste it here. You
-
00:50:06 see. I am duplicating. Then set the gpu id 1. So now when you generate multiple images like
-
00:50:13 10 image it will use both of the GPUs at the same time since there are 2 GPUs on this machine. When
-
00:50:21 I go to the server info I can see that. So how you can backup your files. You can upload them to the
-
00:50:26 Hugging Face, onedrive, google drive. If they are not very big you can also use the synchronization
-
00:50:32 folder. Once you are done with the usage you need to terminate your machine. Do not forget that.
-
00:50:39 Because if you don't terminate it will keep using your credits. You see everything else is as same
-
00:50:45 as using on the Windows computer here. Therefore I will just skip the rest. And I will terminate
-
00:50:52 the machine to show you. How you are going to terminate from here. If you click the stop.
-
00:50:56 It will not stop using your credits. So you need to terminate your machine. And I will terminate.
-
00:51:02 And that's it. All the data has been deleted. Now. I will show how to use the FLUX tools SwarmUI on
-
00:51:08 the RunPod. So in our public post search for RunPod and go to the RunPod instructions. You
-
00:51:15 see here. I recommend to read here. Also if you register with this link. I appreciate that. Click
-
00:51:21 this link. Register your RunPod account. Login. Once you did login. Go to the billing. And set up
-
00:51:28 your billing as you wish. Then go to the pods. And in here click deploy. Now. You can pick any GPU
-
00:51:35 to use. It is up to you. I am recommending secure cloud because it is way faster than the community
-
00:51:40 cloud. But you can also go with community cloud if you are going to use it for a long time. Because
-
00:51:45 the initial setup is slow but the rest is same speed. So therefore it is up to you. If you are
-
00:51:50 short on time. Go with secure cloud. If you want to use permanent storage from here. I already have
-
00:51:56 tutorials for them. You see RunPod permanent network storage. You see RunPod massive tutorial
-
00:52:01 for RunPodCTL. So you can watch them. But I am not going to show that right now. So deploy. Secure
-
00:52:07 cloud. I recommend US Texas 3. That is the fastest one. But you can use any of them. And let's go
-
00:52:14 with L40s GPU. This is a very good GPU. It can load FP16 since it is 48 gigabytes. But you can
-
00:52:22 also go with the RTX 4090. Let's go with dual L40s GPU. So which template you need to use. The latest
-
00:52:31 recommended template is written here. So always read the RunPod instructions. So change template.
-
00:52:37 Type PyTorch. And select the PyTorch version. For example like this one 2.2.0. Then select the GPU
-
00:52:45 count. That how many you want to use. You can also use single GPU. And click edit template. Set the
-
00:52:51 volume disk according to the models that you are going to download. Let's download 200 gigabytes.
-
00:52:56 Also you need to set 7801 port. To connect the SwarmUI interface. Set. Overrides. Don't forget
-
00:53:04 that. And we are going to deploy on demand. But I see that this GPU is not available dual on us
-
00:53:11 texas 3. So let's go with 4090. Because this is a tutorial proposal. So it doesn't matter very
-
00:53:17 much. And deploy on demand. And my pods. And it will start the initializing the template. Since
-
00:53:24 this is an official template it is super fast to be loaded. And we are going to install the
-
00:53:29 latest version. We are not dependent on any pre-configured version. We are not using any
-
00:53:34 pre-compiled version. We are always using the latest version. It is also super important to
-
00:53:38 use the latest version. So it is ready. Then click connect. Connect the Jupyter lab interface. In the
-
00:53:44 left top you see there is upload icon. So how you gonna install. The installation is same. In the
-
00:53:50 very bottom of the post you will see that there is install linux.sh file. And install linux fix step
-
00:53:57 2. The instructions all written here. I am going to show in a moment. So upload both of the files
-
00:54:03 into your workspace like this. From this icon. Select them and upload. Then open a new terminal.
-
00:54:10 So first install with this command. Copy paste it. It will start installation. Unfortunately
-
00:54:16 RunPod is not as straight as the Massed Compute. It is a little bit more harder to use. So when you
-
00:54:22 see this local URL. That means that it has been started. Go to my pods. Then click connect HTTP
-
00:54:31 Port 7801. If it is not appeared. Refresh this page. And click connect. And connect whether
-
00:54:37 it is orange or not. Then you will get to this installer agree. Customize settings. Modern dark.
-
00:54:44 Whatever you wish. Next. ComfyUI local. I am not going to download anything. Next. And I am sure
-
00:54:49 install. The installation speed totally depends on the pod that you got. Some pods could be broken.
-
00:54:55 They could be very slow. So RunPod storage system is not as fast as Massed Compute storage system.
-
00:55:03 However they have permanent storage system. And on RunPod you can stop the machine. And it will use
-
00:55:08 very little amount of credits. And you can start and again use wherever you are left. Unfortunately
-
00:55:14 this is not available on Massed Compute yet. But however hopefully it is coming soon. So you can
-
00:55:19 monitor the installation status from here or on here. From the usual cmd window. Just wait here
-
00:55:26 for installation. Initial installation has been completed. You need to wait. Backends
-
00:55:30 are still loading. You need to wait until it is fully loaded. Go to the logs. Debug. After
-
00:55:35 the initial installation it is going to install the missing libraries. So wait until everything
-
00:55:41 is installed and backends are fully loaded. All right. So the installation has been completed.
-
00:55:47 We can see that backends loaded. Now there is second part of installation. This is for to
-
00:55:53 fix onnxruntime error. So this is not mandatory. But if you want. Copy this. Go back to your pod.
-
00:56:01 Open a new terminal. And copy paste. It is going to install the missing ONNX library. After that
-
00:56:09 go to the server and backends. Turn it off. Then turn it on. So the changes will be applied. Now
-
00:56:16 to be able to use we need to download the models we are lacking right now. So as I shown in the
-
00:56:22 beginning you can download them from here. However I am going to use the SwarmUI unified downloader.
-
00:56:27 This is the best way of using them. Click here to download. Then go to your workspace like this.
-
00:56:34 Click this upload icon. Select the downloaded zip file. Wait until uploaded. Yes. Then right
-
00:56:40 click. And extract archive. And it will extract the installation. Refresh by clicking here. Open
-
00:56:47 the RunPod download instructions txt file. Then you will see the download command here.
-
00:56:53 Copy this. Open a new terminal. Paste it. And you will get the options. Whichever you want. Since
-
00:57:01 this is a 24gb gpu I am going to download the FP8 version of the FLUX dev as I have
-
00:57:09 shown in the windows part of the tutorial. But I recommend you to get 48gb of GPU and download the
-
00:57:16 fp16 version. So we are going to download the base fp8 version which is here not the scaled
-
00:57:23 one because I am not sure if FLUX tools would be compatible with the scaled. So download 10. Then
-
00:57:29 should download the fp8 version of the T5. It is option 6. And I did hit enter inaccurately. I was
-
00:57:38 going to type more but it started downloading. After the download I will download the rest of
-
00:57:42 the models. So if you hit enter accidentally we will continue. Since the downloader scripts
-
00:57:49 that I have made is super optimized you see even on RunPod we are getting very very good speeds.
-
00:57:56 However if you download them in the regular way they will be slower than this one because this is
-
00:58:01 super optimized with special techniques. Moreover if you want to upload big files here do not use
-
00:58:09 this upload file because it will not work for big files. Only for small files it will work. What you
-
00:58:15 can use alternatively is RunPodctl and also this tutorial is what you need. Upload to Hugging Face
-
00:58:23 and download from there. Okay let's continue to download. So it is continuing to asking us
-
00:58:28 which we are going to do. Lets download the best face models face inpainting. Then the FLUX tools
-
00:58:35 which are 13, 14, 15, 16, 17, 18 and hit enter. However I do not recommend the LoRA of the Depth
-
00:58:45 and Canny because as I have shown in the windows tutorial they are very low quality compared to
-
00:58:51 the full checkpoint. But if you want to use Depth and Canny models on a custom fine-tuned FLUX model
-
00:58:59 then you can download the LoRAs and see how they are performing. So the rest of the models are also
-
00:59:04 getting downloaded. We can see the download speed it is sometimes 900 megabytes sometimes 1 gigabyte
-
00:59:10 per second sometimes 300 megabytes. Still really really fast because I have optimized them hugely.
-
00:59:16 You see this is an amazing speed for RunPod we were never seeing such speeds on RunPod before
-
00:59:22 I did this optimization. All right the models have been downloaded. Now we are ready to use.
-
00:59:27 Go back to your RunPod proxy which we have been connected from here. Then go to models and click
-
00:59:34 this refresh icon and it will refresh all the models. The usage is exactly same as on the
-
00:59:41 Windows nothing is different. Whenever you have a problem read the instructions and you will solve
-
00:59:48 them. Maybe watch some of the tutorials. You can also join our Discord channel and ask me
-
00:59:53 questions directly. Our discord channel is at the very top of the post here. Moreover,
-
00:59:58 also follow our subreddit follow me on linkedin or star and follow me on the GitHub repository
-
01:00:05 as well. So on RunPod what you can do? You can stop your machine and you can keep your data and
-
01:00:12 you can start it again. Currently it will use a very little amount of money per hour as you are
-
01:00:17 seeing right now. However if you don't want any money to be used what you need to do is
-
01:00:23 terminate and everything will be deleted and it is gone. Okay. As a last step I am going to show
-
01:00:29 you how to use SwarmUI with all of the supported models and features on a free account Kaggle. So
-
01:00:37 if you don't want to pay to do paid cloud services and you want to use 30 hours per week GPUs of the
-
01:00:45 Kaggle this is the part that you need. Search for Kaggle in our main post. So control-F and Kaggle
-
01:00:54 and you will see free Kaggle account notebook for GPU poor. Click this link and in this page
-
01:01:00 you will see the Kaggle notebook file. Download it. This notebook file is kept updated. It has all
-
01:01:07 the instructions and private tutorial links that will show you how to install and start SwarmUI
-
01:01:16 and how to download models that you need on the Kaggle. So please use this Kaggle notebook. Once
-
01:01:23 you got the Kaggle notebook you need to register a Kaggle account. It is for free. Verify your phone
-
01:01:29 number. Once you verified your phone number you are ready. Click create new notebook wait until
-
01:01:35 the interface initialize. Interface initialized. Click file, import notebook. Then drag and drop
-
01:01:41 the downloaded notebook file. Click import and for the rest wait until settings updated. Click ok and
-
01:01:49 follow the instructions on this notebook. Follow the videos on this notebook and you will be able
-
01:01:55 to use the SwarmUI on Kaggle like you are using it on your computer. So this is end. Hopefully
-
01:02:02 see you in another amazing tutorial video. Please don't forget to join our discord channel we have
-
01:02:07 over 9000 members and I am answering all the questions. Please also follow us on our GitHub
-
01:02:14 repository the link is here. Fork it Star it Watch it and if you sponsor I appreciate it.
-
01:02:20 Please also join our subreddit and please also follow me on LinkedIn and hopefully see you later.