MiniMax H3 Infinite Video Make 2 Hour Movies in ComfyUI 0 Shot
Full tutorial link > https://www.youtube.com/watch?v=1580ZDX-60Q
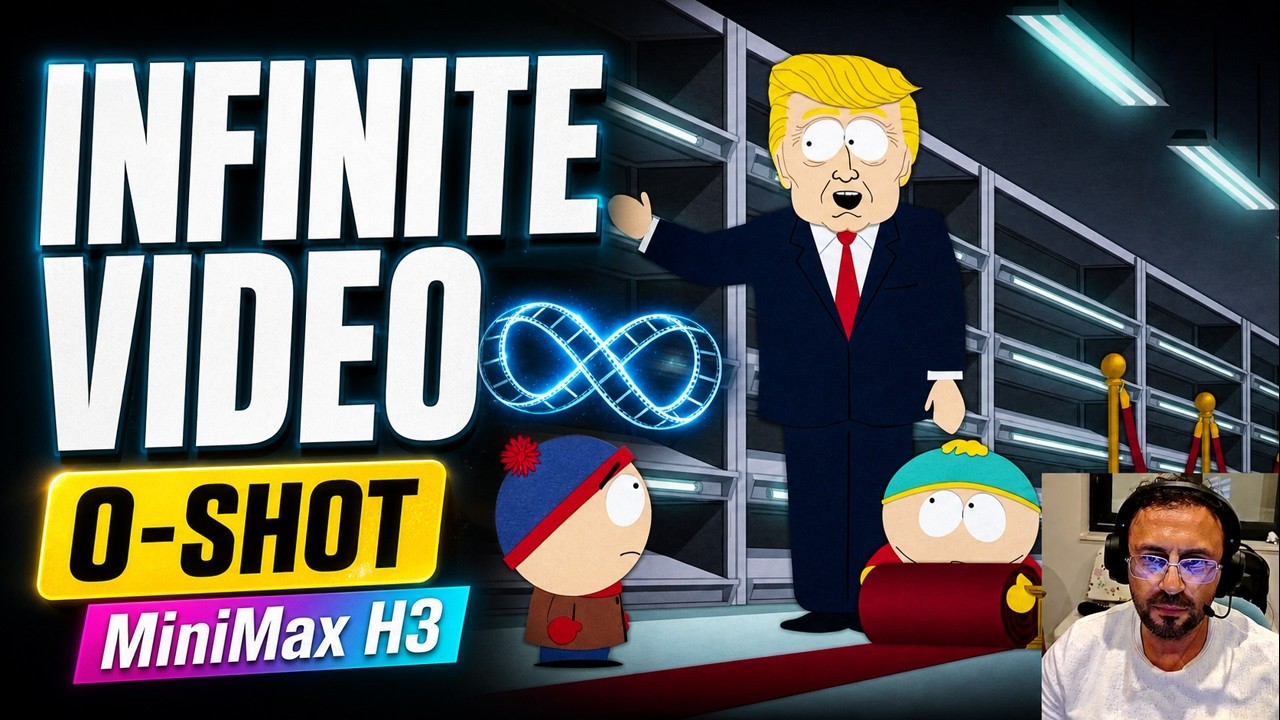











Turn one folder of scene prompts into a long, coherent AI video with MiniMax H3 - locally, 0-shot and without babysitting every clip. This ComfyUI walkthrough shows how to match references, queue scenes, generate clips and automatically merge everything into one movie.
The opening is the raw workflow result. Then we rebuild it from installation to playback: models, presets, VRAM modes, prompt creation, folder batching, reference syntax, draft settings, troubleshooting, selective regeneration and consistency. It can scale to very long projects, including the 2-hour movie shown here.
COMFYUI INSTALLERS + PRESETS:
https://www.patreon.com/posts/comfyui-installers-presets-105023709
SWARMUI MODEL DOWNLOADER:
https://www.patreon.com/SECourses/posts/model-downloader-114517862
DISCORD HELP & SUPPORT:
https://discord.com/invite/software-engineering-courses-secourses-772774097734074388
VIDEO CHAPTERS
00:00:00 0-shot generated movie showcase
00:00:58 MiniMax H3 local workflow reveal
00:01:10 Entire movies, prompts and scenes automated
00:01:22 Audio references and folder-batch strategy
00:01:40 Local desktop vs cloud deployment
00:01:50 Download ComfyUI and the model downloader
00:02:01 Fresh install and recommended Python 3.12
00:02:17 Verify installation and install bundle 100
00:02:37 Troubleshooting and support
00:02:47 Final checks before launch
00:02:57 Launch ComfyUI with run_gpu.bat
00:03:11 6 GB GPU support and speed tradeoffs
00:03:22 Logs, errors and starting the preset
00:03:33 Find the MiniMax H3 presets
00:03:44 References-to-video 4x workflow
00:03:54 Compilation, 20 steps and speed LoRA
00:04:12 Change logs and Windows requirements
00:04:24 Frequent workflow and custom-node updates
00:04:36 Missing models and downloader setup
00:04:48 Launch downloader and share model paths
00:05:03 Core vs low-VRAM MiniMax H3 bundles
00:05:16 INT4 vs recommended INT8 quality
00:05:29 Options for 6-12 GB GPUs
00:05:43 Select the correct models path
00:05:55 Folder structure and model download
00:06:07 Fix path warnings and select both VAEs
00:06:23 Reference manager and default interface
00:06:35 The enhanced prompt helper file
00:06:47 Improve prompts with any major LLM
00:06:59 ChatGPT setup with five voice attachments
00:07:17 Example prompts and downloadable ZIP
00:07:28 Prompt construction and easy referencing
00:07:42 Upload the audio references
00:07:52 Reference syntax and voice samples
00:08:08 Listen to the supplied voice references
00:08:18 Audio and image reference options
00:08:28 Reorder image references by drag and drop
00:08:38 Batch folder mode needs no manual prompt
00:08:50 Set the folder path and draft resolution
00:09:01 Aspect ratios and divisible dimensions
00:09:15 Recommended 1344x768 for 16:9
00:09:25 30-second limit and 15-second sweet spot
00:09:35 Best parameters: ready to run
00:09:47 Run a quick 0.4 MP draft
00:09:57 Automatic merging and queue monitoring
00:10:08 Folder prompts and reference matching
00:10:20 Load many references; use only the matches
00:10:30 Per-generation reference limits
00:10:40 Batch power for full videos and animations
00:10:50 Iterate prompts with your favorite GPT
00:11:00 Draft low resolution, review, then refine
00:11:13 The key file for better prompts
00:11:23 Single-clip mode and included presets
00:11:33 Image, text and references-to-video presets
00:11:46 Lightricks speed-up LoRA implementation
00:11:59 LoRA version notes and future updates
00:12:17 SwarmUI support and future advanced tutorial
00:12:28 Read the docs and enable low-VRAM mode
00:12:38 Save 15-40%+ VRAM
00:12:54 Built-in node help and first output
00:13:08 Regenerate only a weak section
00:13:26 Play the generated result
00:13:36 Current audio-reference limitation
00:13:46 Improve voice and character consistency
00:13:56 Match image IDs to characters
00:14:06 Included reference and consistency guide
00:14:16 0-shot proof: ChatGPT authored all prompts, the movie script and rough draft
00:14:35 Automated setup and broad GPU support
00:14:45 Final requirements reminder and outro
-
MiniMax H3 supports 30-second segments; 15 seconds is the sweet spot. This demo uses 10-second scenes for easy review and regeneration.
-
For 16:9, use 1344x768. Draft around 0.4 MP, review the sequence, improve prompts, then render final quality.
-
Load up to 99 references; each prompt uses only matched IDs. Per generation: up to 3 audio, 3 video and 9 image references. Extra audio/video refs are discarded.
-
Use INT8 for speed and near-BF16 quality; INT4 is for lower VRAM. It runs on 6 GB GPUs, but more slowly. Low-VRAM mode saves about 15%, reaching 40%+ in some cases.
-
Audio references are less reliable than image references. If voice quality drops, try no audio reference. Map image IDs clearly for consistency.
-
Covers local Windows, Massed Compute, RunPod and SimplePod. Use a fresh install with Python 3.12 where recommended. Read requirements and changelogs; nodes and workflows update often.
-
If one scene fails, regenerate only that section. Join the Discord above for setup help.
#MiniMaxH3 #ComfyUI #AIVideo #LocalAI #GenerativeAI
-
00:00:00 The Iran war ends very soon.
-
00:00:01 We found the off-ramp.
-
00:00:03 You said that before the last 3 on-ramps.
-
00:00:09 I simplified your strategy: talk, threaten, strike, call it talking.
-
00:00:15 Perfect. Diplomacy, but with better ratings.
-
00:00:20 These shelves are pre-filled with future precision missiles.
-
00:00:24 So, empty with a press release.
-
00:00:29 I bought every gas can in Colorado. We are economically invincible.
-
00:00:35 Dad, you spent the college fund on panic.
-
00:00:40 My off-ramp is so fast, it leaves the map.
-
00:00:43 Yeah, straight through the cliff.
-
00:00:49 I am driving us to peace.
-
00:00:53 Sweet. Call me when gravity negotiates.
-
00:00:57 Okay, this was a 0 shot generation
-
00:01:01 made with MiniMax H3 model locally.
-
00:01:06 This is our workflow, and today this will be a mini tutorial.
-
00:01:09 I will show you how you can generate entire movies
-
00:01:13 or such clips without any struggle,
-
00:01:16 with fully automatically generating prompts and scenes and everything.
-
00:01:21 So what is this strategy? In this example, I have used 5 audio references.
-
00:01:27 Each reference is for each character,
-
00:01:30 and our ComfyUI workflow is automatically handling
-
00:01:34 everything by giving this folder path and giving these references.
-
00:01:39 Since currently I am on my laptop, this is running on Massed Compute,
-
00:01:43 but it is exactly the same on the desktop PC
-
00:01:47 which I am developing the workflow and software.
-
00:01:50 So first of all, download the latest ComfyUI.
-
00:01:53 The link will be in the description below.
-
00:01:55 Then download the latest SwarmUI model downloader,
-
00:01:59 because we will use this to download models.
-
00:02:01 So quickly install or update your ComfyUI.
-
00:02:05 I am recommending now Python 3.12.
-
00:02:08 This is the best Python version at the moment until Python 3.13 matures.
-
00:02:13 So the installation has been completed. This was a fresh installation.
-
00:02:17 Quickly check and verify there aren't any errors.
-
00:02:20 Obviously, you need to extract from zip file, then install.
-
00:02:24 After that, run the Windows custom nodes bundles installer,
-
00:02:27 then select bundle 100 and click yes.
-
00:02:30 This will install the necessary bundles to run all the presets we have.
-
00:02:36 If any of these nodes gets broken, causes any issues,
-
00:02:40 always message me from YouTube or from Patreon.
-
00:02:42 Hopefully, I will fix them as soon as possible.
-
00:02:44 Okay, bundle installation is also completed.
-
00:02:47 You can also quickly check and see if there are any errors.
-
00:02:50 There shouldn't be. Now I am ready to run this workflow.
-
00:02:53 For running this workflow, I am going to use Windows run gpu.bat file.
-
00:02:58 It will start the ComfyUI on my computer.
-
00:03:00 We also have Massed Compute, RunPod,
-
00:03:03 and SimplePod installers and instructions,
-
00:03:05 so just read them to learn how to install
-
00:03:09 and use on those platforms if you don't have a powerful GPU.
-
00:03:12 But this model runs as low as 6 GB GPUs.
-
00:03:16 Of course, there are some slowness if you use low VRAM GPUs.
-
00:03:21 So the ComfyUI started.
-
00:03:22 You can also check the messages, logs, and see if there are any errors or not.
-
00:03:27 So how to use this preset?
-
00:03:29 For using this preset, we have the presets inside presets folder.
-
00:03:33 You can sort by name or you can sort by date modified.
-
00:03:37 So in the top, you will see the MiniMax H3 presets.
-
00:03:41 For this particular preset,
-
00:03:43 we are going to use MiniMax H3 references to video 4x speed.
-
00:03:48 The 4x speed is coming from the SANA Labs.
-
00:03:50 They claimed 4x speed, so you can enable it.
-
00:03:53 If you enable it, at the first run, it will compile, so it will be slow.
-
00:03:57 Then the subsequent runs will be much faster.
-
00:04:00 So this is the default workflow with 20 steps.
-
00:04:03 Moreover, we support the 8 steps LoRA as well.
-
00:04:07 Actually, this is 4 steps, not 8, but to get better quality, use the 8 steps.
-
00:04:12 Again, I recommend you to read all the latest change logs in here,
-
00:04:17 Windows requirements in here, follow it.
-
00:04:19 So when you read the change logs,
-
00:04:21 you will learn everything I am adding almost every day
-
00:04:24 because there are so many developments with this application, with this model,
-
00:04:28 and I keep updating the application, adding new features into our zip file
-
00:04:33 and also into our custom nodes.
-
00:04:35 So we are going to use this one.
-
00:04:38 You see the models are missing, so you need to download models.
-
00:04:41 I recommend you to use our SwarmUI model downloader zip file.
-
00:04:46 So it was already extracted.
-
00:04:47 So run the Windows start download models app.bat file.
-
00:04:51 If you are using both SwarmUI and ComfyUI,
-
00:04:54 you can use the same model path, just download the models into SwarmUI
-
00:04:58 and then use the ComfyUI extra model paths yaml.
-
00:05:03 Okay, so our very advanced model downloader application started.
-
00:05:06 To run these presets, all you need is MiniMax H3 core bundle.
-
00:05:11 If you are a low VRAM user, you can also use MiniMax H3 low VRAM bundle.
-
00:05:15 The difference is that this bundle includes INT4
-
00:05:19 precision of the models instead of the INT8.
-
00:05:24 INT8 is the fastest, almost BF16 quality. This is recommended.
-
00:05:28 However, let's say you have 12 GB of GPU or 10 GB or 8 GB or 6,
-
00:05:34 you can use this bundle as well. Even this bundle should work but it will be slower.
-
00:05:38 So select your ComfyUI models path, or if you are using the SwarmUI, select it. How?
-
00:05:44 You see there is this folder, the models, where we need to download models.
-
00:05:49 So I will select it like this, copy and paste it here.
-
00:05:52 So it will download them accurately into here.
-
00:05:55 Then you can also select ComfyUI folder structure and it will be all accurate,
-
00:05:59 then you can download all the models.
-
00:06:01 After downloading the models and refresh your ComfyUI interface,
-
00:06:05 you will get like this, it will see the models.
-
00:06:08 If you get a warning like this, just click here and fix the path.
-
00:06:12 So this is the video VAE and this is the audio VAE.
-
00:06:16 So depending on your system, you may get a very minimal error
-
00:06:20 like this, but everything else is set.
-
00:06:22 So this is the default interface.
-
00:06:24 You can add references, you can manage them, you can reference them.
-
00:06:28 I recommend you to read the start read here,
-
00:06:30 but I will show you today how I generated that 1 minute clip.
-
00:06:34 So we have a very special file to write prompts,
-
00:06:38 inside prompt generate MiniMax LTX demo materials.
-
00:06:42 The file name is MiniMax H3 enhanced prompt feed for LLMs.
-
00:06:46 So whatever you are writing or working on, I recommend you to feed this into an LLM,
-
00:06:52 it can be Gemini, ChatGPT, Claude, or whatever, and let it improve your prompt.
-
00:06:56 So for this particular example,
-
00:06:59 what I did, I used the ChatGPT, I uploaded my file, I gave it this prompt.
-
00:07:05 I said it that I am going to use this. I have these attachments which are 5 voices.
-
00:07:09 So I tell LLM to reference them in the prompts.
-
00:07:13 In the zip file, there is an example that I have used.
-
00:07:16 You see inside here there is example prompts for MiniMax.
-
00:07:20 So the ChatGPT generates it and gives me as a zip file at the end.
-
00:07:25 When I download it, I have the prompts ready.
-
00:07:27 And how are these prompts are constructed? So let me open the first prompt.
-
00:07:32 So this is the construction.
-
00:07:33 With our application, referencing is much easier than the other ComfyUI
-
00:07:37 or SwarmUI workflows. So let me demonstrate you quickly.
-
00:07:41 So let's delete here, add reference.
-
00:07:43 Audio samples are here, so I select all of them and they will be appearing here.
-
00:07:48 Since this is running on cloud right now, it is taking time. Yes.
-
00:07:51 So these are my references. Now I can reference them like this:
-
00:07:55 man 1 speaking with audio 1 voice.
-
00:07:59 Of course, do not write like this.
-
00:08:01 If you want to get best quality, you should use that LLM instructions txt file.
-
00:08:06 Let me play them.
-
00:08:07 And I watched those B-2 bombers with those pilots we had them in the Oval Office.
-
00:08:12 Okay, and this one. Man, I wonder what Stan got me for my birthday, Pan.
-
00:08:16 This morning you took my brother, Ike.
-
00:08:18 So whatever you are going to generate, you can give references like this.
-
00:08:22 You can also give image references.
-
00:08:24 For example, let's select these images. Okay, image references.
-
00:08:27 So you see I can reference them like this.
-
00:08:30 You can also drag and drop and change the image reference order as well.
-
00:08:34 We support both drag and drop and we support everything literally.
-
00:08:36 You can also request me more.
-
00:08:38 Let's remove these image references because we are not going to use.
-
00:08:42 For batch folder processing, you don't need to write any prompt here. Why?
-
00:08:46 Because the batch folder processing will read your folder path.
-
00:08:49 So you need to give your folder path like this wherever it is.
-
00:08:53 Then you need to set your resolution.
-
00:08:55 I recommend you to first generate with 0.4 megapixel.
-
00:08:59 You see this is the width and height.
-
00:09:01 You can also set different aspect ratios, it will be automatically set.
-
00:09:04 You can change the resolution from here as well, like 850,
-
00:09:08 it will automatically set it to the accurate divisible number.
-
00:09:11 You can use these to set whatever you want.
-
00:09:14 For this one, it was 16:9,
-
00:09:16 the best value is this resolution 1344 768.
-
00:09:22 Then set the duration. It supports up to 30 seconds. 15 seconds is sweet point.
-
00:09:27 But for this particular example, I have generated 10 seconds.
-
00:09:31 And I am all ready. I don't need to change anything else.
-
00:09:34 It is all set with best parameters. All I need to do is just hit run.
-
00:09:39 Since this is running on my Massed Compute,
-
00:09:41 it has a different folder path I need to give like this. Then I can hit run.
-
00:09:46 But since I want to show you a quick demo, so let's make this 0.4 and run.
-
00:09:51 Now as each part is executed and generated,
-
00:09:55 it will appear here and at the end it will automatically merge all of them
-
00:10:00 and show the merged video. We can also see the queue here.
-
00:10:04 So you see it has queued every generation by reading from that folder.
-
00:10:08 And when it reads every single prompt, it matches with this accurate reference.
-
00:10:14 So you can have here 99 references as well,
-
00:10:17 and if your prompt only matches 3 of them, it will use only those particular 3 ones.
-
00:10:22 If it is matching only 2, it will use 2.
-
00:10:25 This model supports up to 3 audio files, up to 3 video clips,
-
00:10:28 and up to 9 images as reference in a single generation.
-
00:10:32 So you cannot reference 4 audios or 4 clips,
-
00:10:35 the last one will be automatically discarded.
-
00:10:38 This is how the application is developed by me.
-
00:10:41 So this is really, really cool.
-
00:10:43 I mean you can generate entire video clips, entire animations.
-
00:10:46 All you need to do is just give this MiniMax enhanced prompt
-
00:10:51 into your favorite GPT, then ask it back and forth to improve.
-
00:10:57 For example, with this example, I made some back and forth improvements,
-
00:11:00 therefore first generating with low resolution and seeing the output,
-
00:11:05 then asking AI to improve it is the best way.
-
00:11:09 You can also manually write of course. I also made some improvements final times.
-
00:11:13 So as you use it, you will understand how it works.
-
00:11:16 This is the key file that you need to write perfect prompts.
-
00:11:21 Of course, you can also generate single clips. You don't need to use the batch.
-
00:11:24 We support all the best presets.
-
00:11:27 You see audio only with optional references, image to video.
-
00:11:31 With image to video, you provide 1 single beginning image.
-
00:11:34 Image to video 8 steps, references to video 4x,
-
00:11:37 references to video 8 steps, text to video 4x, text to video 8 steps.
-
00:11:42 8 steps means that it is using speed up LoRA. I have implemented this myself.
-
00:11:46 When you read the change logs, you will learn.
-
00:11:49 This is using the Lightricks, not the Kijai.
-
00:11:52 I have directly implemented from the Lightricks
-
00:11:55 because they are the maker of the LoRA, so their source code is the best.
-
00:11:59 And as they publish newer versions of the LoRA,
-
00:12:02 hopefully I will implement them as well.
-
00:12:04 Currently, it is only version 0.1,
-
00:12:06 and this LoRA is actually made for text to video model, not references,
-
00:12:09 but it is working in both cases.
-
00:12:11 As they add newer versions and add more,
-
00:12:14 I will hopefully update the workflows as soon as possible.
-
00:12:17 Everything is also supported in SwarmUI, but in this tutorial, I will cut it short,
-
00:12:22 and I will hopefully make a much better, much advanced,
-
00:12:24 much detailed tutorial soon.
-
00:12:27 Again, I am repeating, read the change logs,
-
00:12:30 read this information, everything is explained here,
-
00:12:33 and you won't have any issues. By the way, we also support low VRAM mode.
-
00:12:38 When you enable this, you can get exact same result with 15 percentage
-
00:12:42 or more VRAM reduction,
-
00:12:44 or you can also go with max saving up to 40 percentage even more.
-
00:12:49 So when you hover your mouse, it will show you what it is doing.
-
00:12:52 My custom nodes are very advanced.
-
00:12:54 I explain everything, they are very easy to understand as well.
-
00:12:58 Okay, we are about to get the first output.
-
00:13:00 If you don't get the output on the interface
-
00:13:02 because of the web interface communications,
-
00:13:05 just check out your outputs folder.
-
00:13:07 And the best part is that if you didn't like the particular section,
-
00:13:11 you can just generate that section.
-
00:13:12 Upload the references, write the prompt into here, for example this prompt,
-
00:13:17 and do not use the folder, and it will just generate that particular section.
-
00:13:23 So you can replace that section with new generated one.
-
00:13:26 Let's play this.
-
00:13:27 The Iran war ends very soon.
-
00:13:29 We found the off-ramp.
-
00:13:30 You said that before the last 3 on-ramps.
-
00:13:36 Audio references is not extremely well working.
-
00:13:39 If you don't use any references, it is better.
-
00:13:41 Image references are working much better.
-
00:13:43 Hopefully, I will show that. But still, this gives us a consistent voice.
-
00:13:47 So if you want a consistent voice,
-
00:13:49 if you want a consistent character, just reference them.
-
00:13:53 And mention in your AI prompting that this image is this character,
-
00:13:58 this image is this character. I mean the image ID, like image 2, image 3, image 4.
-
00:14:03 When you mention like that, it will properly match that.
-
00:14:06 So just pause the screen and read this. This is also included in the zip file.
-
00:14:10 This gives you whole idea of how to reference, how to get consistency,
-
00:14:15 and how to automatically prompt. As I said, this is a 0 shot generation.
-
00:14:19 I didn't modify any prompt, anything.
-
00:14:21 It is all written by the ChatGPT.
-
00:14:24 Even the script is written by the ChatGPT. That is why it is not very good.
-
00:14:29 So that's up to you. Always you can comment, ask me anything.
-
00:14:32 It is fully automatically installed, downloaded, everything is ready.
-
00:14:36 I am trying to make it as much as possibly easy.
-
00:14:38 Don't you worry whether you don't have a powerful GPU or not.
-
00:14:41 This workflow works with all GPUs.
-
00:14:44 And again, please read the change logs.
-
00:14:46 This will give you huge amount of information.
-
00:14:48 And please follow the Windows requirements tutorial.
-
00:14:51 This is only 1 time.
-
00:14:53 Thank you so much. Hopefully see you later.