How to use
This page explains step-by-step how to use the Region Table to create and manage your regions.
You can get the Region Table in two ways:
- Crafting: Use 4 planks (any type), 1 paper, and 1 book.
- Creative Mode: Find it in the "Functional Blocks" tab in your creative inventory.
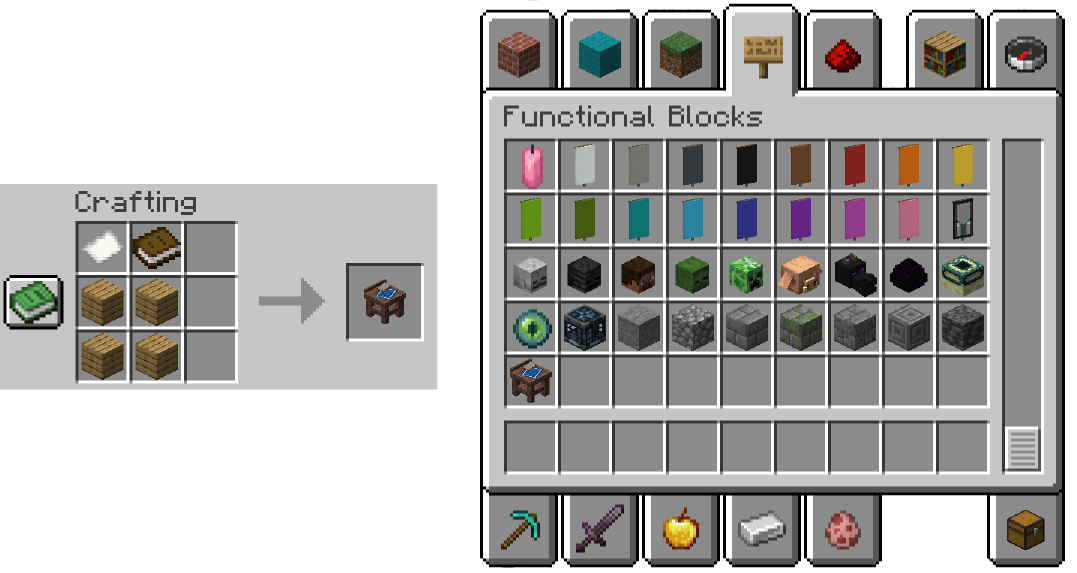
Place the Region Table in the world and Right-Click it. The main menu will open:
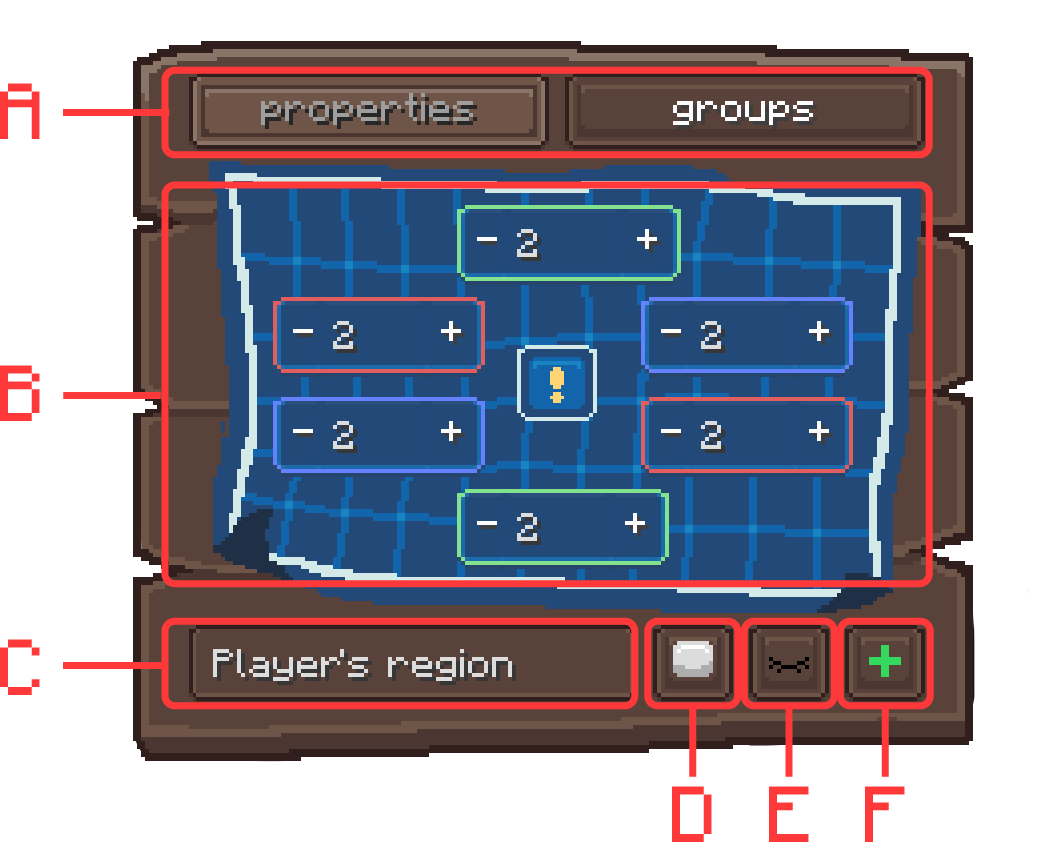
The interface has many buttons and fields. Let's look at what each part does.
By default, the Properties tab is open. This is where you set the size, name, and look of your region.
The two large buttons at the top switch between main sections:
- Properties: Set borders, name, and visual grid (you are here).
- Groups: Set Rules and manage players (we will cover this later).
The 6 blue number fields control the size of the region relative to the Region Table:
- 🔴 Red border: X axis
- 🟢 Green border: Y axis
- 🔵 Blue border: Z axis
The number shows how far the region border will be from the table.
Tip
The Center Icon: Hover your mouse over the icon in the center of the fields to see useful info, like the total area and status.
- ⚪ White: Everything is fine. You can create the region.
- 🟡 Yellow: Warning. Check notifications.
- 🔴 Red: Error. Something is blocking the creation (e.g., overlap).
The text field at the bottom sets the region's name. All players in your region will see it. The name does not need to be unique; it is just for cosmetics.
The button next to the name lets you choose a color. This color will be used for the region's grid and its name tag.
The eye button toggles the visual grid that shows the region borders.
- Important: This is a local setting. If you turn off the grid, other players will not see it until they turn it on for themselves.
Grid Types:
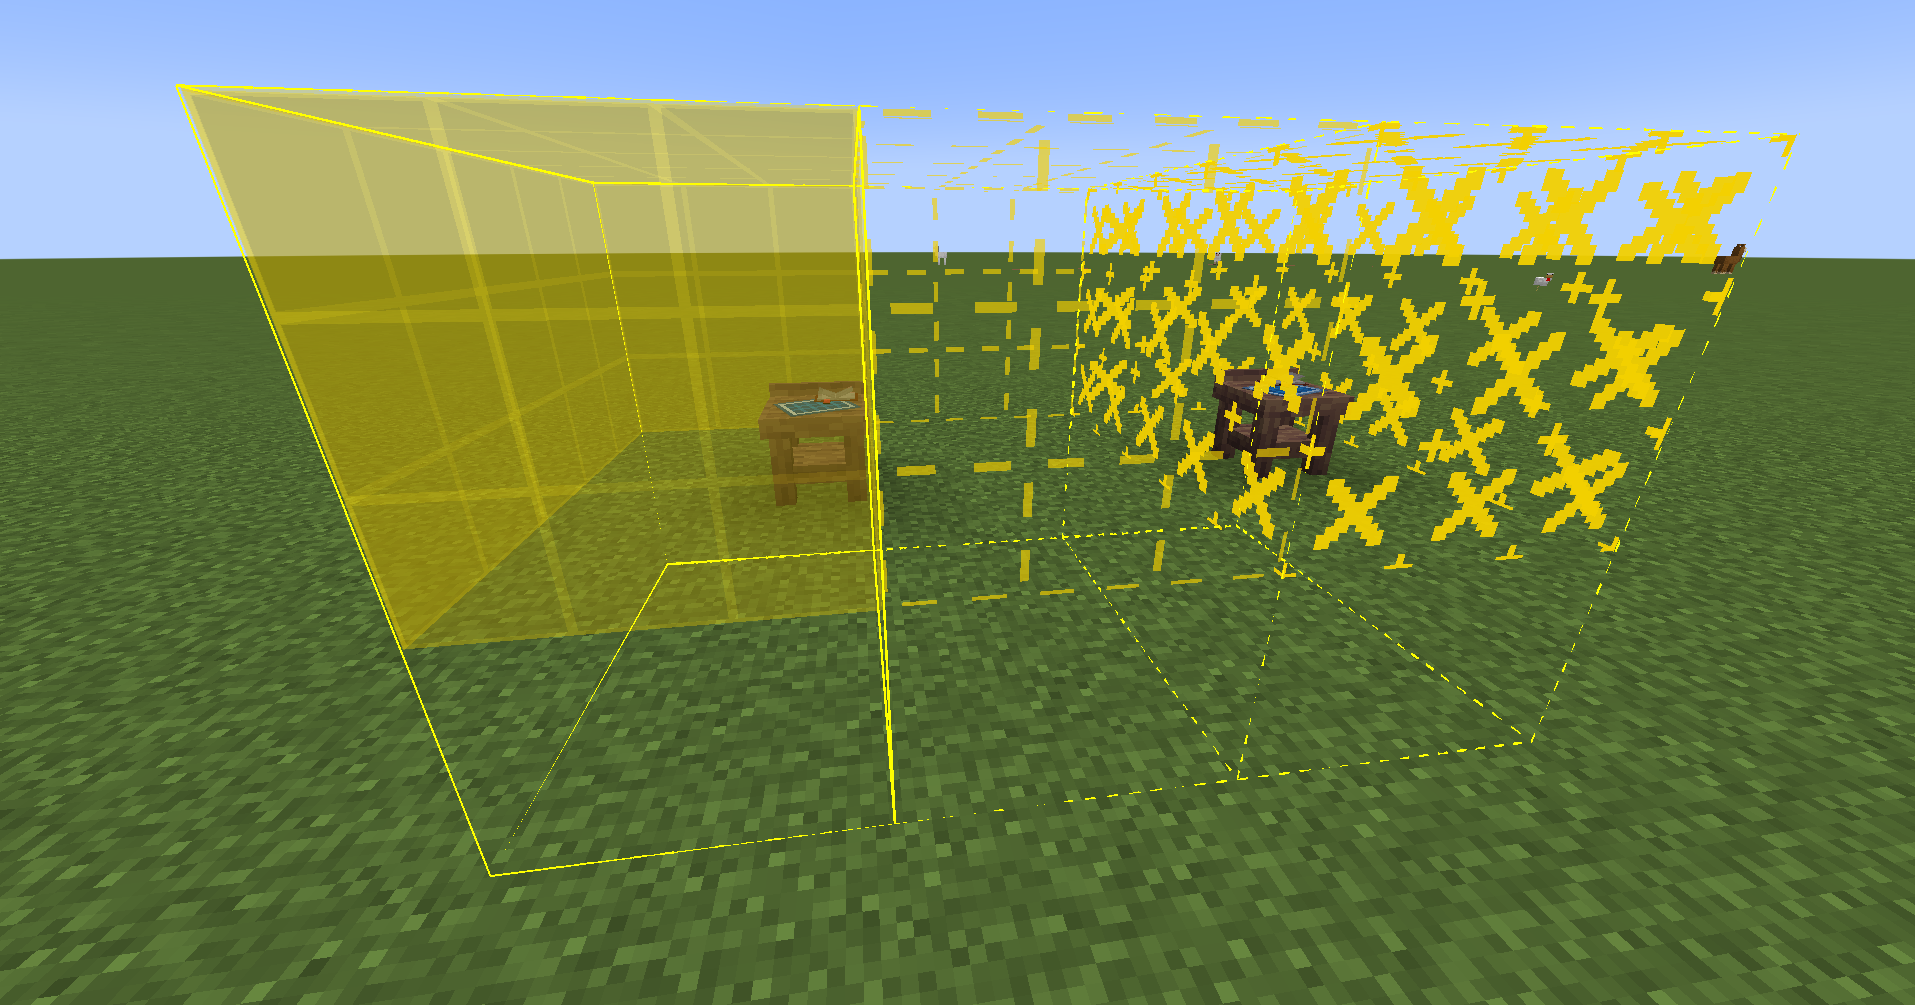
- Solid lines: Active borders. All Rules are working inside.
- Dashed lines: Draft mode. The region is not saved yet. You must click "Create" to make the borders solid.
- Dashed lines with a cross: Conflict. You selected an area that already belongs to someone else's region. You cannot create a region on top of an existing one.
The most important button is in the top right corner. The region is not created until you click this.
- If the button shows a checkmark/plus, it will create the region.
- If the button shows a red cross, the region already exists. Clicking it will delete the region.
Click the Groups tab at the top to open the permissions menu:
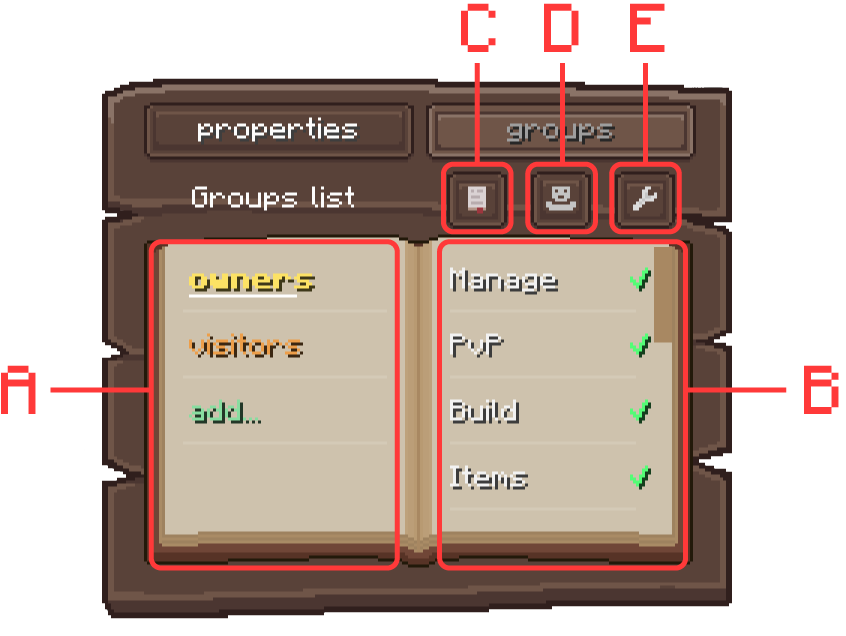
The left side shows the list of groups. Click a group name to select and edit it. The selected group will have highlighted text.
Every region has 2 default groups:
-
Owners: The only group that can edit region properties (change borders, add new groups, etc.). You can have multiple player-owners in one region, but at least one is required.
[!WARNING] Tip: Only add players to the "Owners" group if you fully trust them. They will have the exact same rights as you!
- Visitors: The Rules for this group apply to all players who are not added to any other group in this region. This means you don't need to set up rules for every single player on the server.
If you need more groups, click the "Add" button at the bottom of the list to create custom ones.
The right side shows either the list of Rules or the list of Players for the selected group, depending on which button is active (see C and D).
- You can hover over any Rule to read a short tooltip about how it works.
- For a full list of Rules and how they work, read the Rules page.
Click this to open the list of Rules (this is open by default). Here you can toggle Rules on or off for the selected group.
Click this to switch to the player list. Here you can add or remove players from the selected group.
This button lets you change the auto-generated name of the group or delete the group completely.
- Note: You cannot edit or delete the default "Owners" or "Visitors" groups.
👉 Next: Learn about all available limitations on the Rules page.