Datum Capture Part 3
This guide explains how to add support for localized messages in the Settings API to your Foobar Power SolarNode plug-in. If you have not read part two you will want to go back and follow that part first before continuing here.
The source for this part of the guide is available as well.
In this part we will:
- Examine our Spring
MessageSourceconfiguration - Add localized message properties
To see why this is useful, take a closer look at how the SolarNode GUI rendered our component in part two of our guide:
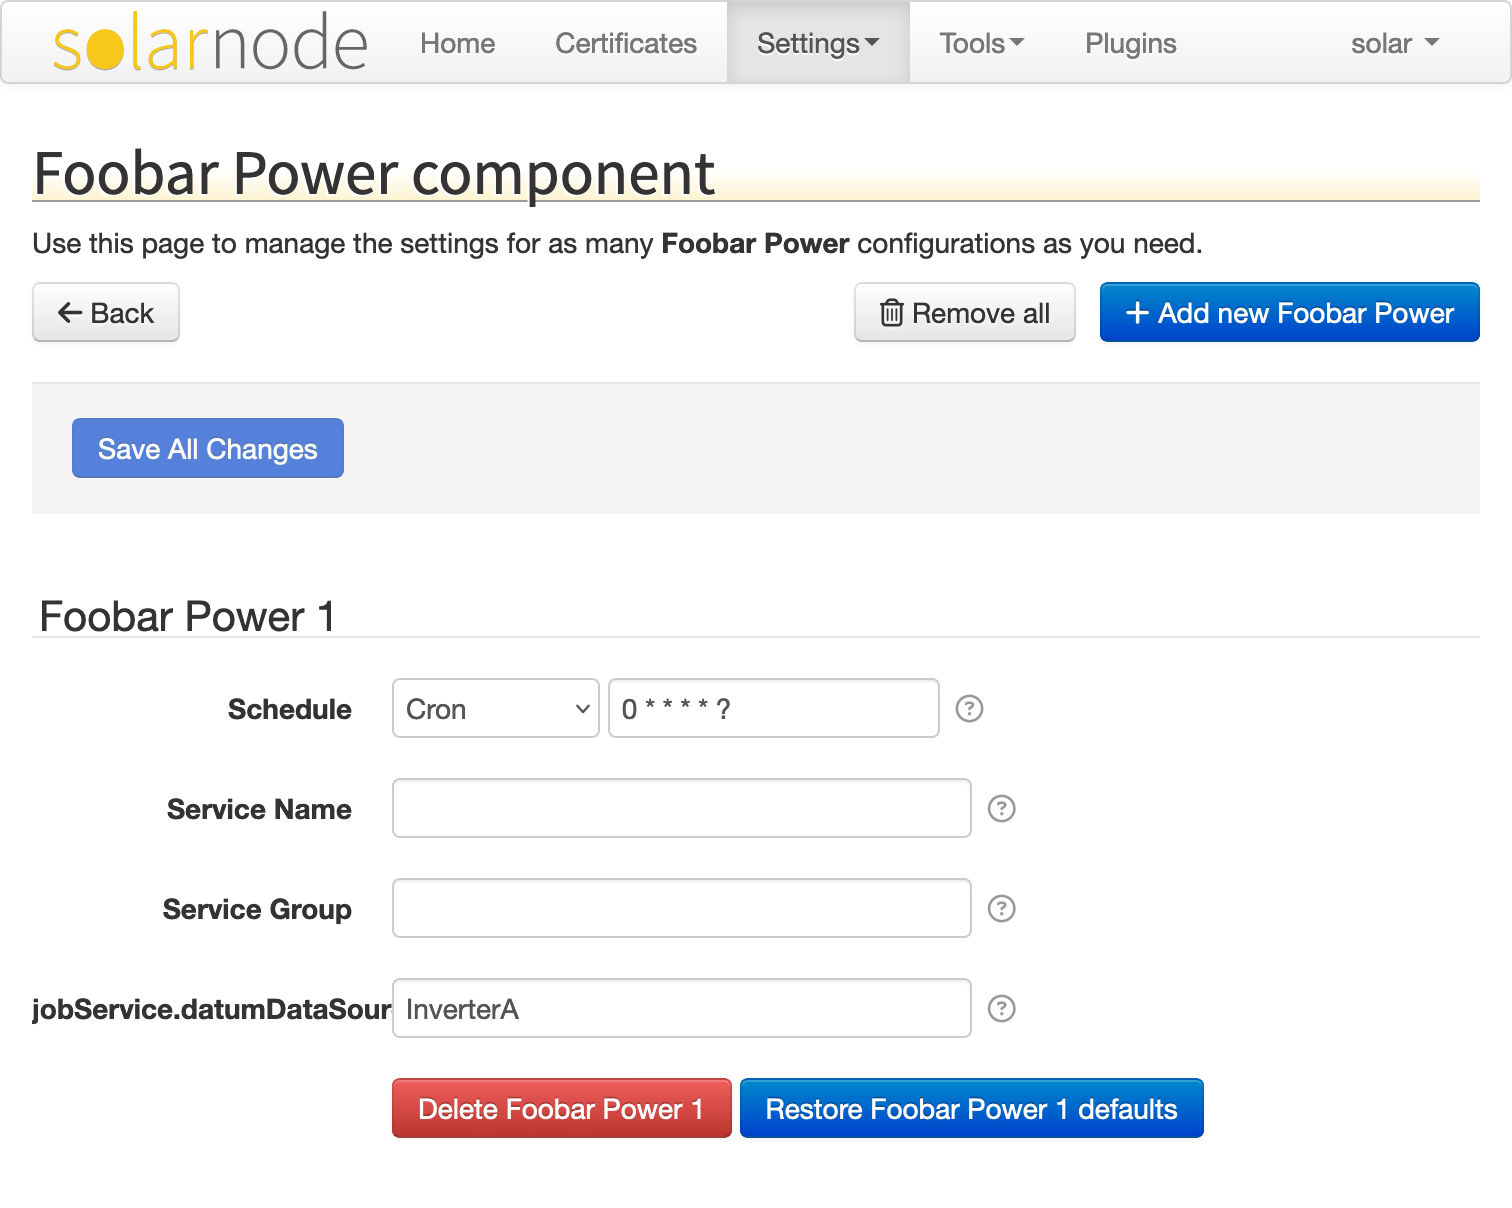
The label for our configurable sourceId property looks like a snippet of broken code:
jobService.datumDataSour. It would be better to display a friendly label instead, one that can
also be localized to different languages.
The SolarNode Settings API makes use of Spring Framework's MessageSource API to
allow bundles to expose localized messages to the SolarNode application. You may recall there was a
method in the net.solarnetwork.settings.SettingSpecifierProvider API that returned a
MessageSource:
/**
 * Get a MessageSource to localize the setting text.
 *
 * <p>
 * This method can return {@literal null} if the provider does not have any
 * localized resources.
 * </p>
 *
 * @return the MessageSource, or {@literal null}
 */
MessageSource getMessageSource();
In our Foobar implementation we can return a ResourceBundleMessageSource which will allow us to add standard Java java.util.ResourceBundle properties files containing our localized messages.
You might have noticed that the SolarNode GUI already displays the name Foobar Power in many
places. That name comes from the SettingSpecifierProviderFactory we configured in the bundle's
OSGi Blueprint module.xml file, on line 3 here:
<service interface="net.solarnetwork.settings.SettingSpecifierProviderFactory">
	<bean class="net.solarnetwork.settings.support.BasicSettingSpecifierProviderFactory">
		<property name="displayName" value="Foobar Power"/>
		<property name="factoryUid" value="net.solarnetwork.node.example.datum_capture.foobar"/>
		<property name="messageSource" ref="messageSource"/>
	</bean>
</service>
Notice line 5 of that snippet configures a messageSource property that refers to the <bean id="messageSource"> definition, which is defined as:
<bean id="messageSource" class="org.springframework.context.support.ResourceBundleMessageSource">
	<property name="basenames">
		<array>
			<value>net.solarnetwork.node.example.datum_capture.FoobarDatumDataSource</value>
			<value>net.solarnetwork.node.service.support.DatumDataSourceSupport</value>
			<value>net.solarnetwork.service.support.BasicIdentifiable</value>
		</array>
	</property>
</bean>
That defines a ResourceBundleMessageSource with a
basenames value of a list of resource bundle names, starting with our datum data source's class
name: net.solarnetwork.node.example.datum_capture.FoobarDatumDataSource. This is a conventional way of
naming these localized resources. Let us provide a default message property file (this guide will not
go into details on how to create localized copies of this default file, read up on
ResourceBundle for that). The properties file must be named
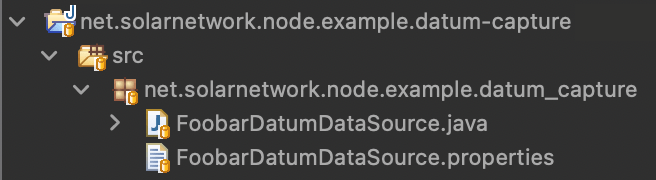
FoobarDatumDataSource.properties and located in the same directory (package) as our
FoobarDatumDataSource.java file.
Add the following contents:
title = Amazing Foobar Power Inverter
desc = A demonstration of a datum data source for a fictional solar power inverter device.
That is a much more exciting name for our fictional inverter, and a more detailed description! Now you can start up (or restart if still running) the SolarNode OSGi runtime in Eclipse, and then refresh the settings screen in your browser. You should now see the following:
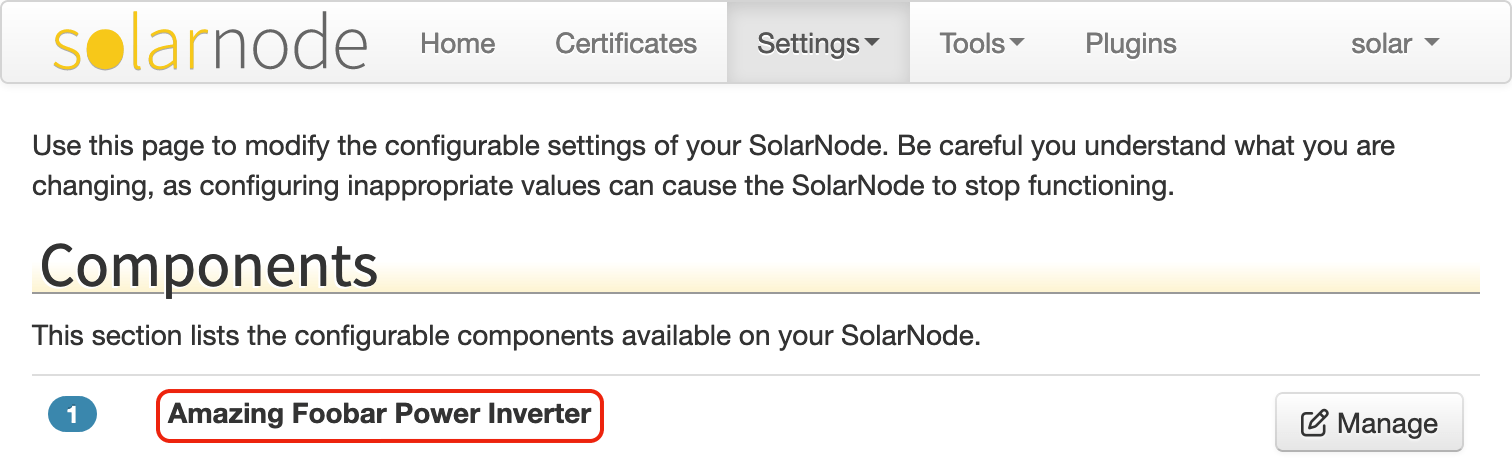
The SolarNode GUI uses the supplied title in place of the one defined in the XML configuration. If
you click on the Manage button to view the detail screen for this component, you should see the
following:
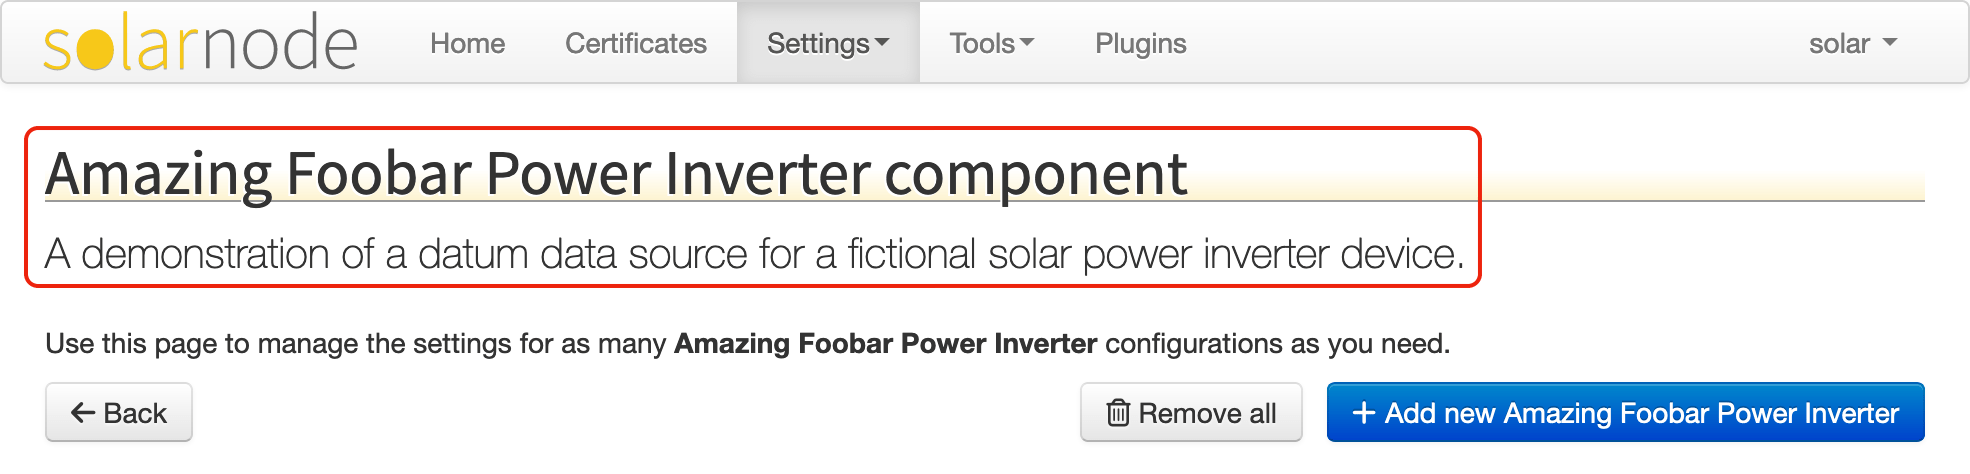
If this does not reinforce the name of our inverter in user's minds I am not sure what will.
We have provided a nice localizable title for our inverter, but now we must provide a localized name
for our configurable sourceId property. Recall that in our Blueprint definition for our
FoobarDatumDataSource class we had the following:
<bean class="net.solarnetwork.node.example.datum_capture.FoobarDatumDataSource">
	<property name="messageSource" ref="jobMessageSource"/>
</bean>

<bean id="jobMessageSource" class="net.solarnetwork.node.util.PrefixedMessageSource">
	<property name="prefix" value="datumDataSource."/>
	<property name="delegate" ref="messageSource"/>
</bean>
We have configured the FoobarDatumDataSource class to use the jobMessageSource bean as its
messageSource. This is necessary because we are wrapping the data source within a periodic job
(the net.solarnetwork.node.job.SimpleManagedJob class). It is the SimpleManagedJob object that
actually appears at runtime to the SolarNode settings system, not FoobarDatumDataSource. Did you
wonder where that Schedule setting came from, seeing as you never defined a setting for that
yourself?

Well SimpleManagedJob implements SettingSpecifierProvider as well, it turns out, and it
provided that setting, and the net.solarnetwork.node.service.support.DatumDataSourceSupport
resource bundle provides the localized message for it.
If you then inspect the HTML in the settings GUI of the sourceId setting label you will find the
full text, which is the localized message key the GUI is trying to render:
jobService.datumDataSource.sourceId
Where did that come from? If you look closely back at the Blueprint XML, we have this:
<bean class="net.solarnetwork.node.job.SimpleManagedJob">
	<argument>
		<bean class="net.solarnetwork.node.job.DatumDataSourcePollManagedJob">
			<property name="datumDataSource">
				<bean class="net.solarnetwork.node.example.datum_capture.FoobarDatumDataSource">
The SimpleManagedJob adds a jobService. prefix to all the setting keys returned from the
configured DatumDataSourcePollManagedJob, so that is where the jobService. start to the message
key comes from. The DatumDataSourcePollManagedJob returns all the settings of the configured
FoobarDatumDataSource. Following Spring Framework's property accessor syntax, hopefully the rest of the
message key starts to make sense: datumDataSource. gets us to the FoobarDatumDataSource object
and the final sourceId is the sourceId setting we configured in our plug-in.
It can quickly get your head spinning if you are unfamiliar to all this stuff, so just trust that
this setup allows us to configure our data source property messages in the
FoobarDatumDataSource.properties file we created. Let us add some messages to that file now, to
provide a name and description for the sourceId setting
sourceId.key = Source ID
sourceId.desc = A unique name to give to this specific inverter. If you have more than \
	one inverter, you should give each of them a unique Source ID value, for example \
	<code>Inverter1</code>, <code>Inverter2</code>, etc.
We have added two properties here: sourceId.key and sourceId.desc. The SolarNode GUI expects
all property message label keys to follow the pattern <property>.key and corresponding description
keys to follow the pattern <property>.desc. The .desc message is used to give users a concise
tip as to the purpose of the associated configurable property.
Now you can start up (or restart if still running) the SolarNode OSGi runtime in Eclipse, and then refresh the component screen in your browser. You should now see the following:
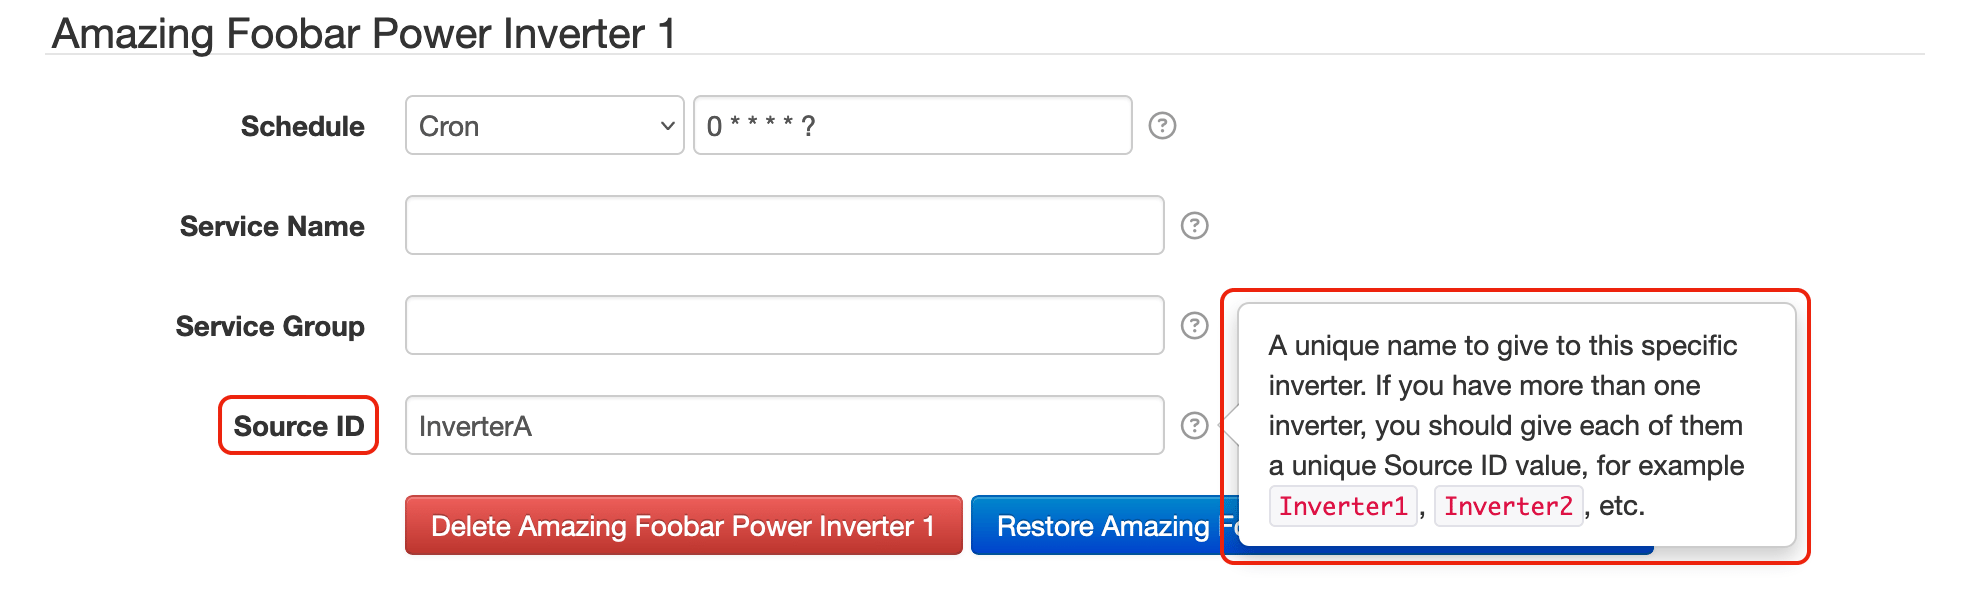
That is much better indeed, as far as users will be concerned.
In Part 4 we will show how to add an Apache Ant build script so the bundle can be built from the command line.