SolarNode Motion Camera Integration Guide
This guide describes how to integrate a security camera with and the motion detection
library with SolarNode, so that images and/or video events captured by motion can be logged by
SolarNode as a datum stream and the media uploaded to AWS S3. Additionally, snapshot images
can be captured on-demand via the SolarNetwork instruction API. These features can be
quite useful for operational maintenance and security aspects of SolarNode deployments.
You'll need the following things before starting:
- a SolarNode device that has already been deployed and associated with a SolarNetwork account
- a camera that is supported by motion and accessible to SolarNode, i.e. via a USB connection or network connection
- an S3 bucket and associated AWS token credentials that have permission to create files in a location within it
First you need to install the motion software. For Debian based systems like
SolarNodeOS this is available as the motion package, so you can install it like
sudo apt-get install motionOnce installed, configure motion to process your camera's video stream and save motion detected
images and/or motion detected video clips to the node's local filesystem. In Debian systems, the
default location for captured media is /var/lib/motion.
Also consider that the SolarNode application will need to be able to access the media files
captured, so will need to have the right file system permissions. In Debian systems, motion runs as
the motion user in the adm group. In SolarNodeOS, the sn-motion package can be
installed which will automatically add the solar user to the adm group, as well as install a
helpful periodic job to delete old media files so they don't accumulate forever. Install that like:
sudo apt-get install sn-motionInstall the SolarNode S3 Storage Service plugin onto your node. This plugin will enable SolarNode to upload the image/video media captured by motion to S3. Once installed, configure a S3 Storage Service component with your S3 details. You can configure the S3 Path setting with a folder path to have all media files get stored within that folder. If the Node ID Path setting is enabled, then your node's unique ID will be added to the S3 Path prefix as another folder segment.
You must give the component a unique Service Name, which we will refer to later on. The value doesn't matter, other than being something that makes sense to you and is unique on your node. In the example image below, the Service Name is configured as Camera Storage:

Next install the SolarNode Storage Service Upload plugin onto your node. This
plugin provides a Storage Service File Watcher component that will watch for newly created or
modified files and copy them to a Storage Service. In our case, we want to configure one of these
components to watch the directory motion saves its media files to (e.g. /var/lib/motion) and
copy them to the S3 Storage Service we configured in the previous section. Continuing with the
example settings used in this guide, the following values should be configured:
| Setting | Value |
|---|---|
| Storage Service |
Camera Storage — as configured on the S3 Storage Service component. |
| Path |
/var/lib/motion — as configured in motion. |
| Filter |
.+\.jpg — to only upload JPEG images. Can tweak to also upload movies if you need. |
| Datum Source ID |
/camera/1/motion — the source ID of the generated datum stream, set to any sensible value. |

At this point if everything is configured correctly then after motion captures an image SolarNode
should notice and upload the image to S3 and generate a datum for that event. You can verify that
the images are being uploaded to S3 by watching the SolarNode log file (use sn-log-tail -f in
SolarNodeOS and that the files appear in S3. You can verify the generated datum by using the
SolarNetwork API Explorer with the /datum/mostRecent or
/datum/list endpoints. For example (substitute your node and source IDs):
/solarquery/api/v1/sec/datum/mostRecent?nodeId=123&sourceIds=/camera/1/motion
{
  "success": true,
  "data": {
    "totalResults": 1,
    "startingOffset": 0,
    "returnedResultCount": 1,
    "results": [
      {
        "created": "2019-10-23 01:09:44.321Z",
        "nodeId": 123,
        "sourceId": "/camera/1/motion",
        "localDate": "2019-10-23",
        "localTime": "14:09",
        "size": 23751,
        "url": "https://example-bucket.s3.us-west-2.amazonaws.com/solarnode-storage/123/1-01-20191023140914-01.jpg",
        "path": "1-01-20191023140914-01.jpg"
      }
    ]
  }
}To enable using the SolarNetwork instruction API to request motion capture a new
snapshot image, you can install the SolarNode Camera Control via Motion plugin.
This plugin uses the motion webcontrol API to perform this task, so that must
be enabled in motion.
⚠️ Note: by default motion's webcontrol listens on port 8080, which is the same port SolarNode listens on by default. You should configure motion to listen on a different port, using thewebcontrol_portconfiguration parameter.
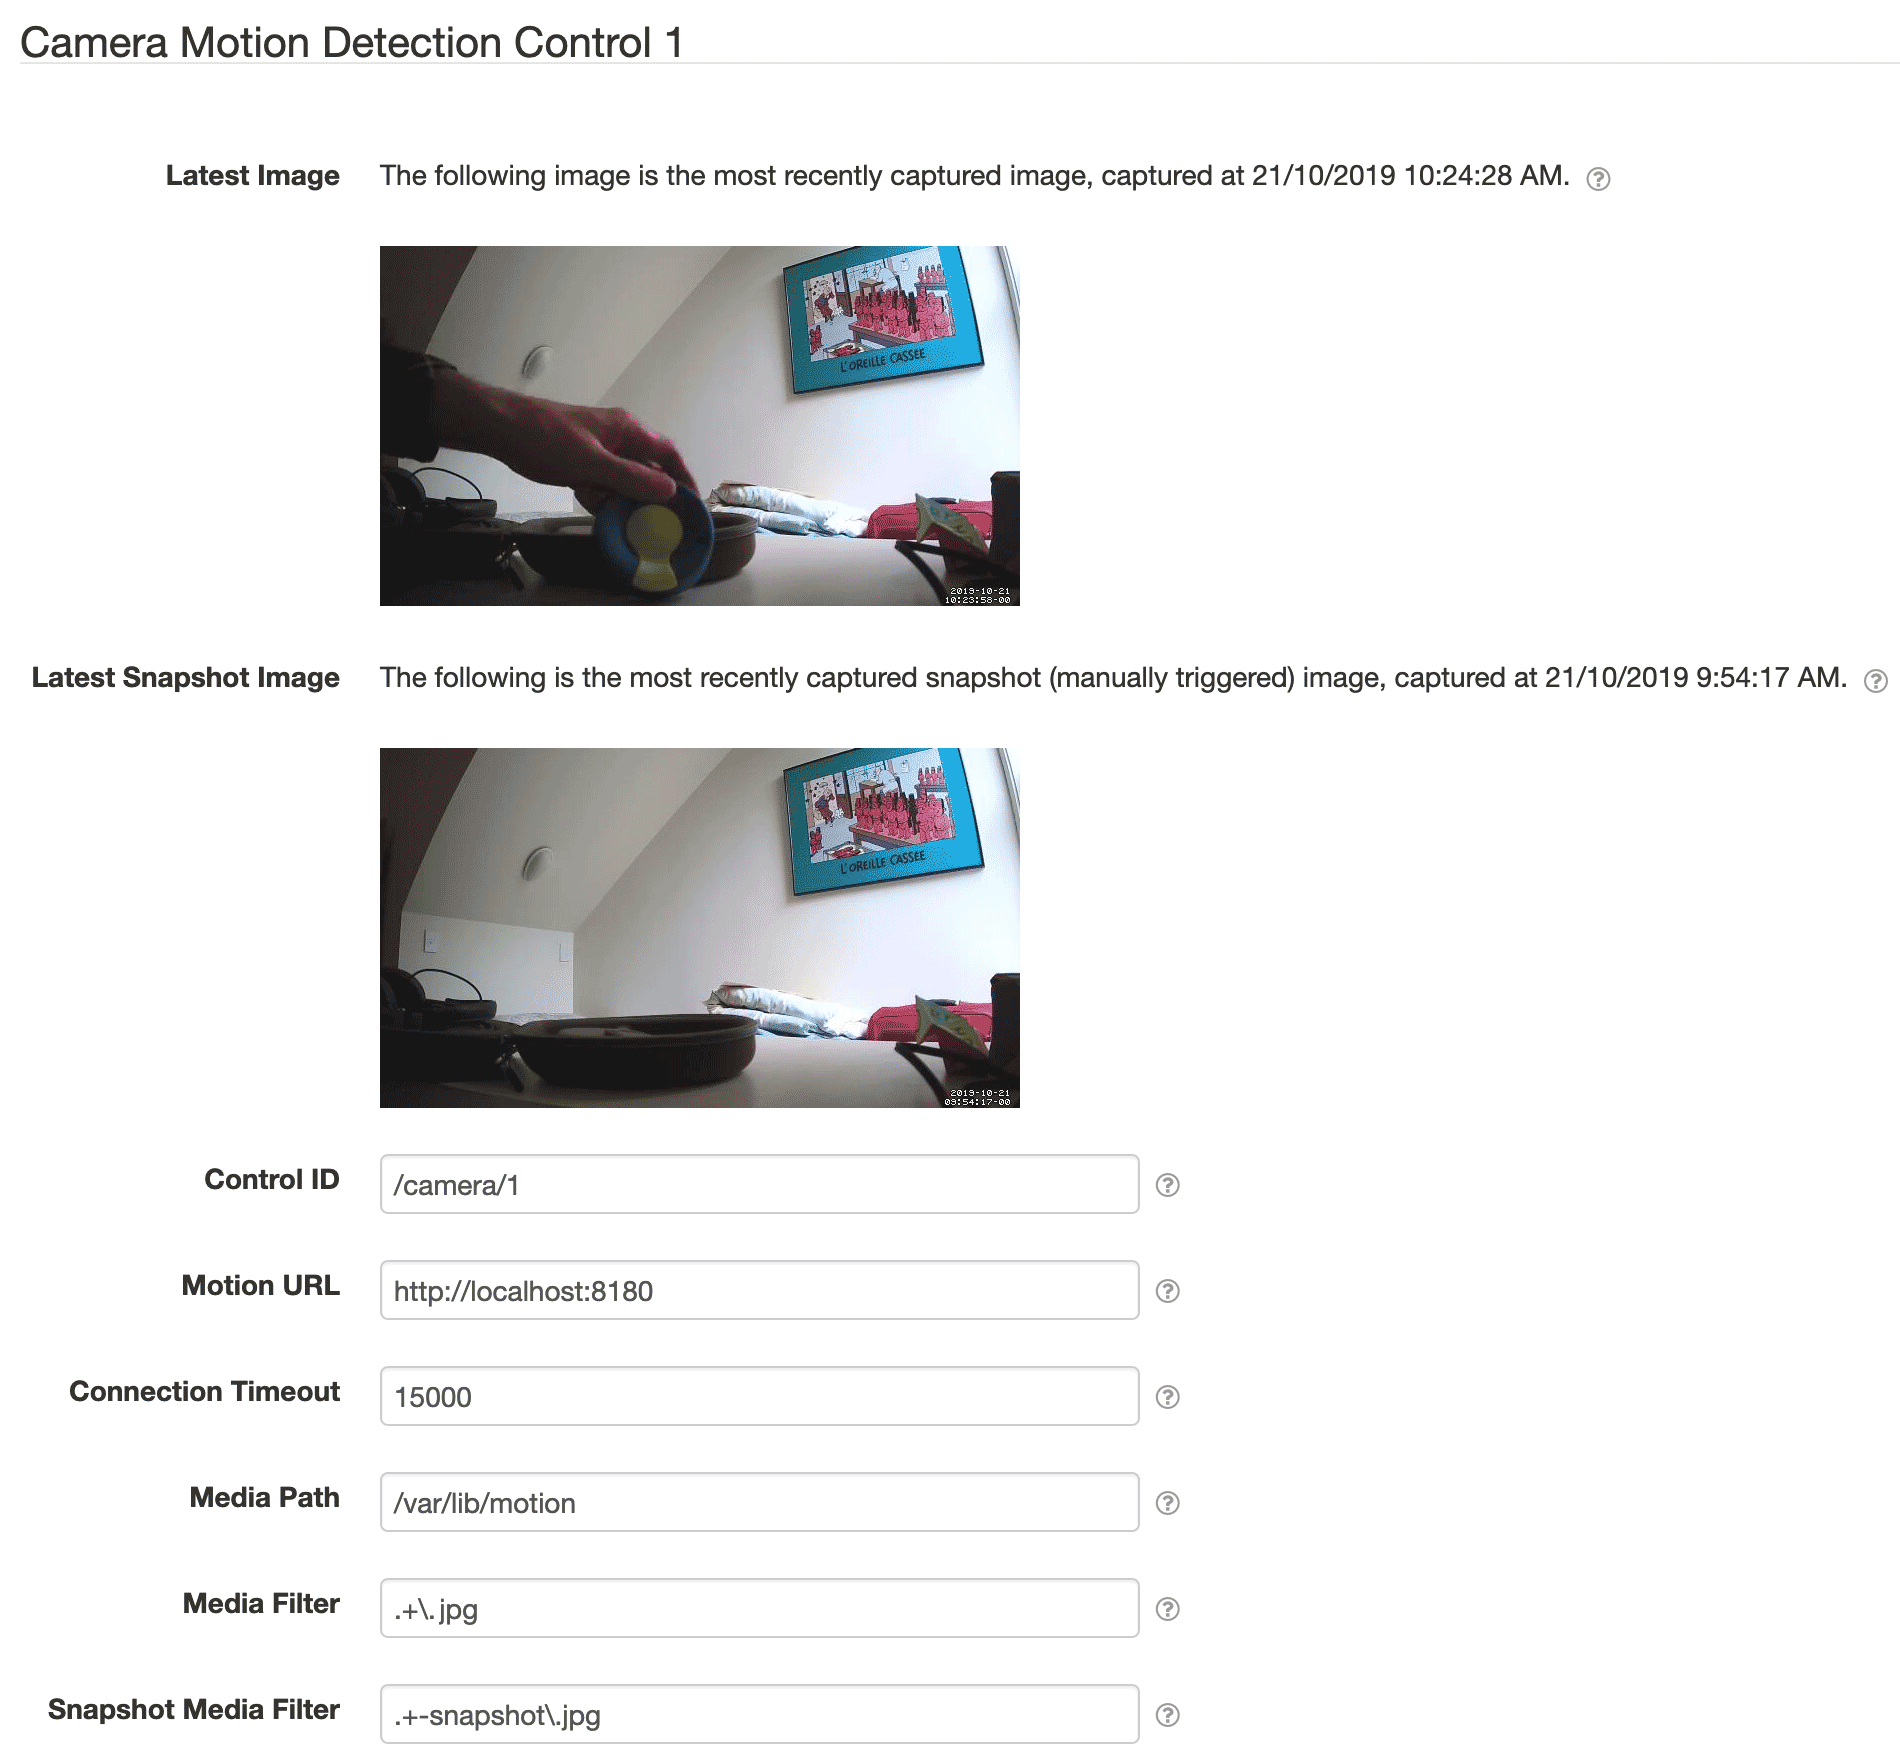
The Camera Control via Motion component must be configured with settings that match how motion is configured:
| Setting | Value |
|---|---|
| Control ID |
/camera/1 — the control ID to refer to this component by, set to any sensible value. |
| Motion URL |
http://localhost:8180 — the URL of the motion webcontrol service. |
| Media Path |
/var/lib/motion — as configured in motion. |
| Media Filter |
.+\.jpg — to identify non-snapshot images, as configured in motion. |
| Snapshot Media Filter |
.+-snapshot\.jpg — to identify snapshot images, as configured in motion. |
Once configured, refresh the setup page and the latest motion-triggered image and manually-triggered snapshot image should appear, as shown here:
To request a new snapshot image, this control supports a snapshot Signal
instruction. Thus to request a new snapshot, a POST call to /solaruser/api/v1/sec/instr/add with
a body like this would work:
topic=Signal&nodeIds=123¶meters%5B0%5D.name=/camera/1¶meters%5B0%5D.value=snapshot
In the SolarNetwork API Explorer you would just include the POST body as query
parameters, like this:
/solaruser/api/v1/sec/instr/add?topic=Signal&nodeIds=123¶meters%5B0%5D.name=/camera/1¶meters%5B0%5D.value=snapshot
Once executed by the node and motion generates a new snapshot, that snapshot will be uploaded to S3 and a new datum generated, just like any other image created by motion.
That's all for this guide. We hope it was helpful for integrating security camera footage into your SolarNode deployment.