Developer VM
This guide describes how to set up a SolarNetwork development virtual machine (VM) using VirtualBox and Vagrant. This is a convenient way to get started with SolarNetwork development, as all the required software will be available in the VM. The VM features:
- Ubuntu host with minimal X window manager
- Postgres server for SolarNet development
- VerneMQ server for SolarQueue development (SolarNode ⇌ SolarNet MQTT integration)
- pgAdmin Postgres GUI
- Eclipse IDE
- Firefox web browser
- Cloned SolarNetwork git repositories
- Basic developer configuration

The VM requires VirtualBox and is initially set up using Vagrant. Install both of these before continuing. The VM will be allocated 2GB of RAM by default, but you may want to configure more if your system has enough RAM. The VM will also be allocated a 20 GB disk image (although only a few GB will be used at the start), so you must have that much disk space available.
Additionally, the Vagrant disksize plugin is required. Once you have Vagrant installed, simply run
vagrant plugin install vagrant-disksizeto install the plugin.
Download the solarnetwork-dev
repository, or clone it via https://github.com/SolarNetwork/solarnetwork-dev.git. Once downloaded
or cloned if you can afford to give the VM more RAM and/or CPU cores to work with, the VM will run
much more smoothly. You can adjust the RAM/CPU count by creating a Vagrantfile.local file, like
this:
cd solarnetwork-dev/vagrant/solarnet-dev

# give the VM 6GB of RAM
echo 'memory_size = 6114' >>Vagrantfile.local

# give the VM 4 CPU cores
echo 'no_of_cpus = 4' >>Vagrantfile.local
You will end up with a Vagrantfile.local like this:
memory_size = 6114
no_of_cpus = 4
Note more options can be configured in
Vagrantfile.local— see the project README for more information.
To then start the VM, run vagrant up like this:
# if not already in the solarnet-dev directory:
cd solarnetwork-dev/vagrant/solarnet-dev

vagrant up
Vagrant will download the VM image and then start configuring the SolarNetwork environment.
⚠️ Note This process can take a fair amount of time, as the OS image itself must be downloaded as well several hundred MB of software packages. Please be patient. It could be a good time to grab a ☕...
You should see output similar to this:
Bringing machine 'solarnet' up with 'virtualbox' provider...
==> solarnet: Importing base box 'ubuntu/jammy64'...
==> solarnet: Matching MAC address for NAT networking...
==> solarnet: Checking if box 'ubuntu/jammy64' is up to date...
==> solarnet: Setting the name of the VM: SolarNet Dev
...

--------------------------------------------------------------------------------
SolarNetwork development environment setup complete. Please reboot the virtual
machine like:

vagrant reload

Then log into the VM as solardev:solardev and Eclipse will launch automatically.
Right-click on the desktop to access a menu of other options.

!! NOTE: If X fails to start on tty1, login on tty2 (Alt-F2) and run `startx`
!! to start X and have Eclipse launch automatically.
⚠️ Note you should take a moment before continuing to review all the script output for problems. Some parts of the script might fail, for example due to network problems that prevent software from downloading successfully. If any problems do occur, try runningvagrant provisionto execute the scripts again.
Follow the instructions to restart the VM:
vagrant reloadMore details on the Vagrant setup are available on the project README.
The VM image will have a 1GB swap file configured. You might need to enable more swap memory, if
your VM is not configured at least 2GB or so. To change the swap file to 2GB, starting again from
the solarnetwork-dev directory, execute:
vagrant ssh
sudo swapoff /swapfile
sudo fallocate -l 2G /swapfile
sudo chmod 600 /swapfile
sudo mkswap /swapfile
sudo swapon /swapfileSwitch over to the VM in VirtualBox, and log in as solardev with the password solardev. You should end up with a screen like this:
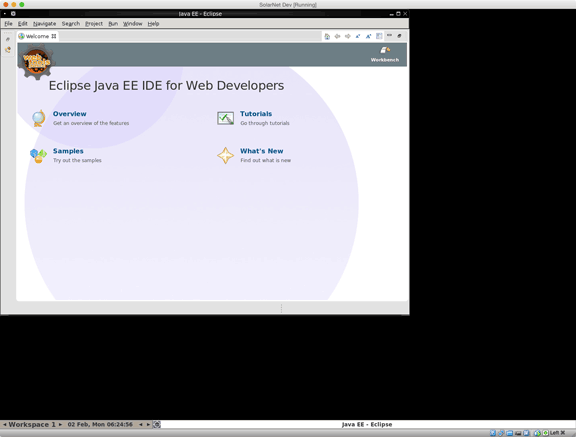
Click on the Workbench big-arrow icon to dismiss the welcome screen.
Note if you get an error about X refusing to start, try this approach instead:
- Switch to the
tty2virtual console by pressing Alt+F2. - Log in as solardev with the password solardev.
- At the shell prompt, type
startxto launch the display environment.
The default screen size might be pretty small to work with when you eventually log in. Minimize
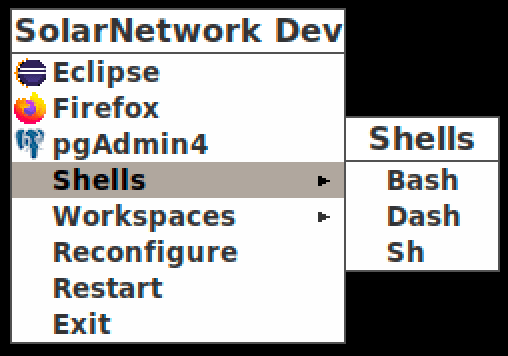
Eclipse, then you can open up a shell by right-clicking on the desktop and choose Shells > bash.
Then run xrandr -q to get a list of available screen resolutions:
Screen 0: minimum 64 x 64, current 800 x 600, maximum 32766 x 32766
VGA-0 connected 800x600+0+0 0mm x 0mm
   800x600       60.00*+  60.00*
   2560x1600     60.00
   2560x1440     60.00
   2048x1536     60.00
   1920x1600     60.00
   1920x1080     60.00
   1600x1200     60.00
   1680x1050     60.00
   1400x1050     60.00
   1280x1024     60.00
   1024x768      60.00
   640x480       60.00
You can tell X to switch to one of those resolutions by executing
xrandr --size 1400x1050
(using whatever resolution you like). You can that change permanently by creating a
/etc/X11/xorg.conf.d/10-monitor.conf file with the desired settings, like this:
# log into the VM from your host machine, as an administrator
vagrant ssh
sudo mkdir /etc/X11/xorg.conf.d
sudo nano /etc/X11/xorg.conf.d/10-monitor.conf
The 10-monitor.conf file's content will look like this; note the Modes line where you specify
the desired screen resolution:
Section "Monitor"
    Identifier             "Monitor0"
EndSection

Section "Device"
    Identifier             "Device0"
EndSection

Section "Screen"
    Identifier             "Screen0"
    Device                 "Device0"
    Monitor                "Monitor0"
    SubSection             "Display"
        Modes              "1400x1050" # Use one of the sizes returned by xrandr
    EndSubSection
EndSection
Just replace the Modes line with the size you want from the xrandr output.
Note you can also configure Vagrant to create this file for you when it provisions the VM, by adding the file to a
local-rootdirectory on your host machine. See the project README for details. This is especially handy if you need to recreate the VM as the resolution settings will be applied at the start.
When Eclipse first launches, it won't have any projects configured. You need to perform some one-time initial setup tasks to get everything working.
A Team Project Set will have been created for you that contains all the SolarNetwork projects. Import this now by selecting File > Import... > Team > Team Project Set.
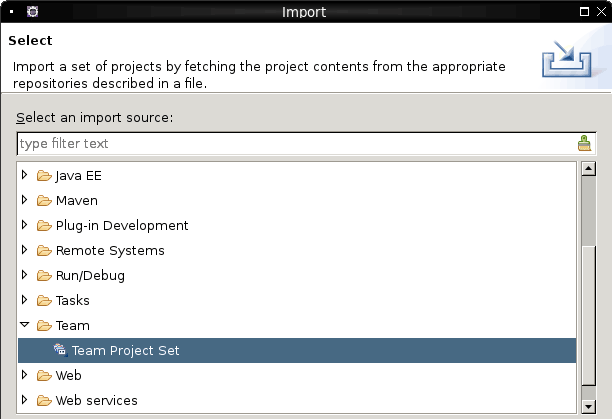
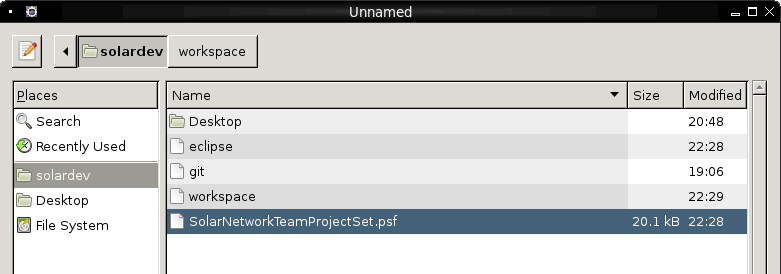
Click Next > and in the dialog that follows, enter a File path of
/home/solardev/workspace/SolarNetworkTeamProjectSet.psf (or use the Browse... button
to select this file), and then click Finished. This will import all the
projects into Eclipse.
Once the import completes, you should have all the SolarNetwork projects available in your Eclipse workspace. Eclipse will compile all projects, which can take a couple of minutes.
⚠️ Note you may see some projects reporting compile errors when importing the projects the first time. If that is the case, often selecting Project > Clean... > Clean all projects can sort things out. Some errors can be ignored (you can configure Eclipse to ignore those if desired).
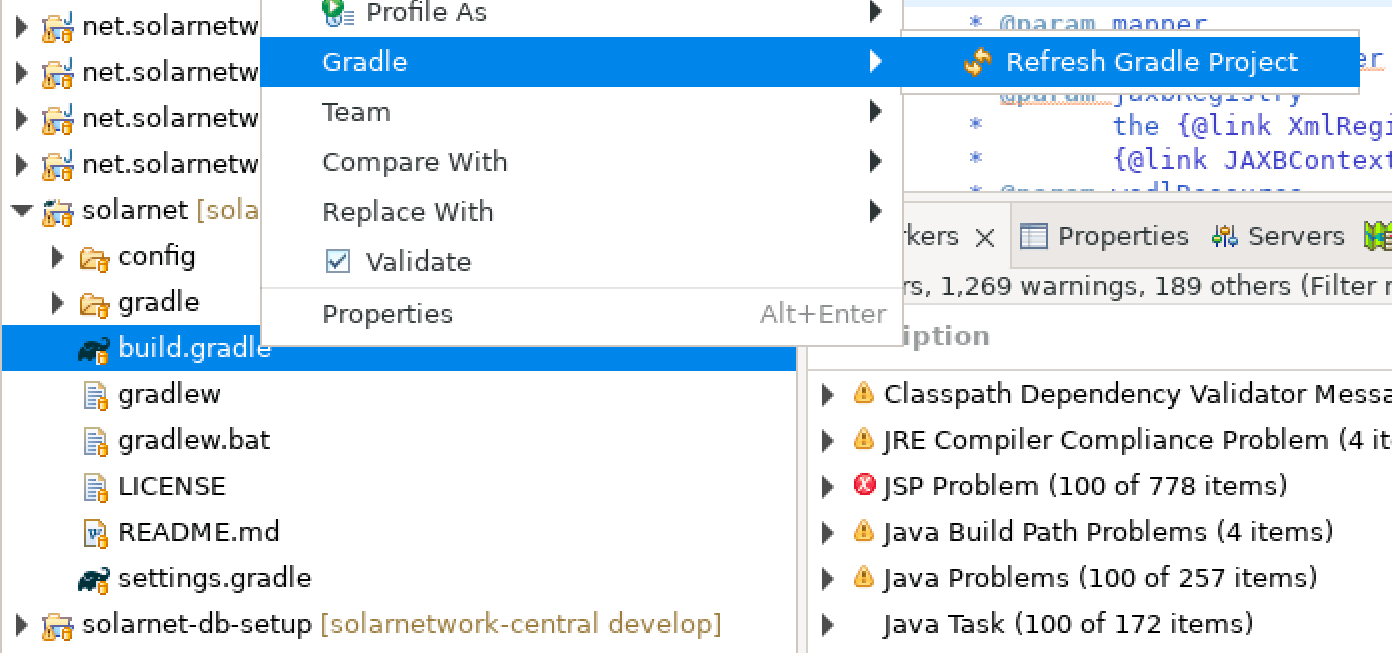
The solarnet project is built with Gradle. It will have been imported in Eclipse, but not its
children projects. To do that, right-click on the project and choose Gradle > Refresh Gradle
Project:
⚠️ Note this can take a fair amount of time, as many dependencies will need to be downloaded. Please be patient. You will need to wait for the refresh to complete before continuing. Perhaps it is time for another ☕...
SolarUser is the application that provides a web-based UI to manage SolarNetwork accounts and their associated SolarNode devices and data. You must launch SolarUser first so it can generate some initial TLS certificate infrastructure. Launch the SolarUser app by going to Run > Run Configurations... > SolarUserApp and clicking the Run button. Wait for the app to start up.
SolarIn is the application that SolarNode connects to to post data to and receive instructions from. SolarIn must be running to set up your first SolarNode. Launch the SolarIn app by going to Run > Run Configurations... > SolarInApp and clicking the Run button. Wait a few moments for the app to start up.
Now that SolarUser and SolarIn are running, you can create a development SolarNet account in
SolarUser so you can then add a development SolarNode. Open a browser window (click the little
earth icon in Eclipse) and visit http://localhost:9081/solaruser/. You should see a page like
this:
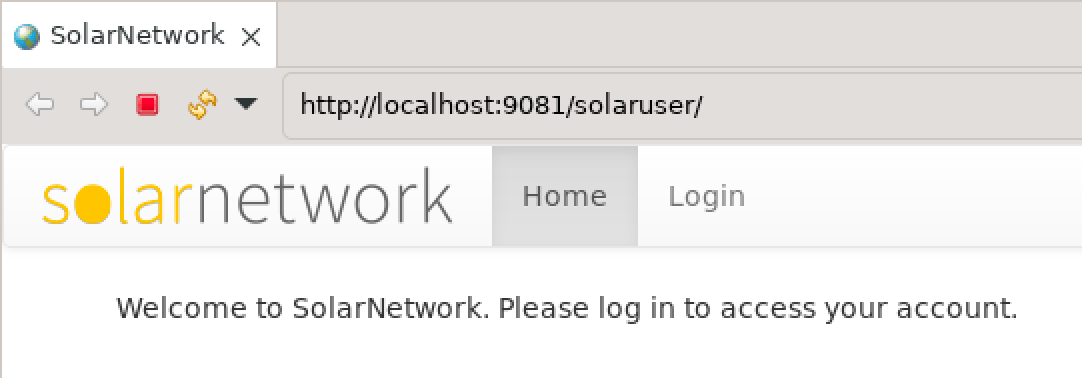

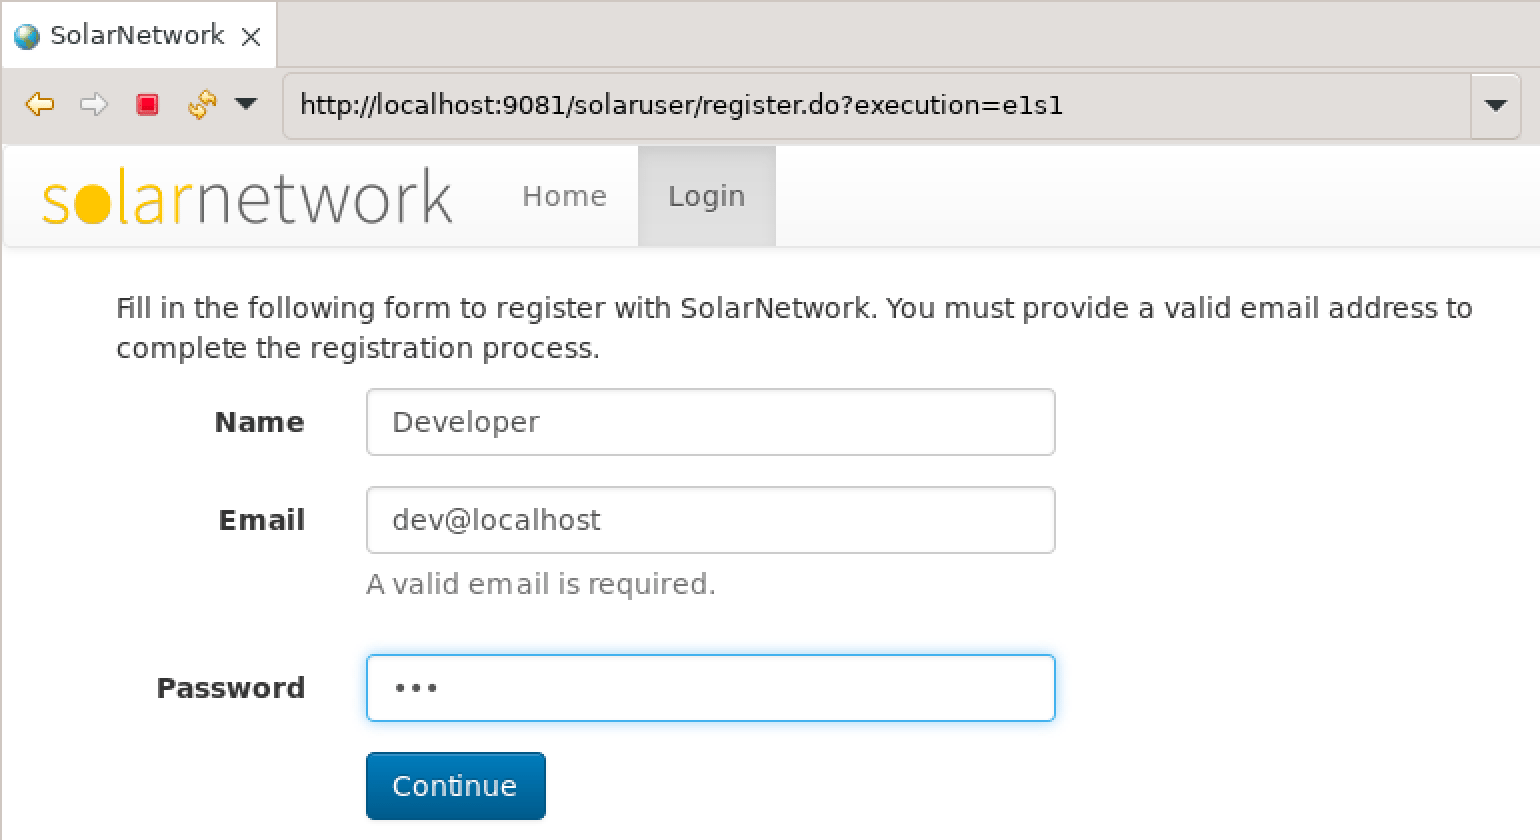
Click on the Login link, then click the "goto the User Registration page" link to register as a new user. Fill in the form and submit it.
When you submit the registration, SolarNet will send a confirmation email to the address provided with a confirmation URL in the message body. The development environment is set up to simply log outbound email messages, so look in the Eclipse SolarUserApp console and you should see the confirmation URL there. Since SolarIn was the last application you launched, you will have to switch to the SolarUser console, using the switcher button in Eclipse:

The logged email message will have a URL that takes the form of
http://localhost:9081/solaruser/register/confirm.do?...
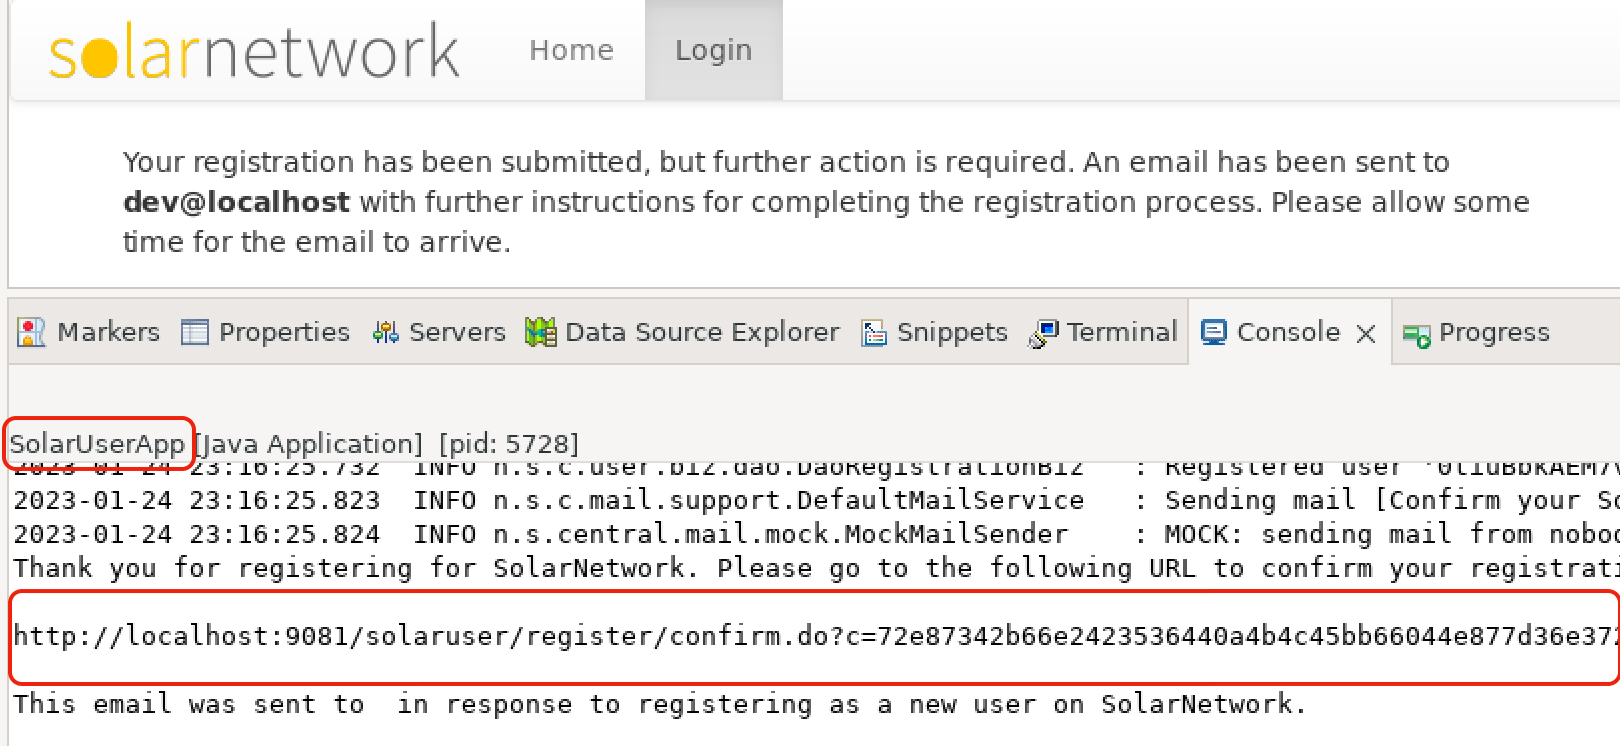
Copy that entire URL, and paste it into the browser to visit it. That will complete the registration process, and you should then log in. That will land you on the My Nodes page:
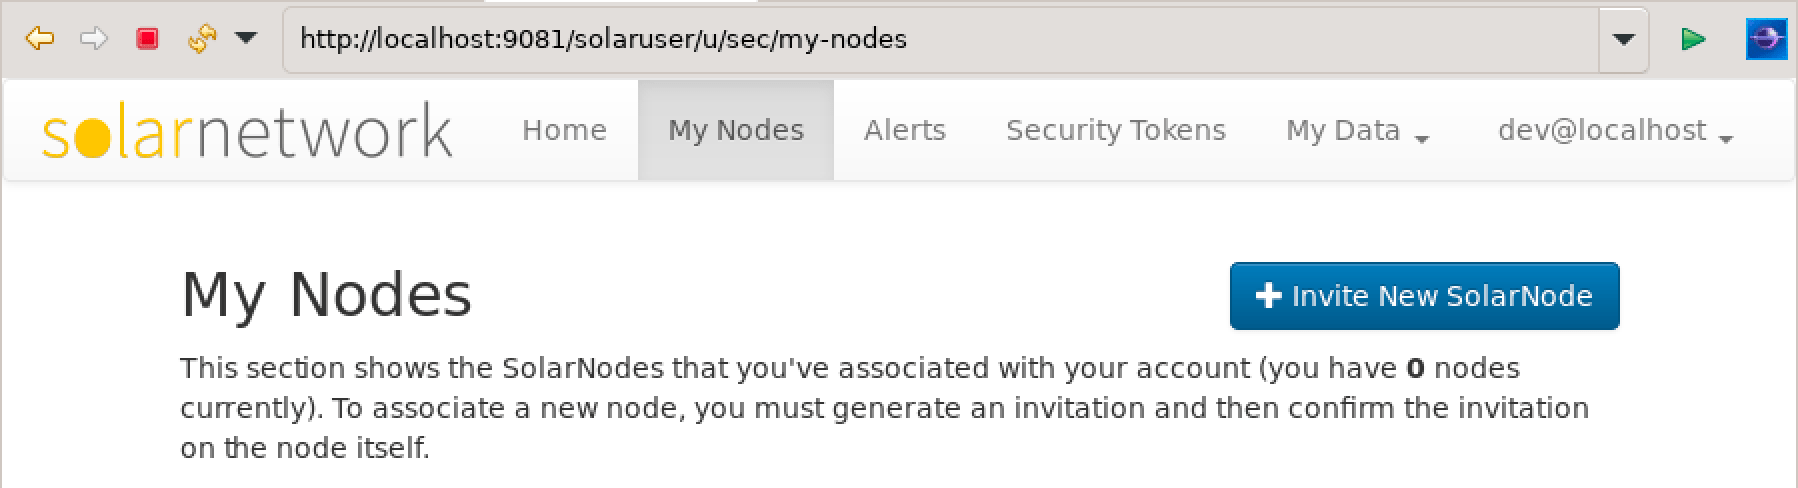
Now you are ready to set up your development SolarNode. Start by clicking on the Invite New SolarNode button on the My Nodes page you landed on after logging in. Fill in and submit the form that appears.
⚠️ Note to fill in the required Time Zone, simply click on the appropriate area of the map.
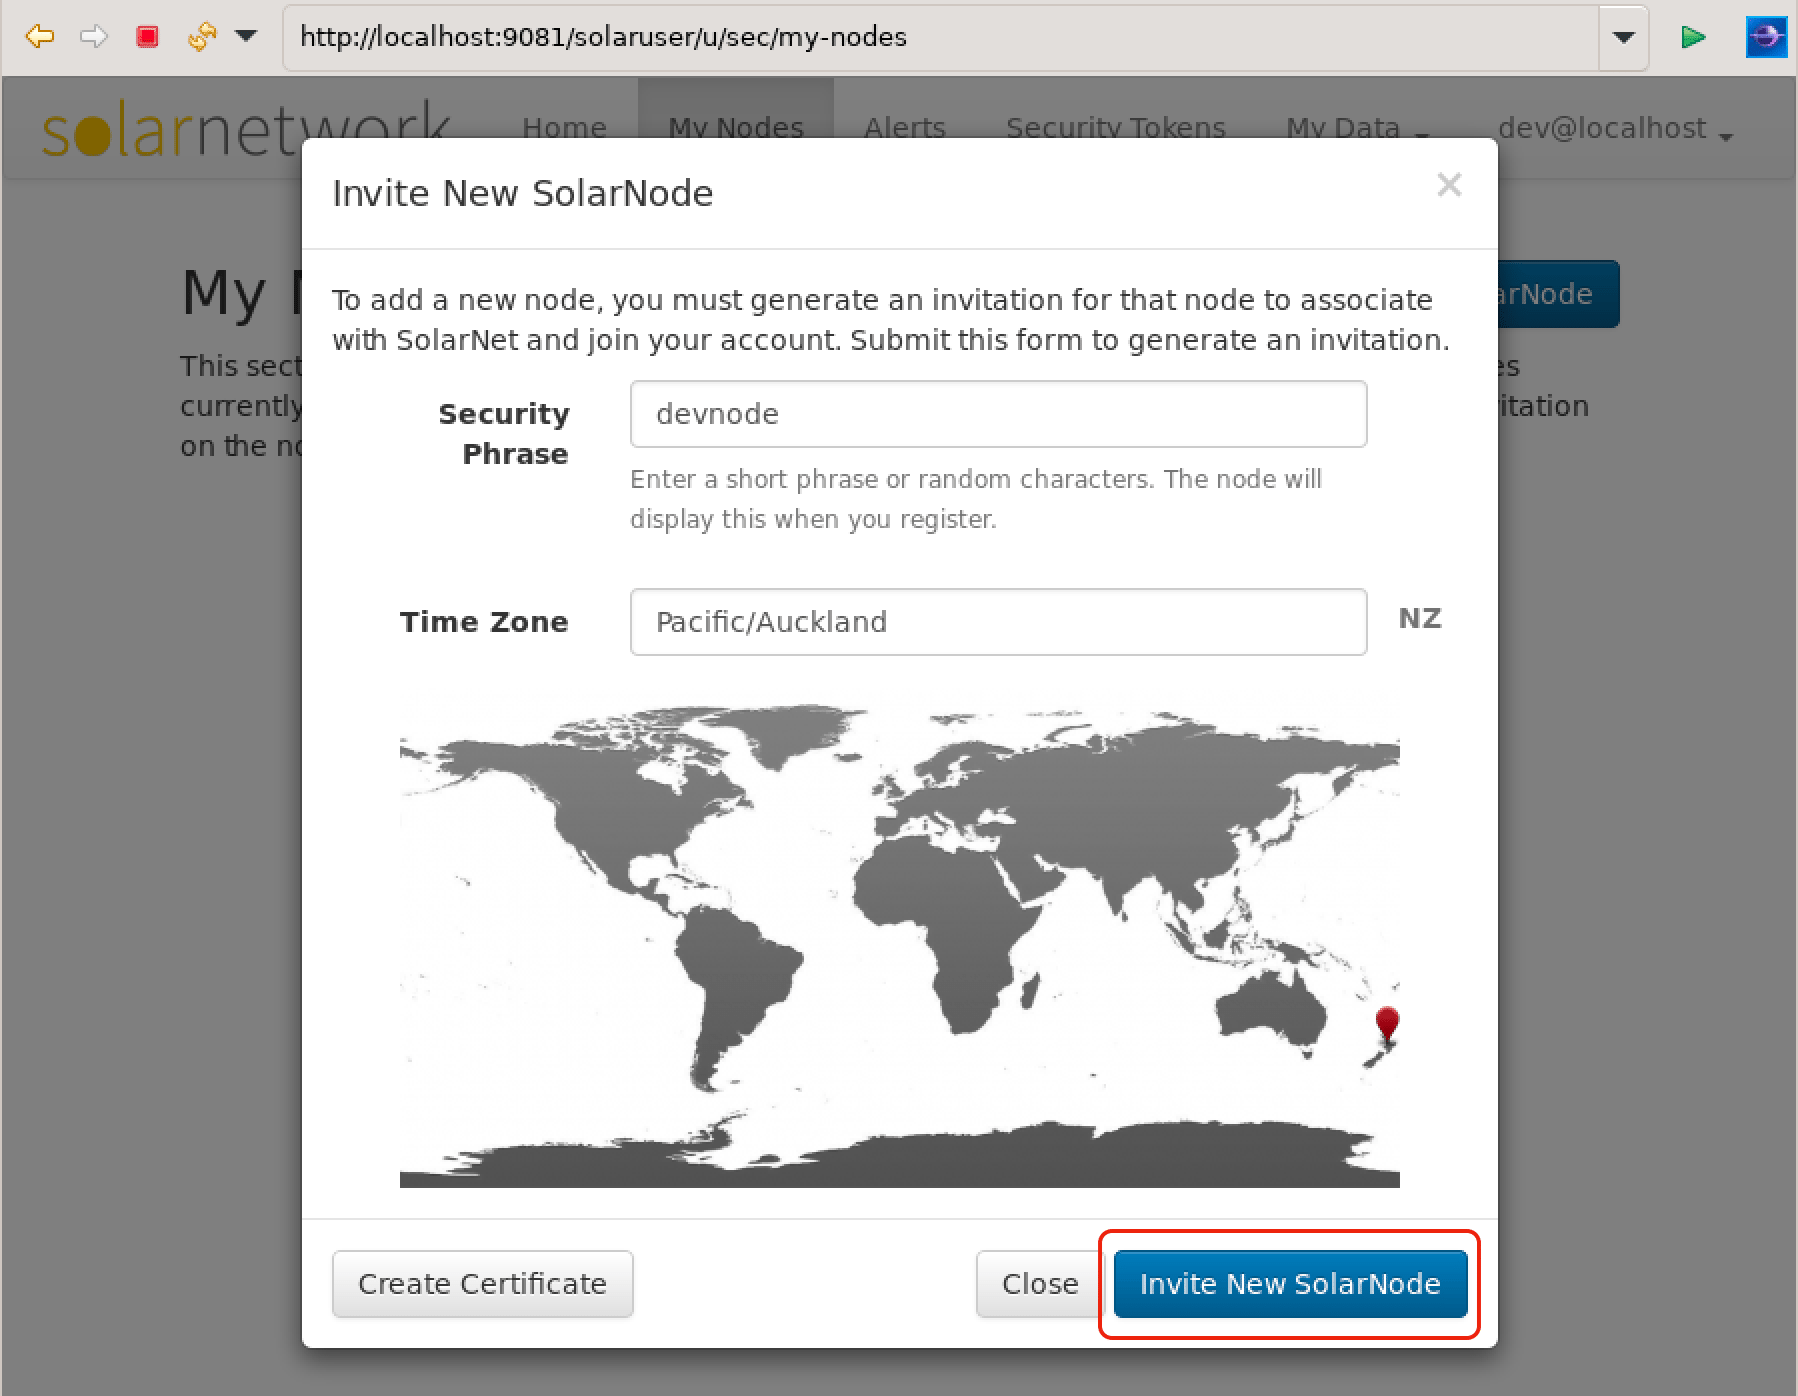
Once submitted an invitation will be generated, like this:
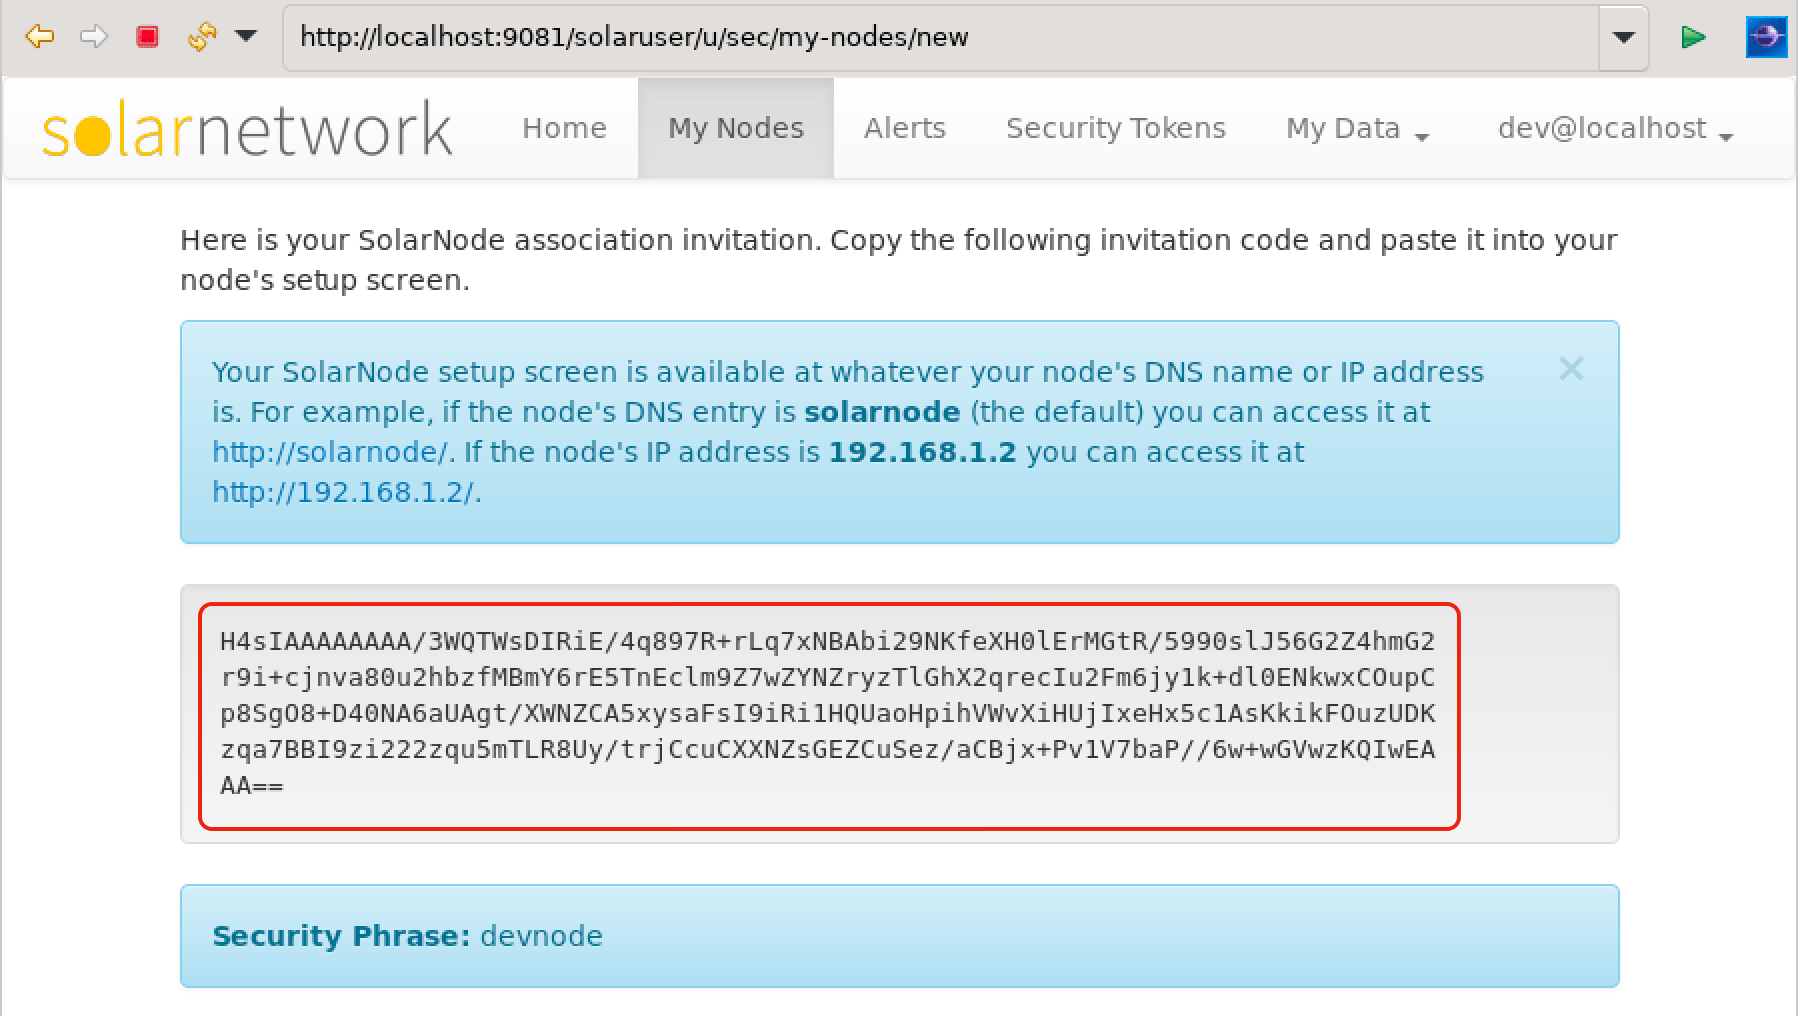
Now select and copy the entire invitation code. You will need to paste that into the SolarNode setup screen in the next section.
To launch the SolarNode platform go to Run > Run Configurations... > OSGi Framework > SolarNode and click Run.

After a few minutes, the SolarNode platform should finish starting up, and you'll see many log messages printed to the Eclipse console, including some errors.
Now you are ready to associate your development SolarNode with your development SolarNet account.
Open a new browser window and visit http://localhost:8080. You should land on an association form
like this, where you can paste the entire invitation code you generated in SolarUser:
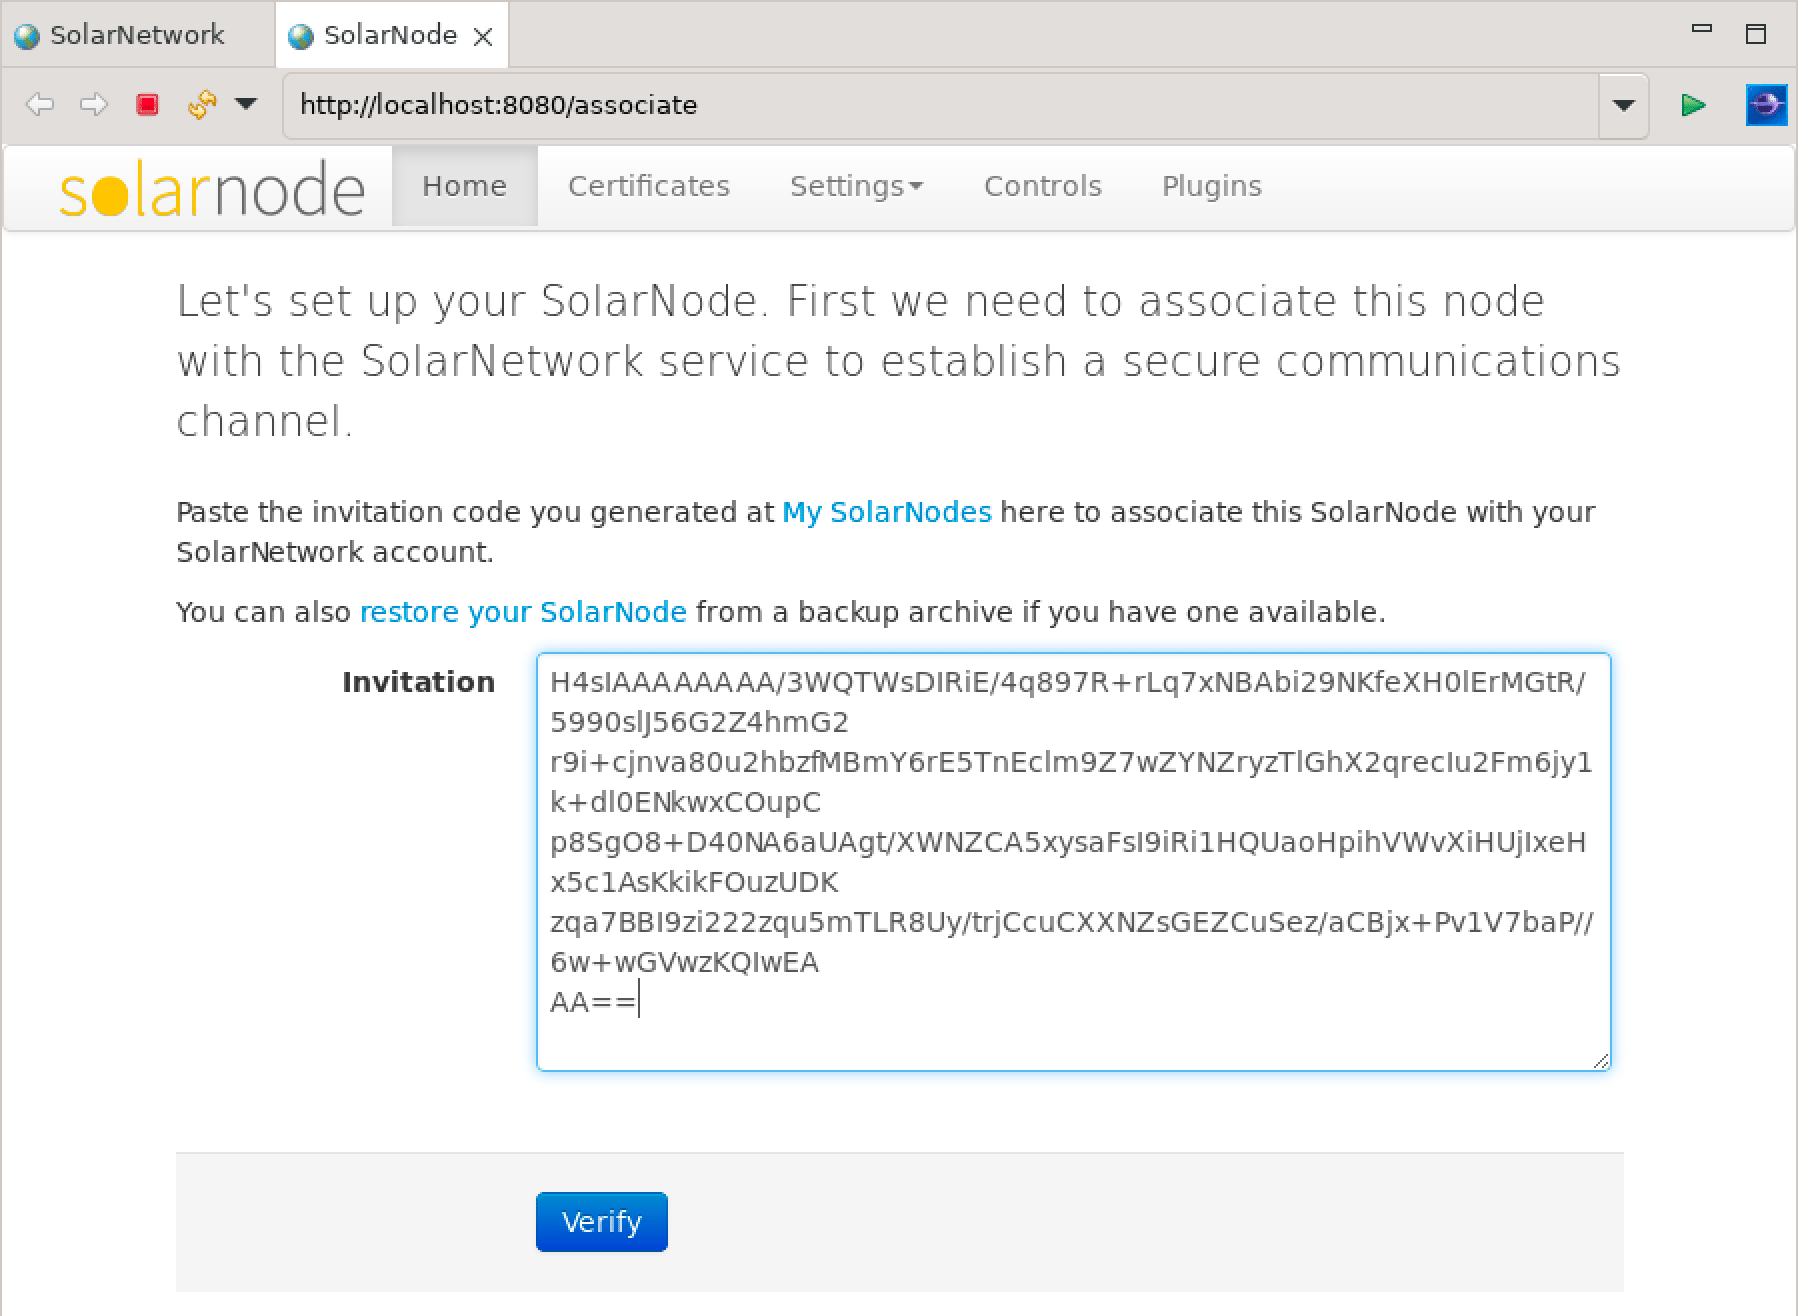
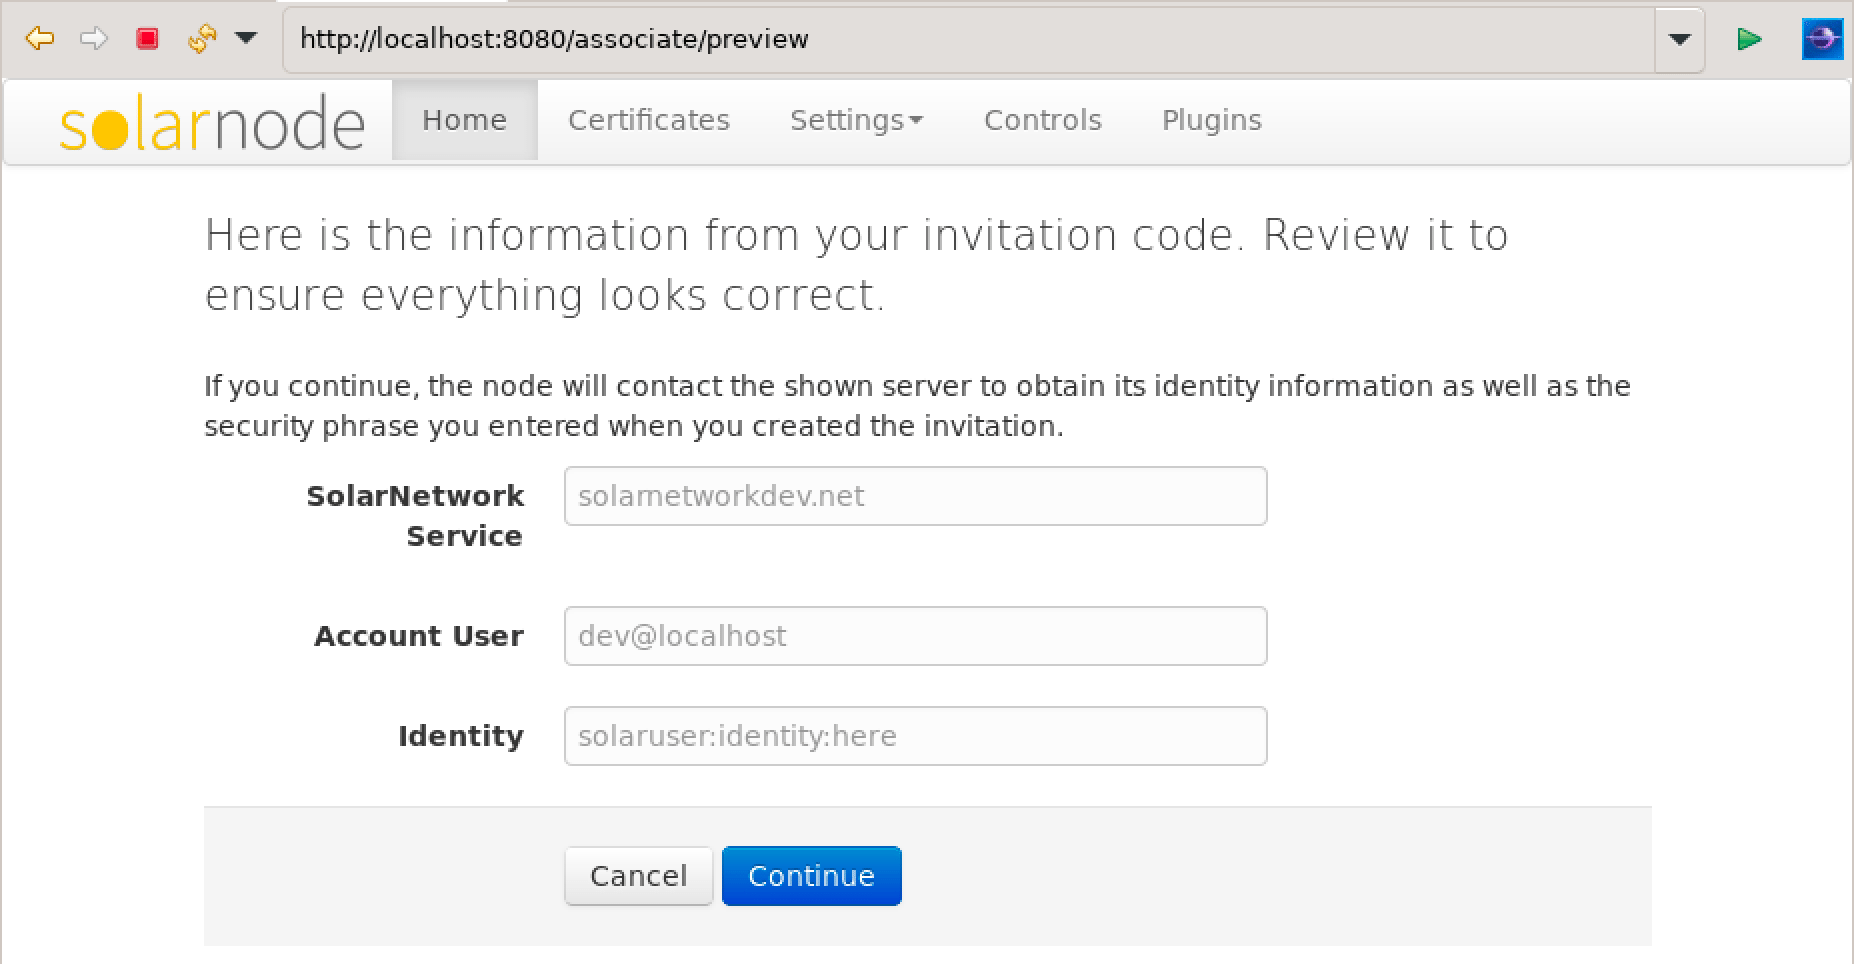
After pasting in the invitation code click the Verify button. You will be guided through the
association process. Note the host will be shown as solarnetworkdev.net, which the VM has
configured to map to 127.0.0.1 (e.g. localhost).
⚠️ Be sure to enter a certificate password when asked, so SolarNet can generate the node's certificate for you.
When the association is complete, you should see a screen like this (your node ID might differ):
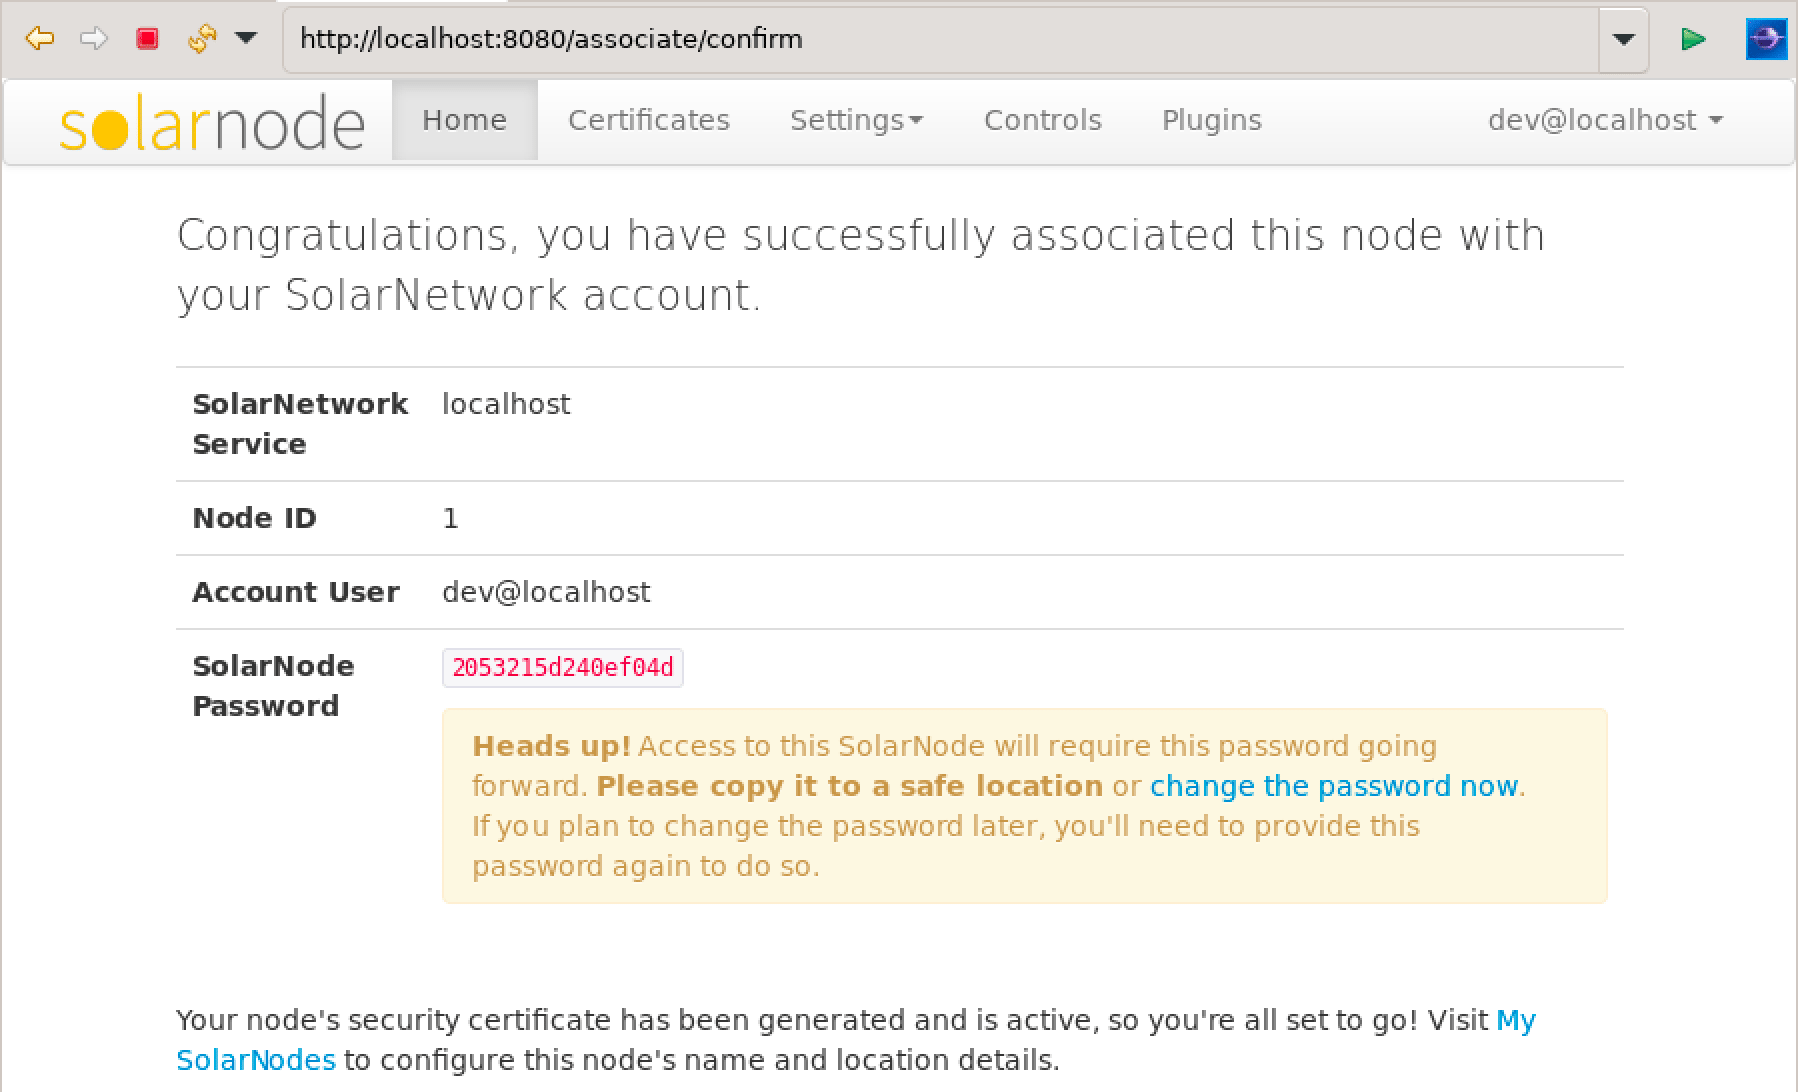
⚠️ A random password will have been generated for you to log into SolarNode. For development it can be useful to immediately change it to a simple password likesolarso you do not have to remember the random password. You can use the change password now link on the completion page to quickly change the password.
The SolarQuery application exposes web APIs for accessing the data posted by your SolarNodes. Launch the SolarQuery app by going to Run > Run Configurations... > SolarQueryApp and clicking the Run button. Wait a few moments for the app to start up.
⚠️ Note that SolarQuery is configured to listen on port9082, so the base URL to the SolarQuery API ishttp://localhost:9082/solarquery.
The SolarJobs application runs various maintenance jobs for SolarNetwork, like processing the raw data posted by SolarNodes into various aggregate rollups for faster query performance. Launch the SolarJobs app by going to Run > Run Configurations... > SolarJobsApp and clicking the Run button. Wait a few moments for the app to start up.
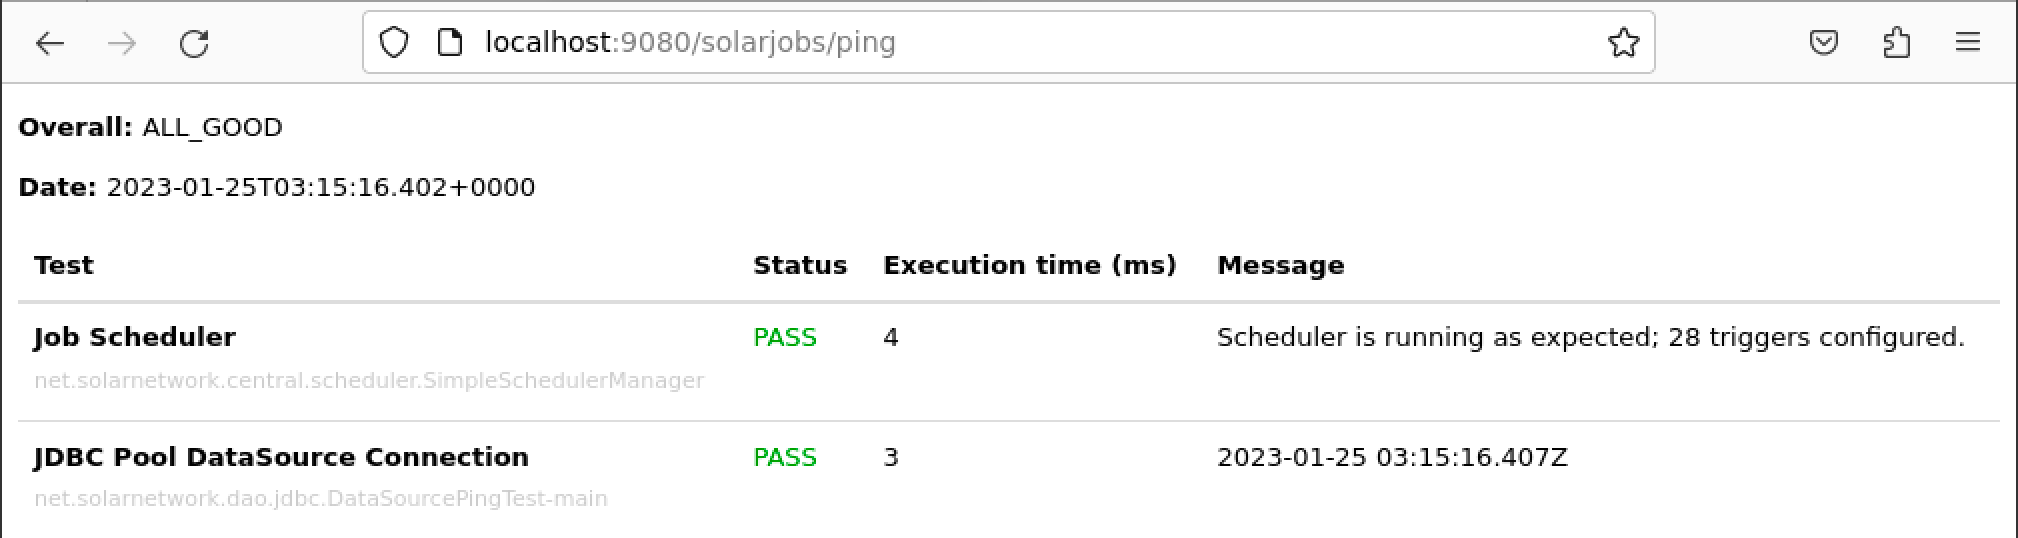
All SolarNet applications provide a basic status/health URL that you can use to quickly check for issues. Those URLs are:
| App | URL |
|---|---|
| SolarJobs | http://localhost:9080/solarjobs/ping |
| SolarUser | http://localhost:9081/solaruser/ping |
| SolarQuery | http://localhost:9082/solarquery/ping |
| SolarIn | http://localhost:9083/solarin/ping |
Look for Overall: ALL_GOOD to quickly tell if all checks have passed.
These URLs can also produce JSON if invoked with an Accept: application/json request header,
for example
curl -s http://localhost:9080/solarjobs/ping |python3 -m json.tool{
"success": true,
"data": {
"allGood": true,
"date": "2023-01-25 03:21:08.624887553Z",
"results": {
"net.solarnetwork.central.scheduler.SimpleSchedulerManager": {
"success": true,
"message": "Scheduler is running as expected; 28 triggers configured.",
"pingTestId": "net.solarnetwork.central.scheduler.SimpleSchedulerManager",
"pingTestName": "Job Scheduler",
"start": "2023-01-25 03:21:08.624891604Z",
"end": "2023-01-25 03:21:08.625264949Z",
"duration": 0
},
"net.solarnetwork.dao.jdbc.DataSourcePingTest-main": {
"success": true,
"message": "2023-01-25 03:21:08.629Z",
"pingTestId": "net.solarnetwork.dao.jdbc.DataSourcePingTest-main",
"pingTestName": "JDBC Pool DataSource Connection",
"start": "2023-01-25 03:21:08.625267187Z",
"end": "2023-01-25 03:21:08.630581181Z",
"duration": 5
}
}
}
}You can quickly tell if all checks have passed when the data.allGood value is true.
Congratulations, your SolarNetwork development environment is set up, and you have created your own
development SolarNet server and SolarNode to work with. Your node probably started collecting mock
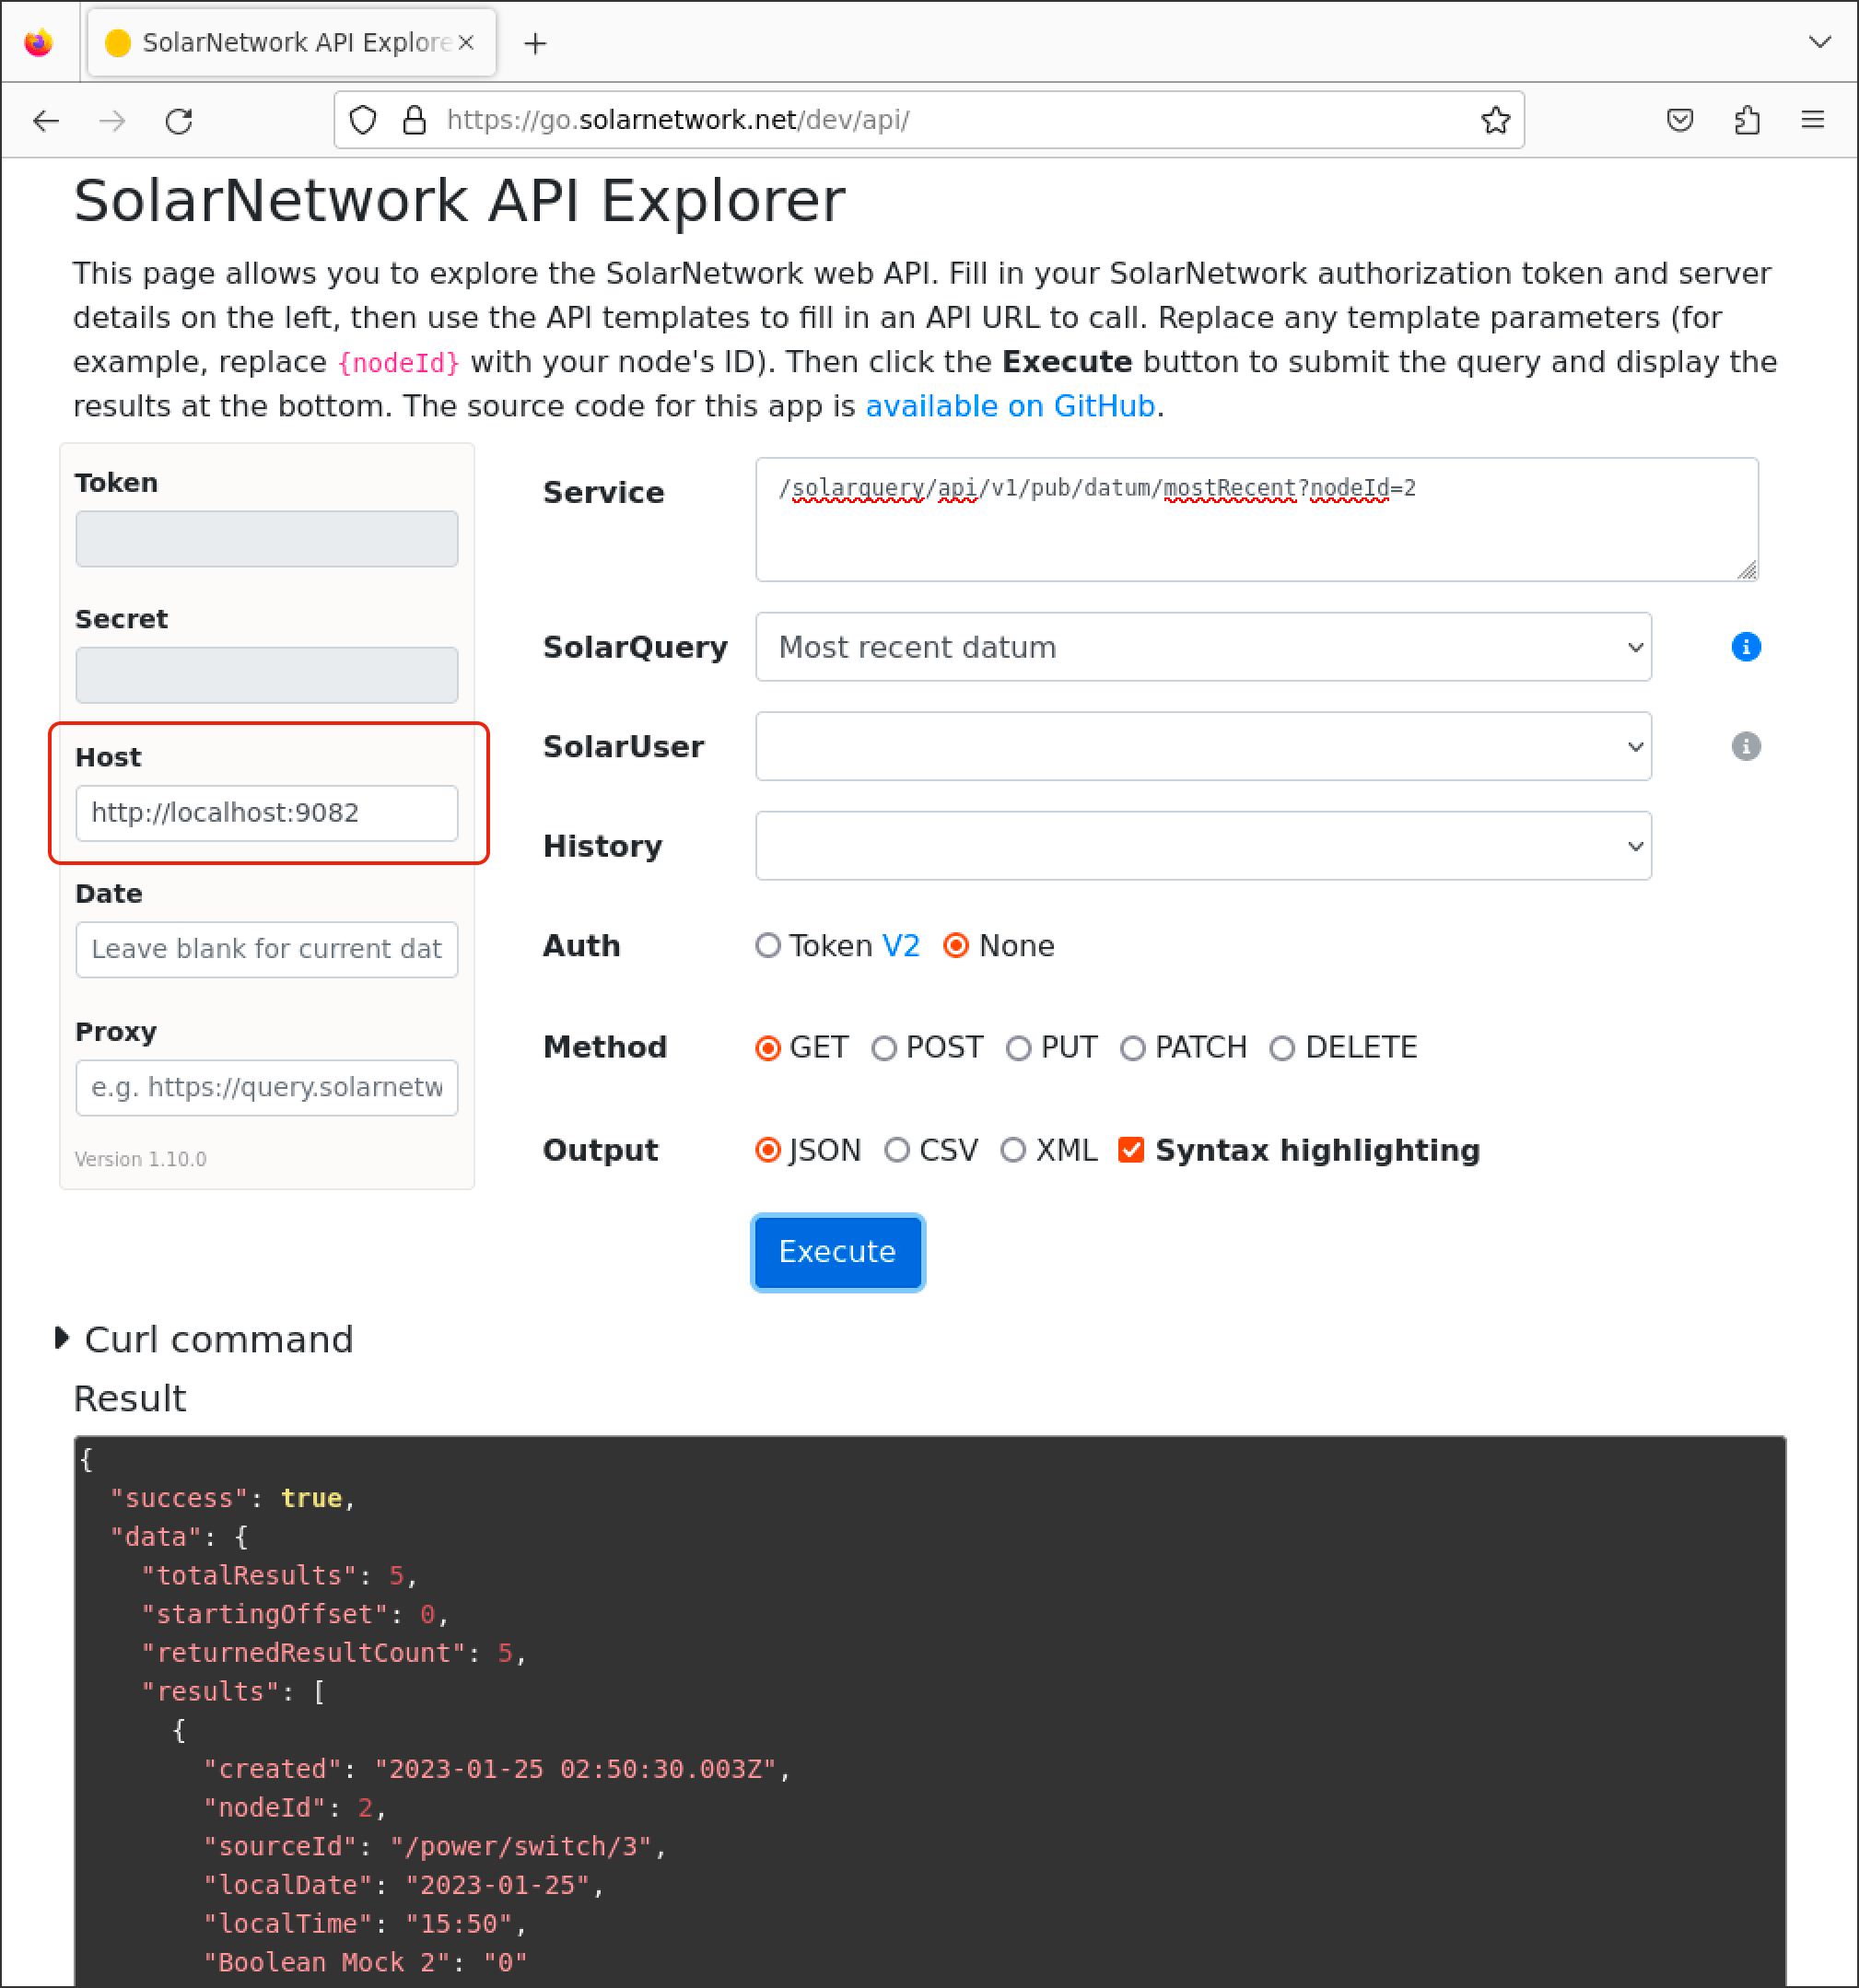
data and uploading it to your development SolarNet service. You can visit the API
Explorer in the VM (works best in Firefox, not the Eclipse internal browser) to
explore the data posted by your node. Make sure the Host field has http://localhost:9081 to
access the SolarUser API or http://localhost:9082 to access the SolarQuery API. For example, enter
a service URL like /solarquery/api/v1/pub/datum/mostRecent?nodeId=1 to see the most recently
collected data (change the nodeId=1 to match the ID if your development node if needed):
See the API Guide for more information on the available web services.
Here is a summary of what is installed in the virtual machine.
- The
solardevuser account's home directory is/home/solardevand is the main development account for running Eclipse. - The
vagrantuser account's home directory is/home/vagrantand can becomerootby runningsudo su -. You can access this account by runningvagrant sshfrom thesolarnetwork-dev/vagrant/solarnet-devdirectory on your host machine.
Right-click on the desktop to access a menu with shortcuts to the most useful development tools. Select Exit to shut down the OS GUI and either log out or return to the console command line.
All the SolarNetwork git repositories have been cloned into ~solardev/git:
/home/solardev/git/
├── solarnetwork-build
├── solarnetwork-central
├── solarnetwork-common
├── solarnetwork-external
└── solarnetwork-node
Eclipse is installed in ~solardev/eclipse, and set to automatically launch with the workspace
location ~solardev/workspace when launching the OS GUI (when you run startx).
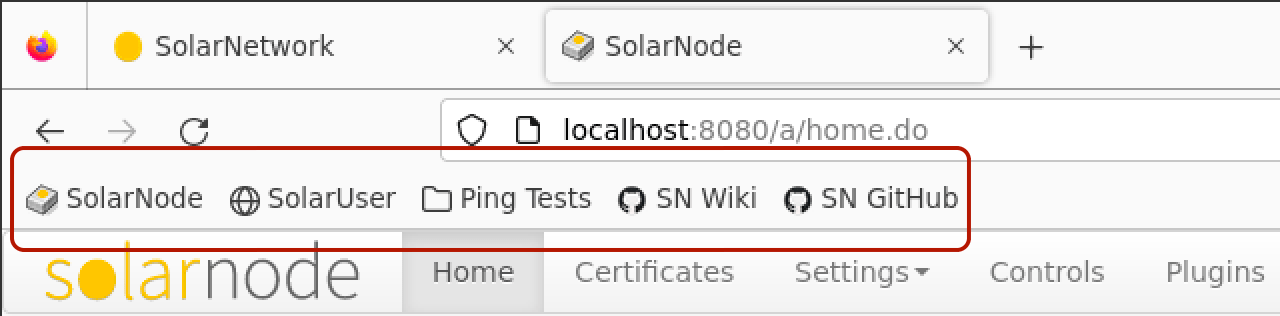
Firefox is installed for web browsing. Some handy bookmarks will be configured as well:
Postgres 12 is installed with the following settings:
- Listening on the standard
5432port forlocalhostaccess only - Configuration is in
/etc/postgresql/12/main - Data directory is
/var/lib/postgresql/12/main - systemd service is
postgresql@12-main(for example:systemctl status postgresql@12-main)
The pgAdmin Postgres GUI administration tool is installed. To connect
via the command use the psql tool. The solardev user can connect as the solarnet database
owner like:
psql -U solarnet -d solarnetworkTo connect as the postgres database administrator run:
sudo -u postgres psqlVerneMQ 1.12.6.2 is installed with the following settings:
- Listening on the standard
1883port for non-TLS access - Configuration is in
/etc/vernemq; thevmq.passwdandvmq.aclfiles control permissions - Data directory is
/var/lib/vernemq
A helper tool solarqueue-tail is also installed for easily viewing the messages posted to the
SolarQueue MQTT broker. Pass an MQTT topic filter to subscribe to. For example, to subscribe to all
node messages:
solarqueue-tail node/#Each message that is posted will be decoded from CBOR into JSON and printed, for example:
Thu Feb  2 03:56:55 UTC 2023 node/1/datum [ 1675310215001, -404849988206902096, -5993097785230245033, [ "4([0, 1010])", "4([-6, 10050955])", "4([-1, 2300])", "4([-1, 500])", "4([0, 5289])", "4([-8, 99999995])", "4([-5, 10050955])", "4([0, 5289])", "4([0, 1])" ], [ "4([0, 6885176])" ], null, null ]
Thu Feb  2 03:57:33 UTC 2023 node/1/datum [ 1675310253001, -3010941099974638936, -8249437777732963913, [ "4([0, 100])" ], null, [ "100" ], null ]
Thu Feb  2 03:57:33 UTC 2023 node/1/datum [ 1675310253001, -5598950462836224681, -5482446926411541645, null, null, [ "0" ], null ]
Thu Feb  2 03:57:33 UTC 2023 node/1/datum [ 1675310253001, 3452134440566082527, -9028603012390098324, null, null, [ "1" ], null ]
The following ports are forwarded to the VM, so you can access the services running there easily:
| Host Port | VM Port | Service |
|---|---|---|
| 11883 | 1883 | MQTT (SolarQueue); admin login is admin password admin
|
| 15432 | 5432 | Postgres; login solarnet password solarnet database solarnetwork
|
| 18080 | 8080 | SolarNode (ui) |
| 19080 | 9080 | SolarJobs (ping) |
| 19081 | 9081 | SolarUser (ping) (ui) |
| 19082 | 9082 | SolarQuery (ping) |
| 19083 | 9083 | SolarIn (ping) |
| 19483 | 9483 | SolarIn SSL |
If you only want to work on SolarNet development, you can streamline your workspace by closing all Eclipse projects except those under solarnet and solarnet-db-setup. Simply select the projects in Eclipse and choose Project > Close Project. See the SolarNet Development Guide for more information, keeping in mind the VM has already been configured with the various settings described there.
For SolarNode development, your development environment will start with all the available
SolarNode projects enabled, which can slow your environment down. You can selectively close projects
you know you don't need, such as the various net.solarnetwork.node.datum.* projects you are not
working on. See the SolarNode Development Guide for more information,
keeping in mind the VM has already been configured with the various settings described there.
That's it for this guide. Happy coding!