Developer PKI
This page describes how to set up Public Key Infrastructure (PKI) support when developing SolarNode ⇌ SolarNet secure communication. This guide assumes you have your development environment set up with SolarNode, SolarIn, and SolarUser applications all able to run.
For TLS to work you'll need to use a DNS name, which should be solarnetworkdev.net and added to
your system's host file. For example on POSIX systems, you can usually add a line to /etc/hosts
like this:
127.0.0.1 localhost solarnetworkdev.net
When SolarNodes are registered and then associated with SolarNet, SolarNet acts as the Certification Authority (CA) for certificates issued to SolarNode devices. SolarNet is responsible for generating X.509 certificates for nodes, and signing them as a CA.
The SolarUser application handles the certificate generation, and by default is configured to use a simple development PKI service that will create its own self-signed CA "root" certificate for signing node certificates with the first time you launch SolarUser. The root certificate is stored in the solaruser/var/DeveloperCA/ca.jks Java keystore. The password for this keystore is randomly generated and stored in a file named secret in the same directory.
The development PKI service will also create a new webserver certificate for the
solarnetworkdev.net DNS name and store this in a keystore named central.jks. The password for
this keystore is dev123. This certificate will be used by SolarIn to support TLS.
Finally, it will also create a trust keystore named central-trust.jks that holds the CA root certificate.
The directory structure looks like this:
solaruser/var/DeveloperCA/
├── ca.jks
├── central-trust.jks
├── central.jks
├── requests/                                # directory for SolarNode certificate requests
│   └── a66cb08ad8db82956d9078ea94f96e6b
└── secret
SolarNode needs to be configured to trust the developer CA generated by SolarUser. SolarNode will look for the certificate trust keystore in solarnetwork-build/solarnetwork-osgi-target/conf/tls/trust.jks. An easy way to configure that is to create a link to the solaruser/var/DeveloperCA/central-trust.jks file created by SolarUser:
cd solarnetwork-build/solarnetwork-osgi-target/conf/tls
ln -s ../../../../solarnetwork-central/solarnet/solaruser/var/DeveloperCA/central-trust.jks trust.jksSolarIn needs to be configured to inform SolarNode that it should connect using TLS, and to include
an HTTP listener that uses the solarentworkdev.net certificate generated by SolarUser.
Add or update the following in the solarnetwork-central/solarnet/solarin/application-development.yml file:
app:
  network-identity:
    host: "localhost"
    port: 9083
    force-tls: false
    service-urls:
      solarin: "https://solarnetworkdev.net:9483/solarin"

server:
  port: 9483
  http:
    port: 9083
  ssl:
    client-auth: "WANT"
    key-store: "../solaruser/var/DeveloperCA/central.jks"
    key-store-type: "JKS"
    key-store-password: "dev123"
    key-alias: "web"
    trust-store: "../solaruser/var/DeveloperCA/central-trust.jks"
    trust-store-type: "JKS"
    trust-store-password: "dev123"
This configuration creates an HTTPS link between SolarNode and SolarIn using port 9483.
Start up the SolarIn, SolarUser, and SolarNode applications. Log in to SolarUser (http://localhost:9081/solaruser/) Invite a new SolarNode (on the My Nodes page). Copy the invitation code, then go to SolarNode (http://localhost:8080). Paste in the invitation and complete the association process. Your new node should setup and get a new certificate and then be ready for general use.
If you click on the Certificates section on the SolarNode app and you should end up with a screen similar to the following:

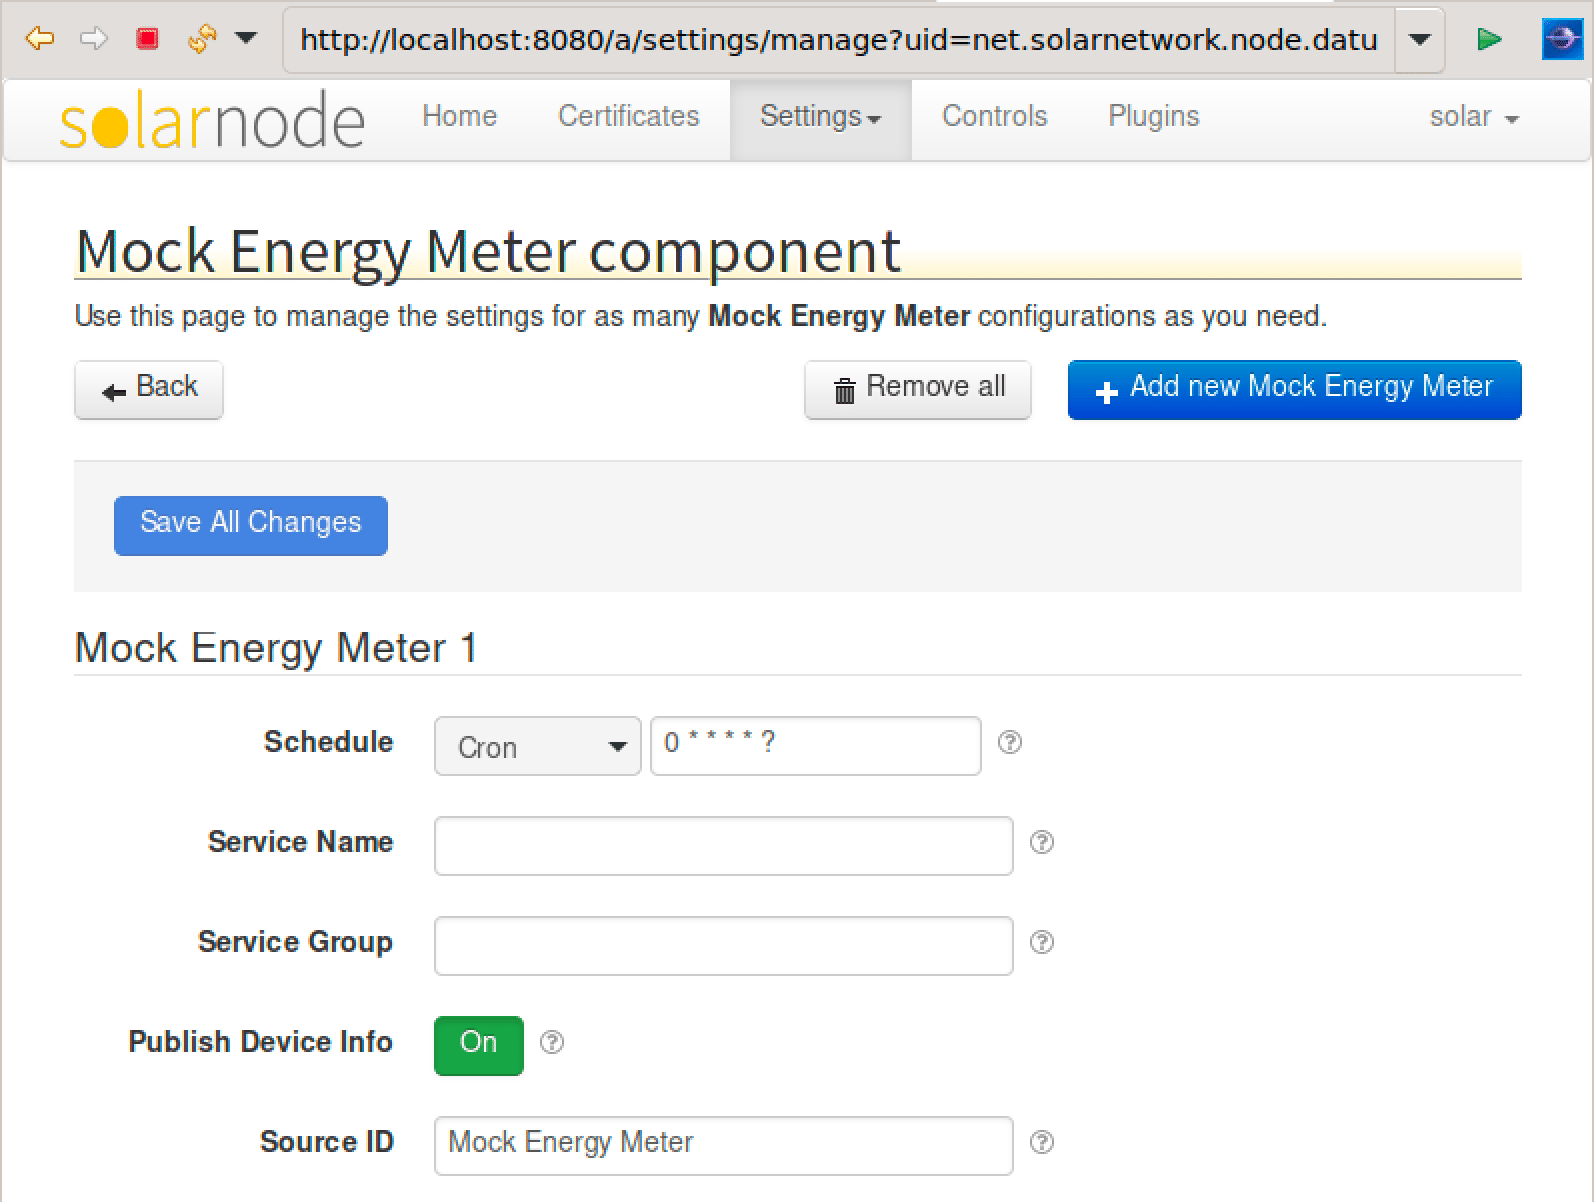
To test if everything is working as expected, enable some mock data to be collected on the node and
then have it uploaded to SolarIn to see that everything works smoothly. For example, deploy the
net.solarnetwork.node.datum.energymeter.mock bundle in Eclipse to collect and post some fake data:
Watch the console for messages like:
01:43:15 DEBUG DatumDataSourcePollManagedJob - Got Datum to persist: Datum{kind=Node,sourceId=Mock Energy Meter,ts=2023-01-29T01:43:15.003601Z,data={i={voltage=230.0, frequency=50.0, phaseVoltage=263.1497, current=26.314968, reactivePower=1, realPower=5289, apparentPower=5289, watts=6924, powerFactor=0.99999995}, a={wattHours=6877630}}}
followed later on by:
01:44:15 INFO BulkJsonWebPostUploadService - Bulk uploaded 1 objects to [BulkJsonWebPostUploadService:solarnetworkdev.net]
or if you have SolarQueue (MQTT) configured:
01:44:15 INFO MqttUploadService - Uploaded datum via MQTT: Datum{kind=Node,sourceId=Mock Energy Meter,ts=2023-01-29T01:44:15.003176Z,data={i={voltage=230.0, frequency=50.0, phaseVoltage=263.14713, current=26.314713, reactivePower=1, realPower=5289, apparentPower=5289, watts=6924, powerFactor=0.99999995}, a={wattHours=6877718}}}
If you see messages like that, you're good to go!