Repository navigation
Installation — NodeMCU Flasher
The easiest way to flash EthiFi onto your ESP8266. No coding, no compiling — just download, select your file, and flash.
🪟 Windows only. If you're on macOS or Linux, use Installation — Arduino IDE instead.
- 📋 Requirements
- 📥 Downloads
- 💾 Choosing the Right Flash Size
- 🔧 Flashing Steps
- ✅ Verify It Worked
- 🩺 Something Went Wrong?
Before you start, make sure you have:
| ✅ Item | 📝 Notes |
|---|---|
| ESP8266 board | NodeMCU, Wemos D1 Mini, etc. — see Supported Devices |
| USB data cable | Must carry data — many cheap cables are charge-only |
| USB driver installed | CP2102 or CH340 — see Driver Installation |
| Windows PC | NodeMCU Flasher is Windows only |
📖 Full solutions → Troubleshooting & FAQ
- 🚀 Getting Started — Connect to EthiFi and use the Web UI
- ⚙️ Installation — Arduino IDE — Want to compile from source instead?
- 🩺 Troubleshooting & FAQ — Something not working?
<div align="center">
🌐 haybnz.web.app · 🐙 GitHub · 📖 Home
</div> # ⚡ Installation — NodeMCU FlasherThe easiest way to flash EthiFi onto your ESP8266. No coding, no compiling — just download, select your file, and flash.
🪟 Windows only. If you're on macOS or Linux, use Installation — Arduino IDE instead.
- [📋 Requirements](#-requirements)
- [📥 Downloads](#-downloads)
- [💾 Choosing the Right Flash Size](#-choosing-the-right-flash-size)
- [🔧 Flashing Steps](#-flashing-steps)
- [✅ Verify It Worked](#-verify-it-worked)
- [🩺 Something Went Wrong?](#-something-went-wrong)
Before you start, make sure you have:
| ✅ Item | 📝 Notes |
|---|---|
| ESP8266 board | NodeMCU, Wemos D1 Mini, etc. — see Supported Devices |
| USB data cable | Must carry data — many cheap cables are charge-only |
| USB driver installed | CP2102 or CH340 — see Driver Installation |
| Windows PC | NodeMCU Flasher is Windows only |
Download both files before starting:
| 📦 File | 🔗 Link |
|---|---|
| ⚡ NodeMCU Flasher | [github.com/nodemcu/nodemcu-flasher](https://github.com/nodemcu/nodemcu-flasher) |
| 📦 EthiFi Firmware (.bin) | [github.com/h9zdev/EthiFi/releases](https://github.com/h9zdev/EthiFi/releases) |
💡 From the EthiFi releases page, download the
.binfile that matches your board's flash size. Not sure which? See below.
⚠️ This is important! Flashing the wrong size will cause the firmware to crash or the Web UI to not load.
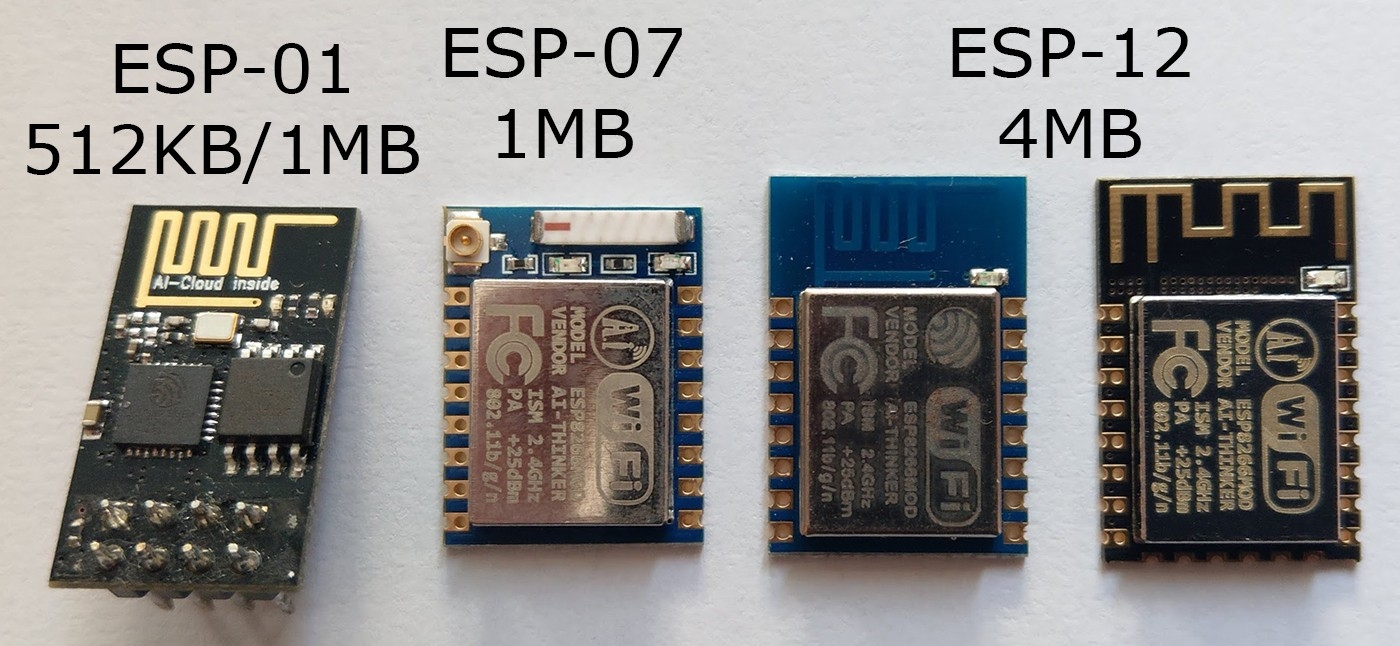
| 📦 Module | 💾 Flash Size |
|---|---|
| ESP-01 (old) | 512 KB |
| ESP-01 (new) | 1 MB |
| ESP-07 | 1 MB |
| ESP-12E / NodeMCU | 4 MB |
| Wemos D1 Mini | 4 MB |
💡 Most modern NodeMCU and Wemos D1 Mini boards use 4 MB. When in doubt, start with 4 MB.
🔌 Plug your ESP8266 into your computer using a data-capable USB cable.
Open Device Manager → Ports (COM & LPT) and note the COM port number — e.g. COM3.
If no port appears, your driver isn't installed yet — see Driver Installation.
Launch ESP8266Flasher.exe. You'll land on the Operation tab.
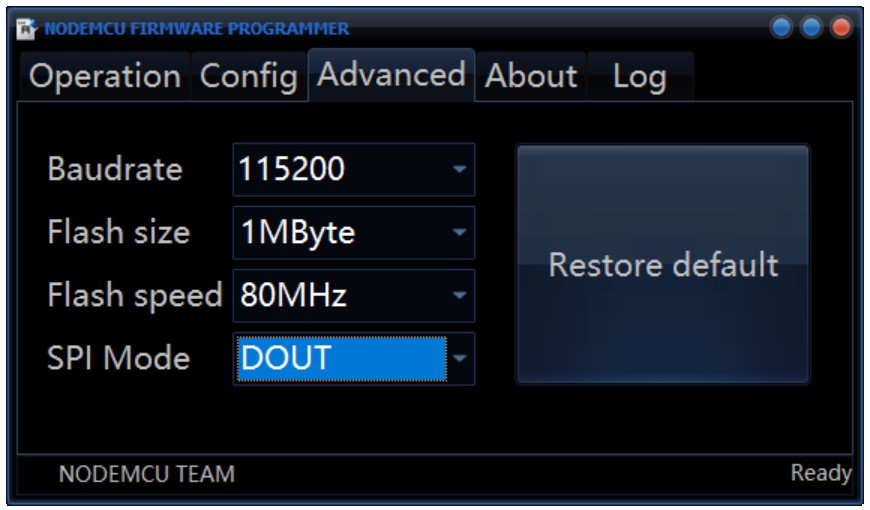
Select your COM port from the dropdown at the top.
Click the Config tab at the top.
- Click the 📂 folder icon on the first row
- Browse to and select your downloaded EthiFi
.binfile - Set the address field on that row to
0x000000
Go back to the Operation tab and click Flash
The progress bar will fill as the firmware is written to the board. This usually takes 30–60 seconds.
⚠️ Do not unplug the board while flashing.
Once the progress bar completes, the flasher will show a success indicator. Your board will reboot automatically and EthiFi will start running.
After flashing:
1. 📶 On your phone or laptop, open WiFi settings and scan for networks
2. You should see a new network:
| 🔑 Setting | 📝 Value |
|---|---|
| 📶 SSID | EthiFi |
| 🔐 Password | deauther |
3. Connect to it, then open your browser and go to:
http://192.168.4.1
4. The EthiFi Web UI should load 🎉
💡 If it doesn't appear straight away, wait 15–20 seconds and try again — the board needs time to fully boot.
| ❌ Problem | 🔗 Fix |
|---|---|
| No COM port in the dropdown | Driver Installation |
| Flash fails or disconnects | Lower baud rate, try BOOT button, shorter cable |
| Progress bar completes but no WiFi network appears | Power cycle the board, wait 20 sec, try again |
Web UI won't load at 192.168.4.1
|
Disable mobile data, use http:// not https://
|
| Board crashes on boot | Wrong flash size selected — re-flash with correct size |
📖 Full solutions → Troubleshooting & FAQ
- 🚀 Getting Started — Connect to EthiFi and use the Web UI
- ⚙️ Installation — Arduino IDE — Want to compile from source instead?
- 🩺 Troubleshooting & FAQ — Something not working?
🌐 [haybnz.web.app](https://haybnz.web.app/) · 🐙 [GitHub](https://github.com/h9zdev/EthiFi) · 📖 Home