Getting Started
This page walks through a first batch and the rhythm of using MeadOS day to day.
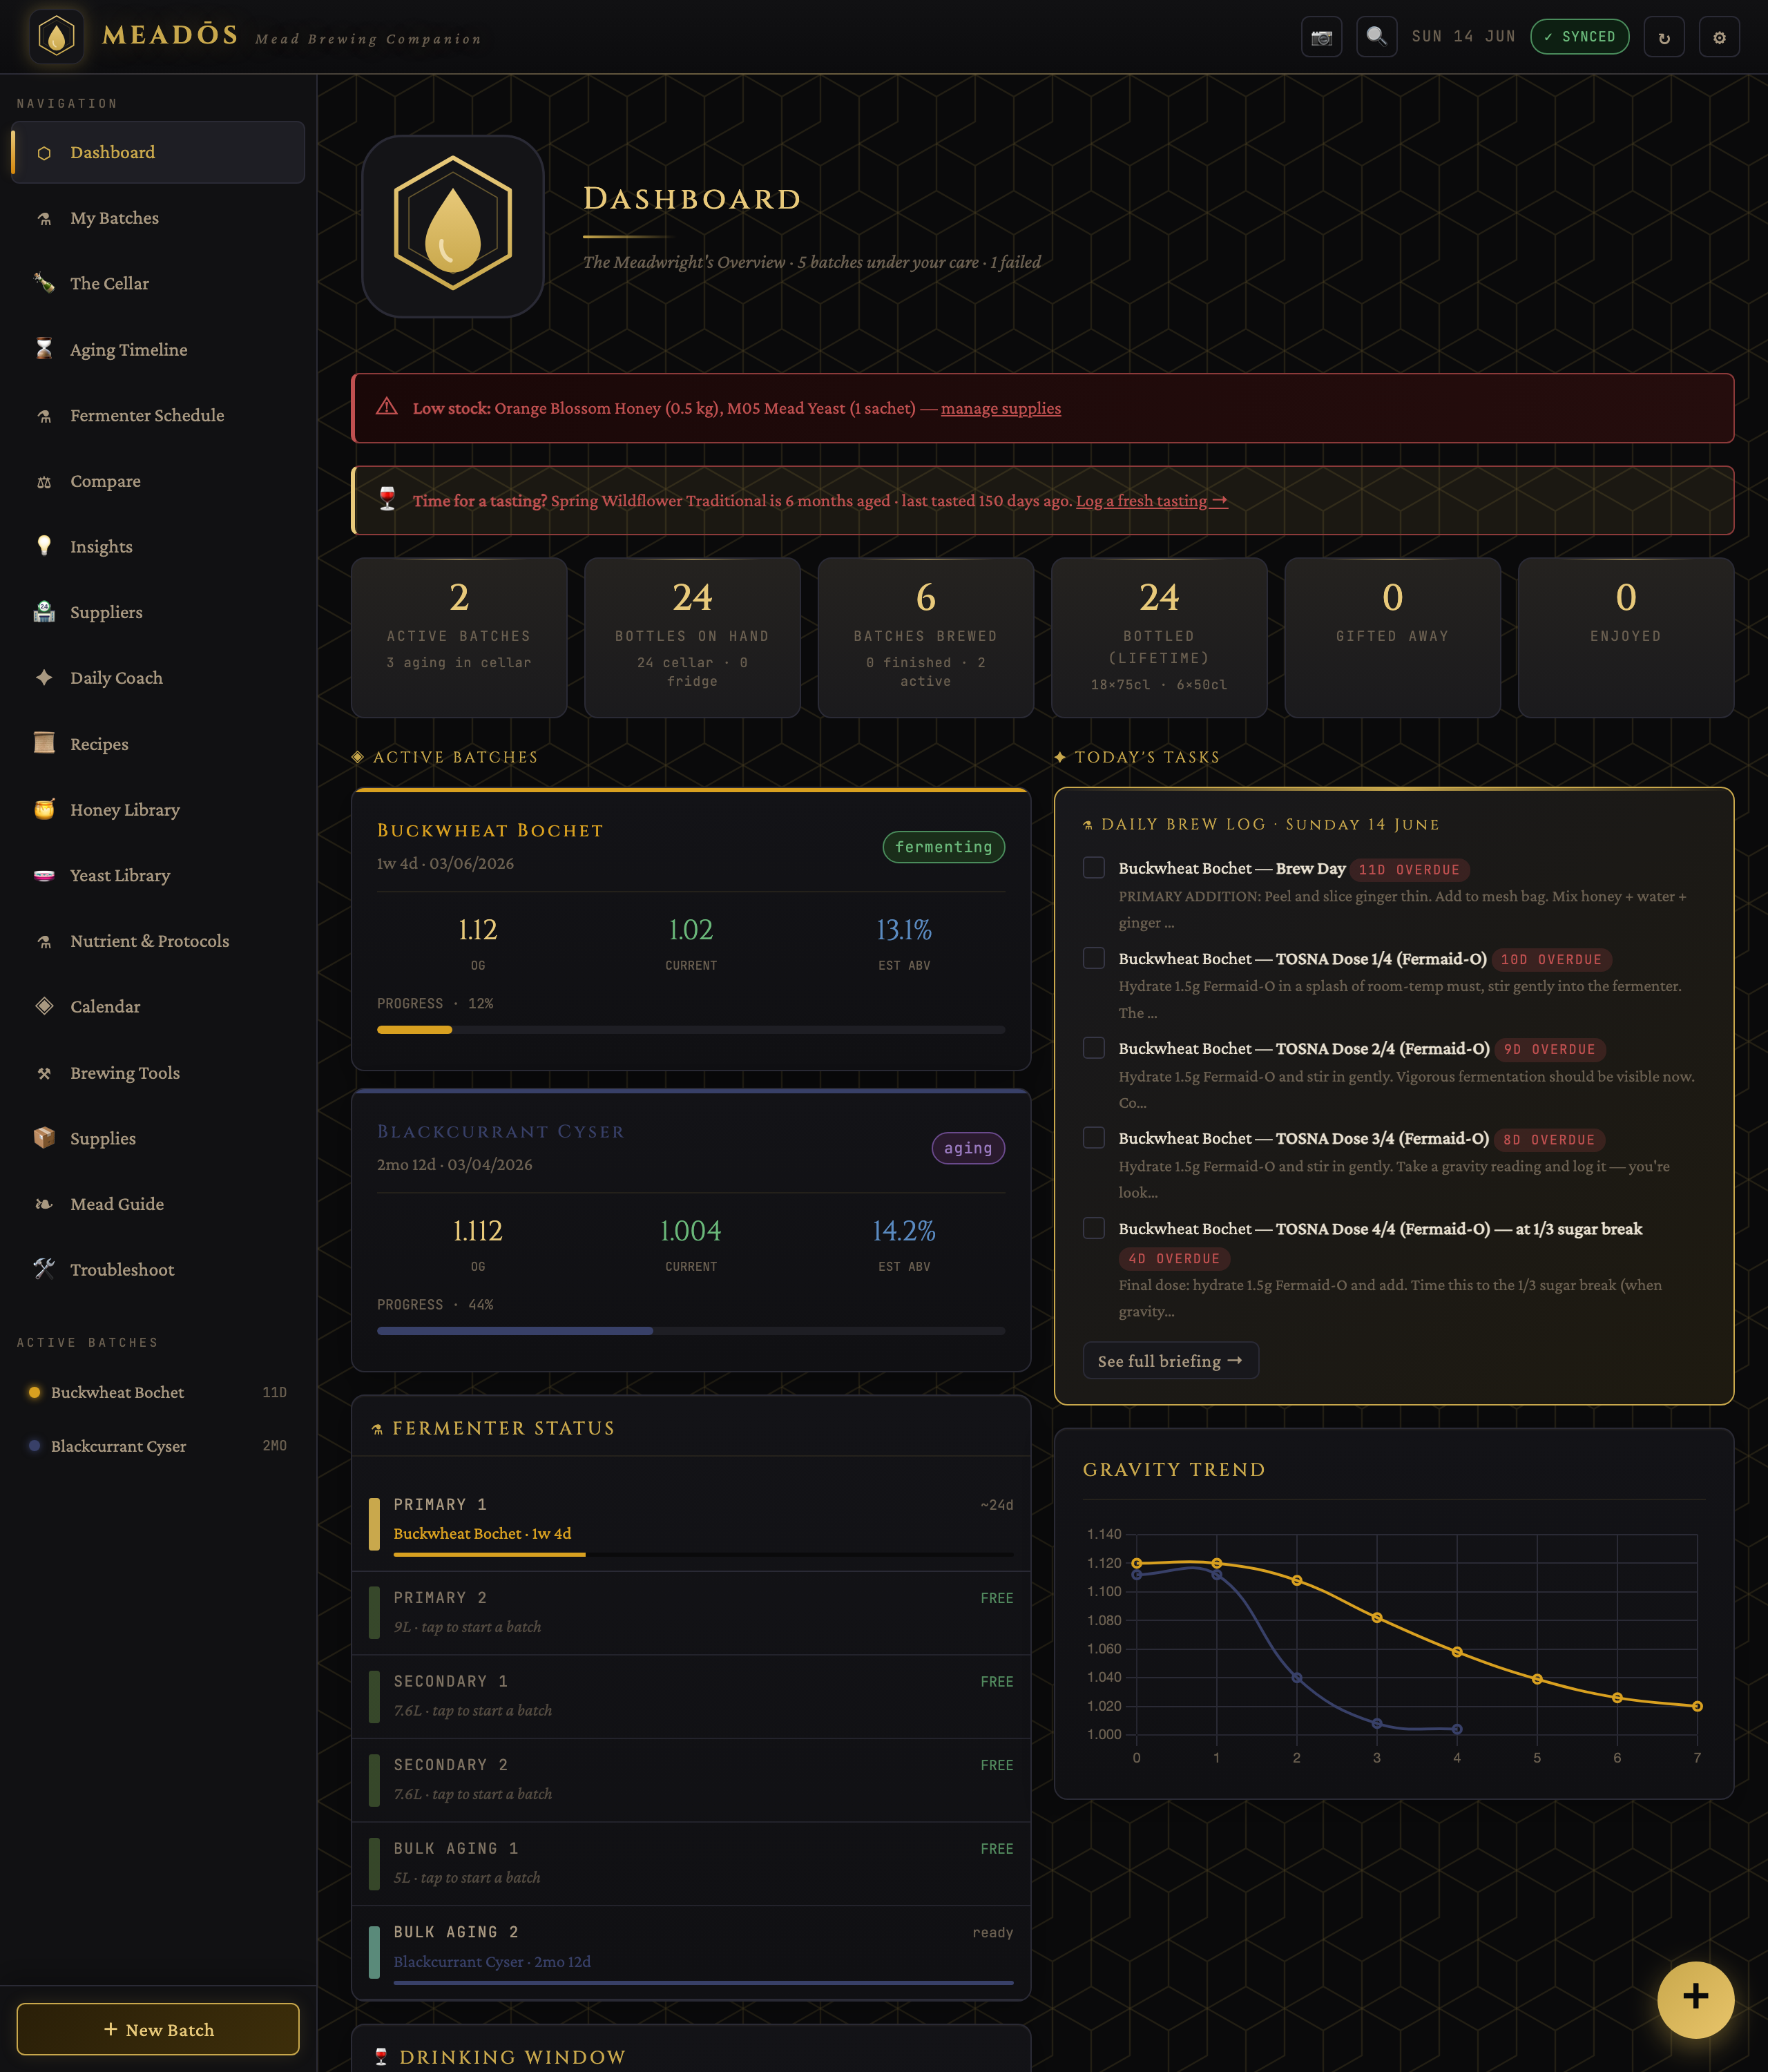
The left sidebar is your map. The main areas are:
- Dashboard — today's tasks, active batches and quick status
- My Batches — every batch you're brewing or have brewed
- The Cellar — where your bottles and aging vessels physically live
- Aging Timeline / Fermenter Schedule — what's maturing and what's occupying a vessel
- Recipes — the built-in collection plus your own
- Honey / Yeast / Nutrient libraries — reference knowledge
- Brewing Tools — calculators
- Supplies — your inventory and shopping list
- Settings (gear icon, top right) — name, logo, units, server and backups
Open Settings and add your brewer name and a logo (it appears on labels and exports), pick your currency and a honey price (used for cost estimates), choose your sanitizer (Chemipro SAN or Star San — calculators follow your choice), and set your preferred units (metric, US or imperial). Everything is stored metric internally, so you can switch display units any time.
Add your fermenters (in Settings, or when you start a batch) with their capacities. MeadOS uses this to recommend safe batch sizes (allowing headspace for foam), to warn about vessel conflicts when planning, and to drive the Fermenter Schedule.
- Open Recipes and pick one — a Traditional Mead is the classic first brew.
- On the recipe page, drag the scale slider to your batch size. Ingredient amounts, nutrient sachets and costs update live.
- Click Brew This Recipe. Give the batch a name, confirm the volume, pick a fermenter, and start it.
Your new batch appears in My Batches and on the Dashboard.
Each batch has a step-by-step schedule from its recipe. The Daily Coach and the Dashboard surface what's due today — nutrient additions, racking, gravity checks, bottling. As you complete steps, the batch's status advances on its own (it won't jump ahead to "aging" if you haven't actually racked).
Log a gravity reading whenever you take one. The batch chart plots gravity falling and estimated alcohol rising, with a dashed projection of where it's heading. If the gravity goes flat too early, MeadOS flags a possible stall and can help you diagnose it from the nutrients you logged.
When fermentation is genuinely finished (a stable gravity across two readings — not a fixed day), the recipe steps walk you through racking, optional stabilising (potassium sorbate and metabisulfite together) and backsweetening, then bottling. The guided bottling workflow handles pre-flight checks, the final gravity reading, a sanitiser contact timer, per-size bottle counts and label printing.
Bottled batches go into The Cellar, where you place them on real shelves and track each batch's drinking window — when it's ready, when it peaks, and when to drink it by.
Check the Dashboard → do today's tasks → log a gravity reading when you take one → mark steps done → let MeadOS advance the status and remind you when the next thing is due.
- Understand the recipe page in depth → Recipes & Designer
- Everything about tracking a ferment → Batches & Fermentation
- Stock, shopping lists and "what can I brew now?" → Cellar & Inventory