Controls
This page covers the radio controls available in RigControl Web. Controls are organized into the VFO and frequency display at the top of the screen, the meters section, and the Quick Controls panel.
Important: Not every radio supports every control listed here. RigControl Web probes your radio's capabilities when it connects, and buttons for unsupported functions are hidden or disabled automatically. If a control you expect to see is not there, your radio's Hamlib driver may not support it.
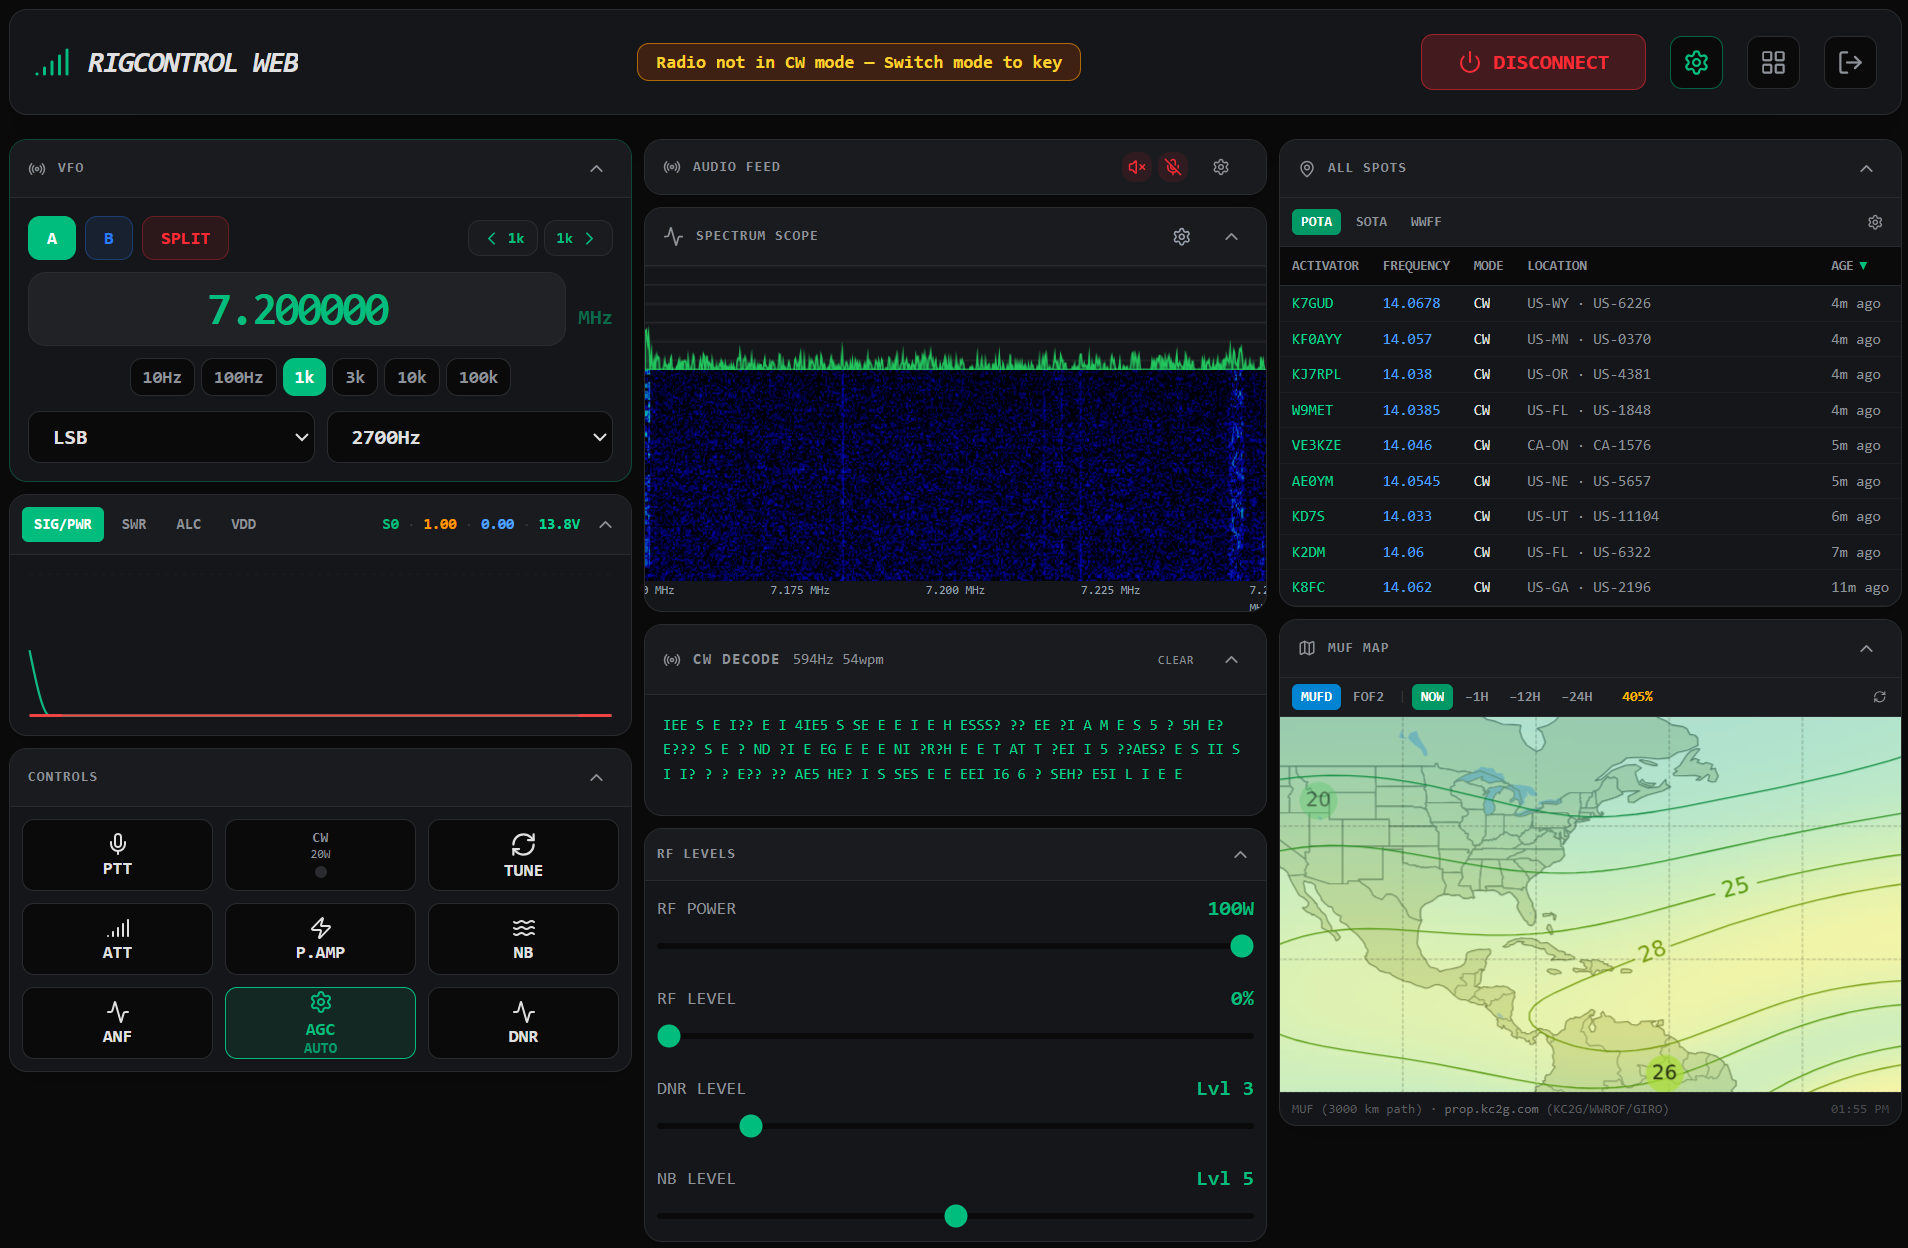
Your radio's two VFOs are shown as VFO A and VFO B buttons at the top of the frequency section. Click either one to switch the active VFO. The active VFO is highlighted:
- Green = VFO A is active
- Blue = VFO B is active
- Red = That VFO is currently transmitting (during split operation)
- Amber = Split is active on that VFO
The SPLIT button engages split VFO operation — transmitting on one VFO while receiving on the other. When split is active, the button turns amber. Click it again to turn split off.
During split operation the frequency display shows both VFO A and VFO B frequencies.
The large number in the center of the VFO section shows your current frequency in MHz. You can edit it directly:
- Click the pencil icon (or tap the frequency display on touch screens) to enter edit mode.
- Type the frequency you want (in MHz, e.g.
14.225). - Press Enter or click away to tune to that frequency.
Below the frequency display are step buttons: 10Hz, 100Hz, 1k, 3k, 10k, 100k. The highlighted button is the active step size. Use the < 1k and 1k > arrow buttons on either side of the display to step the frequency down or up by the selected amount.
To the right of the frequency display are two dropdowns:
- Mode — Select your operating mode (LSB, USB, CW, AM, FM, etc.). The app immediately sends the change to the radio.
- Bandwidth — Select the IF filter bandwidth. Available options depend on your radio model.
The meters section shows readings from the radio in real time. Available meters depend on your radio.
| Meter | What it shows |
|---|---|
| SIGNAL | S-Meter reading while receiving; transmit power output while transmitting |
| SWR | Standing Wave Ratio on transmit |
| ALC | Automatic Level Control — useful for monitoring audio drive on SSB |
| VDD | Supply voltage (on supported radios) |
Click the tab labels (SIGNAL, SWR, ALC, VDD) to switch which meter is graphed. On the phone layout, these appear as tab buttons above a single graph.
For radios that support Hamlib's set_powerstat command, a Power button appears in the Quick Controls panel header (the power icon, next to the panel title). If your radio doesn't support it, the button is hidden.
- Green power icon — the radio is on.
- Red power icon — the radio is off.
- Amber spinner — waiting (up to ~10 seconds) for the radio to confirm it has powered on while it boots.
Click the button to toggle power:
- Powering off immediately releases PTT and the CW key, stops backend audio, clears the spectrum scope, and switches rig polling to a slow check every 5 seconds so RigControl Web notices when you power the radio back on.
- Powering on resumes normal polling once the radio confirms, then automatically restarts backend audio and the FT-710 spectrum scope reader after a short delay for USB re-enumeration.
While the radio is off, a red "Radio powered down — Power on to resume" banner is shown and all rig controls are disabled until it powers back on.
Linux users: if your radio's USB Audio device disappears when powered off and audio doesn't come back correctly when it powers back on, see Audio and Video → Linux: Radio Power Cycling and USB Audio Reconnection — this covers a known PipeWire default-device issue and the required setup for radios (like the FT-710) that only work at 44.1 kHz.
The Quick Controls panel contains buttons for the most commonly used radio functions. All of these send commands directly to the radio through rigctld.
PTT stands for Push-To-Talk. Click this button to key the radio for transmit. Click again to return to receive. When the radio is transmitting, PTT turns red.
On the phone layout, there is a large dedicated PTT button fixed at the bottom of the screen for easy one-thumb access.
If audio is running, PTT will also activate your microphone automatically when you key up (and release it when you unkey), provided outbound audio is enabled and your microphone is not muted.
RigControl Web includes a full iambic CW keyer that works from any browser or the Electron app — including phones and tablets.
Open General Settings → CW and toggle Enable CW Keyer on. The keyer becomes active as soon as the rig is connected — no audio session is required. Once enabled, an indicator in the Quick Controls area shows the current WPM.
By default:
- Left Ctrl — Dit
- Right Ctrl — Dah
- Space — Straight key (when straight key mode is selected)
Keys can be rebound in the KEYER settings tab — click the binding field and press any key to reassign it. Key presses are ignored when a text input has focus, so you can still type normally while the keyer is enabled.
The default Left Ctrl / Right Ctrl bindings also match the vBand USB paddle interface, so a vBand plugged into a USB port works without any rebinding.
The N6ARA TinyMIDI is also supported the same way — it is a Bluetooth CW paddle that can pair as either a MIDI device or a Bluetooth keyboard. RigControl Web only supports the keyboard mode (not MIDI); pair it as a keyboard, then use the KEYER settings rebind fields above to map its dit/dah paddle presses to keys if they don't already match the Left Ctrl / Right Ctrl defaults.
When the rig is in a CW mode (CW, CWR) and the keyer is enabled, the PTT button at the bottom of the phone layout is automatically replaced by two large touch paddle buttons:
- · dit — Left paddle
- — dah — Right paddle
Hold them like iambic paddles. Both can be held simultaneously for automatic alternating dit-dah sequences in iambic mode.
| Mode | Behavior |
|---|---|
| Iambic A | Releases the current element when both paddles are released mid-squeeze |
| Iambic B | Completes one additional element after both paddles are released mid-squeeze |
| Straight Key | Key down while held, key up on release — no timing logic |
The keyer plays a local audio tone in your browser as you key, giving you instant feedback with no network latency. This is entirely separate from any audio coming back from the radio. You can:
- Enable or disable the sidetone independently of the keyer
- Adjust the tone frequency (Hz) and volume
- The sidetone is automatically routed to the same audio output device you have selected in the Audio settings
The physical key signal can be sent three ways (configured in KEYER settings):
| Method | Description |
|---|---|
| DTR | Keys a DTR line on a serial port (most common — works with Digirig, SignaLink, and similar) |
| RTS | Keys an RTS line on the same or a different serial port |
| CAT PTT | Uses Hamlib's PTT command to key the radio. Last resort only — most radios will key up but produce no CW tone with this method. Only use this if your radio is specifically known to handle fast CAT keying. |
For step-by-step instructions on setting up your radio and the app for CW keying — including radio menu settings and troubleshooting — see the CW Keying Setup page.
RigControl Web includes a real-time Morse code decoder that converts received audio to text as you listen. It works entirely in the browser using GGMorse, an open-source CW decoding library compiled to WebAssembly.
Add the CW Decoder panel to your layout using the Add Panel button in the layout editor. Once the panel is present, the GGMorse WASM module loads automatically — a brief "waiting for CW…" placeholder indicates it is initializing. The decoder stays active for the lifetime of the page and can be removed by deleting the panel from the layout.
Once enabled, a scrolling text area appears in the main screen:
- Compact and desktop layouts: the text area appears in the CW keyer area.
- Phone layout: the text area appears in the phone CW panel.
Decoded characters stream in real time. The display keeps the last 2000 characters and auto-scrolls to the latest output.
A small inline readout shows the decoder's estimated signal pitch (Hz) and speed (WPM) based on the last decoded burst.
The decoder is fed audio from the inbound pipeline independently of the speaker. If you mute the local speaker or reduce the speaker volume to zero, the decoder continues to receive audio and will still decode CW. You do not need to hear the signal to copy it.
The CW Decoder and CW Keyer are independent features. You can:
- Use the decoder without enabling the keyer.
- Use both at the same time (useful for a QSO: decoding the other station while keying your own).
- Enable the keyer without the decoder.
The keyer is toggled in the CW settings tab. The decoder is enabled by adding the CW Decoder panel to your layout.
The TUNE button activates your radio's built-in antenna tuner (if equipped). The tuner will run its tuning cycle and then return to receive.
ATT stands for Attenuator. This reduces the signal level coming into the receiver — useful when you are very close to a strong transmitter and the front end is overloading. Click to toggle the attenuator on or off.
P.AMP stands for Preamplifier. This boosts weak incoming signals before they reach the receiver's front end. Click to toggle the preamp on or off.
NB stands for Noise Blanker. The noise blanker is a circuit designed to remove short, sharp pulses of interference — for example, ignition noise or power line clicks. Click NB to toggle it on or off. When it is on, the button glows green.
Use the NB Level slider that appears below the buttons to adjust how aggressively the noise blanker works. Higher levels remove more noise but can also affect nearby signals, so find the lowest setting that provides relief.
ANF stands for Automatic Notch Filter. The ANF automatically detects and removes steady tones — such as a carrier or a heterodyne — from the received audio without you having to tune a manual notch. Click to toggle it on or off.
AGC stands for Automatic Gain Control. AGC automatically adjusts the radio's receive amplification so that loud and weak signals are both heard at a comfortable volume. The button cycles through the AGC speed settings your radio supports (typically FAST, MED, SLOW, and OFF). The current setting is shown below the button.
DNR stands for Digital Noise Reduction. Unlike the hardware noise blanker, DNR uses digital signal processing to reduce random background noise — hiss, hash, and general band noise. Click DNR to toggle it on or off. When on, use the DNR Level slider to adjust the strength of the noise reduction. Start low and increase until the noise drops without making voices sound processed.
The RF Power slider controls the radio's transmit output power. Slide left to reduce power, right for full power. The current level is shown as a percentage.
The RF Level slider controls the radio's receiver RF gain, separate from transmit power. This control only appears if your radio's Hamlib driver reports it as an independently adjustable level (as opposed to a plain on/off function) — not all radios expose it this way.
The FT8 Decoder panel decodes FT8 signals from the received audio, entirely in your browser (WebAssembly in a background worker — nothing extra runs on the server). It is intended as a quick way to see who is on the band, or to show off reception at a club event, before firing up a full FT8 setup such as WSJT-X. It is not a replacement for WSJT-X (see WSJTX Integration).
Add the FT8 Decoder panel with Add Panel in the layout editor, tune to an FT8 frequency (for example 14.074 MHz USB), and make sure inbound audio is playing (see Audio and Video). Decoding runs whether or not your speaker is muted.
Decodes are grouped under a divider for each 15-second UTC timeslot, with the column header pinned at the top:
| Column | What it shows |
|---|---|
| SNR | Signal-to-noise ratio in dB (green for 0 or above, amber below), calibrated against WSJT-X |
| DT | Time offset from your clock, in seconds |
| Freq | Audio frequency of the signal in Hz |
| Message | The decoded FT8 message |
| Country | The country of the calling station, from a built-in callsign-prefix table |
The panel keeps the most recent 200 decodes.
The Fast / Balanced / Deep selector in the panel header trades CPU time for more decodes. Balanced is the default; the choice is remembered in your browser. Use Fast on a phone or older device.
- Your device's clock must be accurate. FT8 needs sub-second UTC timing. If a remote browser decodes noticeably less than a browser on the server machine, check that the remote device's clock is synced to internet time (NTP).
- Weak signals: it decodes reliably down to about -13 dB. WSJT-X can decode weaker signals (to about -20 dB) because it uses more advanced techniques. Expect fewer decodes on marginal signals.
- The decoder recovers automatically if the browser tab was backgrounded or frozen, but decodes are missed while it is.
On the phone layout, all of the controls above are available inside the collapsible Quick Controls panel. Tap the panel header to expand it. The large PTT button at the bottom of the screen is always visible regardless of whether Quick Controls is expanded.
The phone header's hamburger menu contains Connect/Disconnect, Settings, layout Edit, Log out, and Full Screen. Full Screen also requests a screen wake lock so the display does not sleep while you operate; it releases when you leave full screen. (iOS Safari has limited full-screen support, but the stay-awake part still works.)
When the CW keyer is enabled and the rig is in a CW mode, the PTT button at the bottom is automatically replaced by the dit/dah touch paddles described in the CW Keyer section above.