GettingStartedWithBoxTurtle
This page walks through the first menuconfig pass for a BoxTurtle MMU — the
screens you'll see, in the order you'll see them, and the handful of choices worth
pausing on. It's the first of a set of getting-started pages; other pages cover
toolhead calibration and multi-unit setups in more depth. Here we're just getting
a Box Turtle installed and talking to Klipper.
From your Happy-Hare checkout:
./install.shThe very first time you run this, there's no .mmu_config yet, so the installer
drops you straight into menuconfig — no separate flag needed.
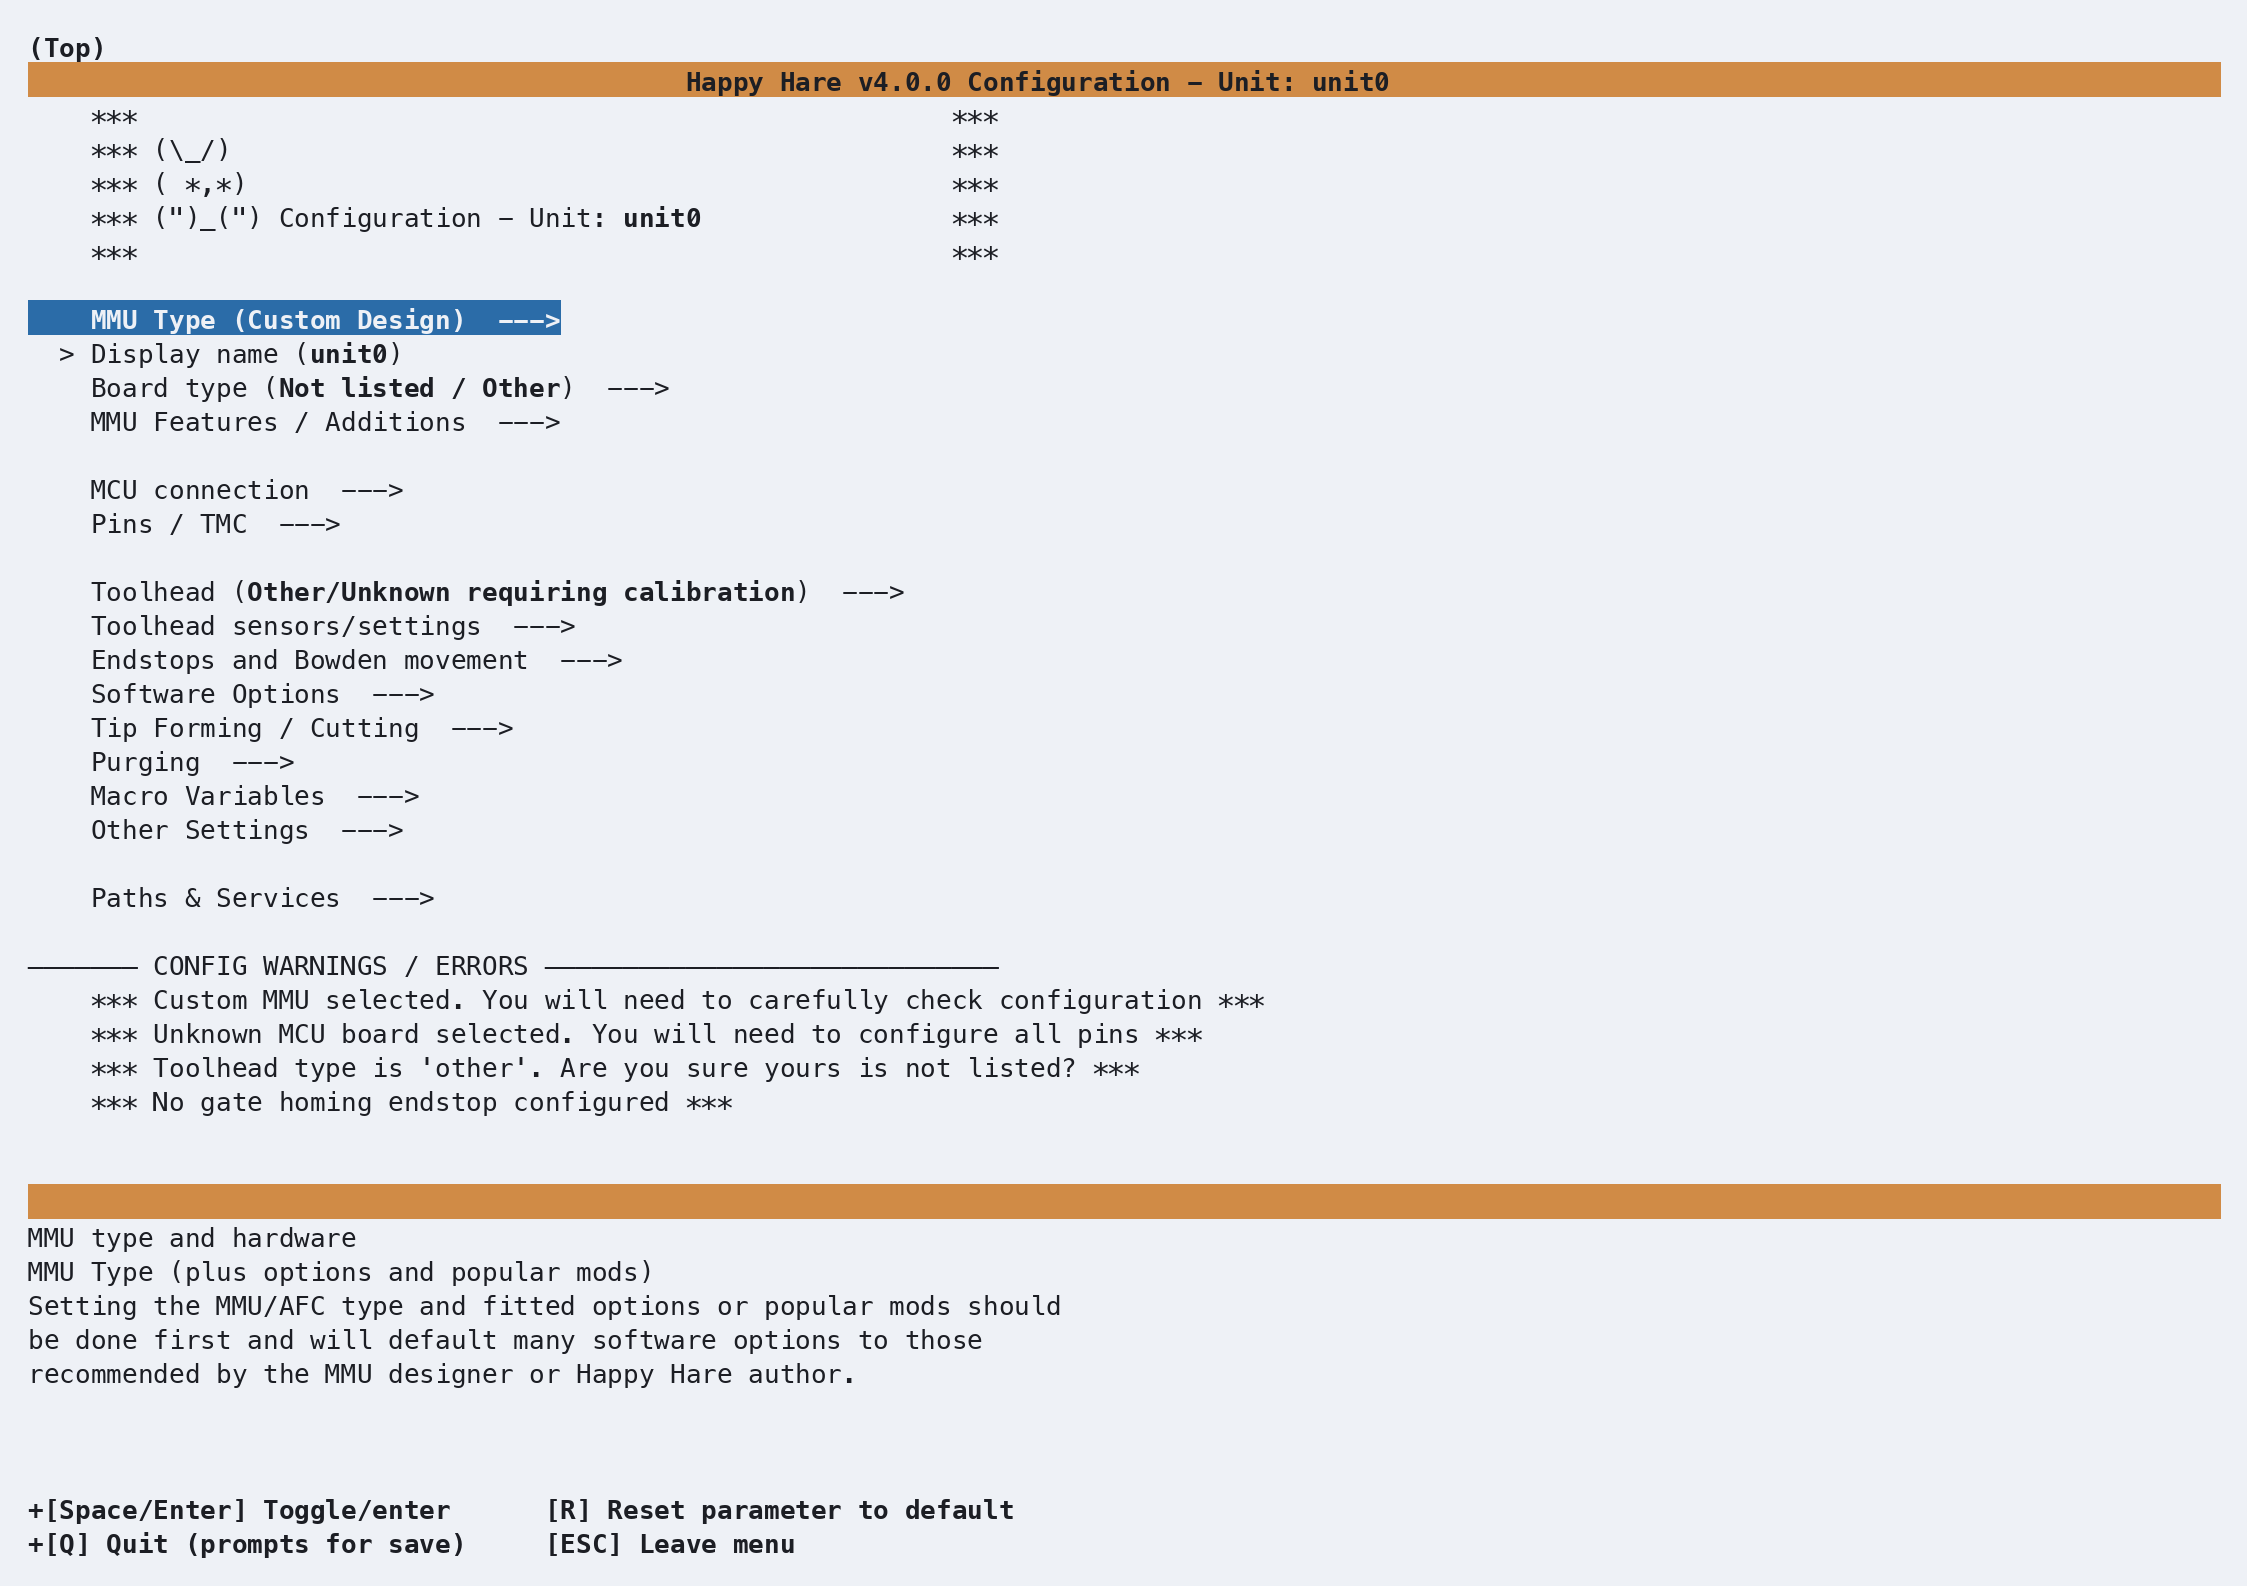
This is the installer's default state: MMU Type is Custom Design, the board is
unknown, and the CONFIG WARNINGS / ERRORS panel at the bottom lists exactly
that — four things still need a decision. As soon as you pick a real MMU type,
most of these clear themselves.
A quick word on the controls, since you'll use them constantly:
- Arrow keys move the highlight; Enter (or Space) opens a submenu or toggles/selects the highlighted item.
- Esc backs out one level; from the top level it offers to save.
- ? shows help for whatever's highlighted.
- R resets the highlighted parameter back to its default — useful any time you've typed something and want to back out cleanly without hunting for the original value.
Highlight MMU Type and press Enter:
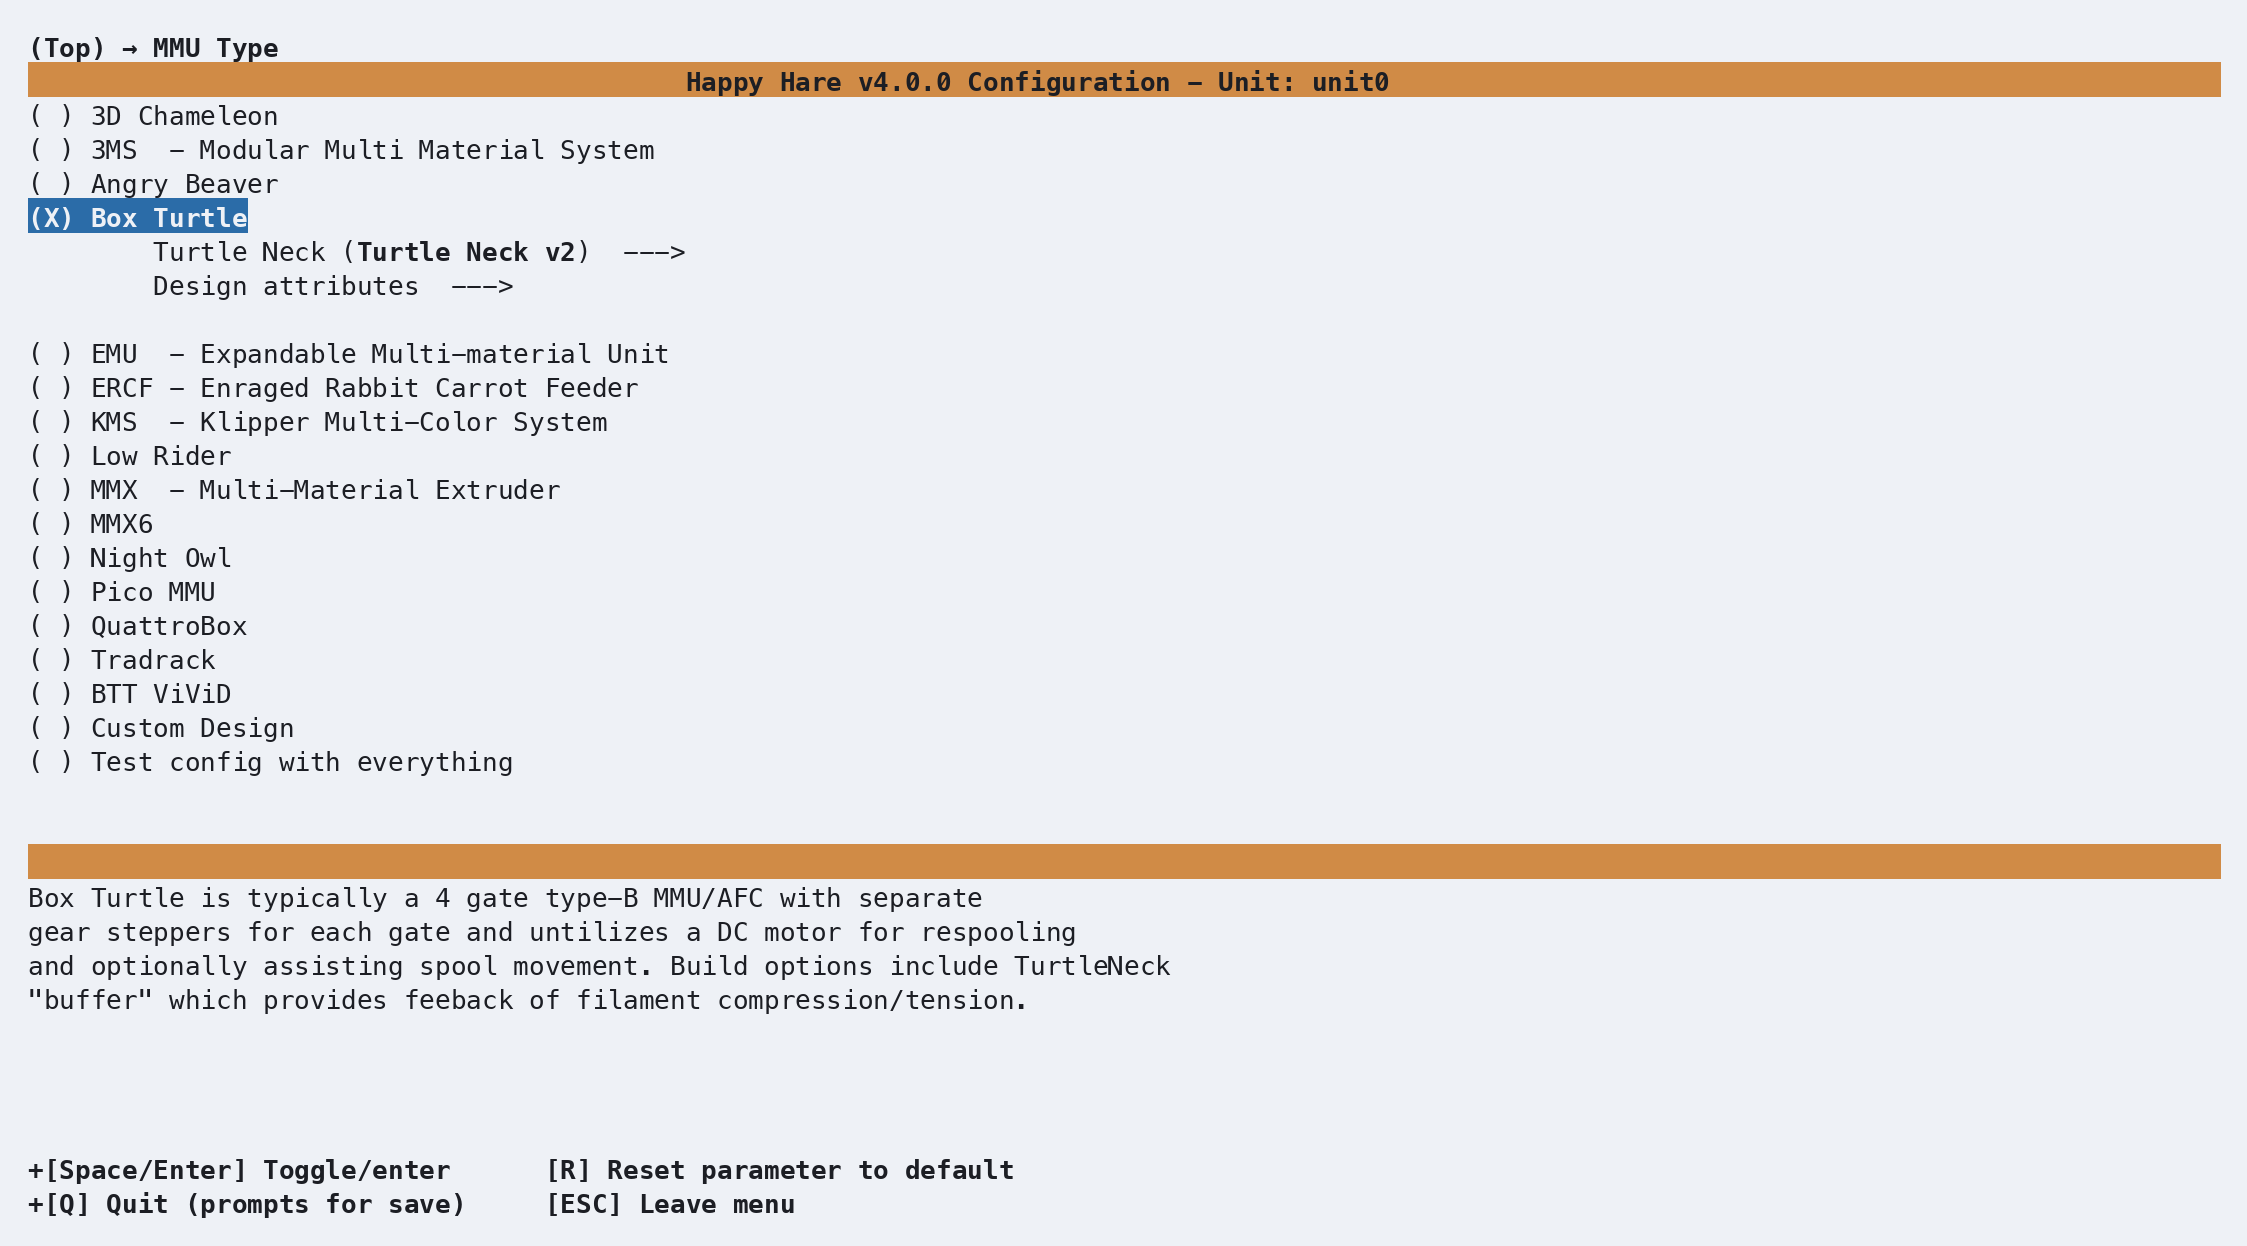
Move down to Box Turtle and press Space to select it. Two things happen
immediately: the radio button fills in ((X) Box Turtle), and two new lines
appear indented underneath it — Turtle Neck and Design attributes — options
that only make sense once Happy Hare knows this is a Box Turtle.
Enter Turtle Neck to see the buffer choice:
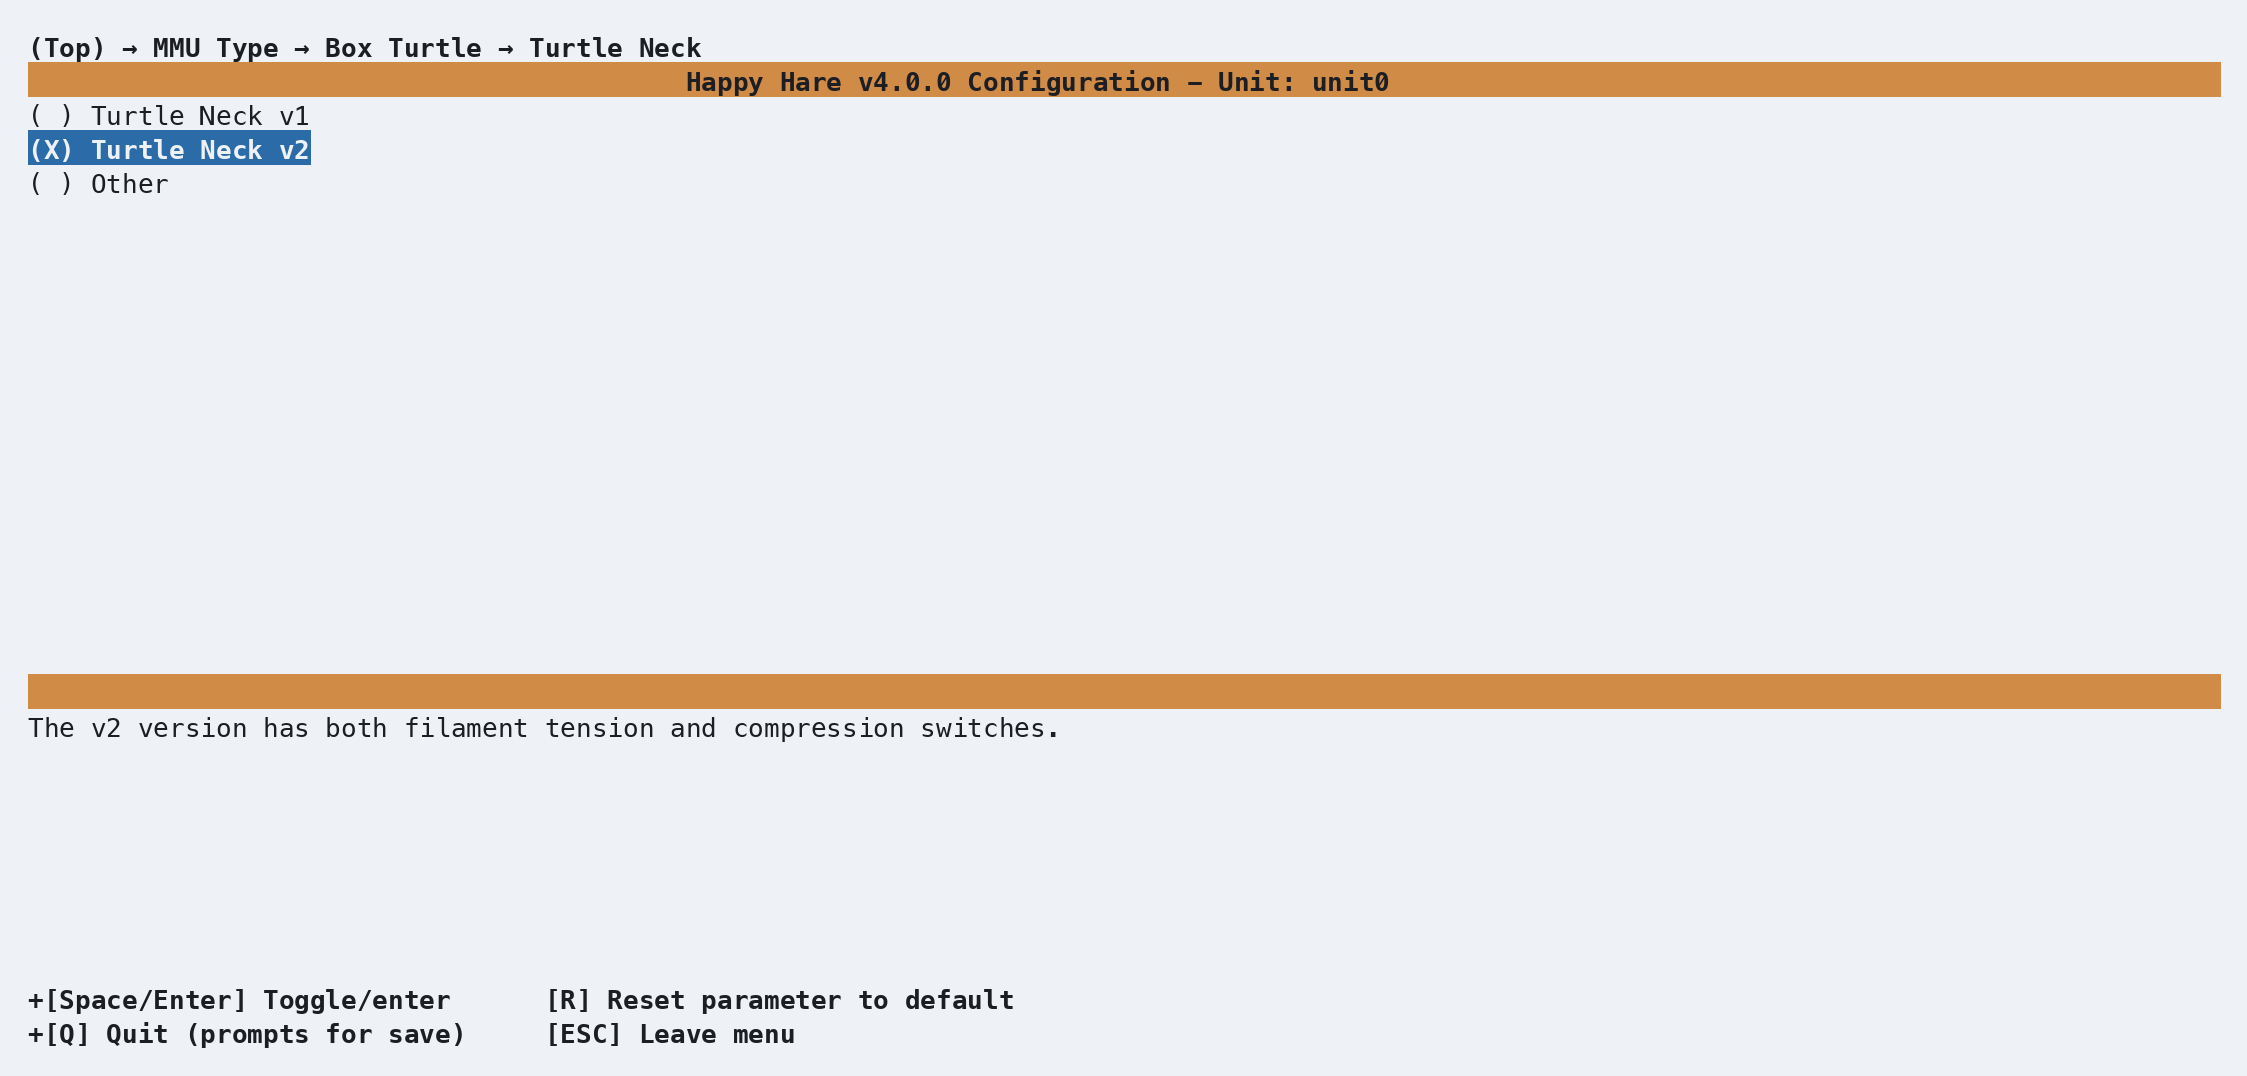
Turtle Neck v2 is already the default — it's the buffer most Box Turtles ship with, sensing both filament tension and compression. If you have the original v1 buffer (unsprung) or something else entirely, change it here; otherwise there's nothing to do and you can back out with Esc.
Back out twice (Esc, Esc) to return to the top menu, and look at the warnings panel again:
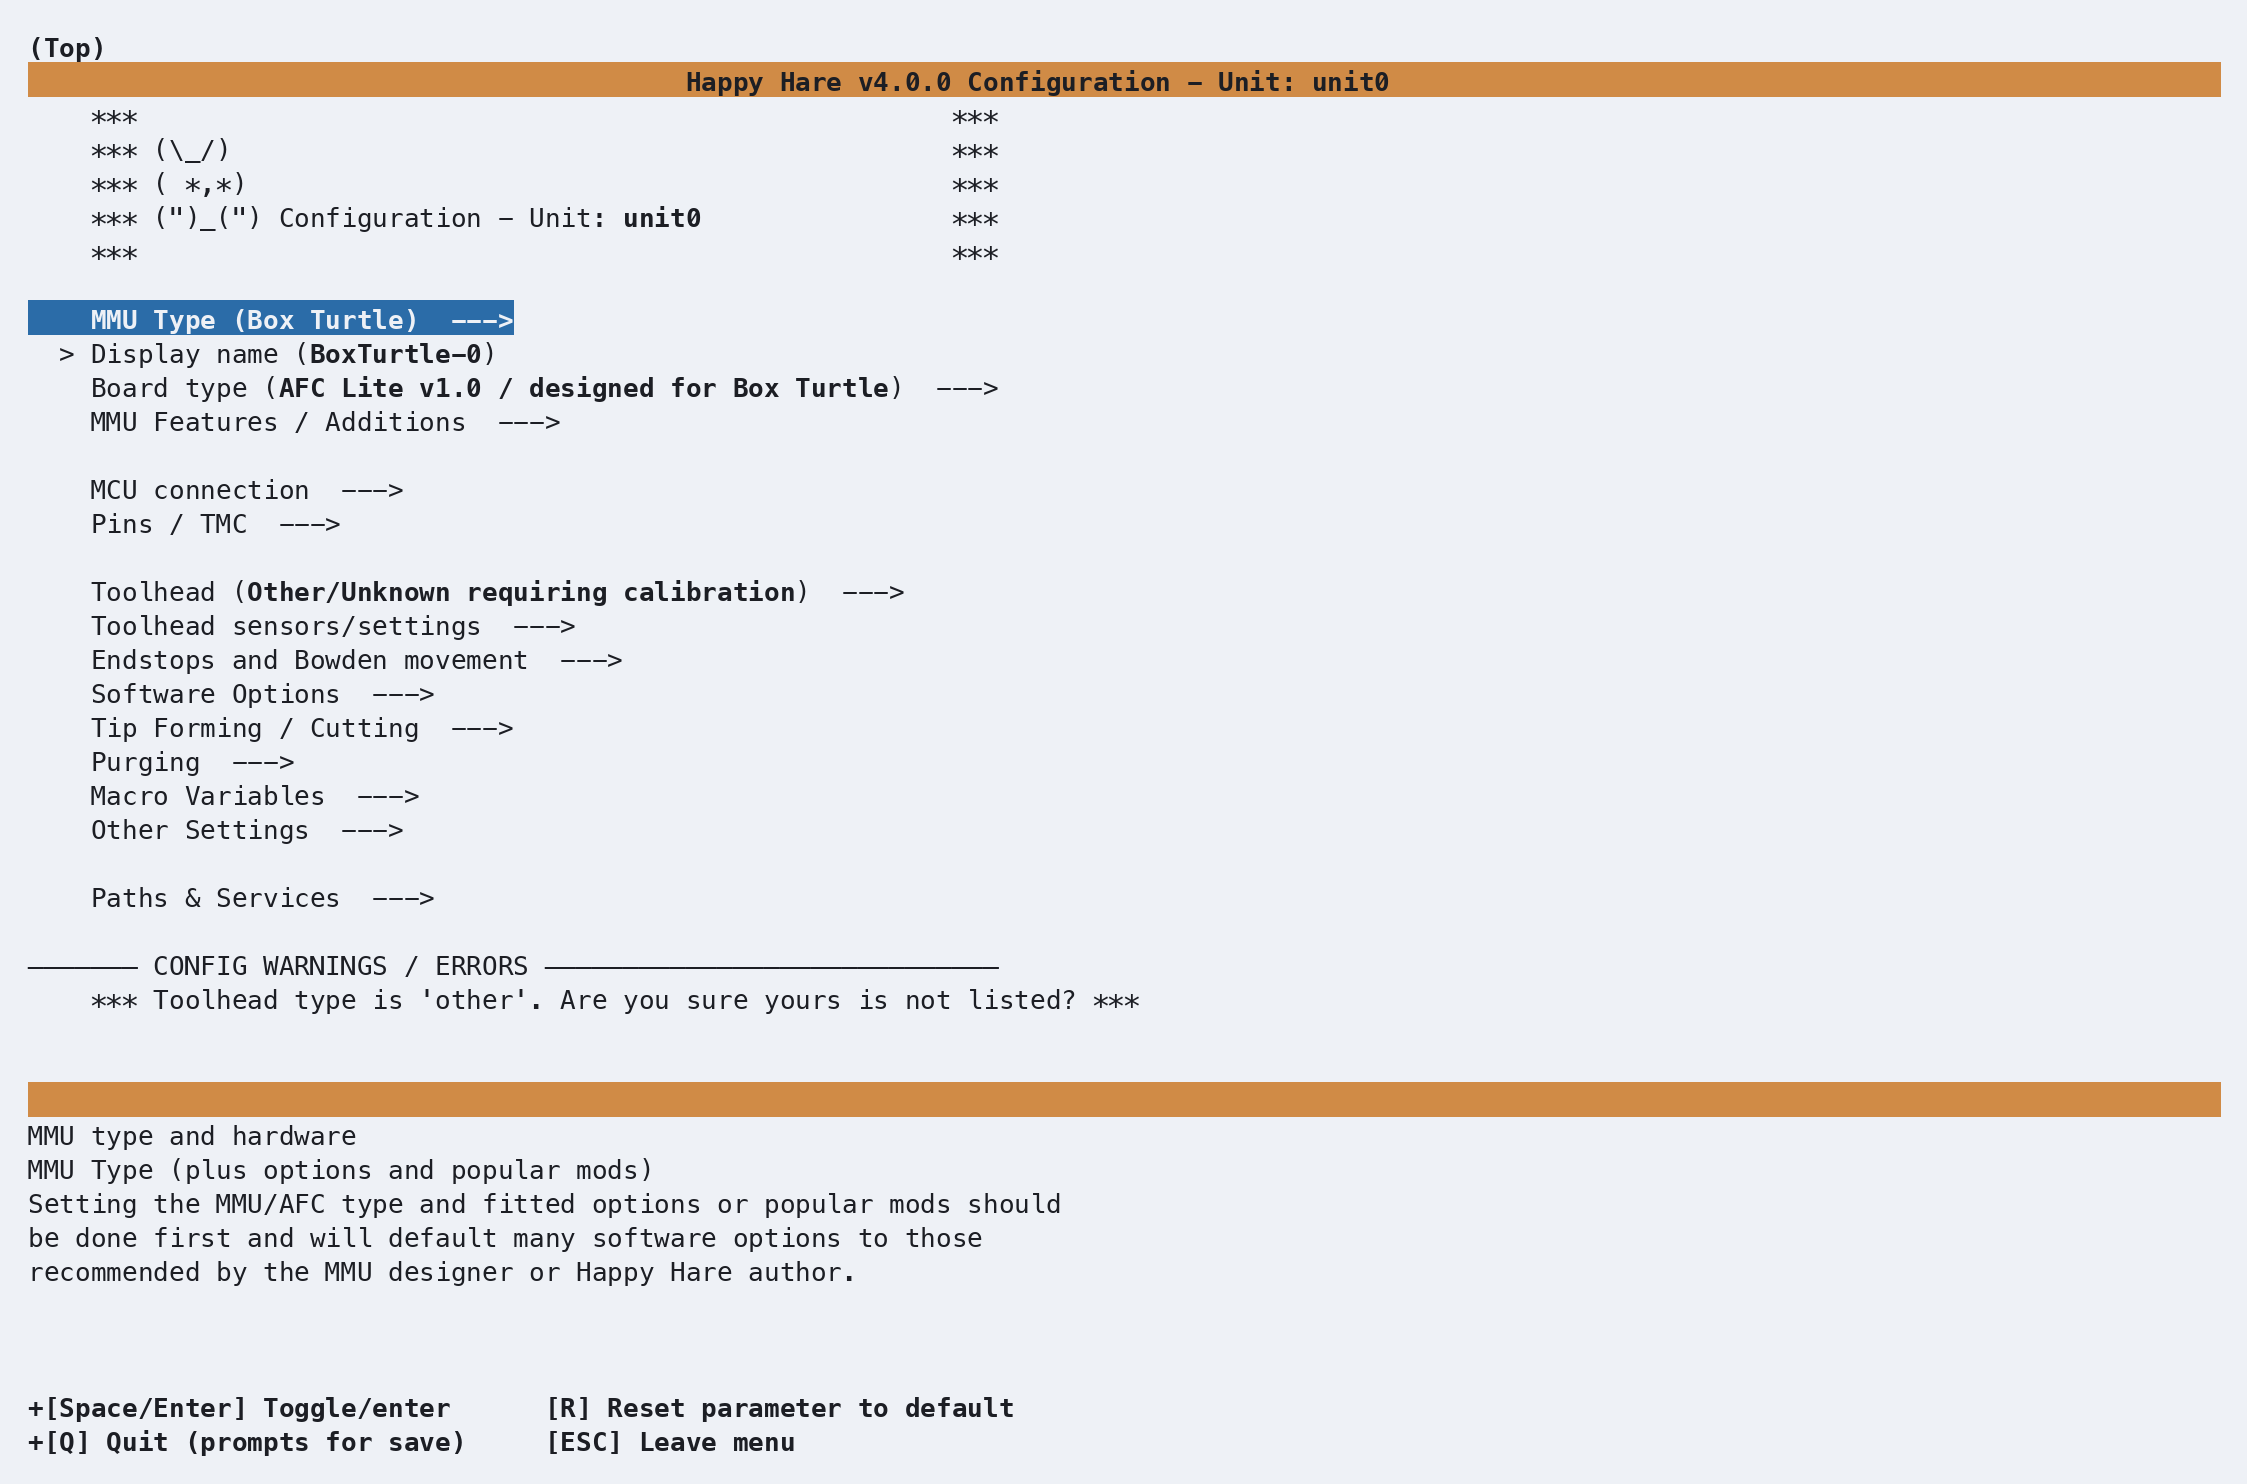
Three of the four warnings are already gone. The one that's left — "Toolhead type is 'other'" — is exactly what it sounds like: Happy Hare still doesn't know your toolhead, and that's covered in a different getting-started page. Don't worry about it here.
Enter Board type:
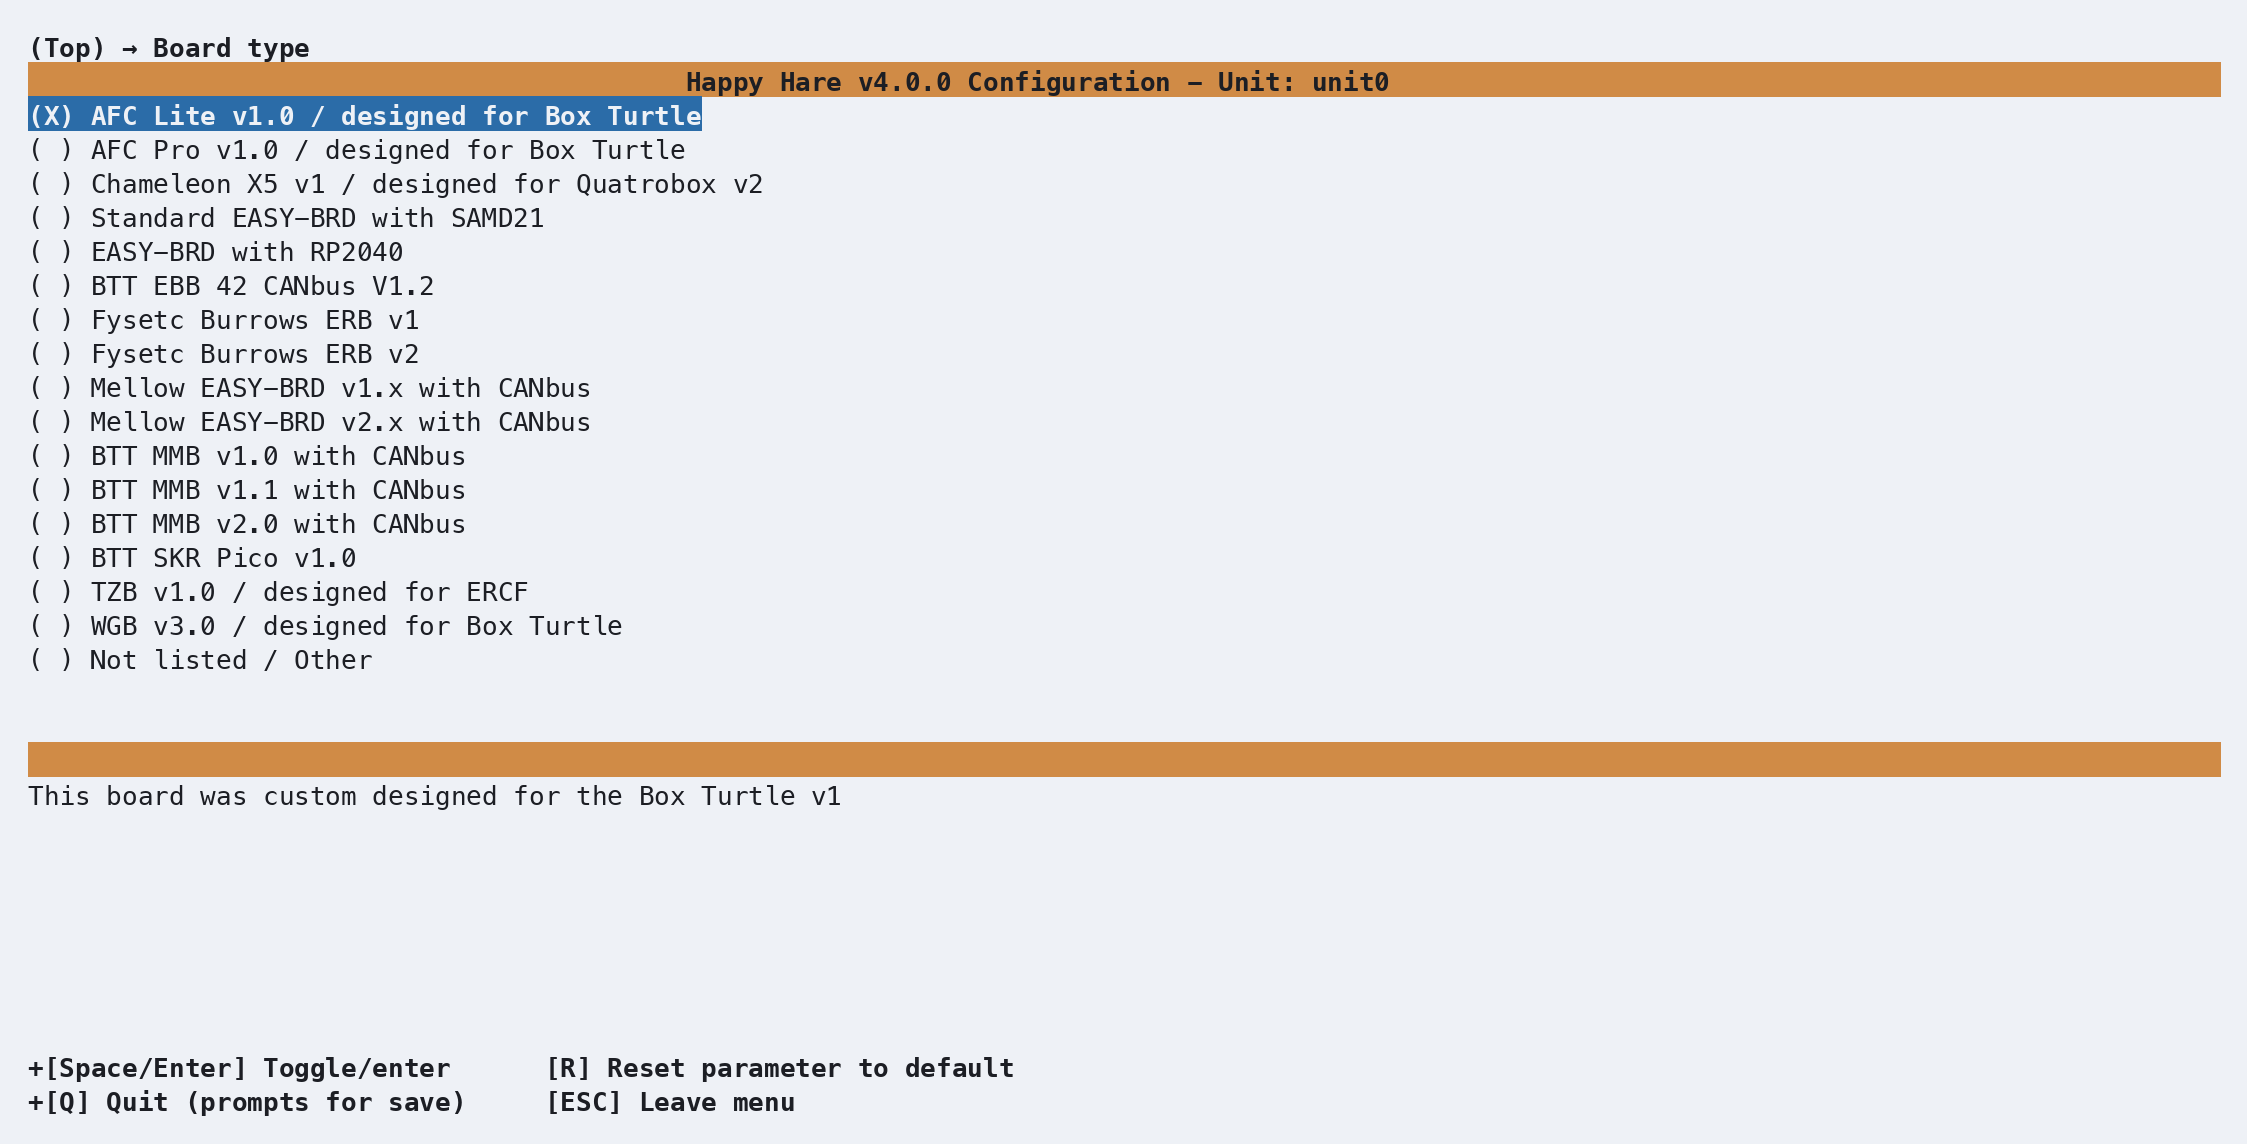
Because you already told it this is a Box Turtle, Happy Hare has pre-selected AFC Lite v1.0 / designed for Box Turtle — the board most Box Turtles are built around. If yours is a Box Turtle on a different controller board, this is where you'd pick it instead; the pin defaults for every stepper, sensor and TMC driver on the rest of the menu come from whatever you choose here.
Back out to the top and enter MCU connection:
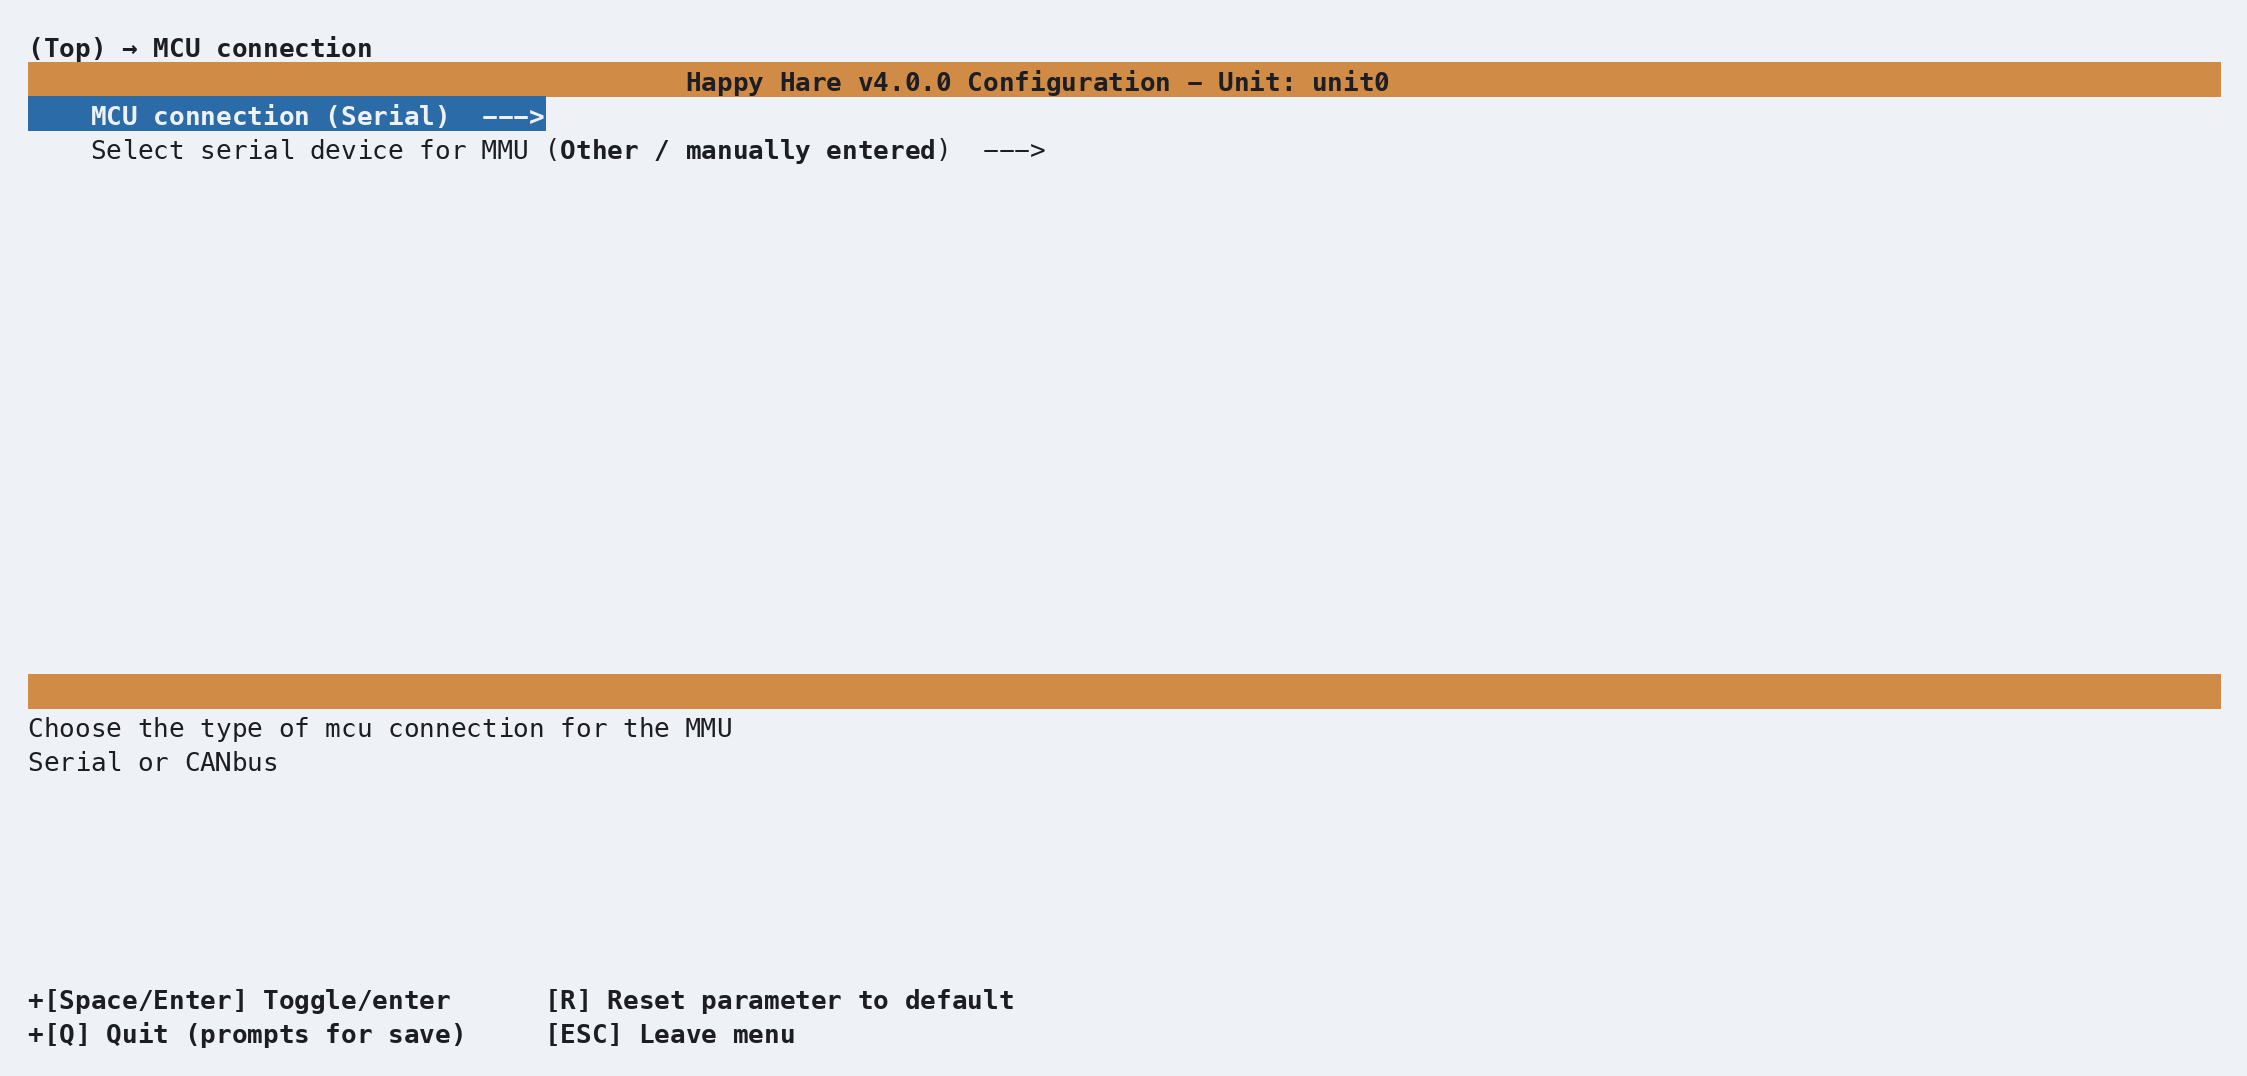
Again, already right for a board like the AFC Lite that plugs in over USB:
MCU connection is Serial, and there's a second line to pick which serial
device if you have more than one board attached. If your board talks CANbus
instead, this is where you'd switch it — but for a stock, USB-attached Box
Turtle, Serial is what you want and there's nothing to change.
Back out and enter MMU Features / Additions:
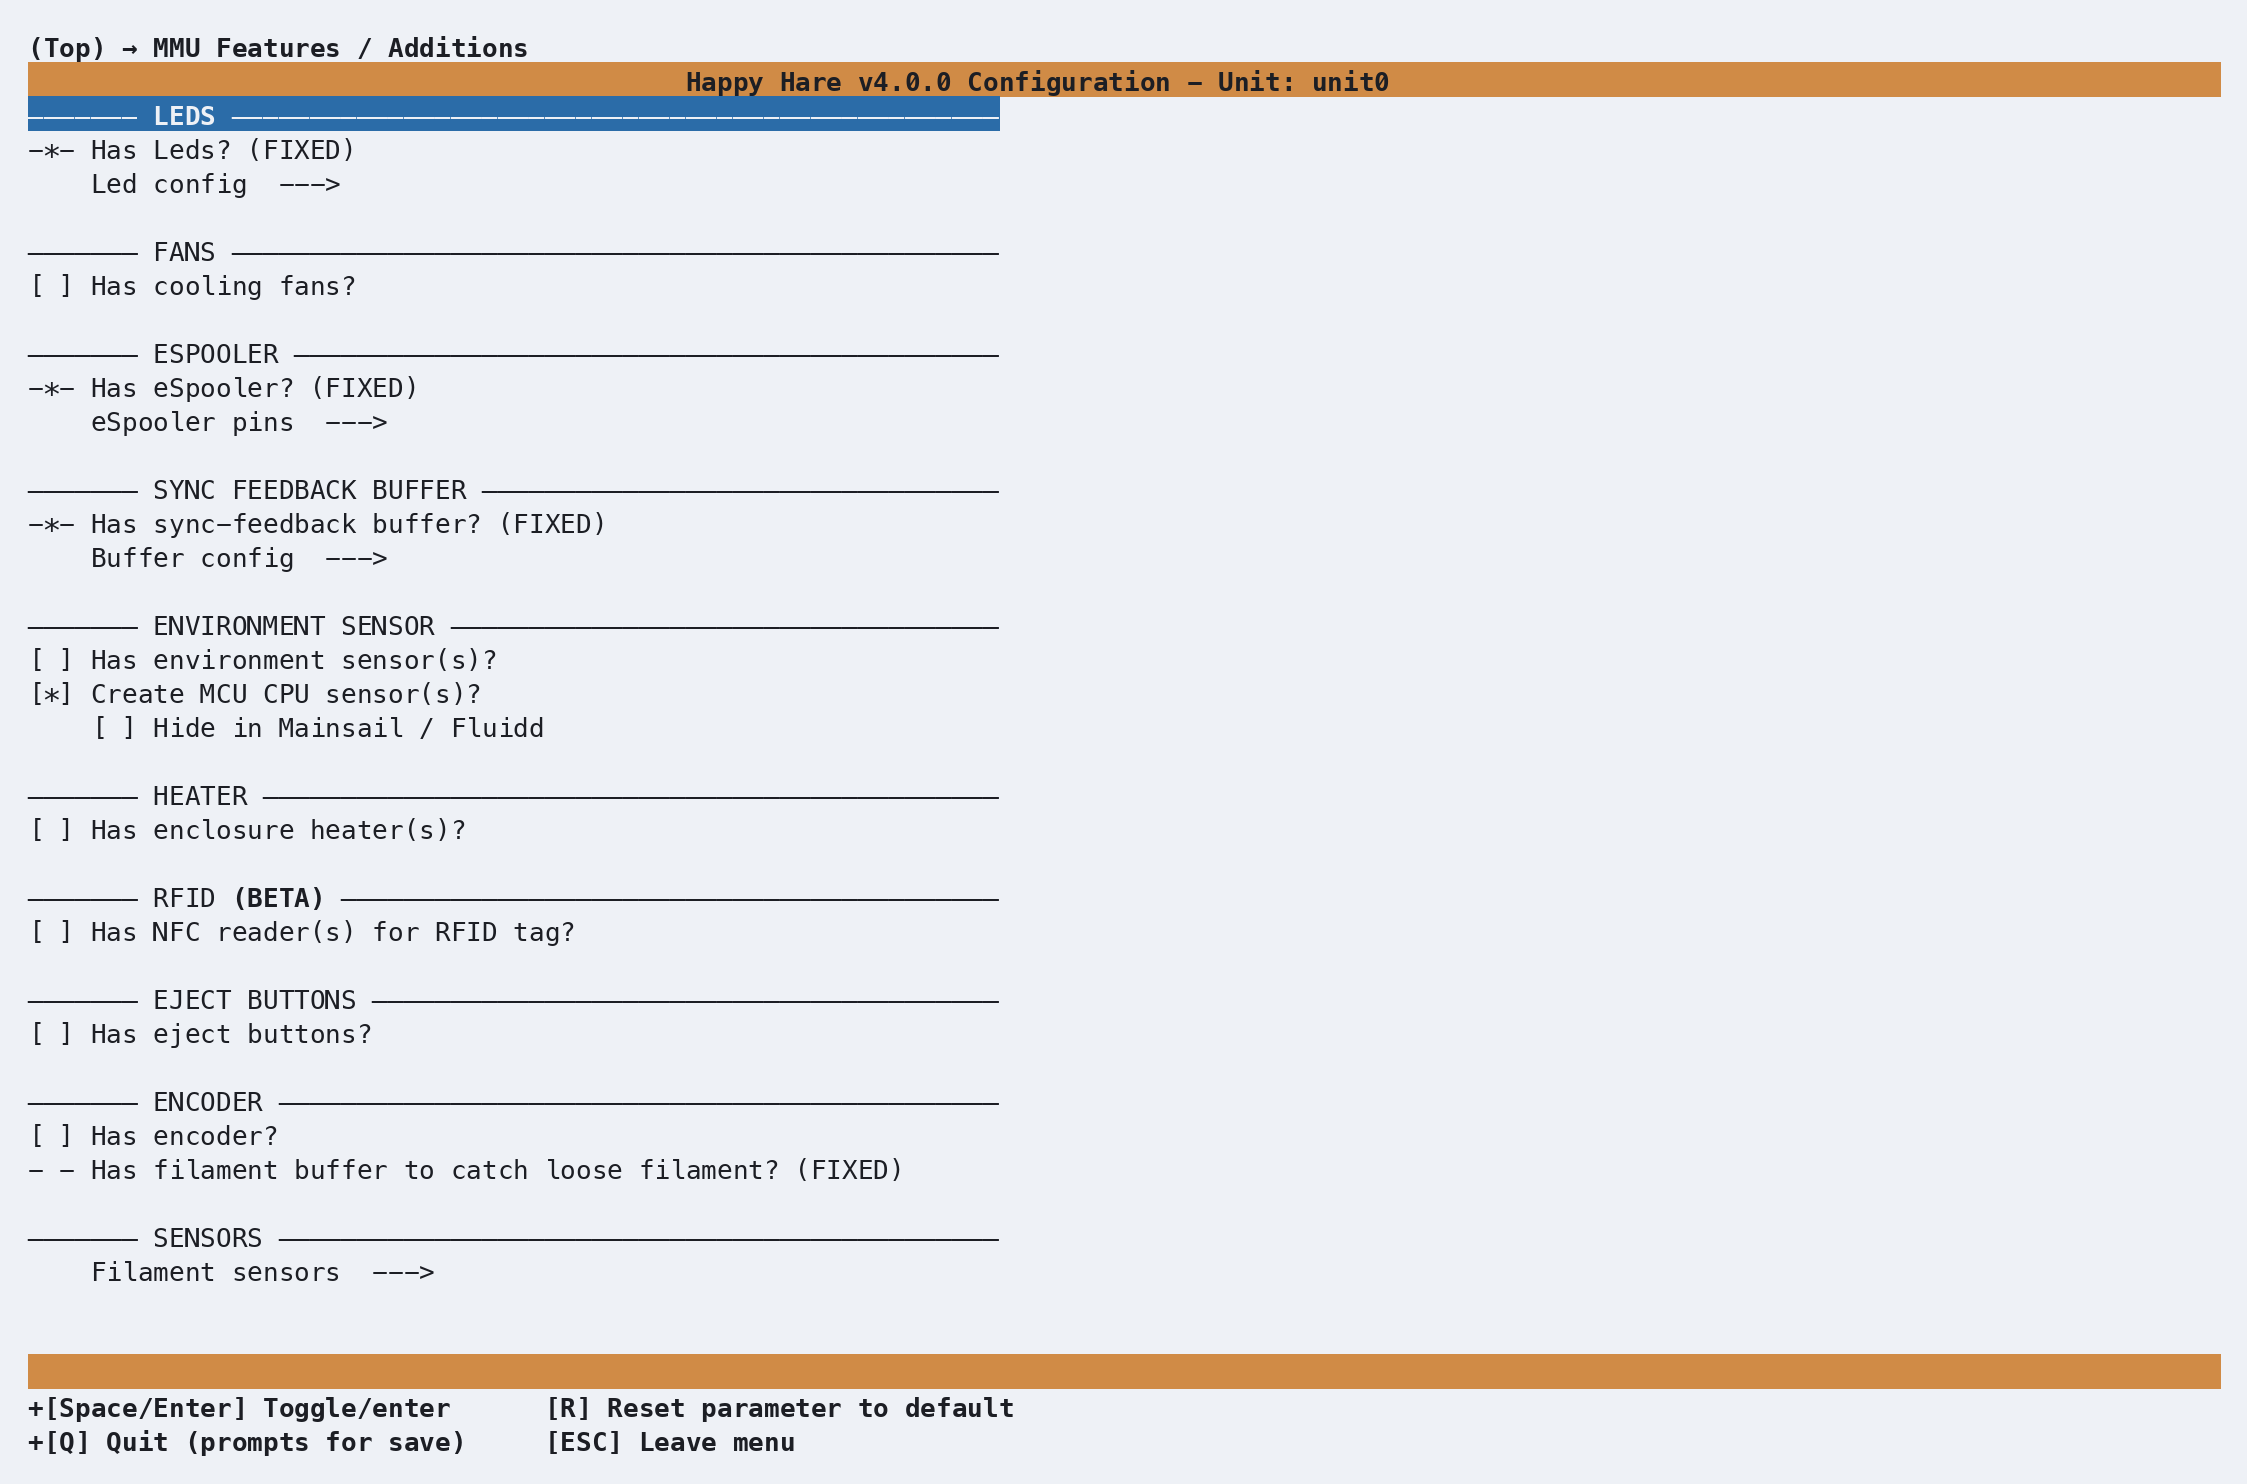
This is worth a look even though — for a stock Box Turtle — there's nothing to
add. LEDs, eSpooler and the sync-feedback buffer are already switched
on and marked (FIXED), because a Box Turtle always has them; you can't turn them
off here. Fans, an environment sensor, RFID readers, eject buttons and an encoder
are all genuine build options and default off — enable whichever ones you actually
built. If you're following this page for a plain, stock Box Turtle, just look and
move on.
This is the one setting on this page that's genuinely impossible to get right by guessing. Back out to the top, enter Pins / TMC, then Gear pins:
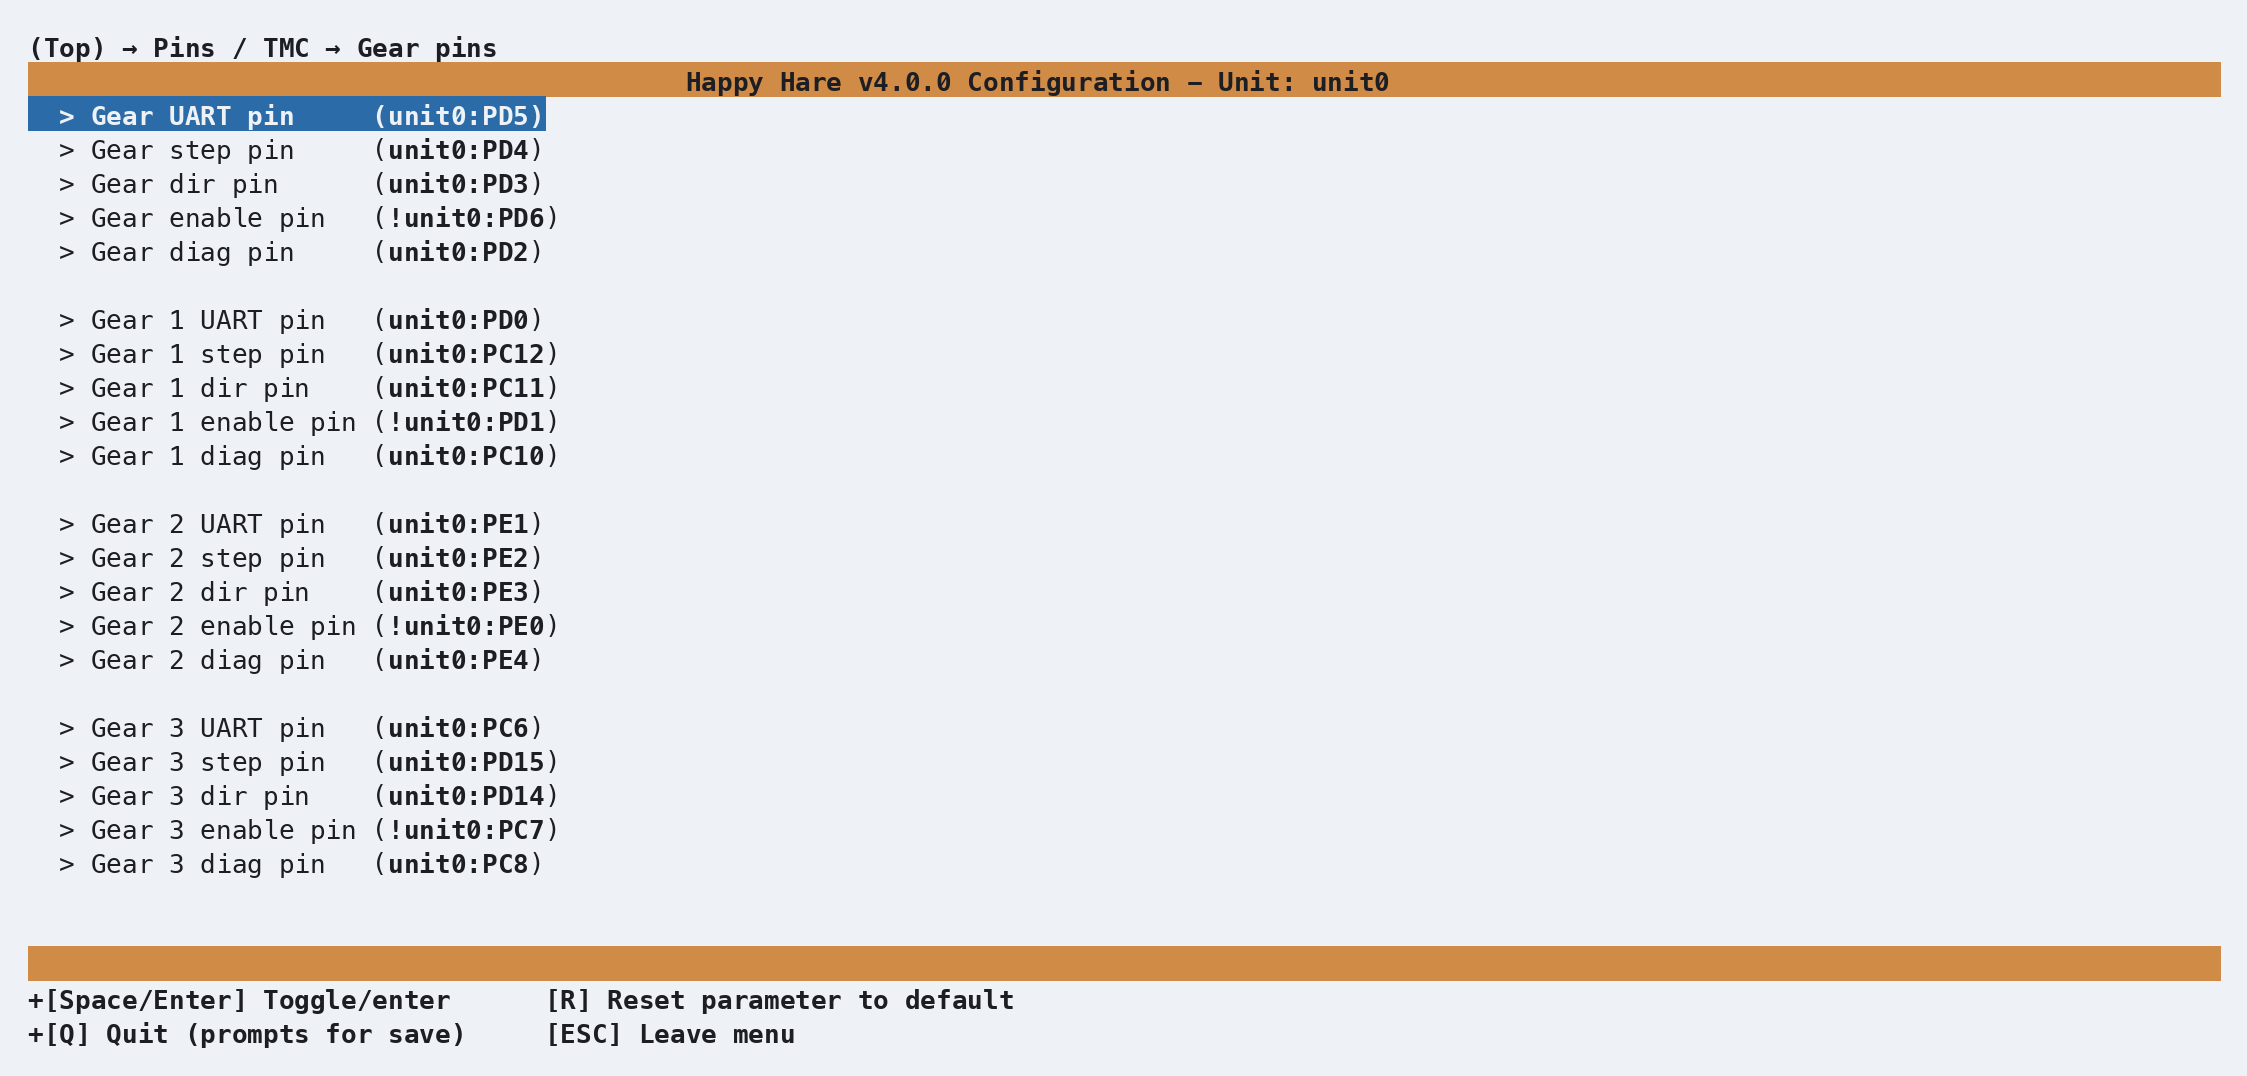
Every gate has its own UART, step, dir, enable and diag pin, all filled in from the AFC Lite defaults you picked earlier. The one you're most likely to need to touch is dir — whether a gear stepper spins the "right" way depends on which way its cable happens to be plugged in, and no config file can know that in advance. You'll find out the first time you try to load filament and gate 0 (say) runs backwards.
Highlight Gear dir pin and press Enter to open its editor:
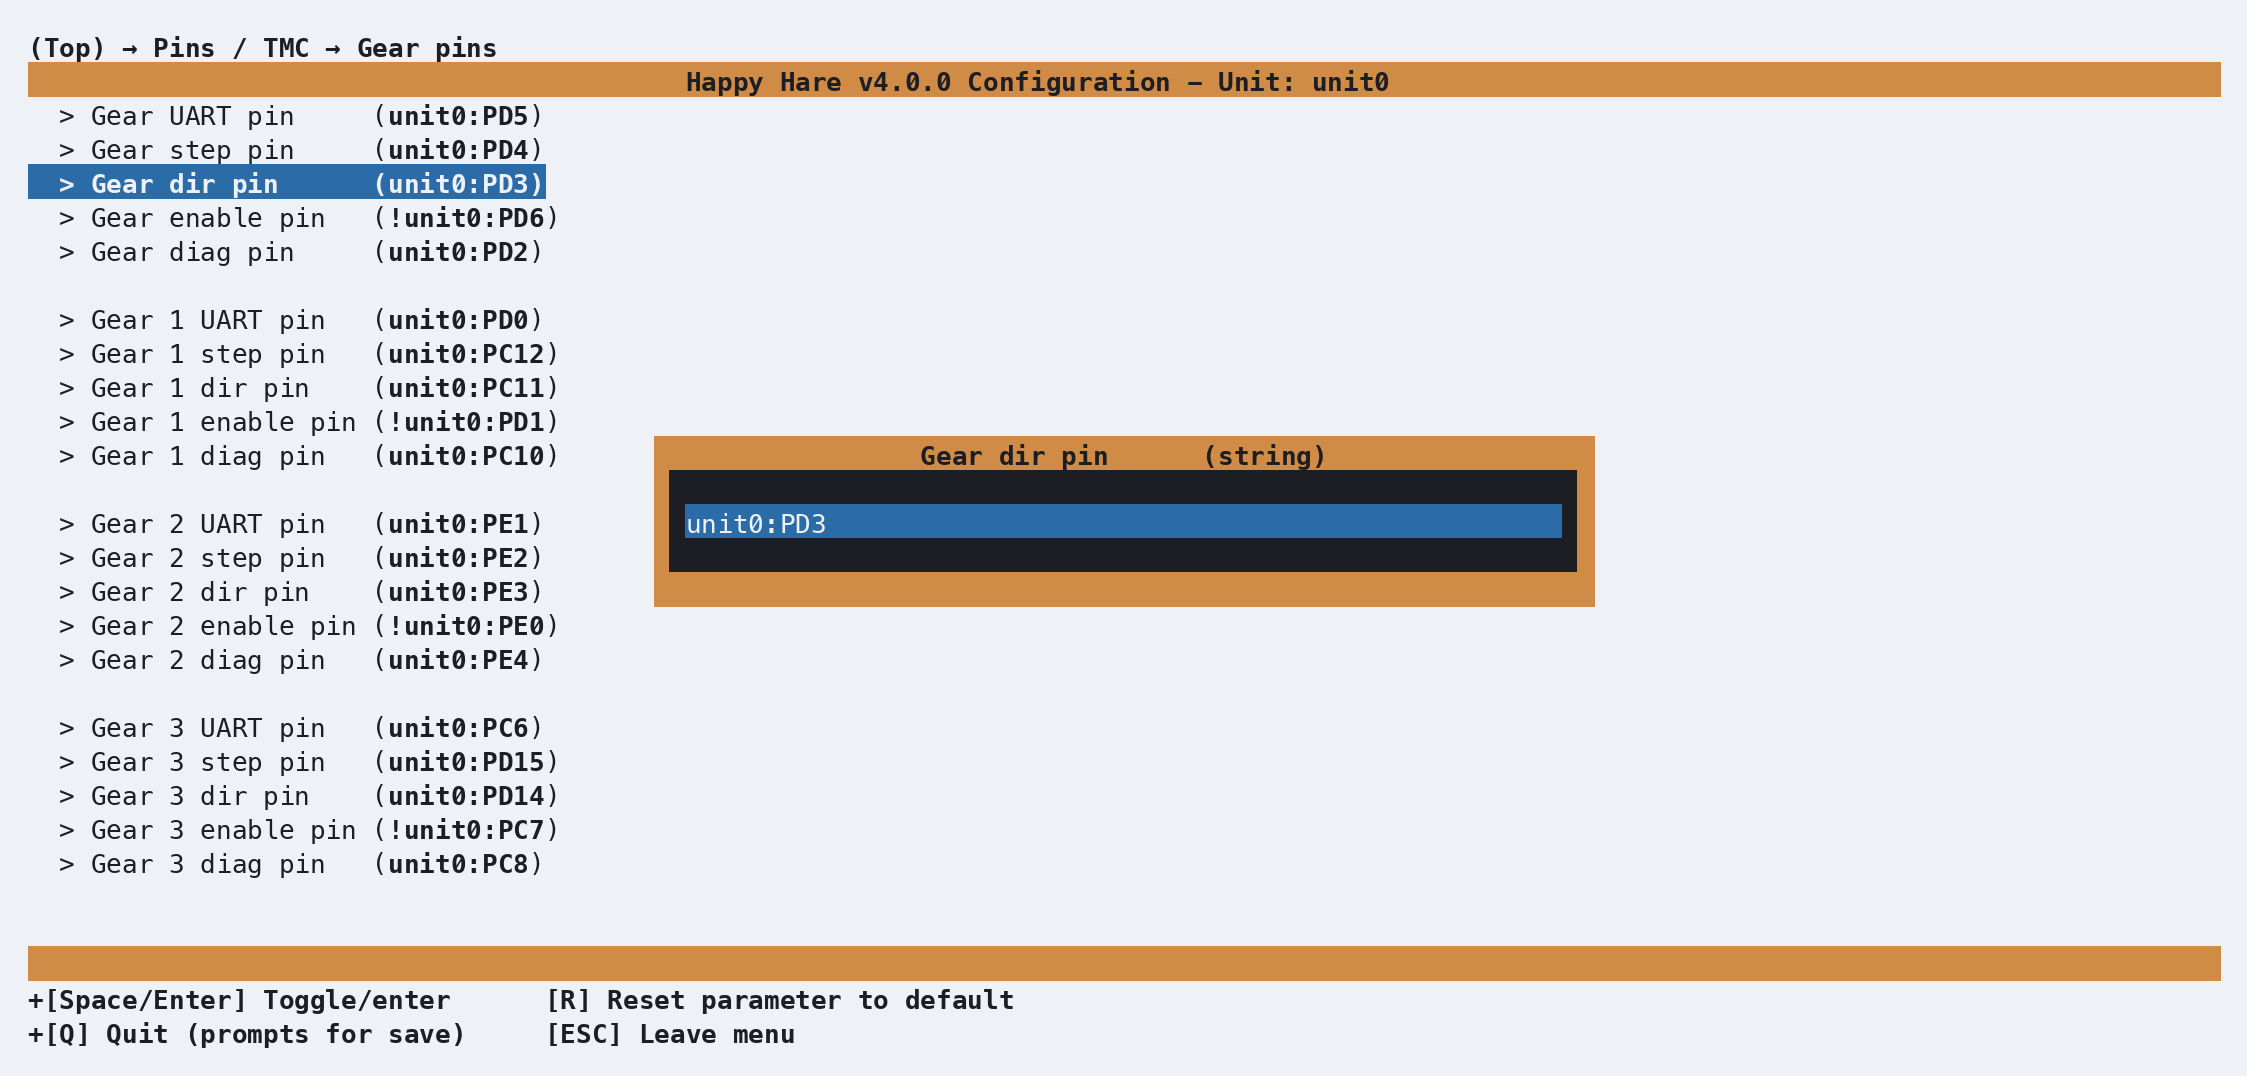
If that gear needs reversing, add a ! in front of the pin name — Klipper's
standard way of inverting a pin's polarity:
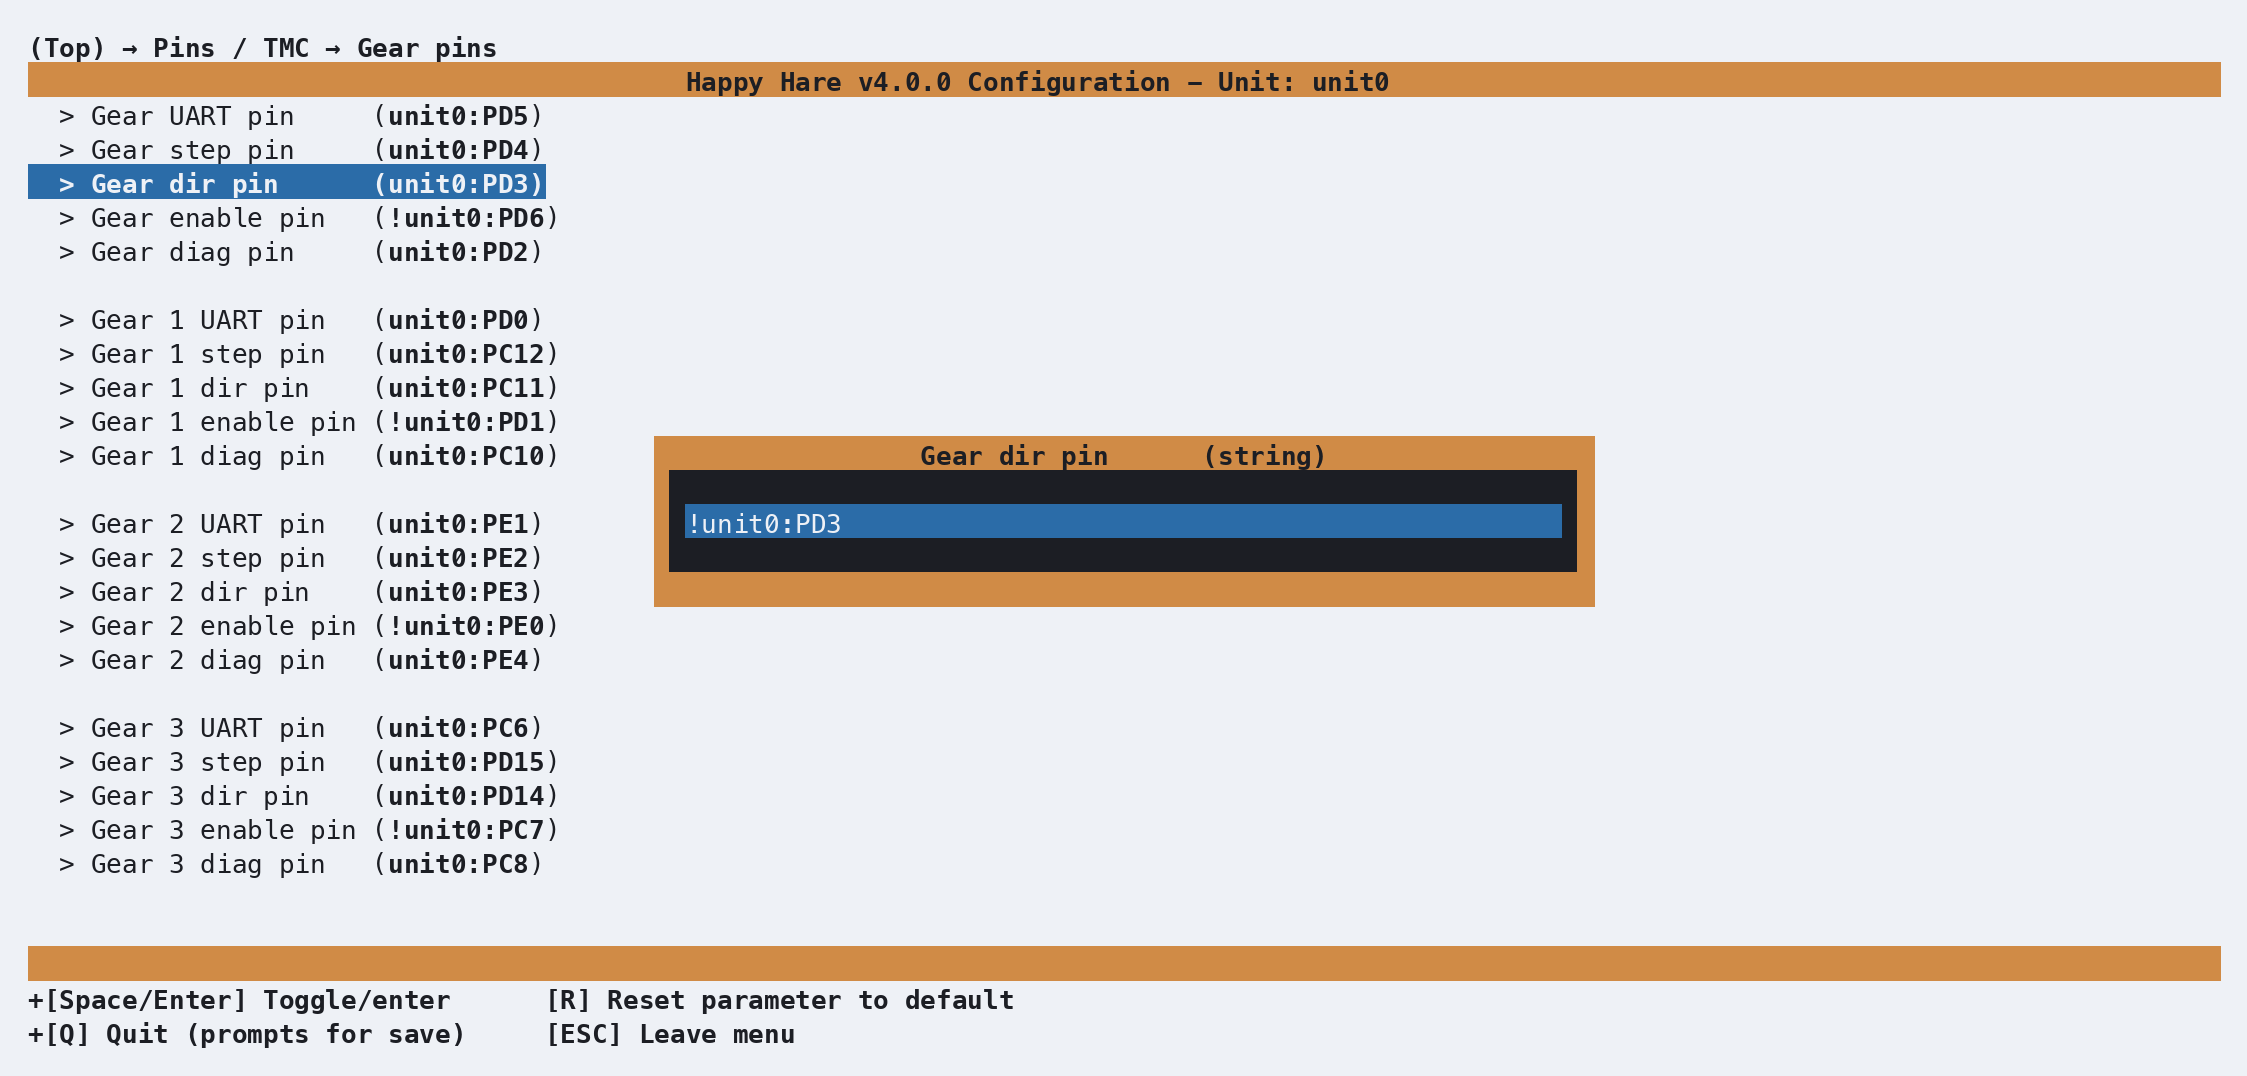
That's it — no rewiring, no .cfg files to hand-edit. Press Enter to accept the
change, or Esc to back out without applying it. And if you ever change a value
here and decide you'd rather have the default back, that's exactly what the R
key mentioned earlier is for: highlight the parameter and press R, and it resets
to whatever Happy Hare would have picked on its own.
Back out twice to the top and enter Software Options, then Select spoolman spool manager support:
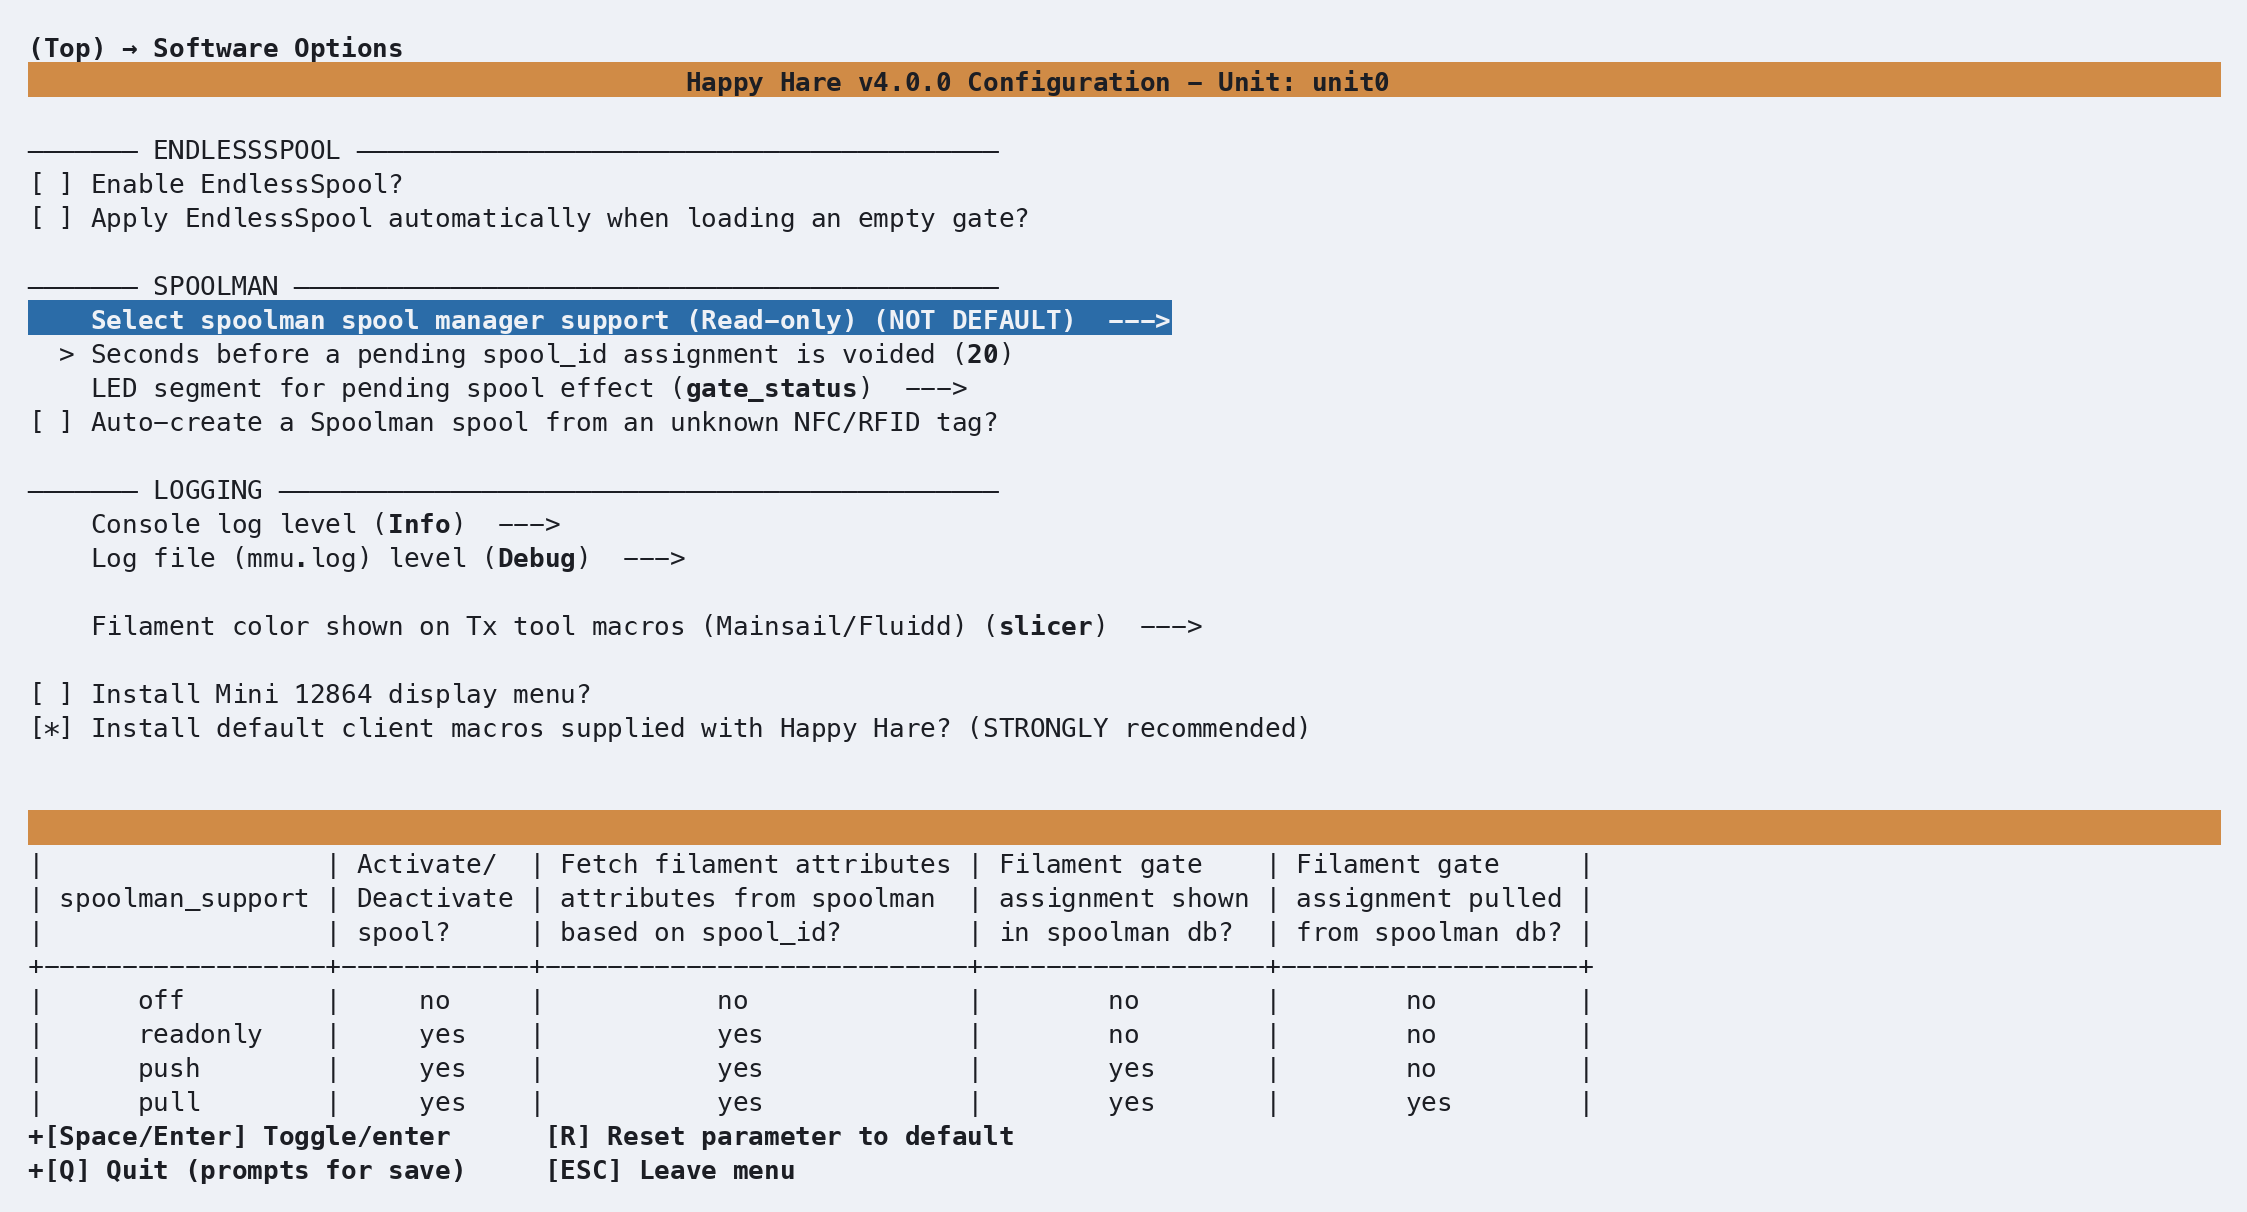
This is one small example of the many software-side options living under Software Options — most of them, like this one, default to off and are entirely optional. If you run a Spoolman instance and just want Happy Hare to pull filament details (material, colour, temperatures) onto each gate without pushing anything back, select Read-only as shown here. The help table on screen lays out exactly what each of the four modes does — off, read-only, push, and pull — so you can pick the one that matches how you actually use Spoolman.
Notice the row now reads (Read-only) (NOT DEFAULT) — menuconfig always flags a
value that differs from its default this way, which makes it easy to spot your
own changes later. If you decide you don't want it after all, R puts it straight
back to Off.
That's enough to get a stock Box Turtle basically talking to Klipper, but it's
only a fraction of the menu. Software Options, Tip Forming / Cutting,
Purging, Endstops and Bowden movement and the rest are all worth a look —
scroll all the way from the top to Paths & Services at the bottom at least
once. Nothing you look at will break anything: moving the highlight and pressing
? for help costs nothing, and R is always there to undo a change you don't
want.
When you're done, press Esc from the top level (or Q) to get the save
prompt, and confirm. Happy Hare writes your .cfg files from what you chose.
The installer only forces menuconfig open automatically on that very first run.
After that, running ./install.sh again just upgrades in place — it won't reopen
the menu. To go back in and change something, use:
./install.sh -iThis is the normal way to revisit any setting on this page — there's no need to
ever hand-edit the generated .cfg files directly. The one thing worth knowing:
if you've hand-edited a .cfg file since your last visit to menuconfig,
-i will ask how to reconcile that — Refresh (keep your edits, just add
anything new), Replace (regenerate everything from menuconfig, discarding
direct edits) or Merge. If you only ever configure through menuconfig, as
this page assumes, the default (Refresh) is fine and you'll rarely see this
prompt matter.