ProjectMap
The Project Map page contains the structure of the Book scenes in chapters and plots.

The Navigation Bar on the left side provides the links to the Project page, the Project Map page, and the Project Book page.
The Toolbar on the top of the Project page contains the following buttons: Create Chapter, Create Plot, Create Scene. The Toolbar contains also a dropdown to filter the Scenes based on the specified Tags.
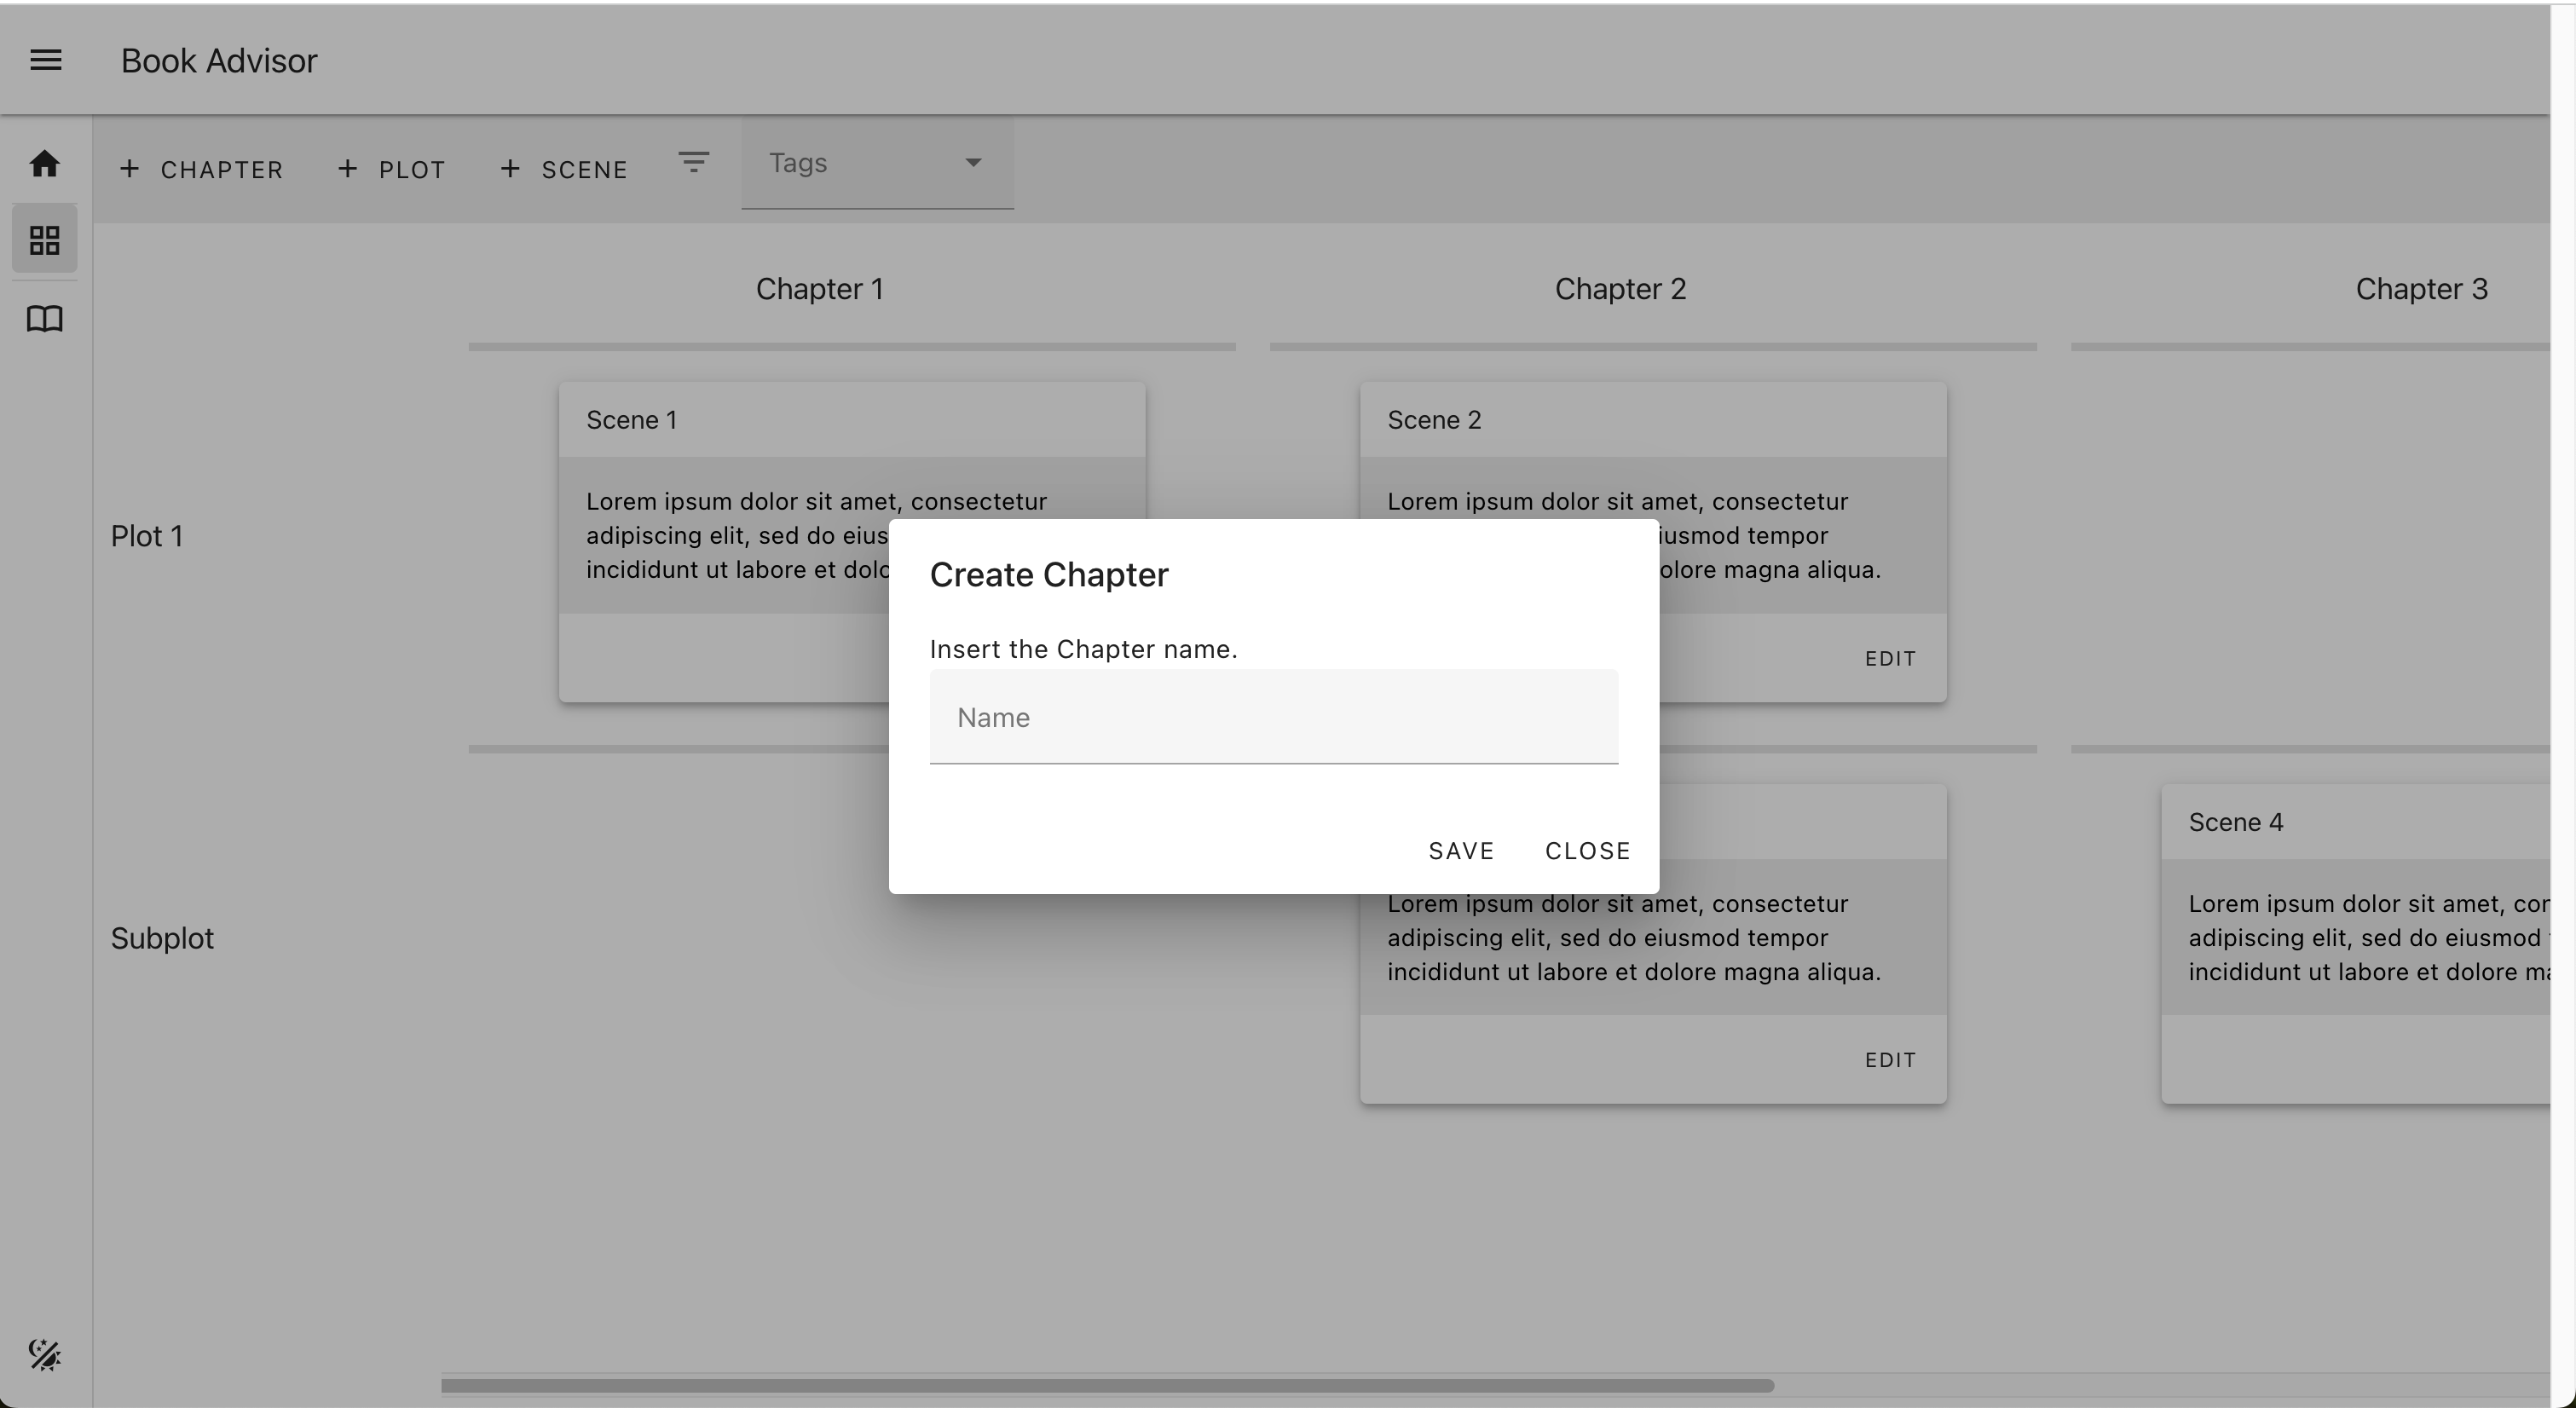
The Create Chapter action triggers the creation of a new Chapter.
Specify the name of the Chapter in the Create Chapter dialog.
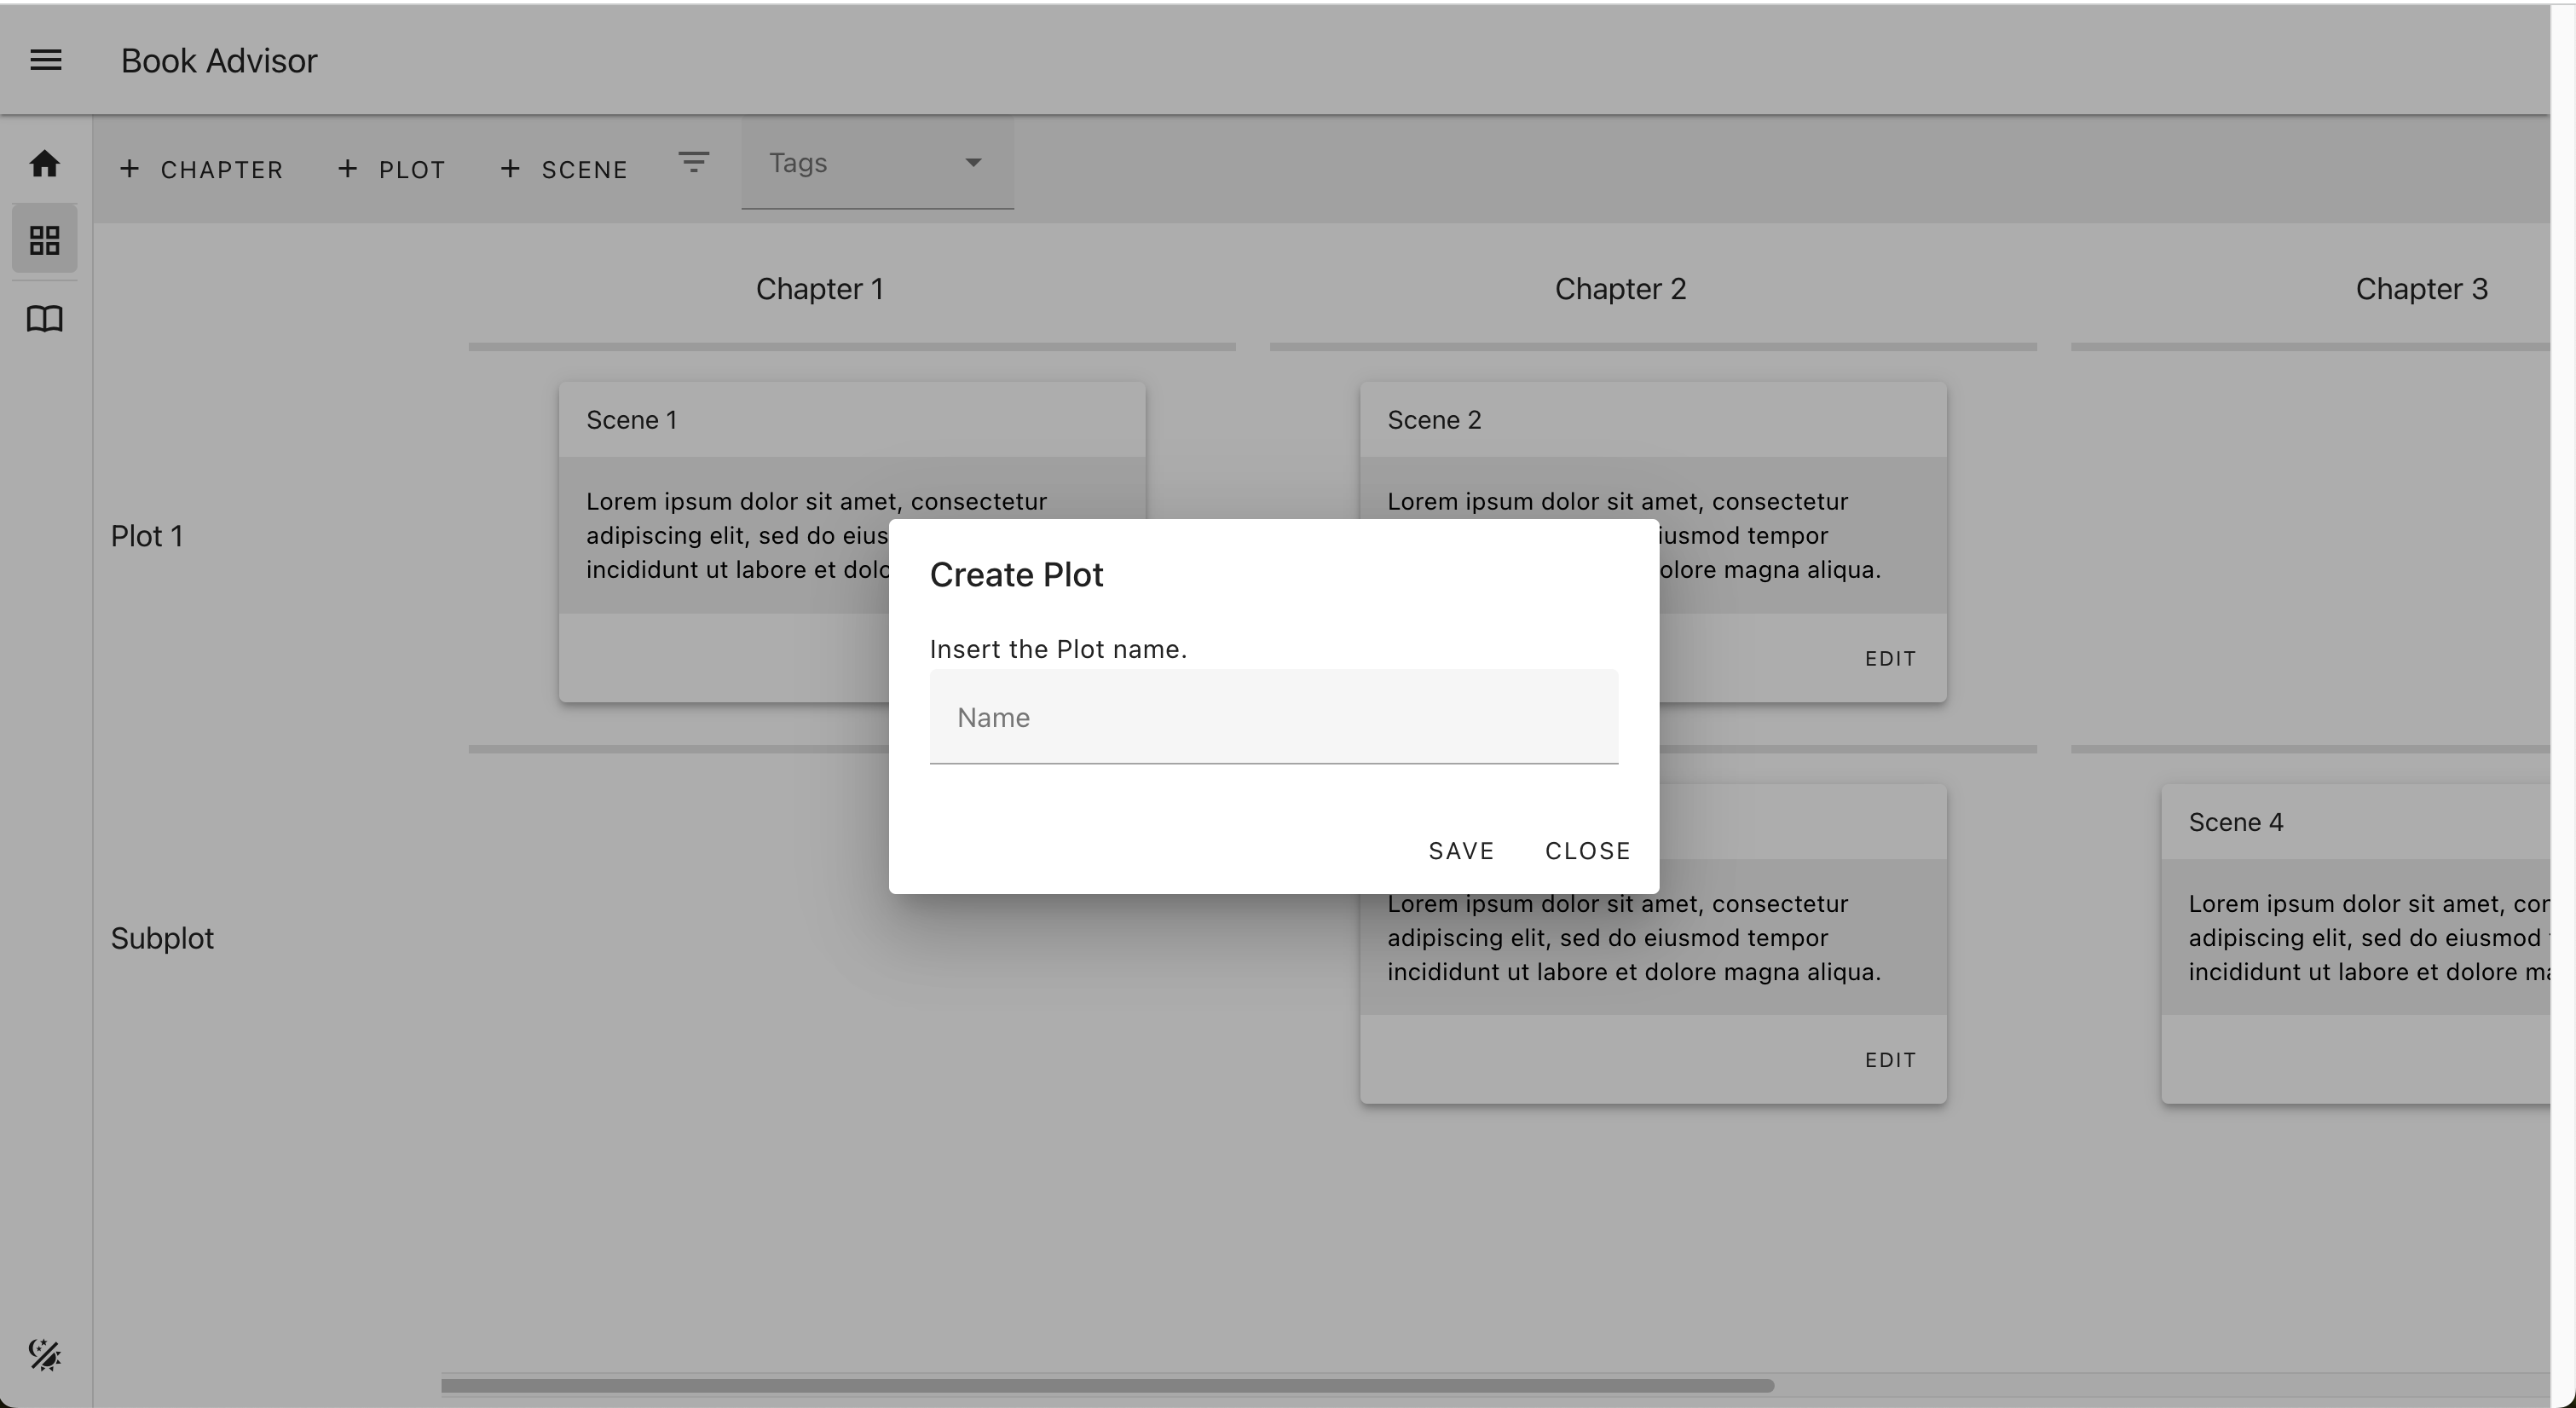
The Create Plot action triggers the creation of a new Plot.
Specify the name of the Plot in the Create Plot dialog.
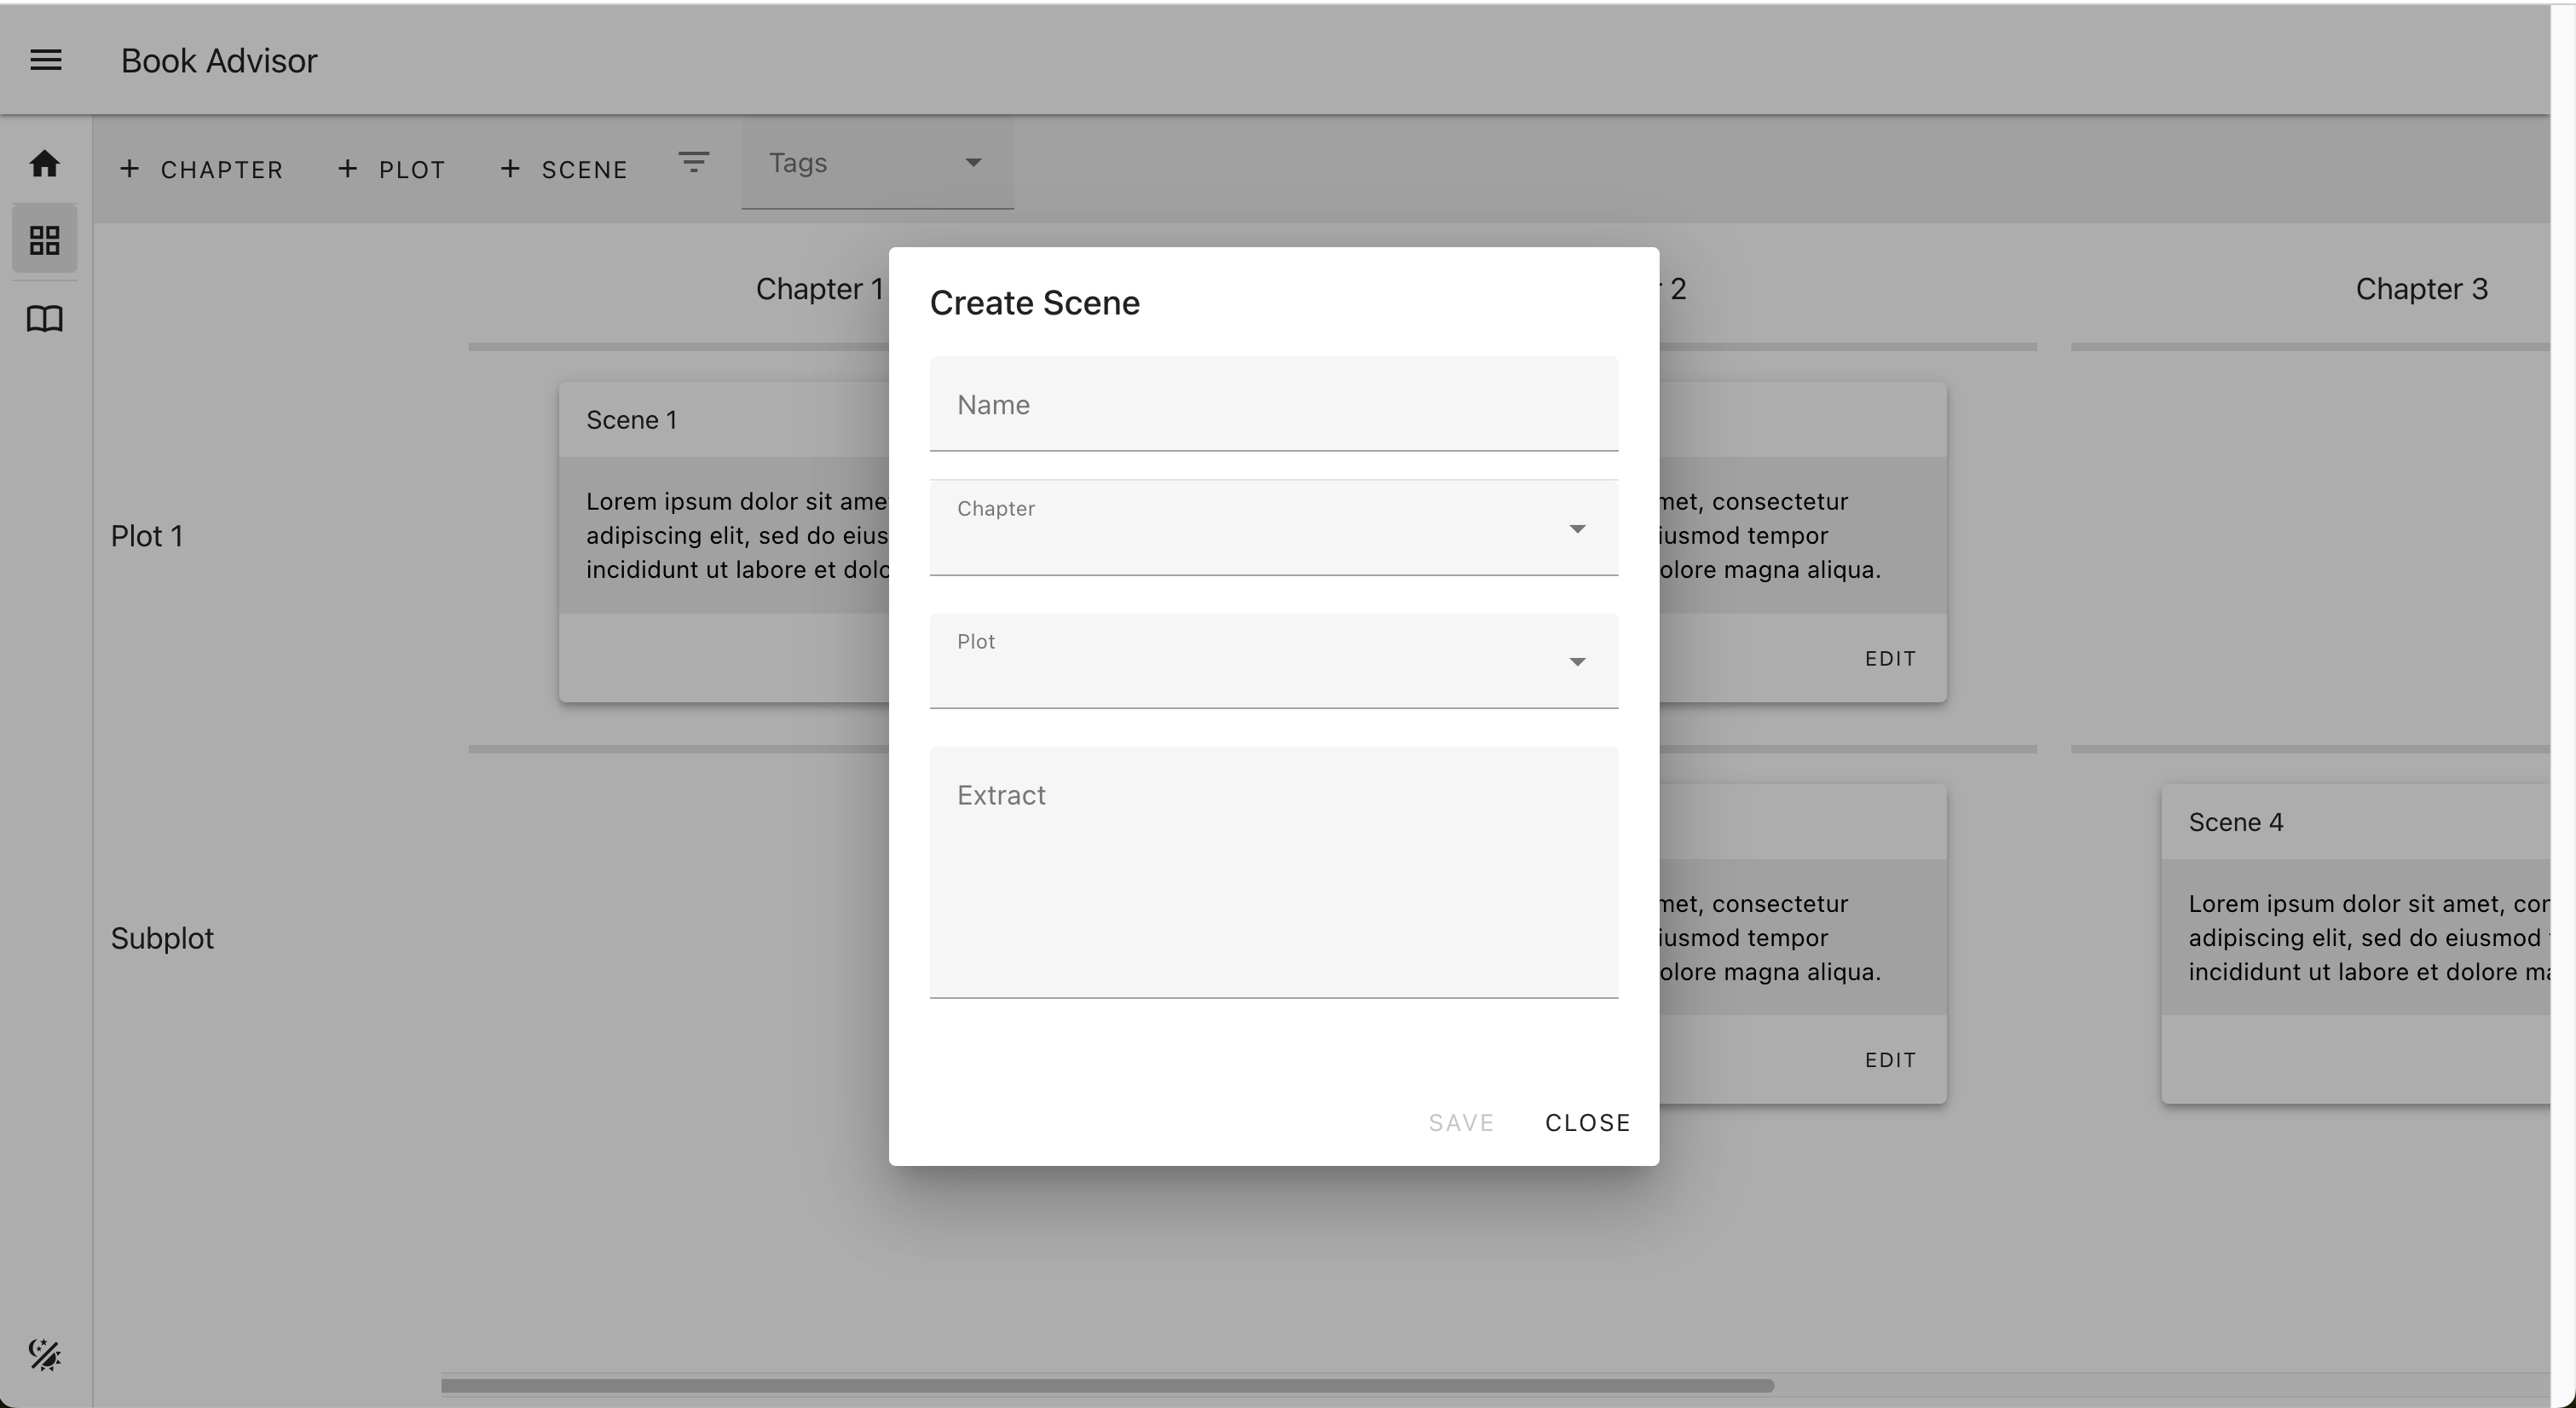
The Create Scene action triggers the creation of a new Scene.
Specify the name and the extract of the Scene, and select the Chapter and the Plot in the Create Scene dialog.
The Filter Scenes dropdown contains the Tags associated with the Project.
Select one or more Tags from the Filter Scene dropdown to filter the Scenes in the Project Map with the scenes that contain all the selected Tags.
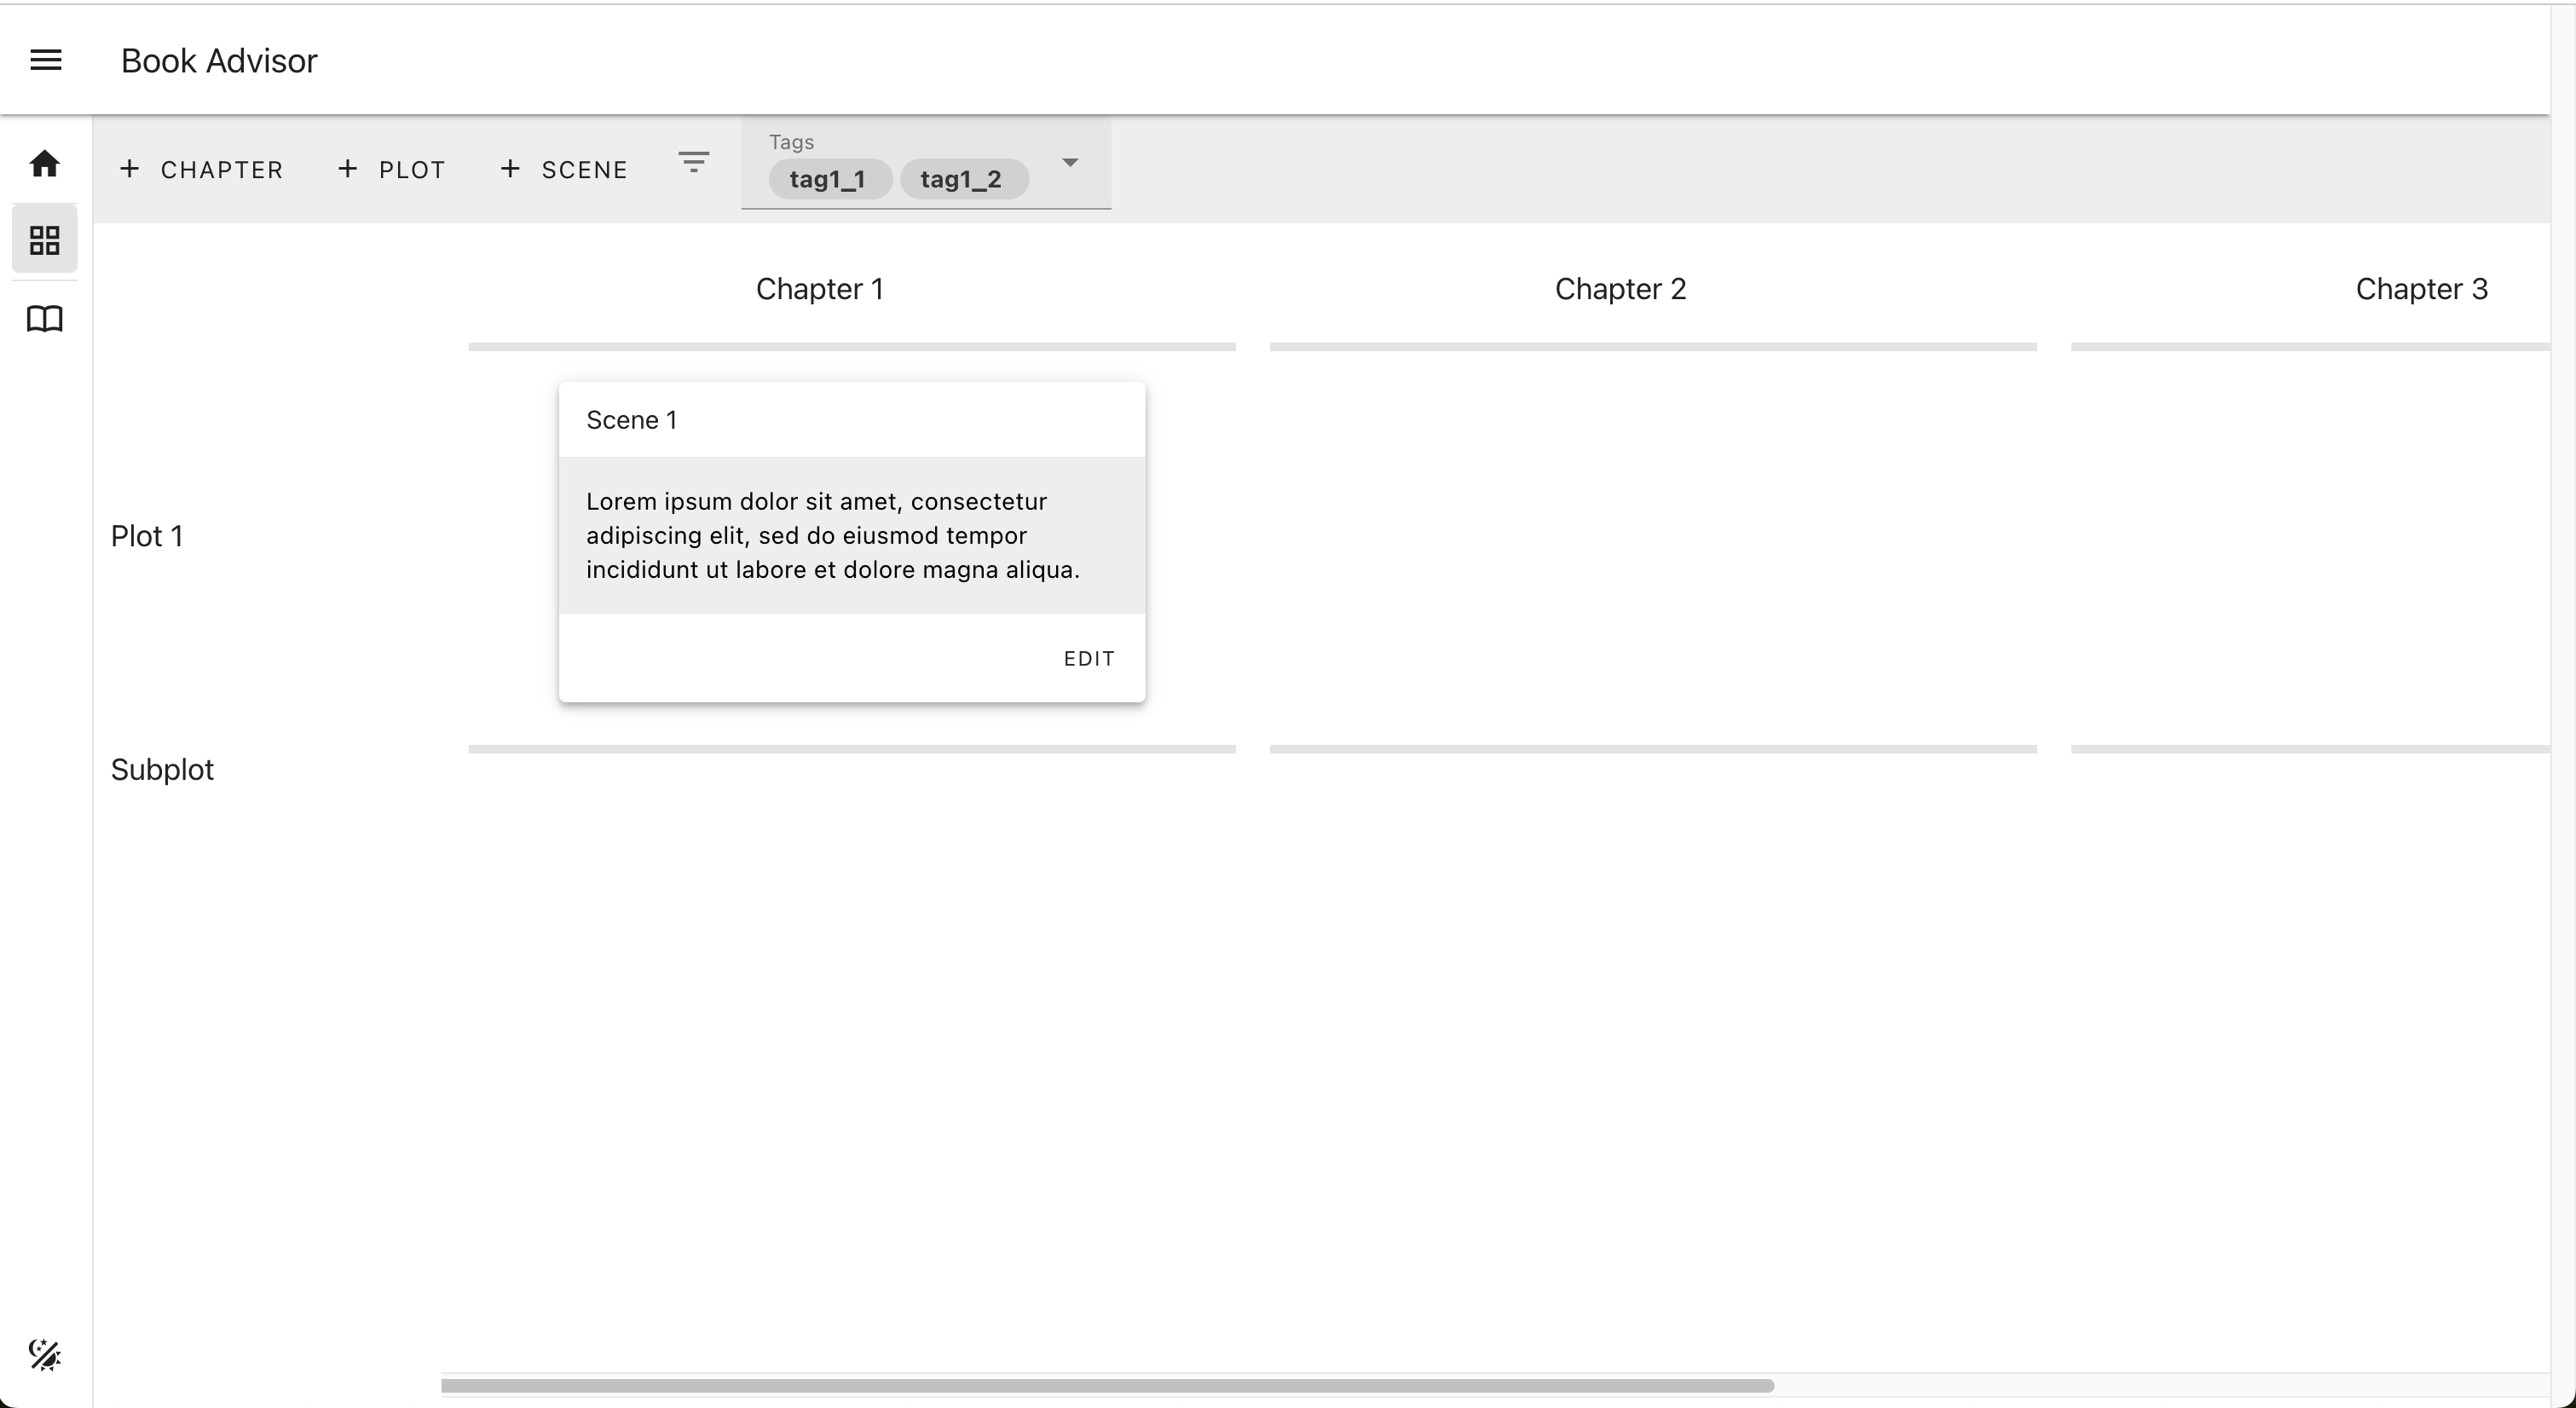
The Project Map contains the structure of the Book scenes in Chapters and Plots. The Chapters are placed in the top header of the Project Map, instead the Plots are placed in the left header of the Project Map.
The Chapters header and the Plots header are aligned with the corresponding Scenes, and they are sticky, so they are always visible during the horizantal and vertical scrolling of the Project Map.
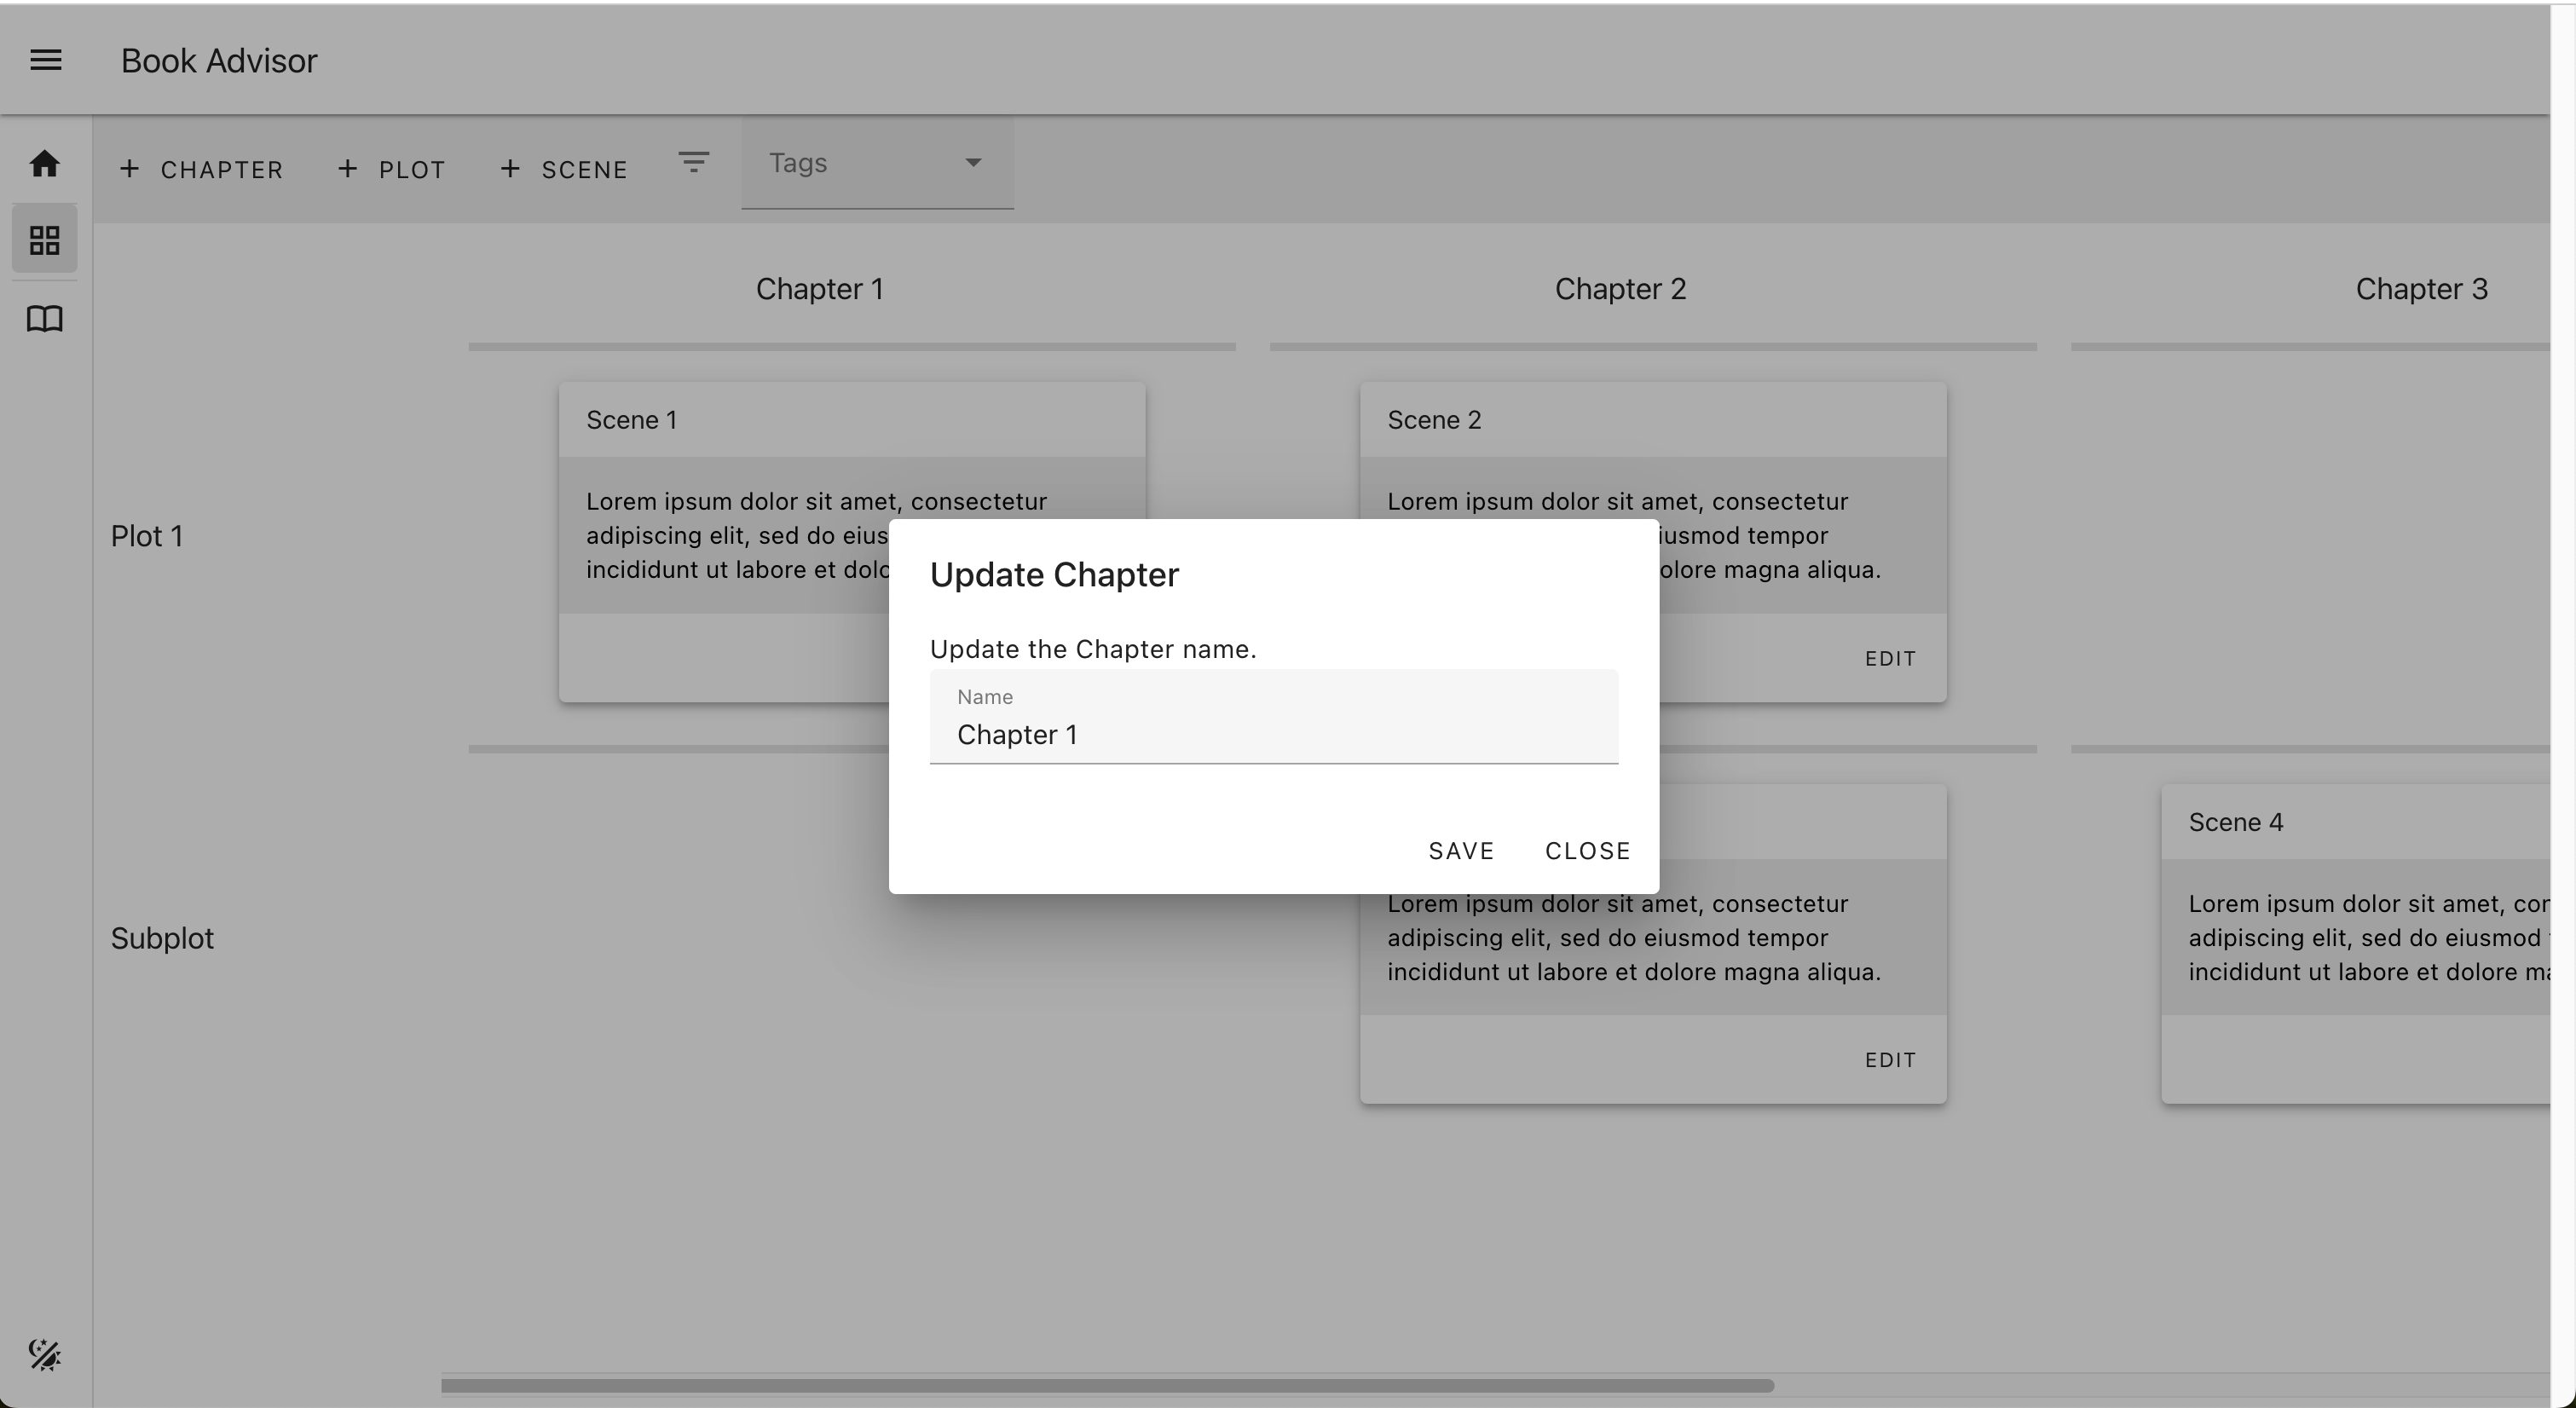
The Update Chapter button appears on the right side of the Chapter name in the Project Map with the mouse hover on the Chapter entry.
From the Update Chapter dialog, specify the name of the Chapter.
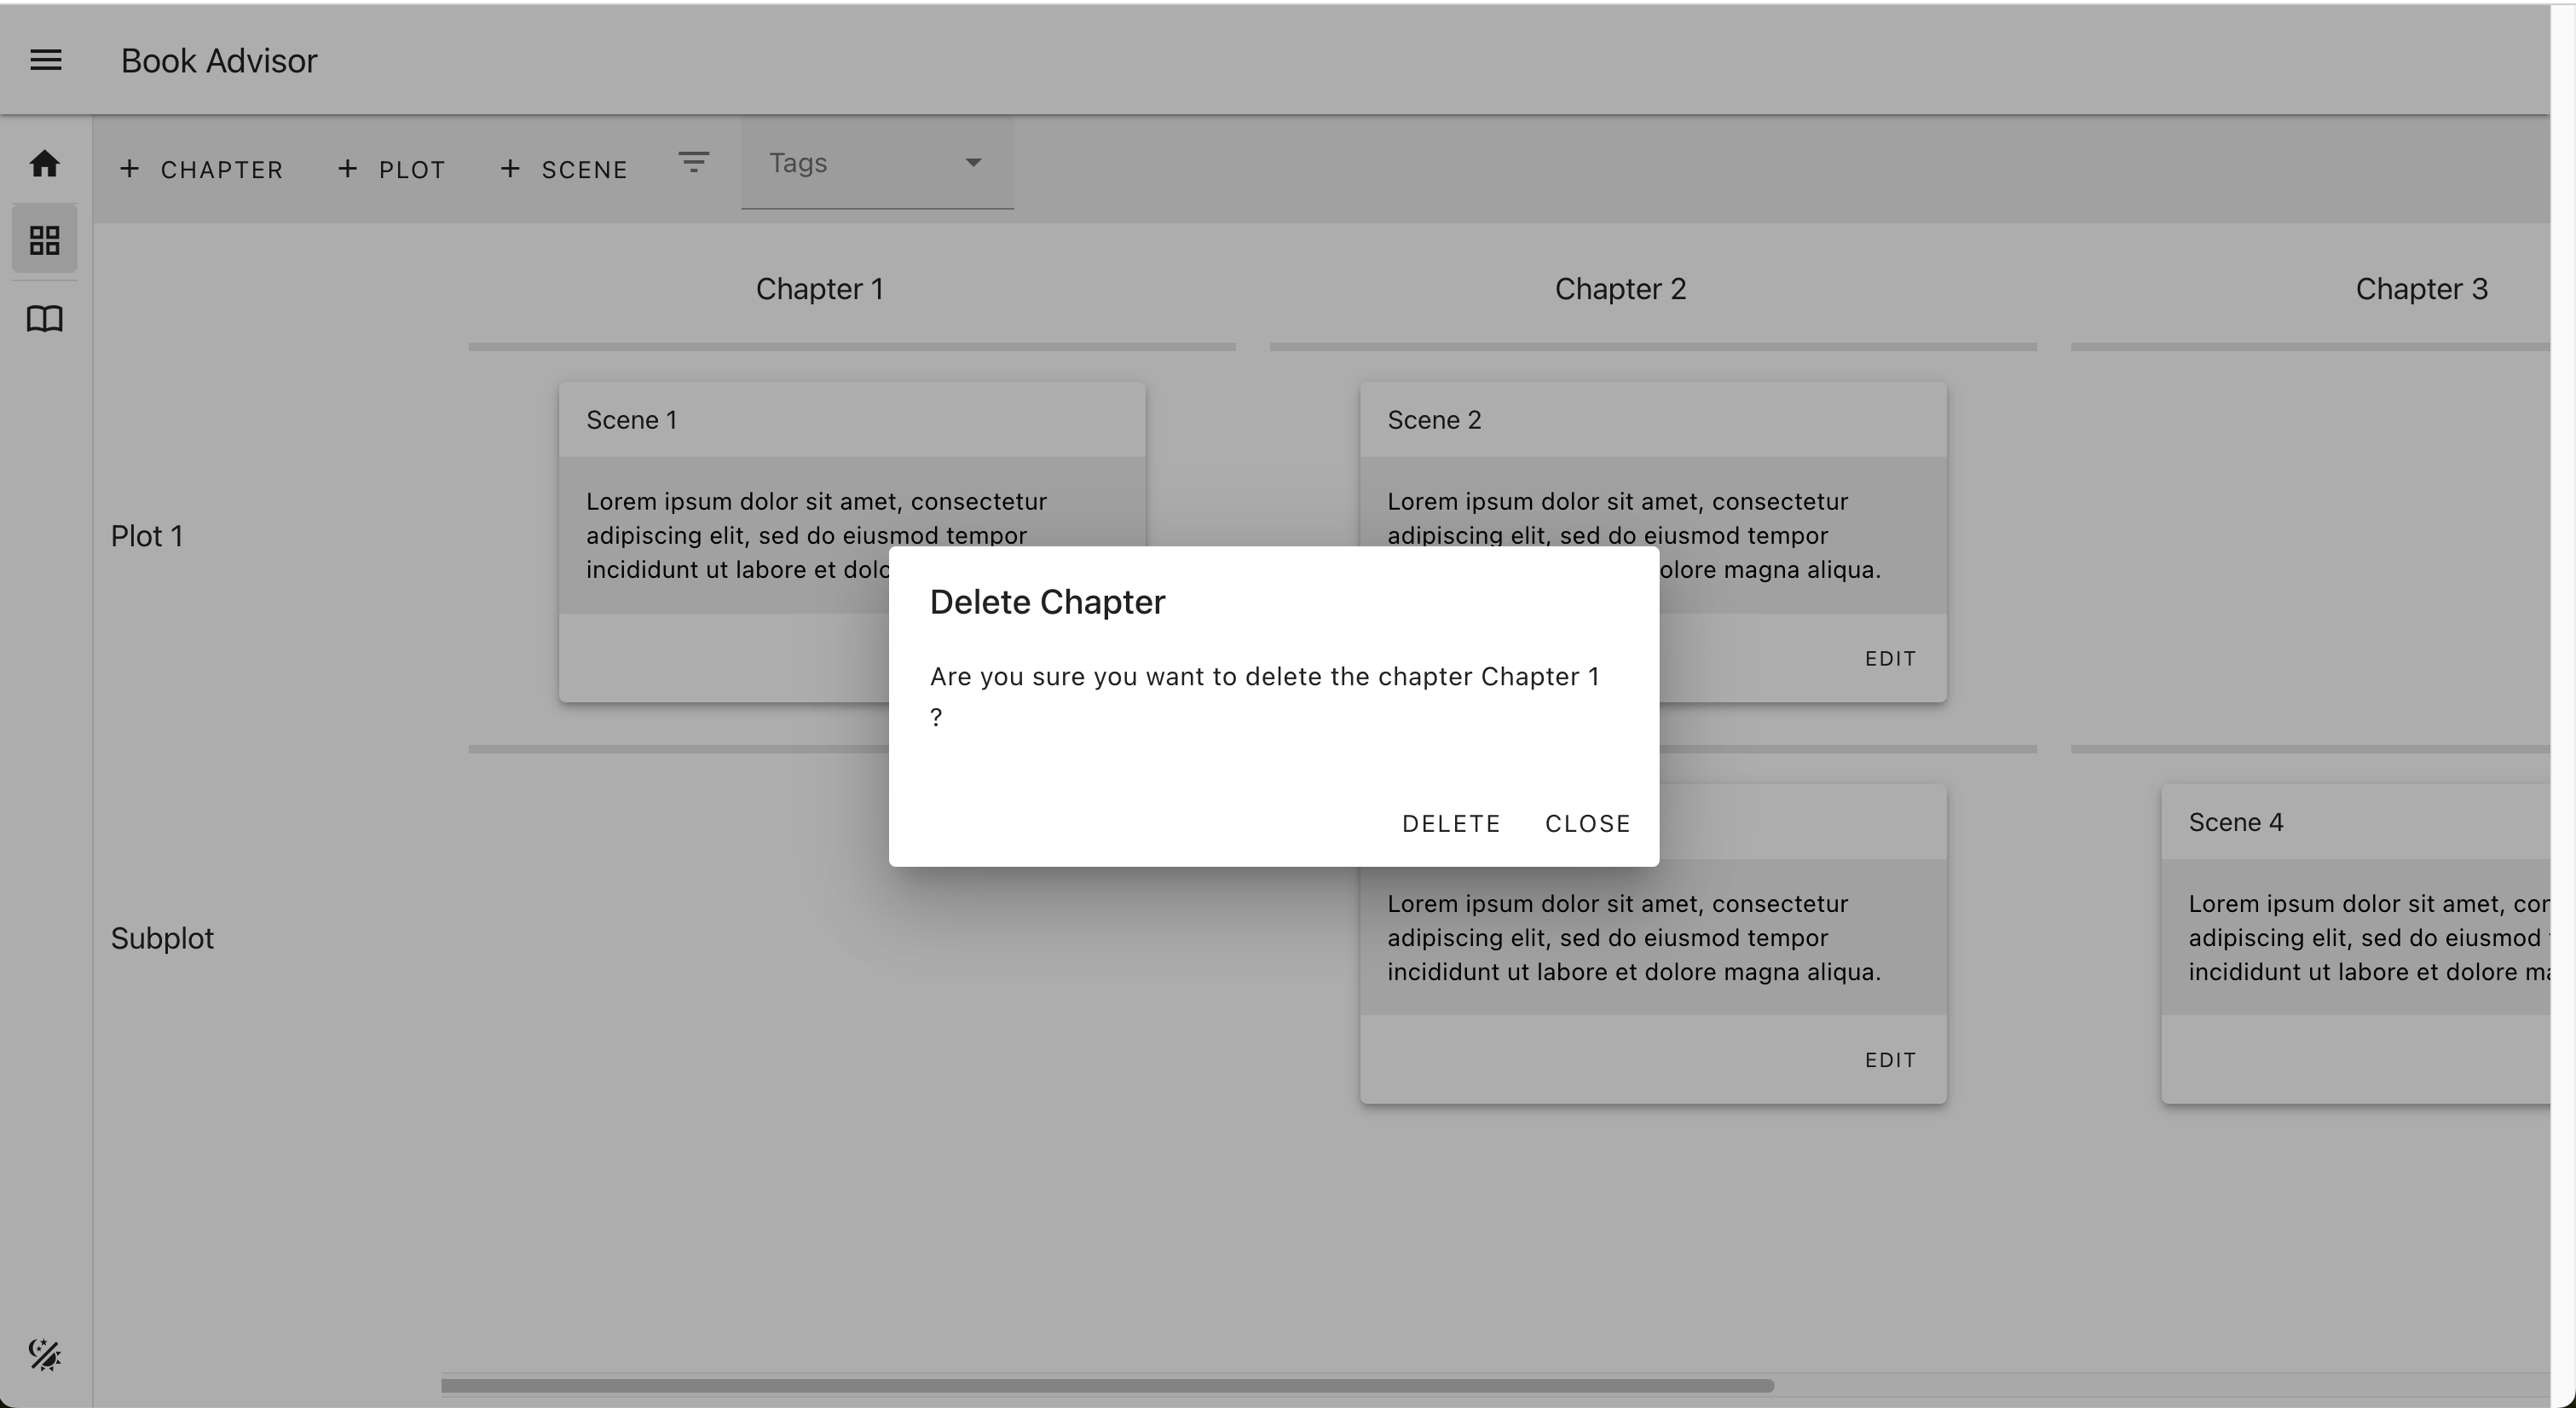
The Delete Chapter button appears on the right side of the Chapter name in the Project Map with the mouse hover on the Chapter entry.
Click on the "Delete" button from the Delete Chapter dialog in order to delete the Chapter.
The Delete Chapter action deletes also the Scenes associated with the Chapter.
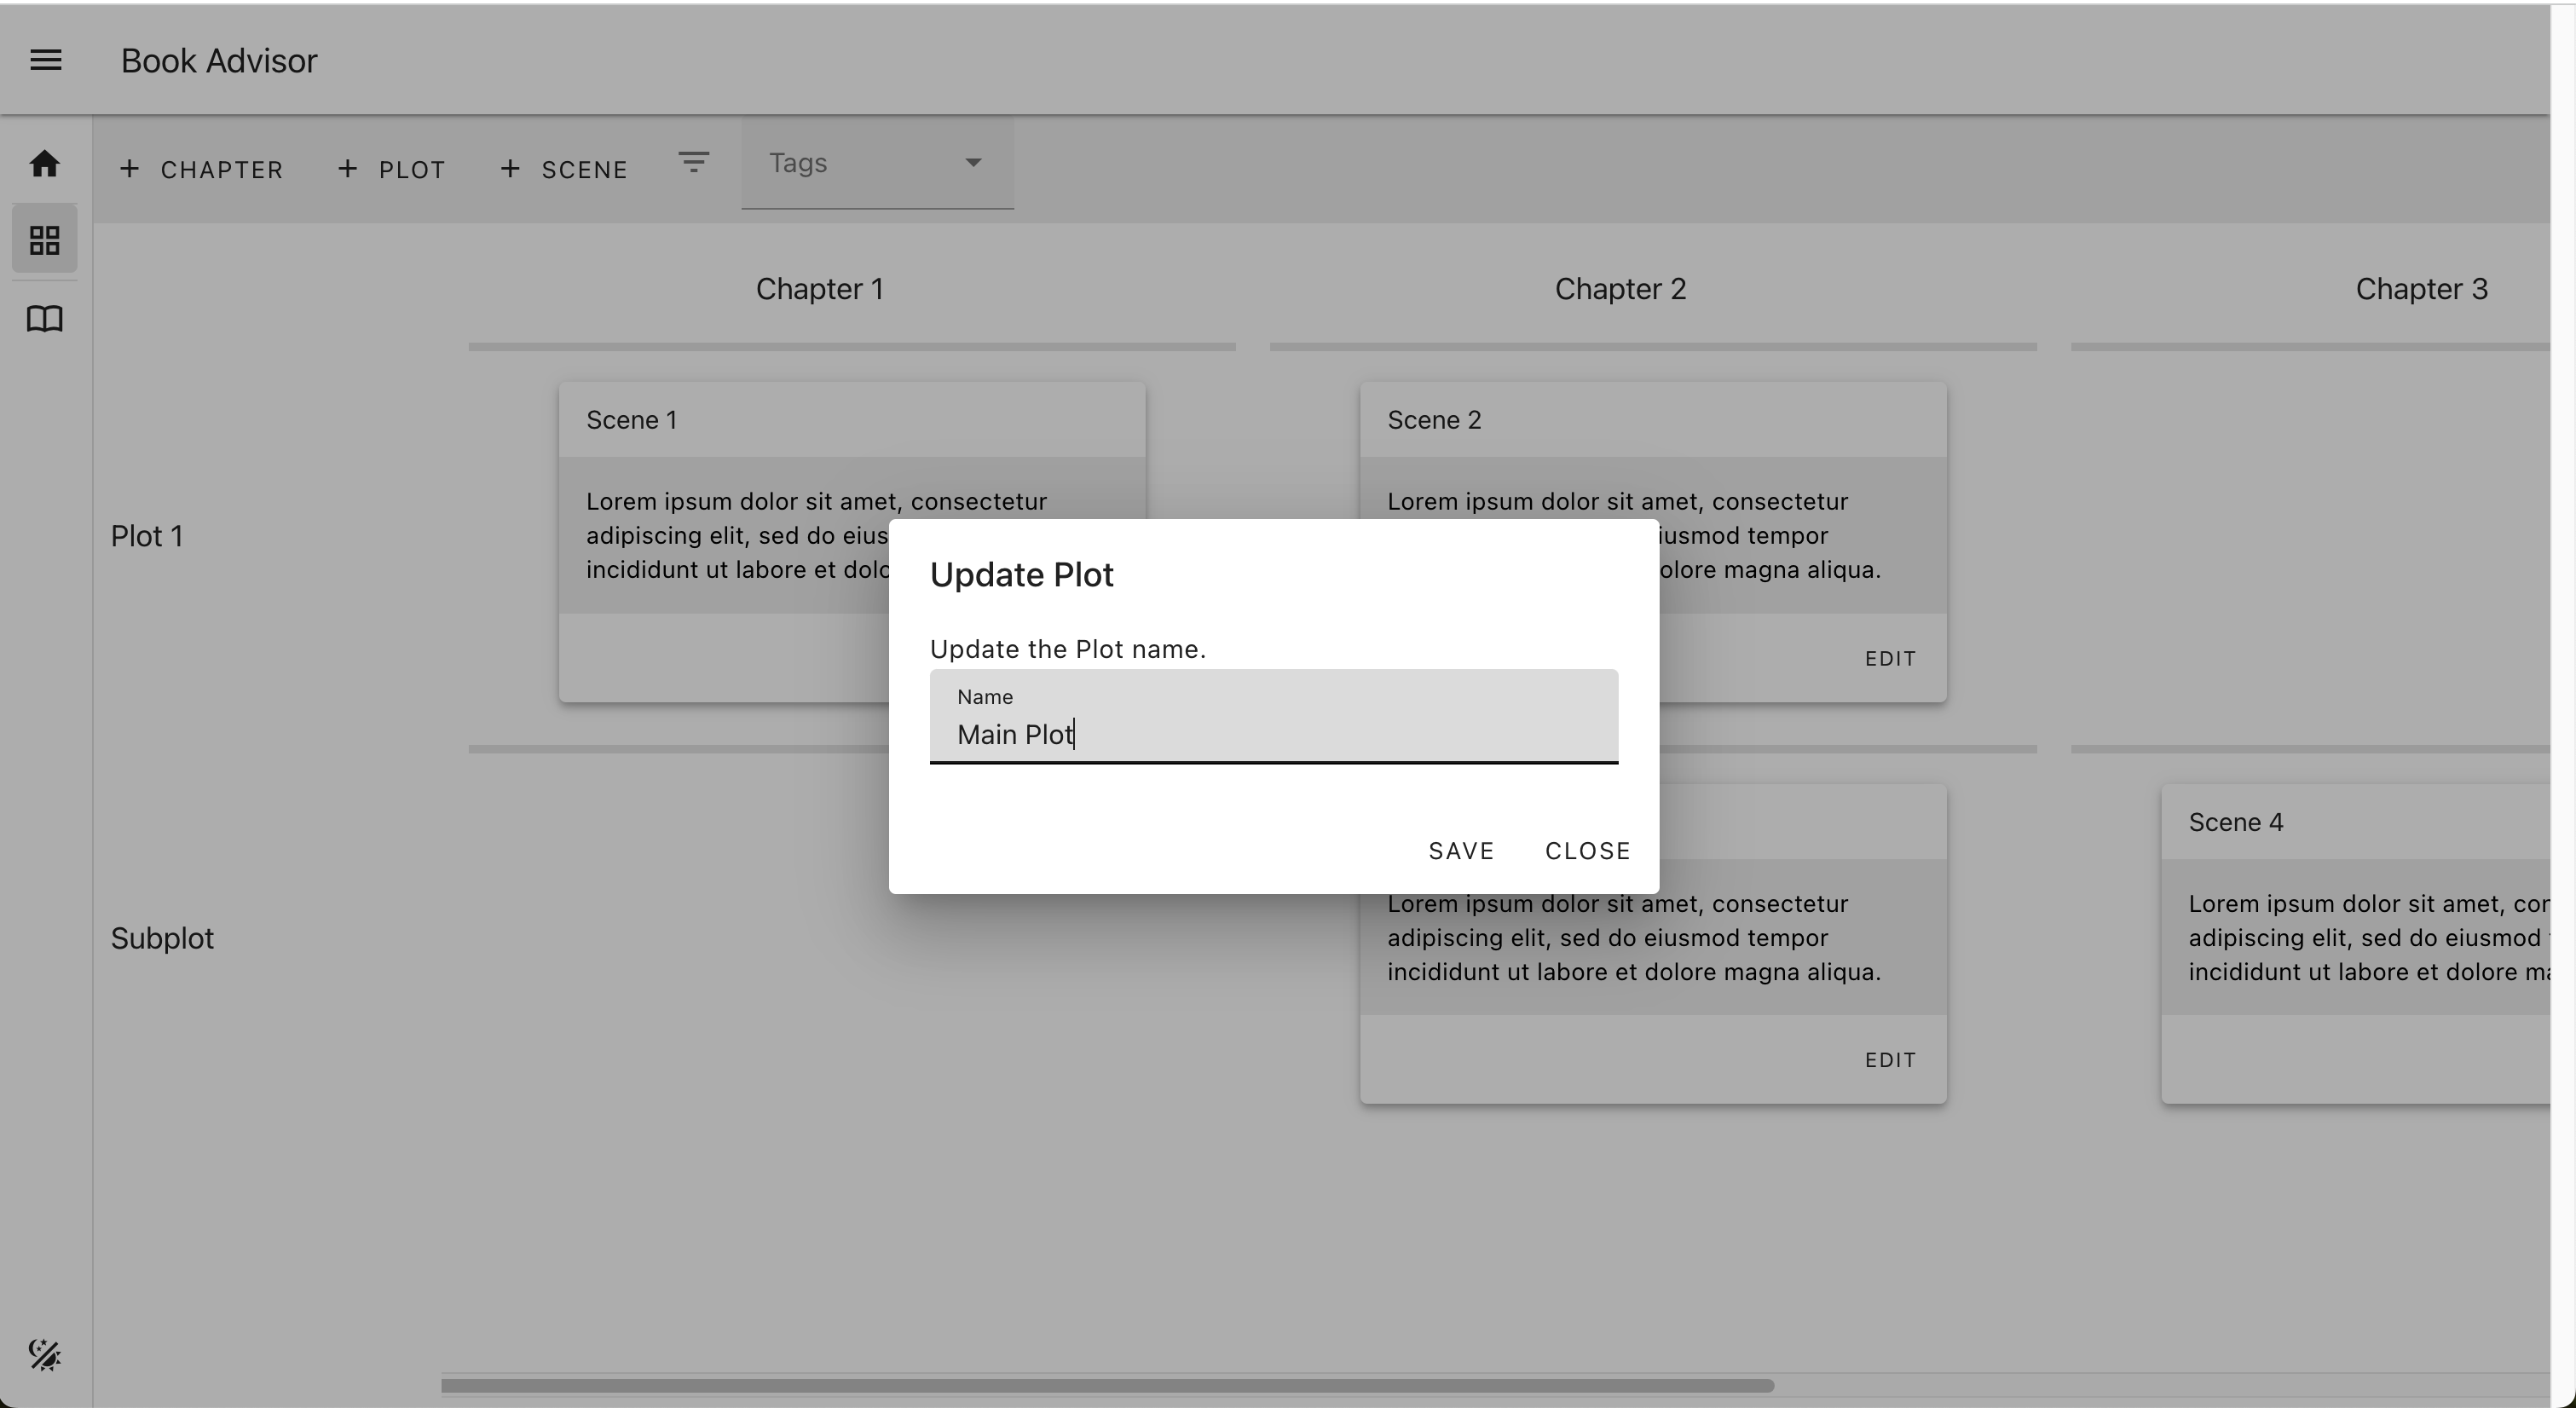
The Update Plot button appears on the right side of the Plot name in the Project Map with the mouse hover on the Plot entry.
From the Update Plot dialog, specify the name of the Plot.
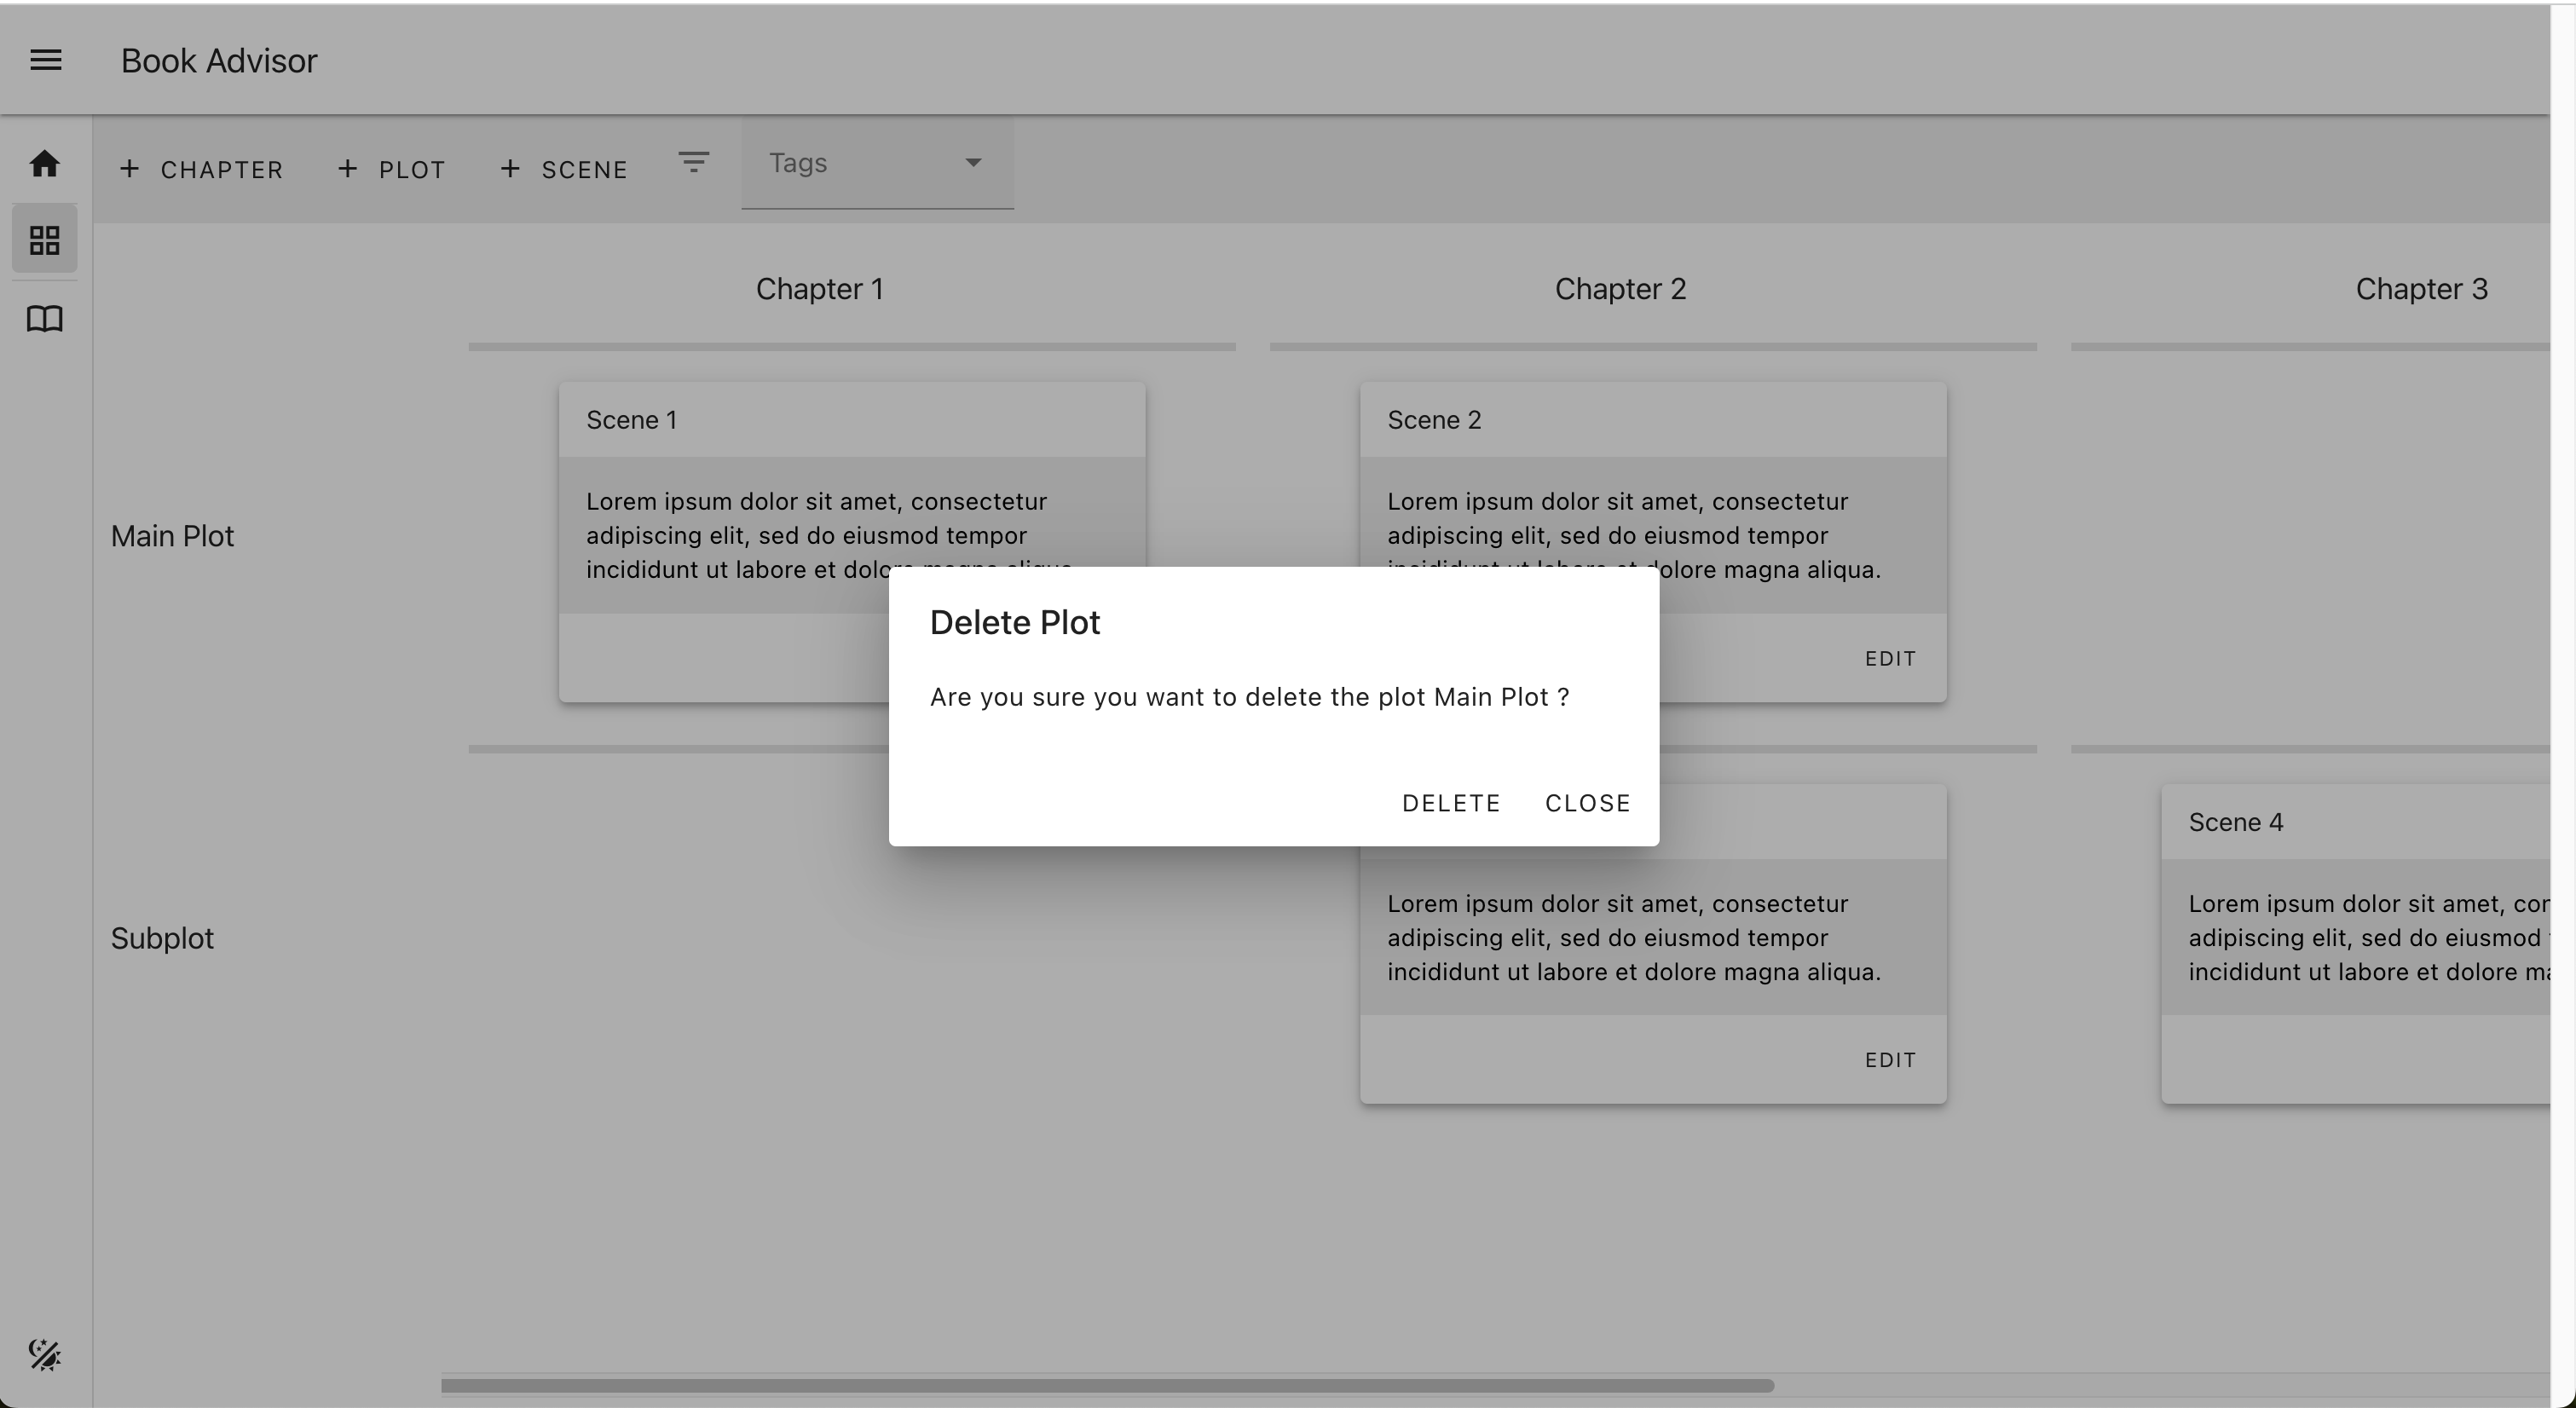
The Delete Plot button appears on the right side of the Plot name in the Project Map with the mouse hover on the Plot entry.
Click on the "Delete" button from the Delete Plot dialog in order to delete the Plot.
The Delete Plot action deletes also the Scenes associated with the Plot.
The Update Scene button appears on the right side of the Scene name in the Project Map with the mouse hover on the Scene entry.
From the Update Scene dialog, specify the name of the Scene.
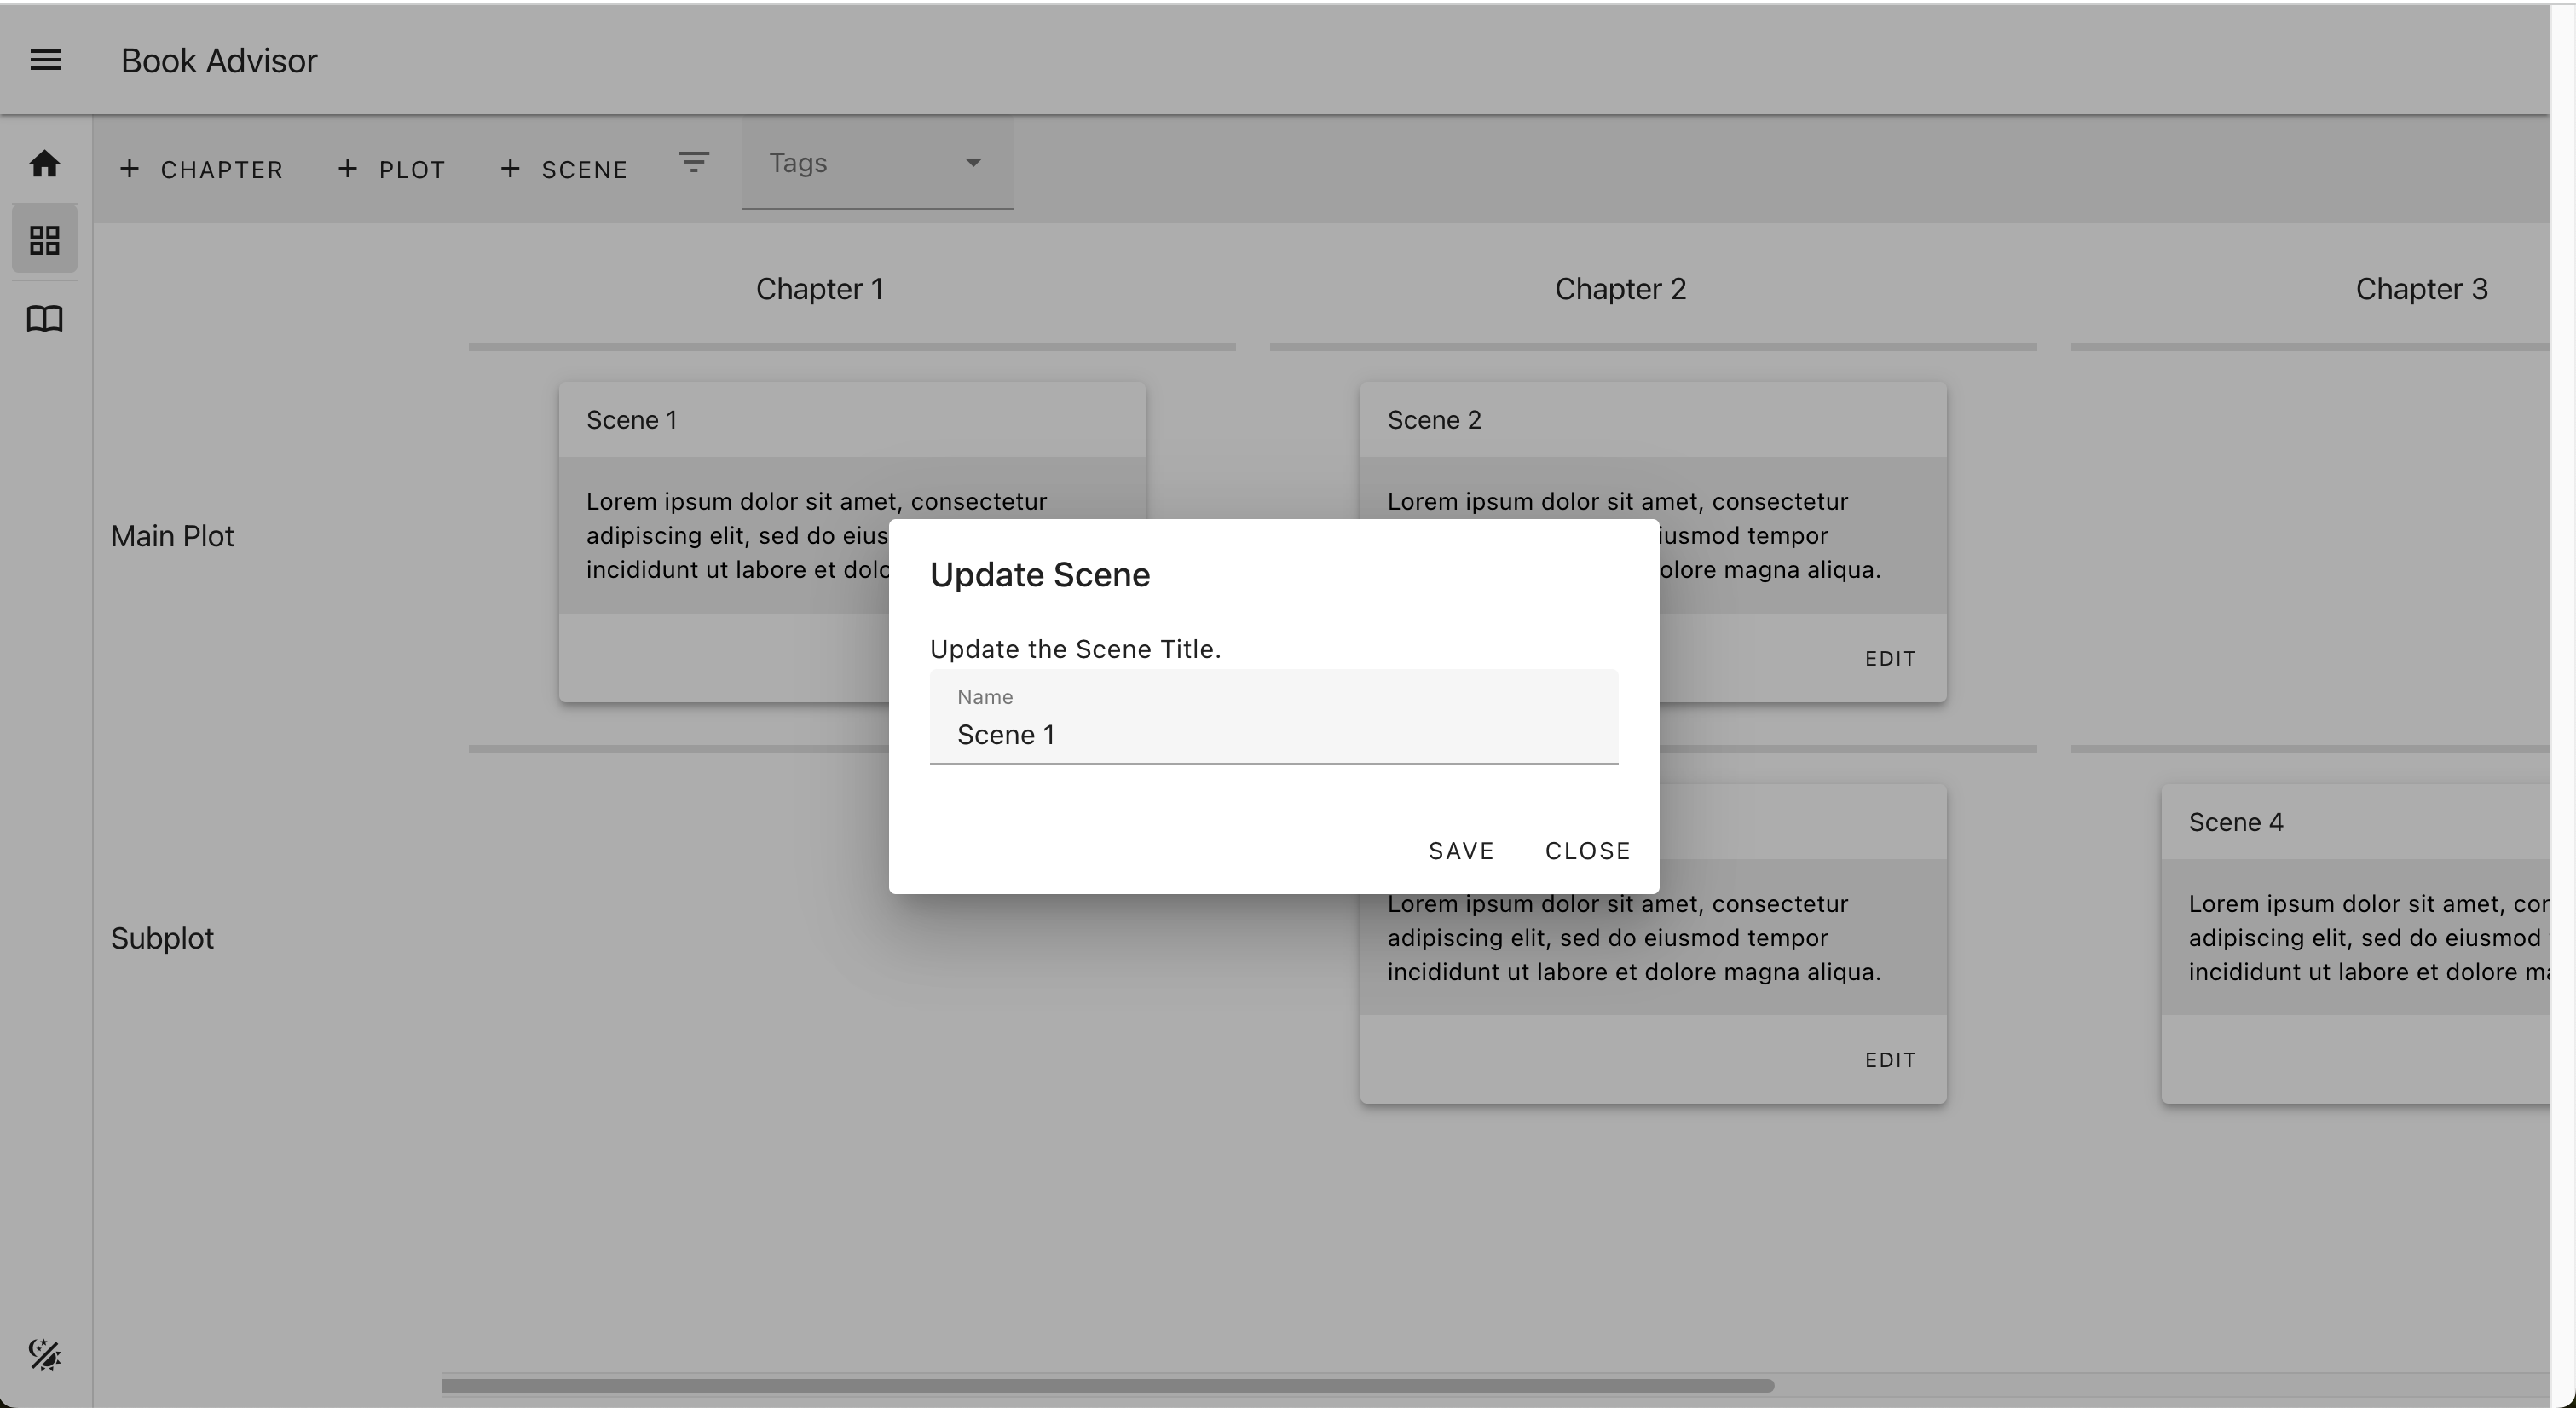
The Delete Scene button appears on the right side of the Scene name in the Project Map with the mouse hover on the Scene entry.
Click on the "Delete" button from the Delete Scene dialog in order to delete the Scene.

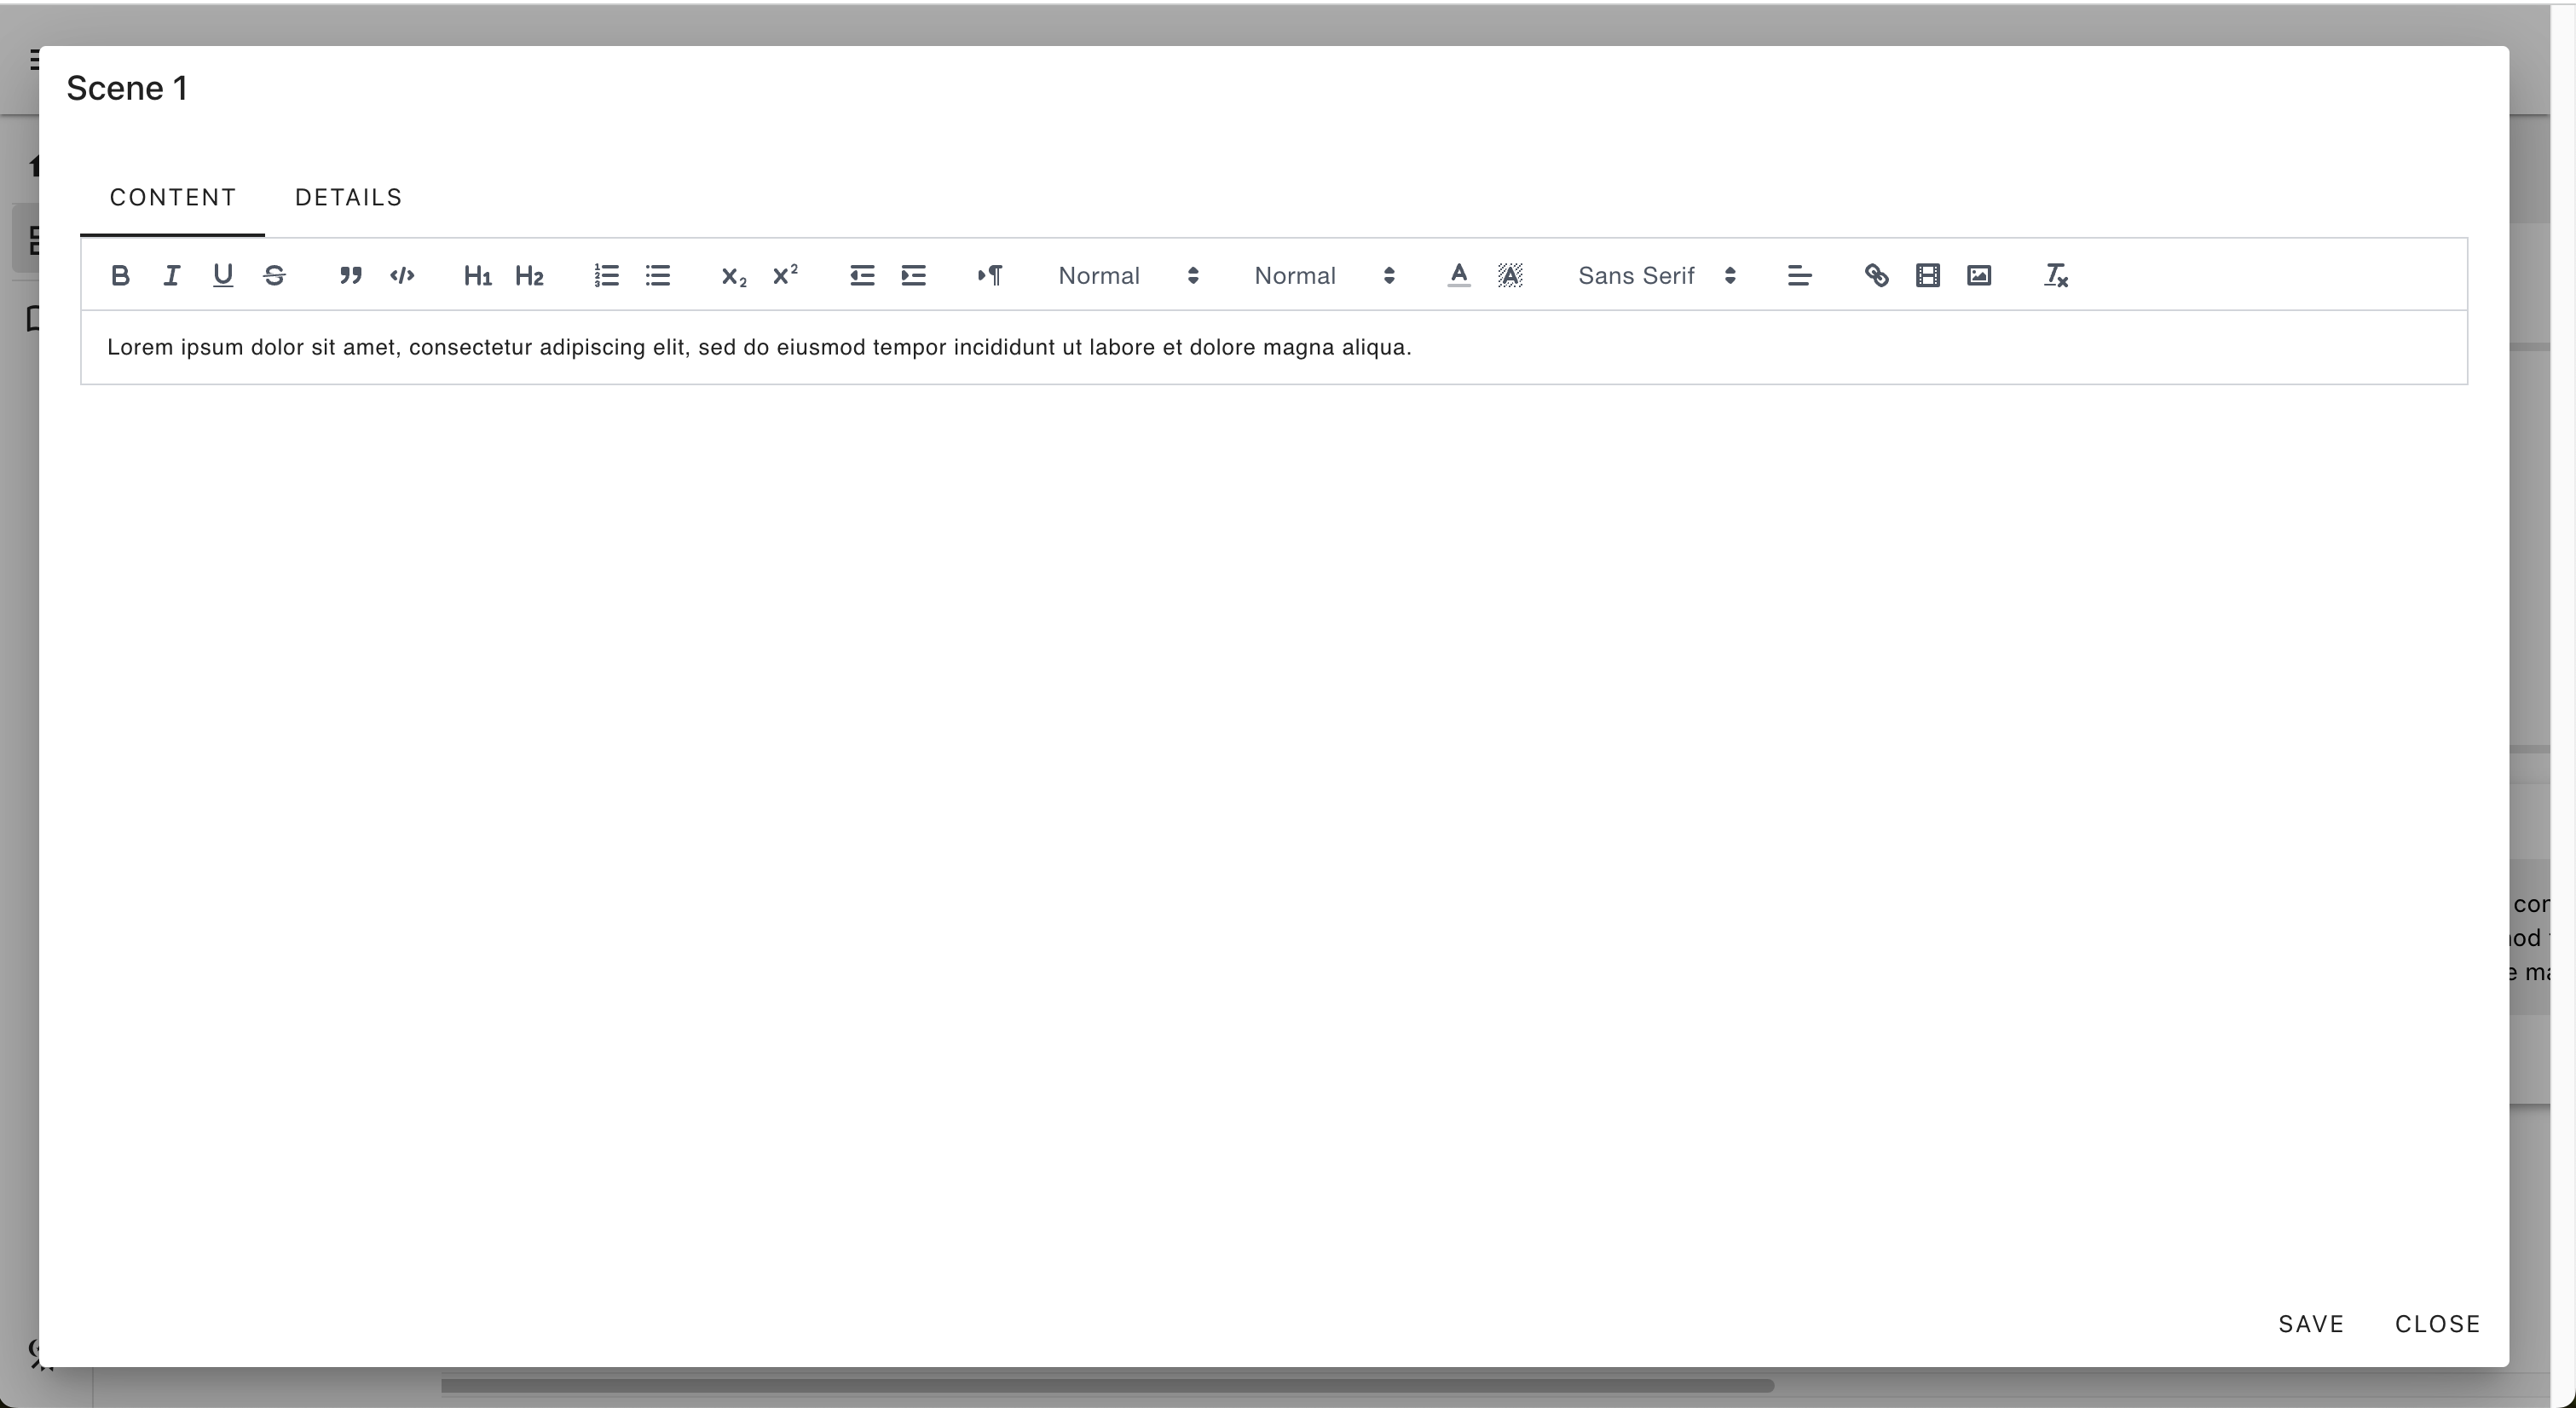
The Edit Scene button is located in the Scene card. The Edit Scene action opens the Edit Scene dialog.
The Content tab of the Edit Scene dialog contains the Scene content.
Edit the content of the Scene from the Editor and click on the "Save" button to save the content.
The Details tab of the Edit Scene dialog contains the Scene details.
From the Details tab, specify the Chapter, the Plot, and the extract of the Scene. The Tags section lists the Tags currently associated with the Scene. The Tags dropdown contains all the Tags associated with the Project. You can add and remove Tags to the Scene from the Tags dropdown. Add the Tags to the Project in order for the Tags to be available on the Scene Tags dropdown.
