Enemies
Enemies are low-poly robotic creatures built from pooled meshes with color-coded identity, chest cores, visors, plating, animated limbs, and LOD transitions. Their base values below are applied before difficulty, wave, mutator, and Easy elite adjustments.
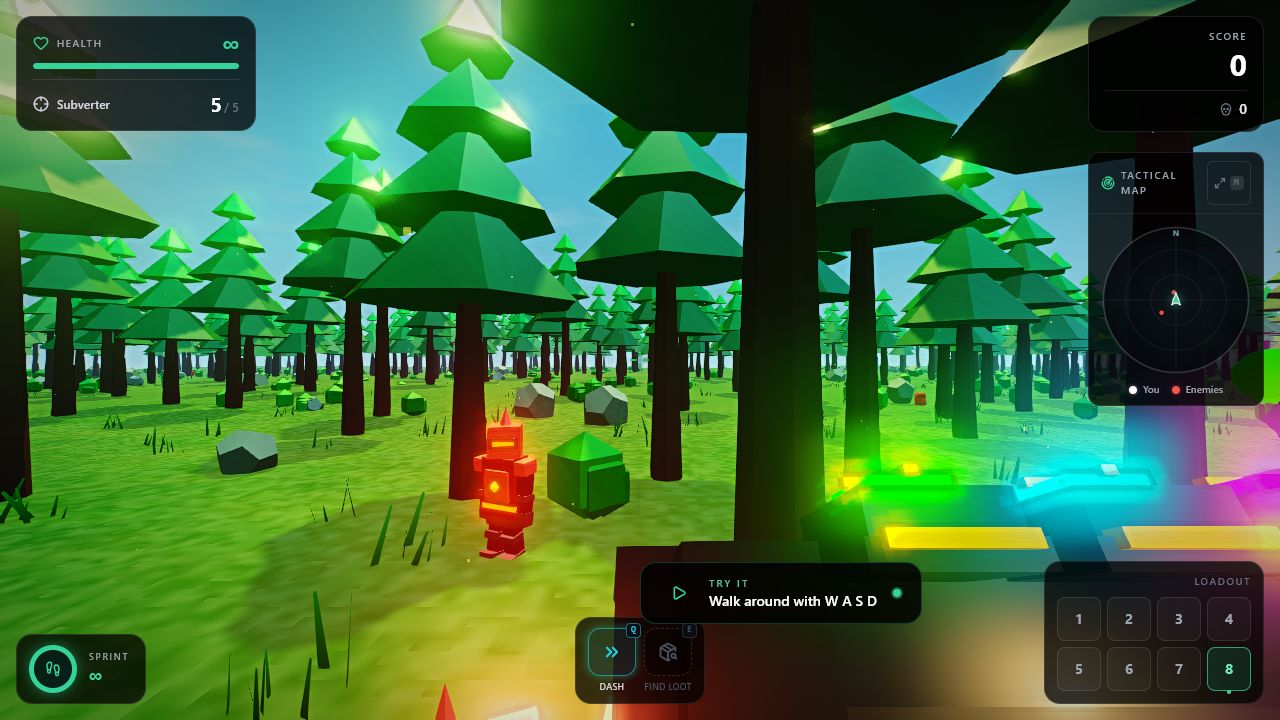
This is the Tutorial mode's initial Normal enemy at close range. The public tutorial unlocks later enemy types only after kills; the roster and per-type behavior below remain implementation-verified rather than inferred from this single capture.
The source-rendered reference below uses the game's pooled enemy manager. It predates the four tactical archetypes and therefore shows the original six types only; the roster table is the authoritative list. It is not a gameplay encounter; it was staged only to make the visual differences between types inspectable, then the temporary showcase was removed.
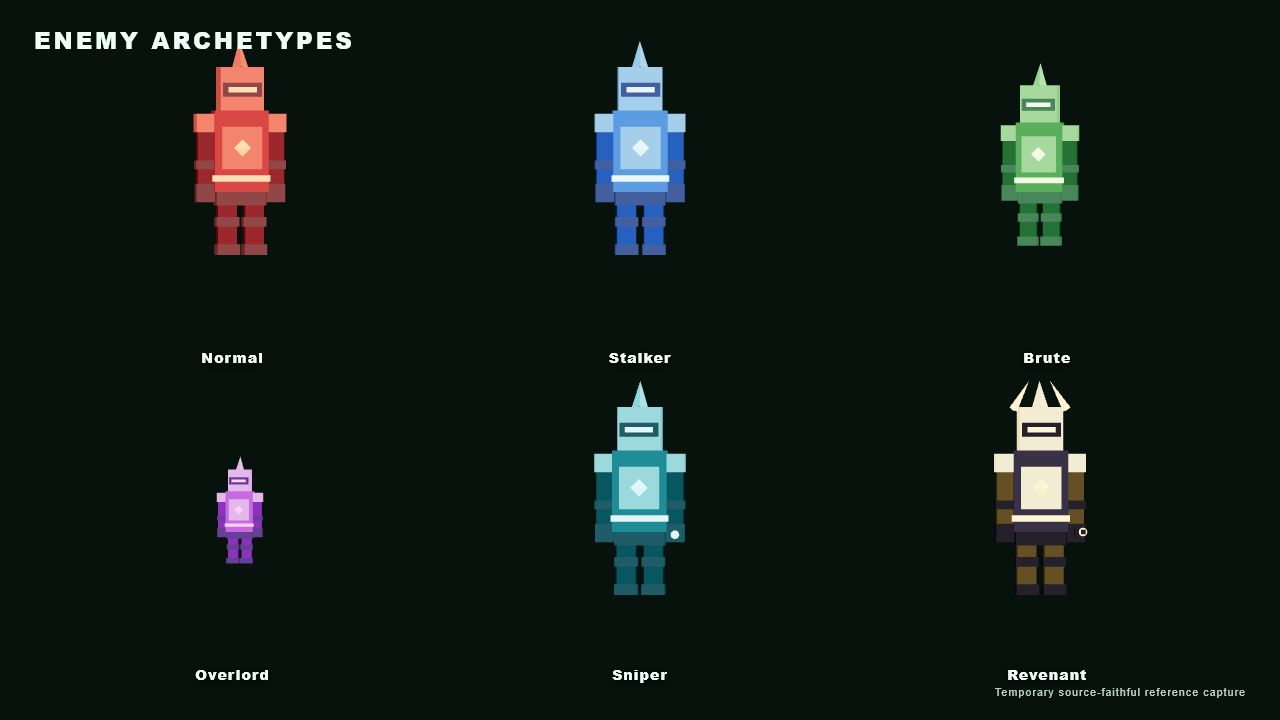
Ten moving archetypes are implemented. The first six are the original roster; the last four are tactical archetypes, added because the original set all resolved to the same behavior — close the distance and melee — so nothing on the field required the player to change position, weapon, or target priority. Each tactical archetype is built around forcing one specific response, and all four are solo-only.
| Type | First normal-wave appearance | Base HP | Base damage | Base speed | Score | Combat behavior |
|---|---|---|---|---|---|---|
| Normal | Wave 1 | 50 | 8 | 0.080 | 10 | Balanced melee pursuer. |
| Fast / Stalker | Wave 2 | 30 | 6 | 0.130 | 15 | Fast tactical flanker that can dodge bullets. |
| Tank / Brute | Wave 3 | 150 | 15 | 0.040 | 30 | Slow, high-health melee threat. |
| Ranged / Sniper | Wave 4 | 40 | 14 per bolt | 0.050 | 28 | Cyan kiter with charged energy bolts. |
| Bulwark | Wave 5 onward, solo only | 120 | 18 | 0.045 | 55 | Slate-and-cyan shield bearer; near-immune from the front. |
| Boss / Overlord | Difficulty-scaled boss era | 900 | 25 | 0.050 | 100 | Summons reinforcements, blinks, phases at 50% HP, resists hacking, and caps incoming bullet damage. |
| Revenant | Wave 6 onward, solo only | 46 | 16 per gold bolt | 0.105 | 65 | Shielded trickster that shoots, blinks, regains health, and can melee. |
| Leaper | Wave 7 onward, solo only | 42 | 10 melee / 22 pounce | 0.115 | 45 | Hot-orange ambusher; telegraphed pounce that clears cover. |
| Howler | Wave 9 onward, solo only | 55 | 5 | 0.070 | 60 | Violet support caster; shields nearby allies and barely fights. |
| Splitter | Wave 11 onward, solo only | 95 | 11 | 0.050 | 50 | Bloated green host; bursts into three runners on death. |
Normal enemy UI text may call the basic target “Forest Creature”; tutorial introductions use Stalker, Brute, and Warden labels. The gameplay type names in this page follow the implementation.
Each of the four forces a different response. All are solo-only, spawn on a difficulty-independent wave ladder so their lessons arrive one at a time, are capped at a small number alive, and announce themselves once through the same “New Threat” intro banner the other archetypes use.
| Archetype | Forces | Mechanic |
|---|---|---|
| Bulwark | Repositioning | A frontal energy shield absorbs all but 12% of any bullet landing within roughly ±60° of its facing. Flank or rear shots land in full. Its body turn rate is deliberately about a quarter of a normal enemy's, so circling it is an achievable answer rather than a race it always wins. |
| Howler | Target priority | Never meaningfully attacks. Every 2.6 s it pulses an overshield onto every non-Howler ally within 9 units, granting up to 30 points of damage absorption that lingers 4 s without a refresh. Shielded allies wear a violet marker ring. Left alone, the swarm stops dying. |
| Leaper | Reaction timing | Crouches for a 0.62 s telegraph with a loud positional cue, then springs on a ballistic arc that clears cover, dealing 22 impact damage and rooting the player for 0.55 s if they are still in the landing zone. It is wide open for 0.9 s after landing. |
| Splitter | Weapon and spacing choice | On death it bursts into three Fast children at roughly 45% health. Children cannot split, so a burst can never cascade. Killing one at point-blank range is a mistake; killing it at range, ideally with splash, is not. |
The Howler is the one archetype exempted from the normal LOD damage gate. Because it deliberately holds position at the back of the pack, on low graphics presets it would otherwise sit permanently outside the high-detail band and be literally unkillable.
Every archetype spawn path — including a Splitter's death burst and a Boss summon — passes through the shared concurrent-enemy cap, which ranges from 10 on Ultra-Low to 40 on Ultra. A burst that would exceed the cap is truncated rather than starving the wave's own budget.
- Health receives
1 + 0.15 × wave, then difficulty and run-modifier health multipliers. - Damage receives a 2% per-wave ramp, capped after wave 40, then difficulty and modifier multipliers.
- Speed receives a 0.6% per-wave ramp, capped after wave 40.
- Snipers roll from wave 4 at 14% on Easy/Medium or 20% on Hard/Adaptive, plus a small wave-scaled bump.
- Tanks roll from wave 3 and Fast enemies from wave 2; harder difficulties give both higher chances.
- The Revenant has a 40% per-wave chance from wave 6 in solo, spawning one and sometimes two while capped at two alive. It never spawns in multiplayer.
- Tactical archetypes roll once per wave in solo on a fixed ladder: Bulwark from wave 5 at 50% (max 2 alive), Leaper from wave 7 at 45% (max 3), Howler from wave 9 at 40% (max 2), and Splitter from wave 11 at 40% (max 2).
Melee archetypes use wind-up, strike, and recovery phases. Base attack configurations are intentionally forgiving: Normal attacks reach 4.5 units with a 900 ms cooldown; Fast attacks reach 4.5 with a 1,050 ms cooldown and can move during the swing; Tanks reach 5.0 with a 1,200 ms cooldown; Bosses reach 5.5 with a 1,000 ms cooldown and a very wide arc. An emergency overlap check prevents enemies clipping harmlessly through the player.
Snipers kite at standoff range and only charge a bolt with line of sight between 6 and 50 units. A charge takes 750 ms; bolts then fire on a 2,400 ms cooldown. Trees and other collision props can break line of sight. Snipers do not use the normal melee path.
Before the boss era, every fifth wave adds a Crowned Elite Tank. It has four times its otherwise-scaled health, a yellow crown visual, and a three-times score payout. It is an elite Tank rather than a separate enemy type.
Bosses enter at wave 5 on Hard, 7 on Medium, 8 on Adaptive, and 10 on Easy. From that point one is seeded every second wave, plus a second boss on every fifth wave, and every wave once wave 20 is reached. Appearing on literally every wave made the apex threat stop reading as an event by roughly wave 8.
| Behavior | Confirmed details |
|---|---|
| Base health | 900 before wave, difficulty, and modifier scaling. |
| Per-hit damage cap | A single bullet can never remove more than 14% of the boss's maximum health, so it always takes at least eight well-placed rounds. Explosives, the nuke, and ability bursts are uncapped. |
| Enrage | At 50% health, phase 2 adds 35% speed and 30% damage. |
| Summon | After an 0.85 s telegraph, calls mostly Normal and Fast minions with a 12% Sniper chance. Base packs are 3–4; phase 2 makes them larger and more frequent. |
| Blink | Repositions around the player at a 9–16 unit fairness distance; available charge count and cadence are difficulty-scaled. |
| Hacking | Immune to direct Subverter chips, hacked-enemy attacks, and hacked EMP damage. |
| Arrival cue | A low synthesized roar plays shortly after the boss is seeded, deliberately non-positional so it announces arrival before the player can locate it. |
| Easy tuning | Boss health is multiplied by 0.7 and damage by 0.55 before the rest of normal scaling. |
Player damage is fully multiplicative — Heavy Hitter, Skull Splitter, the damage perks, Glass Cannon, and the ×2 headshot all stack — so it grows far faster over a run than any flat health figure can follow. Tuning health alone leaves the boss either unkillable early or a one-shot late. The per-hit cap makes the fight take a comparable number of hits at every point in a run, which is what keeps it an encounter rather than a stat check. Over-penetrating rounds cannot bypass it: a piercing bullet already records the bodies it has passed through and never re-hits one.
The solo-only Revenant is the apex trickster. It arrives shielded, fires gold bolts from 6–48 units, and can still melee at close range. Its shield cycles between protected and vulnerable windows; normal energy, cryo, shockwave, and Tesla attacks ping off the shield. Explosives—rockets, barrels, and nukes—shatter it and create a vulnerable window.
The Revenant can blink using charge-limited teleport behavior and may restore 15% of maximum health when not recently damaged (7% on Easy). A Subverted enemy may target it indirectly, suppressing its shield and blink behavior long enough to finish it.
Sentinels are separate environmental turrets, not a member of the ten moving enemy archetypes.
| Property | Value |
|---|---|
| Health | 80 |
| Hit radius | 0.95 |
| Damage | 18 |
| Effective range | 55 units |
| Charge telegraph | 1.1 s |
| Cooldown | 1.8 s |
| Reward | 150 score before score multipliers |
They are absent in Tutorial and Easy. Medium spawns two, Adaptive three, and Hard four. Sentinel beams require line of sight; terrain can block them. The turret head brightens while charging.
Enemies use high/medium/low LOD at 45/70/100 units and are only damageable at high-detail range, with the Howler explicitly exempted. Death can detach a critical-hit head, trigger particles and explosions, and use Rapier ragdolls in solo if enabled and loaded. Multiplayer corpses use the lightweight fallback.
Enemies now vocalize: a mechanical alert, a wind-up growl on every melee swing, and a pitch-collapsing death cry, all played positionally so a swing behind the player is audible as such. Pitch tracks chassis mass, so a Tank and a Stalker are distinguishable by ear. See Audio.
Enemies also take damage from environmental hazard pools on the same terms the player does, which makes kiting a pack through lava or sludge a genuine play. See World.
Practical counters include cover against Snipers and Sentinels, explosives against the Revenant shield, barrel chains against clustered enemies, flanking against the Bulwark, focusing the Howler before its dependents, dodging on the Leaper's crouch tell, killing Splitters at range, and the Subverter against non-boss/non-Revenant targets.
Implementation references: src/App.tsx, src/types/game.ts, src/utils/SmartEnemyManager.ts, src/utils/EnemyArchetypes.ts, src/utils/RangedSentinelSystem.ts, src/utils/AttackSystem.ts.