Features and Configuration
This page documents every player-facing feature and menu item in Andy's Salvage Table, in the order a player meets them. For the admin/operator menu and server console commands, see the Admin and Operator Guide. For what the table will and will not accept, see What Can Be Salvaged. For farms, see Automation and Farms.
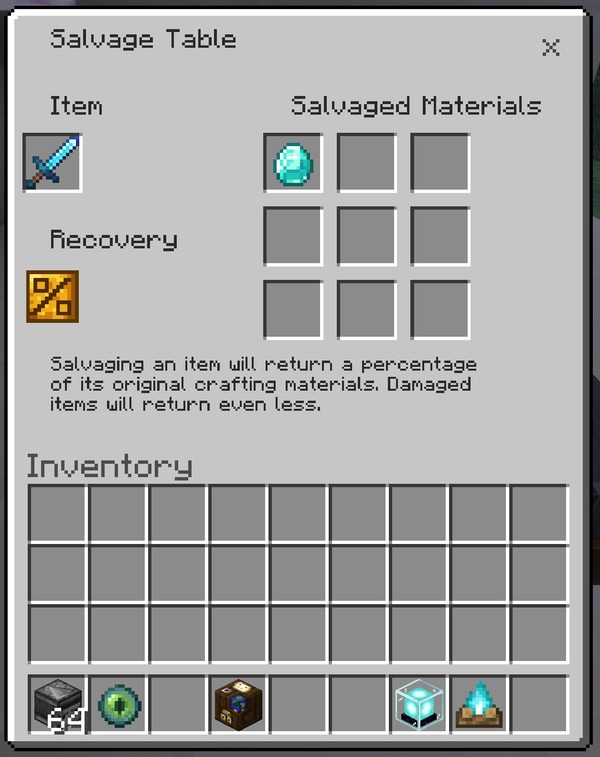
What it does: One Item slot, a 3×3 Salvaged Materials grid, and a gold Recovery % icon. Put a crafted item in the Item slot and the grid fills with exactly what you would receive.
Why and when to use it: This is the whole add-on for most players. Old tools, a chest of stairs you cut wrong, a stack of crafting tables from an abandoned build — anything crafted goes back to something useful instead of being thrown away.
Where to use it: Anywhere you can place the block, in any dimension.
How to use it:
- Use the table to open it.
- Place a crafted item in the Item slot. Shift-clicking an item in your inventory sends it there.
- Read the grid — those stacks are exactly what you get, at the counts shown.
- Take any one of them. The item is consumed once and the whole result is paid into your inventory.
Suggested starting settings: None needed; the screen has no settings of its own.
Edge cases and limits: Nothing is consumed until you take a material, so you can put an item in, read what it would give you, and take it straight back out with nothing lost. If the whole result will not fit in your inventory, nothing is salvaged and a message says so. The materials in the grid are a preview — taking one does not give you that stack on its own, it triggers the whole payout.
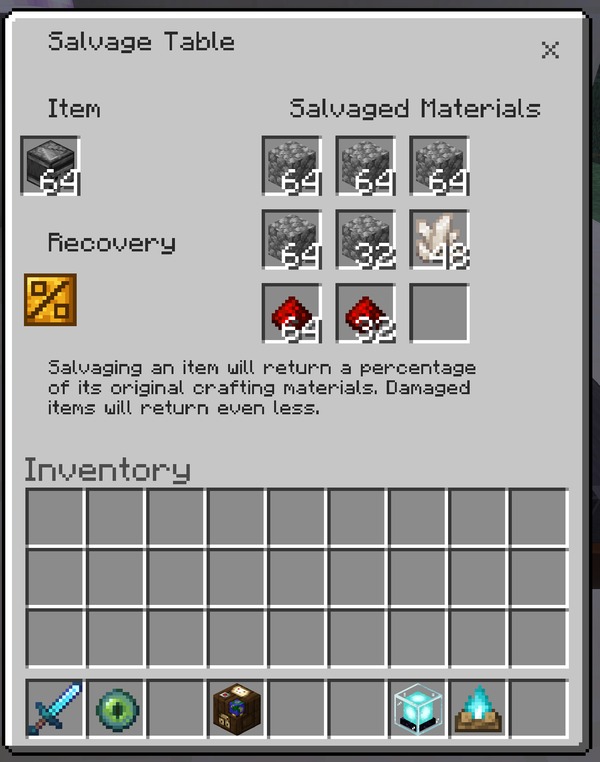
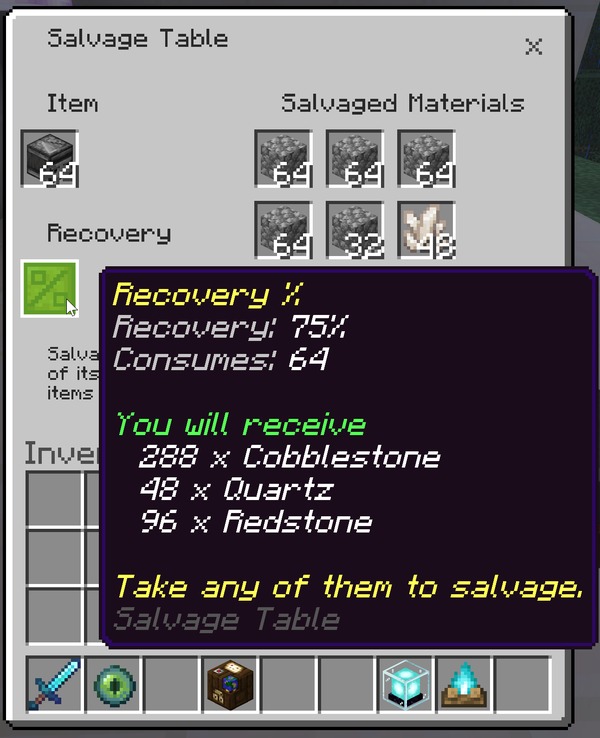
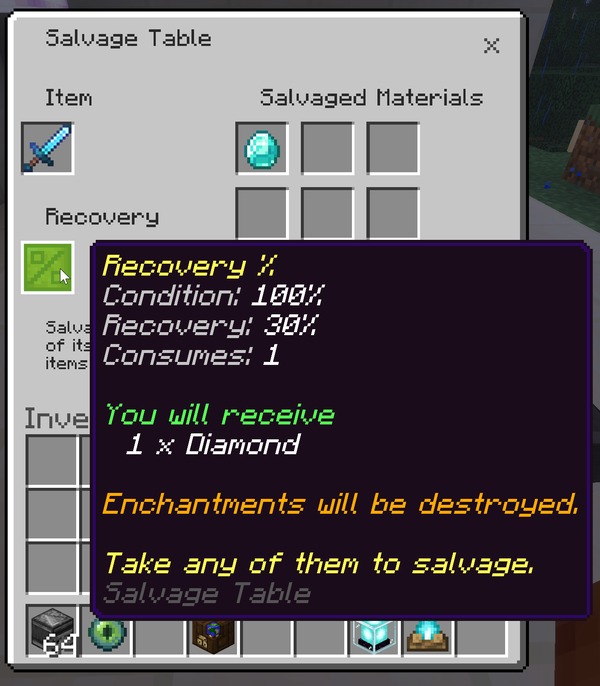
What it does: Hovering the gold percent icon shows live numbers for whatever is in the slot — the recovery rate, the item's condition if it has durability, how many will be consumed, anything left over, and the full list of materials coming back. It is also where the table explains a refusal.
Why and when to use it: To check a trade before you make it, and to find out why something was declined rather than guessing. A refusal always names its reason here: no recipe, too damaged, protected, category filtered, or not enough for one batch.
Where to use it: In the salvage screen.
How to use it:
Hover the icon. On touch devices, tap and hold.
Suggested starting settings: None. Turn on Detailed preview in Your preferences if you would rather see every output listed on its own line than summarized.
Edge cases and limits: It is part of the interface, not an item. It cannot be taken, crafted, or moved.
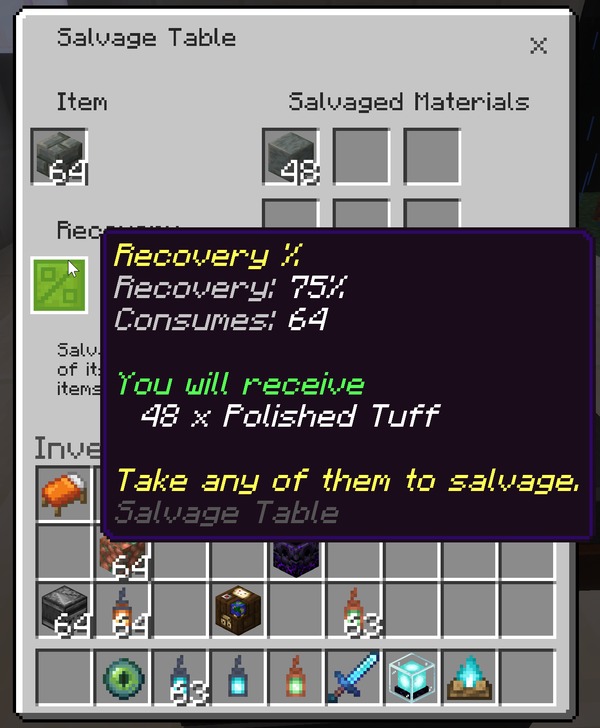
What it does: Recovery is a percentage of the original crafting recipe, scaled by how damaged the item is, and it can never exceed what the recipe took.
Why and when to use it: Knowing the rate tells you whether a salvage is worth making. Wood and stone come back generously; diamond and netherite deliberately do not.
Where to use it: Anywhere the base requirements are met — the rates are world-wide, not per table.
How to use it:
| Tier | Default rate | Applies to |
|---|---|---|
| Basic | 75% | Wood, stone, and everyday materials |
| Component | 75% | Redstone, quartz, lapis, emerald, and similar |
| Copper | 50% | Copper equipment and blocks |
| Iron | 50% | Iron equipment and blocks |
| Gold | 50% | Gold equipment and blocks |
| Diamond | 30% | Anything containing diamond |
| Netherite | 25% | Netherite gear (off by default) |
Three more rules shape the result:
- Batch awareness. A recipe's output count is divided out. Sixteen Glass Panes came from six Glass, so one pane never returns one Glass — and you need sixteen panes before the table can return anything at all.
- Durability scaling. A tool at half durability returns half as much again. A pristine Diamond Pickaxe gives one Diamond; a badly worn one gives nothing.
- Rounding. Fractions floor at or above one and round at half below one, so a result of 3.0 is 3 and a result of 0.75 is 1. That is why a pristine diamond tool returns something rather than nothing.
A worked example. 1,152 Crafting Tables cost 4,608 planks to craft. Salvaged, they return 3,456 planks — exactly 75%. Note that one item becomes three, so the item count grows even though the value falls. Anything built from several parts expands like this on the way back, which matters when you size an output chest.
Suggested starting settings: Leave the rates alone until you have played with it. If you want a harsher economy, a world owner can halve every rate at once.
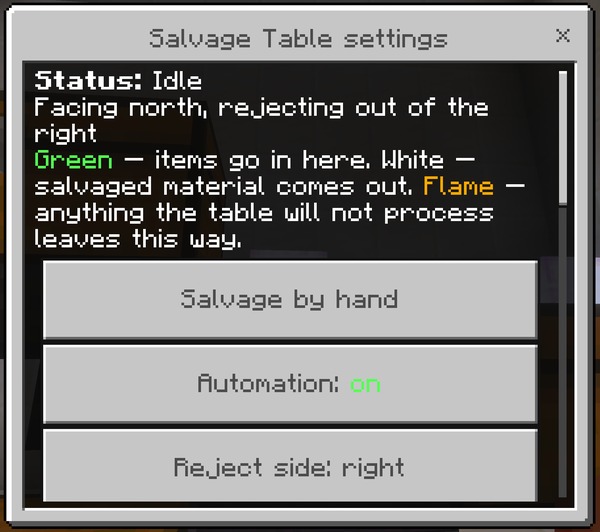
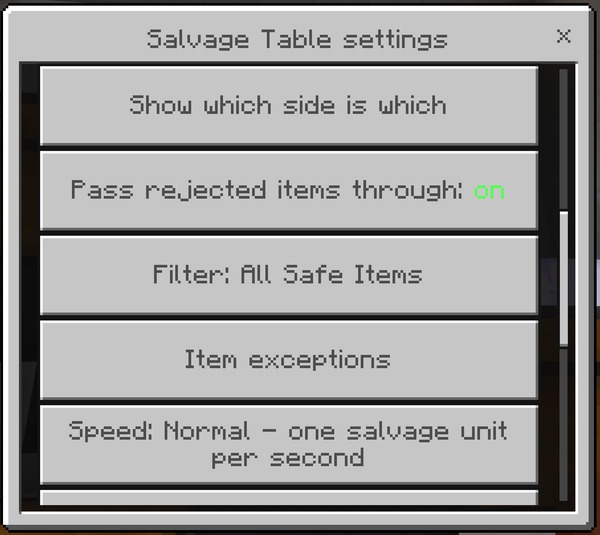
What it does: Crouching with an empty hand and using a table opens its own settings menu. The top of the screen is a live status readout — what the machine is doing right now, which way it faces, which side it rejects out of, and a legend for the particle face markers. Everything else in this list is a button on that menu.
Why and when to use it: This is where a table stops being a block you click and becomes a machine you configure. Every setting here belongs to this one table, so two tables side by side can do completely different jobs.
Where to use it: At any placed Salvage Table. Settings live with the block and are forgotten when it is broken.
How to use it:
Crouch with an empty hand and use the table. Crouching with a block in hand builds against it instead, exactly as with a vanilla workstation.
The status line reads one of:
| Status | Meaning |
|---|---|
| Idle | Nothing to do |
| Processing | Working |
| Output blocked | The container below cannot take the whole result. Nothing is consumed; it waits |
| No output container below | There is nothing under the table |
| Paused by redstone | The redstone mode says no |
| Automation off | Switched off on this machine |
| Turned off for this world | A world setting has disabled it |
Suggested starting settings: The defaults are a sensible first machine: automation on, All Safe Items, Normal speed, redstone ignored, rejecting to the right, both safety protections on.
Edge cases and limits: World settings that override this machine are called out in the menu body rather than hidden — if automation or the whole add-on is off for the world, the menu says so, so you can see at a glance why a table is not doing anything.
One quirk worth knowing about crouch-clicking: the first crouch-click against a table primes it and does nothing visible, and every click for the next few seconds places normally. Punching the table once does the same thing. This is because the table's interaction area has to step aside before a placement can reach the block behind it.
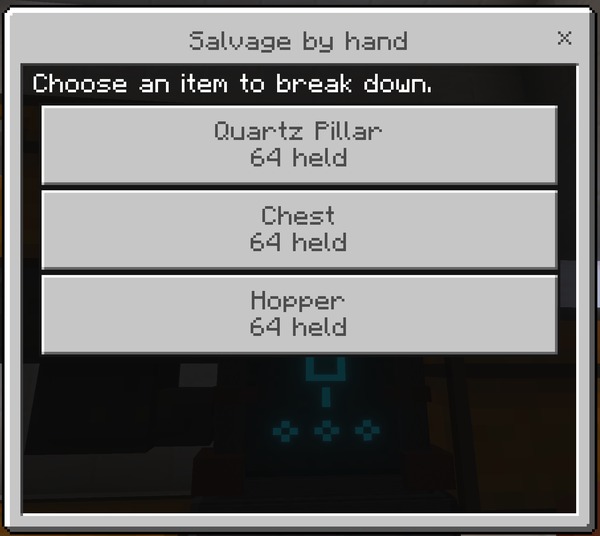
What it does: A list of everything in your own inventory that has a salvage recipe, with a per-item preview, a quantity slider, and a confirm step. It reads your inventory rather than the table's Item slot.
Why and when to use it: When you want to process part of a stack rather than all of it, when you would rather not shuffle items into the slot at all, or when you want to read the full preview and any warnings before committing.
Where to use it: At any Salvage Table, from its settings menu.
How to use it:
- Crouch with an empty hand and use the table.
- Choose Salvage by hand. Every salvageable stack you are carrying is listed with how many you hold.
- Pick one. The detail screen shows its condition, how many will be consumed, the recipe batch size if it is larger than one, the recovery rate, and everything coming back.
- Choose Salvage to do it, Change quantity to set the slider first, or Cancel to go back.
Change quantity opens a single slider measured in whole recipe batches — an item crafted four at a time moves in fours, because anything less recovers nothing. The slider only appears when you hold more than one batch.
Suggested starting settings: Leave the quantity at its default, which is one full recipe batch — the smallest amount that can produce anything.
Edge cases and limits: If you are carrying nothing salvageable, the screen tells you so and explains what the table does accept. If the item leaves your inventory before you confirm, nothing is consumed.
What it does: Switches automatic processing on or off for this one table. Containers on four faces feed it, recovered materials leave through the bottom, and anything it will not process leaves through a side you choose.
Why and when to use it: When you have more to get through than you want to click — a mob farm's gear, a stripped-out build's blocks, a villager-trade surplus. Switching it off parks a machine without dismantling the farm around it, which is what you want while you are still building the arrangement.
Where to use it: Per table. A container directly below the table is required — without one the machine will not run at all. It does not affect any other table or the world.
How to use it:
| Face | Job |
|---|---|
| Bottom | Salvaged materials come out here. Required |
| Reject side | Anything the table will not process leaves here. Right by default |
| Top, front, back, and the remaining side | Inputs. Any container on these is drained |
Four of the six faces take input, so you can feed the table from wherever is convenient. Point a hopper at the table and leave it there. The hopper holds the items and the table takes them out of it — that is the intended arrangement, and it is why a hopper aimed at a table can look like it is doing nothing.
Crouch with an empty hand and use the table → Automation to switch it.
Suggested starting settings: On. A hopper into any input face, a chest below, and a chest on the reject side is a complete farm.
Edge cases and limits: A world owner can switch automation off for the whole world. When they have, this button has no effect and the status reads Turned off for this world. One batch is processed per step, never a whole stack, so a stack of 64 Crafting Tables takes 64 steps.
Size the output for expansion, not for the input. One item often becomes several going back — a Crafting Table becomes three planks, a Chest becomes six. Two rows of crafting tables produce six rows of planks. A single chest underneath will fill long before a double chest of input drains.
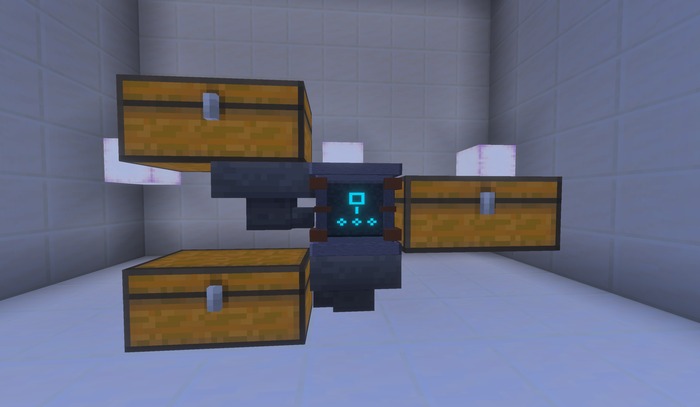
What it does: Chooses whether refused items leave through the table's left or right face. The opposite side becomes an input.
Why and when to use it: To fit a farm into the space you have. The reject side is the only face besides the bottom that is not an input, so which one it is decides your whole layout.
Where to use it: Per table.
How to use it:
Crouch with an empty hand and use the table → Reject side. The menu closes and the table marks its faces in particles, so you see the change on the block rather than reading it in a screen you are about to dismiss.
Suggested starting settings: Right, unless your build needs otherwise.
Edge cases and limits: Changing it does not move anything already sitting in the old reject container.
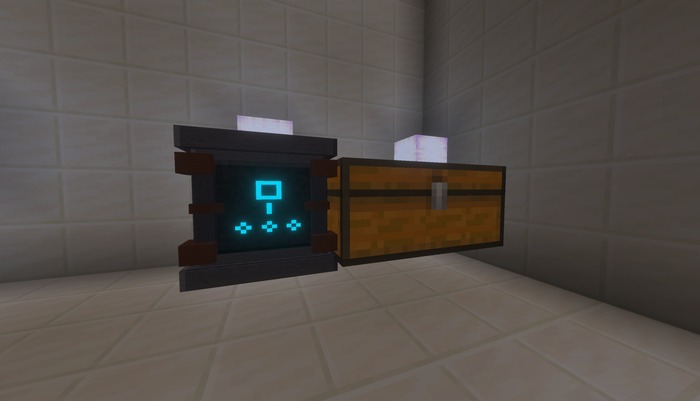
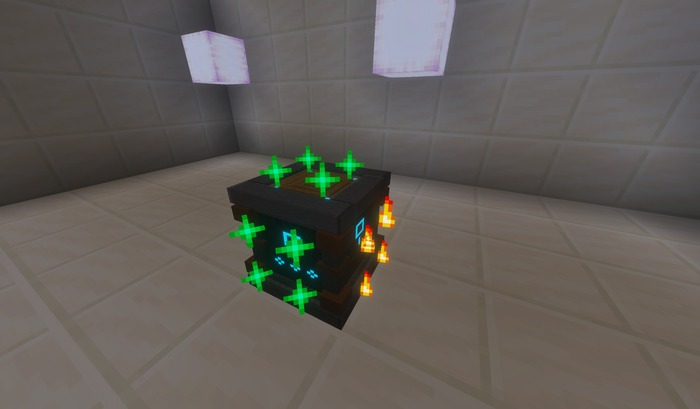
What it does: Marks every face of the table in particles for about two seconds — green sparkles for inputs, white for the material output below, flame for the reject side.
Why and when to use it: While building. The rune panel on the block tells you which way a table faces, which is not enough to know which face takes hoppers and which one will quietly break the farm if you point one at it.
Where to use it: Per table, at any time.
How to use it:
Crouch with an empty hand and use the table → Show which side is which. The menu closes so the markers are visible on the block. Changing the reject side does the same thing automatically.
Suggested starting settings: Use it once per table when you build the farm.
Edge cases and limits: It leaves nothing behind and has no effect on the machine.
What it does: Whether this table moves refused items out of the reject side at all. Off means a refused item stays where it is and the machine moves on to the next slot.
Why and when to use it: Turn it off when the input is a sorting system that should keep hold of anything the table will not take, rather than having it pushed out to a reject chest. With it on, the table clears its own input and the farm never backs up.
Where to use it: Per table.
How to use it:
Crouch with an empty hand and use the table → Pass rejected items through.
Suggested starting settings: On.
Edge cases and limits: Off never jams the machine — it skips the refused item and carries on. The order when it is on is: the container on the reject side first; if there is none or it is full, thrown out dropper-style when the world allows ejection; and if neither works, the item is left exactly where it was. A rejected item can slow a farm down but can never jam it.
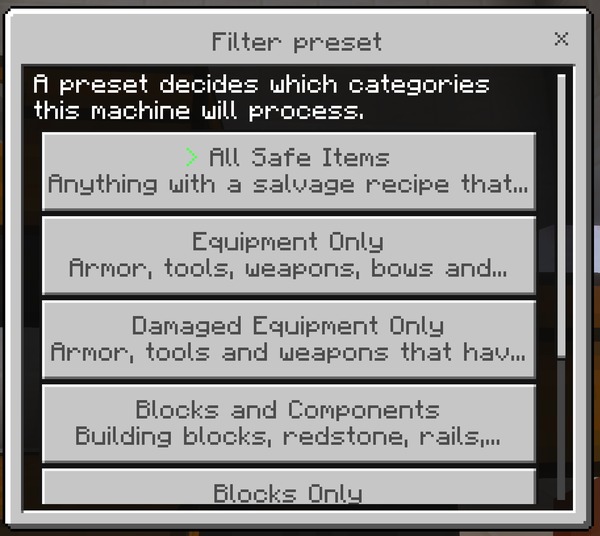
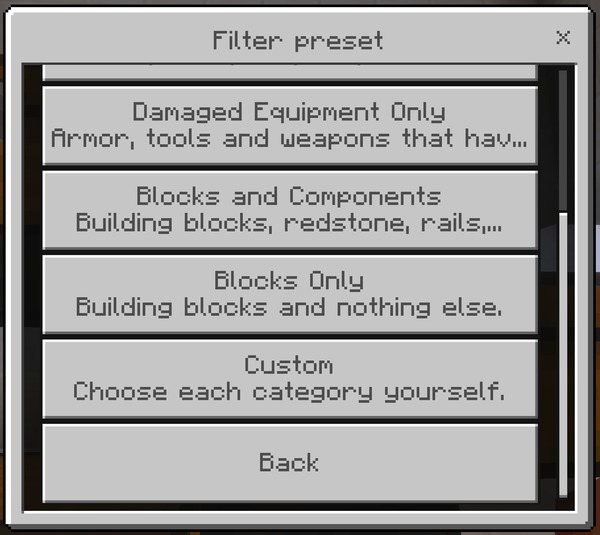
What it does: Chooses which categories of item this table accepts, from six presets.
Why and when to use it: So one table takes only worn gear while another takes only blocks, without either affecting the other. Damaged Equipment Only is the specialist one — pristine gear passes through untouched, which is how you build a farm that recycles broken drops without eating your own spare kit.
Where to use it: Per table, in its own settings menu.
How to use it:
| Preset | Accepts |
|---|---|
| All Safe Items | Everything with a recipe that passes the safety checks |
| Equipment Only | Armor, tools, weapons, bows and shields |
| Damaged Equipment Only | The same, but pristine gear passes through untouched |
| Blocks and Components | Blocks, redstone, transport, storage, utility |
| Blocks Only | Building blocks and nothing else |
| Custom | Pick each category yourself |
Crouch with an empty hand and use the table → Filter → choose a preset. The current one is marked.
A worked example — a piglin gold farm. The drops are gold nuggets, gold ingots, rotten flesh, and golden gear. Set Equipment Only and you get: gear salvaged, nuggets and ingots rejected as category filtered, rotten flesh rejected as having no recipe. Enchanted swords also reject while enchanted-item protection is on, which for a gold farm is usually what you want — feed the reject chest to a Disenchanting Pillar.
Suggested starting settings: All Safe Items. Narrow it once you know what you are feeding in.
Edge cases and limits: Choosing Custom adds a Categories button to the menu. A category a world owner has switched off stays off whatever this table's filter says.
What it does: Eight individual switches — Armor, Tools, Weapons, Building blocks, Redstone components, Rails/boats/minecarts, Storage blocks, and Utility and decorative items — for a table whose filter is set to Custom.
Why and when to use it: When no preset matches what you want. Blocks and transport but nothing else, for a rail-and-building recycler; or everything except storage, so Chests and Shulker Boxes are never touched.
Where to use it: Per table. The button only appears while the filter preset is Custom.
How to use it:
Crouch with an empty hand and use the table → Filter → Custom → Categories → toggle each one. Each button shows its current state and saves immediately.
Suggested starting settings: Start from the preset closest to what you want, switch to Custom, then adjust the one or two that are wrong.
Edge cases and limits: A category switched off for the whole world by an operator shows as locked off and cannot be switched on here.
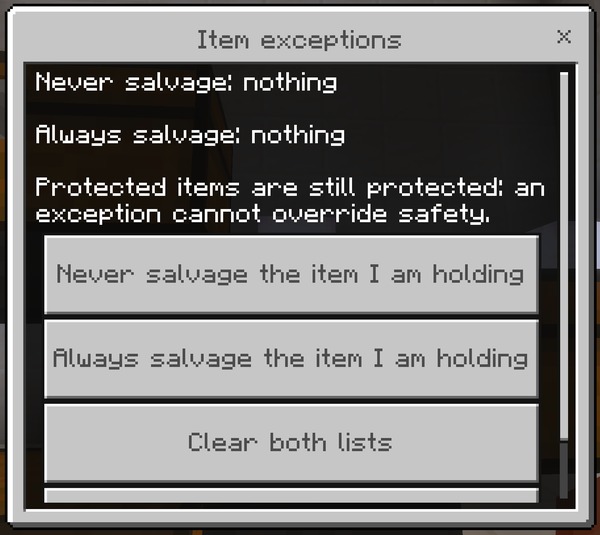
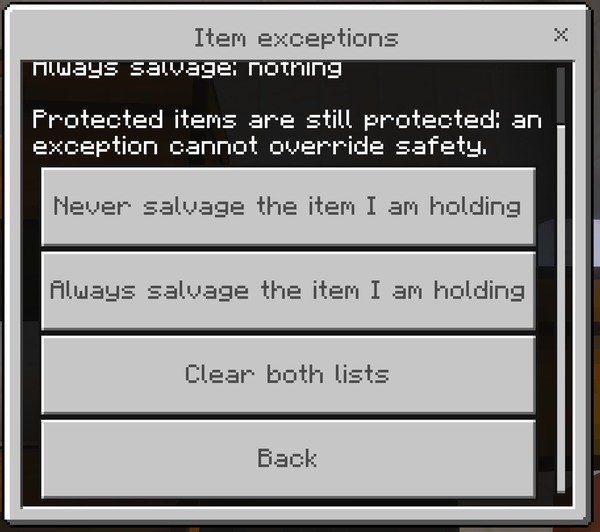
What it does: A per-table allow list and deny list of specific items, set from whatever you are holding. An allow-listed item skips the category filter entirely; a deny-listed item is always refused.
Why and when to use it: For the one exception a preset cannot express — a single item you want processed that its category excludes, or one you never want touched however the filter is set. An allow list is how you build a table that takes exactly one thing.
Where to use it: Per table.
How to use it:
- Hold the item you want to add.
- Crouch with an empty hand and use the table → Item exceptions. Both lists are shown at the top of the screen by name.
- Choose Never salvage the item I am holding or Always salvage the item I am holding.
Clear both lists empties them in one action. Hold the item first — the screen tells you if your hand is empty.
Suggested starting settings: Both lists empty. Reach for them only when a preset cannot do the job.
Edge cases and limits: Adding an item to one list removes it from the other, so the two can never disagree. Neither list overrides the safety protections — an allow-listed enchanted item is still refused while enchanted protection is on. An allow list also cannot invent a recipe: an item with no salvage recipe stays unsalvageable however you list it.
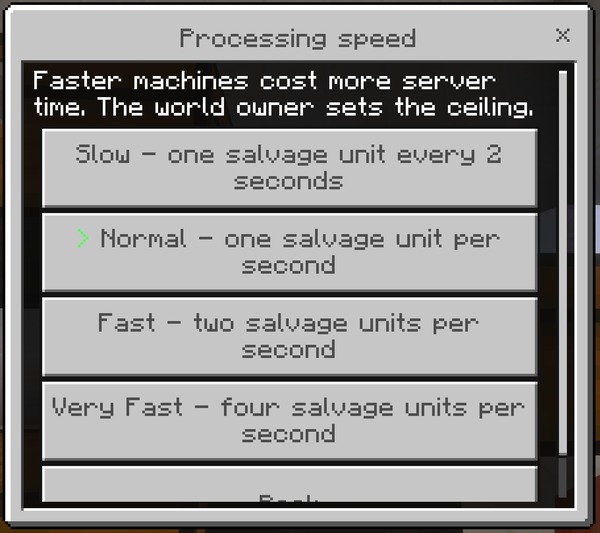
What it does: How often this table processes one batch: Slow (one every two seconds), Normal (one per second), Fast (two per second), or Very Fast (four per second).
Why and when to use it: Speed is the performance cost of a farm. Raise it when a farm genuinely produces faster than the table can keep up; lower it when you are running many tables in the same world.
Where to use it: Per table, under a world-wide ceiling a world owner sets.
How to use it:
Crouch with an empty hand and use the table → Speed. The current one is marked. One batch is processed per step, not a whole stack — so a stack of 64 Crafting Tables takes 64 steps: just over a minute at Normal, sixteen seconds at Very Fast.
Suggested starting settings: Normal. Move to Very Fast only when a farm genuinely outpaces one item per second.
Edge cases and limits: A world owner can cap how fast any machine may run. Speeds above that cap are still listed, marked above the world limit, and cannot be selected.
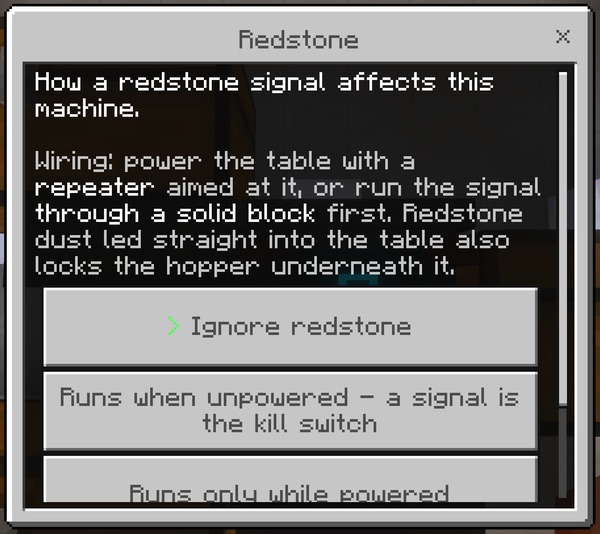
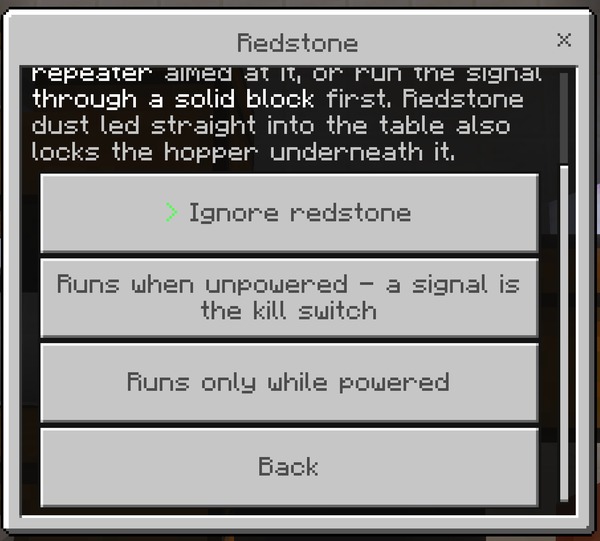
What it does: Chooses how this table responds to a redstone signal: Ignore redstone, Runs when unpowered (a signal is the kill switch), or Runs only while powered.
Why and when to use it: To switch a farm off without dismantling it, or to gate it on a clock, a daylight sensor, a pressure plate, or a lever by the door.
Where to use it: Per table.
How to use it:
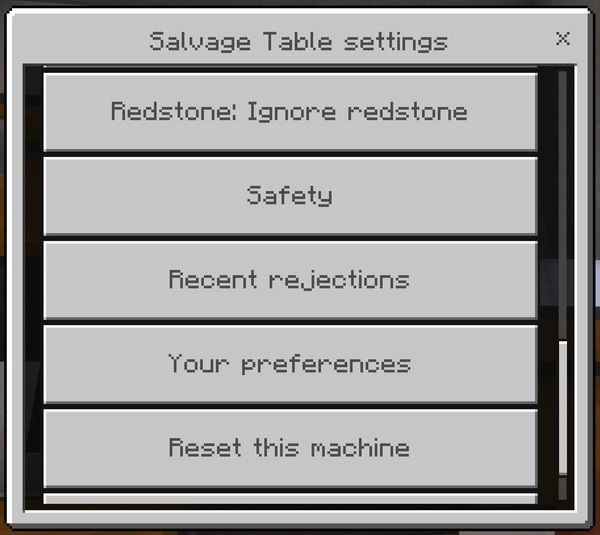
Crouch with an empty hand and use the table → Redstone.
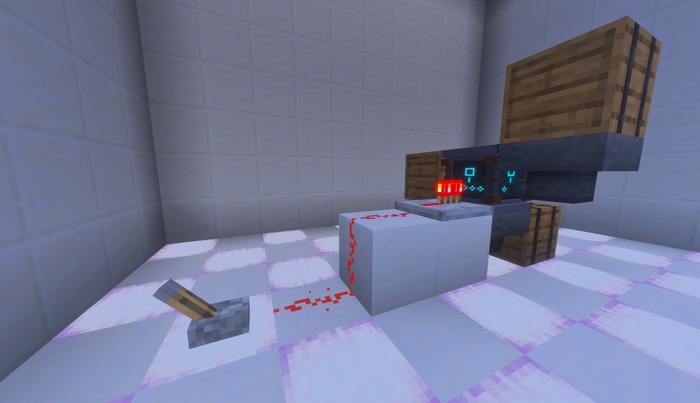
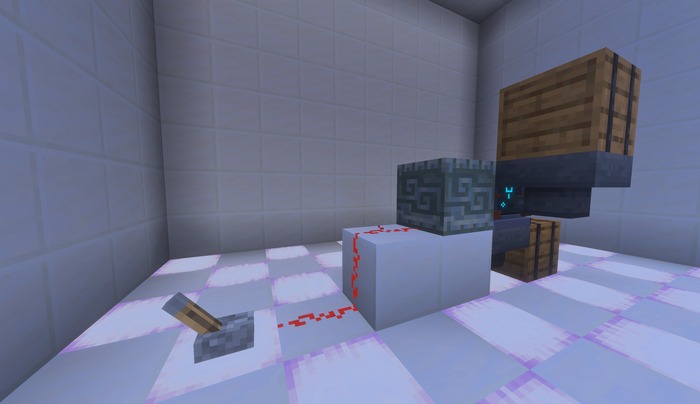
Wiring matters. Power the table with a repeater aimed at it, or run the signal through a solid block first. Redstone dust led straight into the table powers the hopper underneath it as well, and a powered hopper stops moving items. The same note is on the Redstone screen in game.
"Runs when unpowered" avoids the issue entirely and makes the better kill switch: normal operation is unpowered so nothing is ever locked, and the signal only arrives when you want everything to stop anyway.
Suggested starting settings: Ignore redstone until you want a switch, then Runs when unpowered with a lever on the table.
Edge cases and limits: Redstone gates automation only. Salvaging by hand always works, even on a table paused by redstone. Comparators cannot read a Salvage Table. When the chest below fills, the machine pauses on Output blocked and waits rather than spilling anything.
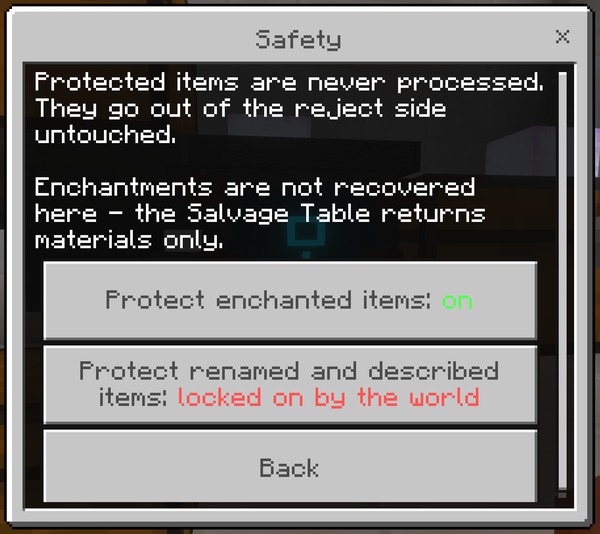
What it does: Two per-table switches, Protect enchanted items and Protect renamed and described items. A protected item is never salvaged — it leaves through the reject side untouched, with its enchantments, name, and durability intact.
Why and when to use it: Salvaging destroys enchantments, names, and lore, and none of it comes back. These protections are on by default so nothing valuable is lost by accident. Turning one off on a single table lets that machine process enchanted drops while every other table in the world still leaves them alone.
Where to use it: Per table, underneath the world policy. A world owner controls the same two protections world-wide, plus a third for container items.
How to use it:
Crouch with an empty hand and use the table → Safety. Two buttons, each showing its current state.
| Protection | Default | What it stops |
|---|---|---|
| Protect enchanted items | On | Salvaging destroys enchantments; a Looting III sword would become one gold ingot |
| Protect renamed and described items | On | Names and lore are lost when an item is broken down |
| Container items | On, world-wide only | A Shulker Box or Bundle carries its contents inside the item, and the table cannot tell a full one from an empty one |
Suggested starting settings: Leave both on. If you have Andy's Disenchanting Pillar installed, the table points you at it when it refuses an enchanted item — recover the enchantment there first, then salvage the bare item.
Edge cases and limits: A machine can be stricter than the world, never more permissive. While a world owner protects enchanted items, this button reads locked on by the world and cannot be switched off here — so these toggles only do anything in a world that has already allowed the destructive behavior. Container items have no per-table switch at all; they are world-wide only.
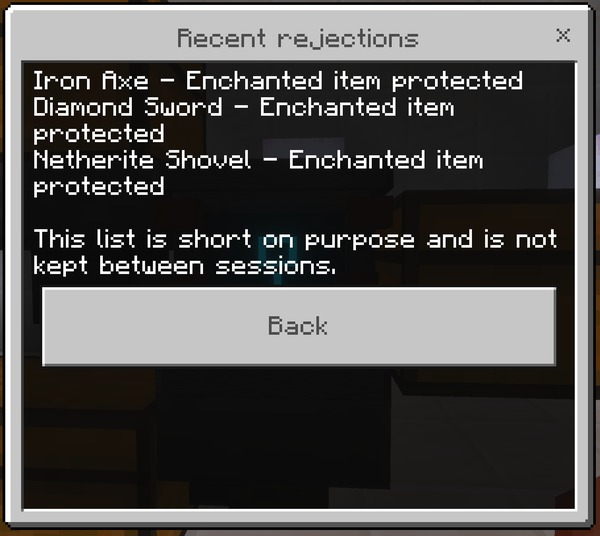
What it does: The last eight items this table refused, each with the item name and the reason.
Why and when to use it: The first thing to check when a farm is not taking something you expected. In one screen it separates a missing recipe from a category filter from a safety protection, instead of leaving you to guess at it from an increasingly full reject chest.
Where to use it: Per table.
How to use it:
Crouch with an empty hand and use the table → Recent rejections.
Suggested starting settings: Nothing to set; it is a readout.
Edge cases and limits: The list starts empty again after a world reload — it shows what a machine is doing now, not a history. Sub-batch amounts are not rejections — fifteen Rails are not refused, they are "not enough yet", and they wait in the input for a sixteenth rather than appearing here.
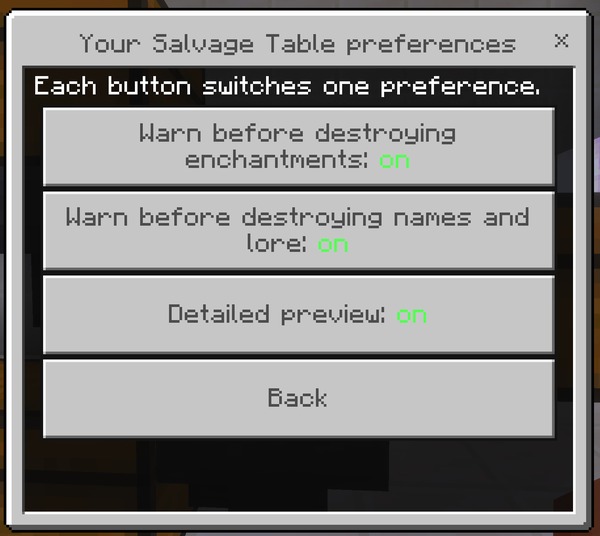
What it does: Three settings that belong to you rather than to any table: Warn before destroying enchantments, Warn before destroying names and lore, and Detailed preview.
Why and when to use it: To turn off a confirmation you have read a hundred times, or to keep it because you share a world with someone who has not. Detailed preview lists every recovered stack on its own line instead of summarizing them, which is worth having on when you are checking exact counts.
Where to use it: Per player. They follow you to every table, in every world.
How to use it:
Crouch with an empty hand and use any table → Your preferences. Each button switches one preference and saves immediately.
Suggested starting settings: All three on. Turn the warnings off only once the behavior is familiar — they are the last thing between you and a destroyed enchantment.
Edge cases and limits: The two warnings only ever appear where the destructive action is actually possible, which is a world that has allowed enchanted or renamed salvaging in the first place. A world owner can lock this screen, in which case opening it tells you that preferences are locked in this world.
What it does: Forgets this table's saved configuration and returns it to the defaults — automation on, All Safe Items, Normal speed, redstone ignored, rejecting right, both protections on, and both item lists empty.
Why and when to use it: When a table has accumulated filter exceptions and settings you no longer remember choosing, and starting clean is faster than unpicking them one screen at a time.
Where to use it: Per table.
How to use it:
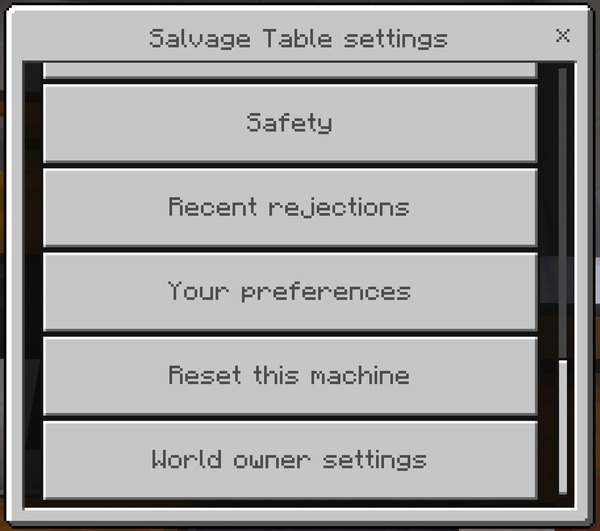
Crouch with an empty hand and use the table → Reset this machine.
Suggested starting settings: Not needed on a new table.
Edge cases and limits: It takes effect immediately and has no confirmation step. Breaking and replacing the table does the same thing, since settings live with the block and are forgotten when it is broken.
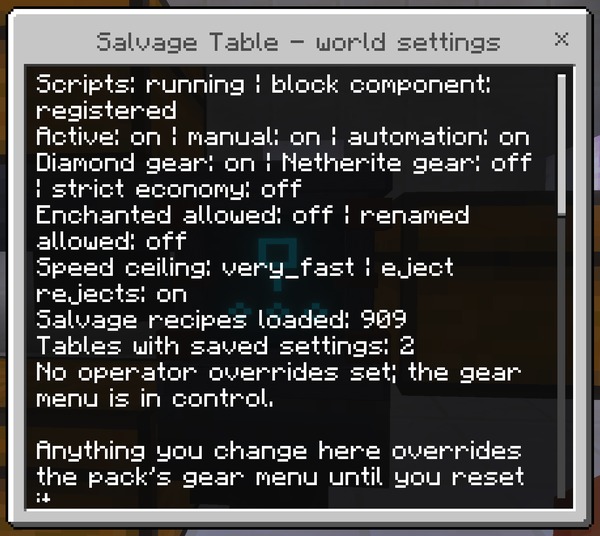
What it does: Opens the world-wide settings menu — every economy rate, protection, category, automation limit, and master switch for the whole world.
Why and when to use it: For a world owner or server operator tuning the add-on for everyone, rather than configuring one machine. Anything set here overrides what an individual table is set to.
Where to use it: Per world. The button is only shown to operators; other players never see it.
How to use it:
Crouch with an empty hand and use any table → World owner settings. Every setting is documented in the Admin and Operator Guide, along with the equivalent console commands for a Bedrock Dedicated Server.
Suggested starting settings: The shipped defaults are a reasonable survival balance. Change them deliberately rather than exploring.
Edge cases and limits: A protection switched on for the world cannot be switched off at a table, and a category switched off for the world cannot be switched on at one. The per-machine menus show these as locked rather than pretending to accept the change.
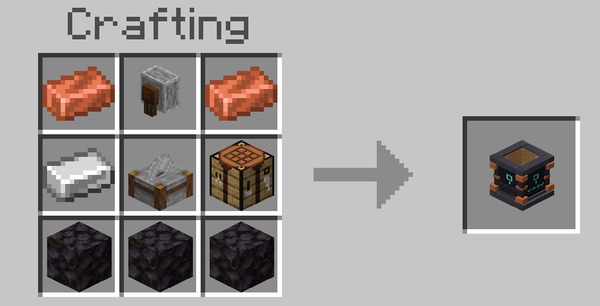
Recipe type: Shaped
| Copper Ingot | Grindstone | Copper Ingot |
| Iron Ingot | Stonecutter | Crafting Table |
| Blackstone | Blackstone | Blackstone |
Unlocks when: you first obtain a Grindstone or a Stonecutter.
What it produces: One Salvage Table. It is a normal block — mine it with a pickaxe and it drops itself, though its settings are not carried with it.
Every world setting, for reference. All of these are changed by a world owner, not per machine — see the Admin and Operator Guide.
| Setting | Default | What it controls |
|---|---|---|
enabled |
on | The whole add-on |
manual |
on | Salvaging by hand |
automation |
on | Automated salvaging |
placement |
on | Whether new tables may be placed |
addon_recipes |
on | Whether recipes registered by other add-ons are accepted |
allow_netherite |
off | Netherite gear may be salvaged |
allow_diamond |
on | Diamond gear may be salvaged |
strict_economy |
off | Halves every recovery rate |
min_condition |
0.05 | Below this durability, an item is refused as too damaged |
allow_enchanted |
off | Enchanted items may be salvaged, destroying the enchantments |
allow_named |
off | Renamed or lore-bearing items may be salvaged |
allow_filled |
off | Shulker Boxes and Bundles may be salvaged, destroying the contents |
max_speed |
very_fast | The fastest speed any machine in this world may use |
default_speed |
normal | The speed a newly placed table starts at |
allow_eject |
on | Rejected items may be thrown out when no reject container is present |
lock_player_settings |
off | Prevents players changing their own preferences |
operators_only |
off | Only operators may use Salvage Tables |
debug |
off | Extra detail in the content log |
category.armor … category.utility
|
all on | Which categories may be salvaged at all, world-wide |
rate.basic |
0.75 | Recovery rate for wood, stone and everyday materials |
rate.component |
0.75 | Recovery rate for redstone, quartz, lapis and similar |
rate.copper |
0.5 | Recovery rate for copper |
rate.iron |
0.5 | Recovery rate for iron |
rate.gold |
0.5 | Recovery rate for gold |
rate.diamond |
0.3 | Recovery rate for diamond |
rate.netherite |
0.25 | Recovery rate for netherite |