StockExchangeTutorial_Classical
This tutorial aims on giving you the different taste between the Virtual and Classic mode for our stock exchange example. Again, this tutorial has no further instructions about mapping creation or query writing but instead our intention is to give you a complete sandbox for further walkthrough. In the Classic mode we have two sub-options that suggest you the types of data structure, namely, the Direct and Semantic-Index. You will experience that the performance of this mode is better than the Virtual mode and, moreover, the Semantic-Index is the best among all our methods.
Before you start, you should already have the StockExchange database installed. If you have not installed it, see Installing the Tutorial Databases and return here when you've completed the installation.
Import the Individuals from the database through the plugin. This short tutorial will show you how to do it. When you're done with the import data, continue your reading to step 2 below. You should be able to see these objects in the "Individuals" tab in Protégé.
Configuring the reasoner is done by choosing the data modes in the Preference panel. By default, the ABox configuration is set to Virtual mode. Change this to Classic mode with DBType Direct. Load (or reload) the reasoner by choosing Reasoner > Quest 1.0 in the Protégé menu bar.
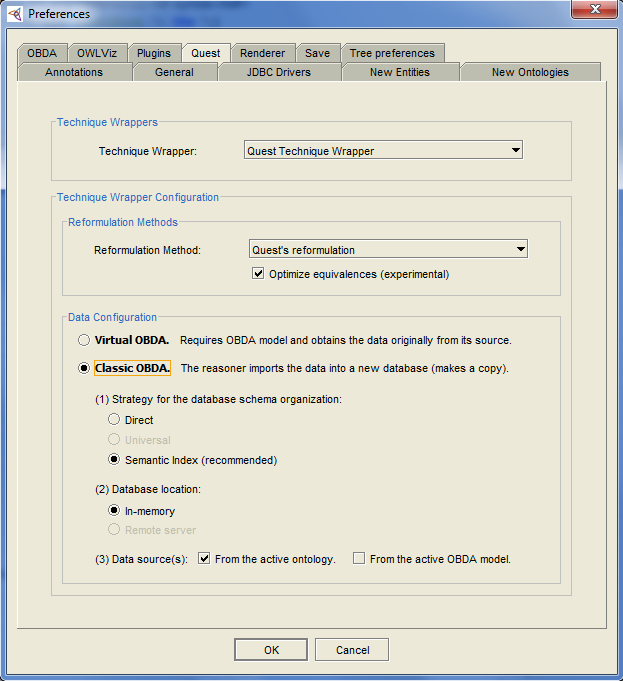
Perform the query answering as usual in the "OBDA query" tab. Up to this point, you should experience some gain in the performance compared to the Virtual mode (i.e., the results are produced faster).
Repeat Step 2 by selecting the DBType Semantic-Index and reload the reasoner. In this mode, the performance may jump to its maximum as the results are produced even faster.
1. StockExchange.owl. The OWL ontology file.
2. StockExchange.obda. The OBDA file.
3. StockExchange_withIndividuals.owl. The OWL ontology file with Individuals saved already. Use this file in case you fail on importing the data.
4. StockExchange_withIndividuals.obda. There is no difference between this OBDA file and the former. But since the plugin recognizes the OBDA settings based on the similarity of filename, we add this for your convenience.