Getting Started
Editorialist is desktop only — it won't appear or load on Obsidian mobile.
Install from the Obsidian Community Plugins directory:
- In Obsidian: Settings → Community plugins → Browse, search for Editorialist.
- Install, then enable it.
(To install a specific version manually, grab manifest.json, main.js, and styles.css from the latest release and place them in <your-vault>/.obsidian/plugins/editorialist/.)
If you also use Radial Timeline, Editorialist will detect it automatically and scope itself to your active book. It is optional — everything below works without it.
Editorialist registers three commands in the command palette:
| Command | What it does |
|---|---|
| Open review launcher | Opens the launcher modal to import a review batch or start a pending-edits review |
| Open review panel | Opens the Review Panel in the sidebar |
| Review pending edits in active book | Starts the pending-edits review flow across the active book |
Editorialist ships no default hotkeys — assign your own under Settings → Hotkeys if you want them.
A five-minute walkthrough of the core loop:
Run Open review launcher and click Copy formatting instructions. This copies the full review format — instructions, both templates, and (with Radial Timeline) your book's actual scene IDs — to the clipboard.
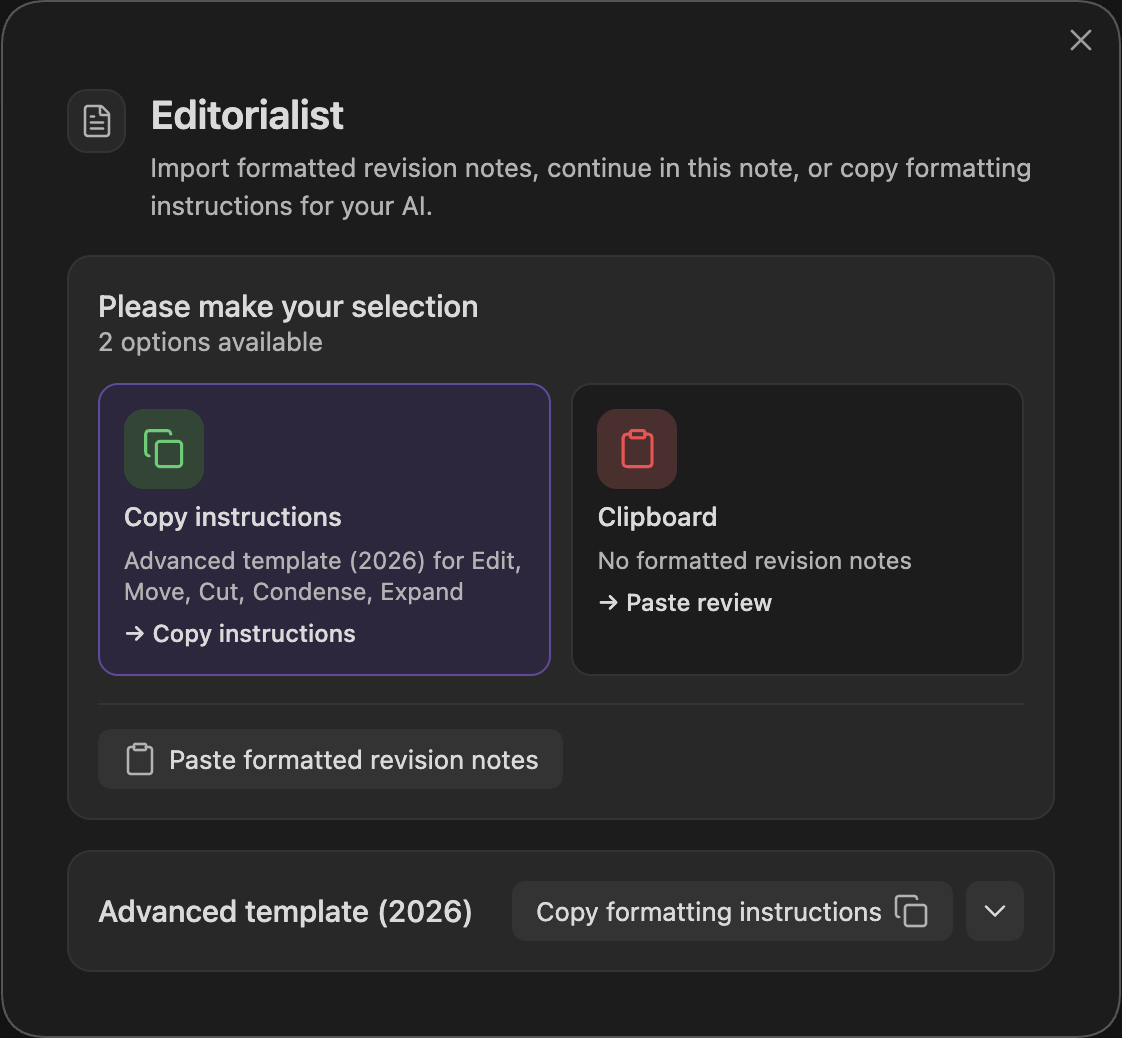
The formatting instructions are written for an AI — a human reviewer never works from them directly.
AI review: paste the instructions into your AI conversation along with the prose to review. The AI replies with suggestions in the review block format.
Human feedback: your editor or beta reader works however they naturally work — margin notes on a printed page, comments in a document, an email. Collect their notes in whatever form they arrive (a photo of the handwritten page, the electronic doc) and hand them to an AI along with the formatting instructions. The AI shapes everything into a properly formatted batch for Editorialist, with your human reviewer credited as the contributor.
Copy the reviewer's reply and run Open review launcher again. The launcher detects the batch on your clipboard — one click imports it. (If detection misses, paste manually; validation runs as you type.) The suggestions are written into the targeted scene notes as review blocks. Nothing has been applied to your prose yet.
The Review Panel opens a guided sweep: each suggestion is highlighted in the editor with a toolbar — apply it, reject it, rewrite it yourself, defer it for later, or back the text up to a cut file first. The sweep advances scene by scene through the batch.
When every suggestion is resolved, the sweep completes and the batch is recorded: per-scene polish state, contributor stats, and revision history all update. The Core settings tab shows your progress across the whole book — see the Settings Reference.
| Path | What it is |
|---|---|
| Your scene notes | Review blocks are injected here on import, removed on cleanup |
Editorialist/<Book>/ |
Editorialism structural guidance documents |
<book-source-folder>/Cut/ |
Per-scene cut files (default location; configurable) |