Repository navigation
Examples
Home · Flows · Getting started · Troubleshooting
These examples use names and values you can change. Replace a device action with the matching card for your own Homey device. Save and enable each Flow before testing it.
- Before you start
- Notify when a stopwatch reaches 30 minutes
- Restart a timer when motion is detected
- Pause and continue a timer without resetting it
- Gradually dim a light
- Install Chronograph on Homey.
- In the examples below,
Workout,Hall light,OvenandLiving room dimare sample names; choose your own fixed names. - For a transition, the target device must accept a numeric value in the range
you use. Many dim-level cards use
0to1, but check your device's card. - A chronograph exists only after its start Flow runs. The name picker may need the Flow to be saved and enabled first.
- The screenshots show Chronograph actions from saved example Flows on Homey. Their When card is This Flow is started, so you can run them manually. The sensor, light and notification cards described below are examples to adapt to your own devices; they are not shown in these screenshots.
Prerequisites: Chronograph and a Homey notification action.
- Create and enable a Flow:
- When: your chosen event, such as starting an activity.
-
Then: Chronograph → Start or replace stopwatch; Name
Workout.
- Create and enable another Flow:
-
When: Chronograph → Stopwatch reached a duration; Name
Workout, Duration30, Unitminutes. -
Then: send a notification such as
Workout has reached 30 minutes.
-
When: Chronograph → Stopwatch reached a duration; Name
- Start the first Flow and wait for the threshold, or test with a shorter duration first.

The saved example starts or replaces the stopwatch named Workout.
Expected result: the notification Flow runs when the stopwatch crosses 30 minutes. The threshold is attached when the stopwatch starts, so save the enabled threshold Flow before starting a new stopwatch.
Card connections: the threshold trigger needs no token connection for the fixed notification text. If your message should include the chronograph name, connect the trigger's Name token to the notification text.
Use this when each new motion event should give a light a fresh countdown.
Prerequisites: a motion sensor with a motion-detected trigger, a light with on/off actions, and Chronograph.
- Create and enable a Flow:
- When: your sensor detects motion.
- Then: turn the light on.
-
Then: Chronograph → Start or replace timer; Name
Hall light, Duration2, Unitminutes.
- Create and enable a second Flow:
-
When: Chronograph → Timer is finished; Name
Hall light. - Then: turn the light off.
-
When: Chronograph → Timer is finished; Name
- Test it: trigger motion, wait about one minute, then trigger motion again.
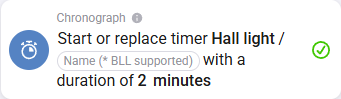
The saved example starts or replaces Hall light with a two-minute countdown.
Expected result: the second motion replaces the first countdown. The light turns off about two minutes after the last motion, not two minutes after the first one.
Card connections: the sensor trigger starts the first Flow. In the second Flow, the timer-finished trigger directly starts the light's off action; there is no output token to connect.
If your sensor already has a suitable “no activity for…” trigger, compare it with a separate countdown before deciding which approach is simpler. This pattern matches the scenario in the community timer-retrigger discussion.
Prerequisites: Chronograph and a timer named Oven.
- Start
Ovenwith Start or replace timer, Duration20, Unitminutes. - In the Flow where you need to pause it, add Pause timer for
Oven. - When you are ready to continue, add Resume timer for
Oven.
Expected result: pausing freezes the remaining time; resuming continues from that point. The separate Start or resume timer action can create the timer if it is absent, but it does not reset an already-running timer.
Prerequisites: a dimmable light whose dim action accepts values from 0
to 1, and Chronograph.
- Create and enable a Flow:
-
When: Chronograph → Transition reached a step; Name
Living room dim. - Then: your light → set dim level. Connect the trigger's Transitionvalue token to the dim-level argument.
-
When: Chronograph → Transition reached a step; Name
- Create a second Flow:
- When: a button, schedule or other event you choose.
-
Then: Chronograph → Start or replace transition; Name
Living room dim, From0, To1, Steps11, Duration5, Unitminutes.
- Save and enable both Flows, then start the transition.

The saved example starts Living room dim with 11 steps over five minutes.
Token mapping: Transition reached a step → Transitionvalue →
light's dim-level argument. The First step and Last step flags are
optional; use them in additional conditions if you need actions only at an
endpoint.
Expected result: the Flow sends an initial value of 0, intermediate
values as the transition advances, and a final value of 1. The light changes
gradually if its driver accepts those values and can apply them at that rate.
The transition itself does not control the light; the first Flow connects the
value to the device.
Trade-off: more steps can look smoother but ask Homey and the device integration to perform more updates. The app limits the effective step count for short transitions, and device response time can affect the visible result. Test a short duration first.
The exact-name picker and token use are important when adapting older forum examples; see the transition dimming discussion.
For more options, see the Flow-card indexes and troubleshooting.