Guide‐Installation
The whole installation is just 6 steps. Everything after this section is the same process explained in detail.
- Download the latest version of MPV-SW-Capture and extract it wherever you want.
-
Run the installer CMD — open
1_INSTALLER_MSC_First-Usage.cmd. -
Install all required components — click the green
INSTALL / Update ALLbutton in the installer. -
The CMD opens Setup automatically — if it fails, open
MPV-SW-Capture_SETUP.vbsmanually. - Configure your capture card — select your video and audio devices, then click Apply Setup.
-
Launch
MPV.exe— MPV-SW-Capture is ready to use.
That's it. The rest of this guide explains each step with screenshots and details.
Download the latest version from either:
- GitHub Releases: https://github.com/TyRaS-SW/MPV-SW-Capture/releases
- Official website: https://tyras-sw.github.io/MPV-SW-Capture/ — click the main Download button.
Grab the file named MPV-SW-Capture-vX.X.X.zip (where X.X.X is the current version).
Extract the .zip and move the MPV-SW-Capture folder to anywhere you like (for example, C:\MPV-SW-Capture). The folder is portable — you can move it later without reinstalling. You can also rename it if you want.
- Connect your capture card to your PC using USB 3.0 (or USB 2.0).
- Connect HDMI from your console to the input of the capture card.
The first time you open one of the .cmd or .vbs launchers, Windows will show a dialog like this:
Open File - Security Warning The publisher could not be verified. Are you sure that you want to run this software?
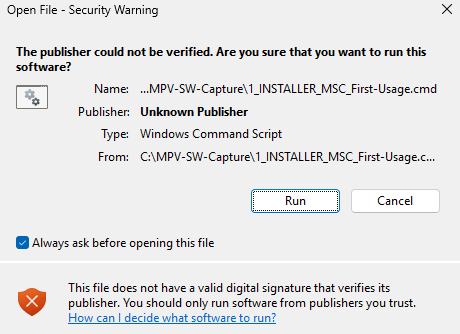
This happens because the files were downloaded from the internet and don't carry a digital signature. Windows marks them with the Mark of the Web and asks for confirmation before running them.
To proceed:
- Click Run.
To stop it from asking every time (recommended):
- Before clicking Run, uncheck the box "Always ask before opening this file".
- Windows will remember your choice for that specific file and won't ask again.
Which files trigger this warning:
1_INSTALLER_MSC_First-Usage.cmd(used once, see §4)MPV-SW-Capture_SETUP.vbs(see §5)MPV-SW-Capture_INSTALLER.vbs(used for future updates, see §6)Skip the warning entirely: once MPV-SW-Capture is running, go to TOOLS in the menu to launch the Installer, Setup, or other bundled tools directly — the menu opens them internally, so no security dialog appears.
Important: This step is only needed the first time you install MPV-SW-Capture. After this, you will never need to run the CMD again. Future updates use a dedicated
.vbslauncher (see §6).
Inside the extracted folder, run: 1_INSTALLER_MSC_First-Usage.cmd
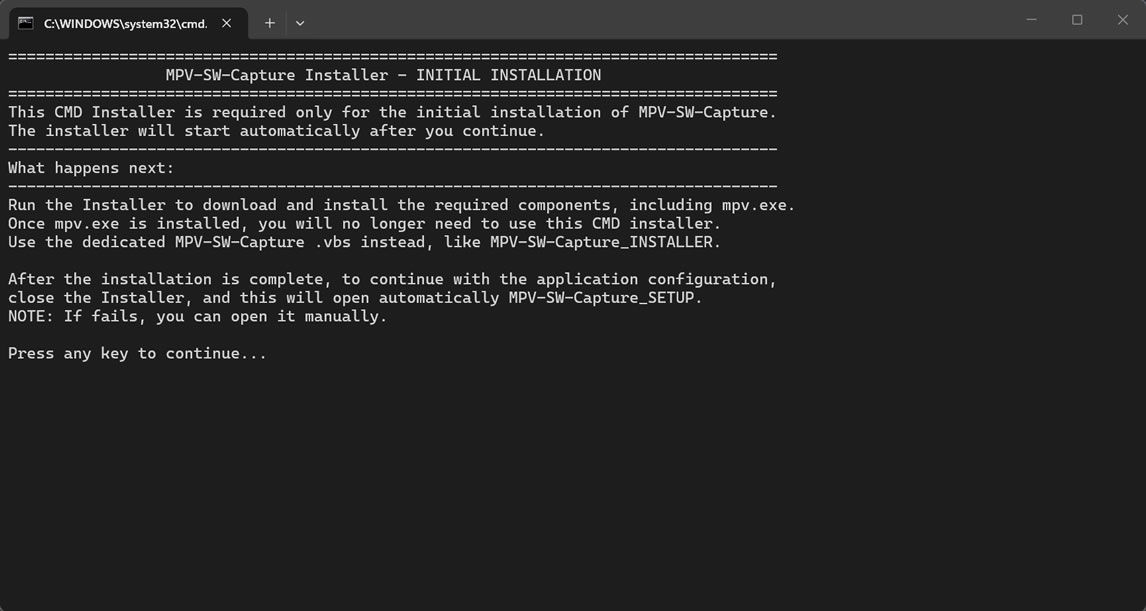
- A console window opens with a short explanation of what will happen. Read it, then press any key to continue.
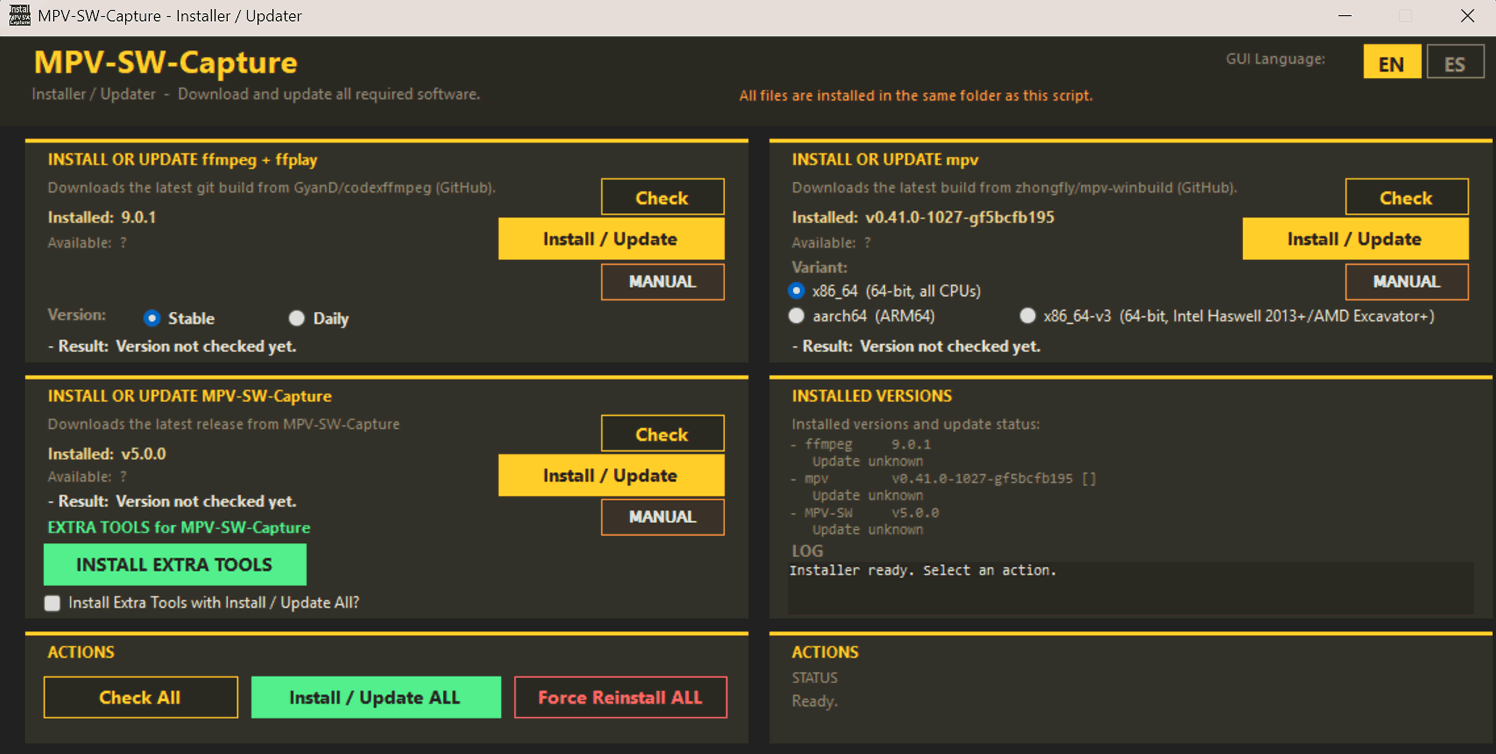
-
The installer opens automatically. It downloads and installs all required components, including
mpv.exe. Use the greenINSTALL / Update ALLbutton to do everything in one go. -
After you close the installer window manually, the original console window (still open in the background) will show a completion message and launch
MPV-SW-Capture_SETUP.vbsautomatically so you can configure the app.
The console window stays open the entire time and orchestrates the sequence. Do not close it manually while the installer is running.
If the automatic SETUP launch fails for any reason, you can open
MPV-SW-Capture_SETUP.vbsmanually from the same folder.
The SETUP window should have opened automatically after the installer finished. If not, double-click MPV-SW-Capture_SETUP.vbs.
You will find a GUI window similar to this:
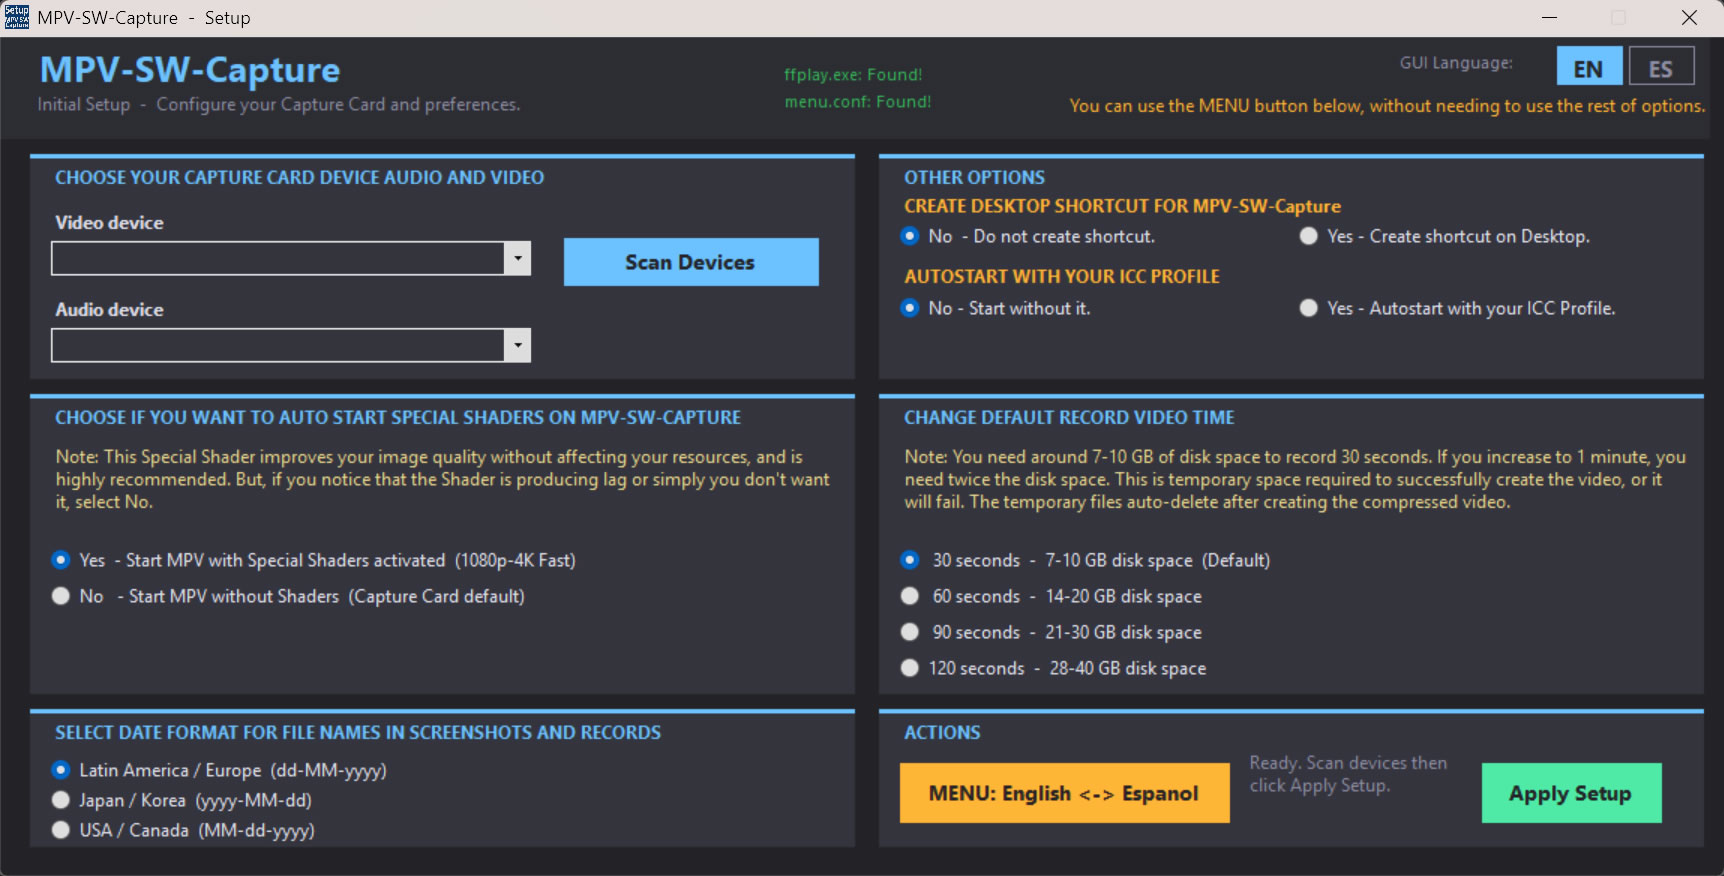
- To change the interface language, select it from the language list and press "Apply Language". You can swap whenever you want.
- Press "Scan Device" — it will list all audio and video devices currently attached. (If nothing is connected, the list will be empty. Connect your devices and press the button again.)
- Choose the video device in the list, then the audio device (must be the same type as the capture card).
- Choose Date Format, Auto Start Special Shaders, Default Record Video Time, and Create Desktop Shortcut to set your preferences.
- When you are ready, press the green "Apply Setup" button. If all is okay, you will receive a confirmation message with the changes.
Once mpv.exe is installed, you no longer need the CMD installer. To update to a newer version in the future, simply run:
MPV-SW-Capture_INSTALLER.vbs
This opens the same installer GUI directly, without the CMD wrapper, and applies the latest components.
Run MPV.exe (or use the desktop shortcut if you enabled it in SETUP).
If everything is set correctly, you will see your console with audio and video.
- To access the menu, right-click inside the window or press ESC.
- Double-click toggles full screen.
📖 Want to learn how the menu works in detail? See the full MSC Menu Guide.
If you want to use the old way to install MPV-SW-Capture (that still works), you are having problems, or anything else, you can find it here: