Guide‐MANUAL Installation
This is for users who want to install MPV-SW-Capture without the installer — either because they prefer full control, or because they want to update components manually.
The 3 core executables (
mpv.exe,ffplay.exe,ffmpeg.exe) are NOT included in the MPV-SW-Capture ZIP. You must download them yourself from their official sources before running the Setup tool.If
mpv.exeis missing,MPV-SW-Capture_SETUP.vbswill silently fail to open — it usesmpv.exeto launch the setup script internally, so it cannot run without it.Follow steps 1 and 2 below in order, then proceed to the Setup in step 3.
MPV (video player) — required
- Go to https://github.com/zhongfly/mpv-winbuild/releases.
- Check the "Download Tips" section. There are 3 versions.
- Choose only ONE of the latest builds matching your Windows version:
- 64-bit for modern PCs
- 64-bit-legacy for older PCs
- ARM64 for ARM-based Windows
- Download the
.7zarchive.
FFmpeg / FFplay (audio engine + tools) — required
- Visit https://www.gyan.dev/ffmpeg/builds/.
- Go to the "git master builds" section.
- Download the latest
ffmpeg-git-essentials.7z.
MPV-SW-Capture (this project)
- Download the latest release of this repository (ZIP) from the "Assets" section.
- Only the file named
MPV-SW-Capture-v.X.Y.Z.zip.
- Create a folder (e.g.
C:\MPV-SW-Capture) anywhere you like. - Open the MPV
.7zarchive you downloaded and extract onlympv.exeinto that folder. - Open
ffmpeg-git-essentials.7z, go to thebin/folder, and copyffplay.exeandffmpeg.exeinto the same folder. - Open the MPV-SW-Capture ZIP and extract all the files into the same folder.
✅ Verify before continuing: open the folder and confirm you see
mpv.exe,ffplay.exe, andffmpeg.exealongside the MPV-SW-Capture files. If any of them is missing, the Setup tool will not work.
You should end up with a structure like this:
MPV-SW-Capture/
├── bezels/
├── data/
├── scripts/
├── shaders/
├── 1_INSTALLER_MSC_First-Usage.cmd ← free to keep or delete
├── 1_README FIRST - MSC.txt ← free to keep or delete
├── ffmpeg.exe         ← from ffmpeg-git-essentials.7z
├── ffplay.exe         ← from ffmpeg-git-essentials.7z
├── input.conf
├── menu.conf
├── MPV-SW-Capture_INSTALLER.vbs
├── MPV-SW-Capture_SETUP.vbs
├── mpv.conf
└── mpv.exe            ← from zhongfly build
About
1_INSTALLER_MSC_First-Usage.cmdandMPV-SW-Capture_INSTALLER.vbs: in a manual installation you don't need them — they're for users who install via the automated installer. You can:
- Keep them (recommended) so you can use
MPV-SW-Capture_INSTALLER.vbsfor future updates.- Or delete them if you prefer a cleaner folder and will update manually every time.
1_README FIRST - MSC.txtis only informational. You can safely delete it after reading.
Connection
- Connect your capture card to your PC using USB 3.0 (or USB 2.0).
- Connect HDMI from your console to the input of the capture card.
Run the Setup tool
⚠️ Before running Setup: make surempv.exe,ffplay.exe, andffmpeg.exeare already in the folder (see step 2). If they are, you're good to go. If not, go back to step 1.
Inside the folder, double-click MPV-SW-Capture_SETUP.vbs.
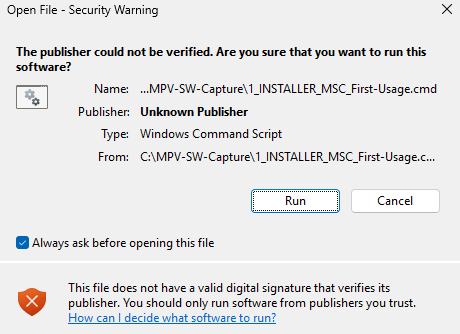
⚠️ Windows may show a Security Warning the first time you run any.vbsor.cmdfile like this example. This is normal — click Run to proceed. To stop it from asking every time, check "Always ask before opening this file" before clicking Run.
You'll see a GUI window similar to this:
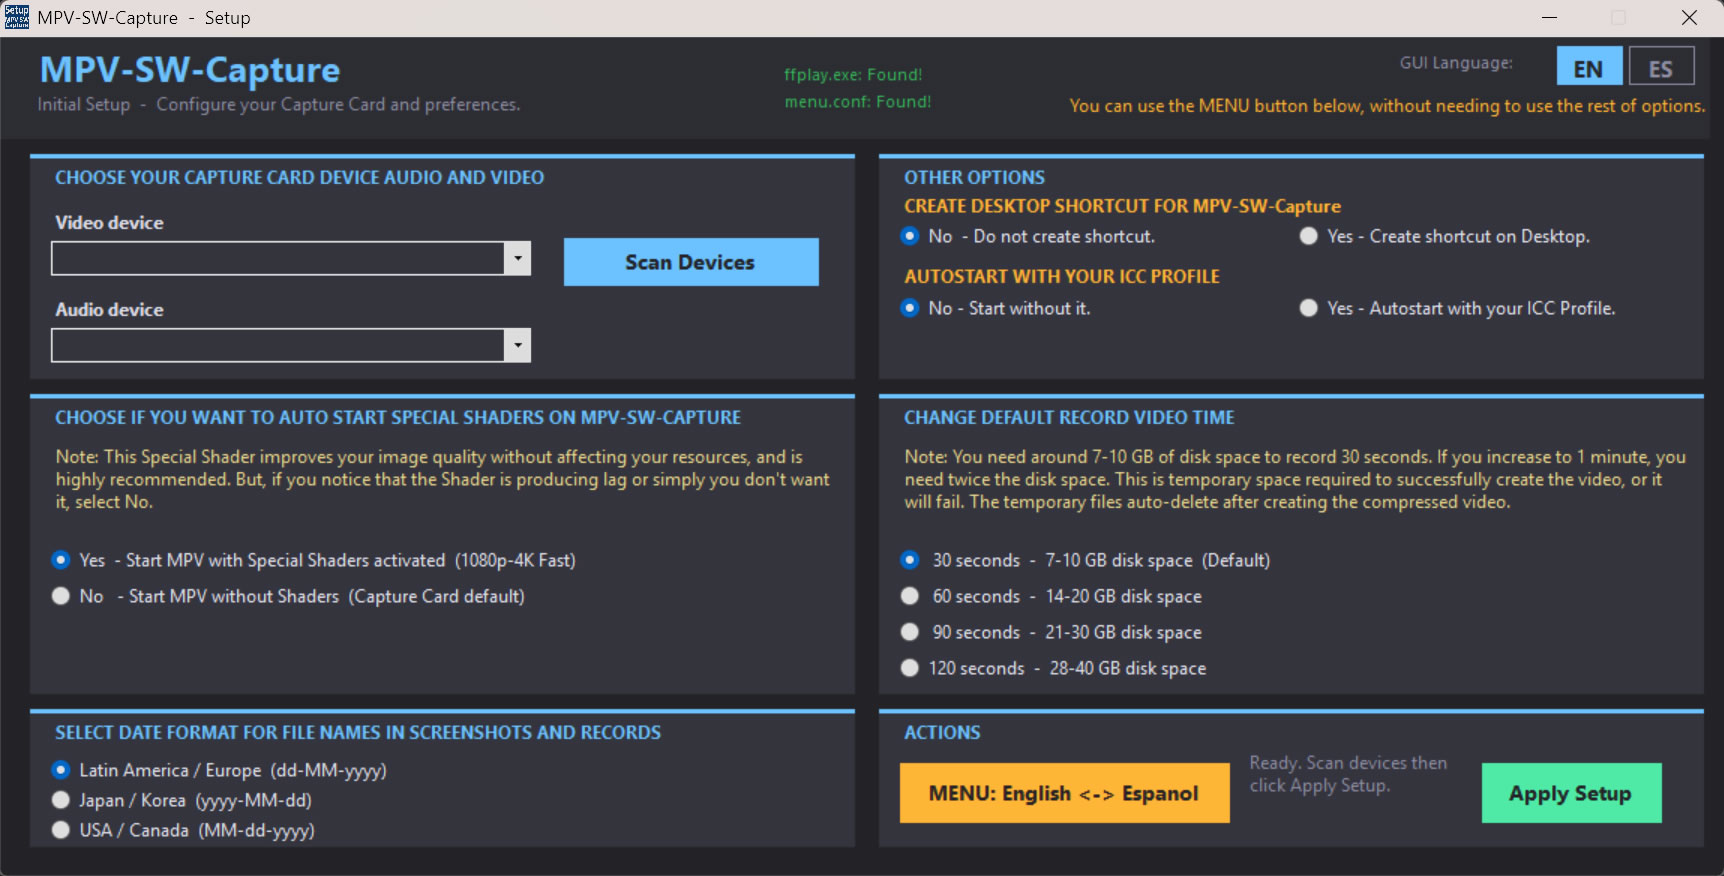
- If the files are correctly placed in the folder, you'll see messages like
ffplay.exe: Found!andmenu.conf: Found!. - Language: to change the GUI language, select it from the dropdown list and press "Apply Language". Currently available: English, Spanish, Japanese.
- Press "Scan Device" — it will list all audio and video devices currently connected. (If nothing is connected, the list will be empty. Connect your devices and press the button again.)
- Choose the video device, then the audio device (must be the same type as the capture card).
- Configure your preferences: Date Format, Auto Start Special Shaders, Default Record Video Time, Create Desktop Shortcut.
- When you're ready, press the green "Apply Setup" button.
- If everything is correct, you'll receive a confirmation message with the changes applied.
Note about languages: there are two ways to change the menu language in MPV-SW-Capture:
- From the Setup: select the language from the dropdown list and press "Apply Language". The change is applied after restarting MPV-SW-Capture.
- From the in-game menu: click the language badge (
EN,ES,JP) in the header, or go to Quick Options → SETTINGS. The change is applied instantly, without closing MPV.Both methods modify the same menu language — just pick whichever is more convenient for you.
- Run
MPV.exe(or use the desktop shortcut if you enabled it in Setup). - If everything is set correctly, you'll see your console with audio and video.
- To access the menu, right-click inside the window or press
ESC. - Double-click toggles full screen.
📖 Want to learn how the menu works in detail? See the full MSC Menu Guide.