Mac
Note
This page describes the new installation method using the official M5Burner v3 utility.
Screenshots will be added soon. Feedback and corrections are welcome, please PR or create an issue.
This guide explains step by step how to program your M5Stack with the official M5Stack M5Burner utility (Arduino not required).
Connect the M5Stack device to your computer with the USB cable, open a terminal (Applications > Utilities > Terminal) and enter:
ls /dev/cu.*
Recent macOS versions (Catalina 10.15 and later) recognize most M5Stack devices without installing any driver. Depending on your device you should see a new port appear such as:
-
/dev/cu.usbserial-XXXX(CP2104 chip, built-in macOS driver) -
/dev/cu.wchusbserial-XXXX(CH9102 chip) -
/dev/cu.SLAB_USBtoUART(CP2104 chip with the SiLabs driver installed)
Take note of the port name, you will need it later.
If a new port appears, no driver is needed: skip to Download and install M5Burner.
-
Go to the M5Stack download page https://docs.m5stack.com/en/download, section USB Driver, and download the driver matching your device:
-
CH9102 chip (most recent Basic and Core2 units):
CH9102_VCP_SER_MacOS(take the M1 Silicon version if your Mac has an Apple Silicon processor). On macOS 13 and later you must then allow the driver in System Settings > General > Login Items & Extensions > Driver Extensions. Reconnect the device: the port appears as/dev/cu.wchusbserial-XXXX. The same driver is also available from the manufacturer WCH at https://github.com/WCHSoftGroup/ch34xser_macos. -
CP2104 chip (older Basic and Core units):
CP210x_VCP_MacOS.
-
CH9102 chip (most recent Basic and Core2 units):
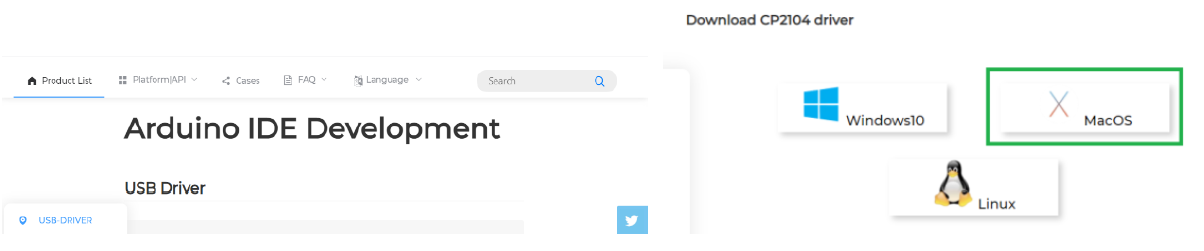
- Go to SiLabs https://www.silabs.com/developer-tools/usb-to-uart-bridge-vcp-drivers and download the macOS version.
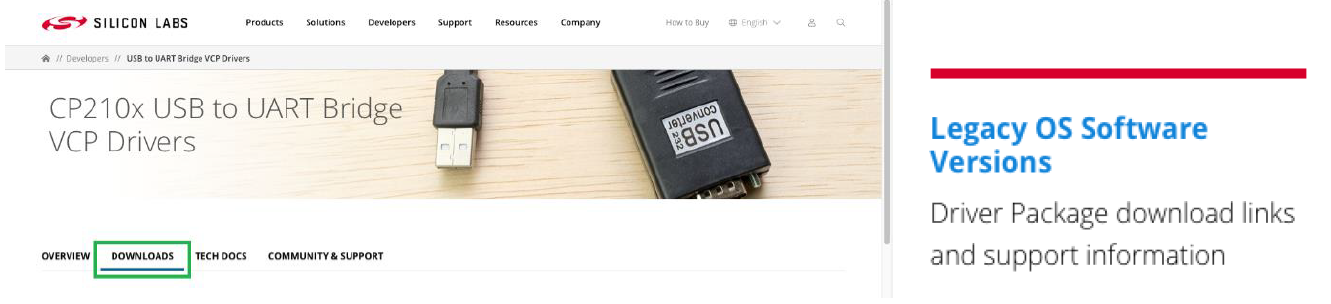
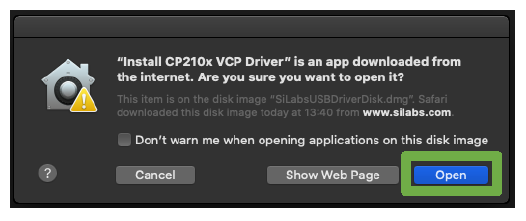
Allow download and open finder to Downloads, folder Mac_OSX_VCP_Driver, double click the SiLabsUSBDriverDisk.dmg. The disk will extract on your desktop. Open it and run the installer.

Select Open
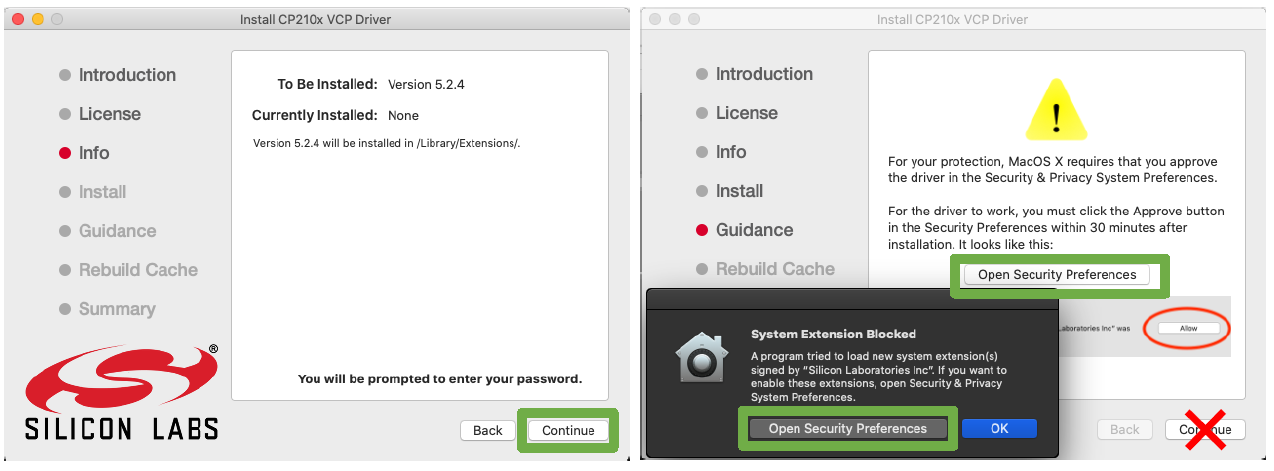
Click Continue, Continue, Agree to license…
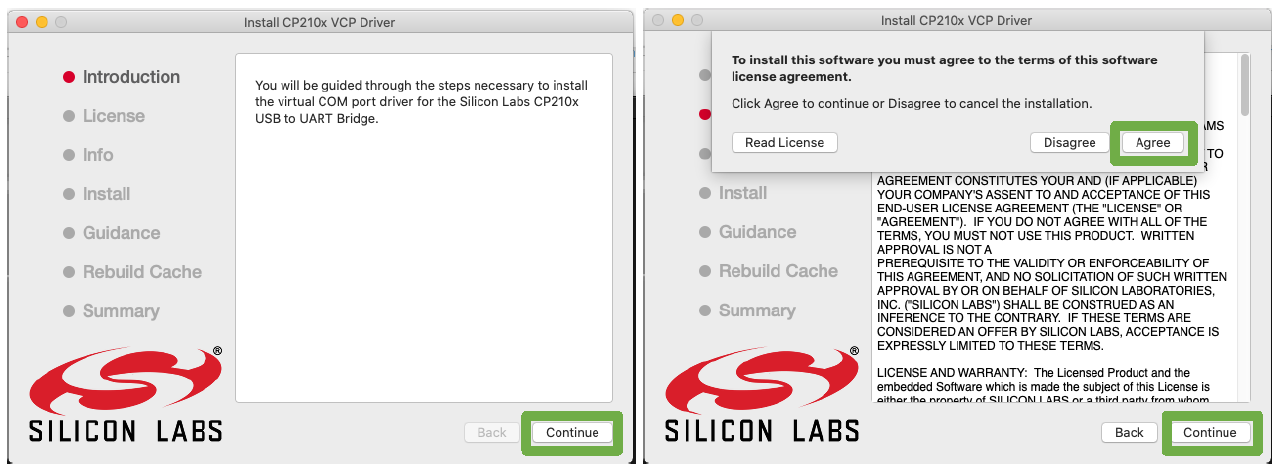
Continue, enter your password, Continue, Open Security Preferences
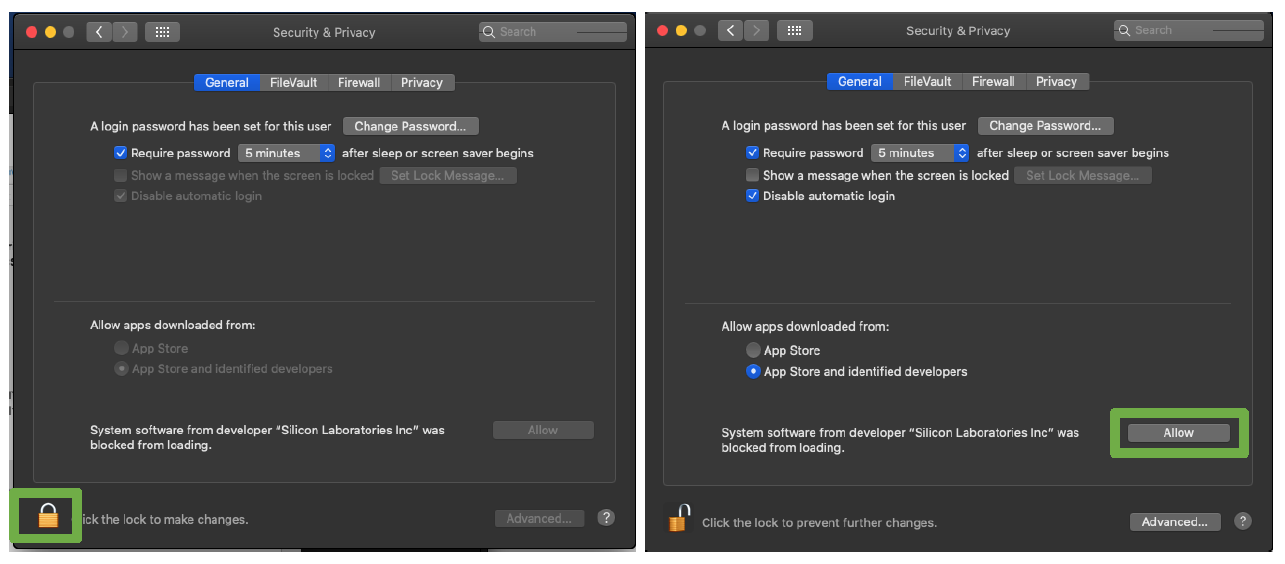
Unlock the panel (enter your password) and allow the driver, close Security & Privacy
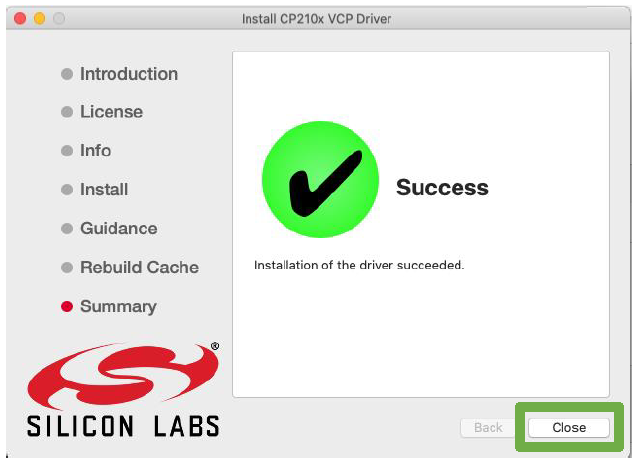
Wait until the install completes and close.
Reconnect the M5Stack device and check the port again with ls /dev/cu.*
Go to the official M5Burner page https://docs.m5stack.com/en/uiflow/m5burner and download the MacOS x64 version.
Open the downloaded .dmg file and drag M5Burner to your Applications folder.
On the first launch, macOS may block the application because it was not downloaded from the App Store. Right click (or Control-click) on M5Burner in Applications and select Open, then confirm Open. If macOS still refuses, go to System Settings > Privacy & Security and click Open Anyway.
The firmware is published in the USER CUSTOM section of M5Burner and is retrieved with a share code.
- Click USER CUSTOM at the bottom of the left menu.
-
Click the Share Burn button at the top of the window.
-
Enter the share code matching your device:
| Device | Share code |
|---|---|
| M5Stack Basic / Core (grey, all models) | 0nPW6eAzC7GcnfWN |
| M5Stack Core2 | 1HgGY5jdSokZb7JK |
M5Burner downloads the firmware and opens the burn window:
- Check your M5Stack device is connected.
- Select the serial port of your device (the one you noted before, for example
/dev/cu.usbserial-XXXX). - Select baudrate 921600.
- Click Start and wait until the operation completes.
Troubleshooting: if the burn fails or stops, try again with a lower baudrate (115200), use a different USB cable or USB port, and make sure no other program is using the serial port.
Congratulations, you programmed your M5Stack.
Continue with the setup here.
Looking for the previous installation method (command line with esptool)? See the old macOS instructions.