Quality and Settings
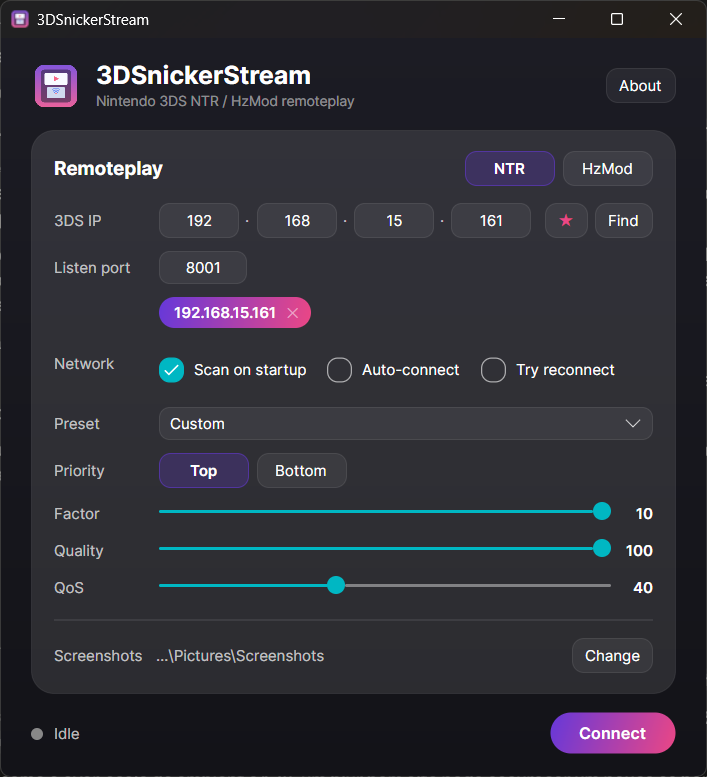
All of this lives on the connect screen (and some is adjustable live in the Stream View).
Priority (Top / Bottom) tells NTR which screen to favour with bandwidth — the priority screen gets
more frames. Swap it live with P.
- Factor (0–10) — the priority ratio between the two screens. Higher = the priority screen gets proportionally more of the bandwidth.
- Quality (10–100) — JPEG image quality. Higher = sharper but heavier (lower framerate).
- QoS (2–100) — the network bandwidth cap NTR uses. Higher lets more data through (smoother), lower is gentler on a congested Wi-Fi.
For HzMod, you instead set Quality and a CPU limit.
Pick a Preset to set Factor / Quality / QoS in one click. Built-ins:
| Preset | Factor | Quality | QoS |
|---|---|---|---|
| Best quality | 2 | 90 | 10 |
| Great quality | 5 | 80 | 18 |
| Good quality | 5 | 75 | 18 |
| Balanced | 5 | 70 | 20 |
| Good framerate | 8 | 60 | 26 |
| Great framerate | 8 | 50 | 26 |
| Best framerate | 10 | 40 | 34 |
Adjust any slider and the preset shows Custom. You can also save your own presets.
The Compression dropdown picks the streaming format (JPEG Compat / Uncompressed / Reliable Stream / Reliable Stream Delta). This is a big lever for smoothness — it has its own page: Compression Formats.
- Scan on startup — scan the LAN for a 3DS when the app opens.
- Auto-connect — connect as soon as a 3DS is found.
- Try reconnect — auto-retry if the stream drops.
- ⭐ / IP chips — bookmark IPs and click a chip to reuse one.
-
Screenshots folder — where
Screenshotsaves PNGs. Change it with the Change button. - Check for updates on startup — toggle in the About dialog; it can also check on demand.
- Listen port — the UDP port the app listens on (default 8001).
Settings are stored per-user (%APPDATA%\3DSnickerStream on Windows; the platform config folder on
macOS/Linux).