Repository navigation
Settings
Open Settings from the user menu (top right, your username). The page is divided into collapsible sections: your own sections first, then — only if you are an admin — the Admin Settings section. Click a section header to expand or collapse it.
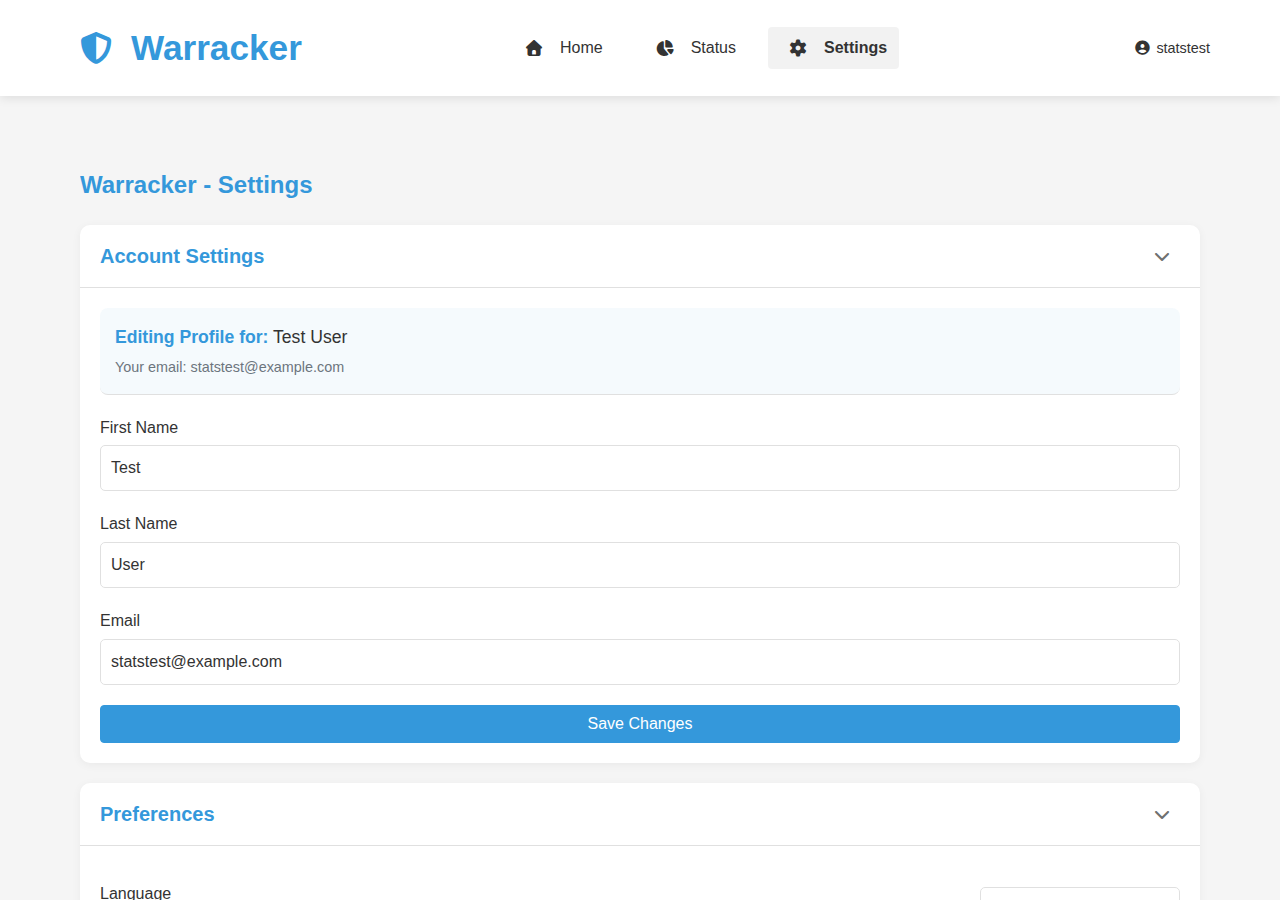
- Account Settings
- Preferences
- Notification Settings
- Security
- Danger Zone
- Admin Settings (admins only)

Your profile:
- First Name and Last Name — shown in the user menu and used in notification emails.
- Email — your contact address, and the address expiry notifications are sent to when your channel includes Email.
- Save Changes — applies the edits. The header above the form shows "Editing Profile for: <username>" and your current email.

- Language — your interface language. 20 are available: English, Français, Español, Deutsch, Italiano, Čeština, Nederlands, हिन्दी, فارسی, العربية, Русский, Українська, 简体中文, 繁體中文, 日本語, Português, 한국어, Türkçe, Polski, and עברית. Only interface text is translated, never your warranty data.
- Dark Mode — toggle between the light and dark themes.
- Default View — how the warranty list is shown when you open the app: Grid View (cards), List View (compact rows), or Table View (columns). You can still switch views per session from the toolbar's View menu.
- Currency Symbol — your default currency (e.g. USD, EUR, CAD). New warranties inherit it, and the status dashboard's Total Value is counted in it. A warranty can still carry its own currency from the add/edit form.
- Currency Position — Left ($100.00) or Right (100.00$) for how prices are displayed.
- Expiring Soon Days — how many days before expiration a warranty counts as "Expiring Soon" (1–365, default 30). This drives the orange card state, the Expiring Soon dashboard count, and the window for email notifications.
- Date Format — how dates are displayed throughout the app: Month/Day/Year, Day/Month/Year, Year-Month-Day, or the three word forms ("Dec 31, 2024", "31 Dec 2024", "2024 Dec 31").
Each preference section has its own save button — save the section after changing it.

- Notification Channel — how you want to be alerted: Disabled, Email, Apprise, or Both. Picking Email reveals the Email Settings block; picking Apprise reveals the Apprise Settings block; Both shows both.
- Email Settings — Notification Frequency (Daily, Weekly, or Monthly — how often the scheduler sends you a digest), Notification Time (24-hour format, the time of day the digest goes out), and Timezone (so the time is interpreted correctly for you). Email alerts cover warranties inside your Expiring Soon Days window.
- Apprise Settings — the same frequency, time, and timezone controls for push notifications via Apprise to 100+ services (Discord, Slack, Telegram, email-to-push, and more).
- Notify once per threshold — each expiry threshold notifies exactly once per warranty (per channel). Alerts do not repeat daily: once you've been told a warranty is 30 days out, you won't be told again for that threshold. See Notifications for the full mechanics, and the site-level Apprise days below for the threshold list.

Change Password — enter your Current Password, then the New Password twice (New Password and Confirm New Password), and save. A confirmation dialog tells you the password was updated.

Delete Account — permanently deletes your account and all of its data (warranties, documents, claims, tags). A confirmation dialog asks you to confirm; this cannot be undone. Admins deleting another user do it from User Management instead (below).

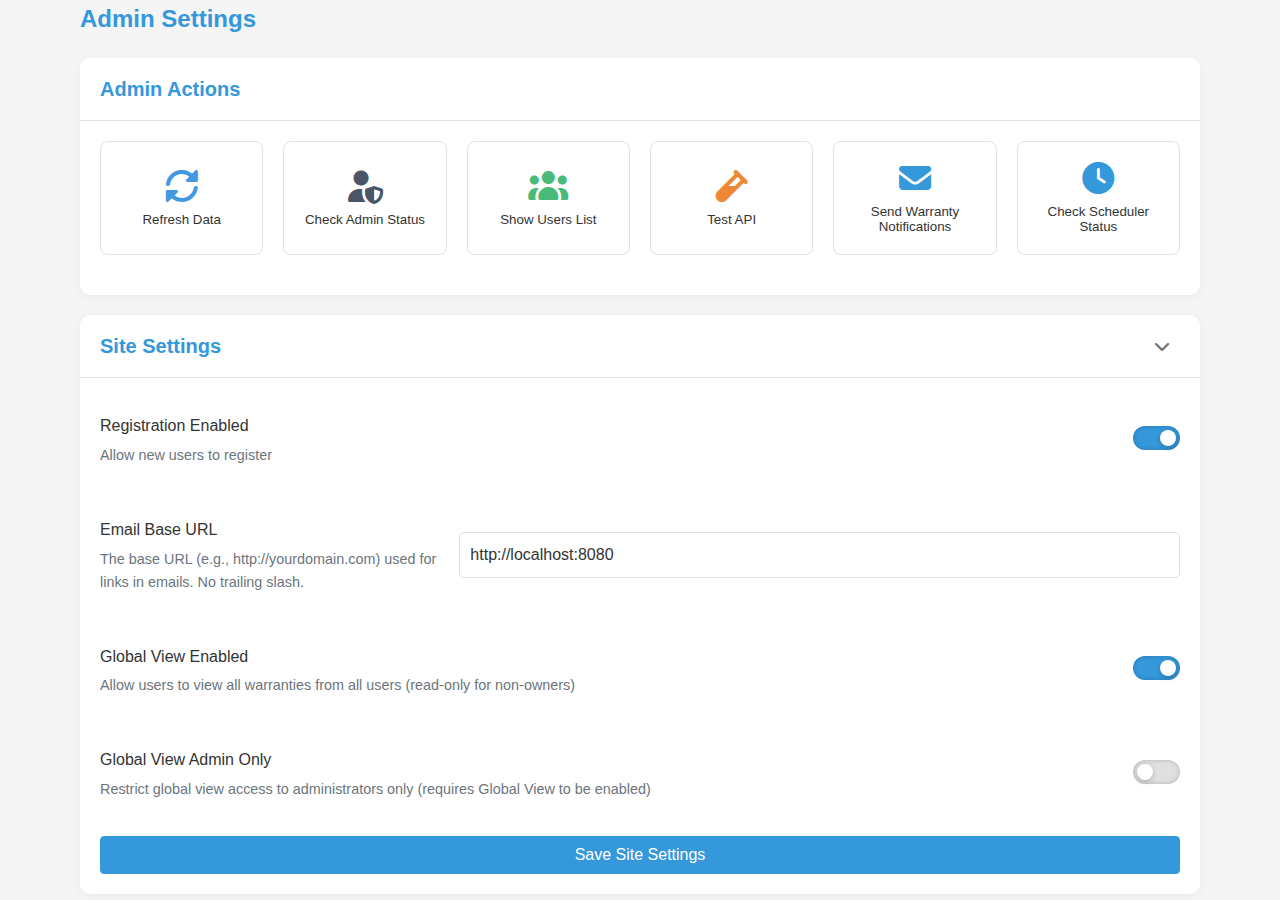
Six shortcut buttons, each running one job immediately:
- Refresh Data — reloads the admin data (users list and related state) shown on the page.
- Check Admin Status — verifies your account currently holds admin privileges.
- Show Users List — opens the users modal: every account, with edit and delete actions (see User Management below).
- Test API — pings the backend API to confirm it responds.
- Send Warranty Notifications — triggers the expiry notification run on demand instead of waiting for the scheduled run. Useful after changing notification settings, to confirm alerts flow.
- Check Scheduler Status — reports whether the notification scheduler is running and healthy.
Site-wide switches (click Save Site Settings after changing them):
- Registration Enabled — when on, anyone who reaches the registration page can create an account. Turn it off to close sign-ups (the first account is always creatable, so a fresh install can never lock itself out).
-
Email Base URL — the public base URL (e.g.
https://yourdomain.com, no trailing slash) used to build links inside notification emails. - Global View Enabled — lets signed-in users see all users' warranties, not just their own. This is the intentional family/team design: one shared instance. Other users' warranties are read-only to non-owners, and claim/"other" documents are never shared.
- Global View Admin Only — restricts the global view to administrators. Requires Global View Enabled to be on.
Connect a single-sign-on provider (Google, GitHub, Keycloak, …). See Authentication for the concepts.
- Enable OIDC SSO — shows the provider button on the login page.
- OIDC-Only Login Mode — hides the username/password form, so the login page offers only the provider button.
- Skip Login Screen — only meaningful in OIDC-only mode: instead of showing the login page at all, Warracker redirects straight to the identity provider.
- OIDC Provider Name — the label on the login button, e.g. "Google" or "Keycloak".
- Client ID and Client Secret — from your provider's application registration.
- Issuer URL — your provider's issuer address (used for discovery).
-
Scope — the scopes requested, default
openid email profile. - OIDC Admin Group — the provider group whose members automatically get admin privileges on login. Blank disables it. The current owner always keeps admin access regardless of group membership.
- Enable Paperless-ngx Integration — turns on the Paperless features in the add/edit forms and claim documents. Non-admin users pick up the enabled flag through a dedicated status endpoint, so they see the browse/link sections without needing admin access.
- Paperless-ngx URL — your Paperless-ngx instance address.
- API Token — generated in Paperless-ngx under Settings → API Tokens.
- View Documents in Warracker — when on, Paperless documents open inside Warracker; when off, they open in the Paperless-ngx UI.
- Connection Testing — three admin-only checks: Test Connection (reachability + credentials), Debug Config (what Warracker thinks is configured), and Test Upload (push a test document through). See Paperless-ngx.
Site-wide push settings, separate from each user's own Notification Settings. A status badge shows whether Apprise is currently working.
- Enable Apprise Notifications — master switch for site-wide Apprise delivery.
- Notification Mode — Global Summary (one digest covering the selected warranties) or Per User (each user gets their own notifications).
- Warranty Scope — All Users' Warranties or Admin's Warranties Only (notifications cover only the admin's own warranties).
-
Notification URLs — one per line (or comma-separated) in
Apprise URL format, e.g.
mailto://user:password@gmail.com,discord://webhook_id/webhook_token,slack://TokenA/TokenB/TokenC/Channel,telegram://BotToken/ChatID. The Apprise wiki documents every supported service and its URL format. -
Notification Days — the expiry thresholds, comma-separated,
default
7,30: a notification fires 30 days and 7 days before expiration, once per threshold per warranty. - Check Frequency — how often the system scans for expiring warranties: Daily, Weekly, or Monthly (a global setting).
-
Message Title Prefix — prepended to notification titles,
default
[Warracker](so alerts read "[Warracker] Warranties Expiring Soon"). - Test URL (Optional) — a URL used only for sending a test notification; it is not saved to the main configuration.
Recent Changes — a log of recent changes made by administrators and users (settings changes, user edits, ownership events, …). Use it to answer "who changed what, and when".
Select New Owner (must be an admin) + transfer confirmation — hands application ownership to another admin user. This is irreversible: you become a regular admin, and the new owner has ultimate control (including transferring it onward). The former owner keeps admin access, but after the transfer they follow normal admin-group synchronization on their next OIDC login.
From Show Users List (or the users modal):
- Users List — every account with username, email, and roles.
- Edit User — change a user's Username and Email, and flip two toggles: Active Status (deactivated users cannot sign in) and Admin Status (grant or revoke admin privileges).
- Delete User — permanently removes the account and its data, after confirmation. (Deleting your own account is done from the Danger Zone instead.)