Repository navigation
Tutorial Projects and Workspace
GUI Tutorial · Chapter 2 of 4 — inspecting, exporting and opening projects, then a tour of the modeling workspace.
Clicking a project card opens its details dialog without leaving the dashboard. From here you can inspect the project, export it, or open it in the full workspace. The header shows the project name and three actions: Open (load the workspace), Delete, and Export study. When an export bundle has already been prepared, a green "Bundle ready" banner and a Download study .zip button appear at the top.
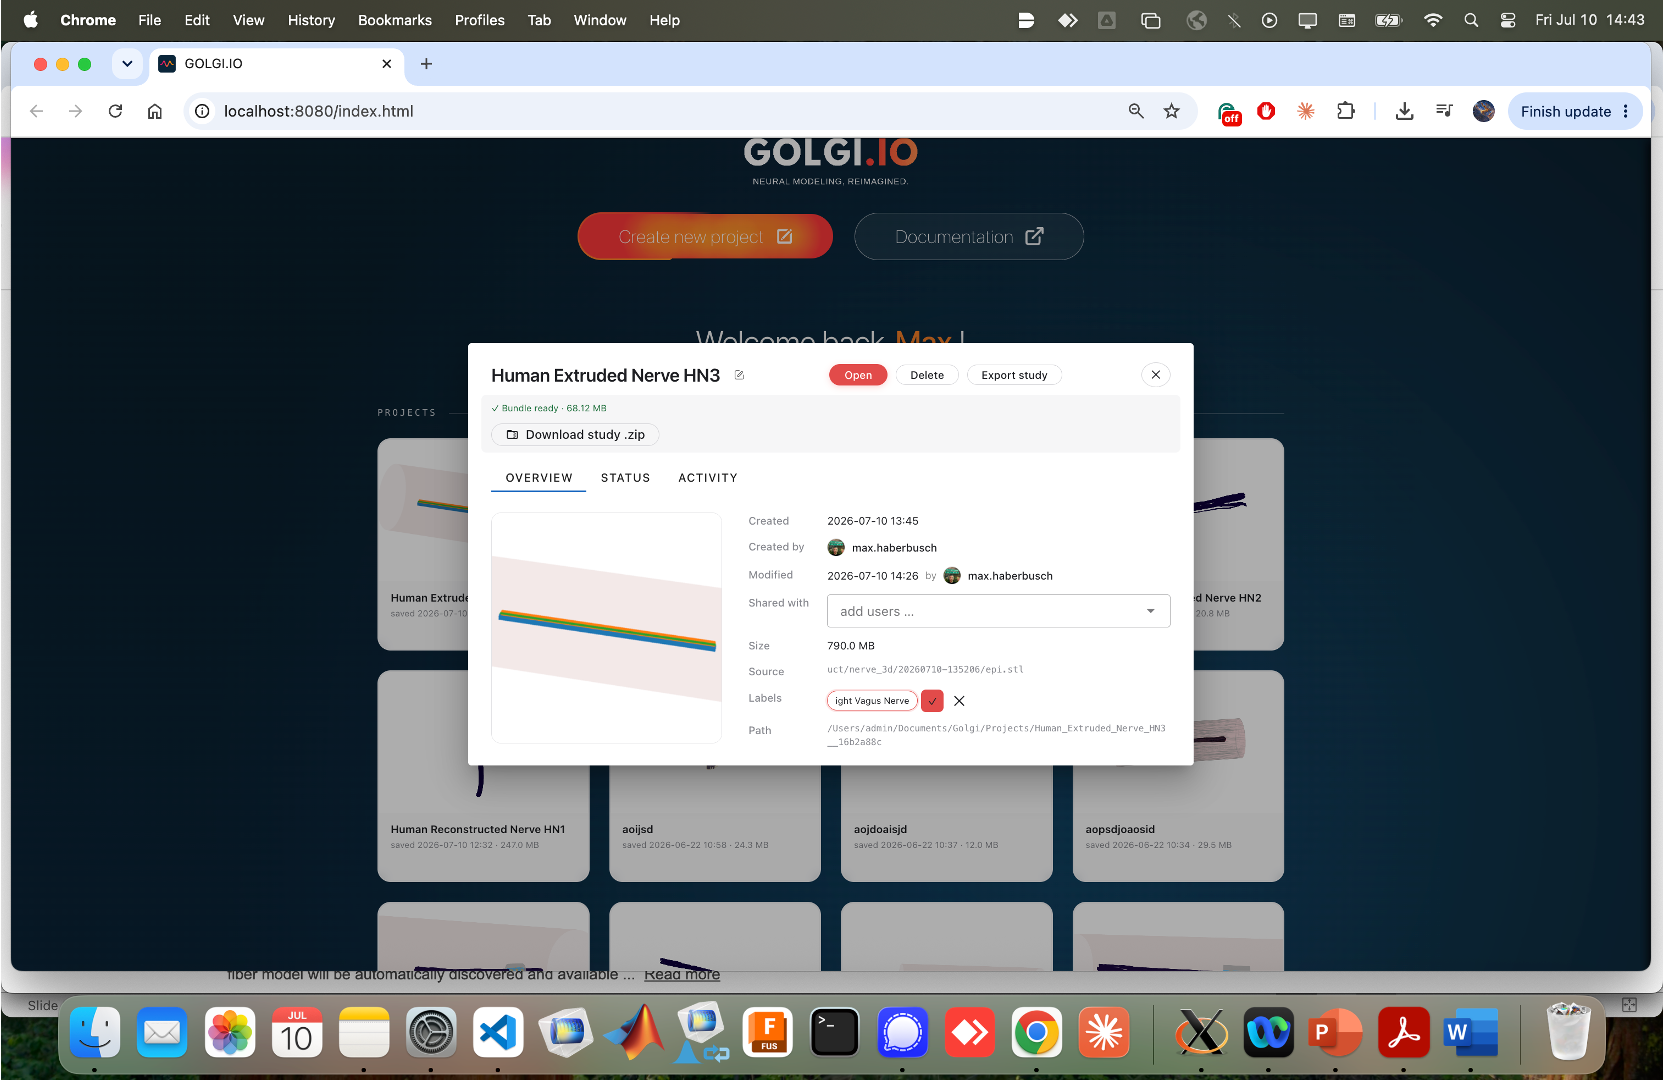
The details dialog has three tabs.
Overview summarizes provenance and storage: Created / Modified timestamps and authors, who the project is Shared with (add collaborators via the add users… picker), the on-disk Size, the Source geometry file, any free-text Labels, and the absolute Path on the server. A rendered thumbnail of the current model sits on the left.
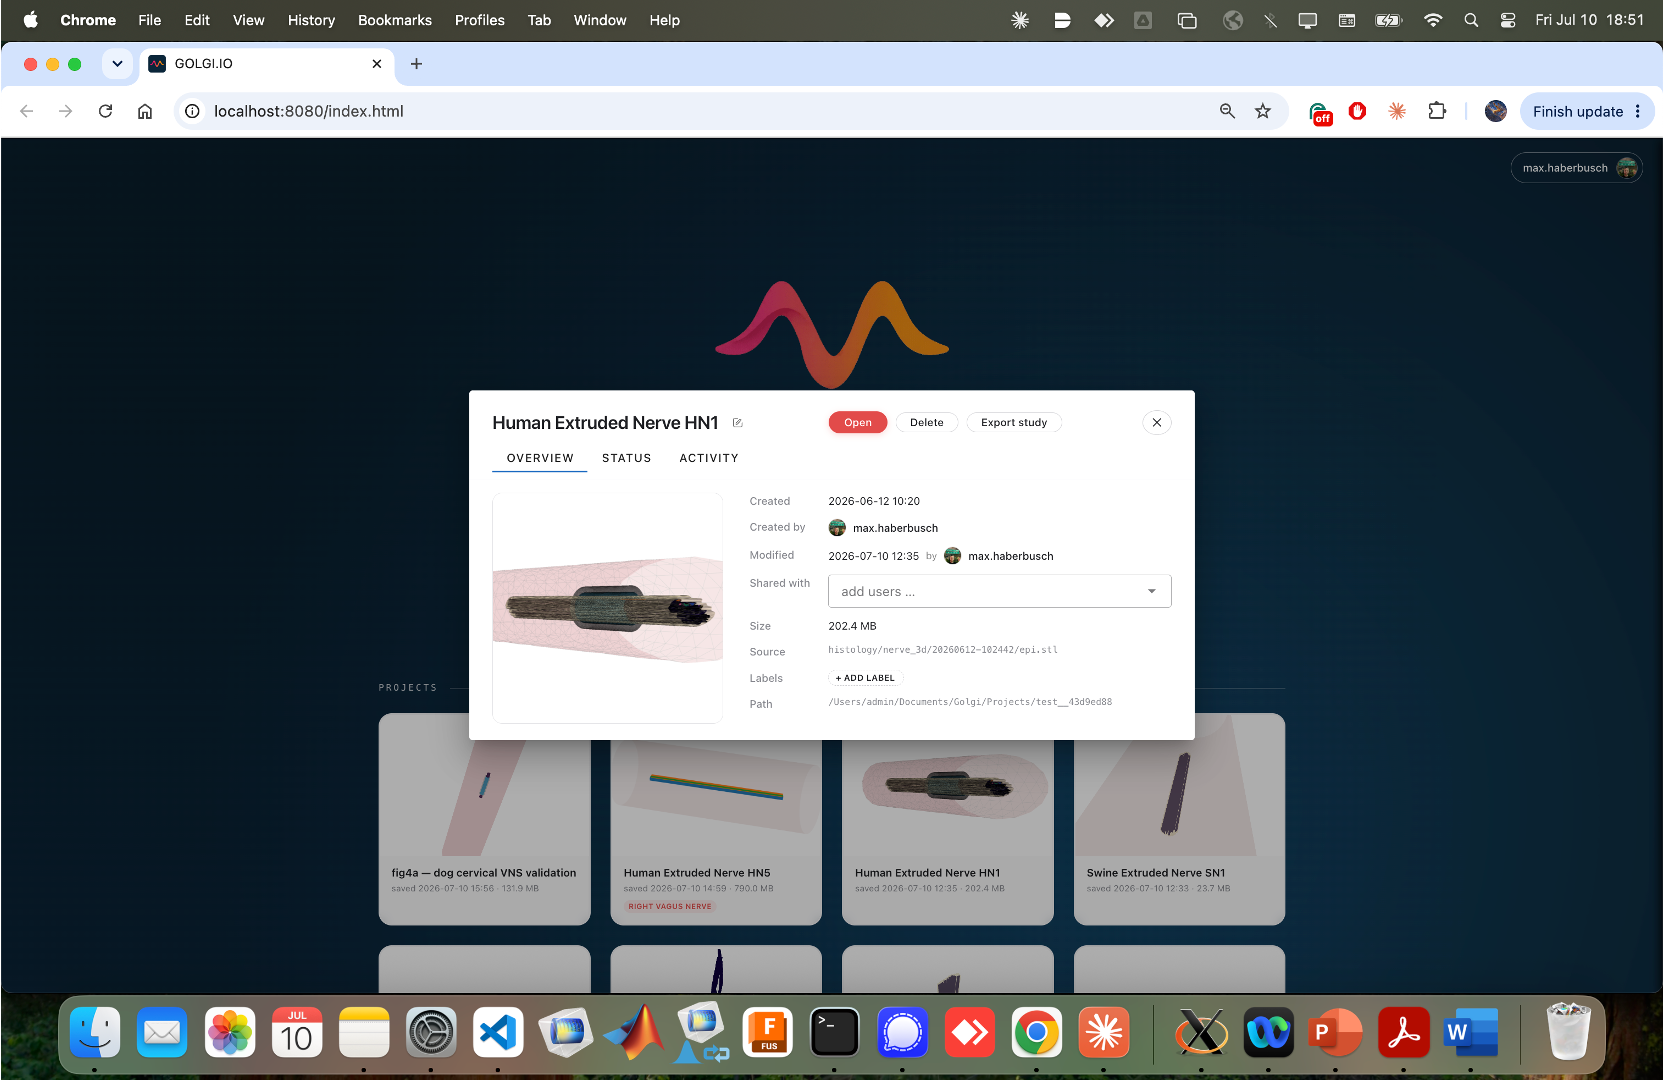
Status is a pipeline checklist. Each stage — Nerve geometry imported, Cuff designs placed, Conductivities configured, Mesh built, Fiber trajectories generated, FEM extracellular field solved, Single-fiber simulations run, Population simulated — shows a green tick when complete (with a short note such as the source file or "Cached"), or a hollow circle when it has not been run yet. This is the quickest way to see what remains to be done for a given project.
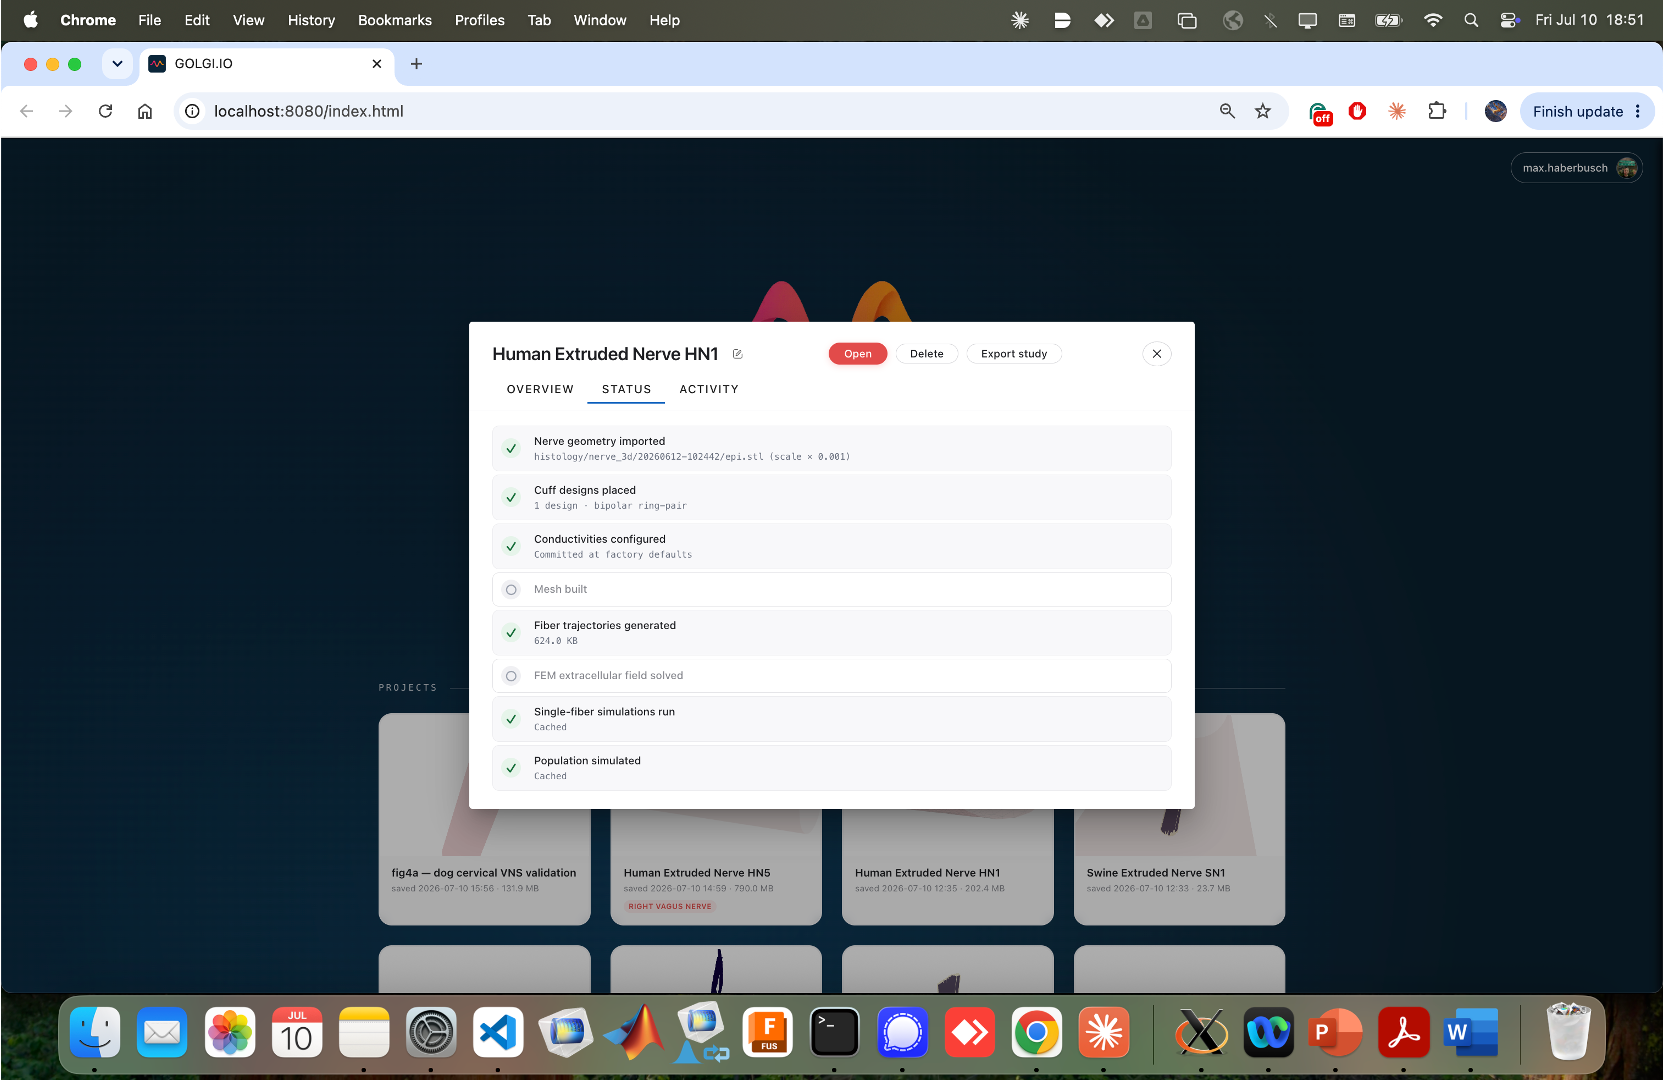
Activity is a reverse-chronological audit log: who did what and when (Project opened, Geometry imported, Study exported, FEM solved, Conductivities updated, Mesh built, Fibers generated, …), each stamped with a SUCCESS badge. This log is also embedded (in excerpt) into exported study bundles for reproducibility — see Authentication & Audit.
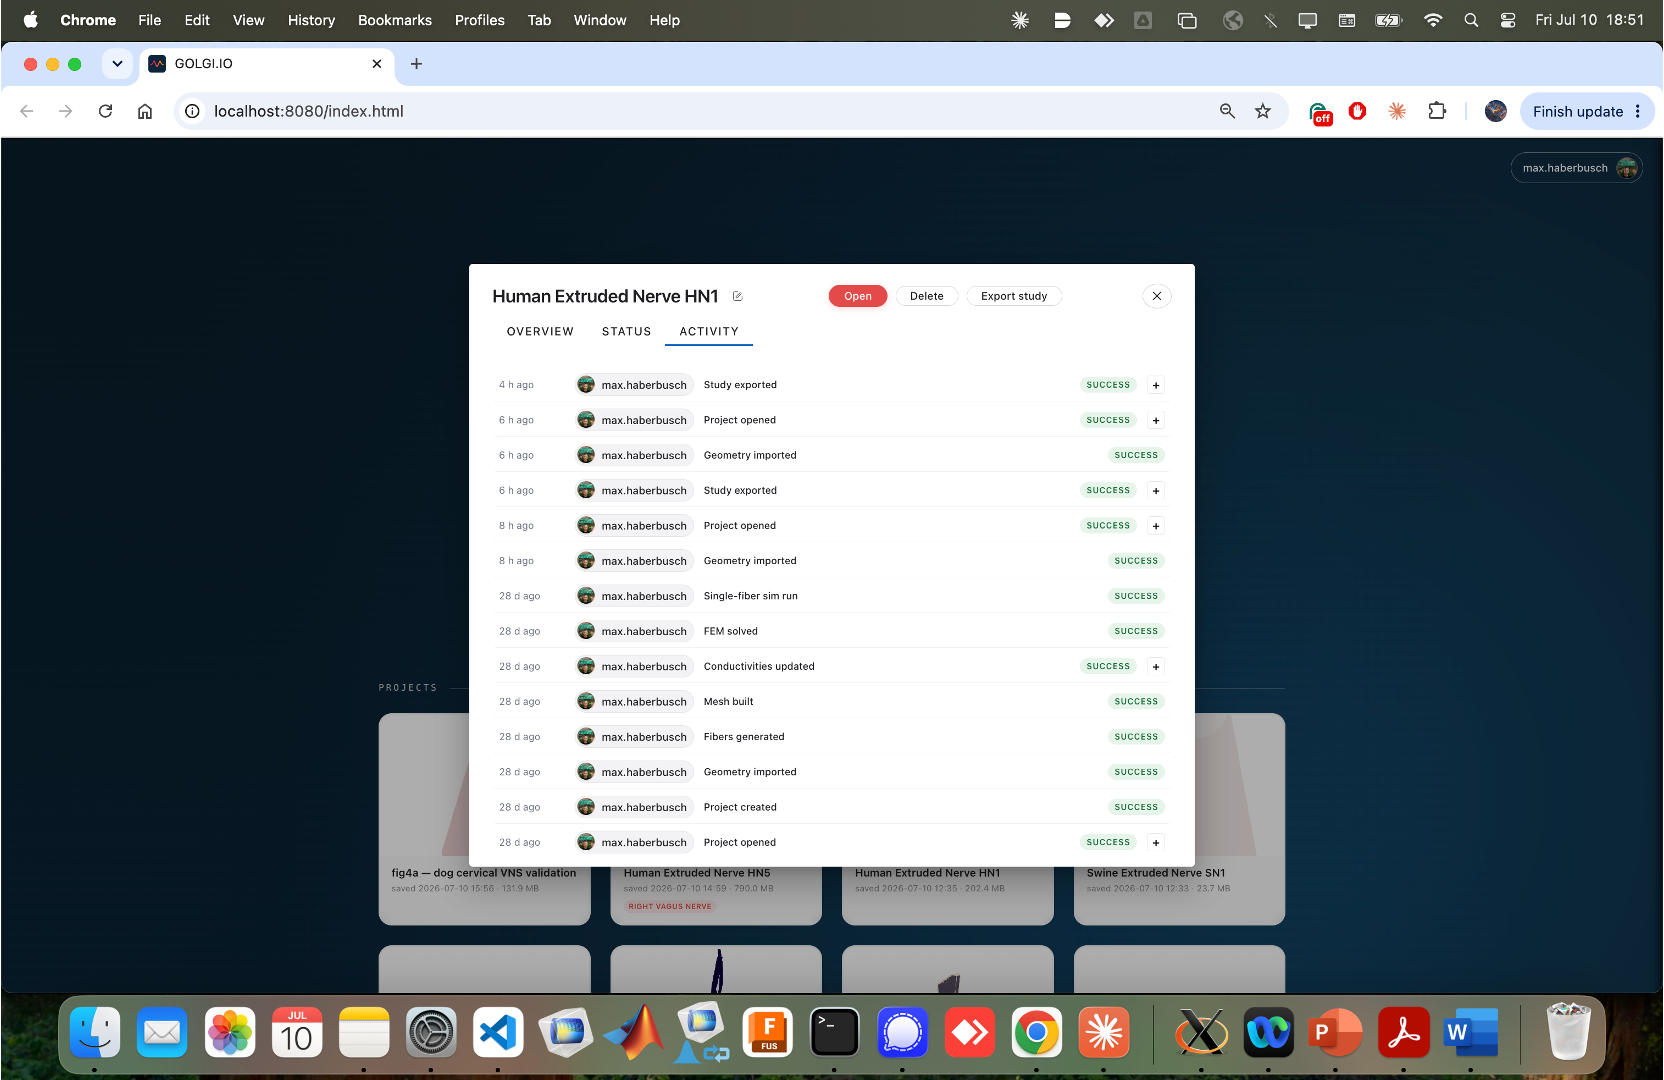
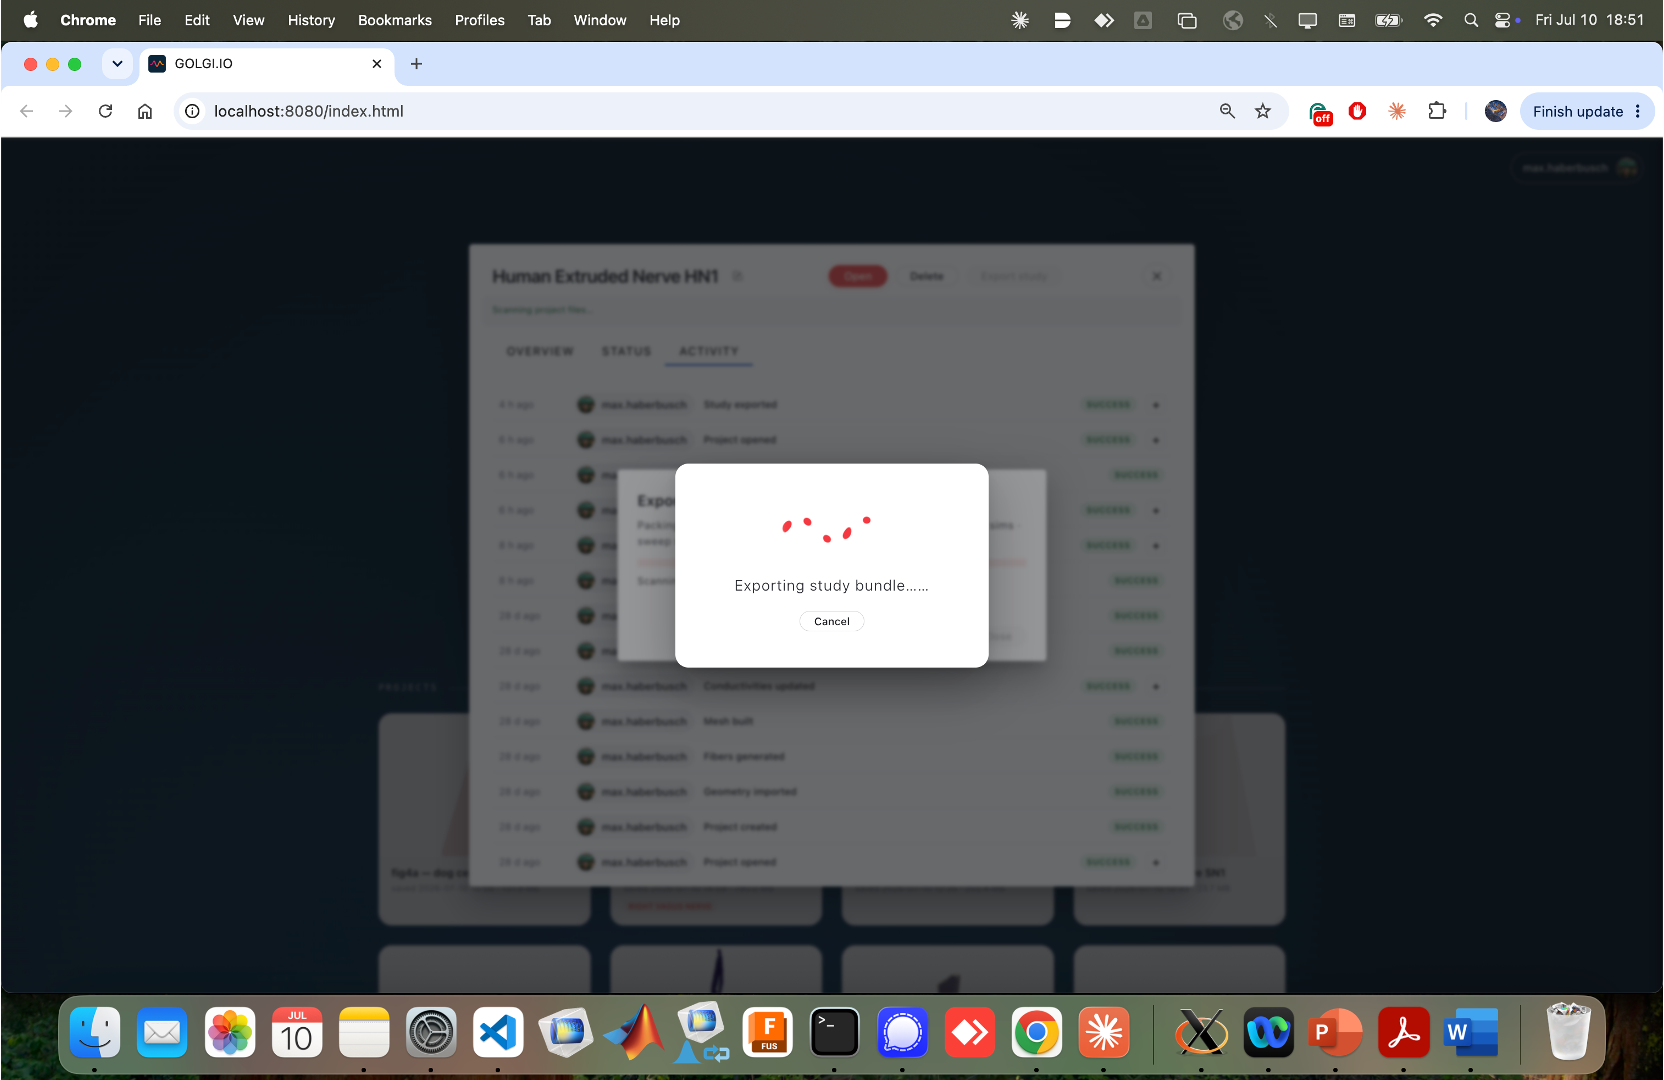
Clicking Export study packs every project file — configs, mesh, FEM outputs, fibers,
simulations, sweep results and an audit excerpt — into a single self-contained .zip. A progress
dialog ("Exporting study bundle…") appears while it packs.
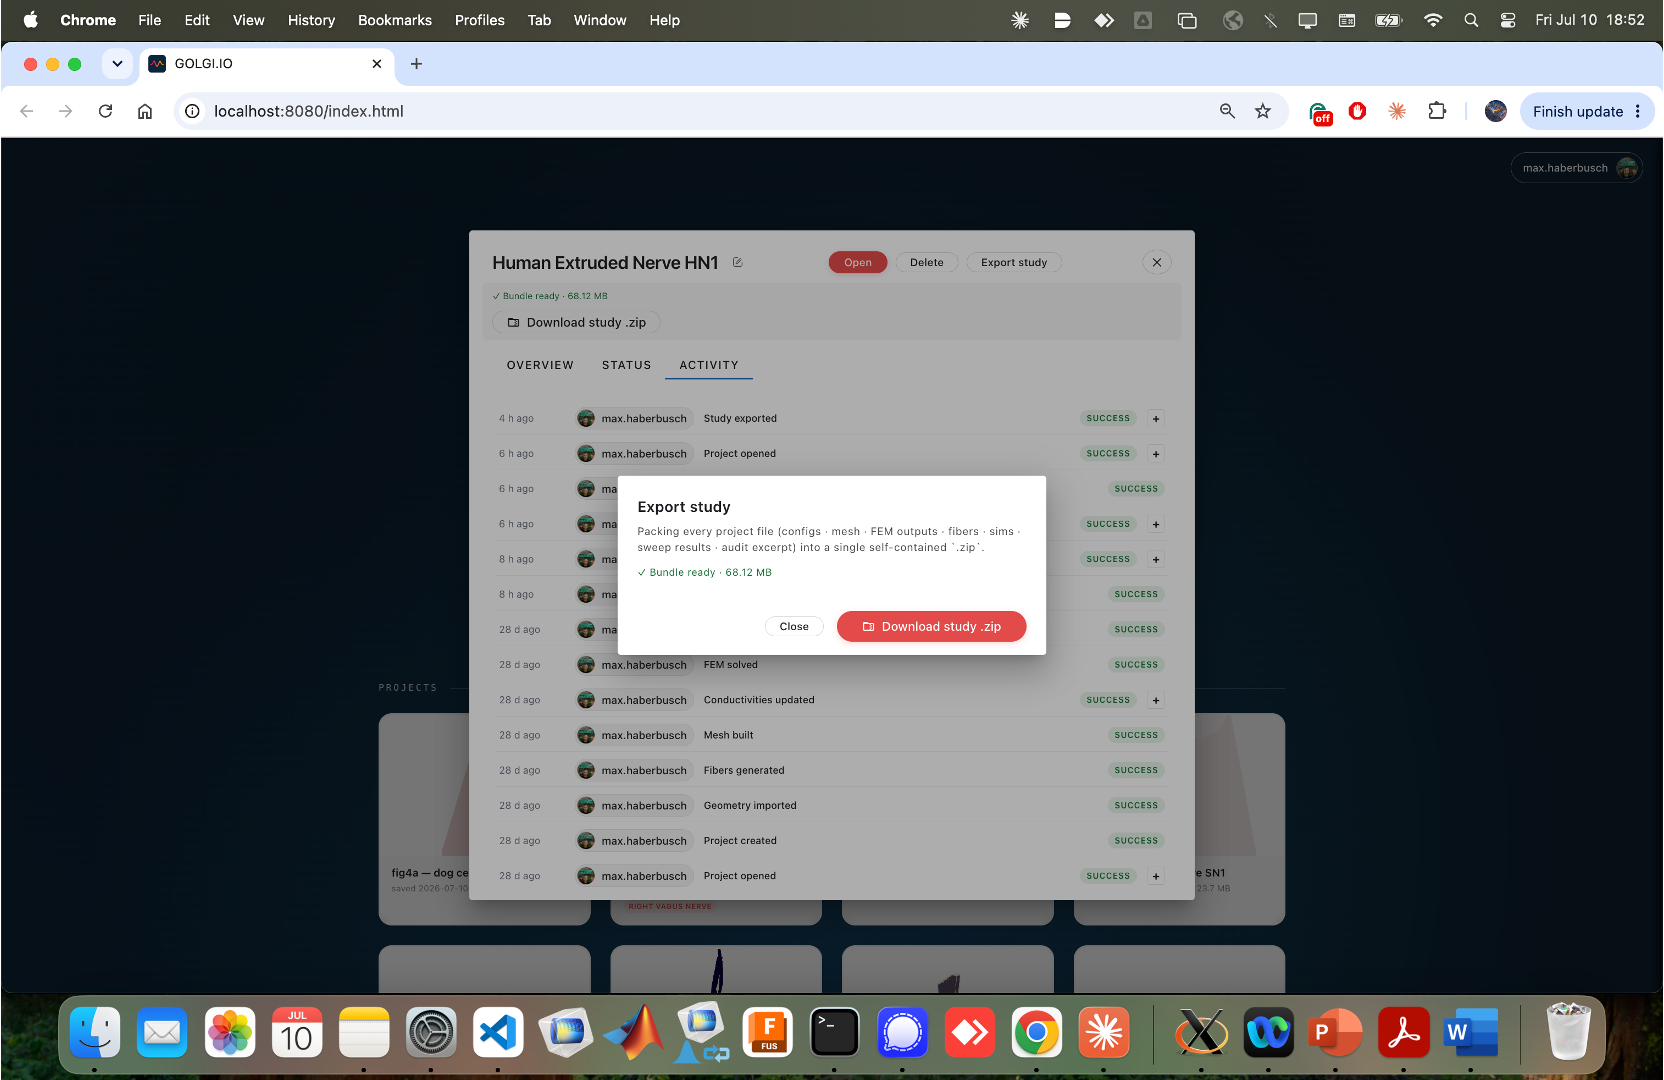
When packing finishes, the Export study popover reports the bundle size and shows a green "Bundle ready" state with a Download study .zip button. The full bundle format — and how it is hashed for replay-verified reproduction — is covered on Reproducible Study Bundles.
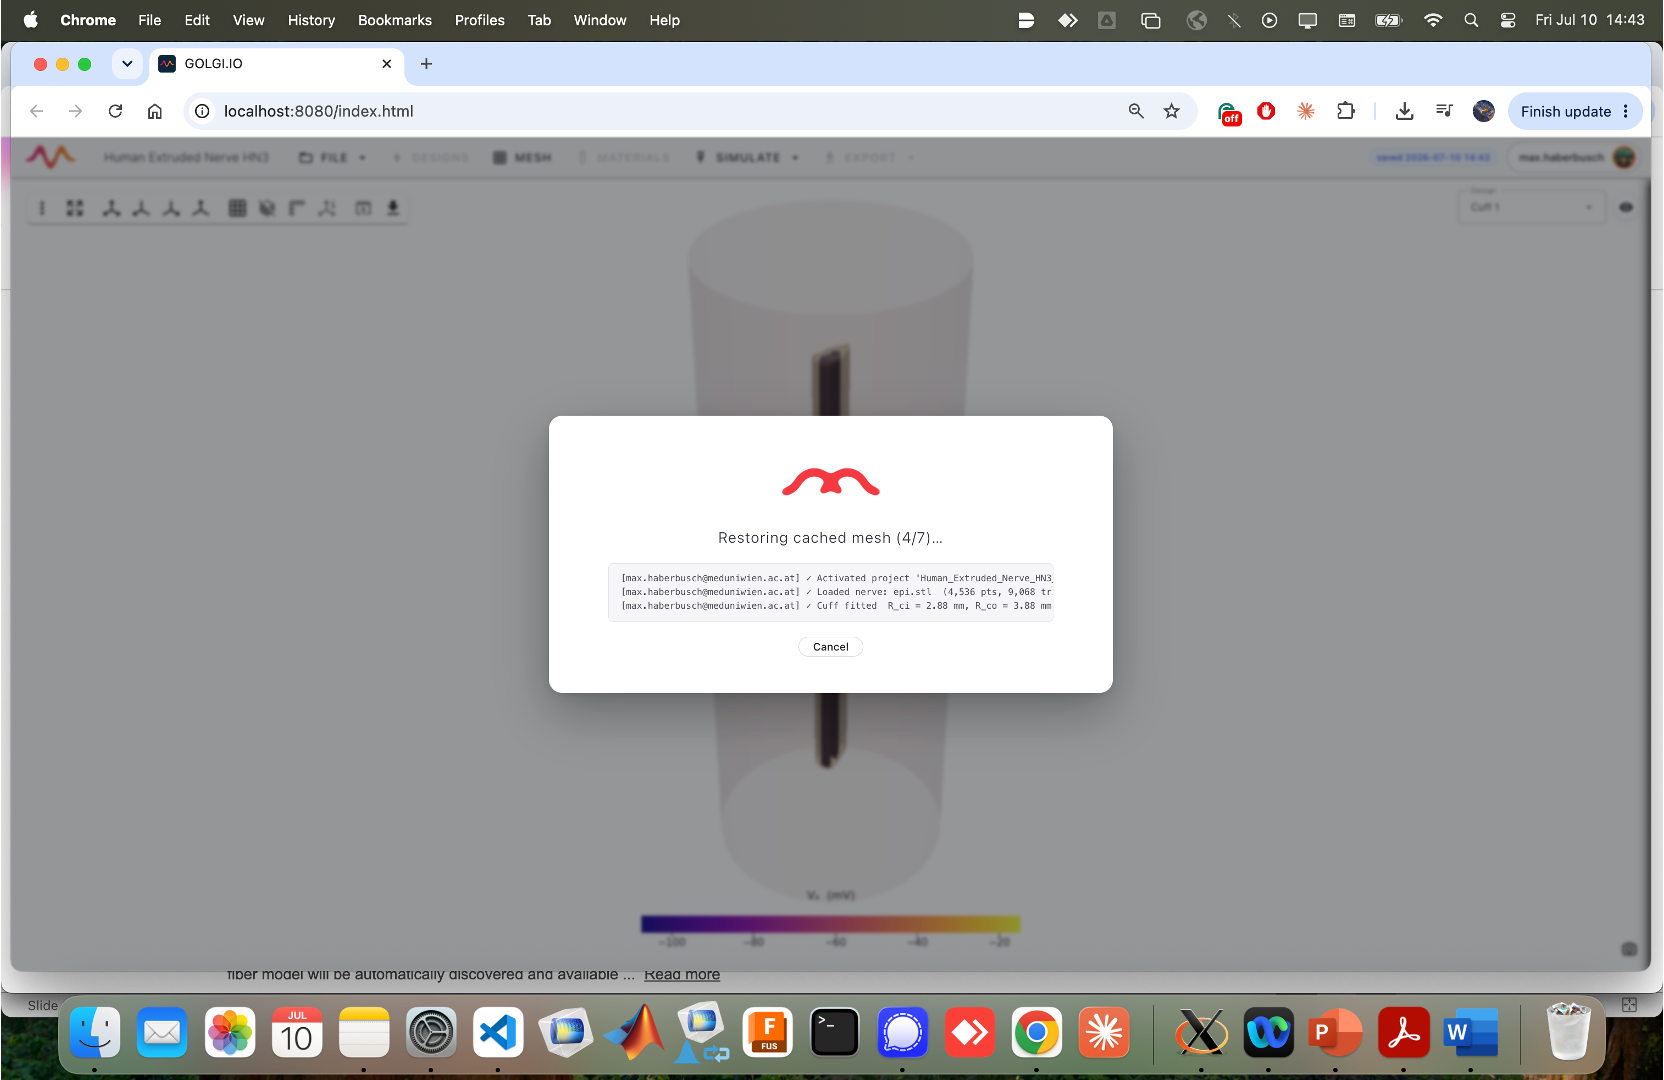
Clicking Open activates the project. Because golgi caches intermediate results, reopening shows a short restore sequence — "Restoring cached mesh…" with a live log of what is being reloaded (activated project, loaded nerve, fitted cuff, …).
Once restored, the full workspace opens with your model in the 3-D viewport.
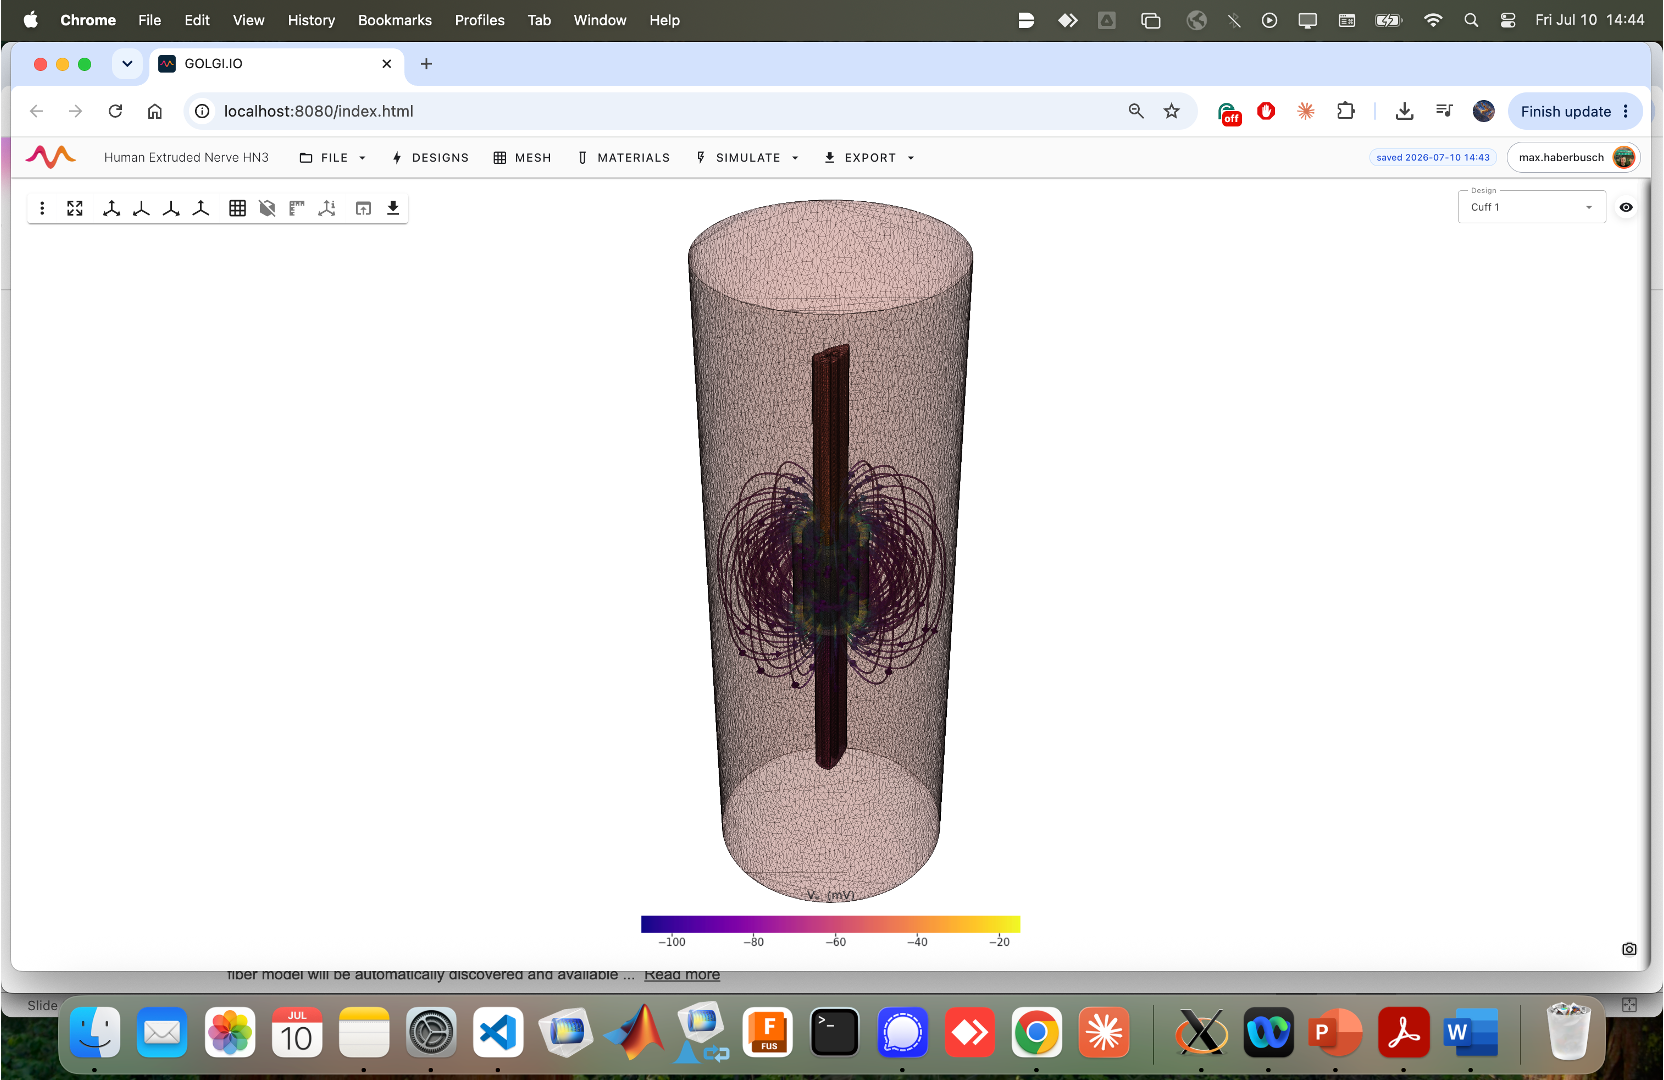
The workspace is where all modeling happens. Its main regions are:
- Top menu bar. The pipeline menus FILE, DESIGNS, MESH, MATERIALS, SIMULATE and EXPORT, plus the project name on the left and the last-saved time and your avatar on the right. Menus become enabled as their prerequisites are met (Mesh once a design exists, Materials once a mesh exists, Simulate once materials are committed, Export once a fiber simulation exists).
- 3-D viewport. A large interactive view of the model. Orbit, pan and zoom with the mouse; a color bar at the bottom shows the currently mapped scalar (for example extracellular potential Vₑ in mV).
- Left toolbar. View helpers — fit/frame, axis and clip tools, grid, edge visibility, screenshot/download, and so on.
- Design selector (top-right of the viewport). A dropdown to pick the active cuff design (e.g. Cuff 1) and an eye icon to toggle its visibility.
- Context panel (right). Opens on the right when you enter a stage — the cuff configurator, the mesh builder, the conductivity editor, the simulation panels, and the export panel all dock here.
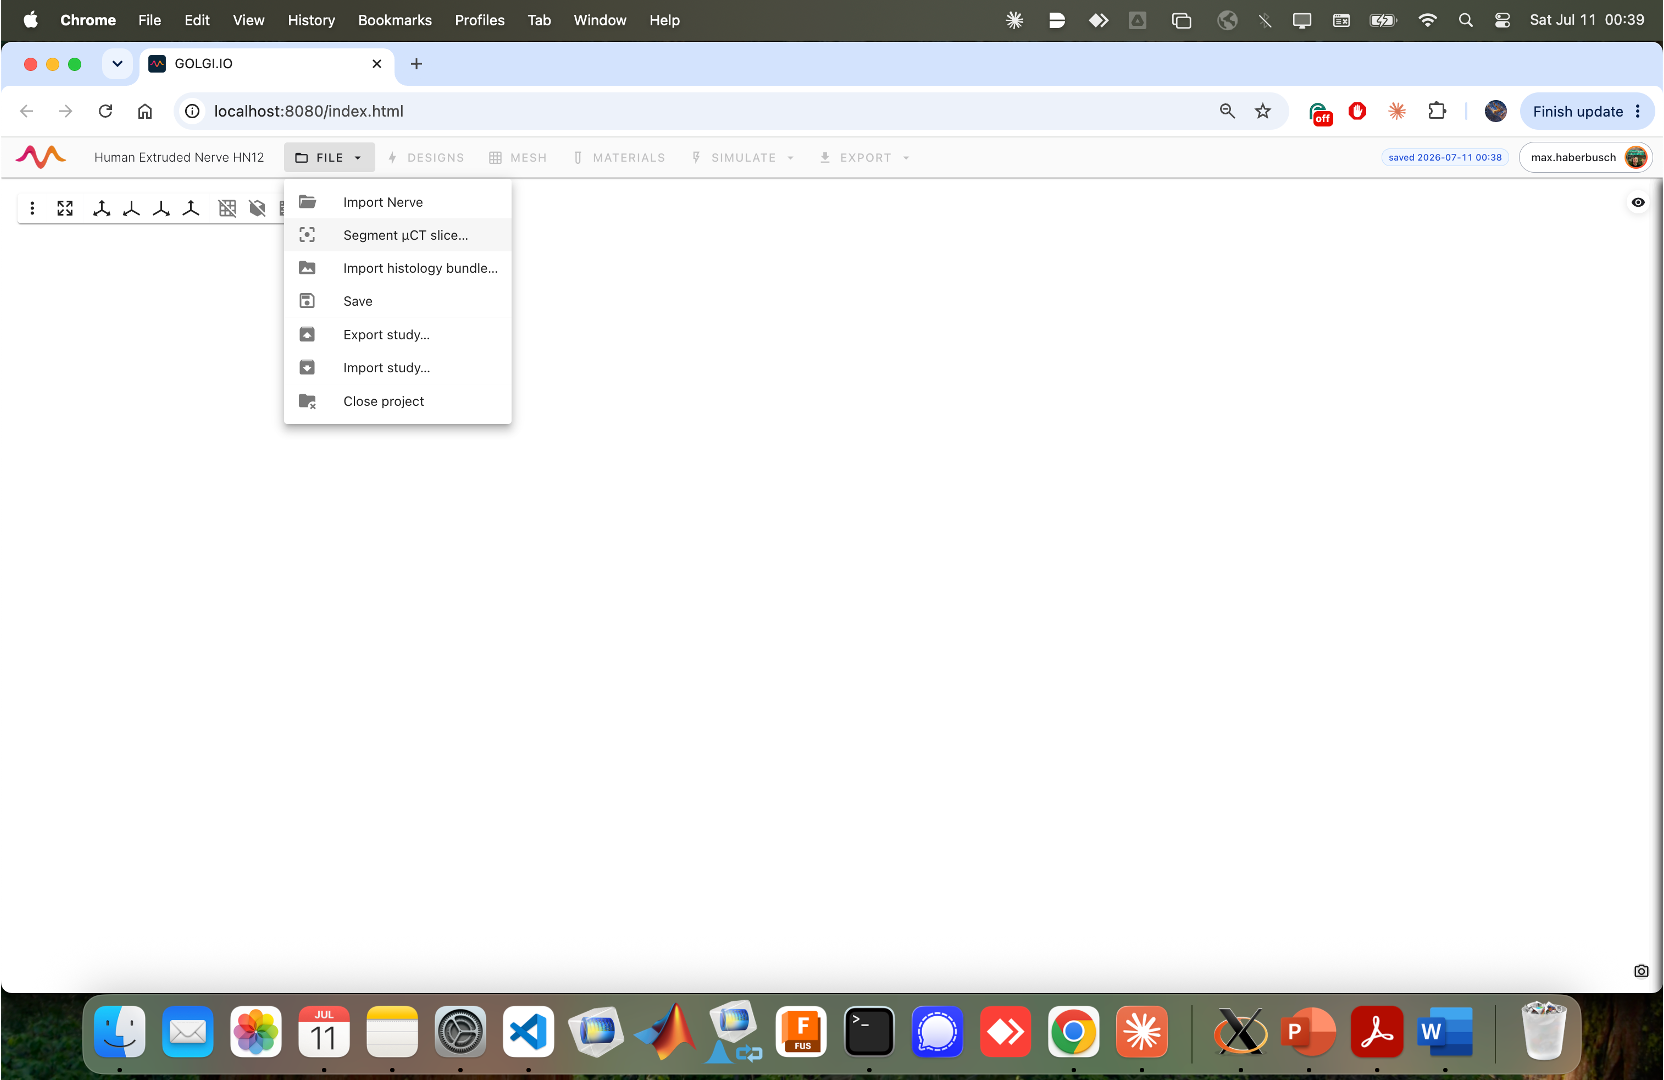
The FILE menu collects the geometry-level actions:
- Import Nerve — load an existing nerve surface.
- Segment µCT slice… — the image-to-nerve segmentation wizard (used in the next chapter).
- Import histology bundle… — load a prepared histology bundle.
- Save — save the project.
-
Export study… / Import study… — write or read a full study
.zip. - Close project — return to the dashboard.

Get started
Tutorial
Build a model
Simulate & analyze
- Finite-Element Solver
- Fiber Populations & Trajectories
- Fiber Models & Activation
- Recruitment Sweeps & Selectivity
- Recording & CNAP
Share & reproduce
Scripting & scale
Reference
Research & project