Repository navigation
Creating Authentication Manager
This page describes the process to create an authentication manager instance using a registered authentication plugin.
$ pki-server ca-auth-manager-add --plugin <plugin name> <manager name>
See also PKI Server CA Authentication Plugin CLI.
Availability: Since PKI 11.10.2
$ pki-server ca-config-set auths.instance.<manager name>.pluginName <plugin name>
$ pki-server ca-config-set auths.instance.<manager name>.<param> <value>
-
Go to Configuration → Authentication → Authentication Instance.
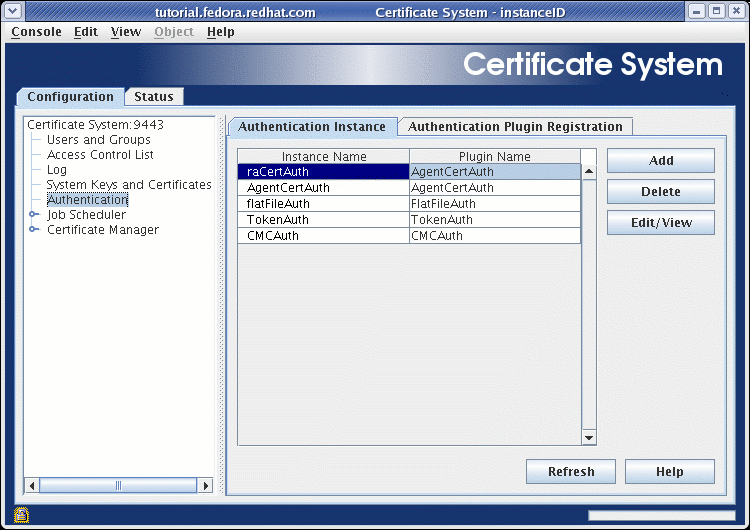
-
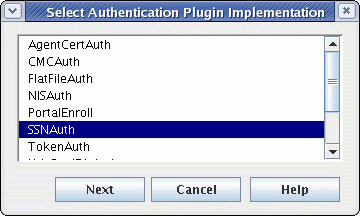
Press the Add button, and a dialog box entitled Select Authentication Plugin Implementation appears:
-
Highlight
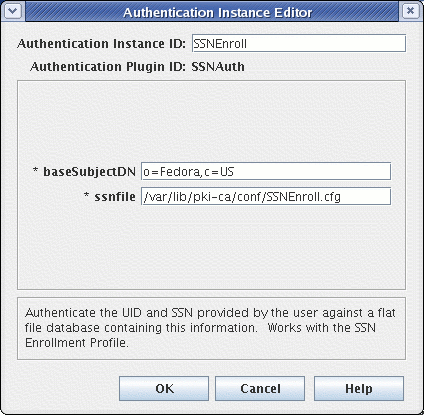
SSNAuth, and press the Next button. A dialog entitled Authentication Instance Editor appears:-
For the Authentication Instance ID: field, type in
SSNEnroll. -
For the Authentication Plugin ID: field, the string
SSNAuthshould already be present (and non-editable). -
For the required baseSubjectDN: field, type in the desired base subject DN to be appended to the UID on each certificate.
-
For the required ssnfile: field, type in the fully qualified path to the
SSNEnroll.cfgfile.
-
| Field | Example Value |
|---|---|
Authentication Instance ID: |
SSNEnroll |
Authentication Plugin ID: |
SSNAuth |
baseSubjectDN: |
|
ssnfile: |
|
-
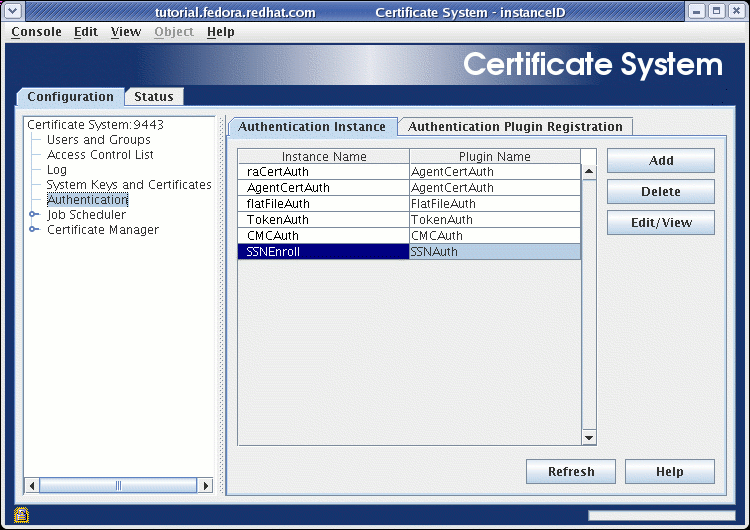
Press the OK button to dismiss the dialog box, and this plugin should now appear on the list of authentication plugin instances displayed on this panel. If it does not, try pressing the Refresh button until it does:
The following parameters should be configured in <instance>/conf/CS.cfg:
auths.instance.SSNEnroll.baseSubjectDN=o=<Organization>,c=US
auths.instance.SSNEnroll.pluginName=SSNAuth
auths.instance.SSNEnroll.ssnfile=<pki-instance>/conf/SSNEnroll.cfg