en develop plugin runtime
Note
Plugin Runtime, CLI, SDK are open sourced at: https://github.com/langbot-app/langbot-plugin-sdk
Since LangBot depends on entities defined in langbot-plugin-sdk, we recommend opening VS Code in a new directory, placing both LangBot and langbot-plugin-sdk (git clone https://github.com/langbot-app/langbot-plugin-sdk) as subdirectories within it. The directory structure should look like:
langbot-projects
├── LangBot
├── langbot-plugin-sdk
Enter the LangBot directory and install dependencies:
cd LangBot
uv sync --dev
At this point, uv will automatically create a virtual environment (.venv) for you. If your editor asks whether to use this virtual environment, please select Yes.
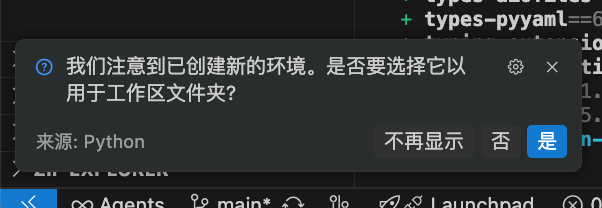
If the prompt does not appear, please manually set the Python interpreter path to the interpreter in the venv from the bottom-right corner.
Then open the terminal at the bottom of VS Code, which will automatically activate the venv.
Or you can manually activate this virtual environment:
# Please modify the command according to your .venv path
source .venv/bin/activateuv run --no-sync lbp rtOr start it via python -m langbot_plugin.cli.__init__ rt.
Plugin Runtime accepts the following parameters:
-
--debug-only: Do not start plugins in thedata/pluginsdirectory, only allow loading plugins through debug connections. -
--ws-debug-port: Debug port to listen on, default is5401. -
--ws-control-port: Control port to listen on (for LangBot main program connection), default is5400. -
-s: Usestdioto accept control connections. Use only in production environment. -
--skip-deps-check: To ensure that all plugin dependencies are installed, the Runtime will check and install all installed plugin dependencies on every startup. Use this parameter to disable this check.
If you have modified things like message entities or plugin data definitions, you need to update them in the LangBot environment to ensure data format compatibility during runtime.
In a terminal with the LangBot directory's virtual environment (.venv) activated, switch to the langbot-plugin-sdk directory and run:
uv pip install .This will install your modified langbot-plugin-sdk into LangBot's environment.
Configure plugin.runtime_ws_url to ws://localhost:5400/control/ws in LangBot's data/config.yaml.
plugin:
  runtime_ws_url: ws://localhost:5400/control/ws
And add the startup parameter --standalone-runtime when starting the LangBot main program (e.g., uv run --no-sync main.py --standalone-runtime). Make sure to include the --no-sync parameter in this command, which ensures that the local langbot-plugin-sdk you just synced will not be overwritten by the remote version.
Restart LangBot, and it will connect to this runtime using WebSocket.
This codebase contains the following:
-
langbot_plugin.api: Plugin-related entities and API definitions. -
langbot_plugin.assets: Plugin templates. -
langbot_plugin.cli: Plugin development CLI tools. -
langbot_plugin.entities: Plugin system-related entities not defined in API. -
langbot_plugin.runtime: Plugin runtime and underlying communication (stdio and websocket) implementation.
The CLI tool provides Runtime startup, plugin initialization, plugin component management, Marketplace interaction, and other functions.
For detailed program entry points, please see langbot_plugin.cli.__init__.