MMUs in Unity
In order to integrate an existing Unity animation controller to MOSIM, we have to create a custom MMU script. Ideally, this can be done by using the MMU Generator. After a new MMU was created, there should be a folder containing the MMU script as well as a reference character. At the current point, we do recommend utilizing the reference avatar, but replacing it with a custom character is possible. The generated MMU script contains a custom, but empty MMU script. In the following, we will describe the functions individually. Afterwards, an example implementation using the Waving MMU is described.
The following MMU functions must be implemented. The MMU Interface is defined in the MMU thrift file.
Parameters: MAvatarDescription avatarDescription; Map<string, string> properties
Returns: MBoolResponse
This function gets called when the target engine is started and initializes a new target avatar. The target avatar is described with the avatarDescription. In this function, the MMU can initialize the avatar, adjust the environment based on the target scene and prepare everything for the MMU execution. If there is an error during initialization, the MMU can return a negative response, which will prevent the co-simulator to load.
Parameters: MInstruction motionInstruction; MSimulationState simulationState
Returns: MBoolResponse
In this function, an instruction is assigned. The instruction should contain all required information for the MMU to be executed. In case of IDs, please consider using IDs that are referring to Constraints rather than to scene objects.
The simulationState describes the current state of the simulation, containing the current avatar pose and its constraints.
If the requirements for execution are not met, the MMU can return a negative result.
Parameters: double time; MSimulationState simulationState
Returns: MSimulationResult
DoStep is the central method to simulate poses. It is compatible to the Update function of the Unity game engine and performs a single simulation step for the amount of time in seconds as provided. The simulationState contains the current and initial posture, as well as all active constraints. In this method, the MMU is supposed to calculate the next pose after time elapsed seconds to the previous pose. The previous frames merged posture is contained in simulationState.Initial. The resulting posture should be returned with the simulation result. In this result, you can as well return events, depending on the current state of the simulation. The most important constraint is the "end" constraint, denoting the end of simulation for this MMU, e.g. when the goal is reached. For all constraints, please consider the MMI.thrift file.
The MSimulationState contains two avatar definitions.
- Initial describes the initial MAvatarPosture before any MMU was executed. Usually, it is the last frames posture after merging and applying all constraints.
- Current describes the current MAvatarPosture with all animations from other MMUs applied, which are running in parallel and are executed prior to the current MMU. If no MMU was executed before, it will be equal to the initial posture.
- Constraints describes the list of constraints, which should be enforced currently, this field should be (at least) forwarded to the simulation result.
- SceneManipulations contains all scene manipulations, which are requested by MMUs that are executed prior to this MMU for the current frame. This field should be (at least) forwarded to the simulation result.
- Events contains a list of events, which are sent by MMUs that are executed prior to this MMU for the current frame. This field should be (at least) forwarded to the simulation result.
- Posture contains the avatar posture after applying this MMU in the internal skeleton format.
- Constraints this field contains all constraints combined: constraints from MMUs executed prior to this MMU and constraints enforced by this MMU.
- Events this field contains all events combined: events from MMUs executed prior to this MMU and events evoked by this MMU.
- SceneManipulations this field contains all scene manipulations combined: manipulations requested from MMUs executed prior to this MMU and manipulations requested by this MMU.
- DrawingCalls this field can contain drawing calls from this MMU
Please remember, that creating a new MMU can remove the old status, hence back up your progress regularly. In addition, the MMU Generator currently does not support a persistent state. Hence, after every restart, the whole MMU generation process has to be repeated from the start. We provide the source code of the WaveMMU as well as all of the assets as a Unity Package. If you want to utilize the MMU Generator to export this MMU, please be aware, that you have to start a new MMU Generation process and copy the source code manually to be able to export the MMU later on.
In addition, you can download the Simple Wave MMU script, containing the complete source code described below.
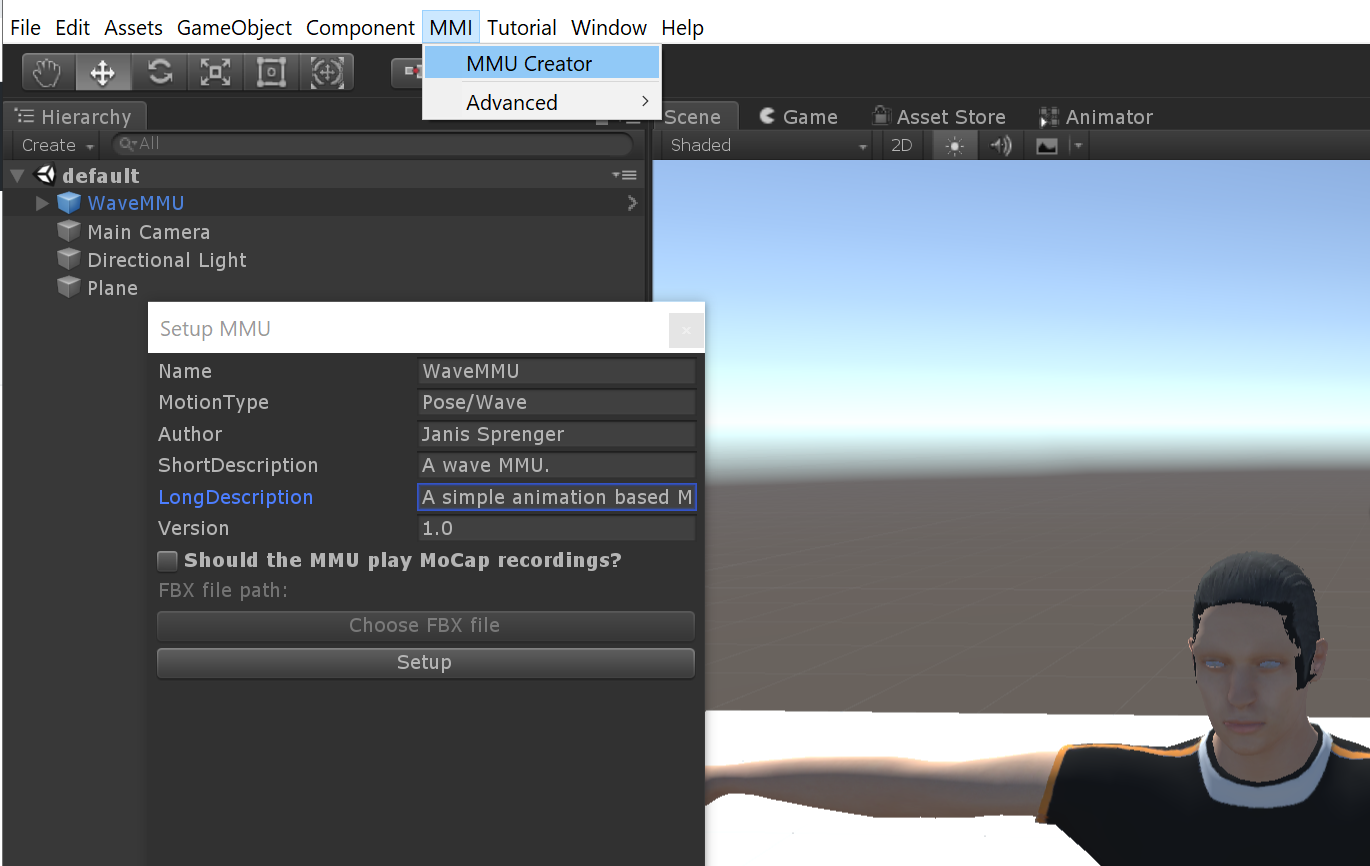
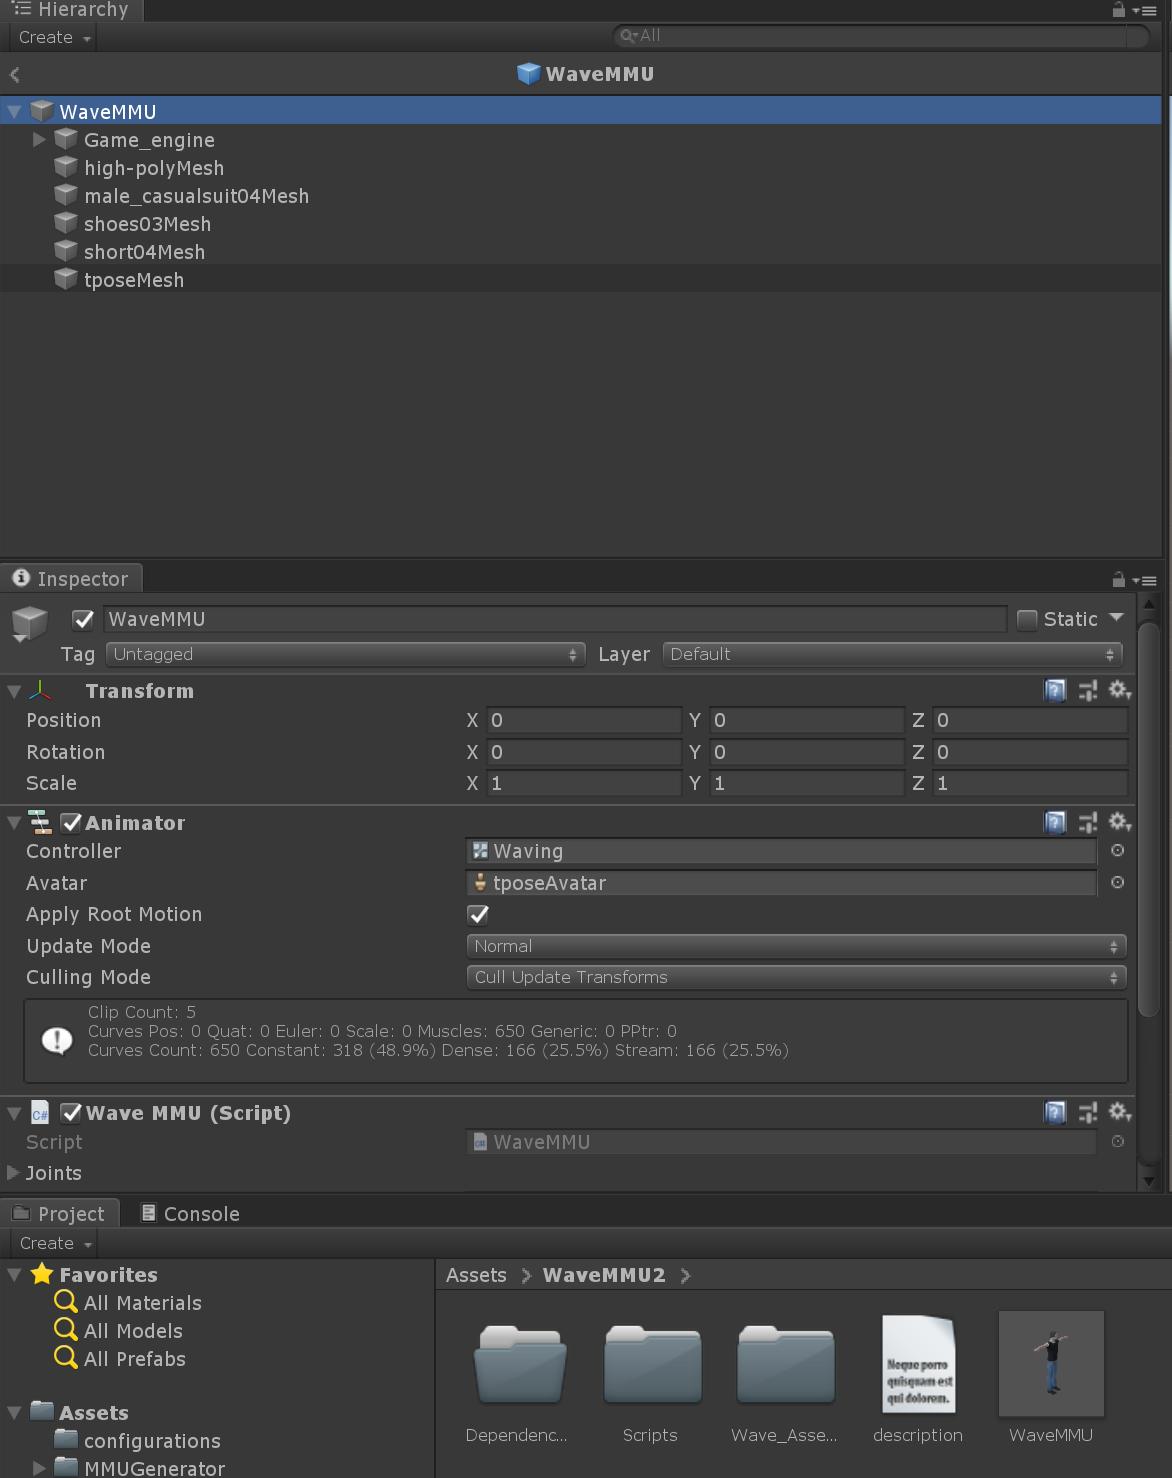
For the Waving MMU, we created a new MMU called "WaveMMU", without providing a motion capture recording. As a result, a new folder named WaveMMU was created in the asset library, containing a WaveMMU-prefab and a WaveMMU-script. The script is not usable at the start, e.g. because the AssignInstruction method throws an error by default. In addition, the default avatar in the scene should contain a component for this WaveMMU-script and an animator component. For the description on how the animations and the animator are created, please check the previous section of our documentation.
At the start, we opened the WaveMMU script in visual studio, added a class member for the animator and assigned the component in the Awake method. In addition, we disabled the animator to allow manual animation and set the culling mode to "AlwaysAnimate".
protected override void Awake()
{
   // Assign the name of the MMU. This name should correspond to the GameObject name, the prefab asset, and the MMU folder.
   this.Name = "WaveMMU";

   // Assign the motion type of the MMU. This motion type will be utilized to assign Instr
   this.MotionType = "Pose/Wave";

   // Auto generated source code for assignemnt of root transform and root bone:
   this.Pelvis = this.gameObject.GetComponentsInChildren<Transform>().First(s => s.name == "pelvis");
   this.RootTransform = this.transform;

   // Get the animator (needs to be added in before)
   this.animator = this.GetComponent<Animator>();

   // Disable the animator at the beginning (otherwise retargeting won't work)
   this.animator.enabled = false;
   this.animator.cullingMode = AnimatorCullingMode.AlwaysAnimate;

   // It is important that the bone assignment is done before the base class awake is called
   base.Awake();
}
Inside the AssignInstruction method, the goal should be assigned. We assume, that the MMU will receive a "TargetID" property that is either pointing to a constraint or a scene object. If there is a constraint with this id provided, it will be utilized.
public override MBoolResponse AssignInstruction(MInstruction instruction, MSimulationState state)
{
   //Assign the instruction to the class variable
   this.instruction = instruction;

   Vector3 target_position = new Vector3(0, 0, 0);
   bool wasConstraint = false;

   // Check if the target id is a constraint
   foreach (MConstraint c in instruction.Constraints)
   {
      if (c.ID == instruction.Properties["TargetID"] && c.GeometryConstraint != null)
      {
         // Constraint found
         Quaternion parentRot = Quaternion.identity;
         Vector3 parentPos = Vector3.zero;
         if (!string.IsNullOrEmpty(c.GeometryConstraint.ParentObjectID))
         {
         // has a parent
         var parent = this.SceneAccess.GetSceneObjectByID(c.GeometryConstraint.ParentObjectID);
            if (parent != null)
            {
               parentRot = parent.Transform.Rotation.ToQuaternion();
               parentPos = parent.Transform.Position.ToVector3();
            }
         }
         // Transform to global space
         target_position = parentRot * c.GeometryConstraint.ParentToConstraint.Position.ToVector3() + parentPos;
         wasConstraint = true;
         break;
      }
   }

...
If there is no constraint provided, we search for a scene object via the scene access. If there is no object exists with the defined constraint, we return a bad return value and a debug message.
...
   // If no constraint, check if there is a suitable scene object
   if (!wasConstraint)
   {
      var mobj = this.SceneAccess.GetSceneObjectByID(this.instruction.Properties["TargetID"]);
      if (mobj == null)
      {
         MBoolResponse result = new MBoolResponse(false);
         result.LogData = new List<string>() { "Target Constraint or Object not found with ID: " + this.instruction.Properties["TargetID"] };
         return result;
      }
      target_position = mobj.Transform.Position.ToVector3();
   }

...
Still inside the AssignInstruction method, we want to prepare the animator to start playing the animation in the next DoStep call. As the MMU itself is running in a separate thread, all Unity related code has to be executed on the main thread. In order to facilitate this parallelism, the base mmu class provides an ExecuteOnMainThread method, which can be provided some additional code. For this example, we first assign the current animation state and compute the blending weight as described in the last chapter. In addition, we update the animator by a very small section, to initialize the animation and force the current animation state to not be in "Idle".
...
   this.ExecuteOnMainThread(() =>
   {
      this.AssignPostureValues(state.Current);

      var dir = this.transform.TransformDirection(target_position - this.transform.position).normalized;

      dir = Vector3.ProjectOnPlane(dir, Vector3.up);
      float angle = Mathf.Clamp(Vector2.SignedAngle(new Vector2(0, 1), new Vector2(dir.x, dir.z)) / 90, -1, 1);

      animator.SetFloat("WaveBlend", angle);
      animator.SetLayerWeight(1, 1);
      animator.SetTrigger("Wave");

      // Initial animator update to start the trigger
      this.animator.Update(0.01f);

   });

   return new MBoolResponse(true);
}
Now we have prepared the MMU for execution and return a positive value in the AssignInstruction. To execute the animation, we have to extend the DoStep method. By default, the method already prepares a return value, which forwards all events, poses, and scene changes provided in the input. We extend the return value, by calling our animator to animate for the provided time. In case, the animator is back in the state "Idle", we want to return an end event. In case, we either did set up a transition window from the idle to the waving state, or we did not invoke the animator update in the AssignInstruction (see above), the animation would still be in the idle state and directly return an end event without actually executing the animation.
public override MSimulationResult DoStep(double time, MSimulationState state)
{
   //Create a new simulation result
   MSimulationResult result = new MSimulationResult()
   {
      Posture = state.Current,
      Constraints = state.Constraints != null ? state.Constraints : new List<MConstraint>(),
      Events = state.Events != null ? state.Events : new List<MSimulationEvent>(),
      SceneManipulations = state.SceneManipulations != null ? state.SceneManipulations : new List<MSceneManipulation>(),
   };

   //Execute the instruction on the main thread (required in order to access unity functionality)
   this.ExecuteOnMainThread(() =>
   {
      this.AssignPostureValues(state.Current);
      this.animator.Update((float)time);

      if (this.animator.GetCurrentAnimatorStateInfo(0).IsName("Idle"))
      {
         result.Events.Add(new MSimulationEvent(this.instruction.Name, mmiConstants.MSimulationEvent_End, this.instruction.ID));
      }

      MAvatarPostureValues simVals = this.GetRetargetedPosture();
      result.Posture = simVals;
   });

   //To do -> insert your do step code in here

   return result;
}
The end-condition (this.animator.GetCurrentAnimatorStateInfo(0).IsName("Idle")) can only be used, if the transition time inside the animator from the Idle state is set to 0 and the "Has Exit Time" toggle is not set. For more information, please consult the Documentation on Animator Development.
With this change, we have prepared the animation code. Inside the Unity editor, we want to ensure, that the "waving" animation controller is assigned to the animation component of the scene avatar and that the WaveMMU component is already set up. In addition, we can use the "MMUAdapter" component to debug our MMU directly within the MMU Generator (For more information check the MMU Generator Documentation. After the MMUAdapter is added and set up, we can run the "MMU Generator" project and it should connect to the launcher (provided, it is started). In addition, we now should set up a target-engine project to call the wave mmu. For this purpose, we do recommend using the Demo Project and more specifically, the Single MMUs Scene. Inside the scene script behavior, we can change one of the buttons to call our wave with the following code. It assumes, that there is a scene object setup with a MMISceneObject component attached, which is called "WaveObject". You can, however, utilize any MMISceneObject within the scene for this purpose. Alternatively, a MGeometryConstraint could have been generated with a hard-coded world position.
MInstruction idleInstruction = new MInstruction(MInstructionFactory.GenerateID(), "Idle", "Pose/Idle");

MInstruction waveObject = new MInstruction(MInstructionFactory.GenerateID(), "wave to", "Pose/Wave")
{
   Properties = PropertiesCreator.Create("TargetID", UnitySceneAccess.Instance["WaveObject"].ID),
};

this.CoSimulator.Abort();
this.CoSimulator.AssignInstruction(idleInstruction, new MSimulationState() { Initial = this.avatar.GetPosture(), Current = this.avatar.GetPosture() });
this.CoSimulator.AssignInstruction(waveObject, new MSimulationState() { Initial = this.avatar.GetPosture(), Current = this.avatar.GetPosture() });
Now we can start the target engine scene and upon clicking the respective button, the target avatar will perform the wave action and wave towards the "WaveObject".
It is possible to rename MMUs in the MMU Generator. As different components of the debugging adapter and MMU generator depend on the name, it must be changed in the following places:
- inside the mmu script: renaming the this.Name field to the new name
- inside the Unity inspector: renaming the game object
- inside the description.json: renaming the MMU name
- inside the project assets: renaming the folder containing the MMU prefab and description file
- inside the project assets: renaming the prefab asset
After renaming, the MMU Generator will not be able to export the MMU anymore. To export the MMU, a new process using the MMU Generator must be started. Please be aware, that the MMU Generator will overwrite your current status if you start a new MMU with the name of an existing one inside your project, and do not forget to generate frequent backups of your code.
In order to export the MMU, we have to ensure, that the prefab-asset (WaveMMU.prefab) has the animator component assigned. To do that, open the prefab by double-clicking it, and assign the waving animator controller. Afterwards, press the left arrow on the top left of the hierarchy to return to the main scene.
Inside the MMUGenerator dialogue, we can now export the MMU. Please remember, to copy the UnityEngine.dll to Assets/MMUGenerator/Dependencies/UnityEngine.dllx. Your UnityEngine.dll is most likely located within your Unity installation folder (e.g. C:\Program Files\Unity\Hub\Editor\2018.4.1f1\Editor\Data\Managed\UnityEngine.dll). We are not allowed to push Unity libraries to Github.
The generated MMU can now be unzipped and the containing folder can be copied to the Framework. Please make sure, that only the containing folder is copied to the frameworks MMU folder, such that the descriptions.json is on the first level (Environment/MMUs/WaveMMU/description.json).
In many cases, only part of the body will be simulated. In our case, only the left arm is relevant. The rest of the body, can be controlled by other MMUs. Due to the hierarchical execution of the MMUs, we do not want to override the rest of the animation. Hence, we can let the Locomotion MMU generate walking, and purely simulate the arm movement, by only transferring part of the animation to the MOSIM framework. I propose the following extensions to MAvatarPostureValues, to copy and transfer partial joint information. This is currently not yet integrated to the core framework, hence it has to be defined in the MMU directly. You can simply copy the following code after your MMU class.
The complete source code using transition blending and partial motion information can be downloaded as WaveMMU_complete.cs.
public static class TransformExtensionsWaveMMU
{

    public static MAvatarPostureValues MakePartial(this MAvatarPostureValues vals, List<MJointType> PartialJointList)
    {
        List<MJoint> defaultList = ISDescription.GetDefaultJointList();
        MAvatarPostureValues ret = new MAvatarPostureValues(vals.AvatarID, new List<double>());
        ret.PartialJointList = PartialJointList;
        int id = 0;
        foreach (MJoint joint in defaultList)
        {
            if (PartialJointList.Contains(joint.Type))
            {
                foreach (var x in joint.Channels)
                {
                    ret.PostureData.Add(vals.PostureData[id]);
                    id++;
                }
            }
            else
            {
                id += joint.Channels.Count;
            }
        }

        return ret;
    }

    public static MAvatarPostureValues OverwriteWithPartial(this MAvatarPostureValues vals, MAvatarPostureValues other)
    {
        List<MJoint> defaultList = ISDescription.GetDefaultJointList();
        MAvatarPostureValues ret = new MAvatarPostureValues(vals.AvatarID, new List<double>());

        int id = 0;
        int idPartial = 0;
        foreach (MJoint joint in defaultList)
        {
            if (other.PartialJointList.Contains(joint.Type))
            {
                foreach (var x in joint.Channels)
                {
                    ret.PostureData.Add(other.PostureData[idPartial]);
                    id++;
                    idPartial++;
                }
            }
            else
            {
                foreach (var x in joint.Channels)
                {
                    ret.PostureData.Add(vals.PostureData[id]);
                    id++;
                }
            }
        }

        return ret;

    }

    public static string[] GetChildNameList(this Transform t)
    {
        string[] acc = new string[] { t.name };
        for (int c = 0; c < t.childCount; c++)
        {
            string[] addAcc = t.GetChild(c).GetChildNameList();
            acc = acc.Concat(addAcc).ToArray();
        }
        return acc;
    }

}
Using this code, the transfer of partial data becomes comparably easy. We have to provide a list of joint types, e.g.
private List<MJointType> partialList = new List<MJointType>() { MJointType.S1L5Joint, MJointType.T12L1Joint, MJointType.T1T2Joint, MJointType.C4C5Joint, MJointType.HeadJoint, MJointType.HeadTip, MJointType.RightShoulder, MJointType.RightElbow, MJointType.RightWrist };and can utilize this joint list to partialize a pose with the following script before setting the resulting posture:
// Make Partial
simVals = result.Posture.OverwriteWithPartial(simVals.MakePartial(this.partialList));In many cases, we want to ensure a smooth transition from and to our animation. A simple tool for smooth transitions is linear blending. Assuming, there is an underlying animation still running (e.g. idle), we can utilize the blending service to perform the blending operation. For this purpose, the blending service should be set up in the Initialize method:
// Setup Blending Service
blending_service = this.ServiceAccess.PostureBlendingService;
blending_service.Setup(avatarDescription, new Dictionary<string, string>());
Using suitable blending times, e.g.
private float start_percentage = 0.15f;
private float end_percentage = 0.15f;
we can perform the blending operation at the start and the end of our animation cycle inside the Do-Step method.
var simTime = this.animator.GetCurrentAnimatorStateInfo(0).normalizedTime % 1.0f;
if (simTime < this.start_percentage)
{
   var blend_weight = simTime / this.start_percentage;
   result.Posture = this.blending_service.Blend(result.Posture, simVals, blend_weight, new Dictionary<MJointType, double>(), new Dictionary<string, string>());
}
else if (simTime > 1 - this.end_percentage)
{
   var blend_weight = 1 - (1 - simTime) / this.end_percentage;
   result.Posture = this.blending_service.Blend(simVals, result.Posture, blend_weight, new Dictionary<MJointType, double>(), new Dictionary<string, string>());
}
else
{
   result.Posture = simVals;
}
Scaling the blending factor with a better ease function, e.g. using a sine function, an even smoother transition can be achieved.
The complete source code using transition blending and partial motion information can be downloaded as WaveMMU_complete.cs.