Repository navigation
Manage Your Workspace
This page covers the administrative tasks that keep GODSEYE useful across a team and recoverable when hardware changes. Sign in as an Admin for these controls.
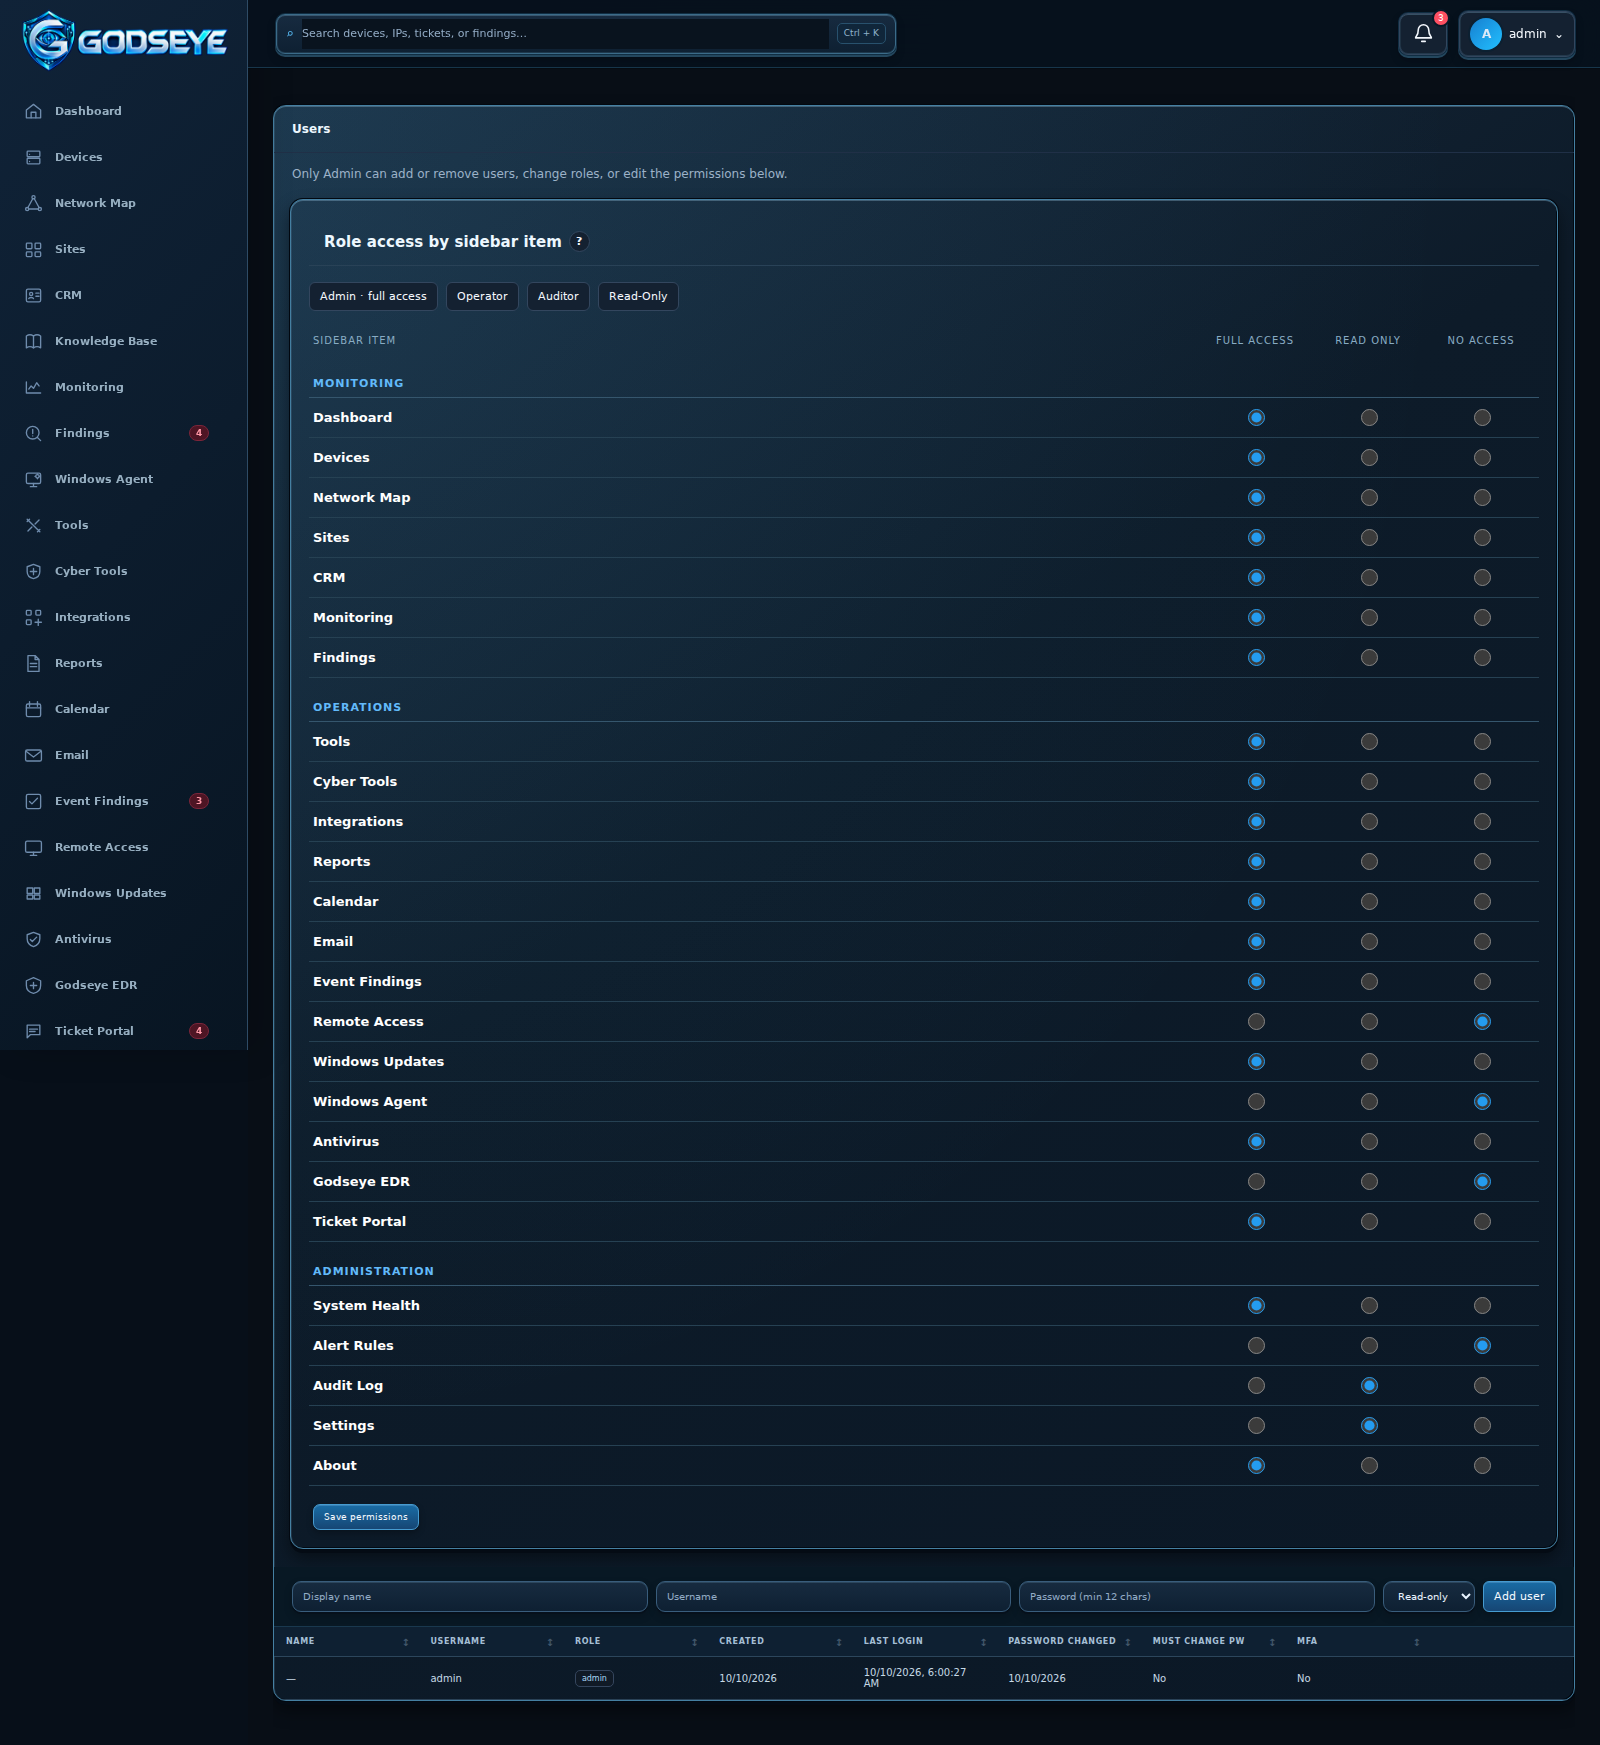
Open Users & Permissions to add or remove users and assign Admin, Operator, Auditor, or Read-Only roles. For Operator, Auditor, and Read-Only, set each sidebar item's permission to Full access, Read only, or No access, then save the role permissions. No access hides the item and blocks direct API requests. Only an Admin can change users, roles, or permissions.
Each location runs its own GODSEYE on a Raspberry Pi or server. Network connectivity through your existing VPN should already work before pairing.
- On the remote installation, open Sites and generate a one-time pairing token.
- On the master installation, add a site with a recognizable customer/location name, the remote HTTPS address reachable over the VPN, and that token.
- If the remote HTTPS endpoint uses a private certificate authority, supply its trusted PEM certificate.
- Open the new site card to see current device, offline, finding, and ticket counts. Refresh to retrieve current data.
- On the remote installation, revoke the master's access from Sites when the link is no longer needed.
GODSEYE does not configure the VPN. The linked card supports remote investigation and supported edits, including device names and classifications, findings, and tickets.
In System Health → Full Backup & Server Restore, choose Export Full Backup ZIP. The archive includes the database, settings snapshot, and appliance encryption key. Store it securely; it contains sensitive operational data.
To replace a server, install GODSEYE on the new supported host, open System Health, select that ZIP, and choose Restore from ZIP. GODSEYE validates the archive, creates a pre-restore safety backup, restores the database and key, and records the action in the Audit Log. Restart GODSEYE services after the restore and sign in using an account from the restored backup. Verify devices, users, sites, and integrations before returning the appliance to normal operation.

Use System Health to review service status, database and backup health, logs, disk usage, CPU, memory, network activity, and temperature. Before an upgrade, export and safeguard a current full backup. The Getting Started guide covers the upgrade command.
Next: Help and Troubleshooting · Explore GODSEYE · Home