Repository navigation
Scripting
Every effect, shape and sticker can be written as a small script. This page shows what a script is for, with examples you can run in the game. The full reference lists every name a script can use. To write and run scripts, see Code editor.
Every effect is a script, the stock presets included. Edit as code opens it, and changing the code or the sliders changes the other.
Code adds what sliders can't:
- values worked out from what the player does, like faster when running
- something on every jump, landing, shot or key press
- each sprite moved on its own: orbits, waves, formations
- options of your own, for others to set without reading the code
A script can only reach its own effect. It has no access to files, the network, other players or the scene. It runs on every player's machine, within limits it can't get past, and the host can switch scripts off.
It has Lua's syntax and C#'s behaviour.
-
local x = 2,function name( a ) ... end,if c then ... endandfor i = a, b do ... end, with--for comments. - A library named like C# and s&box:
Math.Floor,Color.Lerp,Vector3. - Every type is checked when it compiles. A mistake is an error at its line and column, before anything runs.
- Lists count from 0 and know their size:
list[ 0 ],list.Count. - Numbers never go wrong: dividing by zero gives 0.
| Kind | What it does | How to open it |
|---|---|---|
| Effect | Makes layers once, and its functions run while the effect shows | Effects → Edit as code |
| Shape | Draws a shape once | The reference's shape entry, or Shapes.New in an effect |
| Sticker of layers | Stacks shapes into a sticker | The creator's Sticker mode → Code |
| Sticker script | Colors and moves a sticker as it shows | The creator's Sticker mode → Printed On → Animate with code |
| Weapon skin | Works out a weapon's moving colors | Weapon mode → Skin → Write your own |
| Weapon design | A weapon's whole design | Weapon mode → Code |
Every example below is taken from the
reference,
and the addon's tests run each one. A line like local n = 2 --> 2 says what it
holds once it has run.
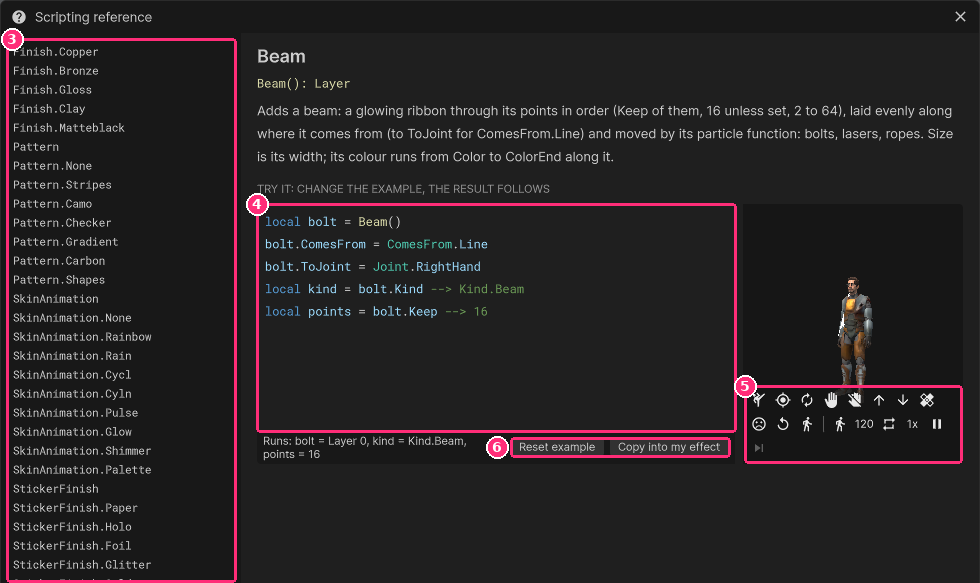
- On Effects, press Edit as code. The code editor opens.
- Press the question mark icon at the end of its toolbar, or F1. The scripting reference opens.
- Type in Search, or pick a name in the list.
- Change the example. The preview follows.
- The test bar plays what an example reacts to.
- Reset example puts it back. Copy into my effect puts it in your script.
Where an example says "paste this", paste the code over the example in step 4.
An effect example shows on your model, and a shape as its picture. A sticker or skin example shows only its values as text, and a weapon design only runs. To see those on a weapon, use the path their example gives.
The top of a script runs once, when the effect is put on. It makes layers and sets their fields, the same fields the Advanced editor shows.
Effect.Name = "Ember"
Effect.Joint = Joint.RightHand

local embers = Sprite()
embers.ComesFrom = ComesFrom.Sphere
embers.Spread = 2
embers.LooksLike = Picture.Spark
embers.Color = Color.Parse( "#ffb04a" )
embers.ColorEnd = Color.Parse( "#ff3d00" )
embers.Gravity = -30
embers.Amount = 25

local glow = Light()
glow.Color = Color.Parse( "#ff7a1f" )
glow.Size = 60
glow.Rhythm = Rhythm.Flicker
glow.RhythmSpeed = 6
glow.RhythmAmount = 0.3

local layers = 2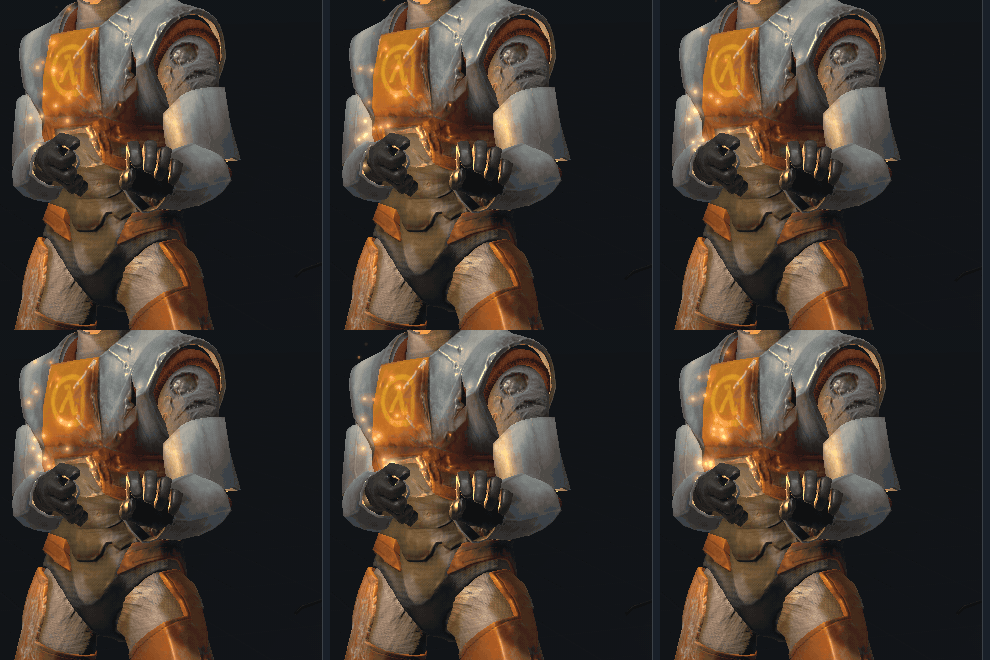
Try it in-game: Effects → Edit as code → ? → Script (under Start here), a shorter version of this effect.
OnUpdate runs every frame. t is the seconds since the effect started.
local glow = Sprite()
function OnUpdate( dt )
	glow.Size = 2 + Math.Sin( t * 4 )
end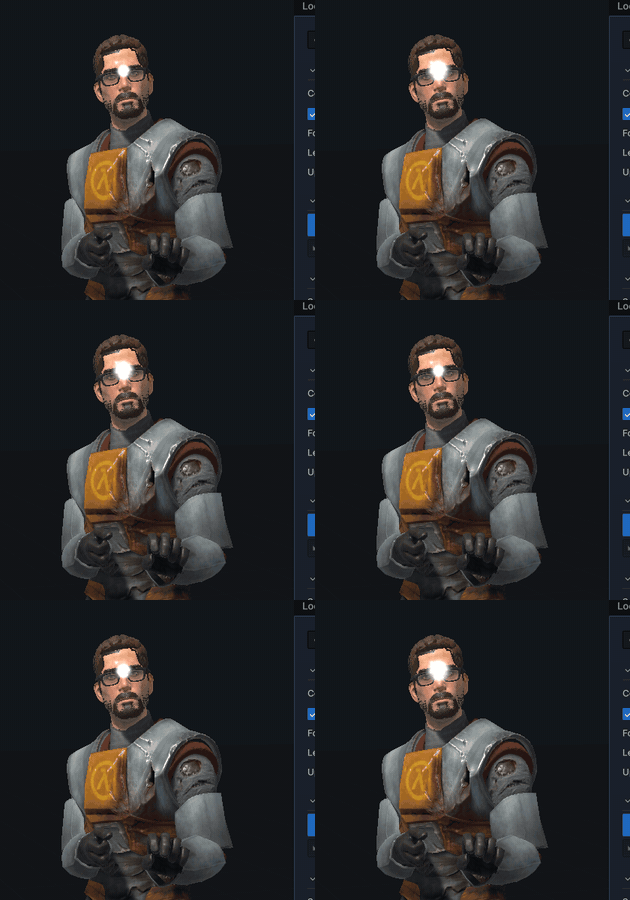
Try it in-game: Effects → Edit as code → ? → OnUpdate
Events run when something happens to the player. OnLand gives how fast they
fell.
local dust = Sprite()
function OnLand( fallSpeed )
	dust.Emit( Math.Min( fallSpeed / 20, 40 ) )
end
Try it in-game: Effects → Edit as code → ? → OnLand, then the down arrow (Land) on the test bar.
OnShoot gives every machine the same shot, worked out from what it already
sees. It follows the player's aim, not the weapon's spread.
local sparks = Sprite()
function OnShoot( shot )
	if shot.Hit then
		sparks.EmitAt( shot.HitPosition, 12 )
	end
end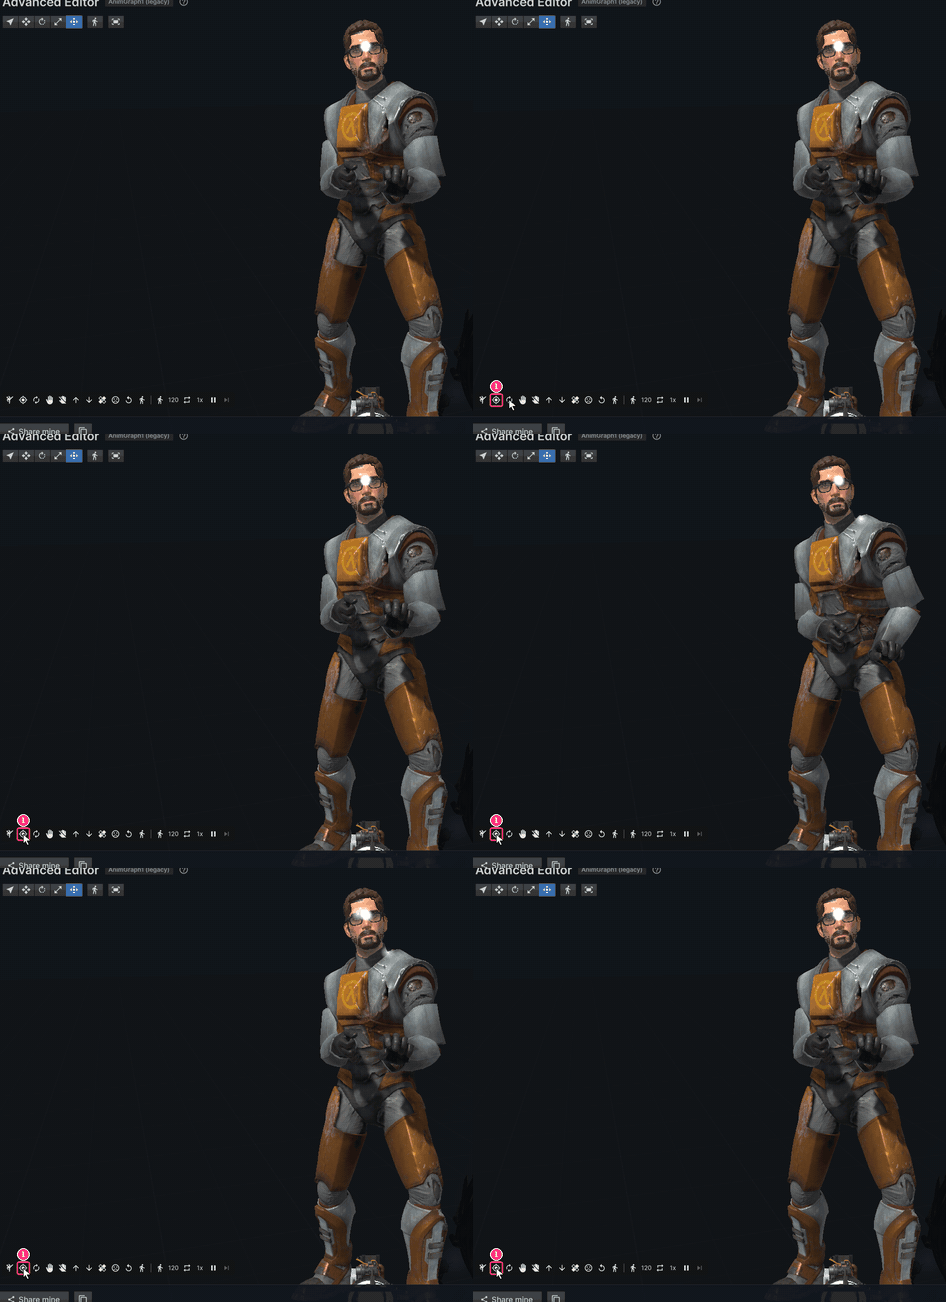
Try it in-game: Effects → Edit as code → ? → Layer.EmitAt, then the target icon (Shoot) on the test bar.
A layer's particle function runs for each of its sprites each frame. p is the
sprite.
local ring = Sprite()
ring.ComesFrom = ComesFrom.Ring
ring.Spread = 14
ring.Palette = { Color.Red, Color.Yellow, Color.Cyan }

function ring.Particle( p )
	local step = Math.Floor( t * 10 )
	p.Color = ring.Palette[ (step + p.Index) % ring.Palette.Count ]
	p.Alpha = 1 - p.Life
end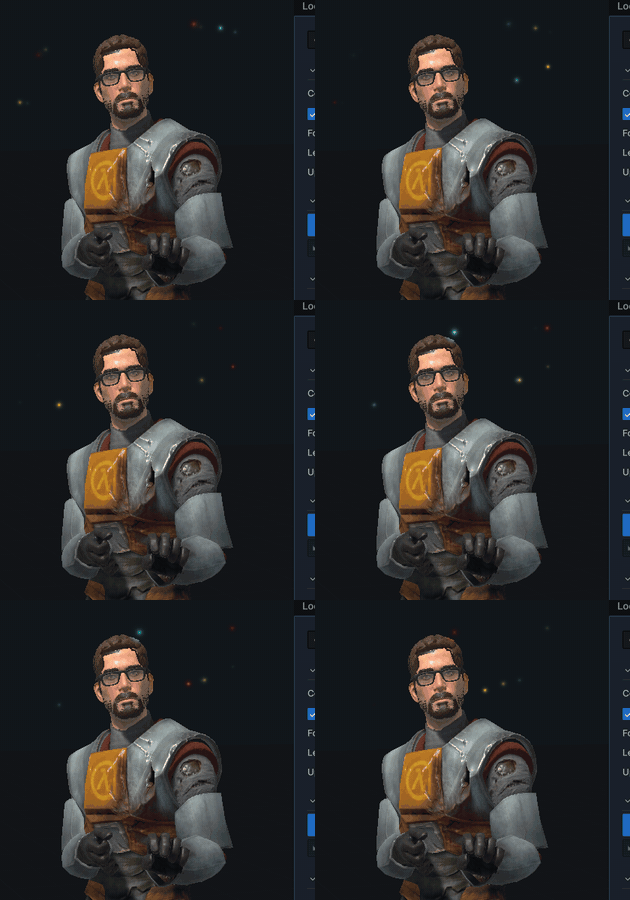
Try it in-game: Effects → Edit as code → ? → Layer.Particle, then paste this.
Keep holds sprites out all the time, spread evenly, each with its own
p.Index. Here they lie flat on the floor under the player, wherever they walk.
Effect.Name = "Magic circle"
Effect.Joint = Joint.Ground

-- Runes kept out all the time, spread evenly round a circle lying on the floor
local runes = Sprite()
runes.ComesFrom = ComesFrom.Shape
runes.Formation = Shapes.Circle
runes.Facing = Facing.Flat
runes.Spread = 28
runes.Offset = Vector3( 0, 0, 0.5 )
runes.LooksLike = Picture.Sparkle
runes.Align = Align.Ground
runes.Color = Color.Parse( "#7ad8ff" )
runes.Size = 4
runes.Amount = 0
runes.Keep = 16
runes.Follow = true

function runes.Particle( p )
	p.Rotation = t * 40 + p.Index * 22.5
	p.Alpha = 0.6 + 0.4 * Math.Sin( t * 3 + p.Index )
end

-- The ring itself, one sprite as wide as the circle, flat under the runes
local ring = Sprite()
ring.LooksLike = Shapes.Ring
ring.Align = Align.Ground
ring.Color = Color.Parse( "#7ad8ff" )
ring.Size = 60
ring.Amount = 0
ring.Keep = 1
ring.Follow = true

local glow = Light()
glow.Offset = Vector3( 0, 0, 4 )
glow.Color = Color.Parse( "#7ad8ff" )
glow.Size = 80
glow.Amount = 0.6

local flat = runes.Align --> Align.Ground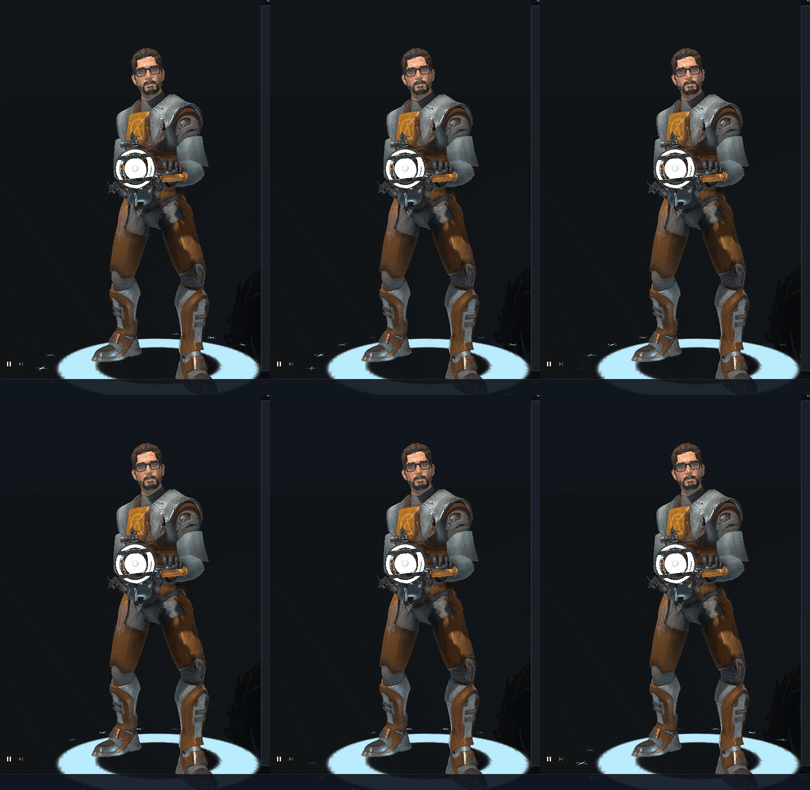
Try it in-game: Effects → Edit as code → ? → Layer.Align, then paste this.
A beam is a glowing ribbon through its points, in order. It is only available in a script.
local bolt = Beam()
bolt.ComesFrom = ComesFrom.Line
bolt.ToJoint = Joint.RightHand
local kind = bolt.Kind --> Kind.Beam
local points = bolt.Keep --> 16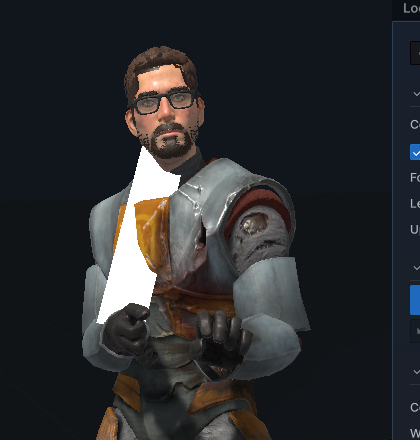
Try it in-game: Effects → Edit as code → ? → Beam
Ghosts are see-through copies of the body, posed as it was. They are only available in a script. At most 30 a second and 8 out at once.
local afterimage = Ghost()
afterimage.Color = Color.Parse( "#7ad8ff" )
afterimage.Amount = 12
afterimage.Lifetime = 0.4
local kind = afterimage.Kind --> Kind.Ghost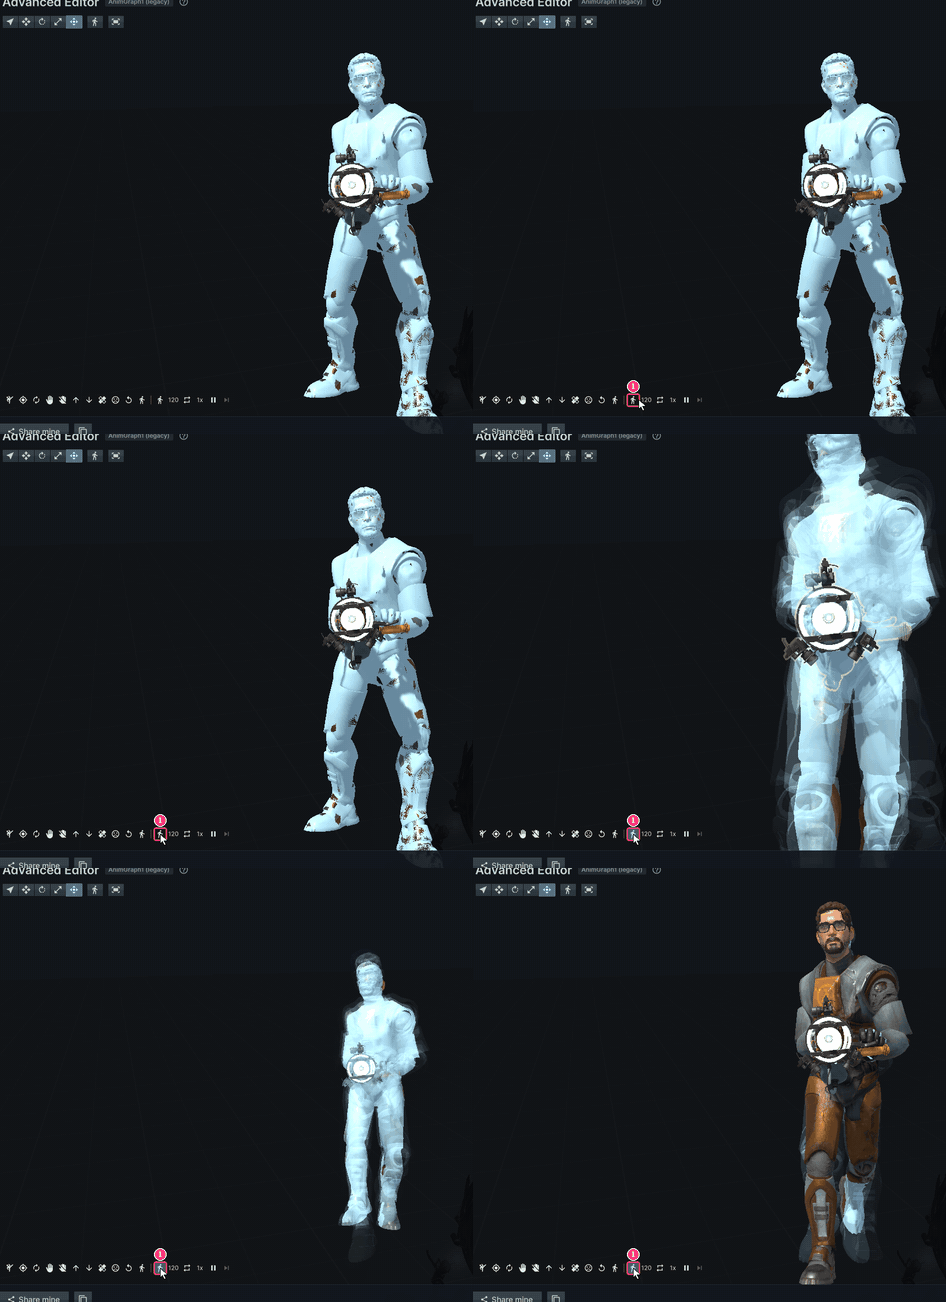
Try it in-game: Effects → Edit as code → ? → Ghost, then the walking figure on the test bar.
[Parameter] on a variable at the top of a script makes it an option players
can change on the Effects tab, without opening the code. The script's value is
the default.
[Parameter( "Glow size", Min = 0.5, Max = 10, Step = 0.1, Group = "Look", Tip = "How big each glow is" )]
local glowSize = 2.6

[Parameter]
local glowColor = Color.Parse( "#7af0ff" )
local size = glowSize --> 2.6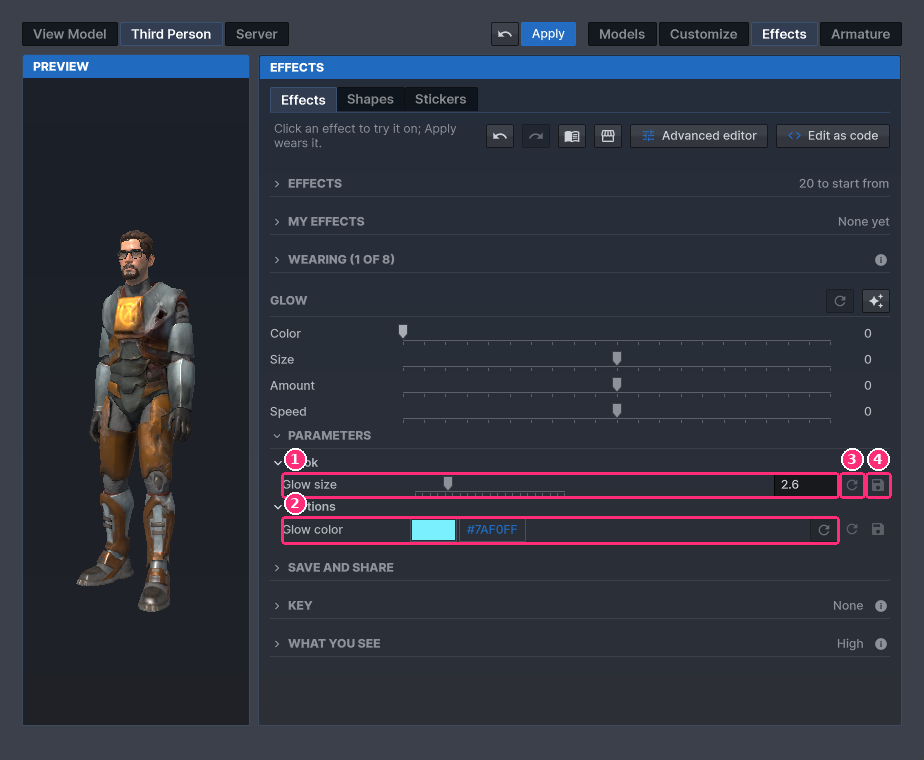
- A number gets a slider, with a box that takes sums.
- A color gets a swatch and a picker.
- The round arrow (Reset) goes back to the script's own value.
- The disk icon (Save as default) writes this value into the script.
A bool gets a check mark, a list of colors a palette, a key a key picker, a
shape a shape picker, a choice or Choices a list, and a Vector3 three
numbers. A value chosen is kept with the effect and held to its range on every
machine.
Try it in-game: Effects → Edit as code → ? → Parameter, or Parameters under Start here.
A script only sees the key presses the host lets through, so it can't get past the 2-minute wait. There is one start per player every 2 minutes, whatever the script says.
Effect.Key = "g"

local flash = Sprite()
flash.Amount = 0

function OnKey( key )
	if key == "g" then
		flash.Emit( 50 )
	end
end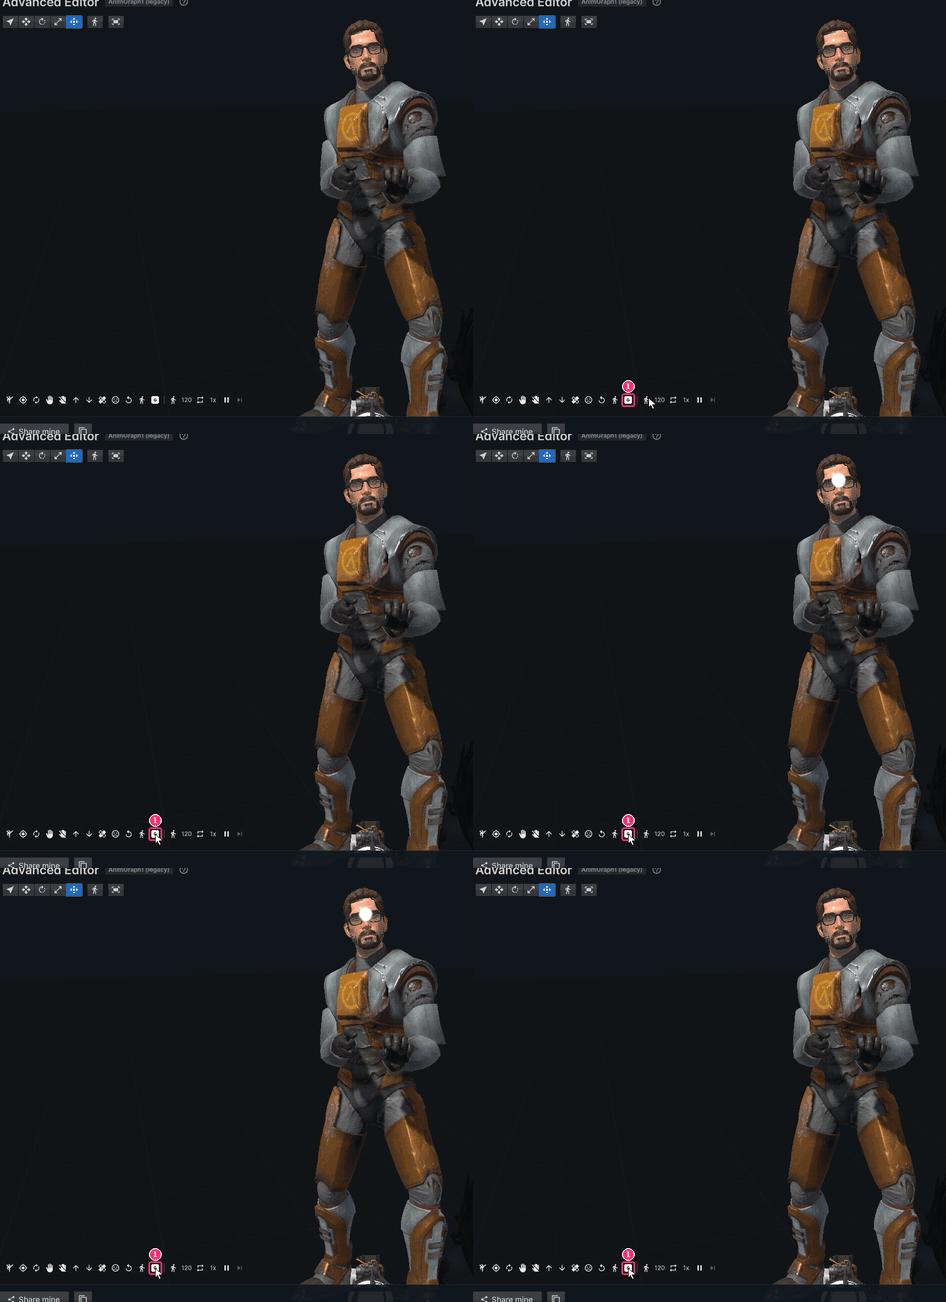
Try it in-game: Effects → Edit as code → ? → OnKey, then paste this. The test bar gets a G button, here with no wait.
A shape script draws into shape, on a square from -1 to 1 each way, at most
500 points. EndLine makes points a line, and EndOutline a filled outline.
-- A five-petal rose: r = cos( 5 angle ), traced once round
local petals = 5
local steps = 120
for k = 0, steps do
	local angle = k / steps * Math.PI * 2
	local r = Math.Cos( petals * angle ) * 0.9
	shape.Point( r * Math.Cos( angle ), r * Math.Sin( angle ) )
end

shape.EndLine()
local points = shape.PointCount --> 121
Try it in-game: Effects → Edit as code → ? → shape, then paste this.
-- A star of any number of points
local tips = 7
for k = 0, tips * 2 - 1 do
	local angle = k / (tips * 2) * Math.PI * 2 + Math.PI / 2
	local r = if k % 2 == 0 then 0.95 else 0.4
	shape.Point( r * Math.Cos( angle ), r * Math.Sin( angle ) )
end

shape.EndOutline()
local points = shape.PointCount --> 14
Try it in-game: Effects → Edit as code → ? → shape, then paste this.
-- Text along an arc, a letter at a time
local word = { "C", "O", "O", "L" }
for k = 0, word.Count - 1 do
	local angle = Math.PI * (0.75 - k / (word.Count - 1) * 0.5)
	shape.Letter( word[ k ], Math.Cos( angle ) * 0.7, Math.Sin( angle ) * 0.7, 0.45, angle * 180 / Math.PI - 90 )
end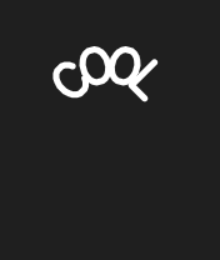
Try it in-game: Effects → Edit as code → ? → Shape.Letter, for a shorter example, or shape, then paste this.
Shapes.New makes a shape the same way, inside an effect. A script can also use
the 40 stock shapes (Shapes.Heart) and your own by name (Shapes.Mine( "COOL" )). A name you don't have is an error when it compiles.
local heartRing = Shapes.New( "Heart ring" )
for k = 0, 5 do
	local angle = k / 6 * Math.PI * 2
	heartRing.Add( Shapes.Heart, Math.Cos( angle ) * 0.7, Math.Sin( angle ) * 0.7, 0.25 )
end

local sparks = Sprite()
sparks.ComesFrom = ComesFrom.Shape
sparks.Formation = heartRing
sparks.Spread = 24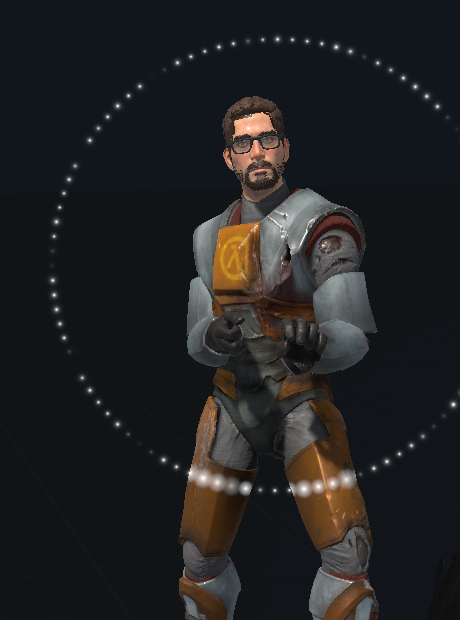
A layer's Spread sets how big its shape is, and it starts at 0, so set it or
the ring stays a point. The picture also holds more sprites in place.
Try it in-game: Effects → Edit as code → ? → Shapes.New, then paste this.
Adding layers makes a shape a sticker: a stack of shapes, each moved, turned, scaled and colored. In the creator's Sticker mode, Code opens the sticker as a script like these, and the layers and the code stay in step.
local back = shape.AddLayer( Shapes.Hexagon )
back.Color = Color.Parse( "#20242c" )
back.OutlineColor = Color.Parse( "#ffd700" )
back.OutlineWidth = 0.08

local star = shape.AddLayer( Shapes.Star5 )
star.Scale = Vector3( 0.6, 0.6, 1 )
star.Color = Color.Parse( "#ffd700" )
star.Animation = Animation.Rainbow
local turned = star.Rotation --> 0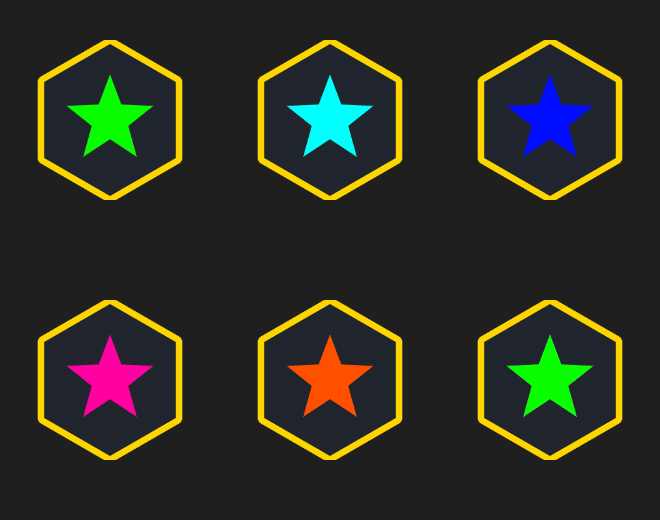
Try it in-game: Effects → Edit as code → ? → shape, then paste this.
An Eraser layer cuts its shape out of the layers below it.
-- A badge with a ring of five stars and a hole punched through its middle, on holo
shape.Finish = StickerFinish.Holo
local back = shape.AddLayer( Shapes.Hexagon )
back.Color = Color.Parse( "#101820" )
for k = 0, 4 do
	local star = shape.AddLayer( Shapes.Star5 )
	star.Position = Vector3( Math.Cos( k * 1.2566 ) * 0.5, Math.Sin( k * 1.2566 ) * 0.5, 0 )
	star.Scale = Vector3( 0.25, 0.25, 1 )
	star.Color = Color.Parse( "#ffcc00" )
end

local hole = shape.AddLayer( Shapes.Circle )
hole.Scale = Vector3( 0.2, 0.2, 1 )
hole.Eraser = true
local cut = hole.Eraser --> true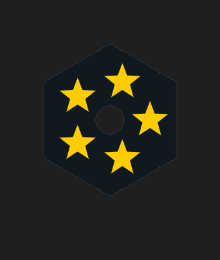
Try it in-game: Effects → Edit as code → ? → shape, then paste this.
A sticker script runs for each element every frame. It sets that element's
color, alpha, size, rotation and offset. On a sticker made of layers,
i is the layer and origin its place. It colors a sticker's layers, and it
fades, sizes, turns or moves each sprite showing the sticker.
It can't move letters inside its picture. To scroll text, build it from kept sprites and move those with a particle function.
-- A wave of colour rising up the sticker's layers, its sprites bobbing as it goes
local wave = Math.Sin( t * 3 - origin.Y * 4 ) * 0.5 + 0.5
color = Color.Lerp( Color.Parse( "#1b2a6b" ), Color.Parse( "#7af0ff" ), wave )
offset = Vector3( 0, 0, wave * 2 )
local lit = wave --> 0.1472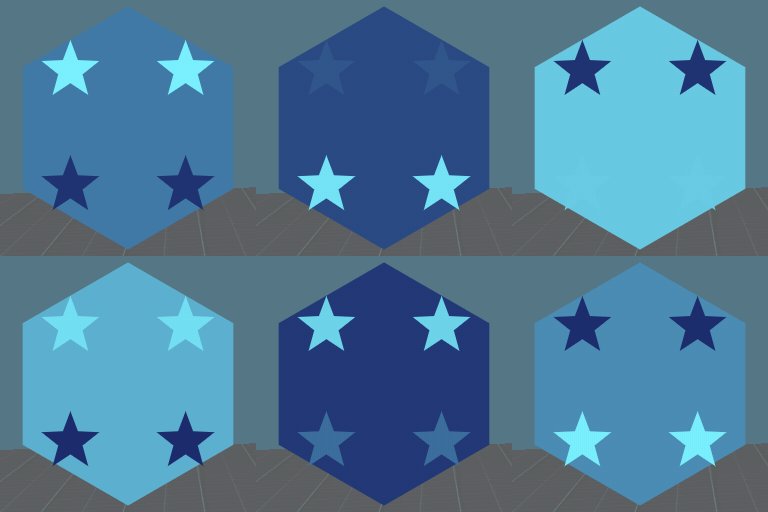
Try it in-game: Effects → Stickers → New sticker → Printed On → Animate with code, then paste this. In the reference (? → origin), it shows its values as text.
World at War's clan tag colors are scripts like this one. It is what Rain does:
-- World at War's "rain": every 100 ms the palette moves one element along, so the colours scroll.
local step = Math.Floor( time / 100 )
color = palette[ (step + i) % palette.Count ]
local shown = color --> #ffff00
Try it in-game: Effects → Edit as code → ? → palette, then paste this. It shows its values as text.
A skin script works out a weapon's moving colors, once a frame for each
different skin. It runs once for each band along the weapon, or at 64 places
along it when it reads along (0 at the back, 1 at the front). It sets color,
alpha, shade, glow, sheen, scroll and spin.
-- A heat haze: hot white at the muzzle cooling to deep red at the back, flickering as if it just fired
local heat = Math.Pow( along, 2 ) * (0.8 + 0.2 * Math.Sin( t * 30 + along * 12 ))
color = Color.Lerp( Color.Parse( "#3a0000" ), Color.Parse( "#fff2c0" ), heat )
alpha = 0.3 + 0.6 * along
glow = color * (heat * 0.8)
local front = along --> 0.25
Try it in-game: Effects → Edit as code → ? → Weapon skins (under Start here), which shows its values as text. To see it on a weapon: weapon mode → Skin → Moving color → Write your own, then paste this. Stock lets your script go.
A design script is a weapon's whole design: Weapon is the weapon, and Skin
what is painted over it. It is built once, when it changes, and it has no
functions that run. It is held to the same limits as the panel. See
Weapons.
To try these, hold a weapon, open the Advanced editor, double-click the weapon, press Code and paste. The reference's entries WeaponSkin.Animation, Weapon.AddSticker, Weapon.AddProp and Weapon.AddEffect run shorter examples, without a picture.
-- Rainbow flowing skin: the colour wheel flowing along the weapon, twice the clan tags' pace, over carbon fibre
Skin.Pattern = Pattern.Carbon
Skin.Animation = SkinAnimation.Rainbow
Skin.Speed = 2
local pace = Skin.Speed --> 2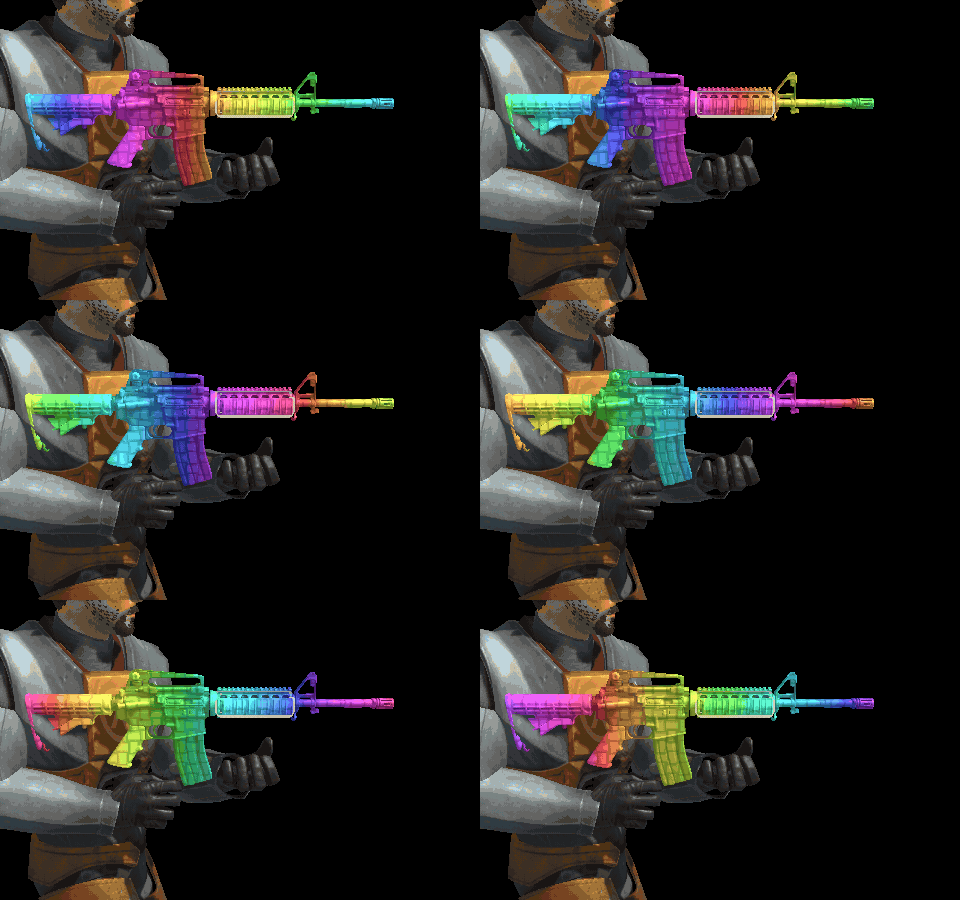
Try it in-game: weapon mode → Code, then paste this. Reference: ? → WeaponSkin.Animation
-- Gold with a holo sticker: a gold finish, and a star printed on holo film on the left of the receiver
Weapon.Finish = Finish.Gold

local star = Weapon.AddSticker( Shapes.Star5 )
star.Position = Vector3( 4, 0, 6.5 )
star.Rotation = Vector3( 0, 0, -90 )
star.Size = 4
star.Finish = StickerFinish.Holo
star.Border = true
local printed = star.Finish --> StickerFinish.Holo
Try it in-game: weapon mode → Code, then paste this. Reference: ? → Weapon.AddSticker
-- Magazine replaced by a can: the can takes the magazine's place and follows it through a reload
local can = Weapon.AddProp( "models/sbox_props/cola_can/cola_can.vmdl" )
can.Part = "magazine"
can.Replaces = true
can.Scale = 0.8
local replaces = can.Replaces --> true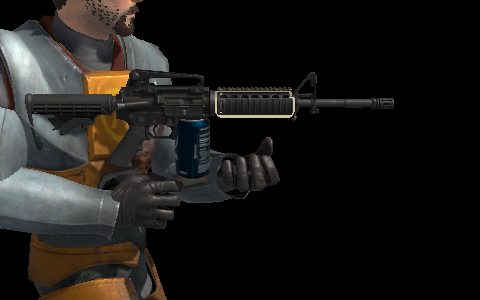
Try it in-game: weapon mode → Code, then paste this. Reference: ? → Weapon.AddProp
local tracer = Weapon.AddEffect( Effects.Preset( "Bullet tracer" ) )
tracer.Hue = 0.3
tracer.When = When.OnShoot
local shows = tracer.When --> When.OnShoot
Try it in-game: weapon mode → Code, then paste this. Reference: ? → Weapon.AddEffect
| What | Most |
|---|---|
| One script | 16 KB, measured minified |
| All the scripts of one look | 32 KB |
| A line | 4096 characters |
| A text literal | 256 characters |
| Nesting | 48 deep |
| Functions | 64 |
| Parameters | 32 |
| Layers | 8 per effect |
| Kept sprites | 100 per layer |
| Beam points | 64 per beam |
| Ghosts | 30 a second, 8 out at once, per layer |
| Pictures | 16 per layer |
| Shape points | 500 per shape |
| Sticker layers | 32 |
| Palette | 32 colors |
| Building | 200,000 instructions |
| One run (frame, event, element) | 10,000 instructions |
| One player's scripts, each frame | 60,000 instructions |
| Everyone's scripts, each frame | 600,000 instructions |
| Calls | 32 deep |
| New scripts compiled per player | 2 a second on each machine (8 at once) |
- A script over a limit is refused whole, with a message saying which. It never runs in part.
- A run that hits its budget stops, and the effect keeps its own values. An endless loop just stops.
- A body out of view, or too far away to show effects, runs nothing.
- No sprite is ever drawn bigger than 128 units, whatever a script asks.
- A script is compiled once when a look changes, and kept by its text. A hundred players with one script compile it once.
- A script that doesn't compile shows what it made when it was saved.
- The host can lower the longest script that runs, down to 2 KB, or switch scripts off. See Server settings.
A script gets no sound as input, so it can't react to audio. A beat is worked out from time.