4. First Steps with Arduino
The Arduino Integrated Development Environment - or Arduino Software (IDE) - contains a text editor for writing code, a message area, a text console, a toolbar with buttons for common functions, and a series of menus. It connects to different boards’ hardware to upload programs and communicate with them.
You need to download and install Arduino IDE you can find it here to different O.S.

After installing Arduino IDE you will see the next window.
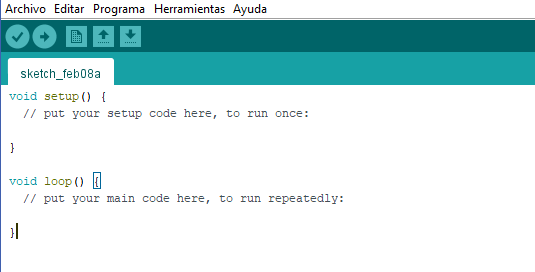
After you have installed the Arduino IDE, you will have to install some boards, don't worry it is nothing to write home about, here is a quick guide on how to install them:
Install "Electronic Cats" support
To add board support for our products, start Arduino and open the Preferences window (File > Preferences).
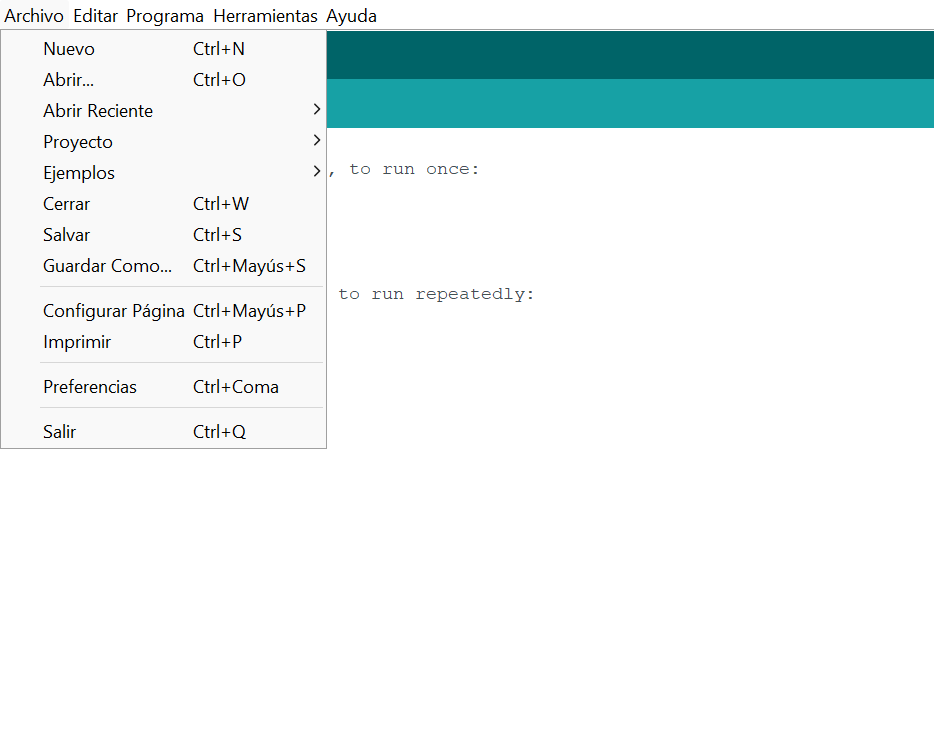
Now copy and paste the following URL into the 'Additional Boards Manager URLs' input field:
https://electroniccats.github.io/Arduino_Boards_Index/package_electroniccats_index.json
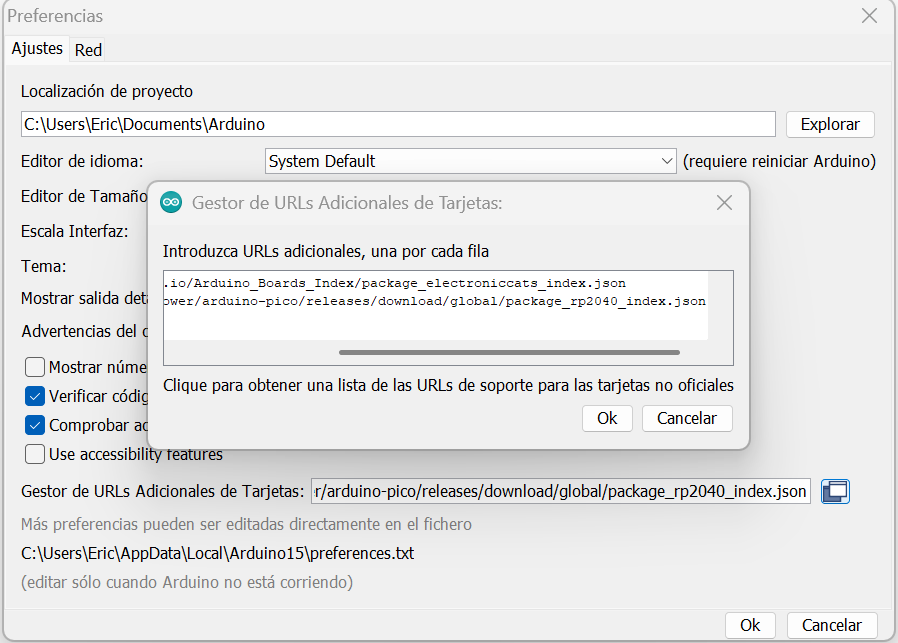
- If there is already an URL from another manufacturer in that field, click the button at the right end of the field. This will open an editing window allowing you to paste the above URL onto a new line.
- Press the "OK" button.
- Open the "Boards Manager" that is in Tools > Board > Board Manager.
- Now write
Electronic Catsin the search bar. - Click in install, just wait to finish installing, and only close the window.
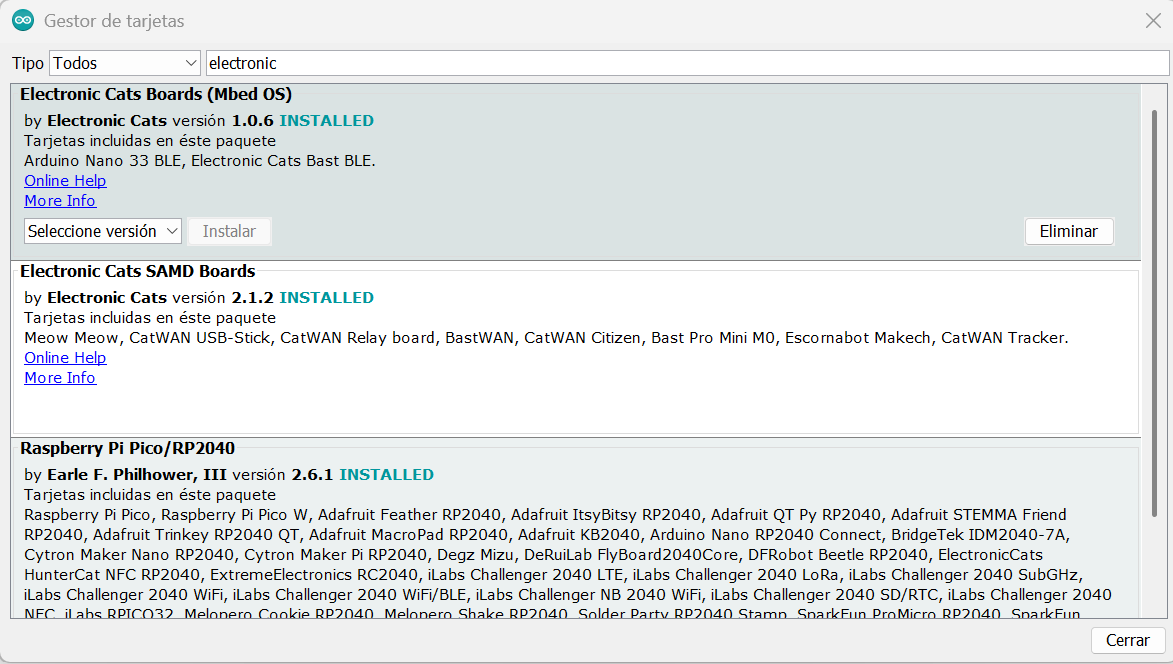
- In Tools > Boards, scroll down in the board's list you can see the Electronic Cat's boards.
Install "Pico Boards" support
To add board support for our products, start Arduino and open the Preferences window (File > Preferences).
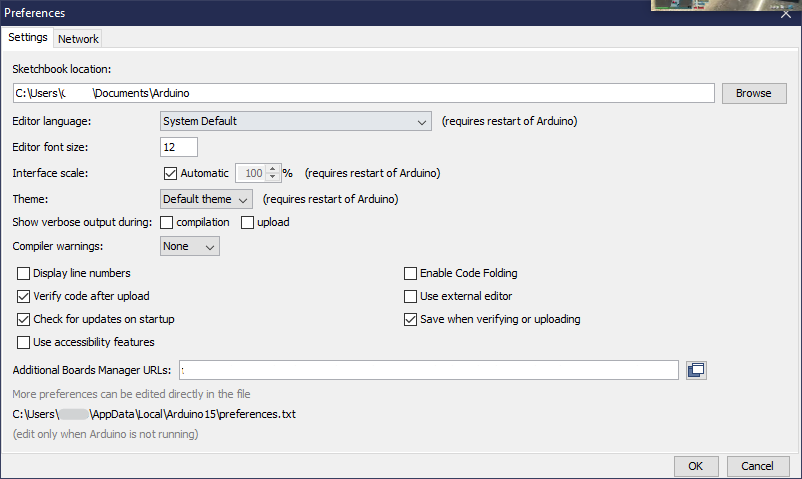
Now copy and paste the following URL into the 'Additional Boards Manager URLs' input field:
https://github.com/earlephilhower/arduino-pico/releases/download/global/package_rp2040_index.json
- If there is already an URL from another manufacturer in that field, click the button at the right end of the field. This will open an editing window allowing you to paste the above URL onto a new line.
- Press the "OK" button.
- Open the "Boards Manager" that is in Tools > Board > Board Manager.
- Now write
RP2040in the search bar. - Click in install, just wait to finish installing, and only close the window.
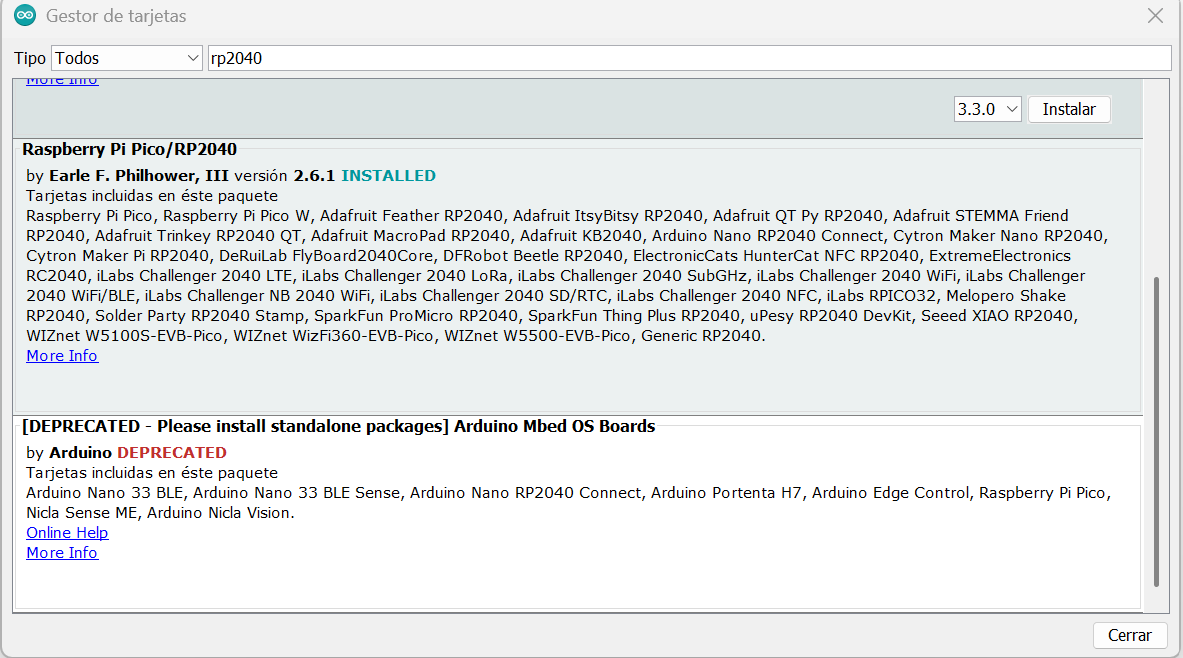
- In Tools > Boards, scroll down in the board´s list you can see the boards with RP2040.
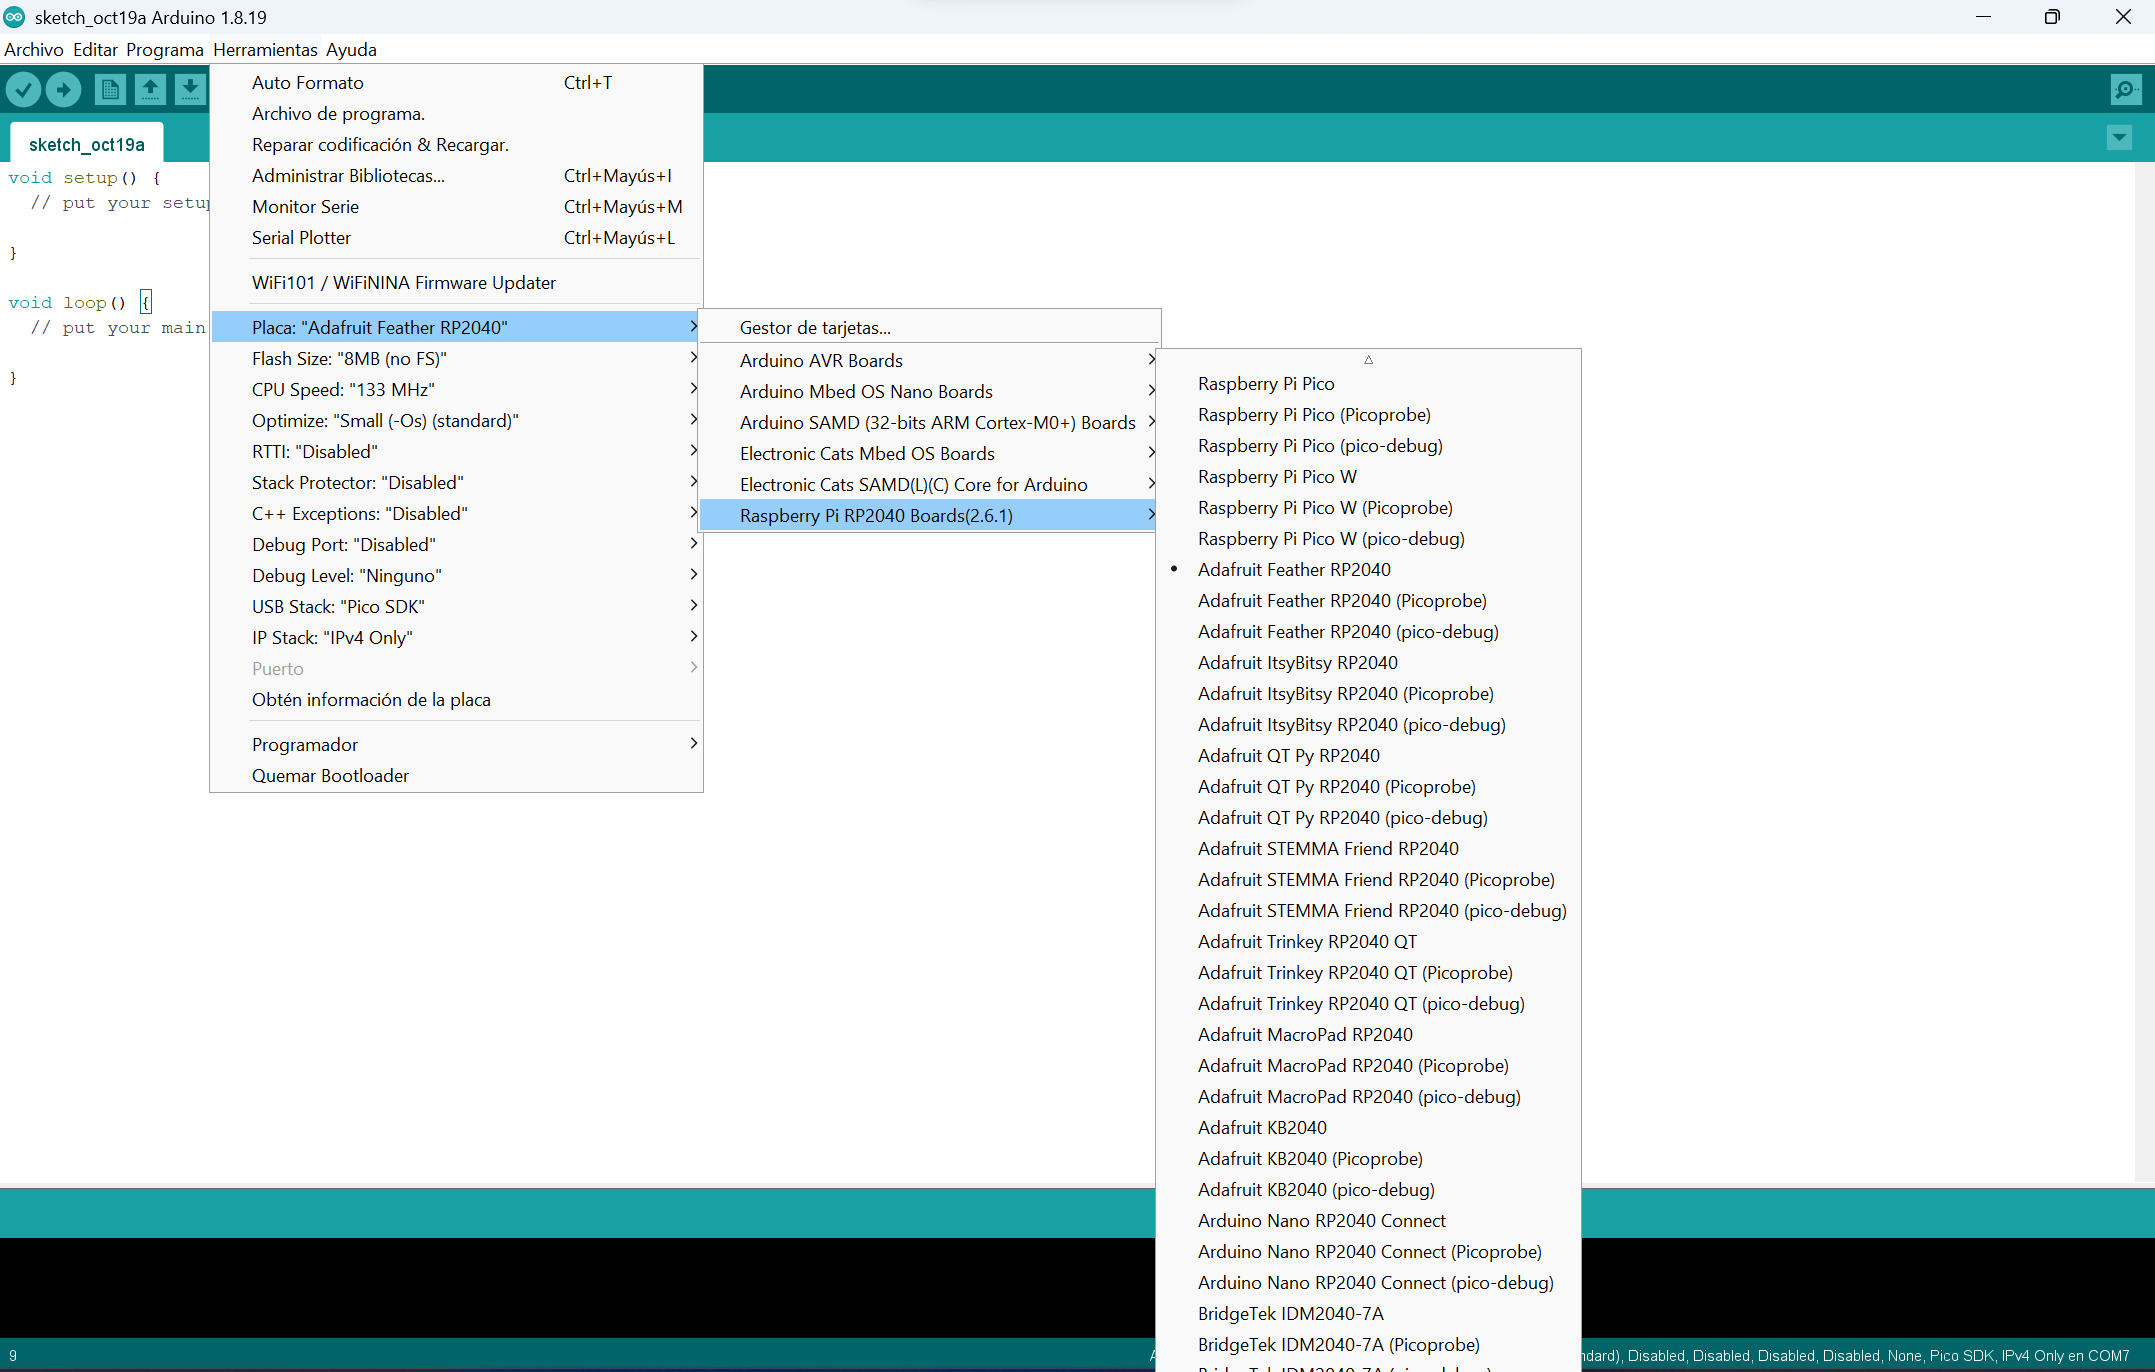
Select Adafruit Feather RP2040 and you will have everything ready to upload programs.

Thank you for reading our Wiki!