Using the map

The toolbar remains available in detailed and map-only views. Save layout is the last toolbar button. Hover or focus a button to see its translated label.
| Control | Action |
|---|---|
| Refresh | Fetch the current network from the integration |
| Fit view | Fit and centre the complete map; exit device zoom |
| Zoom in / Zoom out | Zoom around the map centre |
| Tidy layout | Align and space devices while preserving their ordering and current viewport |
| Link labels | Toggle compact link labels independently of status colours |
| Show detailed view | Toggle title, counts and expandable sections |
| Magnifying glass | Toggle a lens over the map |
| Copy / Paste menu | Transfer display settings and map positions between cards and panels |
| Save layout | Save positions and supported view preferences |
See Saving layouts for how saving works in different dashboard modes.
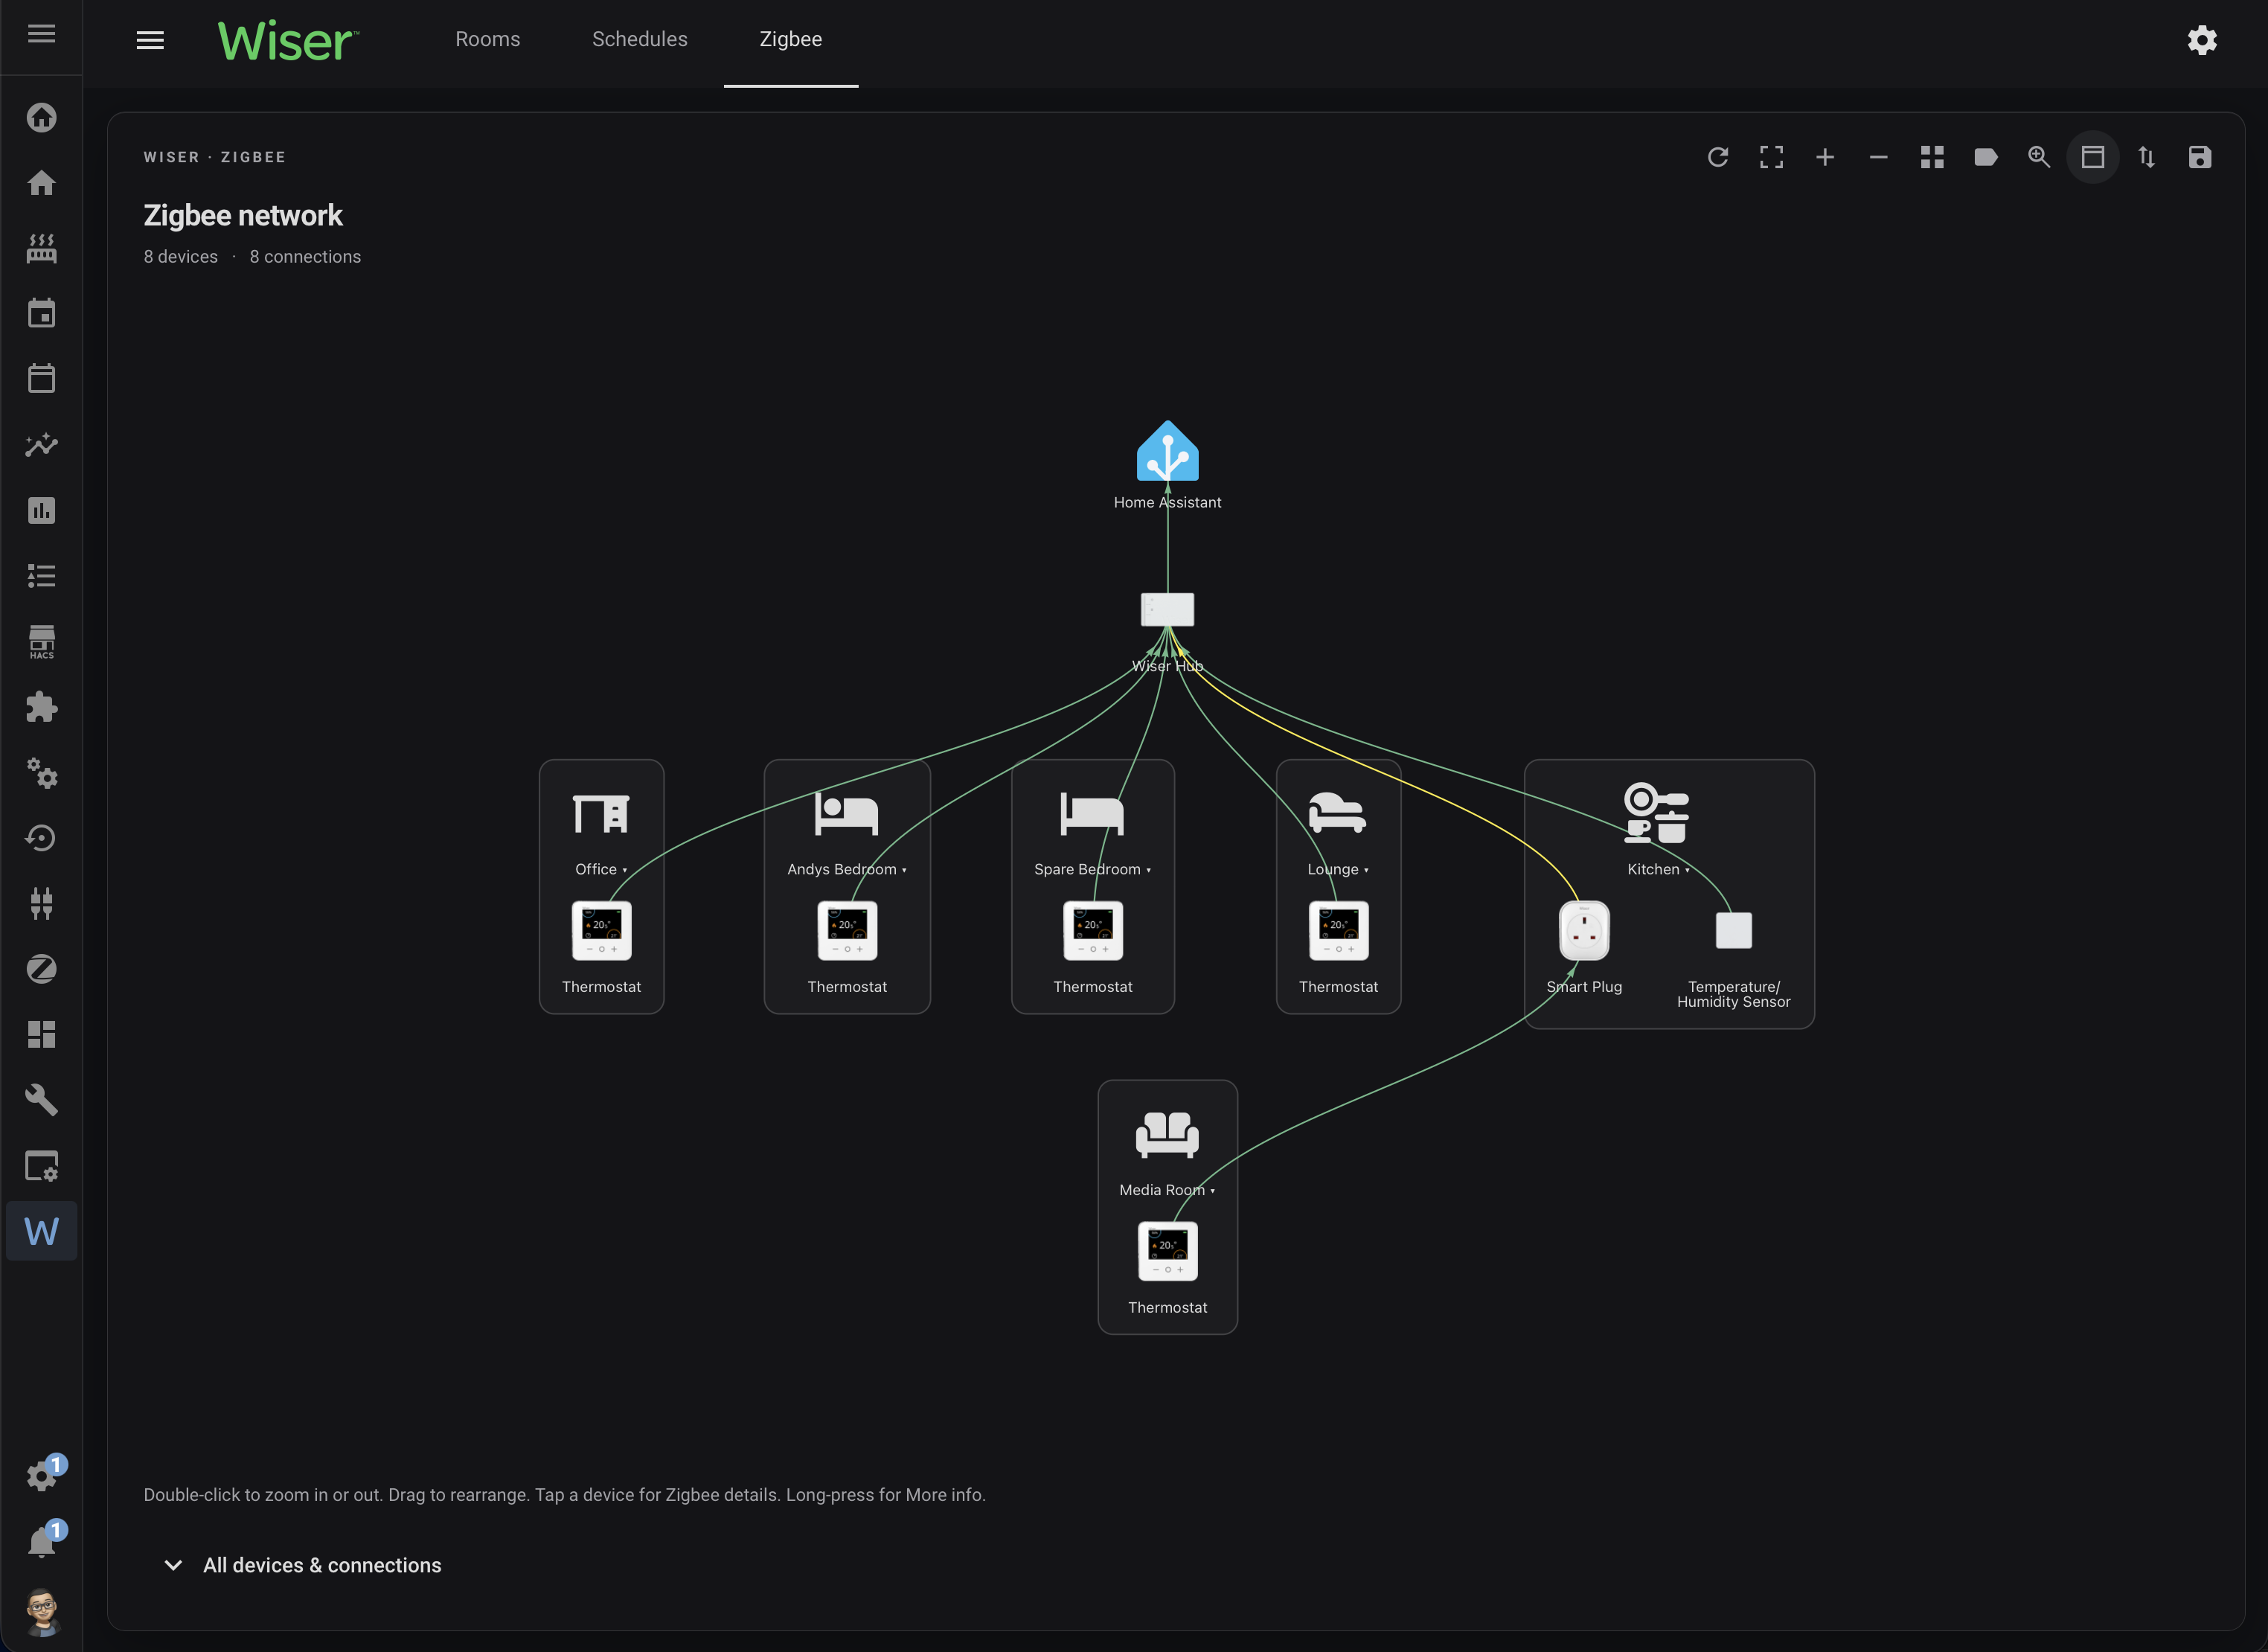
Enable Show detailed view or set map_only: false to display the title, device and connection counts, and expandable sections. All devices & connections is available when show_device_list: true.
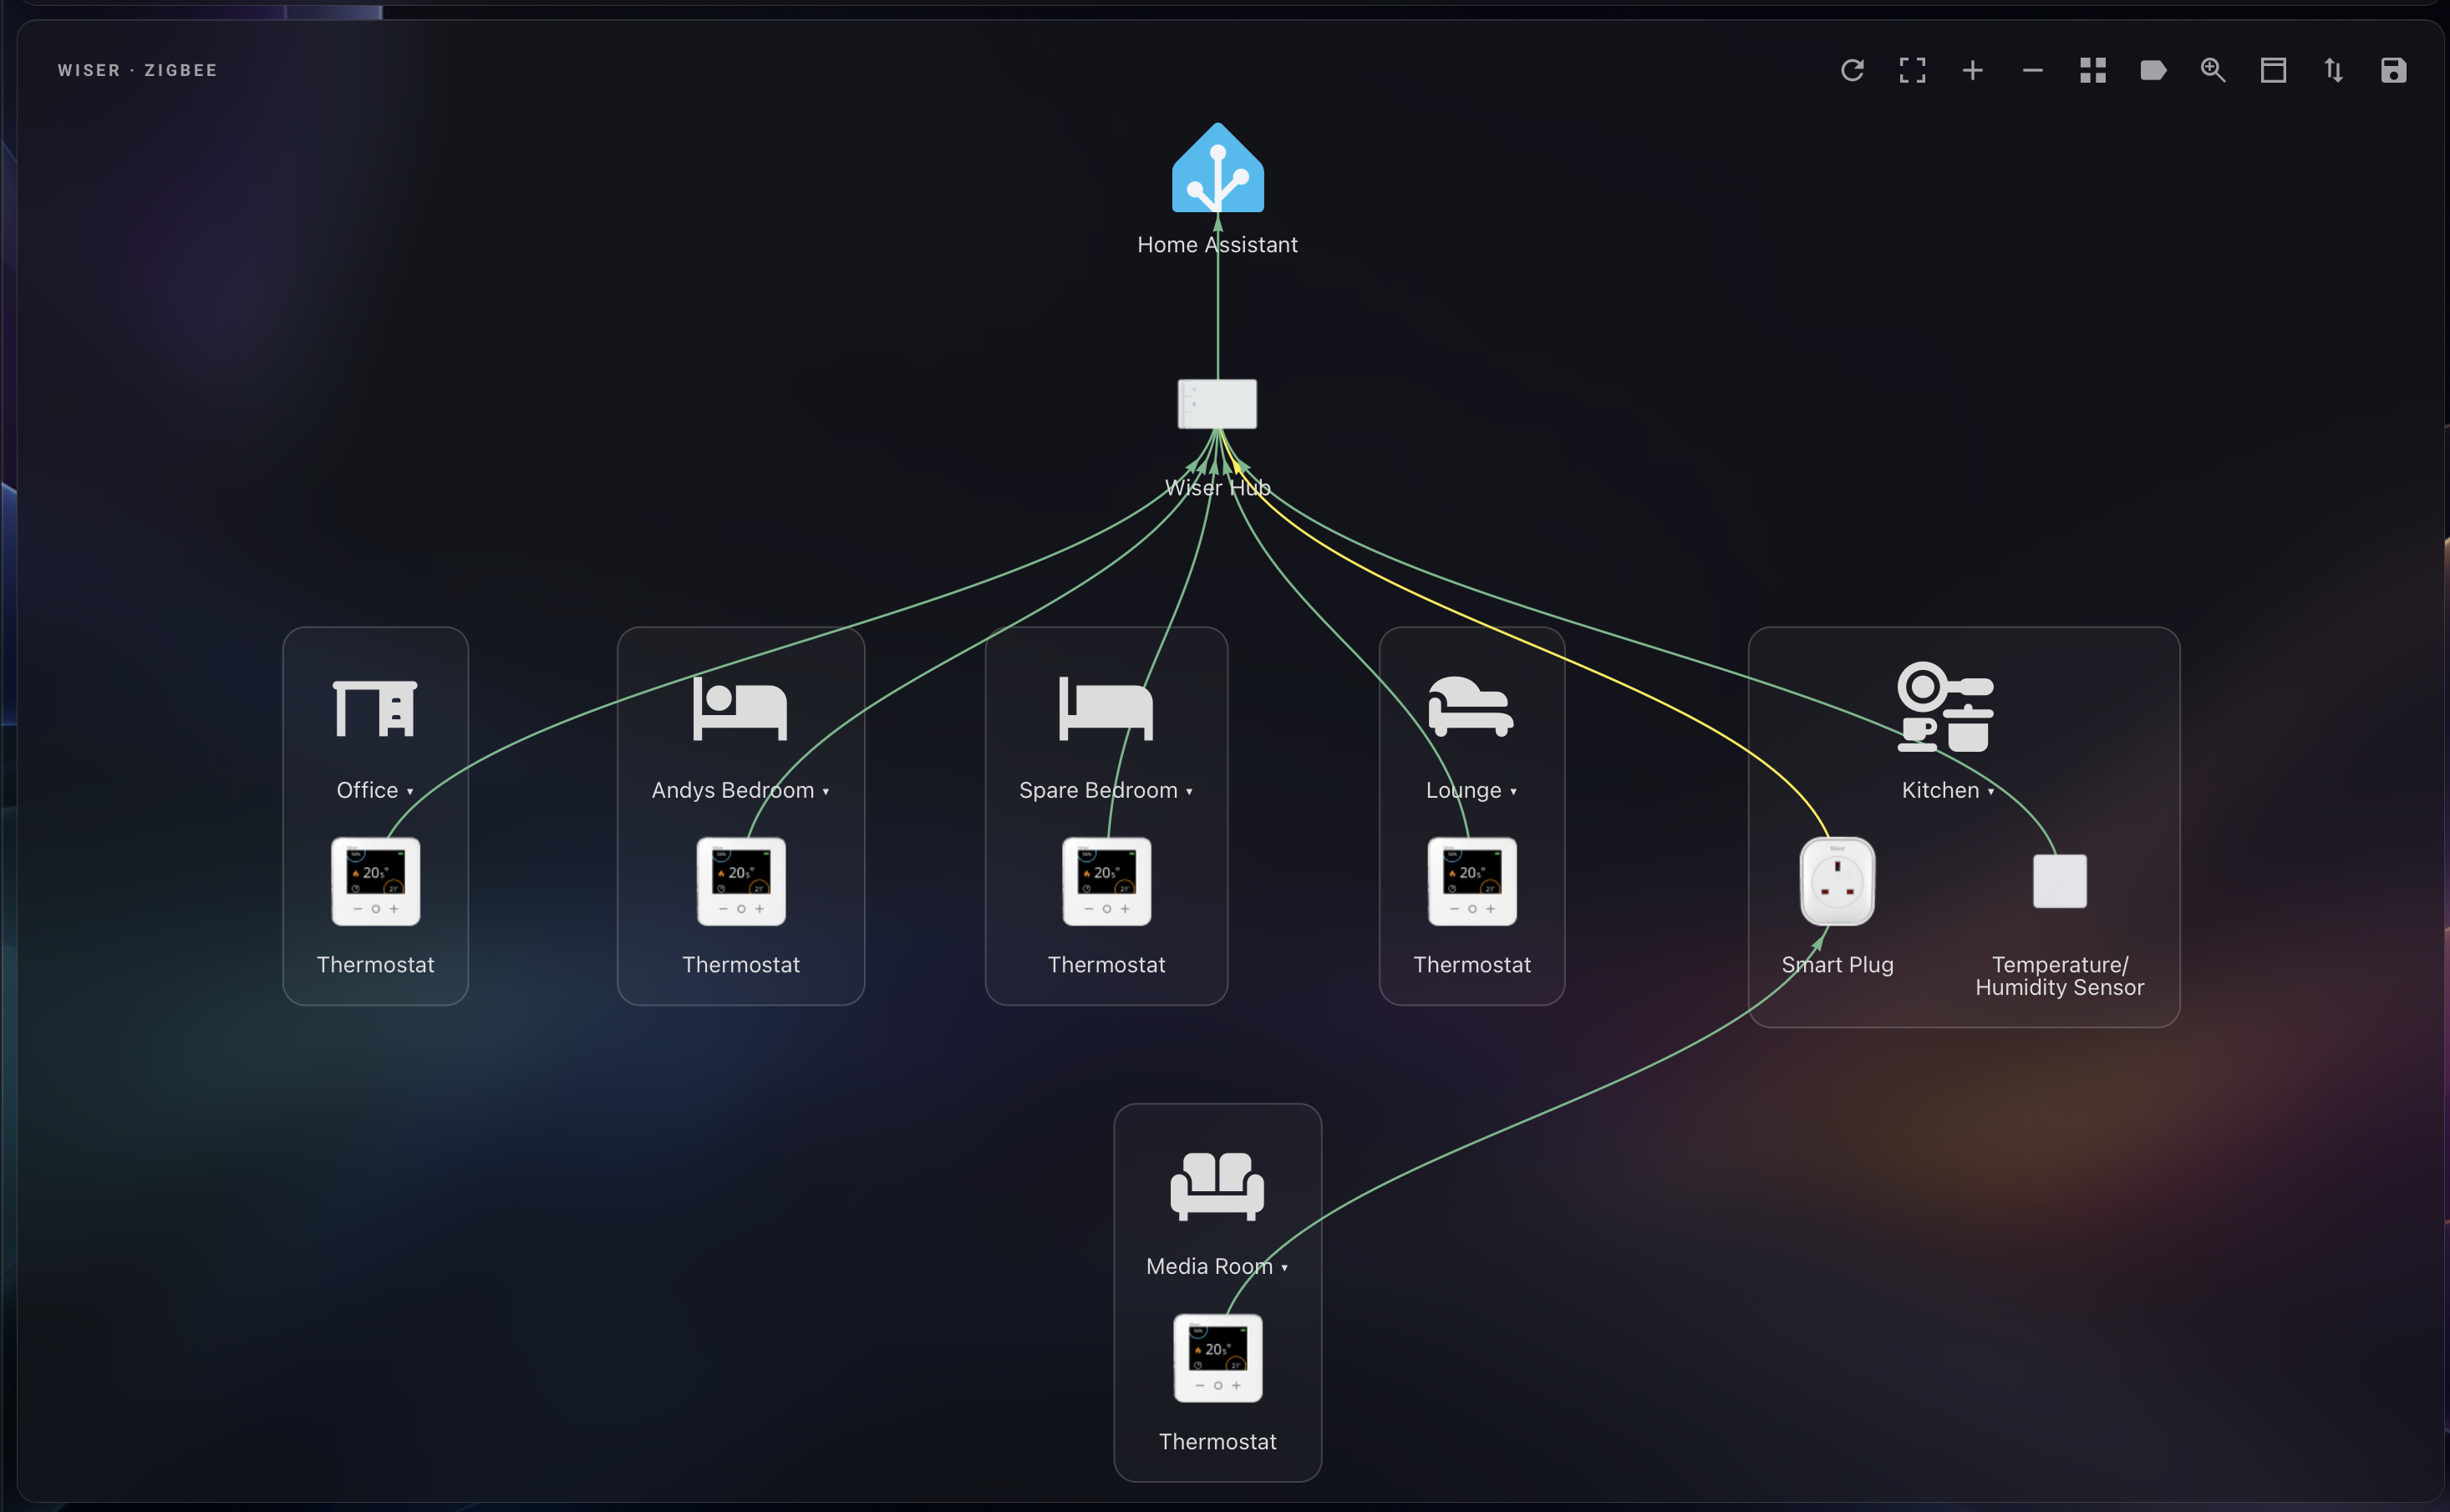
Turn off Show detailed view or set map_only: true for this compact presentation. The toolbar, area groups and device interactions remain available. Tap a device to open its details in a scrollable overlay.
| Interaction | Result |
|---|---|
| Tap or click a device | Show its Zigbee details |
| Long-press a device | Open Home Assistant More info for its matching signal entity, when available |
| Drag a device | Move it to a new position |
| Drag empty map space | Pan the map |
| Double-click the map or a device | Zoom into that location; double-click again to restore the previous view |
| Pinch with two fingers or a trackpad | Zoom around the gesture centre |
| Wheel or two-finger scroll while zoomed | Pan; Shift + wheel pans horizontally |
| Scroll in the overview | Scroll the dashboard normally |
A single tap waits briefly to distinguish it from a double-click. Automatic and manual refresh preserve the current zoom, pan and existing device positions. Animations respect reduced-motion preferences.
Available information includes device type, node and parent IDs, connections, channel, signal quality, and device/hub RSSI and LQI. Some values depend on a matching signal entity. The card matches using the hub and Home Assistant device registry, keeping duplicate node IDs on different hubs separate.
Selected-device headings and the expandable devices and connections list use the Home Assistant device name followed by its area in brackets, for example Thermostat (Office). A leading Wiser prefix and an area name already included in the device name are removed before the area is appended once.
Missing or disabled signal sensors do not prevent the available network details from appearing. Paired RSSI/LQI values of zero are omitted because they can represent missing reception data; zero LQI with nonzero RSSI remains visible.
In map-only mode, details appear in a scrollable overlay. The selected device moves into view above it without changing zoom. Close the overlay or tap the map to restore the prior view. Dragging dismisses details.
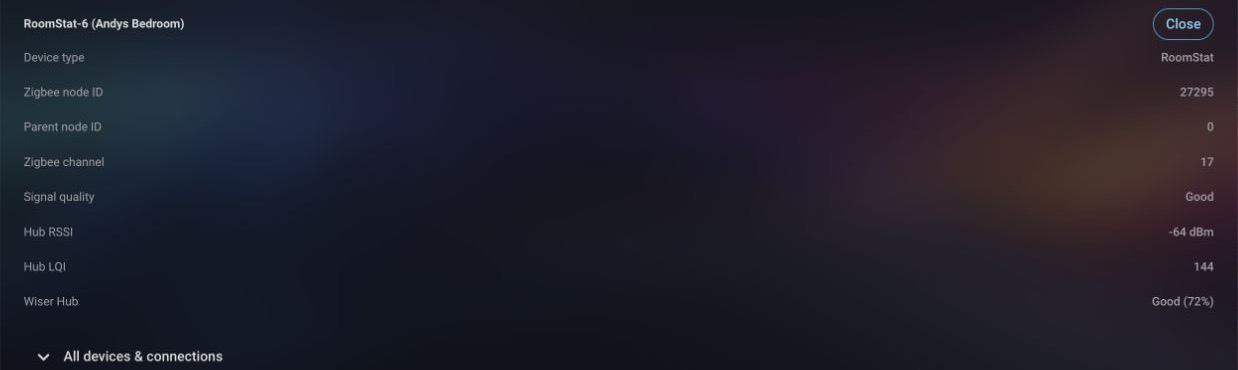
Earlier-build detail screenshot; current headings use cleaned Home Assistant device names. Available rows depend on the integration and matching signal entity.
Enable Show Home Assistant connection in settings (show_home_assistant: true) to add the Home Assistant node shown in the current screenshot. The hub-to-Home-Assistant link represents the hub’s reported Wi-Fi/network connection, not another Zigbee hop. Tap Home Assistant or the hub for available Wi-Fi RSSI, quality, SSID and IP details.
Link labels show compact percentages when available, otherwise status. Hovering over a link reveals its label when labels are turned off. On dense maps, labels without enough free space may be hidden; tap the device or use the devices and connections list to inspect the available information.
Status colours come from the integration's reported category, not thresholds inferred from a percentage:
| Reported category | Colour |
|---|---|
| Good, very good, excellent | Green |
| Medium, normal, fair, online, connected | Yellow |
| Low, very low, poor and related low-quality categories | Orange |
| Offline, unknown or unrecognised category | Red |
Colours use Home Assistant theme tokens. link_status chooses whether these colours affect links, device artwork, both or neither. Offline artwork remains ghosted. Colour settings and label visibility are independent.
Enable the lens from the map toolbar or editor, or set magnifier: true. It follows a mouse or pen and includes device images, links, labels and area icons. It hides while dragging or using touch and does not change the map's zoom or positions. Save layout retains its enabled state, and Copy includes it.
Long-press or right-click the magnifier button to open its menu, or focus the button and press Arrow Down. Choose 2×, 3× or 4× magnification and a lens size from 100 to 360 pixels. Defaults are 2× and 180 pixels. The browser remembers magnification and lens size.