4. Davinci Resolve EN
Language: Deutsch | English
Contents
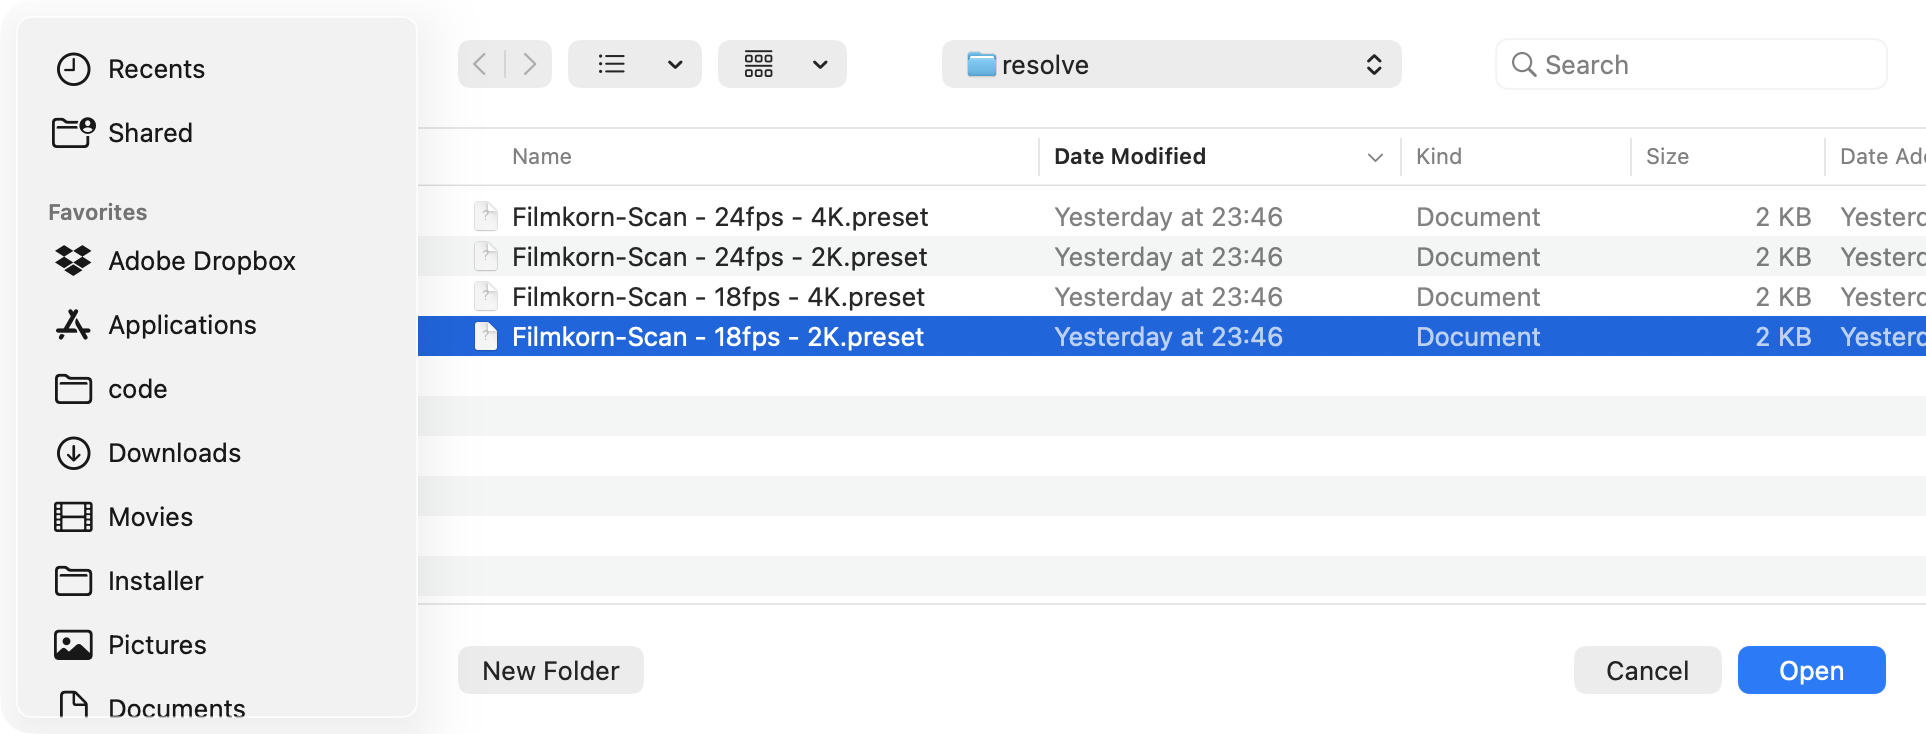
After creating a new project in DaVinci Resolve, the very first thing to do is open the Project Settings. You can get there via the small gear icon at the bottom right, via the "File -> Project Settings" menu, or with Shift-9.
In the "Project Settings" window that opens, click the three dots (•••) at the top right and select "Import Preset":

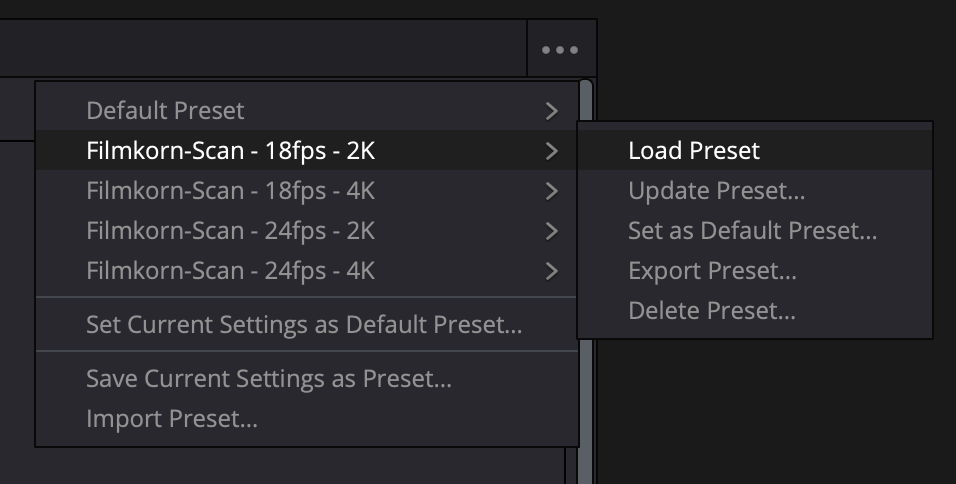
The Scan Controller creates a "Resolve" folder next to the scanned files, containing suitable project presets:
It is best to import all these presets once, one after another; they will then remain available in the ••• menu at the top right. The important thing is to choose the frame rate and resolution that match the scanned material. In particular, changing the frame rate later, for example from 24 to 18 fps, is very complicated - so it is best to make this your first step right away.
Here I have 18 fps material in 2K:
The Project Settings can now be closed.
- First, activate the Media tab at the bottom center (Shift-2)
- Now drag the folder containing the scan onto the lower half of the DaVinci window:

- Now activate the Cut tab at the bottom center (Shift-3)
- The scan is located at the top left under "Master". Drag it onto the lower half of the window; this creates a timeline:
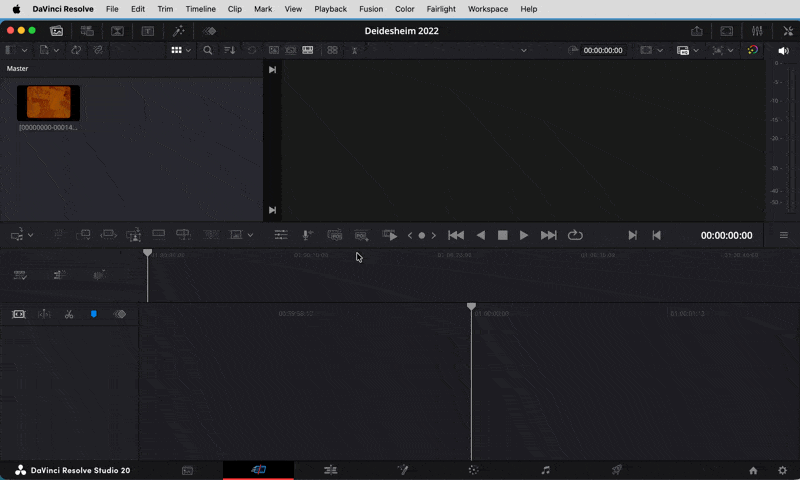
Now the actual editing can begin:
First, choose Detect Scene Cuts from the Timeline menu. This reliably and automatically splits the scan into individual scenes within a few seconds:
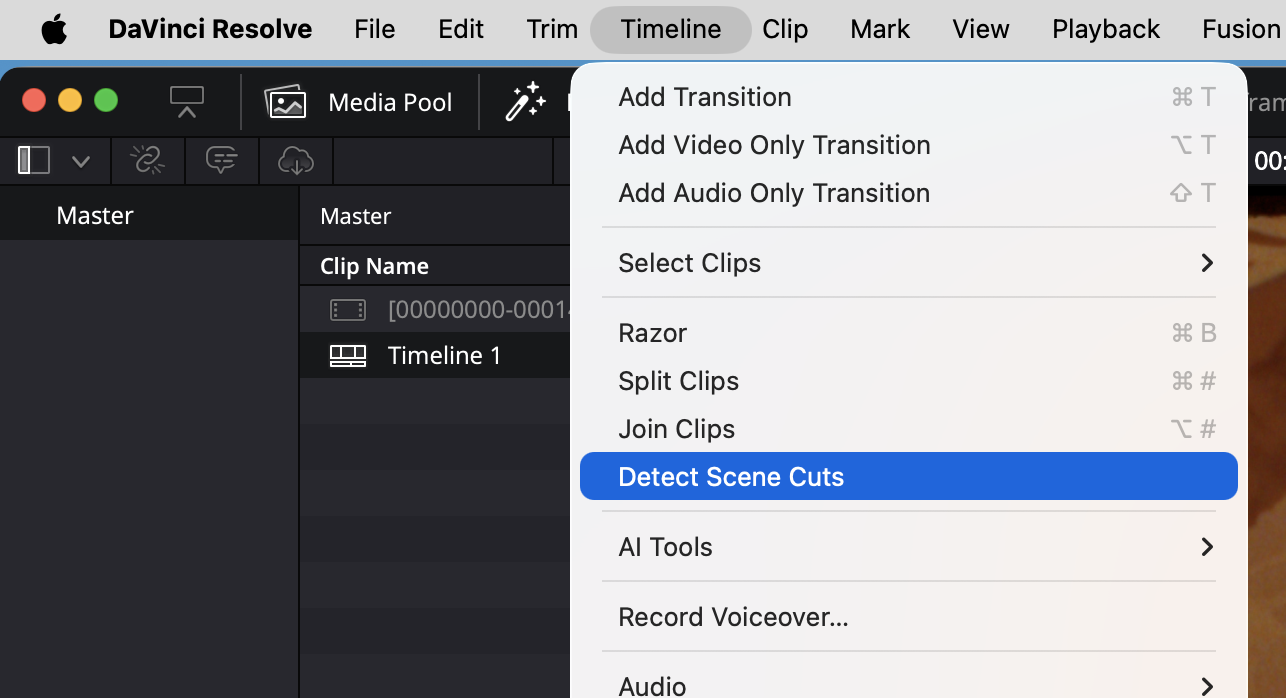
This makes it possible to edit the scenes individually later. Of course, edits made to one scene can also be applied very easily to other scenes (more on that in a moment).
Still, there are also settings that should affect all scenes, for example cropping, the scanner's white balance, a global color cast correction, and so on. This is very easy in DaVinci Resolve, although it is not entirely obvious:
- Switch to the Color tab (Shift-6)
- In the middle row with the thumbnails of all scenes, select one scene and then press Cmd-A to extend the selection to all scenes
- Right-click and select "Add into a new Group":
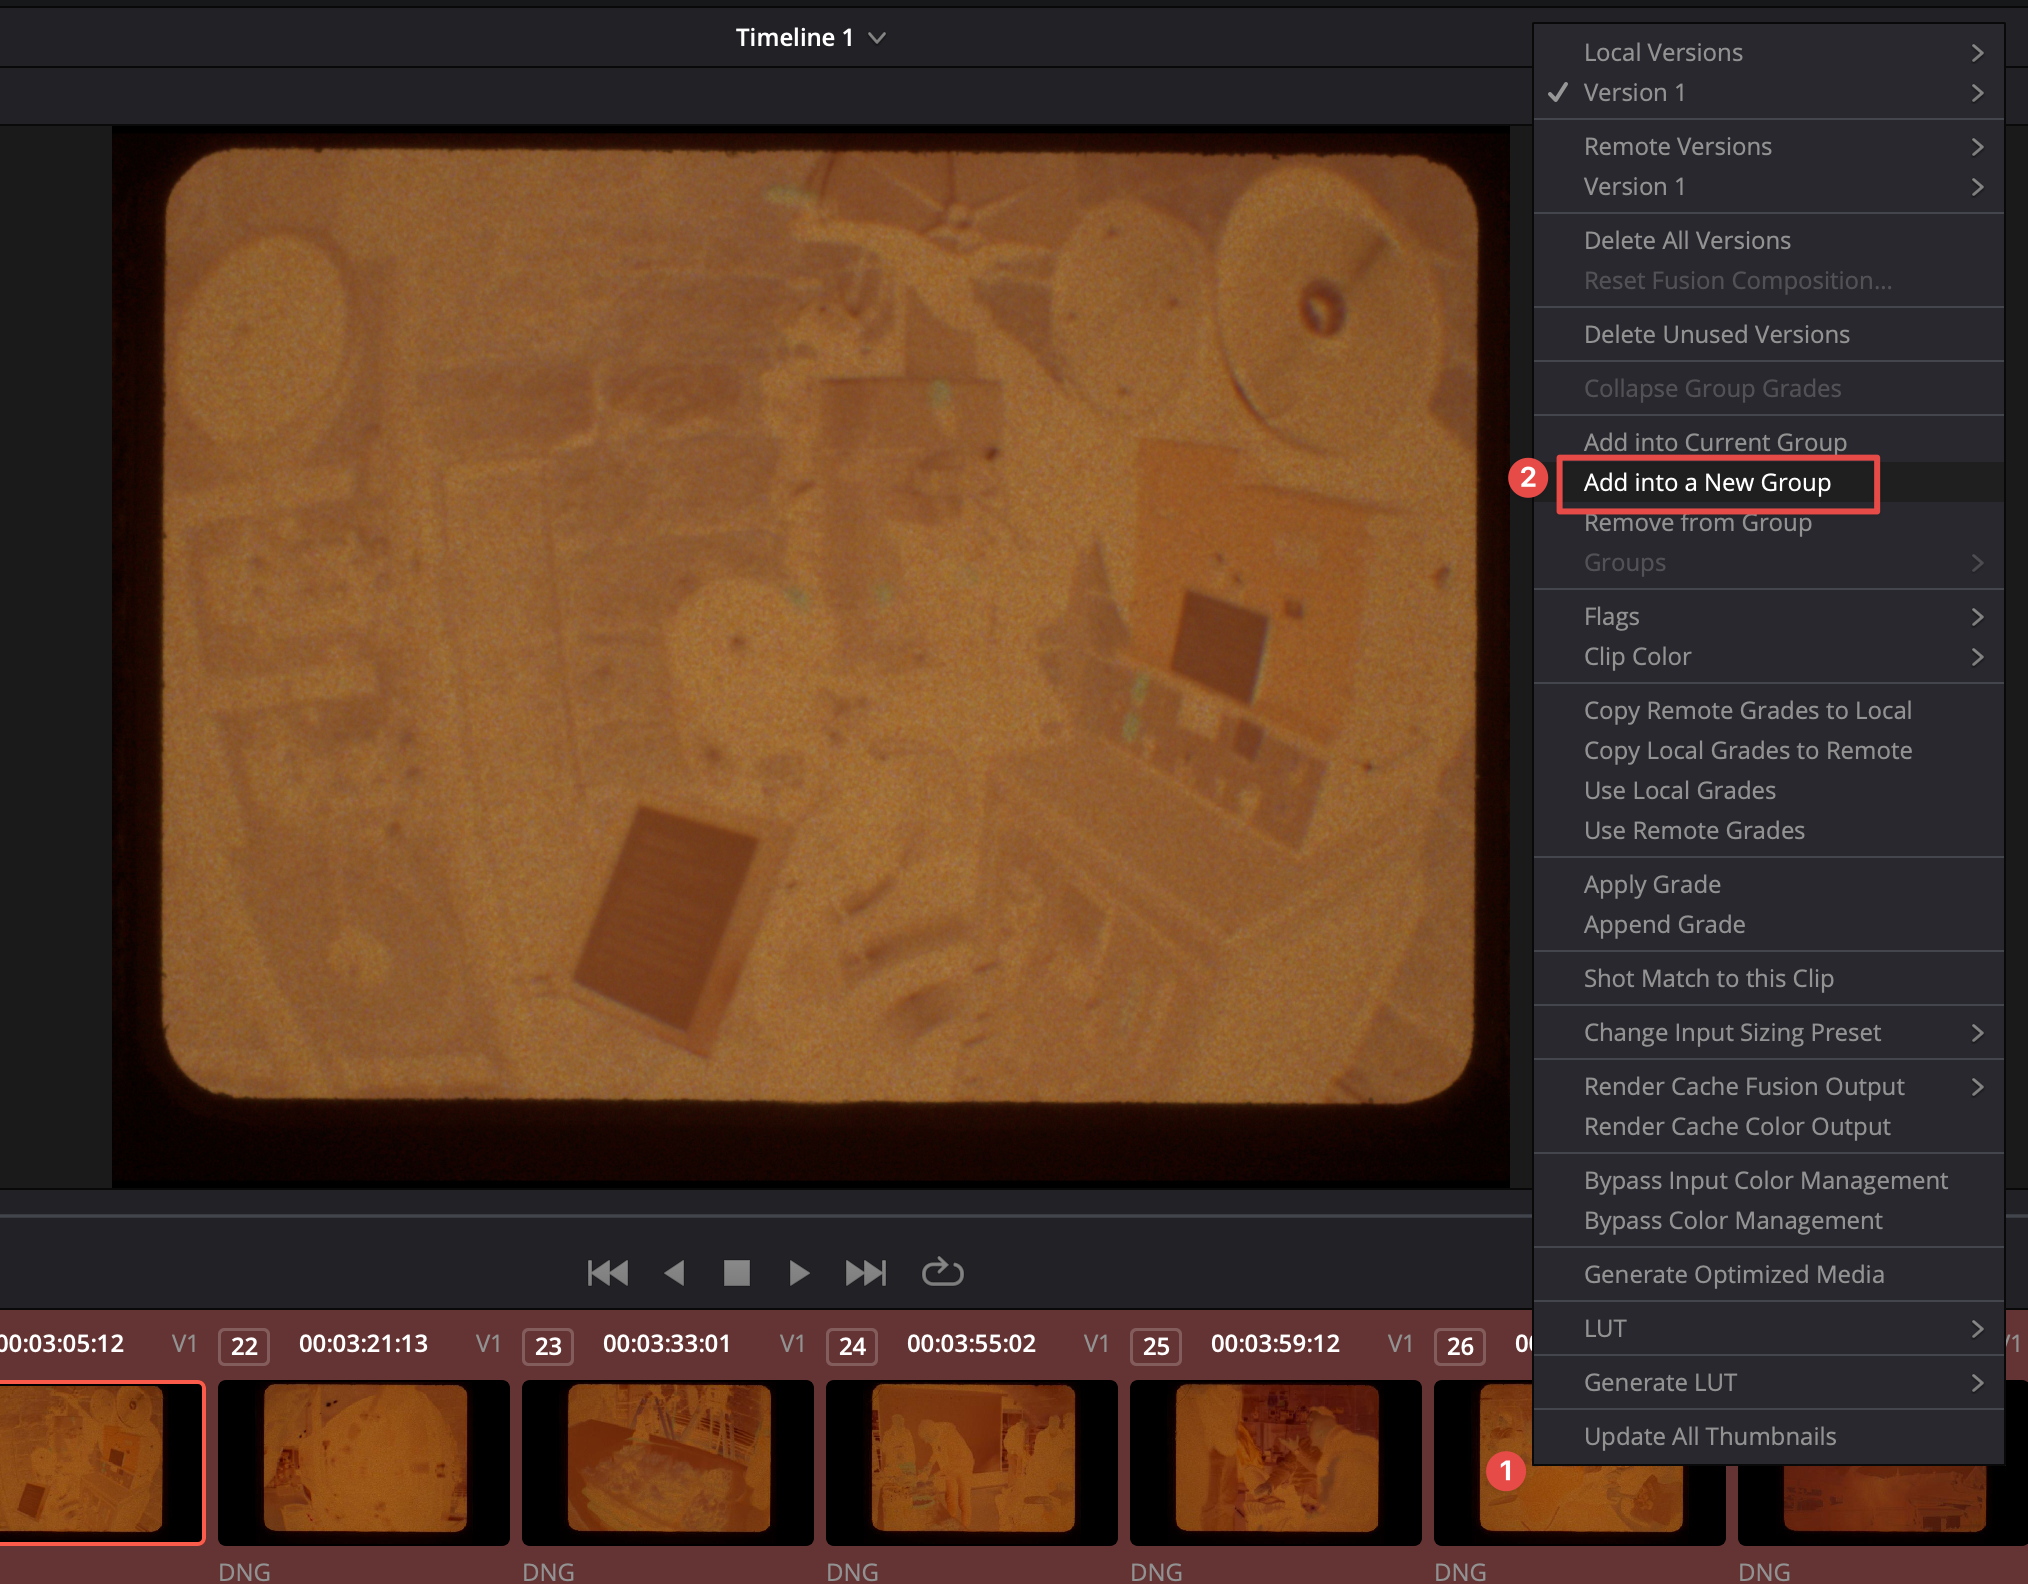
- Confirm the group name (e.g. "All Scenes")
Now, still in the Color tab:

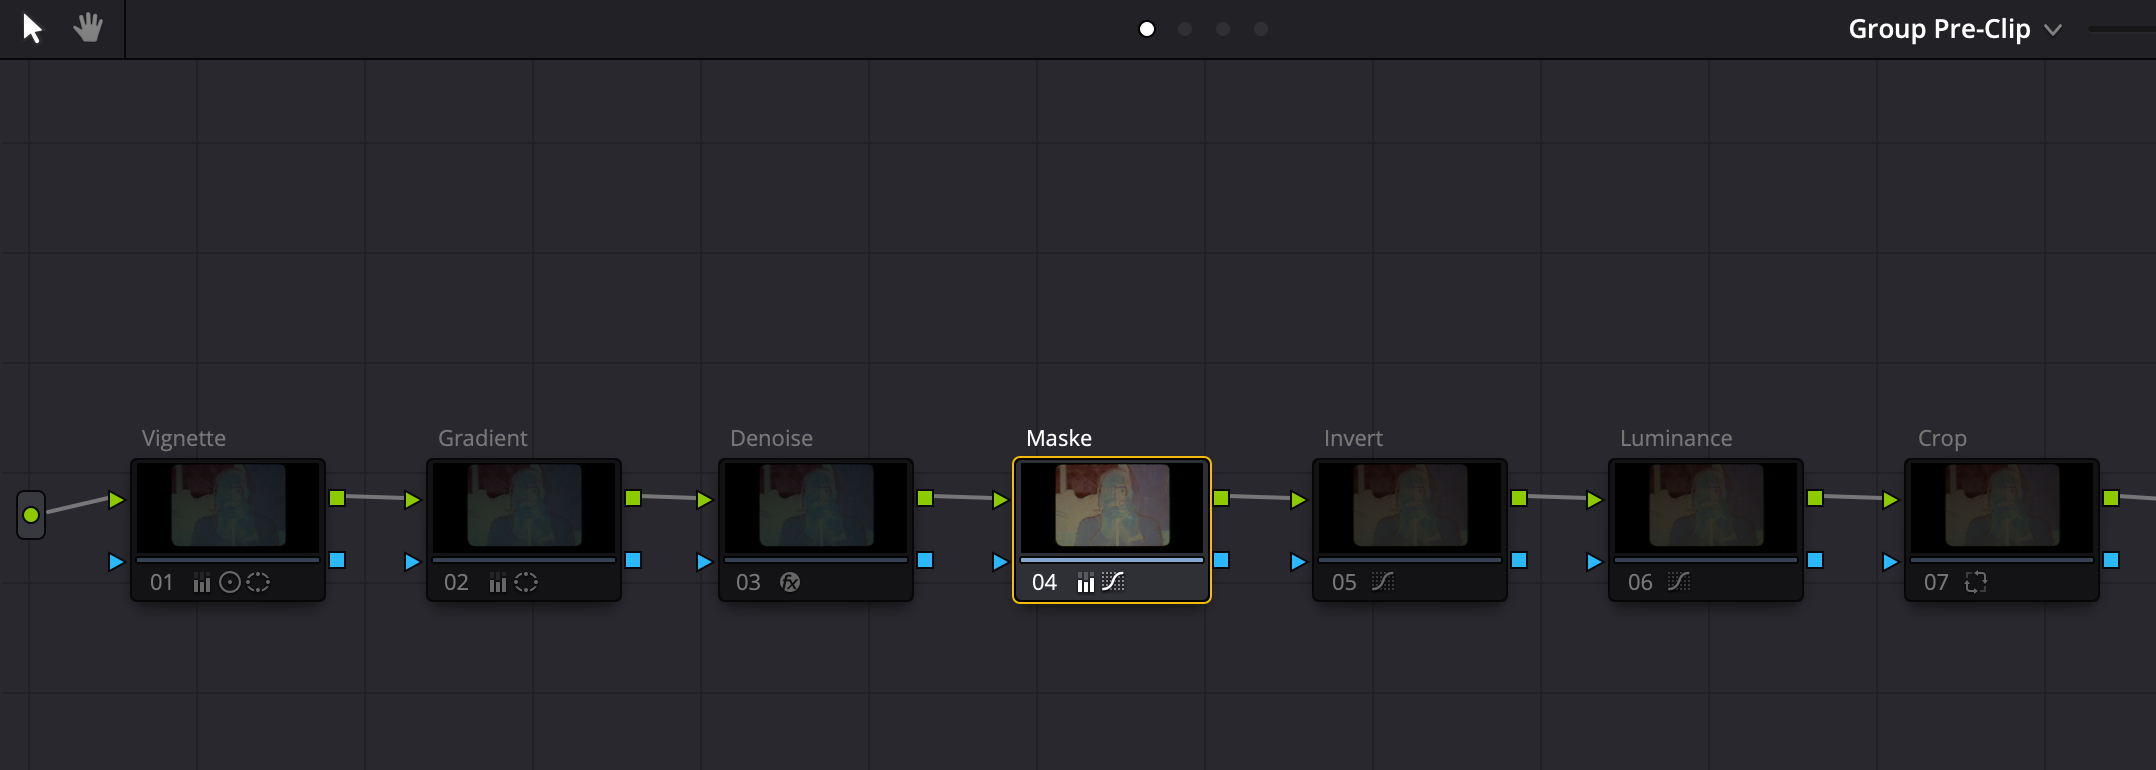
- activate the Nodes view (if it is not already active)
- click the "Clip" chevron and
- select "Group Pre-Clip"
The Group Pre-Clip is, so to speak, an upstream node tree that affects all clips in our clip group (and therefore all scenes). Accordingly, the Group Post-Clip is applied after all other edits; this is where you might, for example, add a little global sharpening.
But first, the Group Pre-Clip.
A color negative scan, for example, should be inverted as a whole, not scene by scene.
To compensate for the orange-brown mask, it is worth tinting the LED light with complementary blue-cyan. This raises all three color channels (red, green, and blue) to roughly the same intensity and makes the subsequent grading easier. Lee filter gels are very inexpensive and well suited for this, for example No. 202 "1/2 C.T. Blue" or the slightly lighter No. 203 "1/4 C.T. Blue". Depending on the brown-orange tint of the film material being scanned, you can tape one of these gels, or both, in front of the PTFE diffuser with a small piece of tape:
 Two Lee gels tint the light bluish, so very dense Vision2 material appears less brown.
The following is not about perfect results, but about a global preliminary conversion of the whole film into a positive that is easy to grade. The result of this step does not have to look perfect, because it can (and should) still be corrected scene by scene. This is basically the foundation.
With "Group Pre-Clip" still selected, we now create (or import) a serial node structure that handles the inversion into a positive image. A prepared "PowerGrade" is included in the repository and can be imported easily: in the Color tab, select "Gallery" at the top left, then select or create a "PowerGrade" folder. A "PowerGrade" remains available across projects, which is handy because more films will almost certainly need to be inverted in the future. Now simply drag the .drx file into it:

This "recipe" can now simply be dragged onto the "Group Pre-Clip" area, creating a practical sequential node tree. Of course, these nodes can also be created manually.
First, we compensate for the negative mask (or what remains of it after the blue filter). To do this, select only the "Mask" node:
All other nodes are inactive (cmd-click) so their effect remains hidden for now in this tutorial. Now set the white balance by clicking with the eyedropper tool on an ideally unexposed area of a negative:

As the second node, we use an "Invert" node in which only a tone curve is applied. For this, choose a clip with the broadest possible histogram and then adjust the curve as follows:
 First, mirror the curve so that it starts at the upper left and ends at the lower right. Then move the right end toward the histogram until a flat image becomes visible. Finally, make the curve S-shaped with a control point to get reasonably realistic tonal values.
Do not worry, the curve does not have to be perfect - this is only the first rough correction. On the right side, it should leave the histogram some room if in doubt, so that no clipping occurs later. This curve, for example, leaves healthy headroom:

Further optional but global correction options would be:
- vignetting correction
- uneven illumination
- denoise
- crop
These are also set up accordingly in the PowerGrade, but are disabled for now. Since color negative material can be extremely flat, vignetting from the taking lens and uneven illumination of the scanned image can become strongly overemphasized. In that case, a corresponding global correction is worthwhile. Of course, a complete flat-field correction would also be possible.
Here is a quick example of what the individual nodes correct across the whole scan in my case:

Denoising, if desired, should always be inserted after the flat-field correction (vignette and linear unevenness), but before all color and tonal corrections, because the latter may otherwise change and amplify noise.
A note on cropping via nodes: most people probably only know cropping through the "Transform" module in the Edit tab, but that type of crop only ever affects the individual clip. To crop via a node (in the Pre-Clip Group), you need the "Sizing" tool in the Color tab:
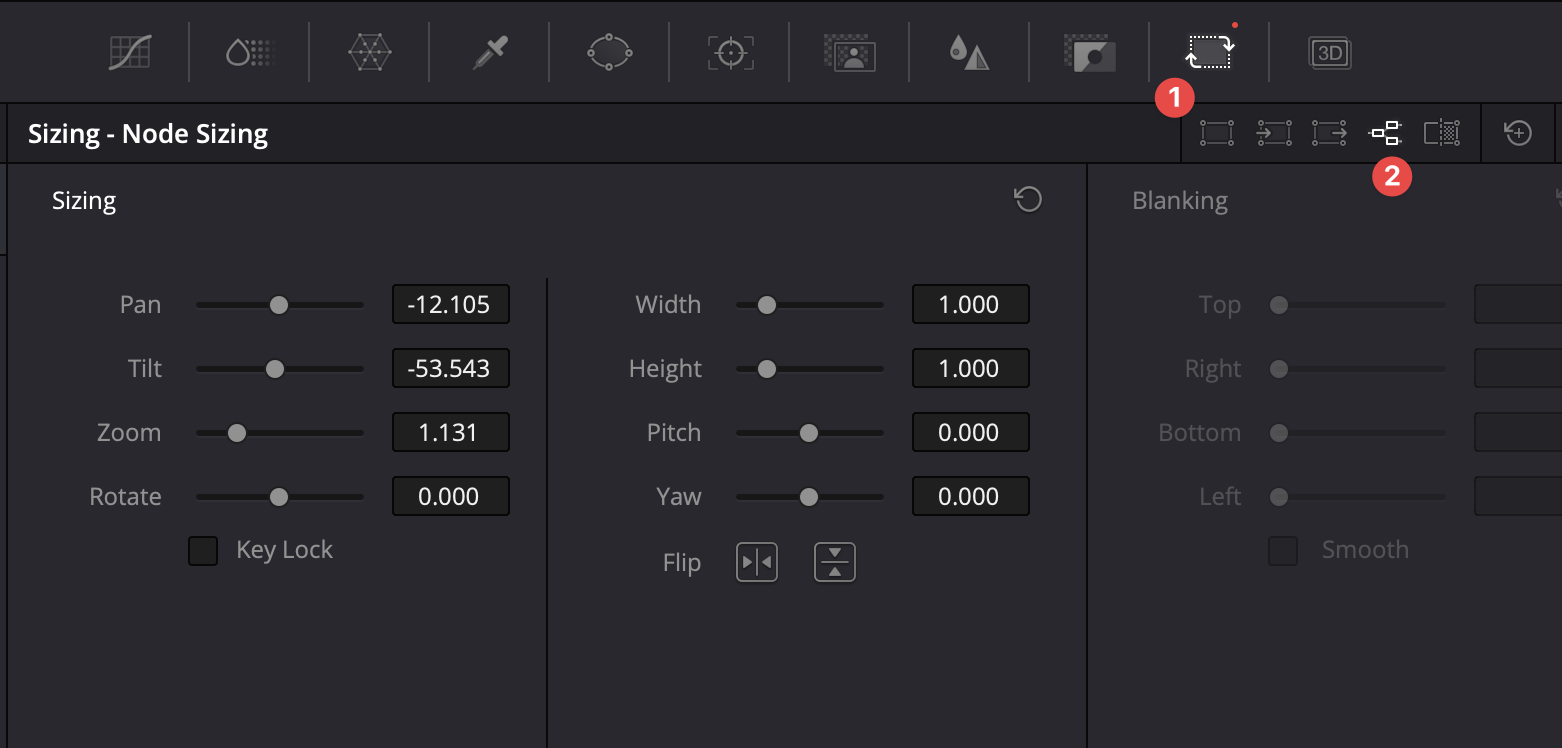 First click (1) Sizing, then (2) Node. With Pan, Tilt, Zoom and Rotate, you can now frame the entire clip group.
To get everything out of color negative film color-wise, scene-by-scene color correction is almost always still necessary. Of course, settings found once often work for several scenes shot in the same light, but that can change quickly if a scene was slightly over- or underexposed, or if daylight and artificial light are mixed.
The scene-by-scene color corrections are done in nodes that affect the currently selected clip, not the clip group as before. To do that, switch at the top right:

There are a thousand ways to perfect colors. For simple and natural color correction of scanned color negative film, I recommend combining Primary Wheels for adjustment with Parade and Vectorscope for objective control.
Here is a brief introduction to the two tools - there are of course hundreds of pages of instructions and countless YouTube videos for going deeper. In my opinion, though, trying them out is the best way to get to know them.

- Icon for activating the Primary Wheels. Careful: do not confuse them with the HDR wheels next to them; they look similar, but work very differently.
- The three wheels on the left, Lift, Gamma, and Gain, control the color tone of shadows (Lift), midtones (Gamma), and highlights (Gain). The small white dot in the center is moved away from the center to compensate for color casts.
- The contrast control is somewhat hidden here
- Pivot controls where the contrast sits, meaning at which brightness value the tonal values spread apart.
- Shadow brightens dark image areas
- Highlights darkens overly bright image areas
- Saturation desaturates, which can quickly become necessary with strong gamma corrections.
Here is a quick introduction:
 Via the "Workspace" menu under Scopes -> On, you should make the RGB Parade and the Vectroscope visible.
The parade shows the tonal distribution of the color channels in the image from left to right, split into red, green, and blue next to each other. The vectorscope helps identify color casts objectively.
Via the "Workspace" menu under Scopes -> On, you should make the RGB Parade and the Vectroscope visible.
The parade shows the tonal distribution of the color channels in the image from left to right, split into red, green, and blue next to each other. The vectorscope helps identify color casts objectively.
 The vectorscope shows hue via direction/angle, and saturation via the distance from the center.
This all sounds terribly abstract, so here is a short video showing how to use it.
