Extend With Your Components
This page covers three ways to extend LOTUSim: adding a new vessel model, adding a new sensor type, and adding a new power provider/consumer type.
- Adding models into LOTUSim
- Adding sensors
- Power management: adding new provider/consumer
- Your world & plugin
Just want to use an existing sensor or battery on your model, not build a new one? See Customising a model in the Tutorial instead. This page is for adding brand-new component types to the codebase.
Go to the model page and click the + button.
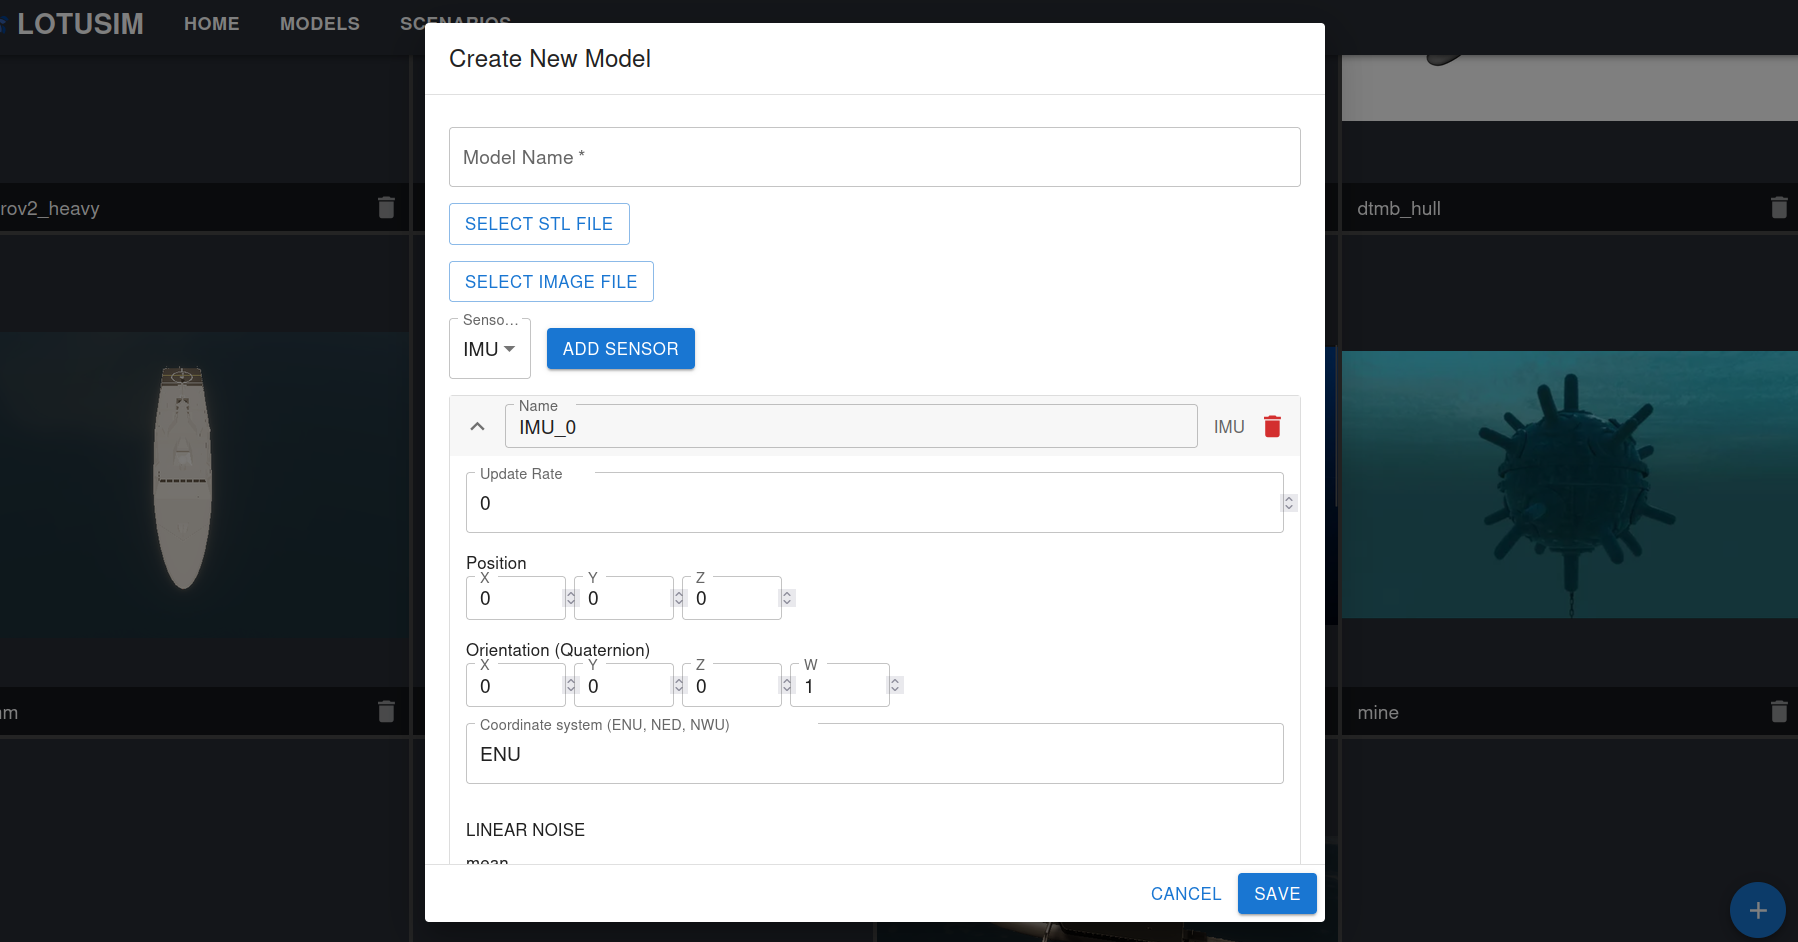
- Under
assets/models, create a new folder named after your model. - Create a
.sdffile insideassets/models/[your-model-name]/in SDF format. This is where you declare which sensors and which battery/generator your model uses, see Customising a model for how to add them. - Add your model's
.stlfile to the same folder. - If you want dynamics to work with your model, create a
.yamlfile defining the forces acting on it and its dynamics matrices.
LOTUSim provides a sensor plugin framework so you can plug in your own sensor type. A new sensor is a self-contained ROS 2/ament package, following the same structure as the built-in sensors (e.g. ais_sensor).
1. Create your sensor package
Under systems/sensors, create a new folder for your sensor with the standard layout:
systems/sensors/your_sensor/
├── CMakeLists.txt
├── package.xml
├── include/your_sensor/your_sensor.hpp
└── src/your_sensor.cpp
2. Subclass CustomSensor
Your sensor class (in lotusim_sensor_base) must implement two virtual methods:
class YourSensor : public CustomSensor {
public:
    YourSensor(
        std::shared_ptr<spdlog::logger> logger,
        rclcpp::Node::SharedPtr node,
        const gz::sim::Entity& vessel_entity,
        const gz::sim::Entity& sensor_entity,
        const std::string& parent_name,
        const std::string& sensor_name);

    virtual bool UpdateSensor(
        const gz::sim::UpdateInfo& _info,
        const gz::sim::EntityComponentManager& _ecm) final;

private:
    virtual bool CustomSensorLoad(const sdf::Sensor& _sdf) final;
};-
CustomSensorLoad()reads your sensor's SDF parameters (e.g. update rate, noise) at load time -
UpdateSensor()runs every tick and publishes your sensor's ROS 2 message
3. Set up your package's build files
-
CMakeLists.txt: buildyour_sensoras a shared library depending onlotusim_sensor_baseandlotusim_common(mirrorais_sensor/CMakeLists.txt) -
package.xml: declare the same dependencies
4. Register your sensor with the plugin
Add your_sensor as a dependency of lotusim_sensor_plugin:
- In
lotusim_sensor_plugin/package.xml, add<depend>your_sensor</depend> - In
lotusim_sensor_plugin/CMakeLists.txt, addfind_package(your_sensor REQUIRED)and include it inament_target_dependenciesThen, inlotusim_sensor_plugin.cpp, add a branch for your sensor's type insideLotusimSensorPlugin::EachNew:
else if (type == "your_sensor_type") {
    m_logger->info(
        "LotusimSensorPlugin::YourSensor: Creating sensor [{}/{}]",
        model_name,
        sensor_name);
    sensor = CreateSensor<YourSensor>(
        data,
        model_entity,
        _entity,
        model_name,
        sensor_name);
}
type comes from your sensor's gz:type attribute in the model's SDF (e.g. gz:type="your_sensor_type").
5. Rebuild
lotusim installThe power subsystem needs at least one power provider enabled on your vessel to activate and one power consumer to actually draw down the battery - see Customising a model to enable an existing one.
- Create a subclass of
BatteryorGenerator - Implement
receiveLoad(),voltage(), and any other overrides - Add a new
else if (type == "your_type")branch inPlatformPowerManagerBase::initPowerProvider() - Add the new
.cpptoCMakeLists.txt
- Create a subclass of
PowerConsumer - Implement
drawnCurrent(),receiveVoltage(),isActive(),deactivate() - Add a new
else if (powerType == "your_type")branch inPlatformPowerManagerBase::initPowerConsumers() - Add the
<lotusim_power>block to the relevant SDF element
📖 Full architecture details are in the Power Subsystem README.
In Gazebo, the world defines the environment parameters and which models are present in the simulation. Worlds are defined in <world_name>.world files, see the assets/worlds folder for all available examples.
The default world we recommend to use is lotusim.world.
| Element | Purpose |
|---|---|
<physics> |
Time management: step size, real-time factor, update rate |
<plugin> |
Enables systems for the world, e.g. custom sensors, waypoint following, power management |
<include> |
Adds a model to the world: remember to set <pose> to position it correctly |
<experimental:params> |
Overrides parameters on an included model (see below) |
Physics and core plugins, from lotusim.world:
<physics type="ode">
    <max_step_size>0.2</max_step_size>
    <real_time_factor>1</real_time_factor>
    <real_time_update_rate>1</real_time_update_rate>
</physics>

<plugin filename="physics_interface_plugin" name="lotusim::gazebo::PhysicsInterfacePlugin"/>
<plugin filename="multi_agent_system_plugin" name="lotusim::gazebo::MultiAgentSystem"/>
<plugin filename="lotusim_sensor_plugin" name="lotusim::sensor::LotusimSensorPlugin"/>
<plugin filename="power_subsystem" name="lotusim::gazebo::PowerManager"/>
Adding a model with <include>, from circling_ship_example.world:
<include>
    <uri>model://dtmb_hull</uri>
    <name>fremm</name>
    <pose>0 0 0 0 0 0</pose>

    <lotus_param>
        <waypoint_follower>
            <follower>
                <loop>true</loop>
                <circle>
                    <radius>20</radius>
                </circle>
            </follower>
        </waypoint_follower>
    </lotus_param>
</include>Custom plugins (systems), like waypoint_plugin or power_subsystem, are separate packages under systems/, built as shared libraries and registered with Gazebo through the <plugin> element shown above.
-
Create your plugin package under
systems/your_plugin/, with the standardCMakeLists.txt/package.xml/include//src/layout (mirrorwaypoint_follower). -
Implement your plugin class, inheriting from
gz::sim::Systemplus whichever interfaces you need (e.g.ISystemConfigure,ISystemPreUpdate,ISystemUpdate,ISystemPostUpdate):
namespace your_namespace {

class YourPlugin
    : public gz::sim::System,
      public gz::sim::ISystemConfigure,
      public gz::sim::ISystemPostUpdate {
public:
    void Configure(
        const gz::sim::Entity& _entity,
        const std::shared_ptr<const sdf::Element>& _sdf,
        gz::sim::EntityComponentManager& _ecm,
        gz::sim::EventManager& _eventMgr) override;

    void PostUpdate(
        const gz::sim::UpdateInfo& _info,
        const gz::sim::EntityComponentManager& _ecm) override;
};

}  // namespace your_namespace

GZ_ADD_PLUGIN(
    your_namespace::YourPlugin,
    gz::sim::System,
    your_namespace::YourPlugin::ISystemConfigure,
your_namespace::YourPlugin::ISystemPostUpdate)-
Build it as a shared library in
CMakeLists.txt:
add_library(your_plugin SHARED
  src/your_plugin.cpp
)
target_link_libraries(your_plugin
  gz-sim8::gz-sim8
  gz-plugin2::gz-plugin2
)- Declare it in your world file.
The filename must match your CMake library target name, and name must match your fully-qualified C++ class (namespace + class name):
<plugin filename="your_plugin" name="your_namespace::YourPlugin">
</plugin>- Rebuild:
lotusim installA note on declaration order: if your plugin depends on data another plugin produces (for example, the power subsystem needs to run before sensors check whether they're powered), declare your plugin before the ones that depend on it in the world file.