Trigger Category Max
Important
This feature requires xyOps v1.0.68 or later.
Sometimes two different scheduled events are harmless on their own, but expensive when they overlap.
For example, imagine you have two events that both connect to the same production database and run heavy reporting queries. Either event is fine by itself, but if they both run at the same time, the database starts to struggle.
You can solve this with a small Trigger Plugin. Put both events in the same category, assign the same Trigger Plugin to both events, and set the maximum active jobs to 1. When either event is about to launch from its schedule, the plugin counts all active jobs in that category. If the category already has one active job, the new launch is skipped. If there is room, the job is allowed to start.
The nice thing about this pattern is that it works across multiple events. Instead of each event only protecting itself, they all share one category-wide ceiling.
A Trigger Plugin is a schedule modifier. This means it does not create the schedule by itself. Your event still needs a normal scheduled trigger, such as Schedule or Interval. When that schedule says "launch now", xyOps calls the Trigger Plugin as a last-second check. The plugin can then say yes or no for each pending launch. This all happens before the job is launched and before xyOps chooses a target server.
Let's say you have these two events:
Daily Customer ReportHourly Billing Reconciliation
Both events run expensive SQL queries against the same database. You want both events to keep their own schedules, but you never want both jobs active at the same time.
Here is the setup:
- Create a category called
Database Jobs. - Move both events into that category.
- Create the Trigger Plugin from this guide.
- Assign the Trigger Plugin to both events.
- Set the maximum jobs to
1on both events.
Now both events participate in the same category-wide limit. If one database job is already active, the next scheduled launch in that category will be skipped.
Important
Every participating event in the category needs to include this Trigger Plugin. The plugin only checks scheduled launches for events that have the trigger modifier assigned. If another event is in the same category but does not include the Trigger Plugin, it will not participate in the category max check.
Open Plugins in the xyOps sidebar and click New Plugin.
Use these basic settings:
| Field | Value |
|---|---|
| Plugin Title |
Category Job Max (or any title you want) |
| Plugin Enabled | Checked |
| Type | Trigger Plugin |
| Executable | node |
Pick any icon you like. Something like traffic-light, database-clock, or gate can make it easy to recognize later.
Click Edit Script and paste this source code:
(async function() {
	// read JSON from STDIN
	const chunks = [];
	for await (const chunk of process.stdin) { chunks.push(chunk); }
	const data = JSON.parse( chunks.join('') );

	// process each item separately
	data.items.forEach( function(item) {
		// count active jobs in current launch category
		let numJobs = data.active_jobs.filter( job => job.category == item.job.category ).length;

		// only allow launch if category isn't saturated with active jobs
		if (numJobs < item.params.max) {
			item.launch = true;
			data.active_jobs.push( item.job );
		}
	} );

	// write results to STDOUT
	process.stdout.write( JSON.stringify(data) + "\n" );
})();
The plugin logic is:
- xyOps passes the plugin a list of pending scheduled launches in
items. - xyOps also passes a list of currently active jobs in
active_jobs. - For each pending launch, the plugin looks at
item.job.category. - It counts active jobs whose
job.categorymatches. - If the count is below
item.params.max, it setsitem.launch = true. - Otherwise, it leaves the launch disabled, so xyOps does not start that job.
Save the plugin once the script is in place.
The plugin expects one parameter with ID max. This is the maximum number of active jobs allowed in the current event's category.
On the plugin edit page, add a new parameter with these settings:
| Field | Value |
|---|---|
| Param ID | max |
| Label | Maximum Jobs |
| Control Type | Text |
| Text Field Variant | Number |
| Default Value | 1 |
| Range | 1 - 999 / 1 |
| Required | Checked |
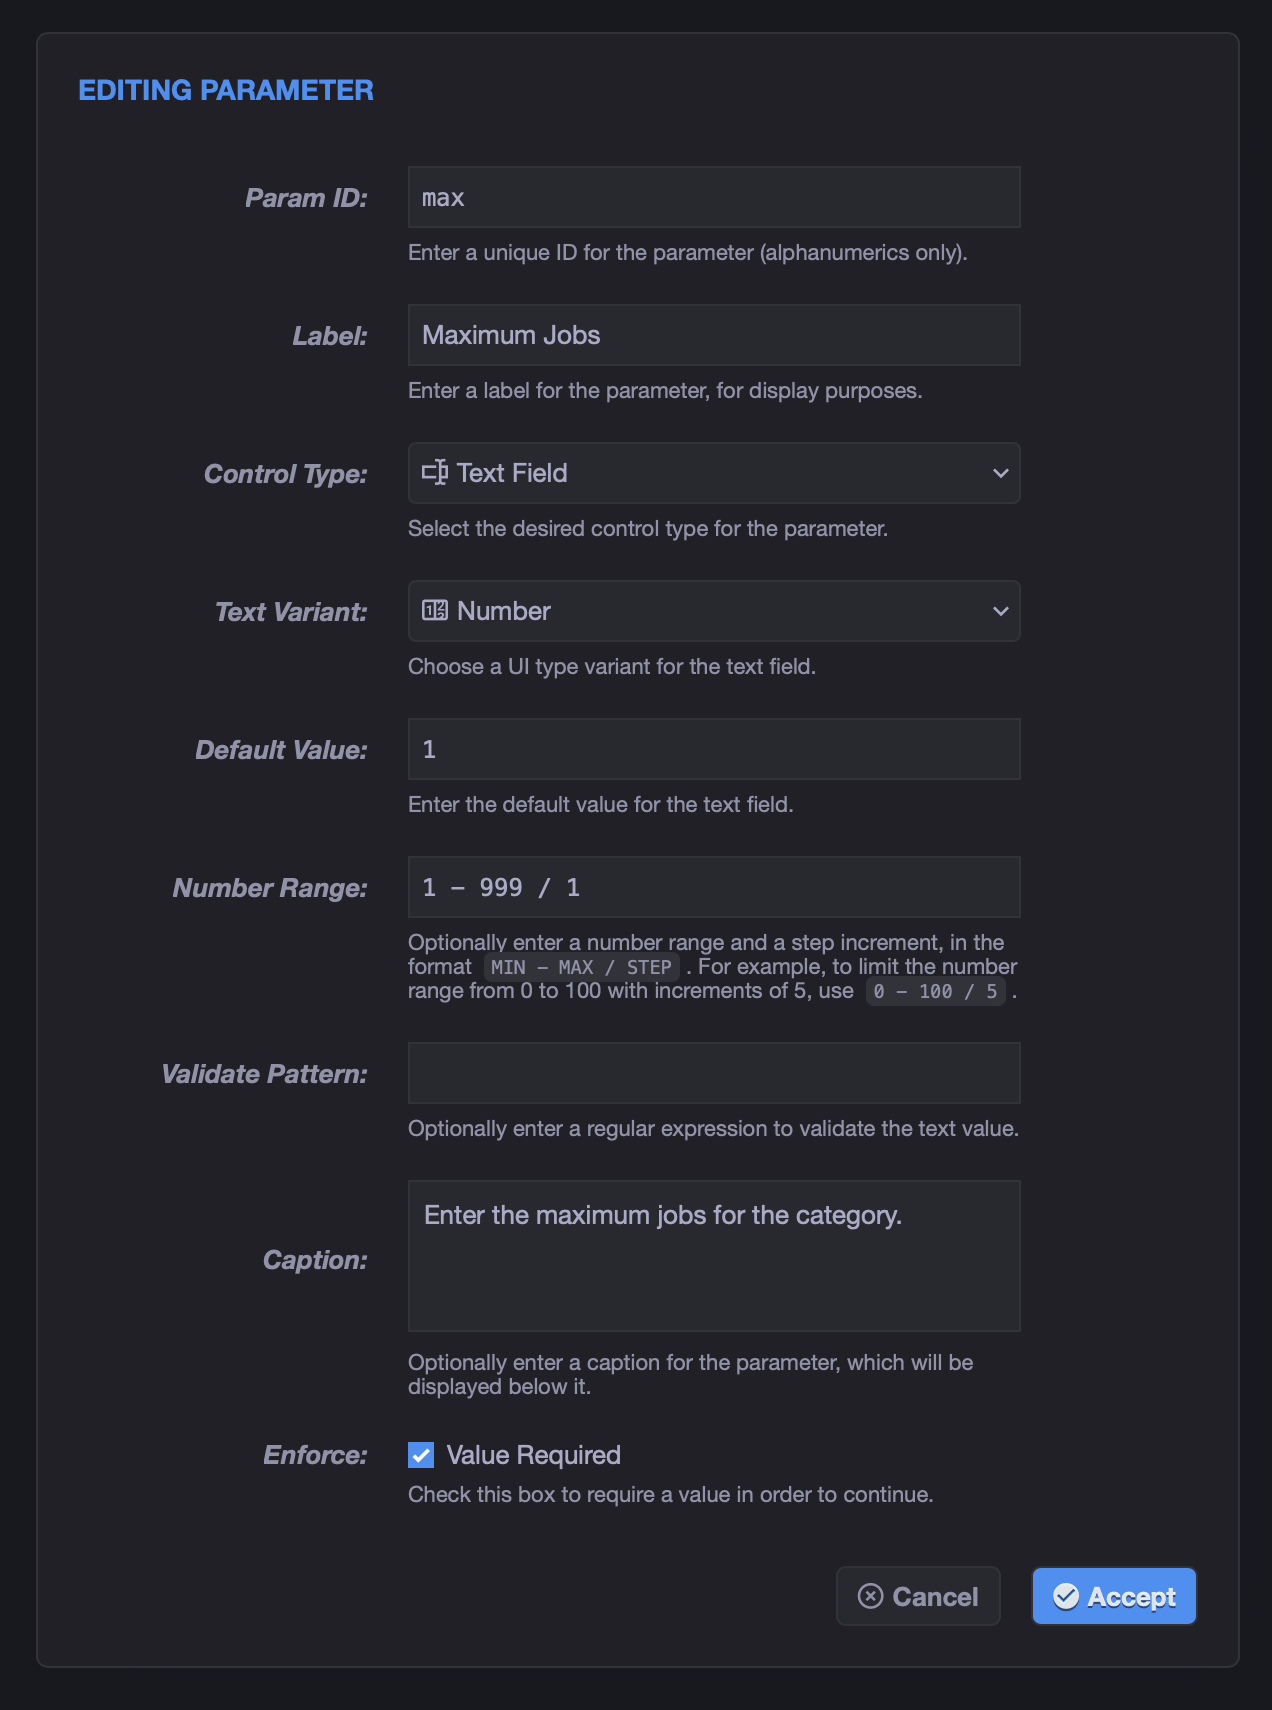
Save the plugin again.
The Number variant is useful here because xyOps stores the value as a JavaScript number instead of a string. That means the plugin can compare numJobs < item.params.max directly.
Open each event that should share the limit, and set its Category to the same category.
For the database example, both of these events would use the Database Jobs category:
Daily Customer ReportHourly Billing Reconciliation
Each event in xyOps belongs to exactly one category, so this gives the plugin a simple grouping key. It can count active jobs by checking the category property on each job.
Because Trigger Plugins are schedule modifiers, each event still needs a normal schedule trigger.
For each participating event, add or confirm one of these trigger types:
- Schedule, for cron-style schedules such as hourly, daily, or specific weekdays.
- Interval, for repeating every N minutes or seconds.
The schedule trigger decides when the event wants to launch. The Trigger Plugin only decides whether that scheduled launch is allowed to proceed.
For example, Daily Customer Report might have a Schedule trigger for every day at 2:00 AM, while Hourly Billing Reconciliation might have a Schedule trigger for every hour. They can keep different schedules and still share the same category-wide active job limit.
Note
This plugin counts jobs that are already active when the Trigger Plugin runs. If two participating events are scheduled for the exact same minute while the category is empty, they may both be pending in the same plugin call. The Plugin handles this case correctly by only allowing up to the configured max to be launched.
Now add the Trigger Plugin as a modifier on each participating event.
For each event:
- Open the event editor.
- Go to the triggers section.
- Add a Plugin trigger.
- Select
Category Job Max(or whatever you chose for the title). - Set Maximum Jobs to
1. - Save the event.
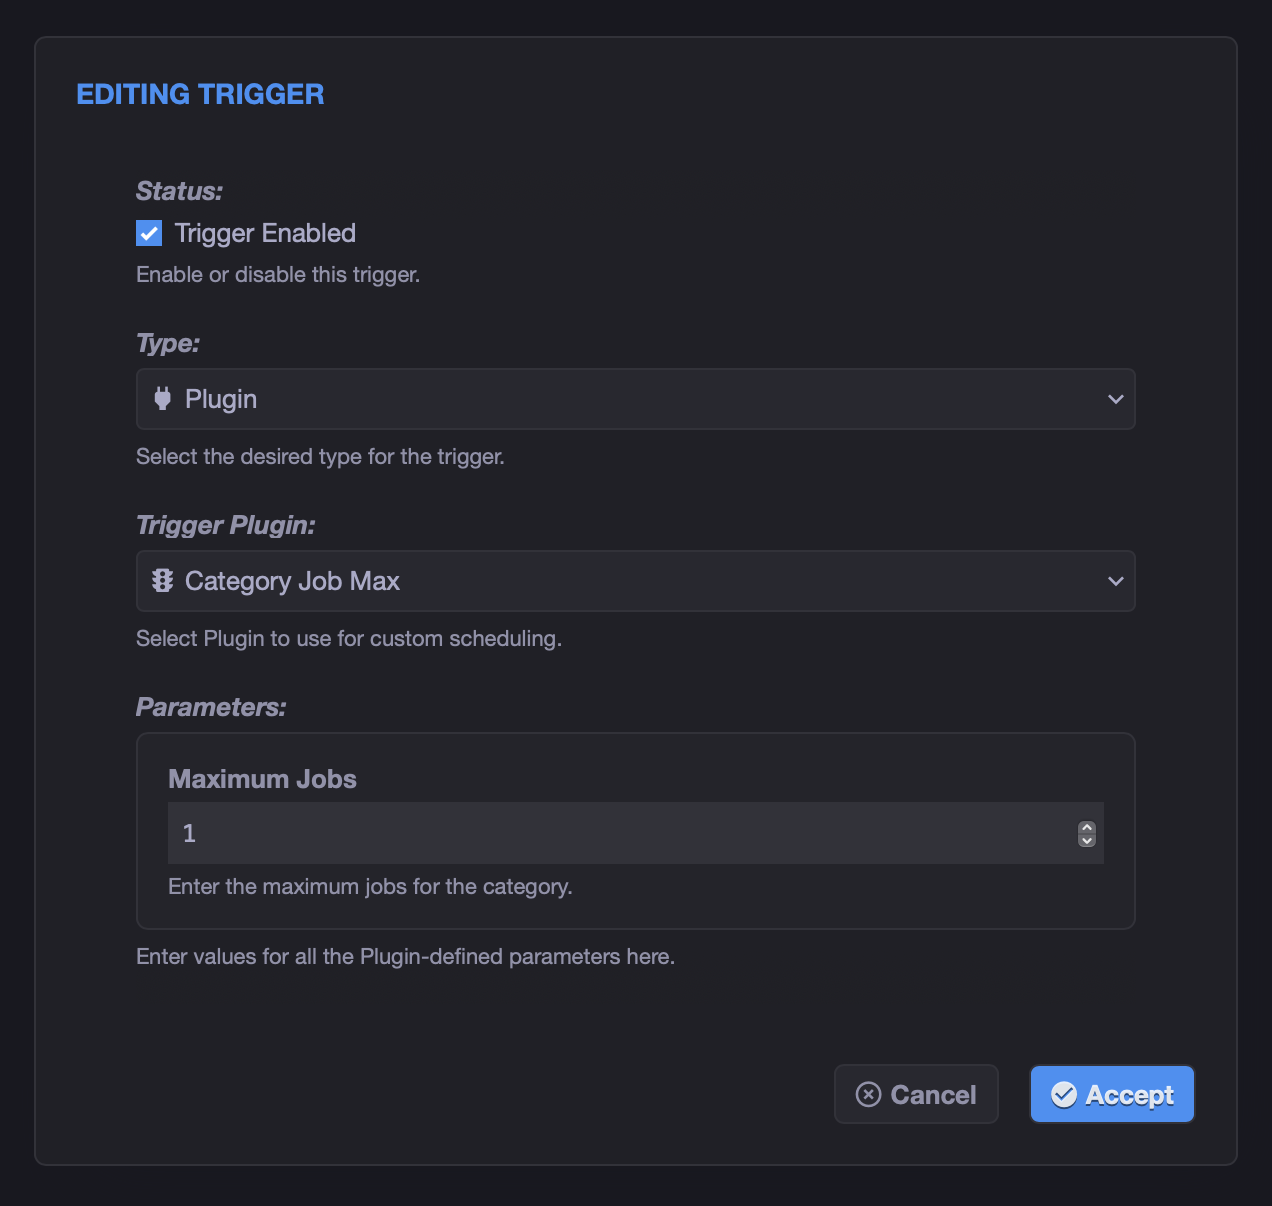
Repeat this for every event that should participate in the shared limit.
If you want to allow two active jobs at a time in the category, set Maximum Jobs to 2 on all participating events. The important part is that all of the events should use the same plugin and the same intended maximum, so the rule is easy to reason about.
When you're done, the event will typically have a schedule trigger and the custom modifier trigger. If you keep Manual Run enabled, remember that manual launches bypass trigger modifiers.
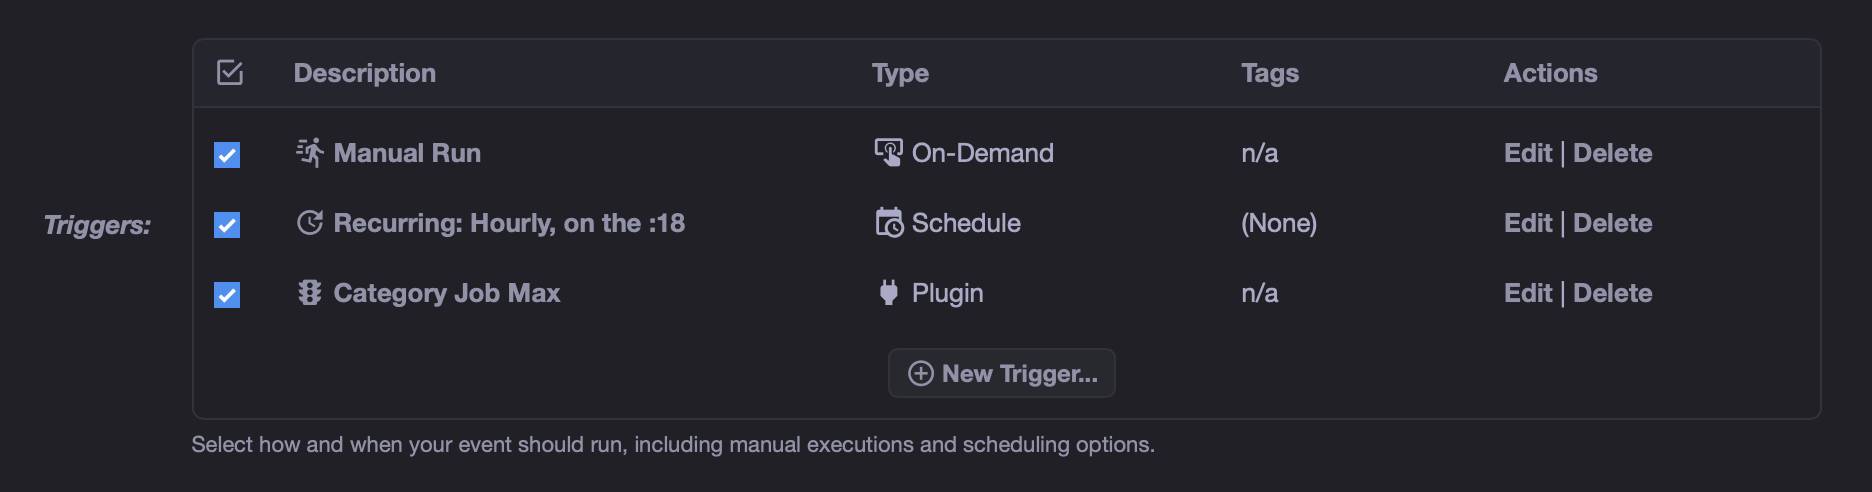
The easiest way to test this is to create two safe events in a test category, using a simple shell script that sleeps for a few minutes.
For example, each event can run:
sleep 300Give both test events:
- The same category.
- A normal schedule trigger.
- The
Category Job MaxTrigger Plugin. -
Maximum Jobs set to
1.
Then wait for the first scheduled event to launch. While that job is active, the next scheduled launch in the same category should be skipped by the Trigger Plugin.
When the active job finishes, the category has room again, and the next scheduled launch can proceed normally.
Trigger modifiers only apply to scheduled launches. Manual launches from the UI or API bypass schedule modifiers, including Trigger Plugins.
That is useful while testing, but it also means a user could manually launch one of the events and exceed the category maximum.
If you want this category limit to be strict, consider disabling the Manual Run trigger on the participating events. That way the events can only launch through their schedules, where the Trigger Plugin gets a chance to enforce the rule.
- This is a scheduled-launch guard, not a runtime limit. It decides whether a new scheduled job should start.
- Manual runs bypass Trigger Plugins unless you remove or disable the Manual Run trigger.
- Every participating event needs the plugin modifier assigned.
- The plugin counts active jobs in the current event's category, including jobs from other participating events and any other active jobs in the same category.
- The plugin correctly handles the case where multiple participating events are all scheduled for the exact same minute.
- If a job is already active when the schedule fires, the new launch is skipped. It is not queued for later by this plugin.
For workloads where skipped launches are not acceptable, combine this idea with a schedule that runs frequently enough to try again soon, or use xyOps queue limits where a queued execution is the behavior you want.
A related pattern is to only allow a scheduled job to launch when there are zero active jobs anywhere in xyOps, regardless of category.
This can be useful for maintenance-style events that should wait for a completely quiet system. For example, if you use the Auto Upgrade marketplace plugin, you may want the upgrade event to run only when no other jobs are active at all. That way an upgrade never overlaps with normal scheduled work.
For this variation, you do not need the max parameter. The plugin simply checks whether active_jobs is empty (i.e. its length is 0). If there are no active jobs, it allows the pending launch. If there is even one active job, it skips the launch.
Create another Trigger Plugin with a title like Singleton Job, set Executable to node, and use this script:
(async function() {
	// read JSON from STDIN
	const chunks = [];
	for await (const chunk of process.stdin) { chunks.push(chunk); }
	const data = JSON.parse( chunks.join('') );

	// only allow launches when there are zero active jobs in xyOps
	if (!data.active_jobs.length) {
		data.items.forEach( function(item) {
			item.launch = true;
		} );
	}

	// write results to STDOUT
	process.stdout.write( JSON.stringify(data) + "\n" );
})();
Then assign this Trigger Plugin to the event that should only run while xyOps is idle. As with the category example, the event still needs a normal schedule trigger. The schedule decides when to check, and the plugin decides whether the system is quiet enough to proceed.
Note
This checks jobs that are already active when the plugin runs. If multiple events using this same plugin are scheduled for the exact same minute while the system is idle, they may all be approved in the same plugin call. For an upgrade or maintenance event, it is usually best to assign this plugin only to that one event, or to stagger any related schedules.