Update Event Action Plugin
Important
This feature requires xyOps v1.0.68 or newer.
xyOps already includes a built-in action for disabling the current event, but sometimes you need something a little more flexible. For example, you might have one job start a long-running process, enable a "watcher" event that checks progress every few minutes, and then have the watcher disable itself when the process is finished.
You can do this today with an Action Plugin. The plugin below can enable or disable any xyOps event selected from a menu.
The basic idea is:
- Create an API Key that is allowed to update events.
- Store the API Key in a Secret Vault.
- Create an Action Plugin with two parameters:
-
event_id: the event to update. -
event_enabled: whether to enable or disable it.
-
- Assign the Secret Vault to the plugin, so the API Key is available at runtime.
- Add the plugin as an action wherever you need it.
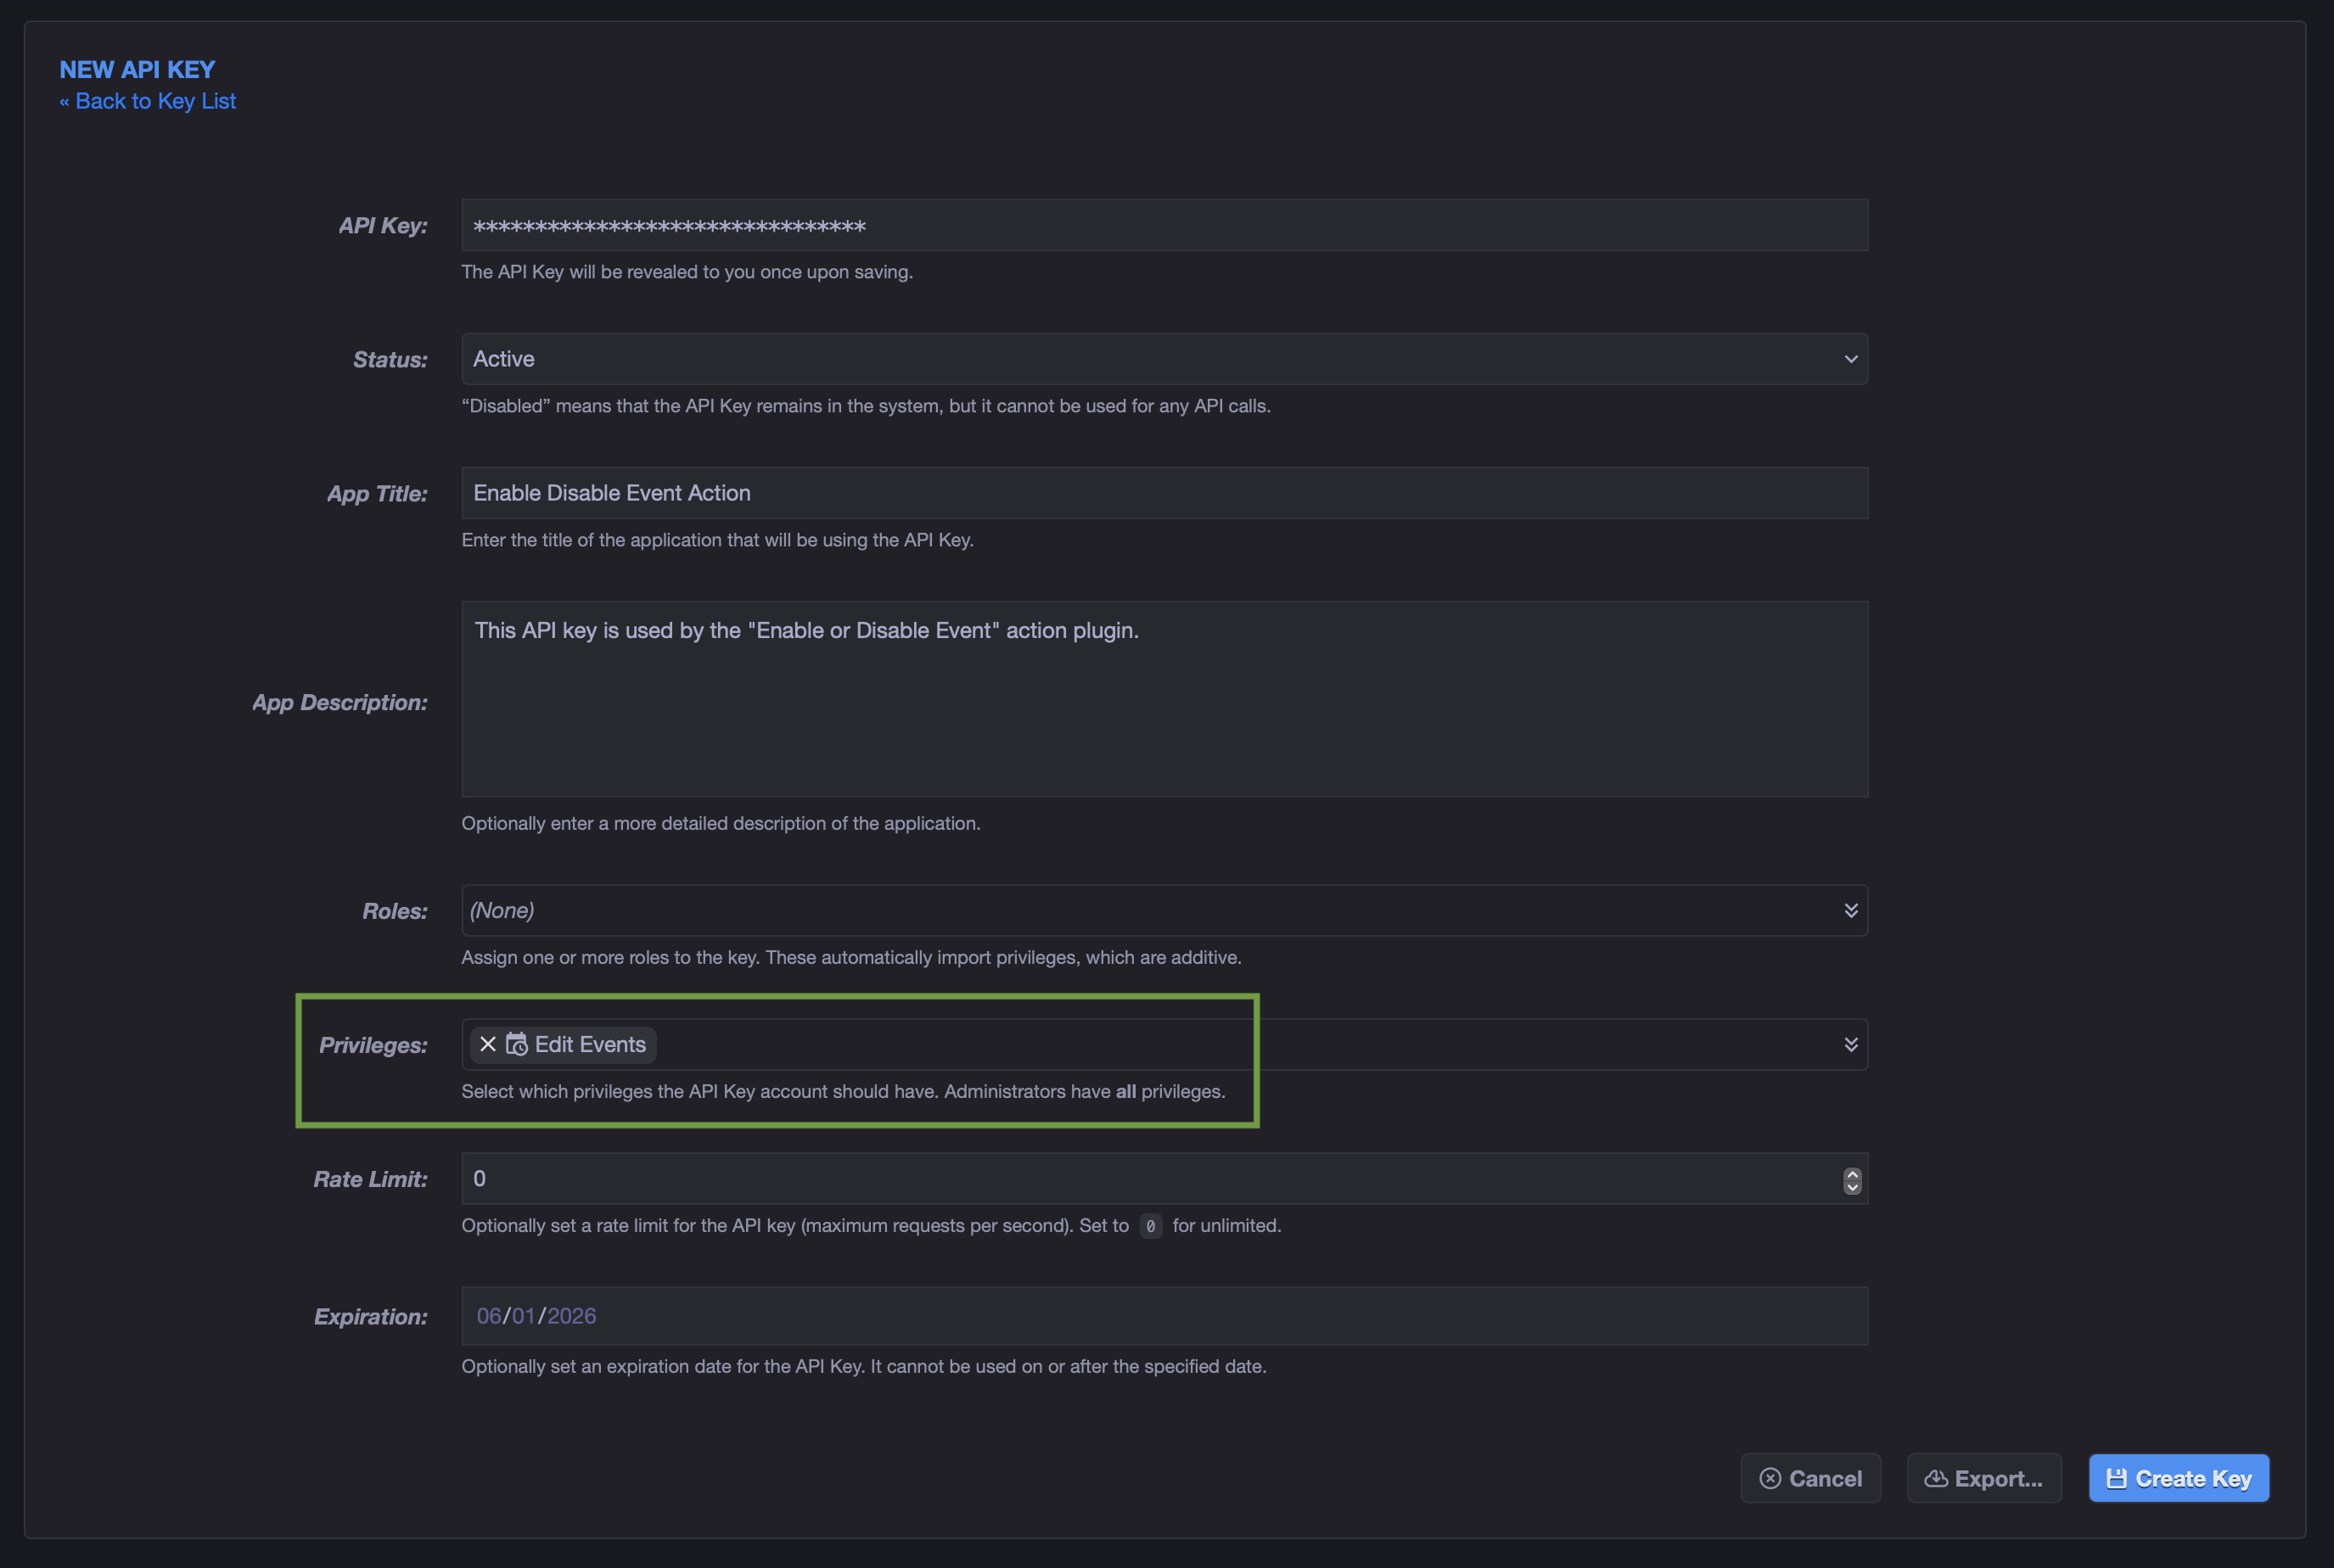
First, create an API Key for the plugin to use when calling the xyOps REST API.
- Open API Keys in the xyOps sidebar.
- Click New API Key.
- Give it a clear title, such as
Enable Disable Event Action. - Grant it the event update privilege:
- In the UI this is shown as Edit Events.
- Internally this is the
edit_eventsprivilege. - This is the privilege required by the
update_eventAPI.
- Save the API Key.
- Copy the generated key value immediately.
The API Key secret is only shown once, so keep it handy for the next step.
Tip
Scope this key as narrowly as your setup allows. It only needs to call update_event, which requires edit_events, plus whatever category or target access applies to the events you plan to update.
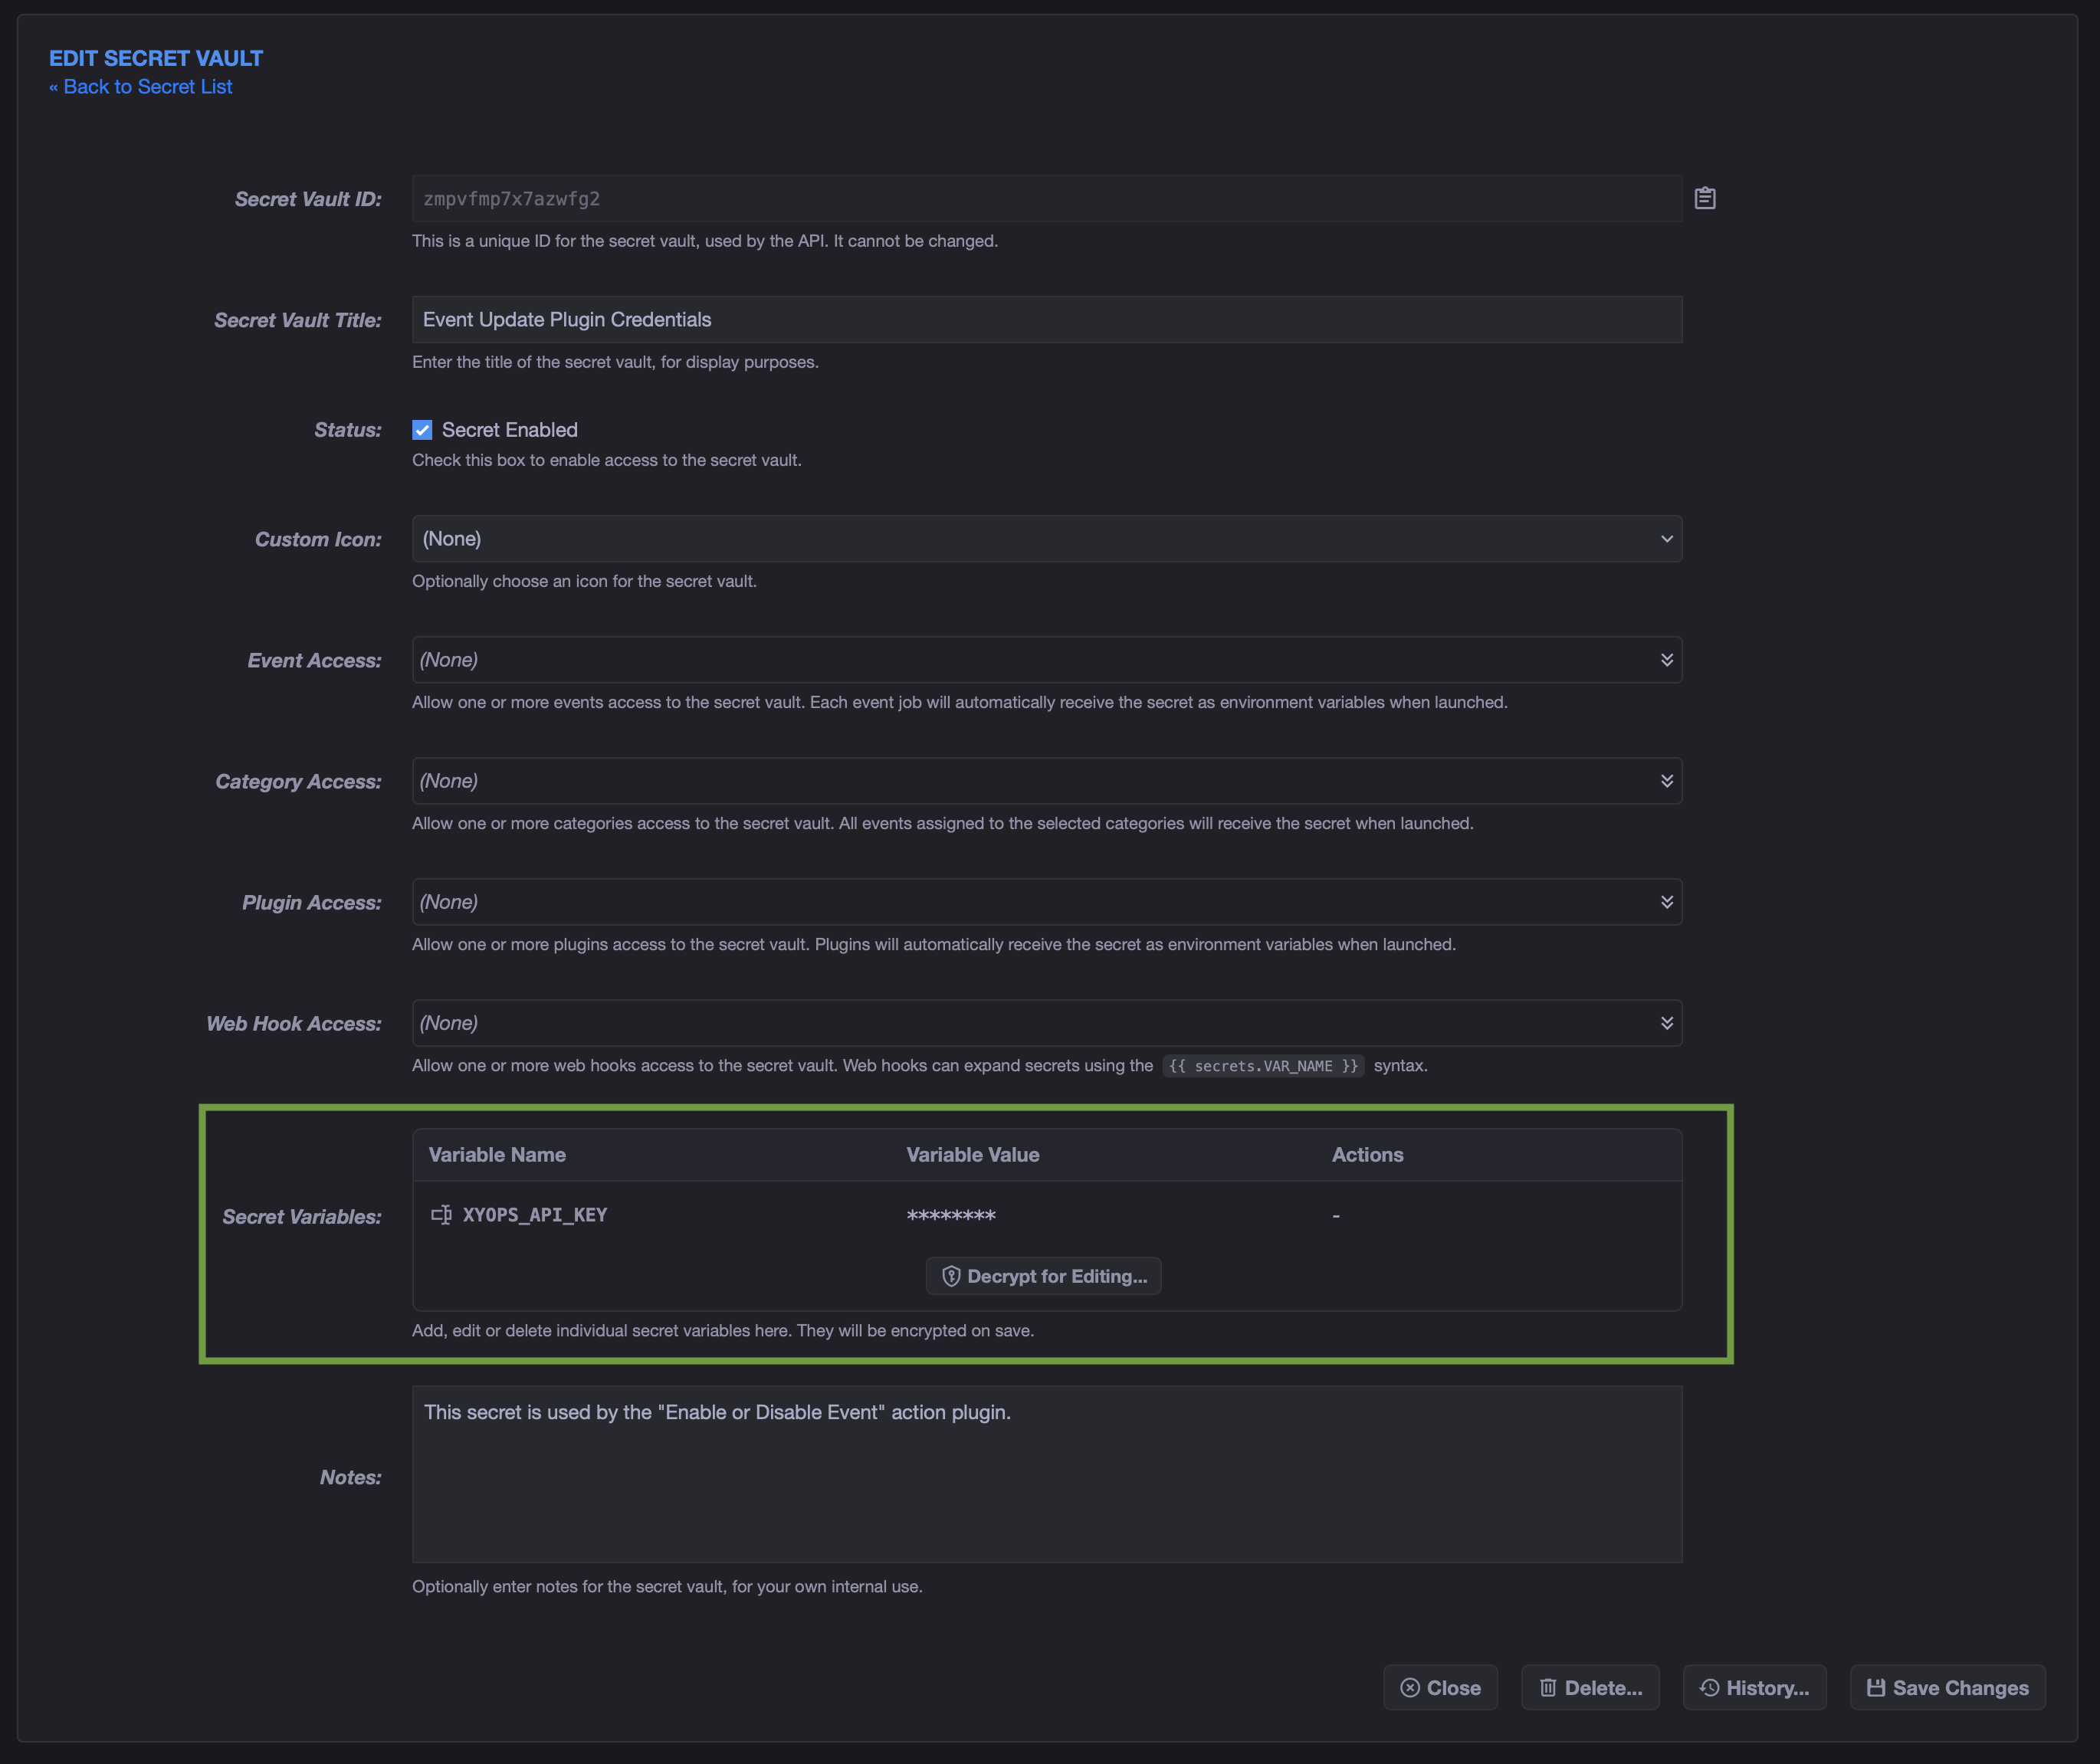
Now store the API Key in a Secret Vault, so it does not need to appear in the plugin source code or action parameters.
- Open Secrets in the xyOps sidebar.
- Click New Vault.
- Give it a title, such as
Event Update Credentials. - Add a secret variable:
-
Variable Name:
XYOPS_API_KEY - Variable Value: paste the API Key from Step 1.
-
Variable Name:
- Save the vault.
You can leave Plugin Access empty for now, because the plugin does not exist yet. We will come back and assign the vault after the plugin is created.
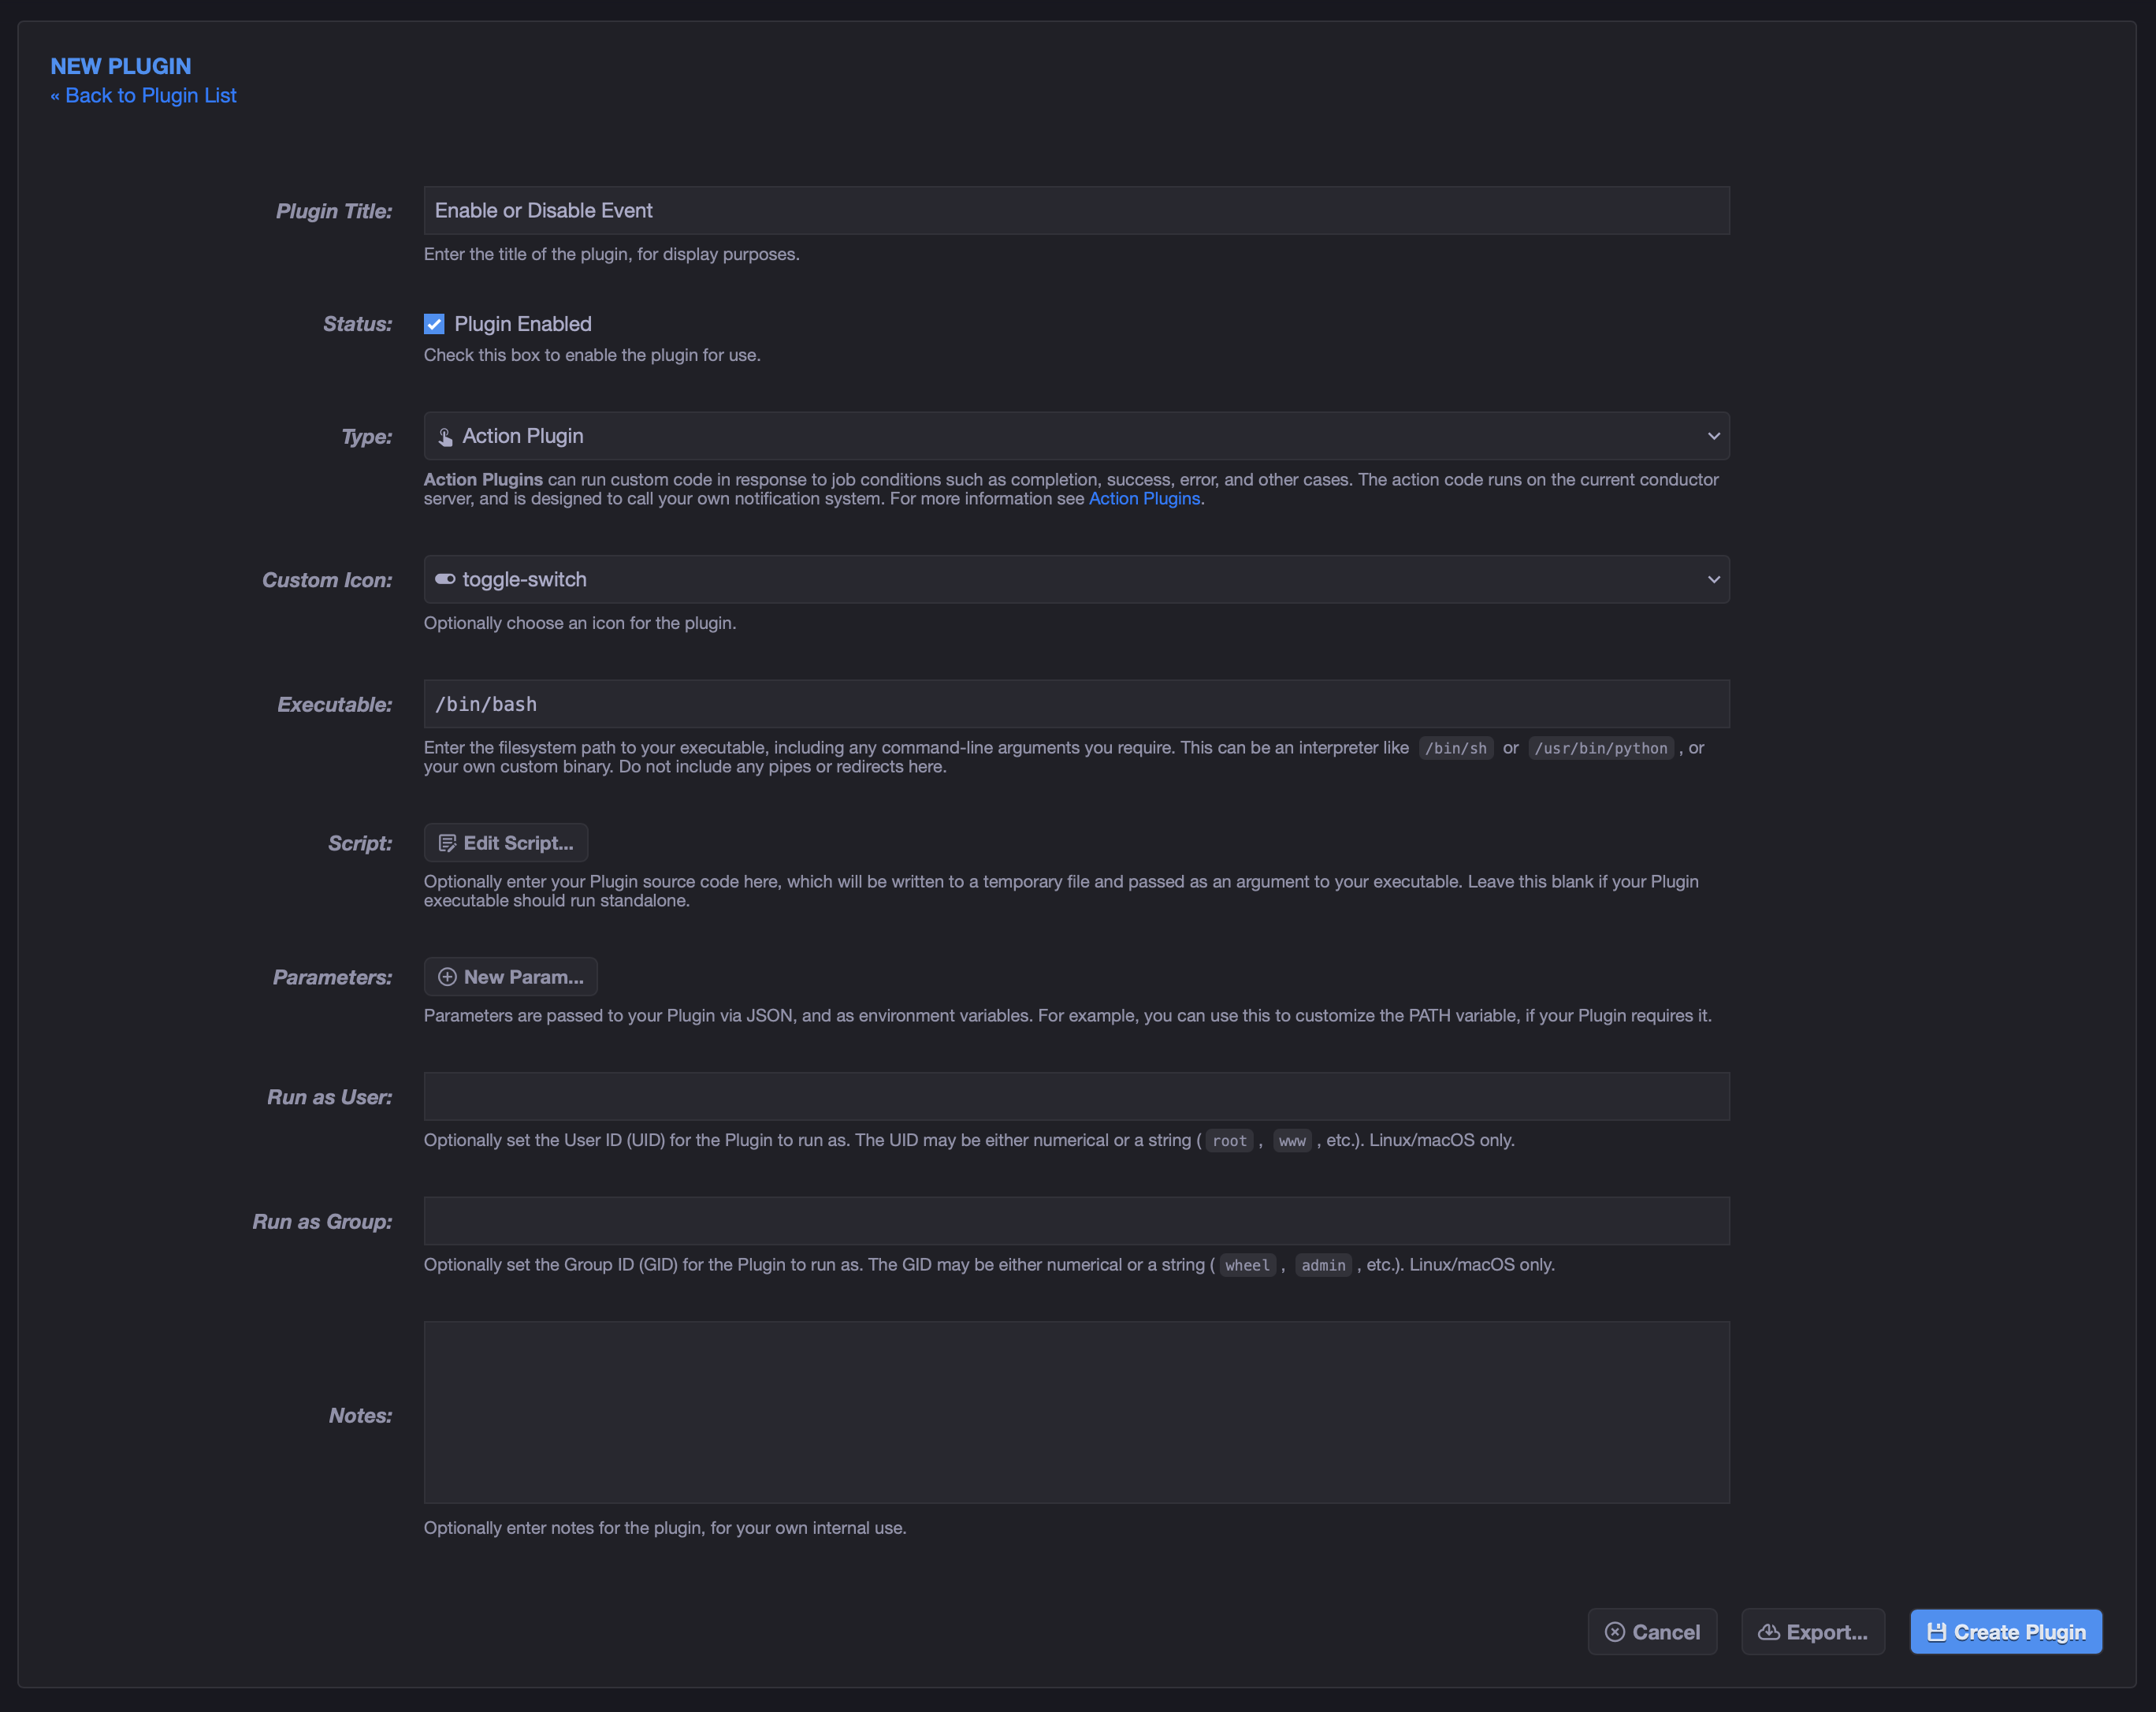
Next, create the Action Plugin itself.
- Open Plugins in the xyOps sidebar.
- Click New Plugin.
- Set Plugin Title to something like
Enable or Disable Event. - Check Plugin Enabled.
- Set Type to Action Plugin.
- Pick a cool icon like
toggle-switch. - Set Executable to:
/bin/bash- Click Edit Script and paste this source code:
set -e
curl -s -X POST -H "Content-Type: application/json" -H "X-API-Key: $XYOPS_API_KEY" -d "{\"id\":\"$event_id\",\"enabled\":$event_enabled}" "${XYOPS_BASE_URL}/api/app/update_event/v1" >/dev/null
echo '{"xy":1,"code":0,"description":"Event updated successfully."}'
That is the whole plugin. xyOps passes the plugin parameters as environment variables named after their Param IDs, so the shell script receives event_id and event_enabled automatically. The assigned Secret Vault provides XYOPS_API_KEY. xyOps also provides XYOPS_BASE_URL, which contains the correct local URL for reaching the primary conductor API.
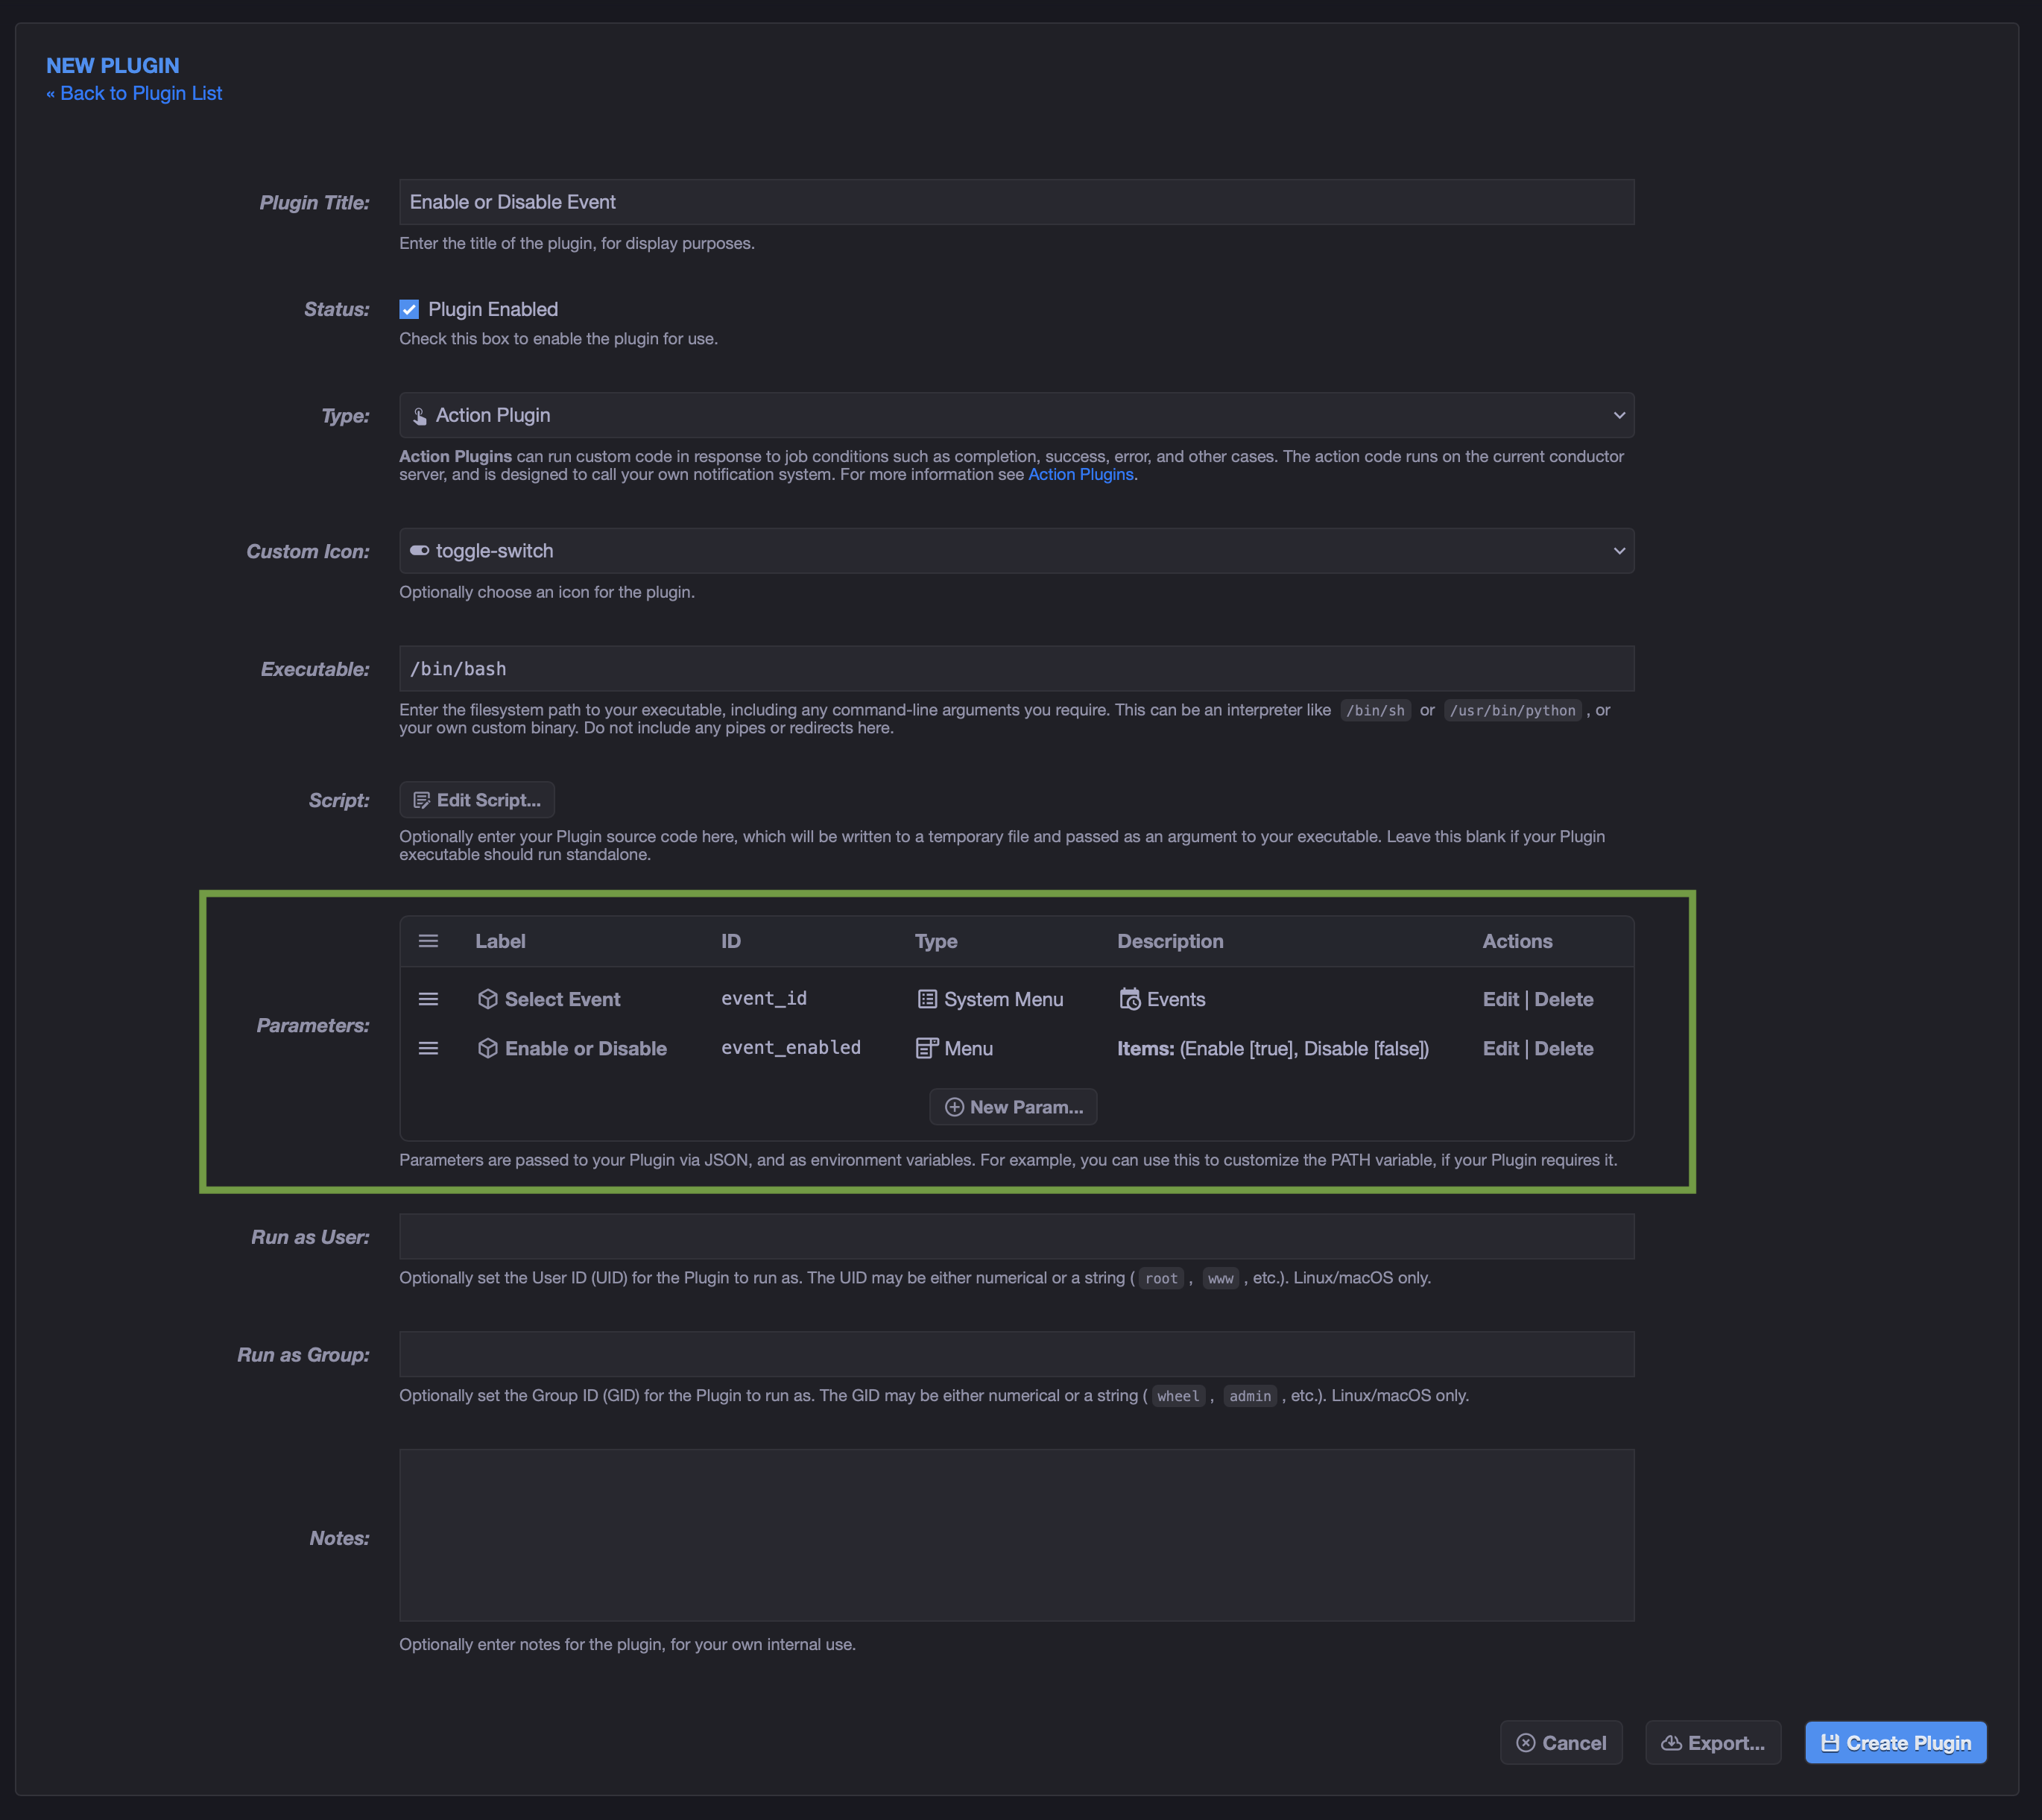
Still on the plugin edit page, add these two parameters.
Create a new parameter with these settings:
| Field | Value |
|---|---|
| Param ID | event_id |
| Label | Select Event |
| Control Type | System Menu |
| System Menu | Events |
| Multi-Select Menu | Unchecked |
This presents a drop-down menu of all events. When the action runs, xyOps passes the selected event ID to the plugin as params.event_id.
Create another parameter with these settings:
| Field | Value |
|---|---|
| Param ID | event_enabled |
| Label | Enable or Disable |
| Control Type | Menu |
| Menu Items | Enable [true], Disable [false] |
| Multi-Select Menu | Unchecked |
This presents a simple menu with two choices. The visible labels are Enable and Disable, while the values passed to the plugin are true and false.
Save the plugin when both parameters are in place.

Now that the plugin exists, go back and assign the Secret Vault to it.
- Open Secrets.
- Edit the vault you created earlier.
- Find Plugin Access.
- Select the
Enable or Disable Eventplugin. - Save the vault.
This is the step that makes the XYOPS_API_KEY environment variable available to the plugin when it runs.
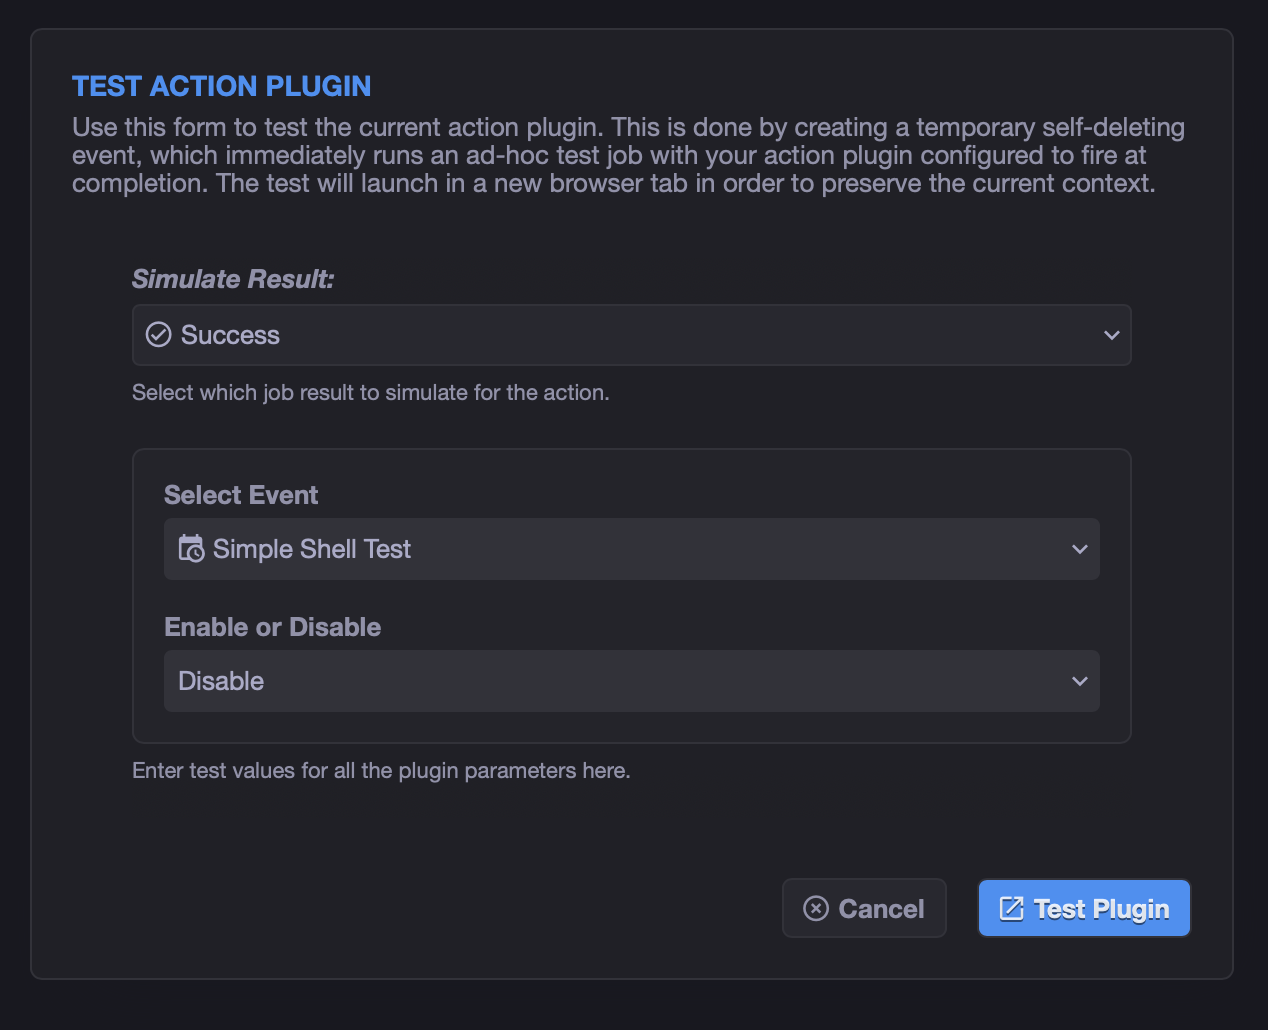
Before wiring this into an important workflow, test it manually.
- Open the
Enable or Disable Eventplugin. - Click Test Action Plugin.
- Choose a safe test event in Select Event.
- Choose Disable.
- Run the test and confirm that the event is disabled.
- Run the test again with Enable and confirm that the event is enabled again.
If both tests work, the plugin is ready to use in real actions.
You can now add this Action Plugin anywhere xyOps supports actions, including events, workflows, alerts, categories, and channels.
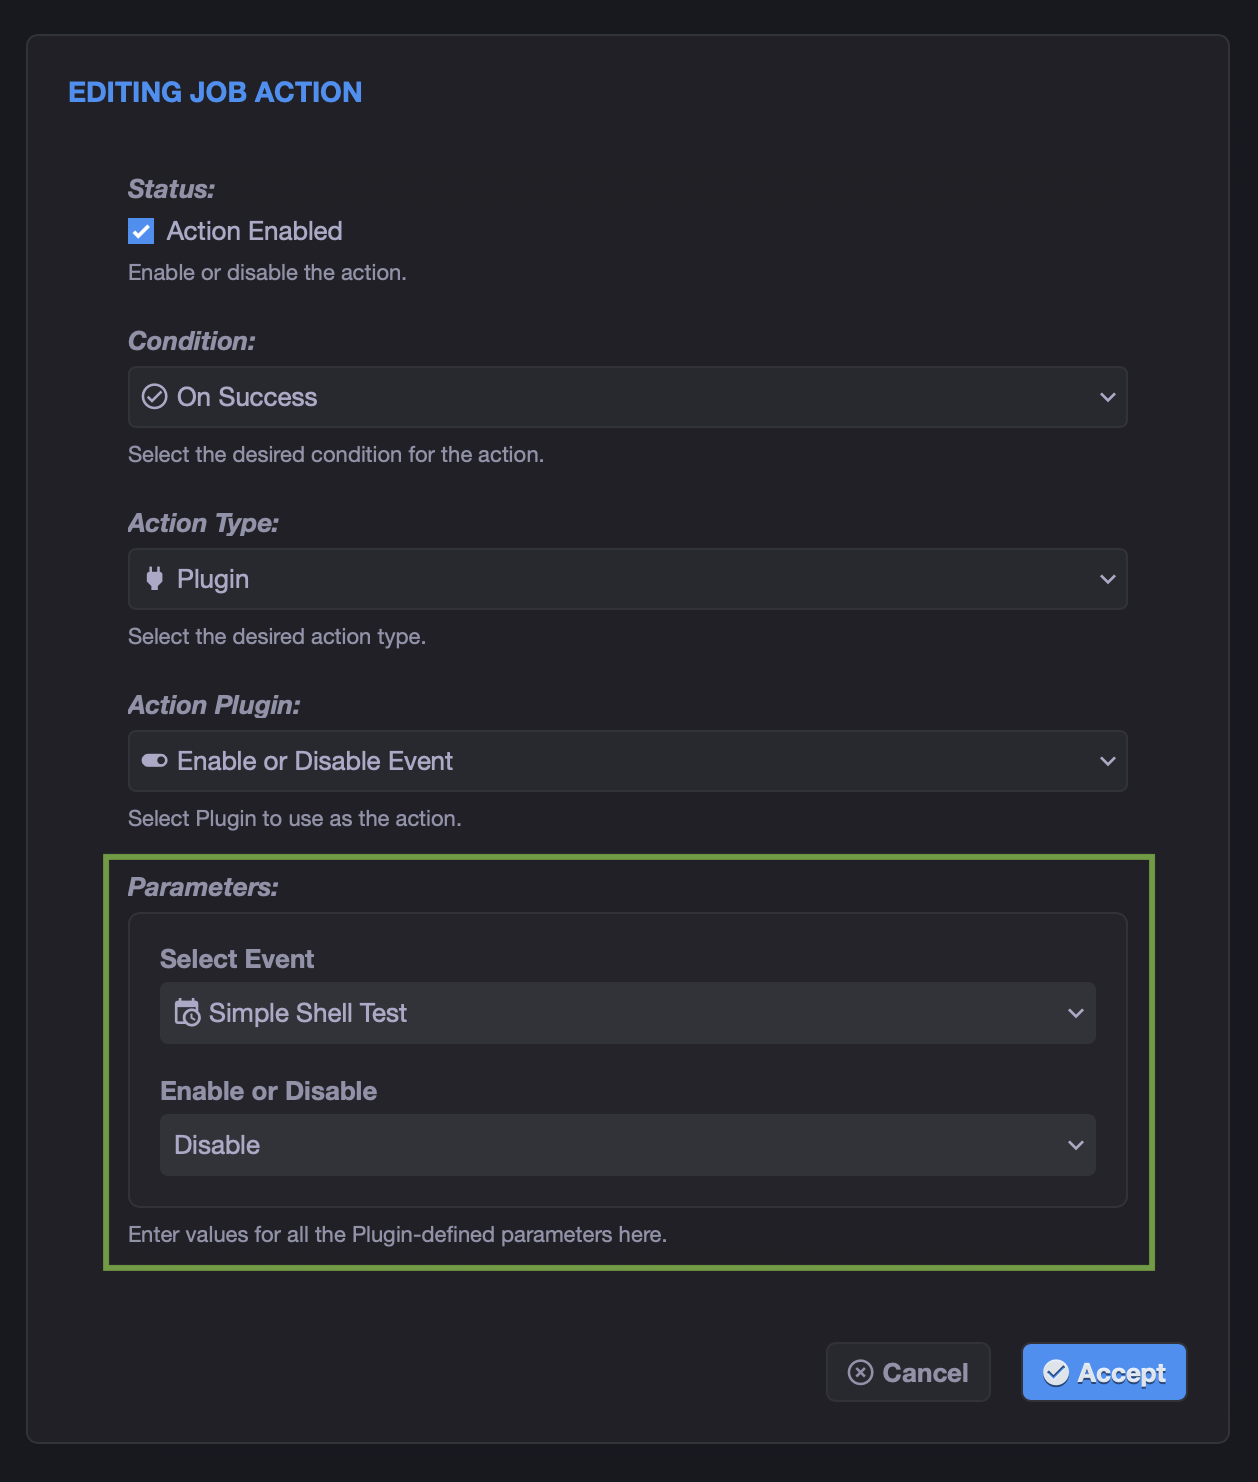
For a watcher-style workflow, one common pattern looks like this:
- On the job that starts the long-running process, add an action:
-
Condition:
startorsuccess, depending on when the watcher should begin. -
Action Type:
Action Plugin -
Plugin:
Enable or Disable Event - Select Event: your watcher event.
-
Enable or Disable:
Enable
-
Condition:
- On the watcher event, add an action for when the watcher detects completion:
-
Condition: usually
success, if your watcher exits successfully only when the process is done. -
Action Type:
Action Plugin -
Plugin:
Enable or Disable Event - Select Event: the watcher event itself.
-
Enable or Disable:
Disable
-
Condition: usually
This allows the watcher to stay disabled most of the day, turn on only when needed, and turn itself off once its work is complete.
The Secret Vault is probably not assigned to the plugin, or the variable name is different. Edit the vault and make sure:
- The variable is named exactly
XYOPS_API_KEY. - The plugin is selected under Plugin Access.
- The vault is enabled.
If the action fails with a privilege error, edit the API Key and make sure it has the event editing privilege. In the API this is edit_events, and it is required by update_event.
Also check any category or target restrictions that may apply to the API Key via roles.
The plugin could not reach the local xyOps API. Make sure you are running xyOps v1.0.68 or newer, and confirm that XYOPS_BASE_URL is available to the plugin:
echo "$XYOPS_BASE_URL"xyOps sets this automatically using the primary conductor's local protocol and port, so you should not need to hard-code or customize the URL in the script.
Double-check the Select Event value in the action configuration. The System Menu stores the selected event's internal ID, so event title changes will not break existing actions.
Action Plugins run on the primary conductor server. xyOps passes plugin parameters and assigned Secret Vault variables as environment variables. This means the shell script can safely receive:
-
event_id, selected from xyOps itself using a System Menu. -
event_enabled, selected from a simple two-item menu. -
XYOPS_API_KEY, injected from the Secret Vault. -
XYOPS_BASE_URL, injected by xyOps with the local primary conductor URL.
The plugin then calls:
POST /api/app/update_event/v1
with this JSON body:
{
	"id": "EVENT_ID_HERE",
	"enabled": true
}
Because update_event shallow-merges the request into the existing event, the plugin only needs to send the event ID and the new enabled state. Everything else about the event remains unchanged.