Getting Started (Meta Quest Linux Steam Link)
Compatibility: Steam Link officially supports Meta Quest 2, Meta Quest 3, and Meta Quest Pro. Meta Quest 1 is not supported. Meta Quest headsets require Meta Horizon OS v74 or later.
- Download the game from the Game Site.
Be careful to download the Linux game build, not the Windows build, the Linux ARM64 build, or the dedicated server.

-
Extract the content of the Zip file.
The extracted content is the game folder. You can extract it to your Desktop or Downloads folder. -
Find
MacroMicroVRService.shin the game folder and enable "Is executable" in its properties.
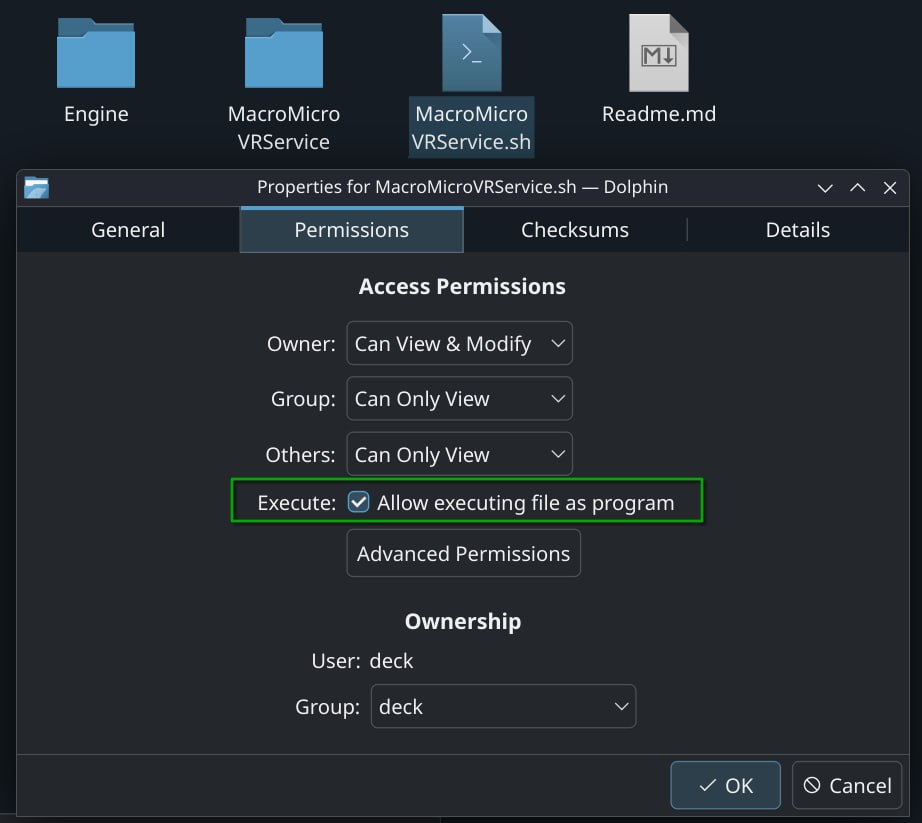
- Alternatively, open a terminal in the extracted game folder and type
chmod +x MacroMicroVRService.sh.
- Download and install Steam on your Linux computer.
- In Steam, download and install SteamVR.
- Start SteamVR, open its settings, and set SteamVR as the active OpenXR runtime.
- Connect your computer to your router with an Ethernet cable.
- Connect your headset to the same network using a 5 GHz Wi-Fi connection. Wi-Fi 5 is the minimum; Wi-Fi 6 or Wi-Fi 6E is recommended.
- Install the free Steam Link app on your Meta Quest headset.
- Start Steam on your computer and sign in.
- Open Steam Link in the headset and follow the on-screen instructions to connect it to your computer.

- Connect the headset to your computer through Steam Link.
- Run
./MacroMicroVRService.shfrom the extracted game folder.
You can add MacroMicroVRService.sh as a "Non-Steam Game" in the Steam app.
- Open your Steam Library.
- Click "Add a Game" in the bottom-left corner.
- Select "Add a Non-Steam Game..."
- Browse to
MacroMicroVRService.shand add it.
You can now launch the game directly from your Steam Library in the Non-Steam section.

Return to Getting Started