Installing xampp for ChurchCRM
XAMPP is not meant for production purposes, It will help you try out and test ChurchCRM, after installing XAMPP, you would need to install ChurchCRM Follow this link to Install ChurchCRM in XAMPP
- Download your choice of xampp build
- For the purpose of this FAQ we use
xampp-win32-7.1.9-0-VC14-installer.exe

- Start xampp installation

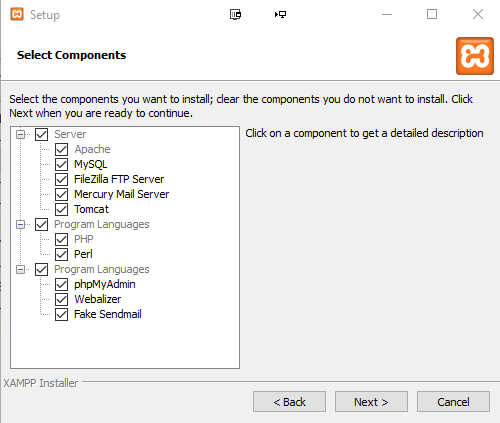
- Select required components
- Choose your installation folder, preferably the root of a drive, without spaces. Avoid "C" drive, "Programs files" folders due to permission issues that may come up later. You can also use a removable drive, pen/flash drive, SD card etc

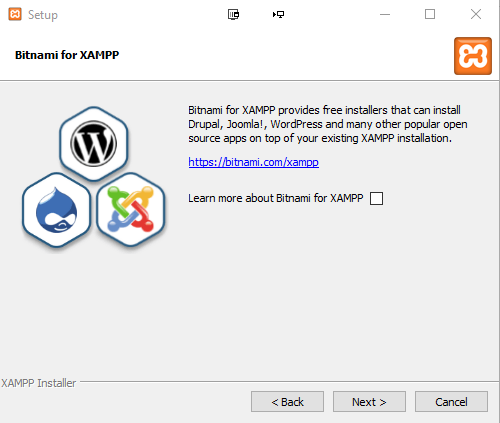
- Step through the following screens

- If you choose to start the control panel in the above screen (this is good as it will help confirm if your installation is ok), 2 screens down, you may get warnings about administrator rights since control panel will not be started with administrator rights, in this case, click quit and restart the control panel.
- Choose your language

- Quit control panel

- To Start up xampp control panel with administrator rights. Go to your installation directory. In this case
g:/xampp719 - Right click on xampp-control

- Choose "Run as administrator"

- Accept the next prompt
- The running xampp control panel will be displayed

- Start the Apache and MySql servers (these are the minimum requirement)
- Accept windows firewall prompts if you use windows firewall, or configure your firewall to allow these servers to be accessed on your network.

- You may enable the servers as a Windows "service" if you want to automatically start them when windows start. (Not a good idea if you install on a removable/flash drive) Otherwise, start servers when required through
xampp-controlpanel as described above (step 11). - You will need to configure the MySQL server to use a password, (to make life easy when installing ChurchCRM or other applications requiring database access) as the default installation uses no password.
- You can do this with the "XAMPP Shell" (command prompt).
- Open the shell from the XAMPP control panel and execute this command:
mysqladmin.exe -u root password secret
This sets the root password to 'secret'. Or edit the config file directly


- After changing the password you will have to reconfigure phpMyAdmin to use the new password otherwise, it won't be able to access the databases.
- To do that, open the file config.inc.php in
\xampp\phpmyadminand edit the following lines:
$cfg['Servers'][$i]['auth_type']	= 'http';   // HTTP authentication
$cfg['Servers'][$i]['user']		= 'root';   // MySQL User
From This:-

To This:-

So first the 'root' password is queried by the MySQL server, before phpMyAdmin may access.
-
ChurchCRM and some other web applications require more than the default 2Mb php max file size upload limits in xampp
-
To increase the allowed file size for uploads through PHP, follow these steps:
Edit the php.ini file in the php/ subdirectory of your XAMPP installation directory (in this example- g:\xampp719\php). Within this file, find the post_max_size and upload_max_filesize variables and change them to reflect the new file upload limit.
; For example, to restrict uploads to not more than 128M, change these variables as shown below:
; Maximum size of POST data that PHP will accept.
; Its value may be 0 to disable the limit. It is ignored if POST data reading
; is disabled through enable_post_data_reading.
; http://php.net/post-max-size
post_max_size=128M
; Maximum allowed size for uploaded files.`
; http://php.net/upload-max-filesize`
upload_max_filesize=128M`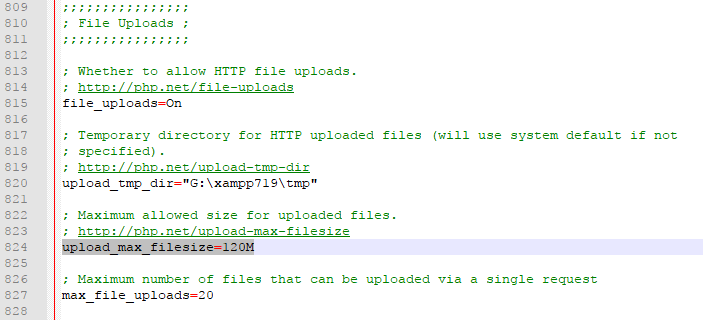
- Save your changes to the file
- Restart the Apache server. The new file upload limit will now come into effect
- Start your browser and type
http://127.0.0.1orhttp://localhostin the location bar. This would take you to the xampp dashboard. - Go to
http://localhost/dashboardfor more help, read the XAMPP how-to, and FAQ
Note that http://localhost may not work on some Windows 10 installations, in which case use http://127.0.0.1 instead.
Apache server may not start if you have Skype, VMware or some other applications using port 80.
NOTES
XAMPP is not meant for production use but only for development environments.
The way XAMPP is configured is to be open as possible to allow the developer anything s/he wants.
For development environments this is great but in a production environment, it could be fatal.
`###### ApacheFriends XAMPP Version 7.1.9 ######`

`Important! PHP in this package needs the Microsoft Visual C++ 2008 Redistributable package from`
``http://www.microsoft.com/en-us/download/details.aspx?id=5582`. Please ensure that the VC++ 2008 runtime`
`libraries are installed on your system.    `

  `+ Apache 2.4.27`
  `+ MariaDB 10.1.26`
  `+ PHP 7.1.9 (VC14 X86 32bit thread safe) + PEAR`
  `+ phpMyAdmin 4.7.4`
  `+ OpenSSL 1.0.2f`
  `+ ADOdb 518a`
  `+ Mercury Mail Transport System v4.63 (not included in the portable version)`
  `+ FileZilla FTP Server 0.9.41 (not included in the portable version)`
  `+ Webalizer 2.23-04 (not included in the portable version) `
  `+ Strawberry Perl 5.16.1.1 Portable`
  `+ Tomcat 7.0.56`
  `+ XAMPP Control Panel Version 3.2.2 by hackattack142 (Great Thanks!!))`
    `See: http://www.apachefriends.org/f/viewtopic.php?f=16&t=46743`
  `+ XAMPP mailToDisk 1.0 (write emails via PHP on local disk in <xampp>\mailoutput. Activated in the php.ini as mail default.)`