Repository navigation
7. Timeline Editor Usage
NOTE: The Timeline Editor bundled with this system is extremely basic, but can be easily replaced by having your favorite AI generate a new timeline-editor.php in the web server's root. Simply point your favorite AI to timeline-api.php in this GitHub repo so it knows how to talk to the system.
Unlike what you learned earlier about Commands, Scripts, and Scheduling Tasks, the Timeline Editor requires you to create commands on the fly and place them at specific seconds from the beginning of the timeline. Commands that you've created in your command libraries aren't used in the timeline editor, but you can call them as well as scripts from location detection actions.
The Timeline Editor works like a multi track recorder where every configured device in Mission Control has its own track. Frames can be added to each track at 0.1 second intervals. Each command is built on the fly just like when you use the CTRL button on a device at the home page. This saves you from having to jump back and forth between the Timeline editor and your command library to create commands.
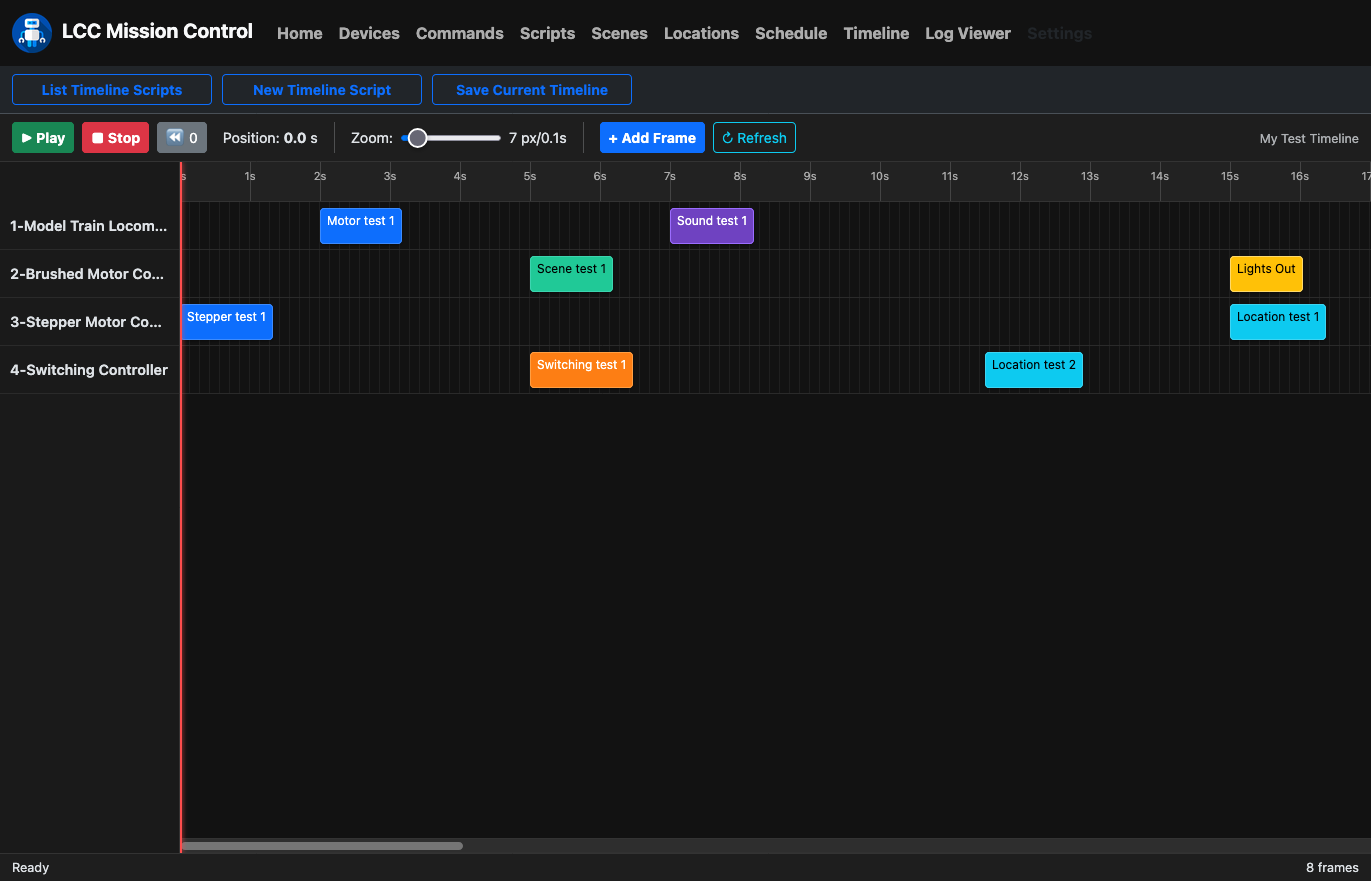
List Timeline Scripts - Opens the page that lists all of your saved timeline scripts that you can open.
New Timeline Script - Clears the current timeline and begins a new unnamed timeline.
Save Current Timeline - Allows you to save the current timeline and choose/update the script name.
▶ Play - Obviously, this is the Play button.
■ Stop - Obviously, this is the Stop button.
⏪ 0 - This is the Rewind button and always rewinds the play head to the zero position.
Position - Shows the current position of the play head, the number of seconds since the zero position.
Zoom - Varies the resolution of the timeline grid from 4px/0.1sec to 40px/0.1sec.
+ Add Frame - Allows you to manually add a frame to any track at any position instead of clicking the grid.
↻ Refresh - Reloads all of the tracks from the server in case two people are working on the same timeline.
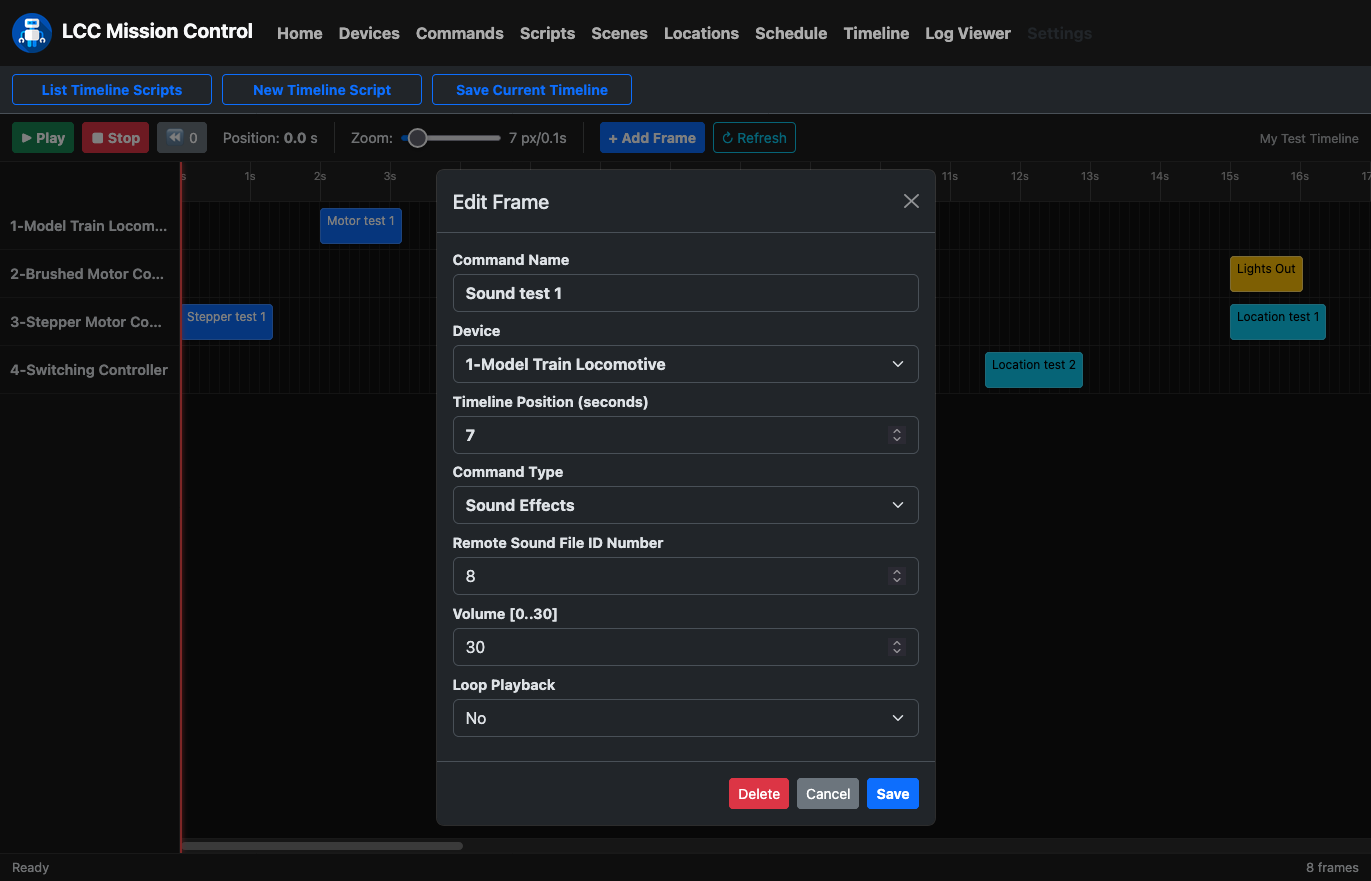
The Timeline Grid - You can click on any square in the timeline grid to open the Add Frame window at the point where you clicked. You still have full control over the editor and can reposition/assign the frame to another device/track. This just makes adding new frames a little easier.
-
If you want to make sure that all slaves are clean of any pending location detection actions, use the Reboot All Slaves button on the Settings page before starting your timeline playback.
-
You can jog the play head to a new start position by clicking on the numbers in the ribbon above the timeline grid.
-
You can click the Rewind button while a timeline is playing to make it automatically restart at the beginning.
-
If you send an RGB LED control command to a slave with a fade time greater than zero, any other RGB LED control commands sent to it before the fade has finished will be held back until the previous command completes.
-
Sending an RGB LED control command to the fixture number 65535 with red/green/blue all set to zero will turn off all lights connected to that slave. RGB LEDs have their own memory, rebooting the slave won't turn them off.
-
Sound effect commands sent while one MP3 is currently playing will pre-empt it and start playing the new one.
-
Once a sound effect command is sent and an MP3 is playing, the only way to stop it without rebooting the slave is to send another sound effect command to play the file number zero.
-
Brushed motor commands with a progress time and stepper motor commands will prevent any later commands sent to the slave from running until the progression has finished or the stepper motor has reached its target position.
-
Location detection commands should always be sent before any motor commands. It's better to tell the slave how it's supposed to react to any location transponders before it starts moving.
-
You should avoid stacking frames on top of each other at the exact same time or you won't be able to selectively edit them. The best way to group frames together is to separate them by 0.1 seconds so you can zoom in and click on the exposed tab of each frame to open its edit window.
-
Depending on your screen size, the furthest right frame position in the timeline will be less than one minute even if you zoom out all the way. Simply add a frame to any track and set its position as far in the future as you need and the the timeline width will automatically adjust as necessary.
-
If your current timeline shows an asterisk before the script name, this means that there are unsaved changes. This will prevent any scheduled timeline playback from running since that would wipe out your current changes.