Getting Started EN
- Open the Latest GitHub Release.
- Download
TwitchManager-Windows11-Setup.exeunder Assets and run it. - Complete the installation wizard.
The default installation path is the TwitchManager folder inside your Windows "Documents" directory.
- Open the Latest GitHub Release.
- Download
TwitchManager-macOS.pkgand install it.
The default installation path is /Applications/TwitchManager. Supported on macOS 11 or later.
- In OBS Studio, open Docks -> Custom Browser Docks... from the top menu.
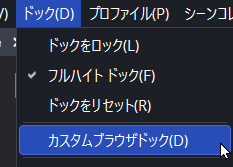
-
Set the Dock Name to
TwitchManager. -
Paste the local OBS URL into the URL field. You can obtain the URL in one of the following ways:
- On Windows, use the URL copied automatically upon installation or found inside
OBS_Dock_URL.txt. - Open
TwitchManagerDock.htmlin your web browser and copy the address bar URL.
- On Windows, use the URL copied automatically upon installation or found inside
-
Click Apply.
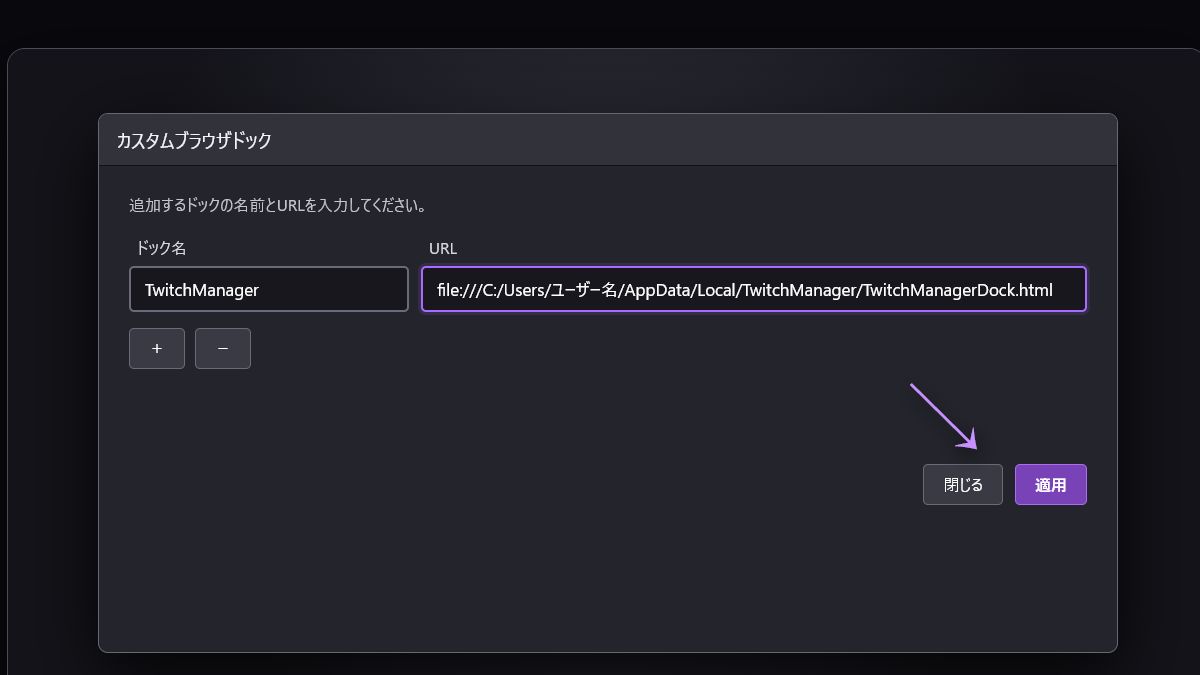
-
Drag the newly created dock to embed it into OBS, adjusting its width so buttons and text are clearly visible.
-
Click the gear icon in the top right to configure Twitch Authentication.
If using the ZIP version, do not move
TwitchManagerDock.htmlout of its folder. Keep all included files in the original directory structure.
SHA256 checksums are attached under Assets in each GitHub Release.