Raid and Notifications EN
Under the "Notifications & Raids" tab, you can configure channel shoutouts, automatic raid handling, shoutout templates, and sound alert settings.
Enter a Twitch ID or channel URL to trigger the following actions:
-
/shoutout: Send Twitch's official channel shoutout. -
/raid: Initiate a raid to the specified channel. - "Send Shoutout Message": Send your saved custom shoutout template to chat.
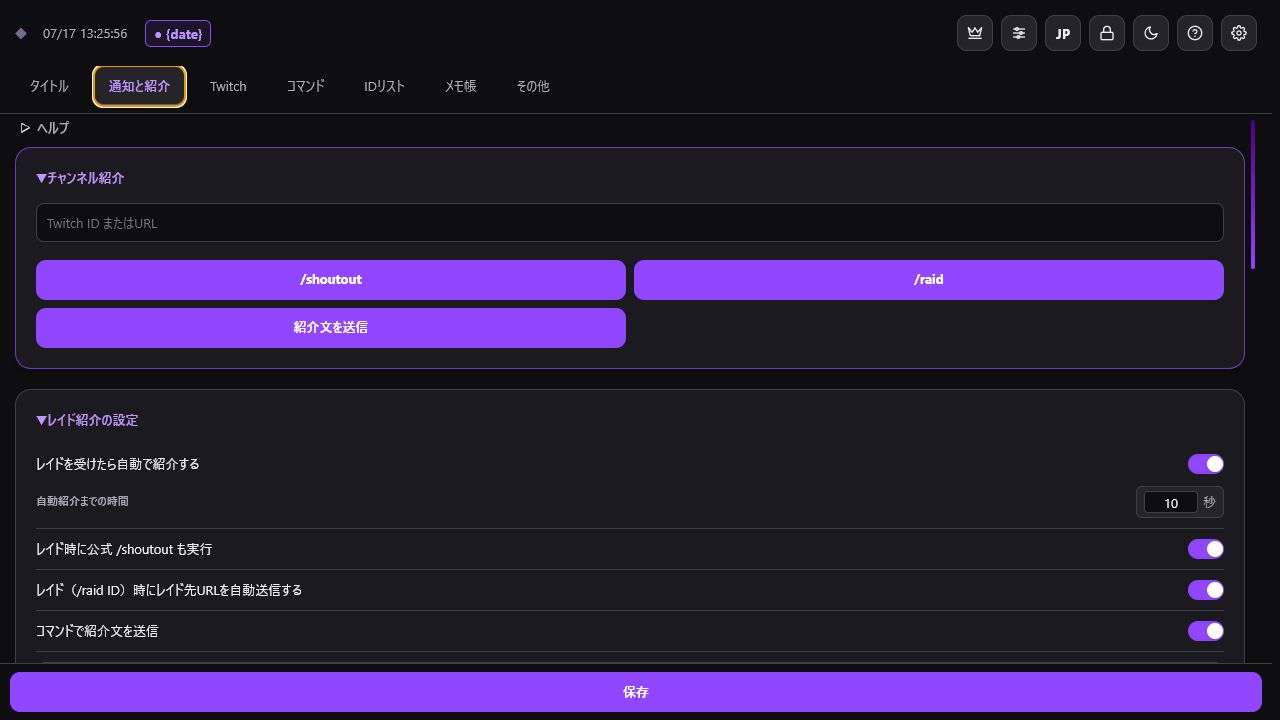
Streamers registered in your ID List will appear as auto-complete suggestions. Always double-check the target Twitch ID before clicking /raid.
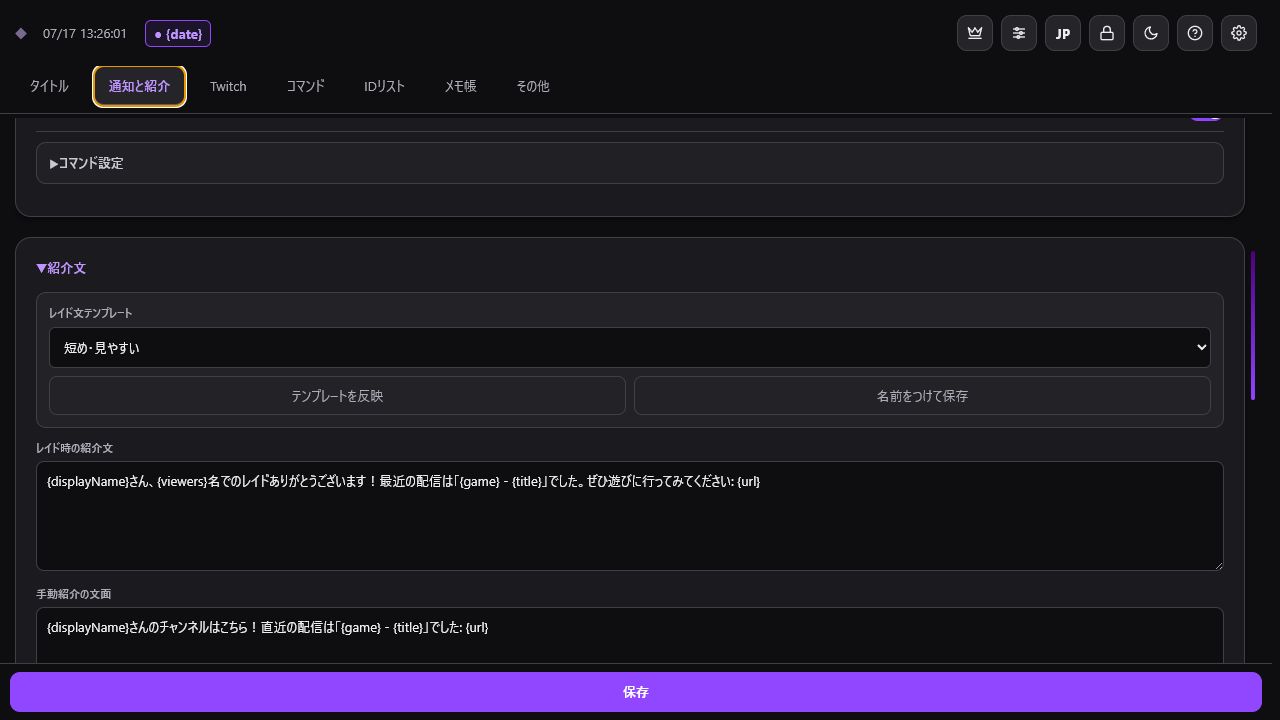
- Automatically send a shoutout message after receiving an incoming raid.
- Set a delay timer (0 to 600 seconds) before sending.
- Simultaneously trigger Twitch's official
/shoutout. - Automatically post the target channel's URL to chat when you manually execute
/raid. - Allow chat commands (e.g.,
!so) to trigger shoutout messages. - Restrict command permissions (Broadcaster, Moderators, VIPs, Subscribers, Everyone).
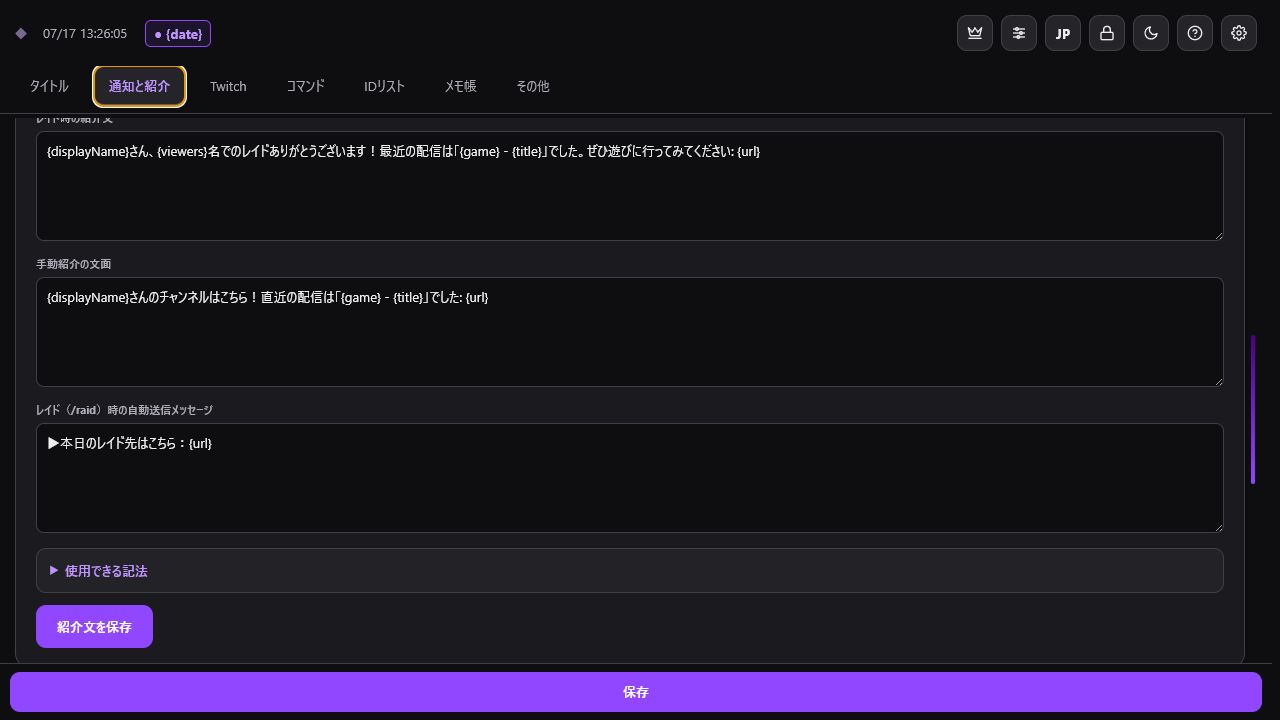
You can save separate templates for incoming raids, manual shoutouts, and outgoing raids. The outgoing raid template is used when sharing the destination channel's URL in chat after launching a raid.
| Variable | Description |
|---|---|
{displayName} |
Target's Display Name |
{username} |
Target's Twitch ID |
{viewers} |
Raid Viewer Count |
{url} |
Target Channel URL |
{game} |
Target's Last Played Category |
{title} |
Target's Last Stream Title |
In outgoing raid templates, {url} is replaced with the raided channel's URL.
Configure sound toggle, audio file, and volume for Raids, Chat Comments, Channel Point Redemptions, and First-time Chat Messages. Choose a global playback mode: "Audio File (Browser)" or "OBS Media Source (obs-websocket)".
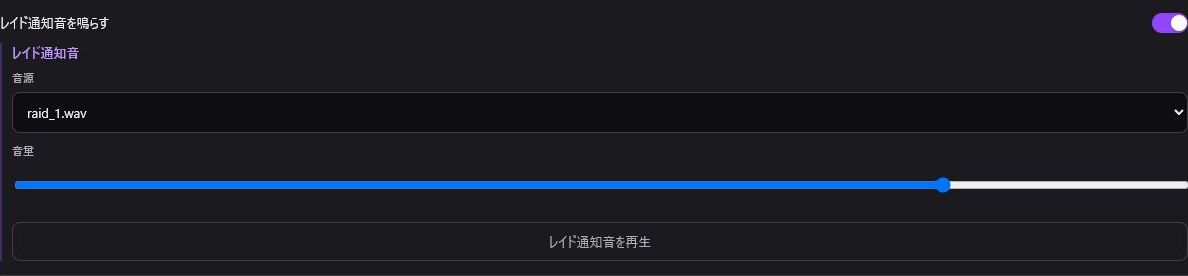
Plays audio files directly within the OBS Dock browser container.
- Click "Select Sound Folder".
- Pick the folder containing your audio files.
- Select sound files for each event, preview, and save.
Recommended formats: .wav or .mp3. Due to browser security policies, you may need to re-select the folder after reloading the page or restarting OBS.
Triggers (restarts) a Media Source inside OBS via obs-websocket. Ideal if you want to route sound alerts through OBS's Audio Mixer or dedicated audio tracks.
- Set the global playback mode to "OBS Media Source (obs-websocket)".
- Enter the WebSocket Host (default:
localhost), Port (default:4455), and Password. - Click "Fetch OBS Sources" to test connection.
- Select the target OBS Media Source from the dropdown for each event type.
- Click "Test" to verify the Media Source restarts from the beginning in OBS.
-
Preventing Double Audio: When using OBS Media Source mode, TwitchManager disables browser-side
Audio.play()and sends play requests exclusively to OBS. - Audio Monitoring: If your OBS Media Source is set to "Monitor and Output" or "Monitor Only" in OBS, you will hear the alert in your desktop audio/headphones. Adjust monitoring settings inside OBS Audio Mixer if needed.
To mute alerts for bot accounts, register their Twitch IDs under "Muted Users".