Repository navigation
Getting Started (Steam Frame Linux)
Compatibility: The Steam Frame streams PC VR games from your Linux computer through SteamVR. The headset ships with a dedicated 6 GHz wireless adapter that creates a direct, low-latency connection between the headset and your computer. Streaming over your home Wi-Fi is also possible but is usually more congested and less reliable.
- Download the game from the Game Site.
Be careful to download the Linux game build, not the Windows build, the Linux ARM64 build, or the dedicated server.

-
Extract the content of the Zip file.
The extracted content is the game folder. You can extract it to your Desktop or Downloads folder. -
Find
MacroMicroVRService.shin the game folder and enable "Is executable" in its properties.
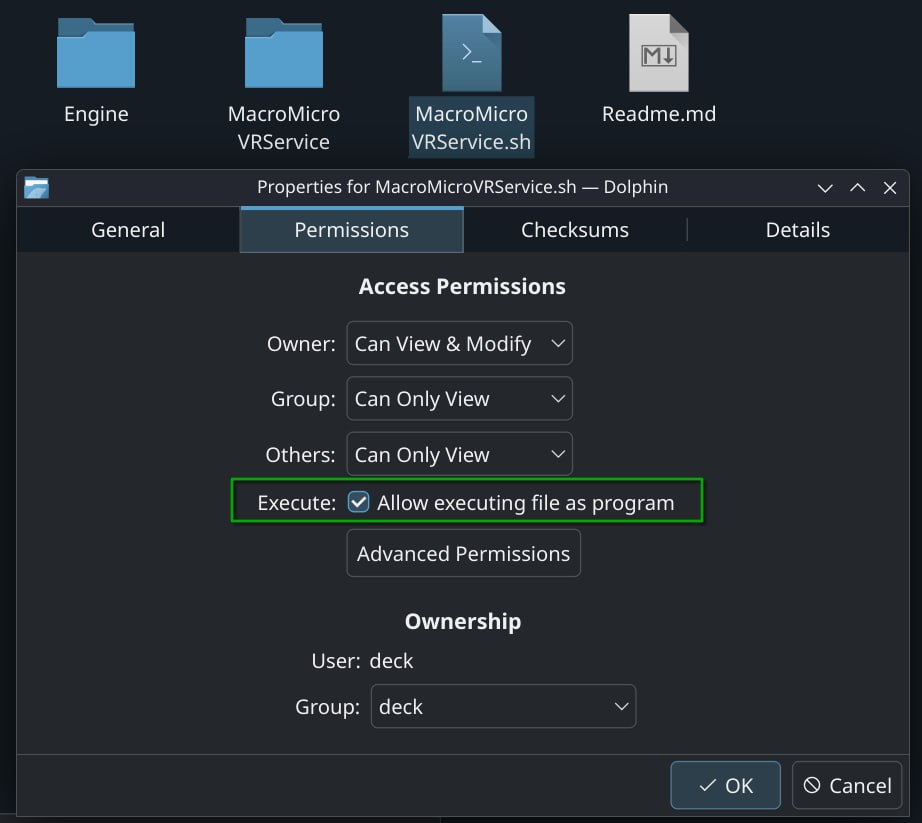
- Alternatively, open a terminal in the extracted game folder and type
chmod +x MacroMicroVRService.sh.
- Download and install Steam on your Linux computer.
- In Steam, download and install SteamVR.
- Start SteamVR, open its settings, go to the "OpenXR" tab, and click "Set SteamVR as OpenXR runtime".
This step is required. If another runtime is active (Monado or WiVRn, for example), the game will not detect the headset. - Make sure Steam, SteamVR, and the Steam Frame system software are up to date. On the headset, go to Steam Settings -> System -> Updates.
- Plug the included wireless adapter into a USB 3.0 port on your computer. For the best results, keep the headset and the adapter in the same room with a clear line of sight.
- Launch SteamVR on your computer and accept the prompt to install the wireless adapter driver. If no prompt appears, reboot your computer and launch SteamVR again.
- Put on your headset and sign in with the same Steam account as your computer.
- When SteamVR asks to pair the headset, select "Pair", then enter the code shown on your computer using the virtual keyboard in the headset.
- Once paired, your computer's name appears under the Steam menu in the VR dashboard. Select it to connect. This launches SteamVR on your computer, and the Steam Frame then works like a regular PC VR headset.
If you do not want to use the wireless adapter, you can stream over your home Wi-Fi instead.
- Connect your computer to your router with an Ethernet cable.
- Connect your headset to the same network using a 5 GHz or 6 GHz Wi-Fi connection. Wi-Fi 6E or Wi-Fi 7 is recommended.
See the official Steam Frame feature and troubleshooting guide for more details.
- Connect the headset to your computer from the VR dashboard.
- Run
./MacroMicroVRService.shfrom the extracted game folder.
You can add MacroMicroVRService.sh as a "Non-Steam Game" in the Steam app to launch it directly from the headset.
- Open your Steam Library on your computer.
- Click "Add a Game" in the bottom-left corner.
- Select "Add a Non-Steam Game..."
- Browse to
MacroMicroVRService.shand add it.
You can now find the game in your Steam Library, in the Non-Steam section. In the headset, open your Steam Library and select "Stream" on the game to launch it on your computer and stream it to the Steam Frame.

- Open SteamVR Settings -> OpenXR. If you see a "Set SteamVR as OpenXR runtime" button, click it.
This is the most common cause, especially if another OpenXR runtime (Monado, WiVRn, etc.) is installed on the computer. - Make sure the headset is connected to the computer before launching the game. The headset icon in the SteamVR status window must be green.
- Unplug any other headset and close any other VR runtime if it is running.
If the problem persists, check the Common Issues and Fixes page or ask for help in the Discord.
Return to Getting Started