Repository navigation
Screen Connections
Wi-Fi, the printer's address and name, other printers, and the Spoolman server. To join Wi-Fi the first time, follow First start; this page describes every control.
Shows the current Wi-Fi network, Address, printer Name (with Change), and the Mainsail, Moonraker and Spoolman addresses (Spoolman says "not configured" when Moonraker has no Spoolman). Buttons:

The real screen app, showing data from a printer running NebulaOS 1.0.0. Addresses are examples.
- Wi-Fi networks — see Wi-Fi panel.
- Printers — see Printers panel.
-
Spoolman — the Spoolman server the printer uses. On the right, In use shows the current
server (address and port); its ✕ stops using Spoolman. On the left, type a new address (IP or
name) and port (Spoolman's default is 7912) and tap Use: NebulaOS writes it into
moonraker.conf([spoolman] server) and restarts Moonraker; the screen reconnects after a few seconds. The keyboard's keyboard key hides it; tap a field to bring it back. The spool list itself is in the Filament panel (Spoolman panel).
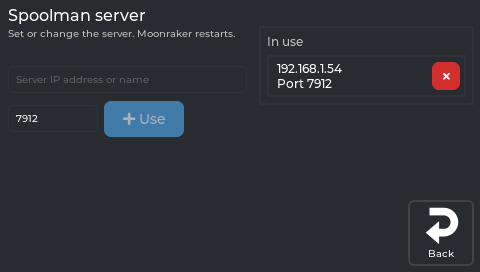
The real screen app, showing data from a printer running NebulaOS 1.0.0. Addresses are examples.
Both changes ask first, because Moonraker restarts:

The real screen app. An example state: the address was typed in for the picture.

The real screen app, showing data from a printer running NebulaOS 1.0.0.
Change (printer name) sets the network name: the printer is then reachable as <name>.local.
Invalid names are flagged while you type; saving asks to confirm first.
Opens from Settings → Connections → Wi-Fi networks. Wi-Fi is managed through NebulaOS.
Networks are grouped into KNOWN NETWORKS (saved) and OTHER NETWORKS IN RANGE, each row with signal bars. Other network (hidden)... at the end connects to a network that does not broadcast its name.
| Row type | Tapping the row | Extra |
|---|---|---|
| Connected network | Opens Network Details | A chevron (›) as a hint |
| Known, not connected | Reconnects to it | A separate ✕ to forget it (asks first) |
| Not known | Asks for the password (empty for an open network) | — |

The real screen app. An example state: the two saved names stand in for real ones, and OtherNetwork and the signal levels were fed in for the picture.
The password field has an eye button to show or hide what you type.

The real screen app. An example state, for the made-up OtherNetwork.
Other network (hidden)... asks for the name first:

The real screen app.
Forgetting a saved network asks first:

The real screen app. The network name stands in for a real one.
Reached by tapping the connected network's row in the Wi-Fi panel.

The real screen app, showing data from a printer. Signal shows - here only because the picture was made without a Wi-Fi scan.
An info card (Signal, Security, IP address) plus two buttons:
- Configure Static IP — opens the Static IP panel.
- Forget This Network (red outline) — removes the saved network.
Reached from Network Details → Configure Static IP. Titled "Static IP (all Wi-Fi networks)": the setting is global for the Wi-Fi interface, not per network. You need four values from your router: IP, Netmask, Gateway and DNS. Unless you have a reason to need a fixed address, DHCP is the simpler choice.
NebulaOS checks a new setting before keeping it - for a static address, that the gateway answers; for DHCP, that a lease arrives - and undoes it by itself if it does not work. That check can take a couple of minutes, so a slow result is not a failure.
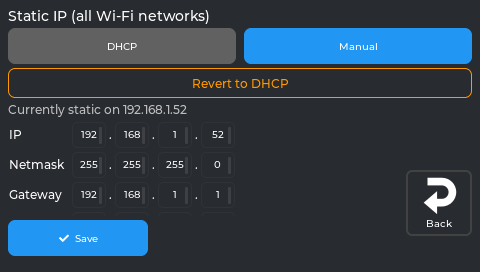
The real screen app, showing data from a printer running NebulaOS 1.0.0. Addresses are examples.
DHCP / Manual switches the view. Manual has four address rows — IP, Netmask, Gateway, DNS — each as four octet boxes; a value outside 0–255 is flagged red at once. ✓ Save stays visible outside the scrolling area. With a static address set, Revert to DHCP appears (asks first).
Tapping an octet box opens a number keypad:
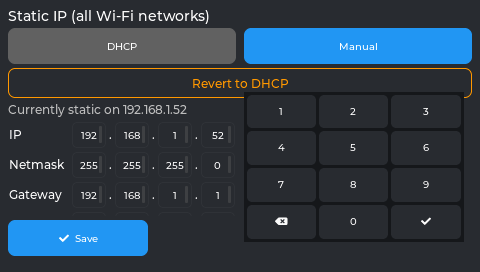
The real screen app, showing data from a printer running NebulaOS 1.0.0. Addresses are examples.
A value outside 0-255 is marked and nothing is sent:
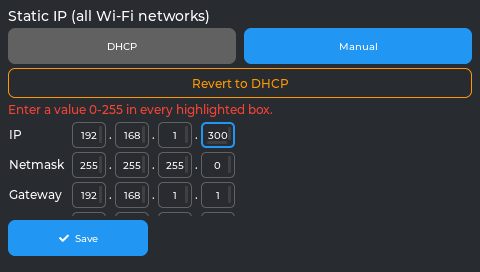
The real screen app. An example state: 300 was typed in for the picture.

The real screen app. Behind the question, the error line from the previous picture is still showing.
NebulaOS checks a new setting (static: the gateway answers; DHCP: a lease) and reverts it by itself when it does not work. This can take a couple of minutes.
Opens from Settings → Connections → Printers. Manages Moonraker connections.
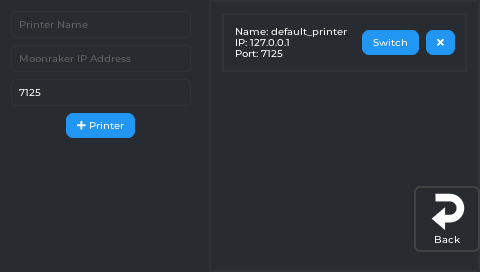
The real screen app, showing data from a printer running NebulaOS 1.0.0.
Each configured printer is a card with its name, IP and port, plus:
- Switch — connects NebulaScreen to that printer
- ✕ — removes it from the config (asks Confirm / Cancel first)
Add a printer: fill in Printer Name, the Moonraker IP address and the port (pre-filled with
7125), then tap the green + Printer button.
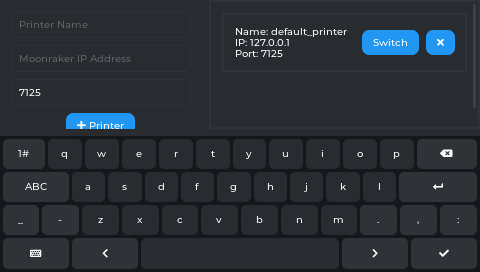
The real screen app, showing data from a printer running NebulaOS 1.0.0.
Previous: Tune · Using NebulaScreen · Next: Settings → Display