Building with IntelliJ IDEA
For working with this project, IntelliJ IDEA is our recommended IDE and the one used by most collaborators. The free community edition has everything you'll need to start testing and contributing real improvements to the project.
You can build RuneLite locally using JDK 11. We recommend installing the JDK through IntelliJ and selecting vendor Eclipse Temurin (AdoptOpenJDK HotSpot) version 11. The codebase supports language features up to Java 11.
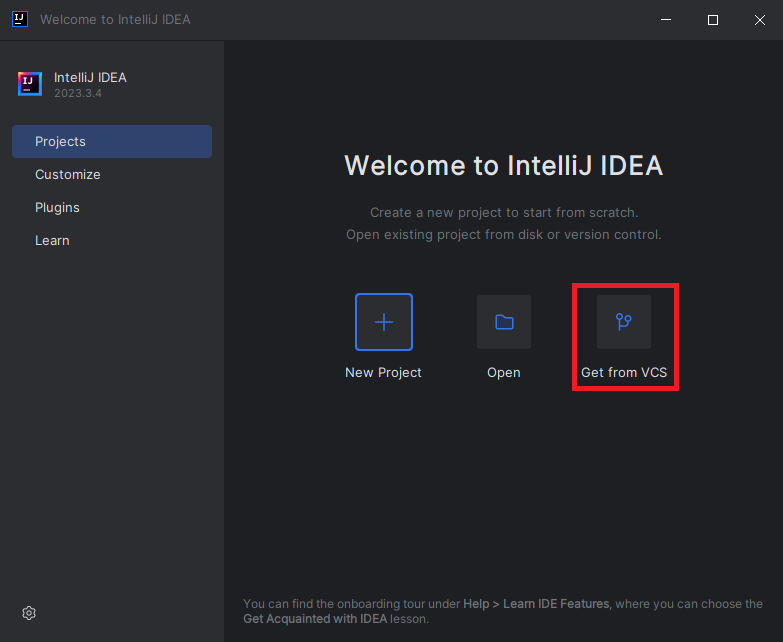
After launching IntelliJ IDEA for first time, you will see IntelliJ's welcome window. You will now need to clone the RuneLite repository from git; to do this you can click the Get from VCS button.
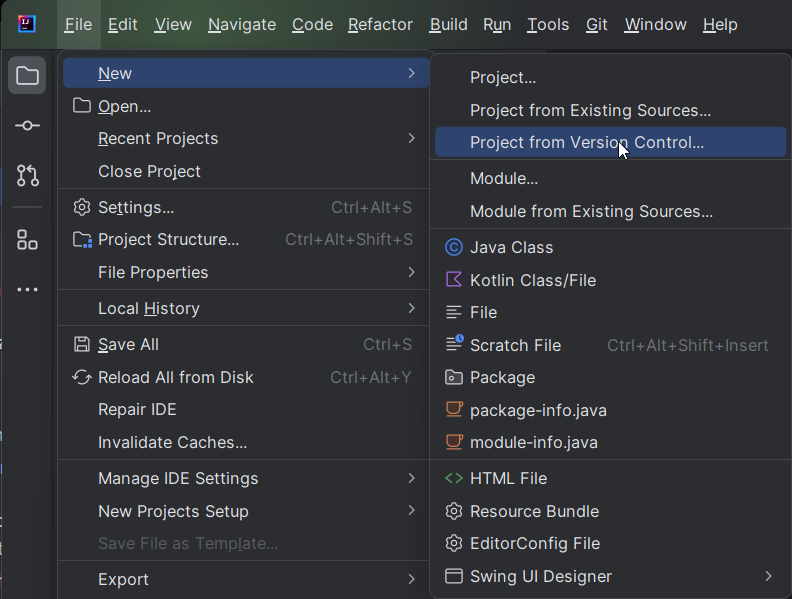
If you're presented with the editor instead of the welcome screen, click File > New > Project from Version Control….
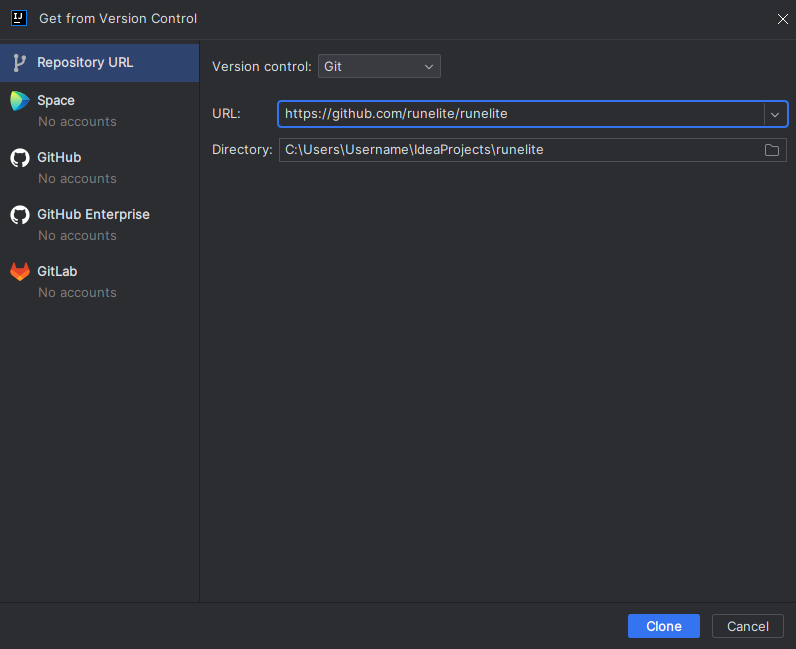
After clicking on that you will be greeted with a prompt. You can either enter the RuneLite repository https://github.com/runelite/runelite or your own GitHub fork, if you've created one.
You can also specify a directory where you'd like to save the RuneLite files to in this prompt. If Git is not installed, click on Download and install to install Git.
NOTE: If you plan to make a Pull Request, you must fork the RuneLite repository, and clone from your fork.
After cloning is done you will be presented with a Trust and open Project 'runelite'? popup. Click Trust Project.
When first viewing the project in IntelliJ IDEA you may come across this error:
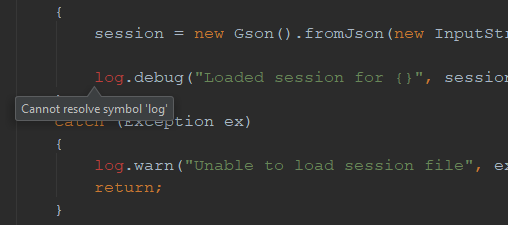
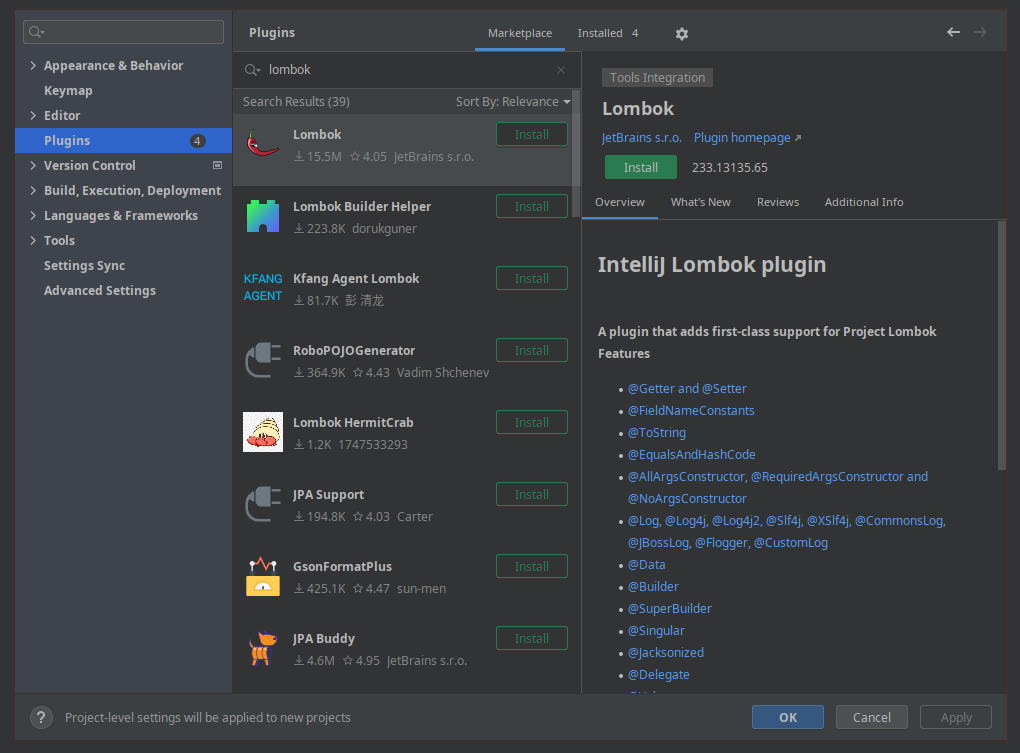
This is because you do not have the Lombok Plugin installed.
Navigate to the Plugins tab under the (Main Menu) > File > Settings menu (IntelliJ IDEA > Preferences for Mac). Click the Marketplace button and search for Lombok to find it. Install the plugin and restart IntelliJ IDEA.
Success! You should no longer be getting Cannot resolve symbol or Cannot resolve method errors.
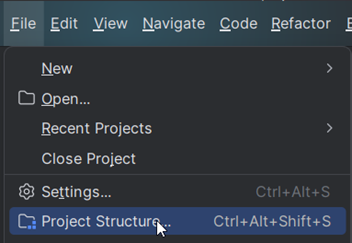
We need to make sure that the correct SDK is selected for RuneLite. To do that go to File > Project Structure…
Go to the Project Settings > Project tab and open the SDK dropdown menu. Click on Download JDK...
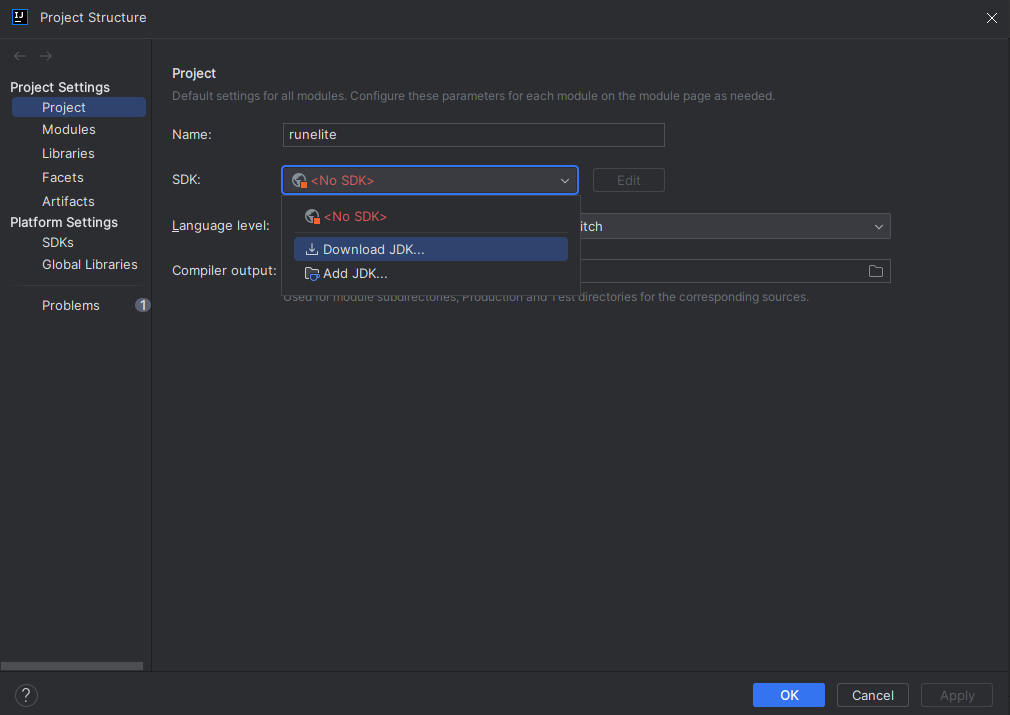
Choose version 11 and vendor Eclipse Temurin (AdoptOpenJDK Hotspot). Then press Download to download the JDK.

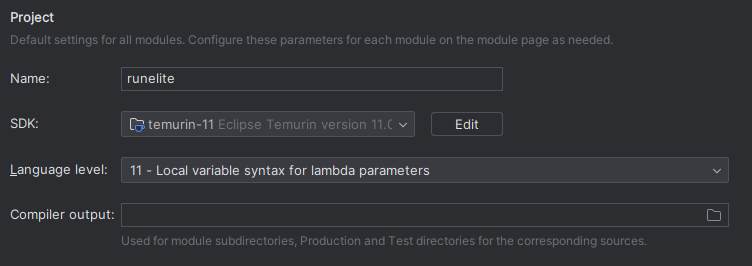
Set the Language level to 11 and press OK to save the changes.
RuneLite is using Maven as build tool. It is used for dependency management, resource generation, running tests and any other tooling needed to properly build, run and deploy RuneLite.
So, to actually run RuneLite, we first need to invoke Maven.
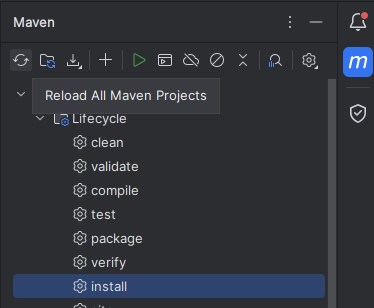
Locate Maven on the right-side of the screen. Then navigate to RuneLite (parent) > Lifecycle, right-click install, and press Run Maven Build:
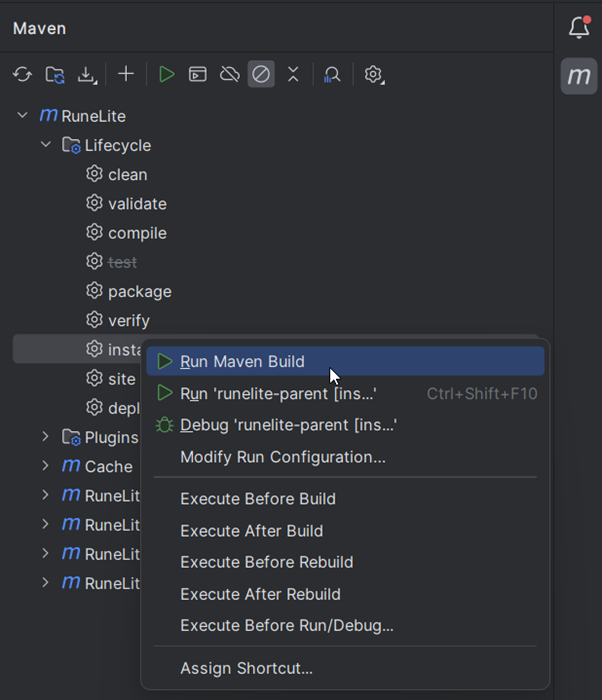
At this point, it should start the build, which might take a while. Once the process is done, you should see a message to let you know the final status of the build. Don't worry if there are build or test failures. We can fix those later.

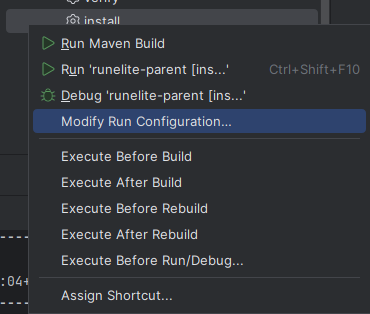
It is highly recommended to create custom Run Configurations. In the Maven window, right-click on RuneLite > Lifecycle > install, and select Modify Run Configuration...
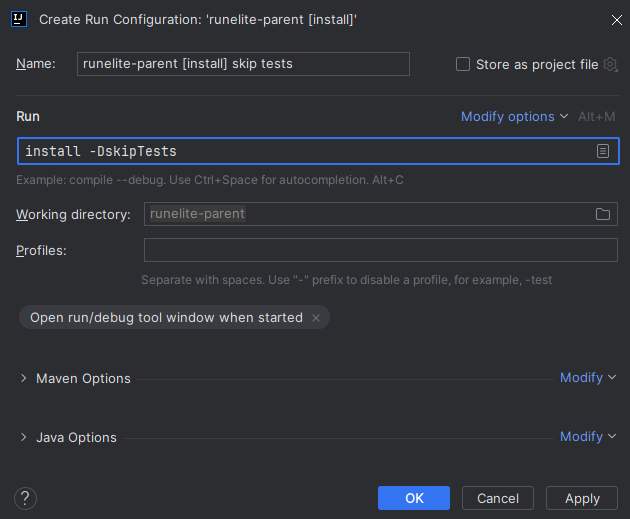
Here you can choose a name, such as runelite-parent [install] skip tests, and add a Maven command. For faster builds, try install -DskipTests. This will skip the tests (and test failures).
Press OK. You can now easily run your run configurations in the Maven window by right-clicking RuneLite (parent) > Run Configurations > runelite-parent [install] skip tests and selecting Run.
Alternatively, you can select your run configuration in the dropdown box at the top and hit the Run button.

Other useful run configurations include:
clean install -DskipTests -U which is your first troubleshooting step that you should run multiple times in case of a build failures
-Dcheckstyle.skip=false checkstyle:check to only run checkstyle without building the client
surefire:test to only run the tests without building the client
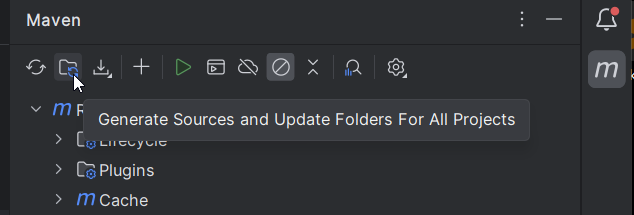
We now need to tell IntelliJ to pick up changes based on Maven build (it should do that automatically, but sometimes it doesn't). Click on Generate Sources and Update folders for all projects in the Maven window.
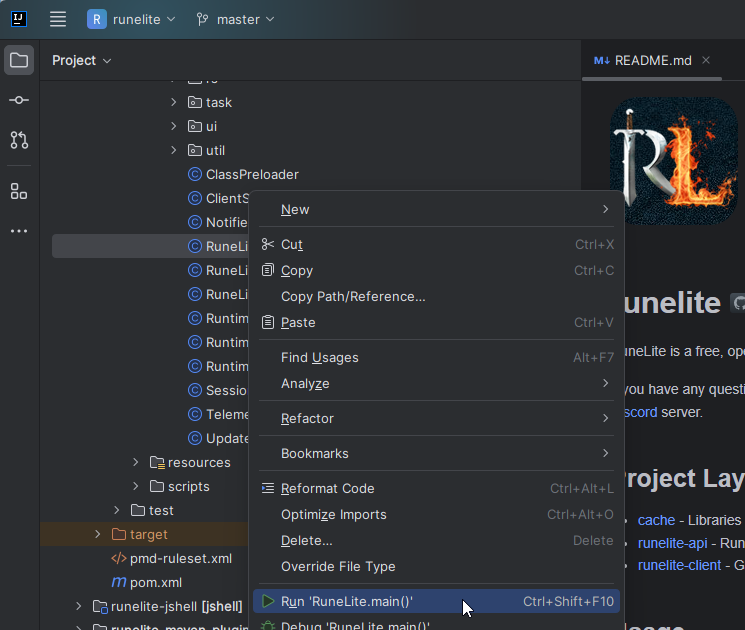
Now locate Project in the sidebar, and in the project view expand the tree to runelite/runelite-client/src/main/java/net/runelite/client.
And all you need to do now is right-click the RuneLite class and select Run 'RuneLite.main()'
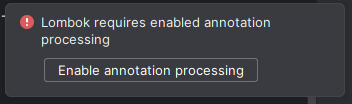
If you receive a notification regarding Lombok's annotation processing, press Enable annotation processing:
In case of errors regarding missing classes, click the Reload All Maven Projects in the Maven tab.
And you are done! RuneLite should open.
If you are having any issues with this step see the Troubleshooting section.
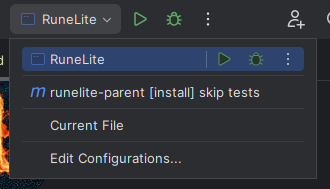
Success! You can switch between running the client and building the Maven project by switching between the RuneLite configuration and your custom Maven configuration (e.g. runelite-parent [install]):
To help enable a faster edit-run-test development loop, check out JetBrains's official documentation on hot reloading.
You can ignore this.
If you are getting error about git.exe (or git on linux and mac) missing, you will need to first download and install Git for your OS. Git is version control software and implementation that RuneLite uses to store and track history of it's source code. To download git, just go here and select your OS version.
If you've followed all instructions correctly, try deleting the %TEMP%/cache-165 folder or skipping the tests by running a custom run configuration as outlined in Building the project.
If the client fails to boot or if the applet does not appear, try running the Maven build again with the following command:
clean install -DskipTests -U

If that also doesn't work, feel free to ask for help in the Runelite Discord server. Here are few helpful tips:
To sync your fork simply run
git checkout master && git fetch upstream && git rebase upstream/master && git checkout - && git rebase -
or update the project from IntelliJ:

If you are unsure, run: Maven Projects > Reimport all maven projects in IntelliJ (or Ctrl + Shift + A and type Reimport all maven project).
Happy development!
You have to add the following extra VM arguments in order to use these java versions:
--add-opens=java.desktop/sun.awt=ALL-UNNAMED
--add-opens=java.desktop/com.apple.eawt=ALL-UNNAMED --add-opens=java.desktop/sun.awt=ALL-UNNAMED