Release Testing Instructions WooCommerce 4.1
WooCommerce 4.1 includes the following new features:
It also contains bug fixes related to tax calculations that we would like to be tested as well:
This release enables new onboarding experience to 100% of users.
Note that the new onboarding experience is available on sites running WordPress 5.3+.
To test:
- Install WC 4.1 pre-release version
- Go to
yoursite.com/wp-admin/. Depending on whether you have a brand new installation or existing site where you've never run onboarding wizard before, the new onboarding wizard will either be started automatically or there will be a button toRun the Setup Wizardon the Dashboard:
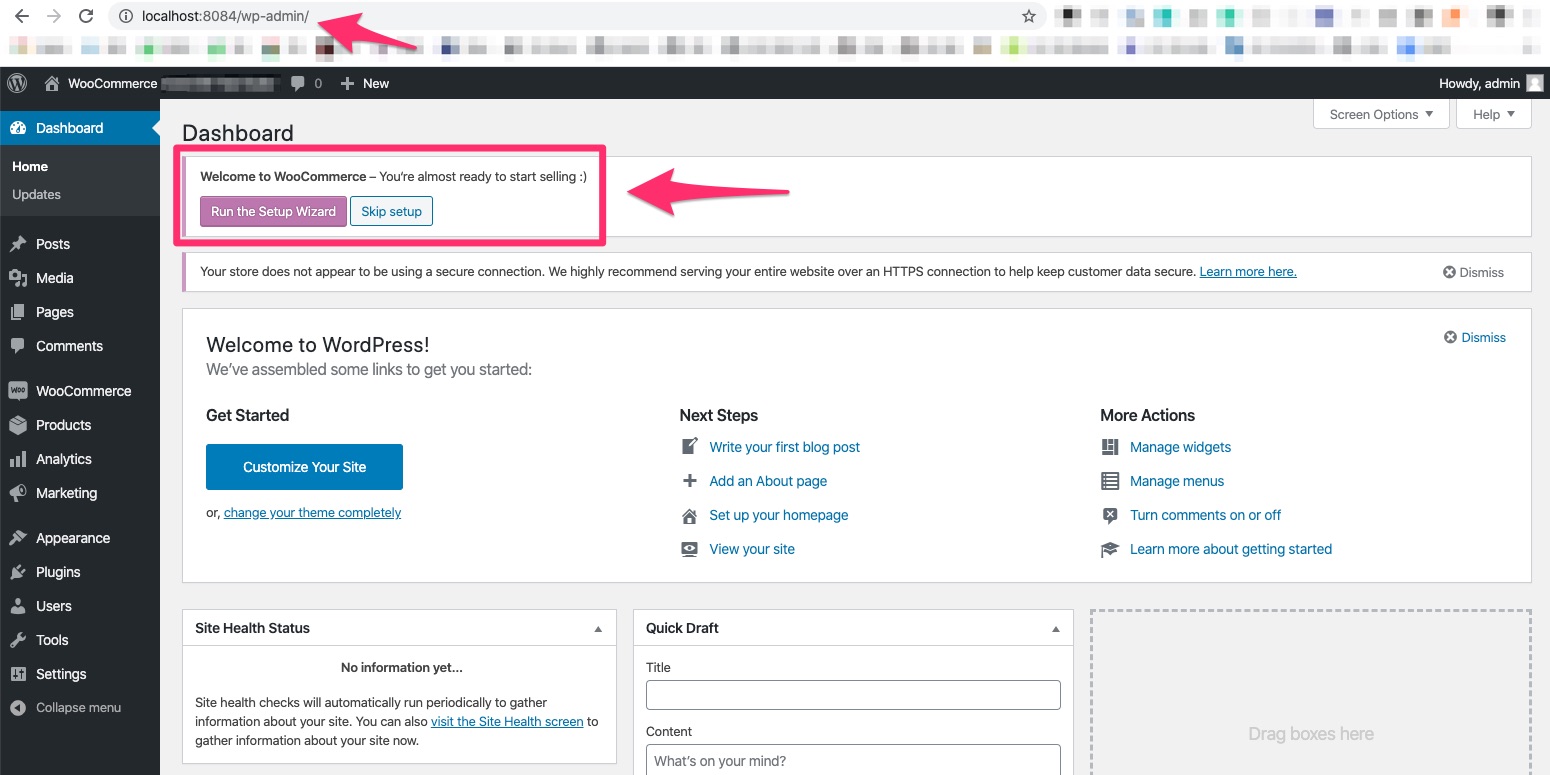
- Click on
Run the Setup Wizard, you should be able to see the following section asking you if you want to proceed. Note that if setup wizard started automatically, you should see the same screen:
- Test
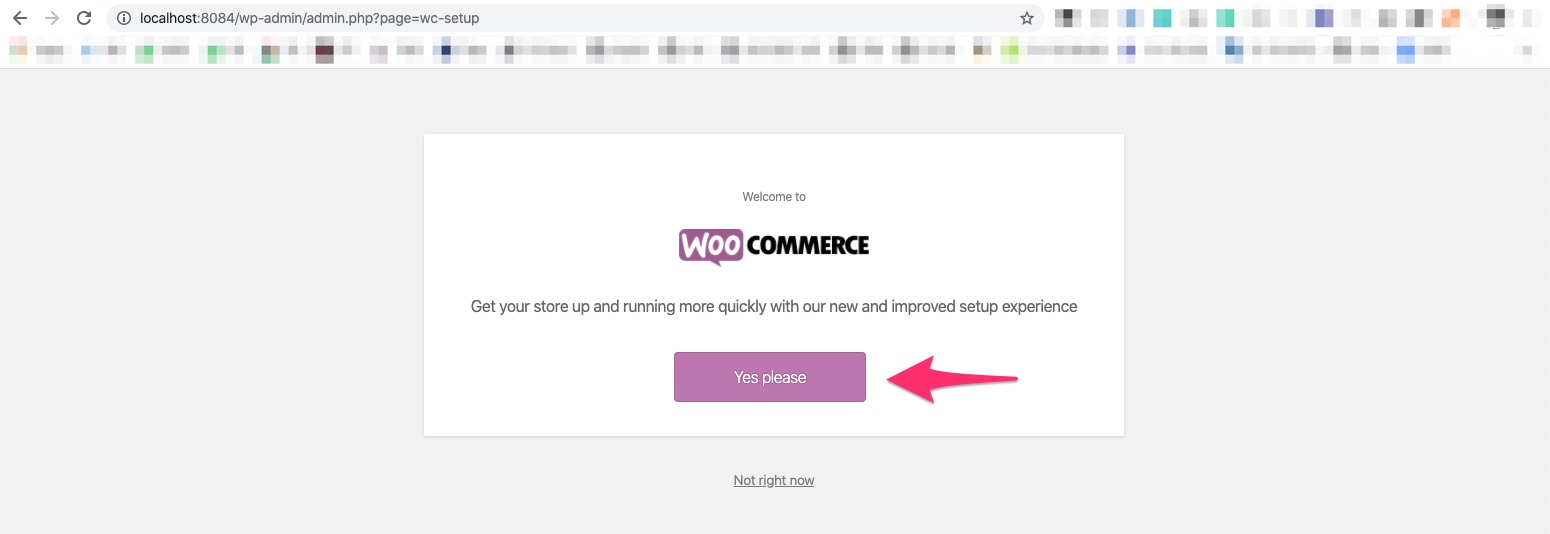
Not right nowlink below theYes pleasebutton and confirm that you can go back to the Dashboard where you started; - Click on
Run the Setup Wizardon the Dashboard once again, and then clickYes please; - You should be redirected to the start of the new onboarding experience:
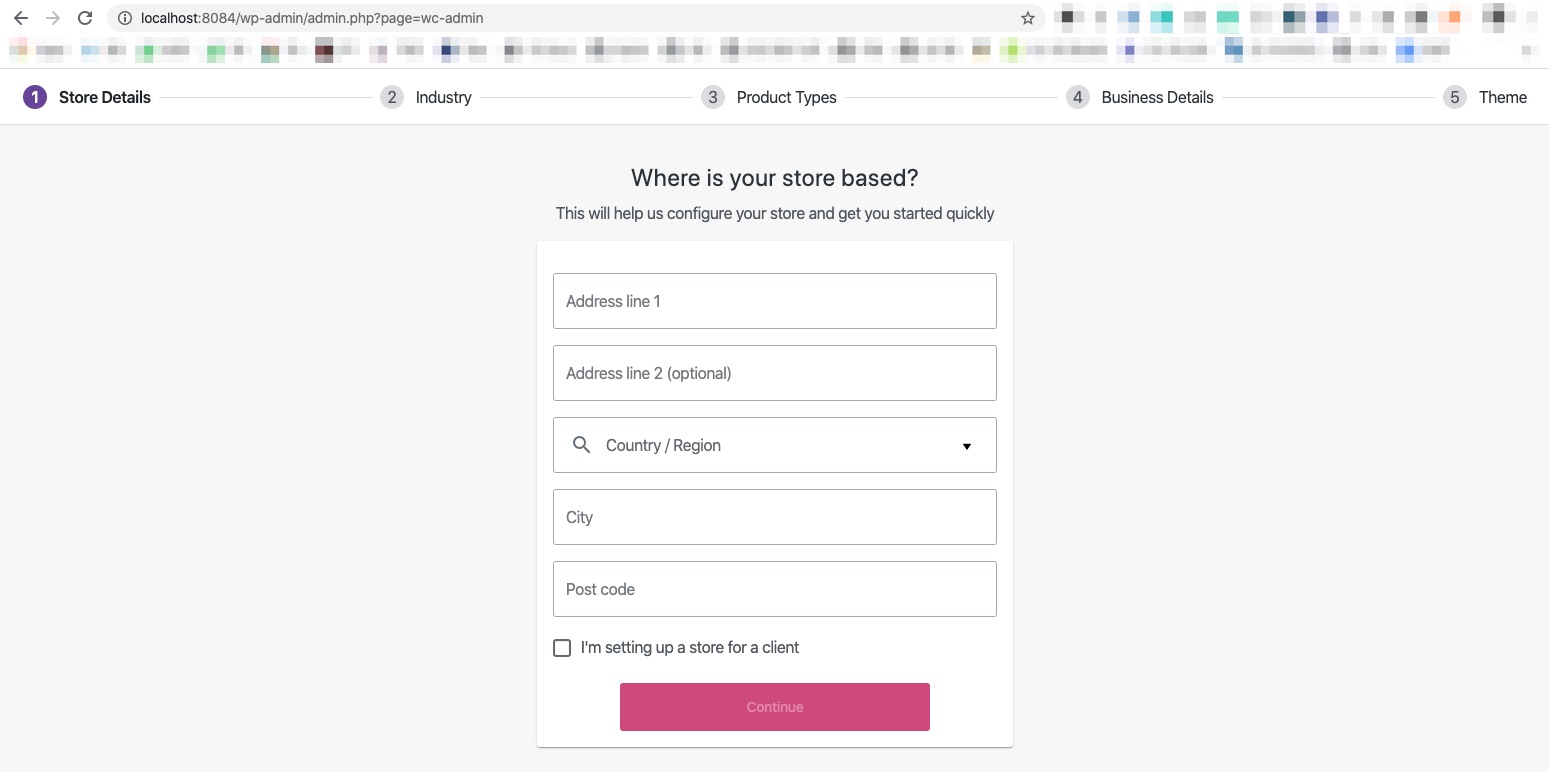
- Go through the new Setup Wizard and make sure you can complete all the steps successfully.
Setup Wizard steps include the following:
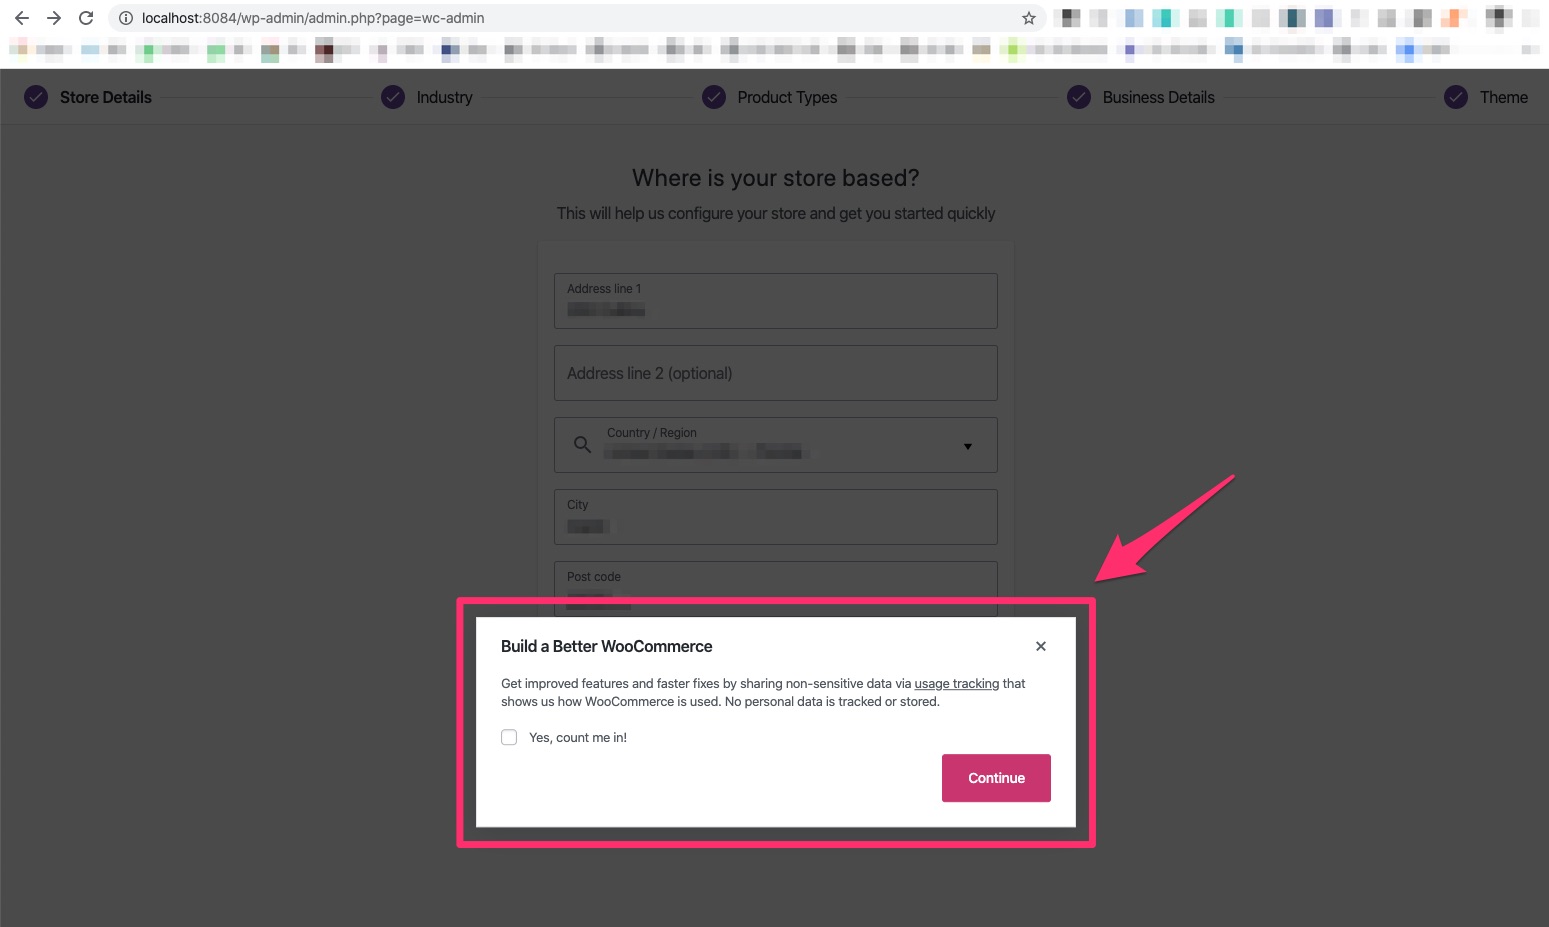
- After filling out store address details and clicking on the
Continuebutton, you should be presented with usage tracking window:
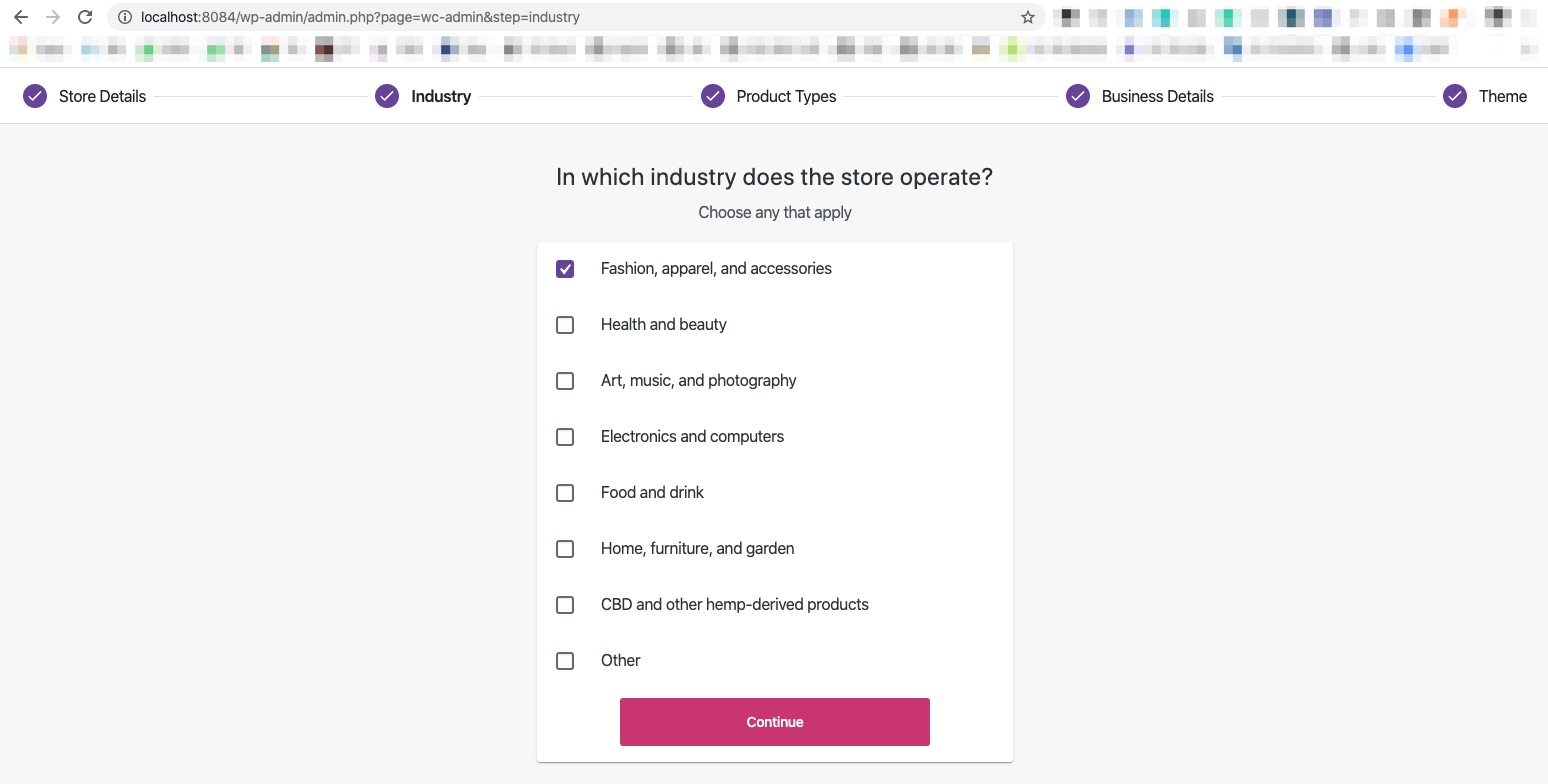
- Next, you should be presented with the store industry selection:
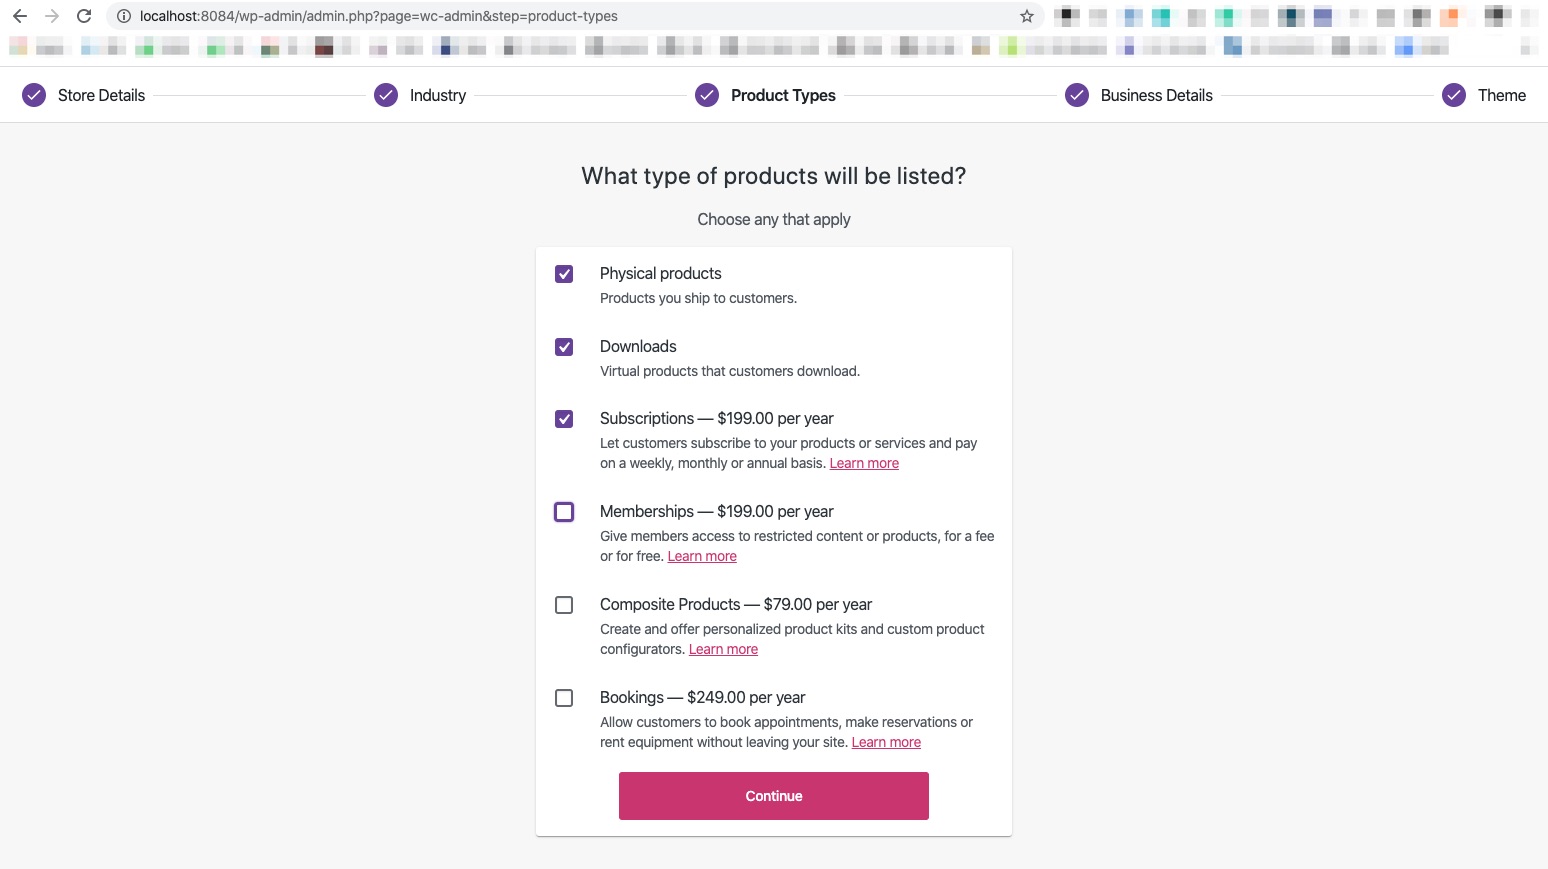
- Next, you should see the product types section:
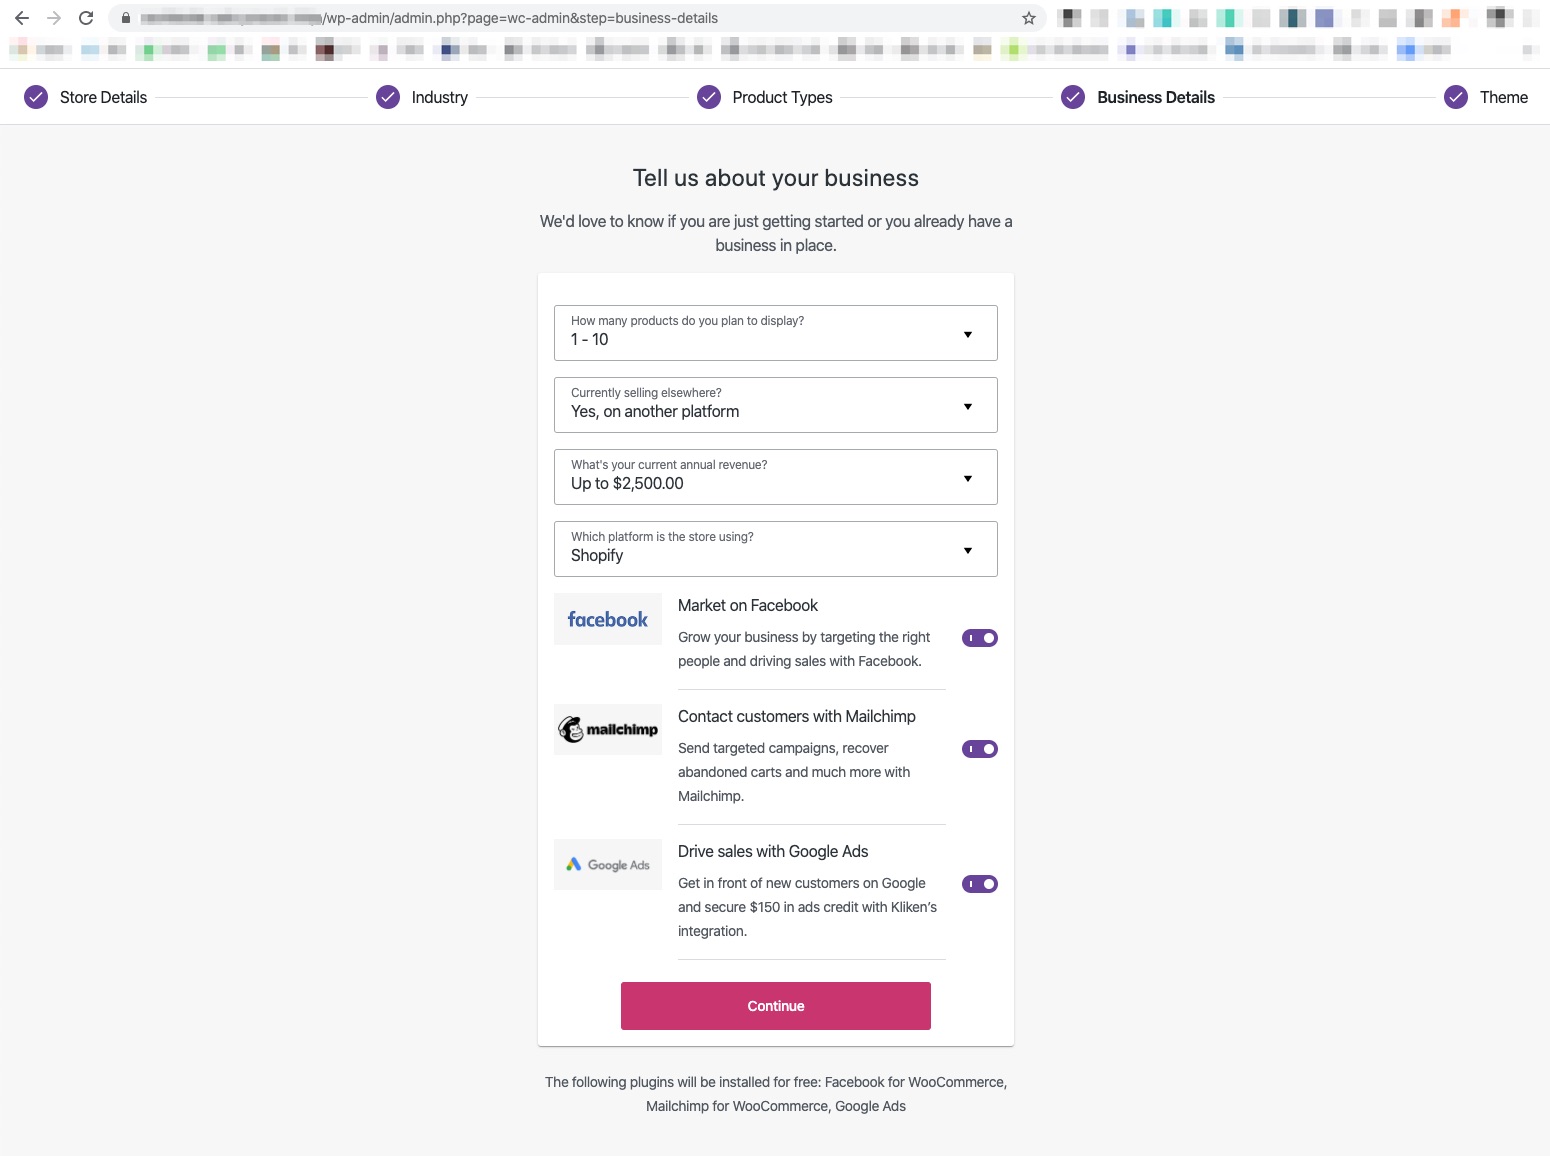
- Next, you should be able to see the business details section. Proceed with installing plugins that are offered:
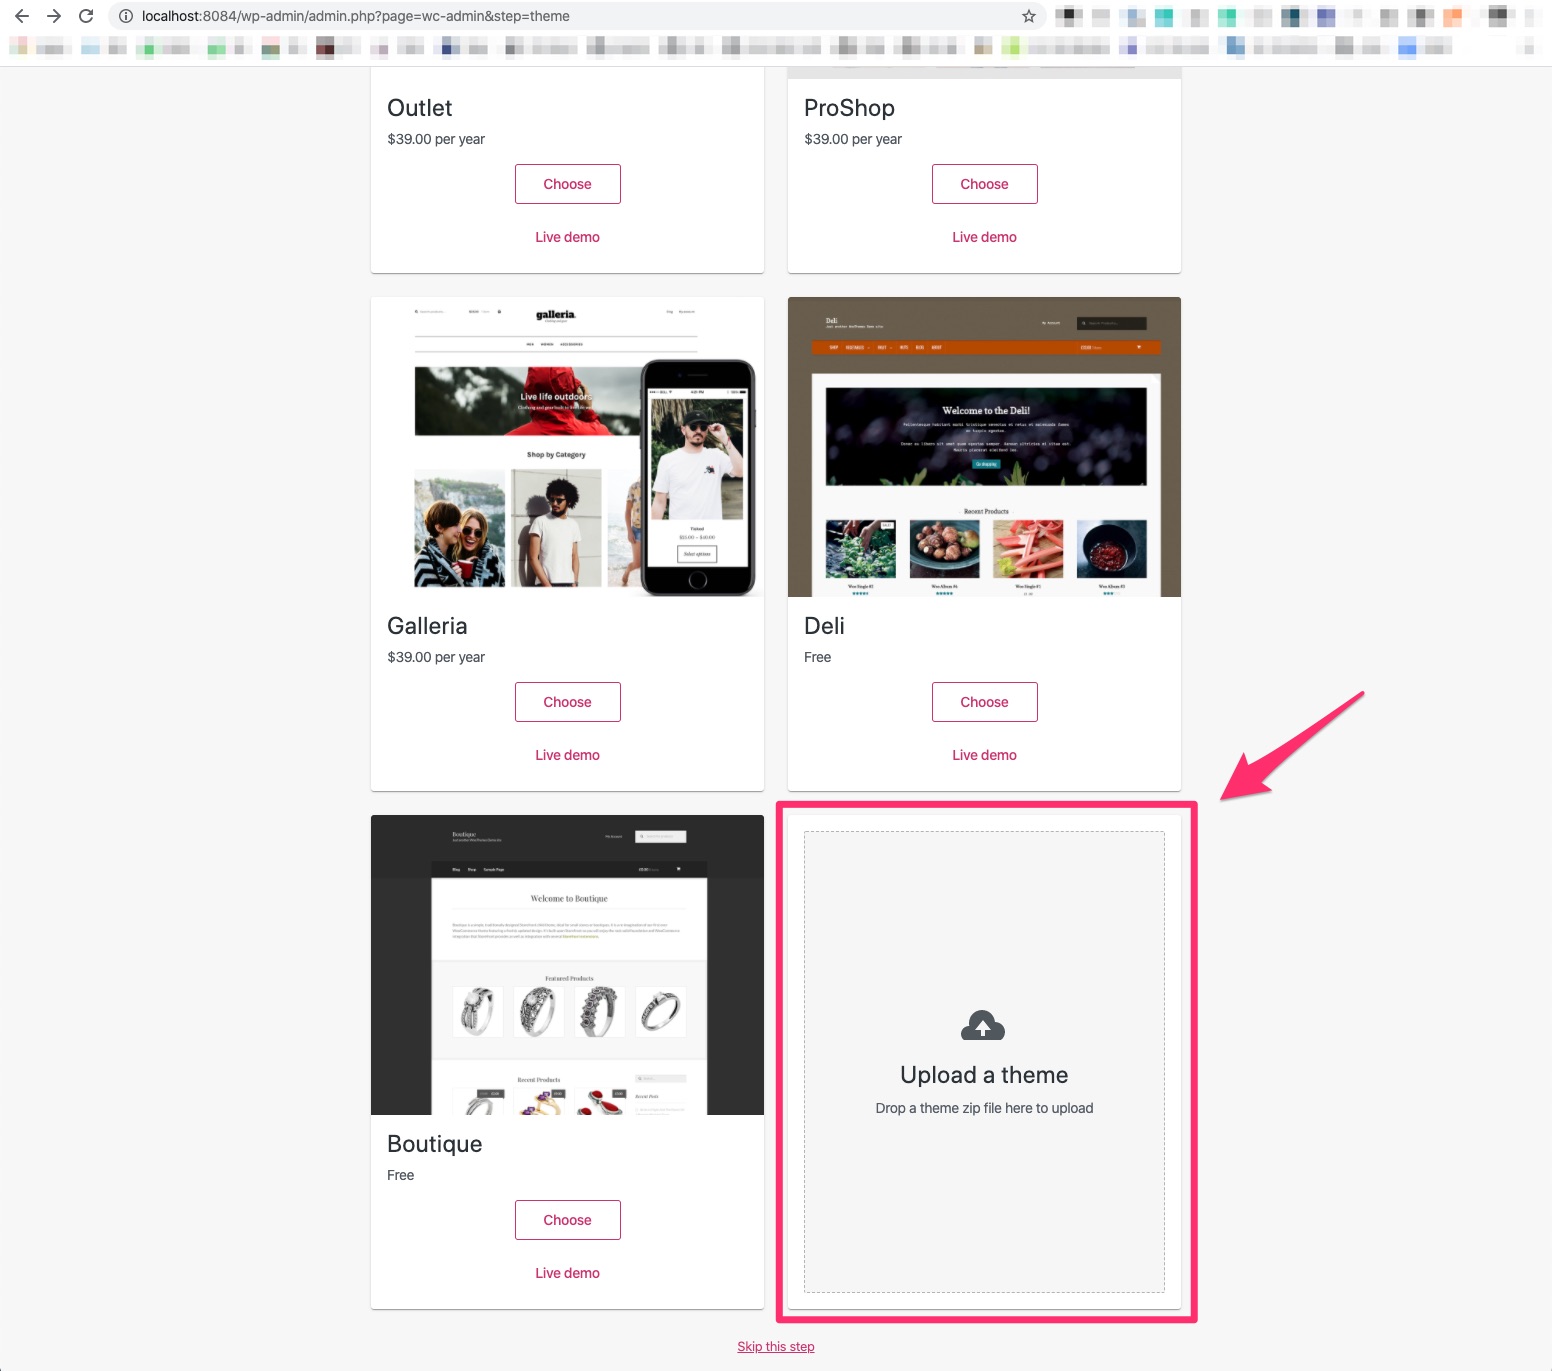
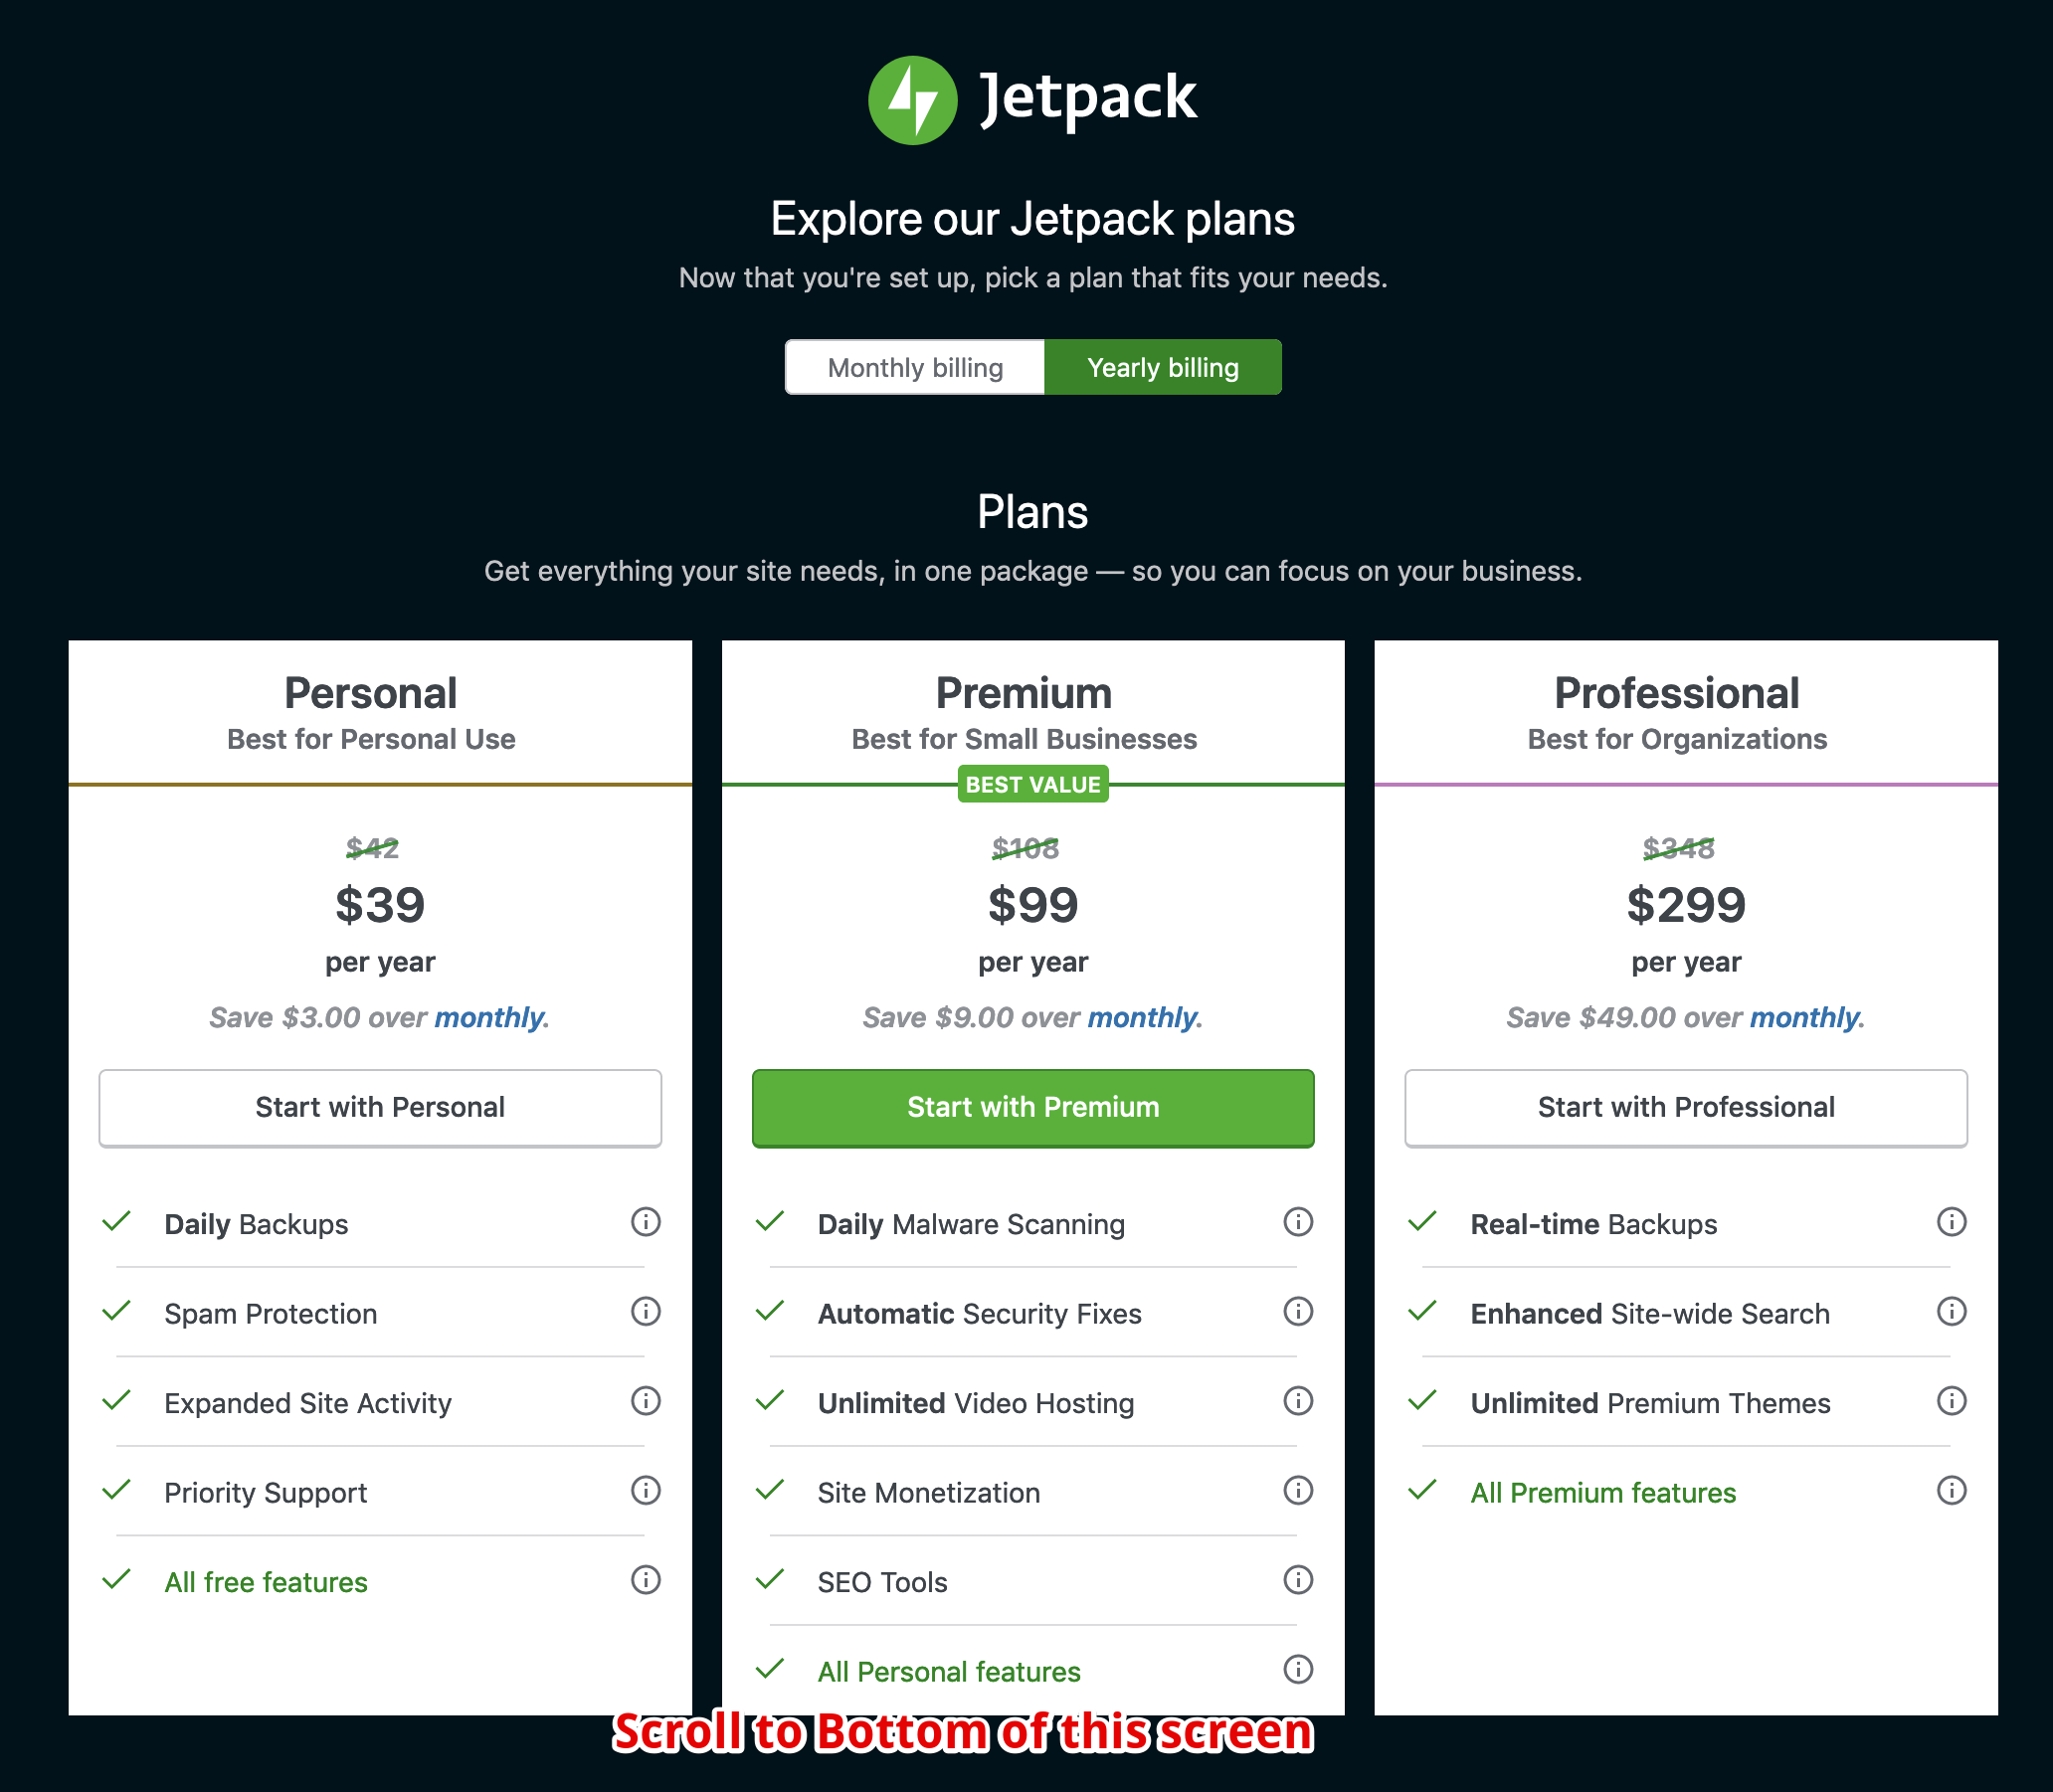
- Next, you should be presented with the themes section:
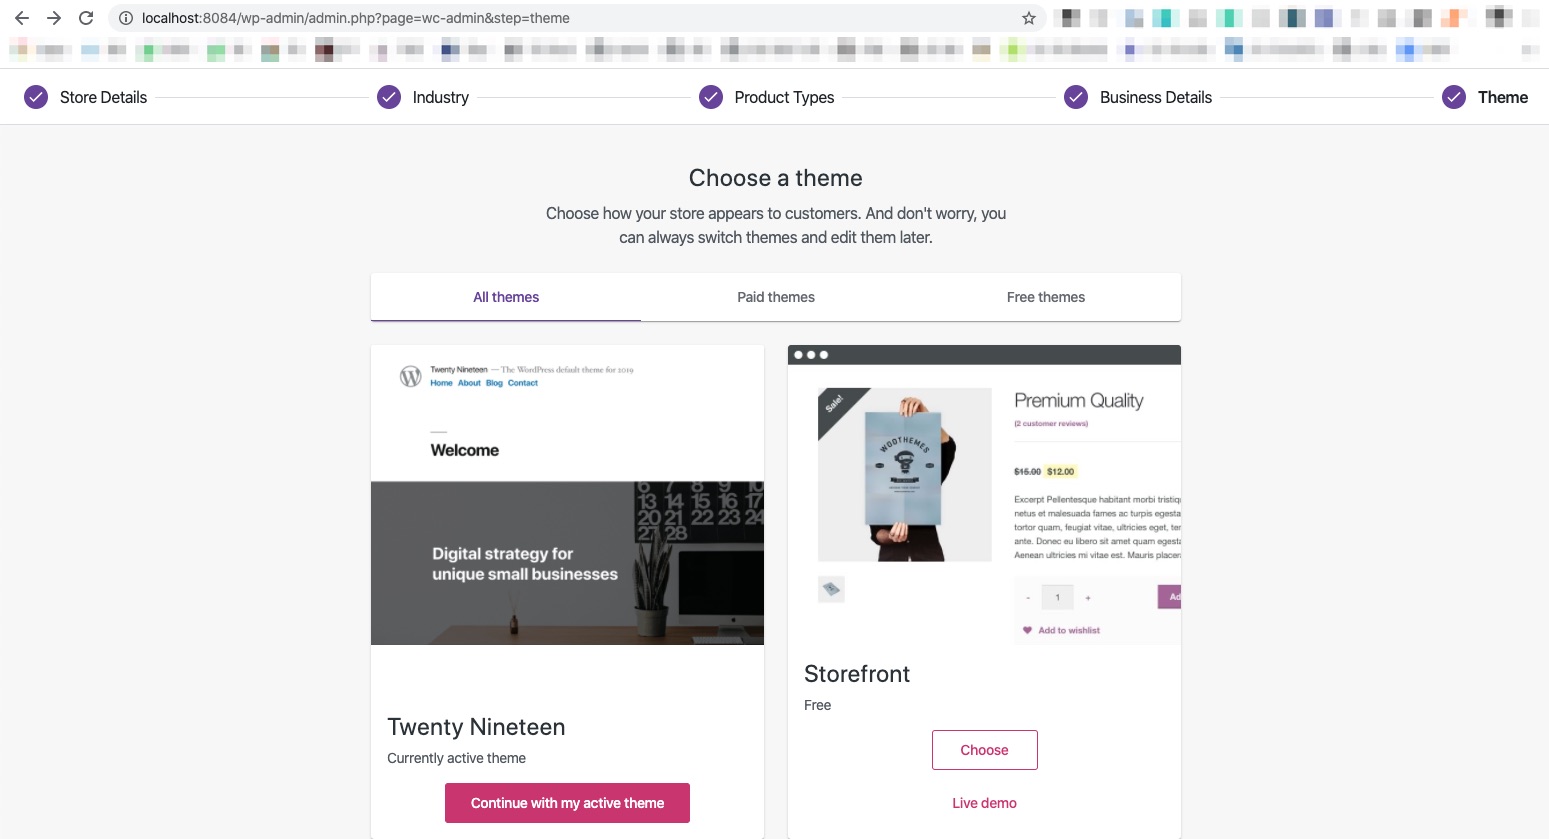
Test the following options here:
- Continue with my active theme
- Choose
Storefronttheme (Free) - Scroll to the bottom of the page and select the option to upload a theme. Download any free theme from the WordPress.org Themes repository (themes already filtered to support WooCommerce) and try to upload the zip file of that theme in the themes section of the onboarding wizard:
In order to try different options, you can select one of the options and make sure you can proceed to the next step. Once you can see the next section, go back (via the browser Click to go back option) to the themes section and select another theme option.
- Next, you should be able to see WooCommerce Services section:
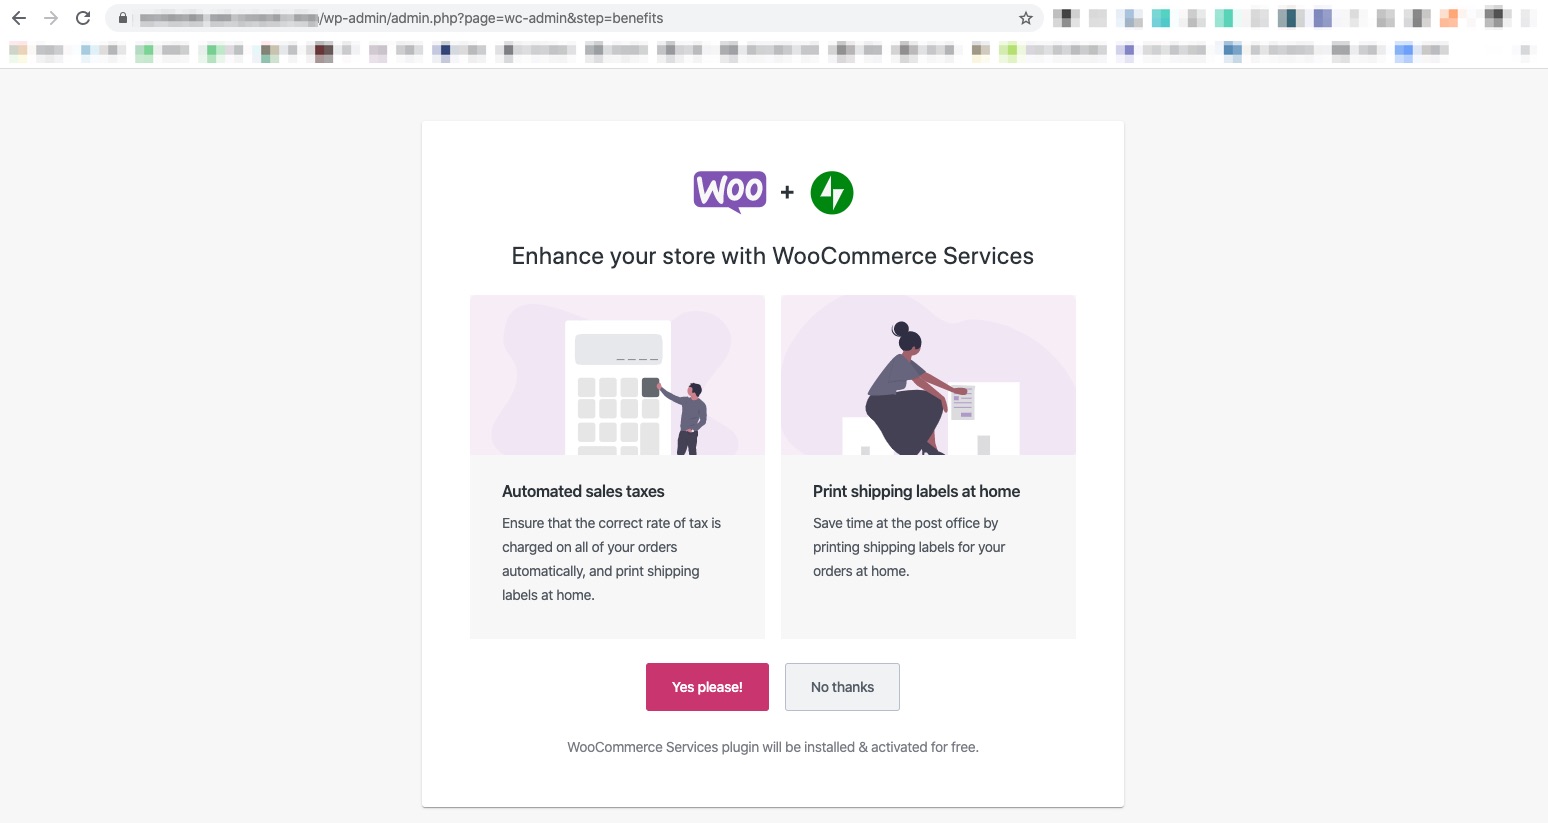
-
Click on
Yes please!button to proceed with the installation of WooCommerce Services; -
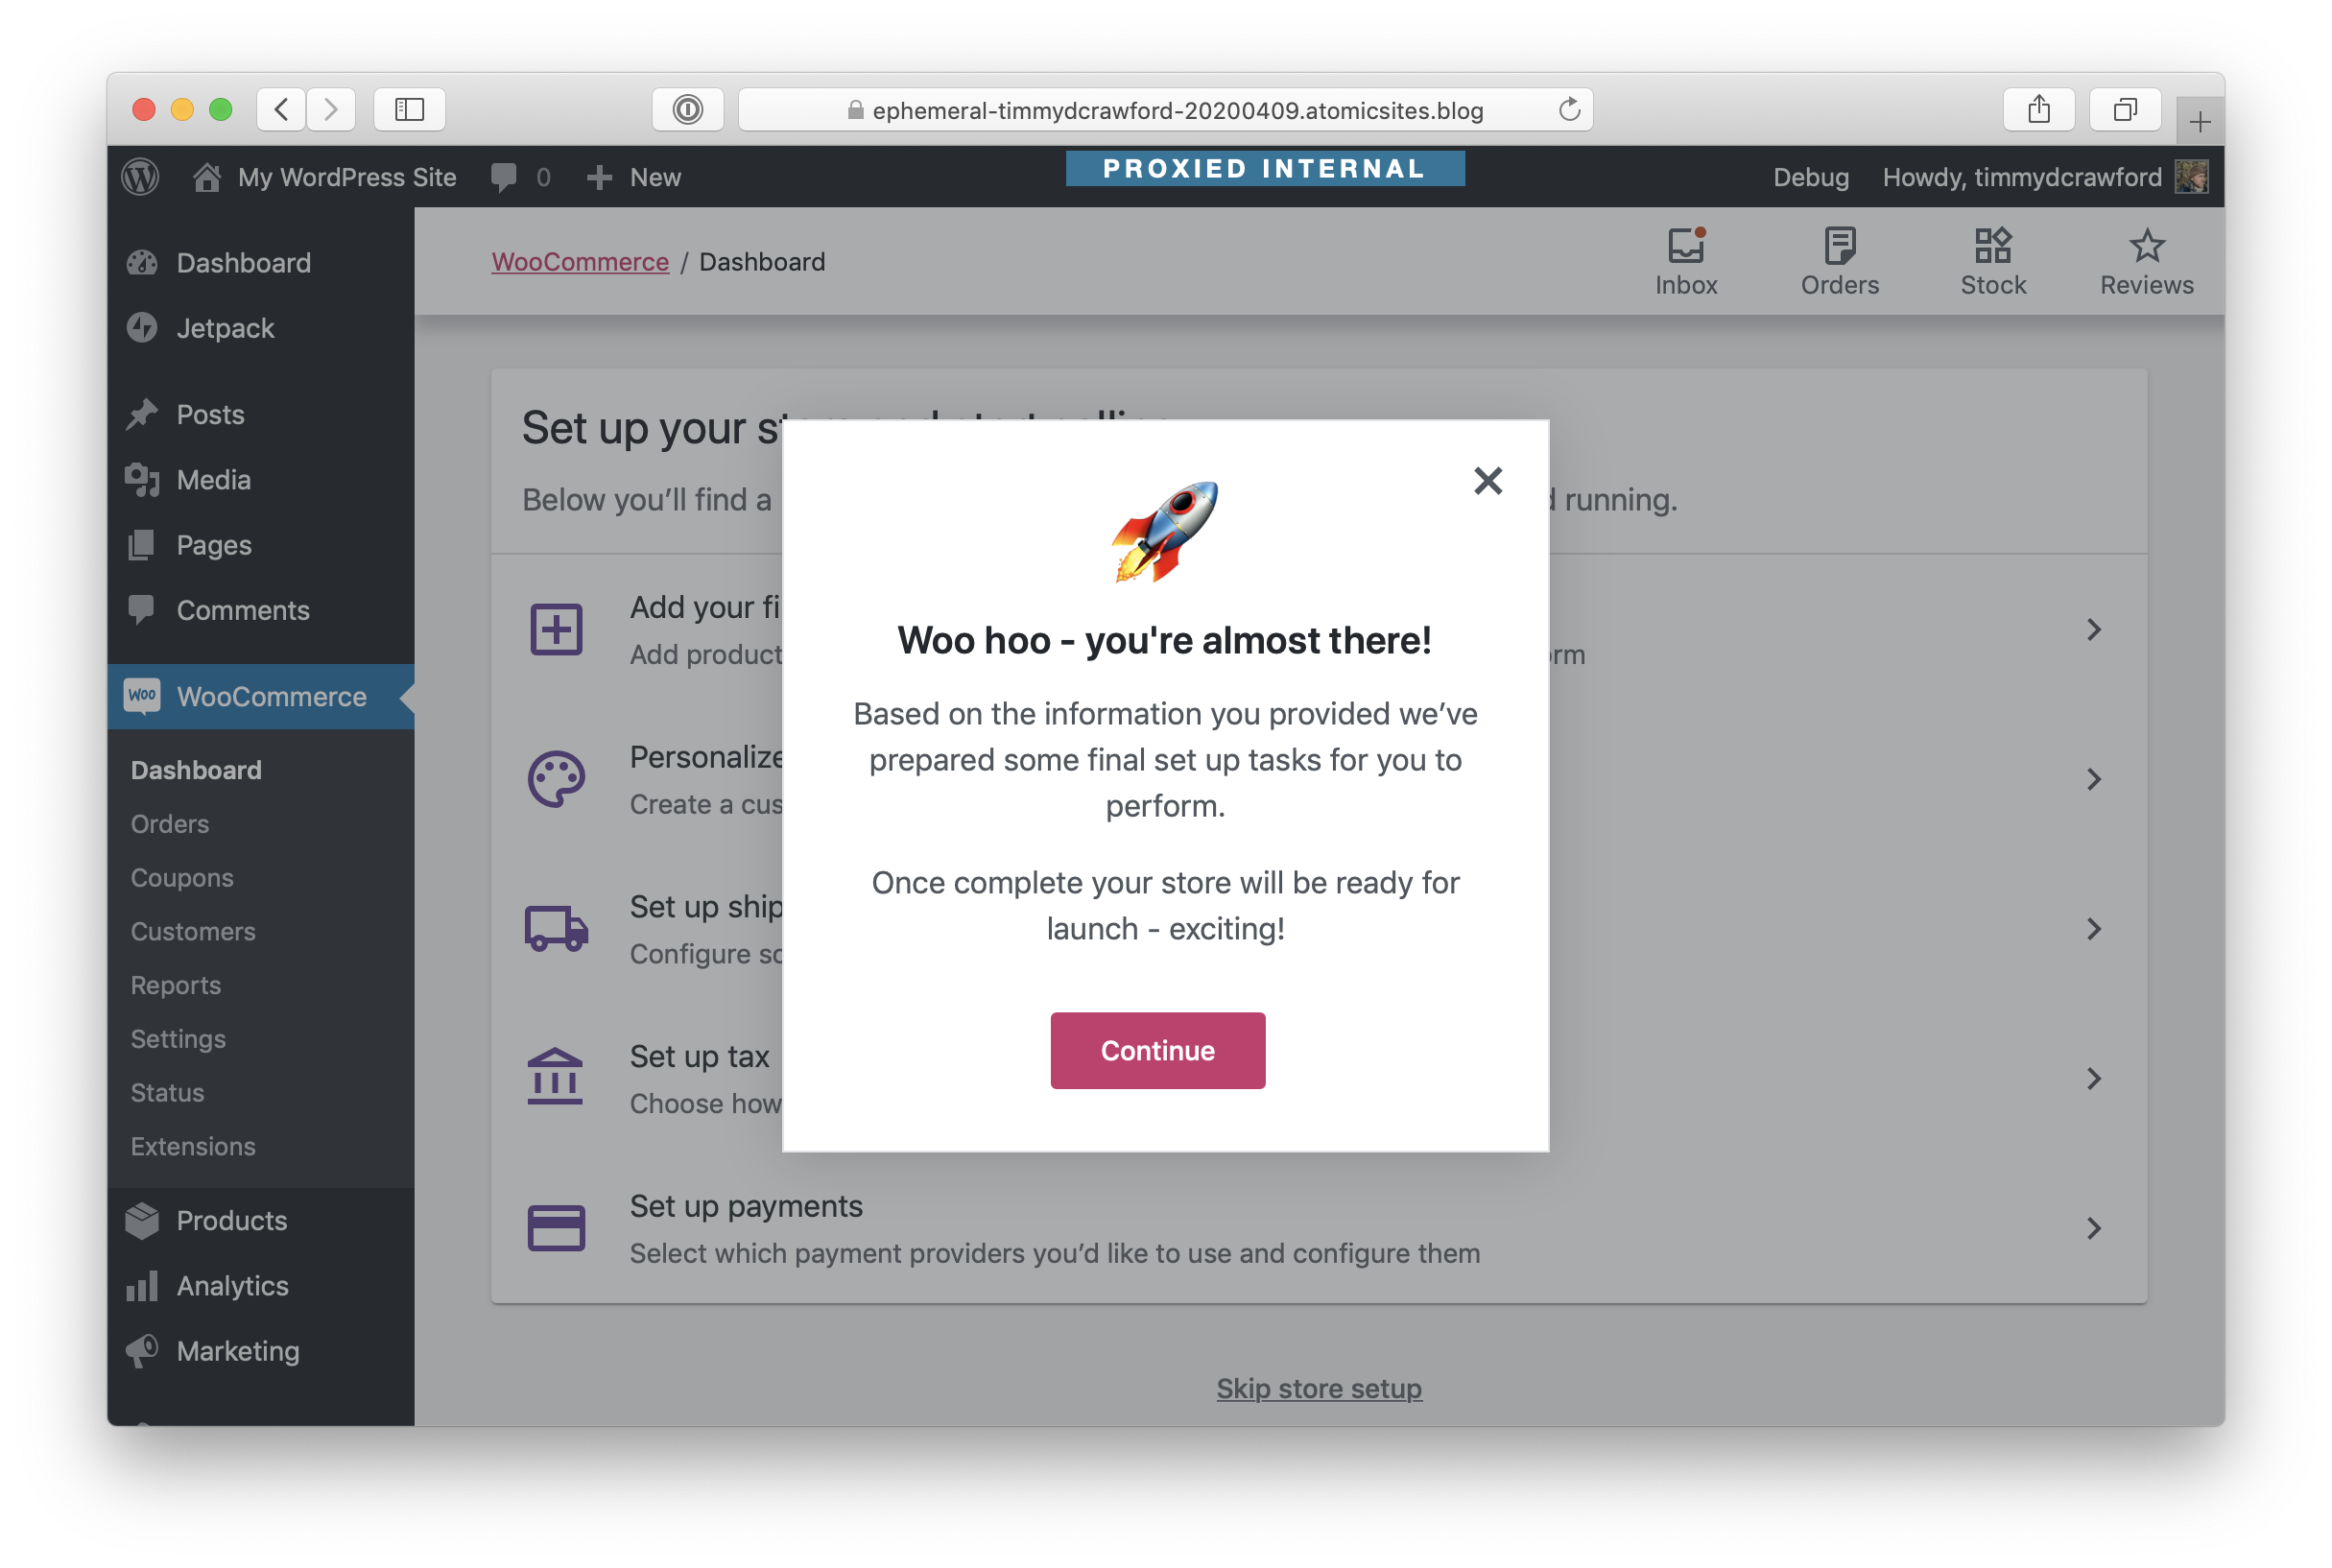
You should then be done with the onboarding and be directed back to the WordPress Dashboard and a task list:
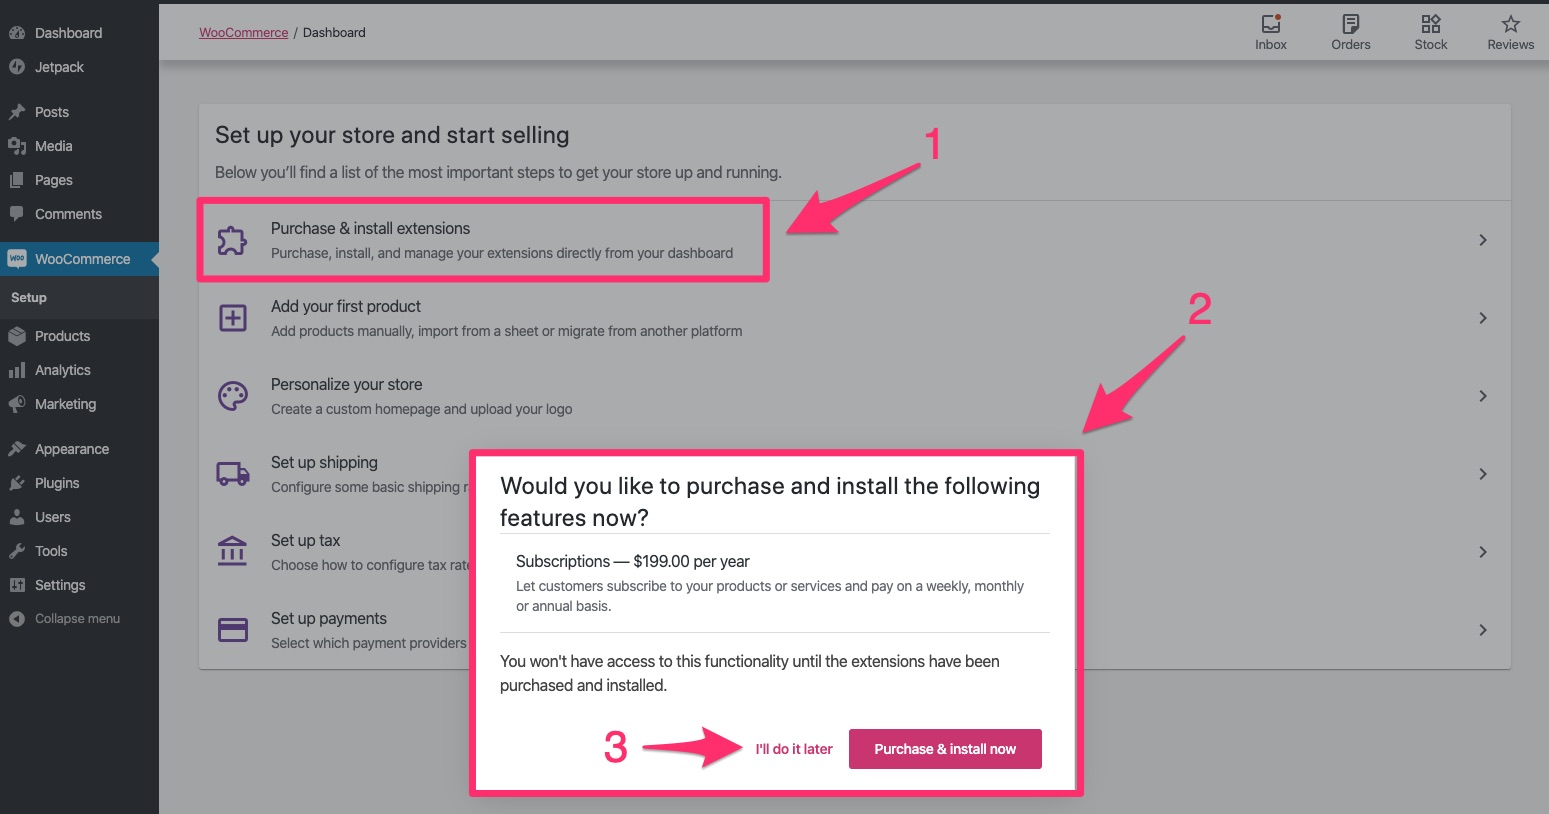
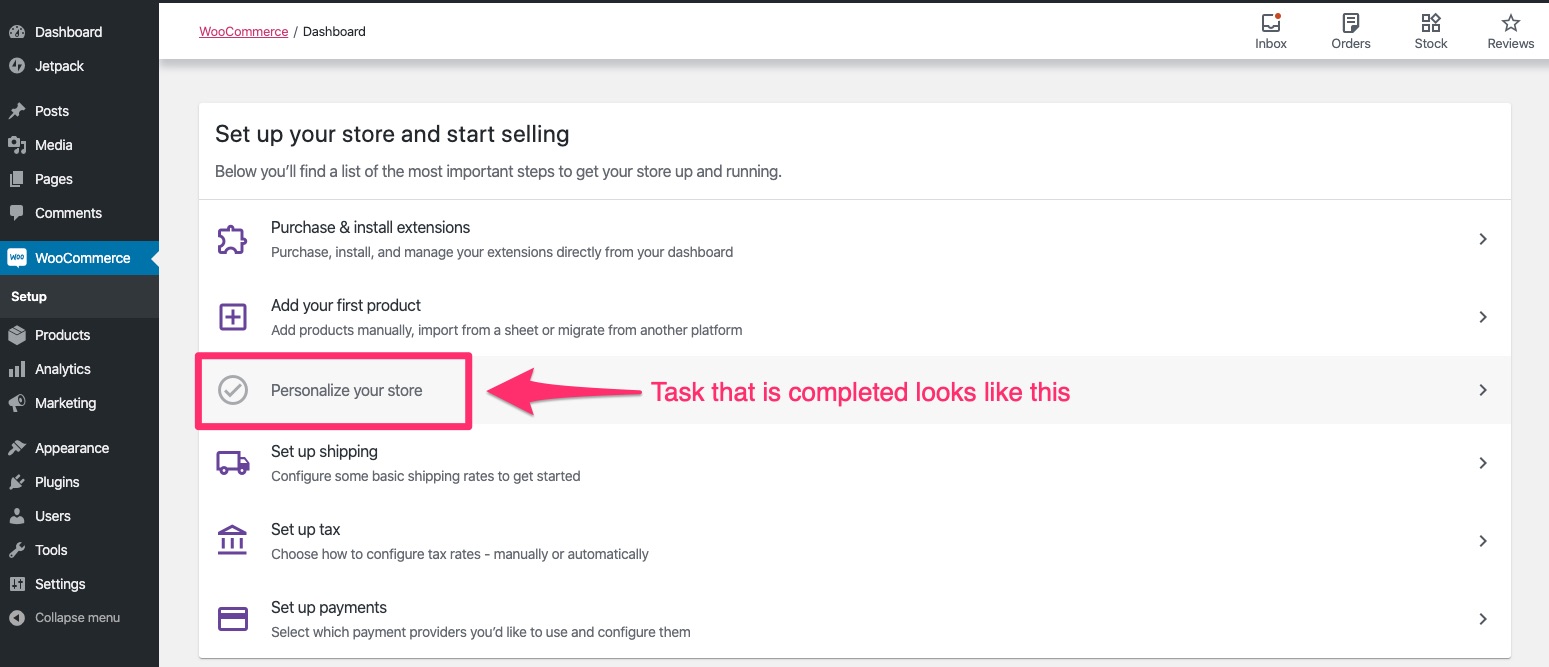
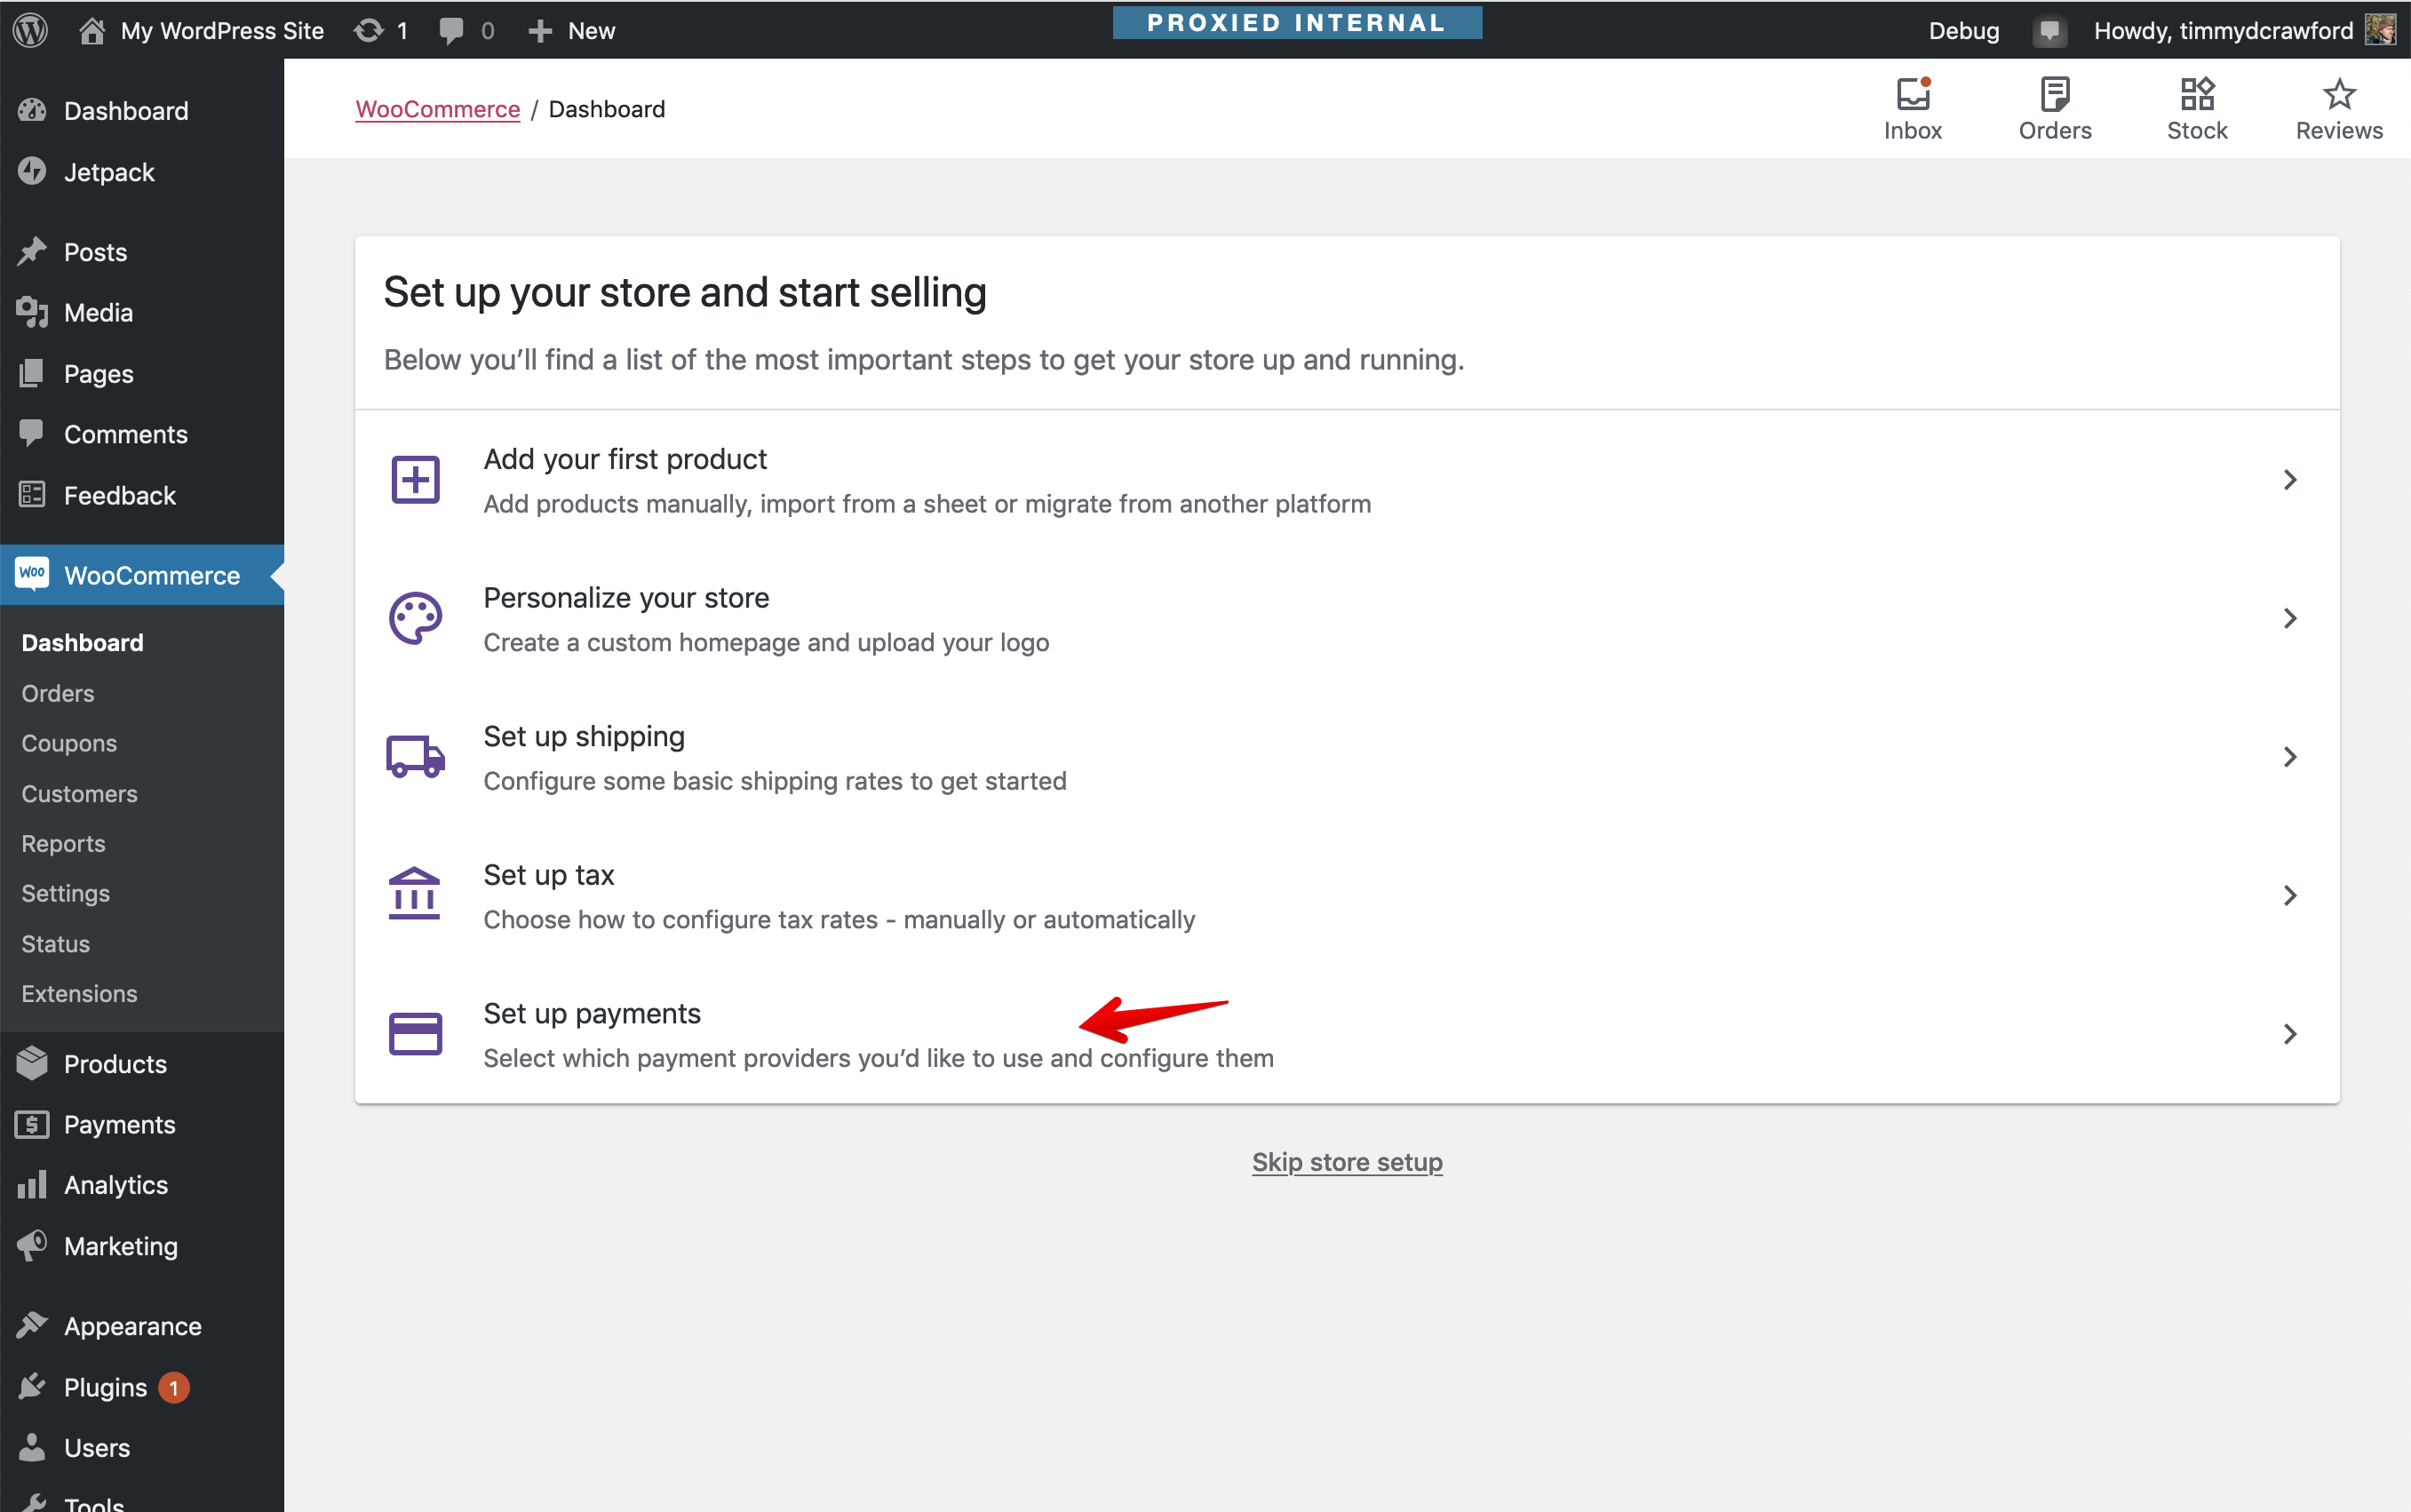
Next, test the task list steps by going through each of them one at a time:
-
Purchase and Install extensionstask - feel free to skip it but make sure the pop-up window appears in order to buy them:
-
Add your first producttask - you will be redirected to sub-task list where you can select to either create product manually, import products or migrate:
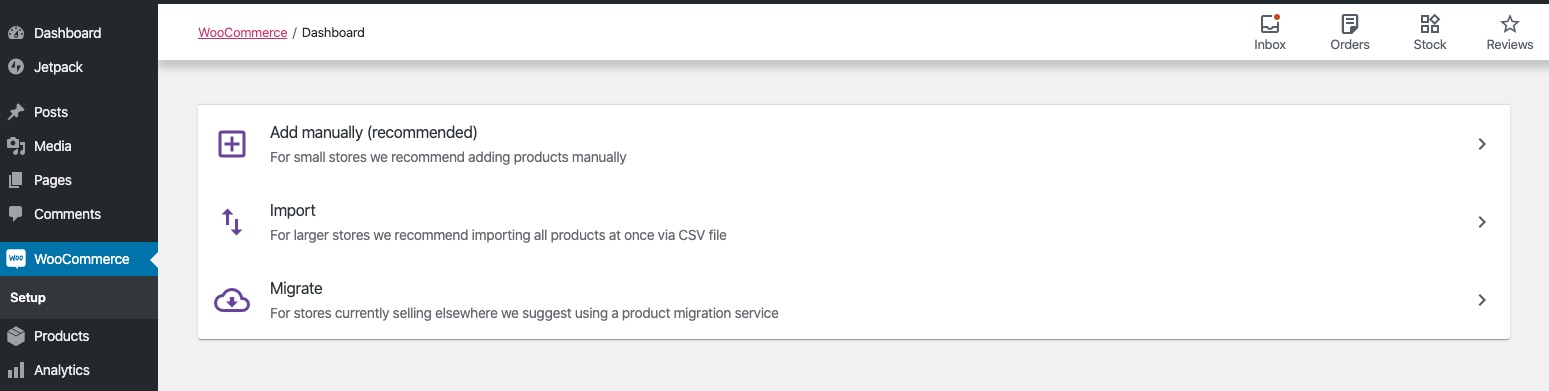
- Test adding product manually and by importing products:
- See the documentation on Adding and Managing Products in order to know what to expect during the steps of creating a product. As a minimum, please test creating
simpleandvariableproducts. - See the documentation on Product CSV Importer and Exporter in order to know what to expect when importing products. You can use this sample CSV file for products import testing.
-
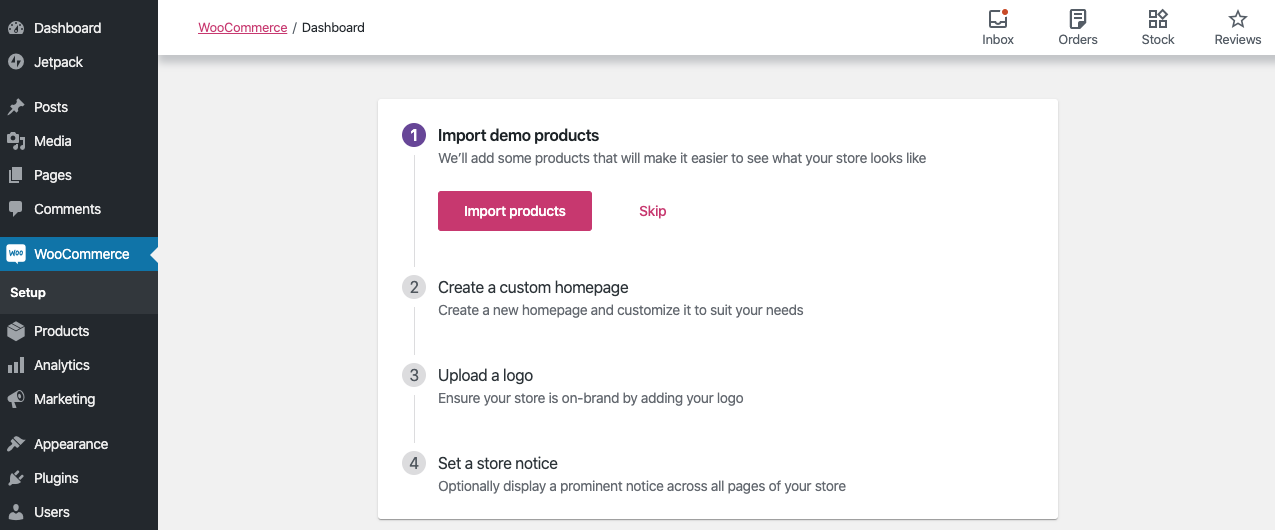
Personalize your storetask - is pretty straightforward. You should see the following upon clicking on it:
Note that once you complete each task, it should be marked as completed on the Task List:
-
Set up shippingtask - upon clicking on the task, you should see the following:
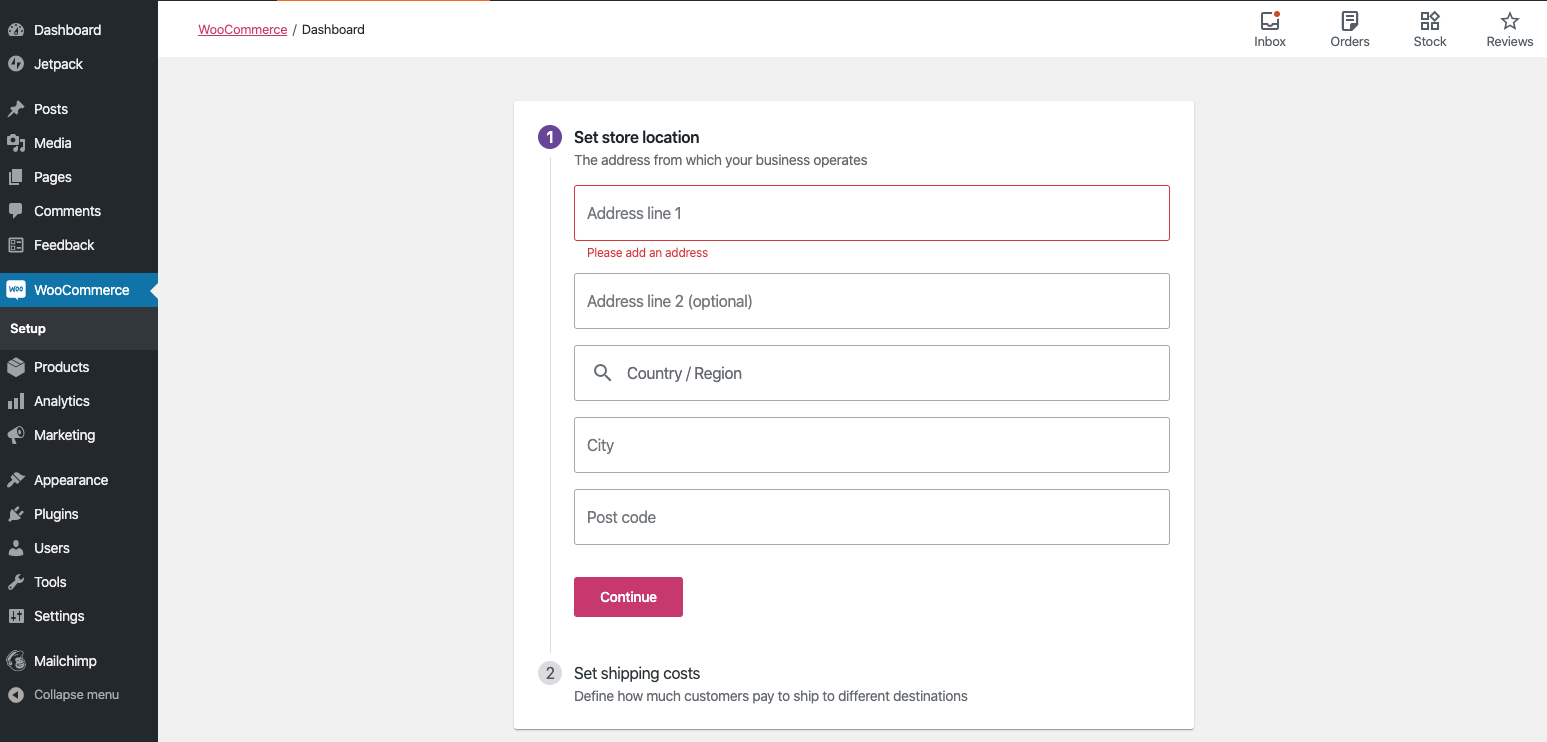
Proceed with filling out the details of the store location.
Note that it is possible that you encounter a blank screen when clicking on the shipping task. Try waiting for a few minutes and refresh the page - the section seems to eventually come up. We are aware of this issue in beta and tracking it here.
If the shipping section doesn't come up, please test setting up shipping as described in Setting up Shipping Zones documentation. In order to get to the settings part of WooCommerce, add the following to your site's URL: wp-admin/admin.php?page=wc-settings. The final URL should look as follows: yoursite.com/wp-admin/admin.php?page=wc-settings
-
Set up taxtask - please test it. You should see the following upon clicking on it:
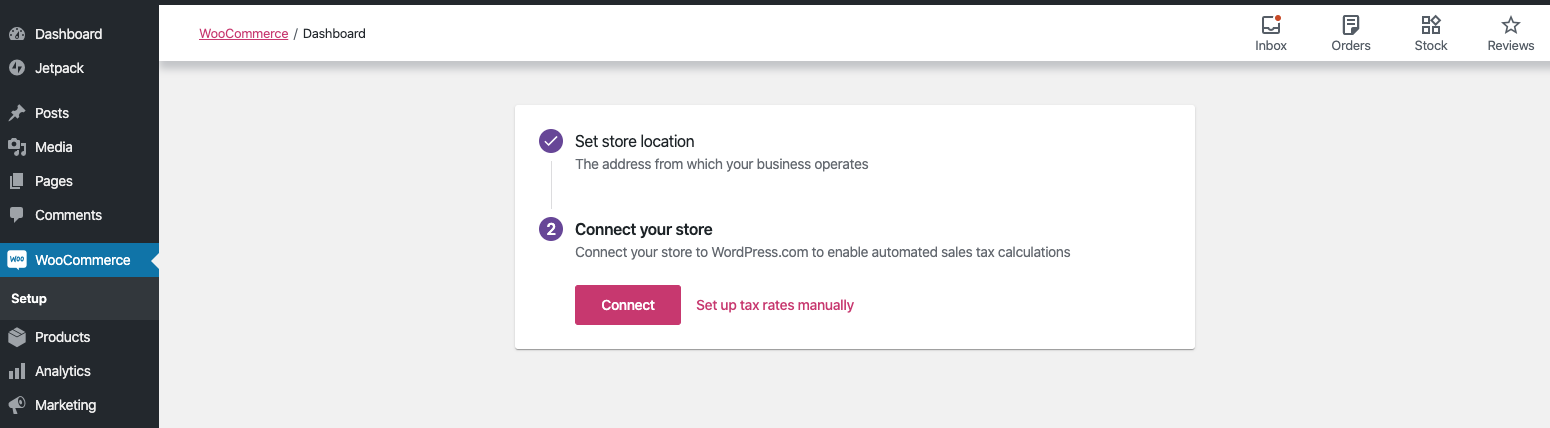
Test both enabling automated sales tax calculations and manually setting up taxes:
- Automated tax calculations - click on the
Connectbutton to proceed. You will need WordPress.com account in order to proceed here:
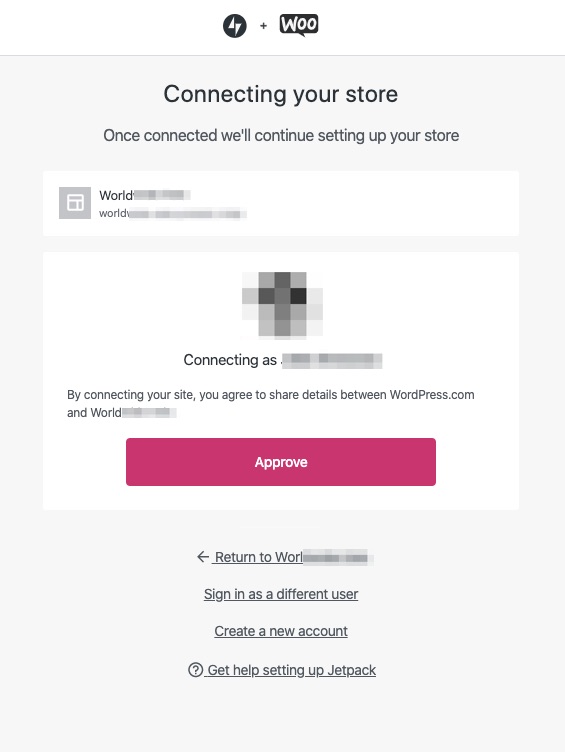
You can use your existing WordPress.com account or create a new one by selecting an option to create a new account.
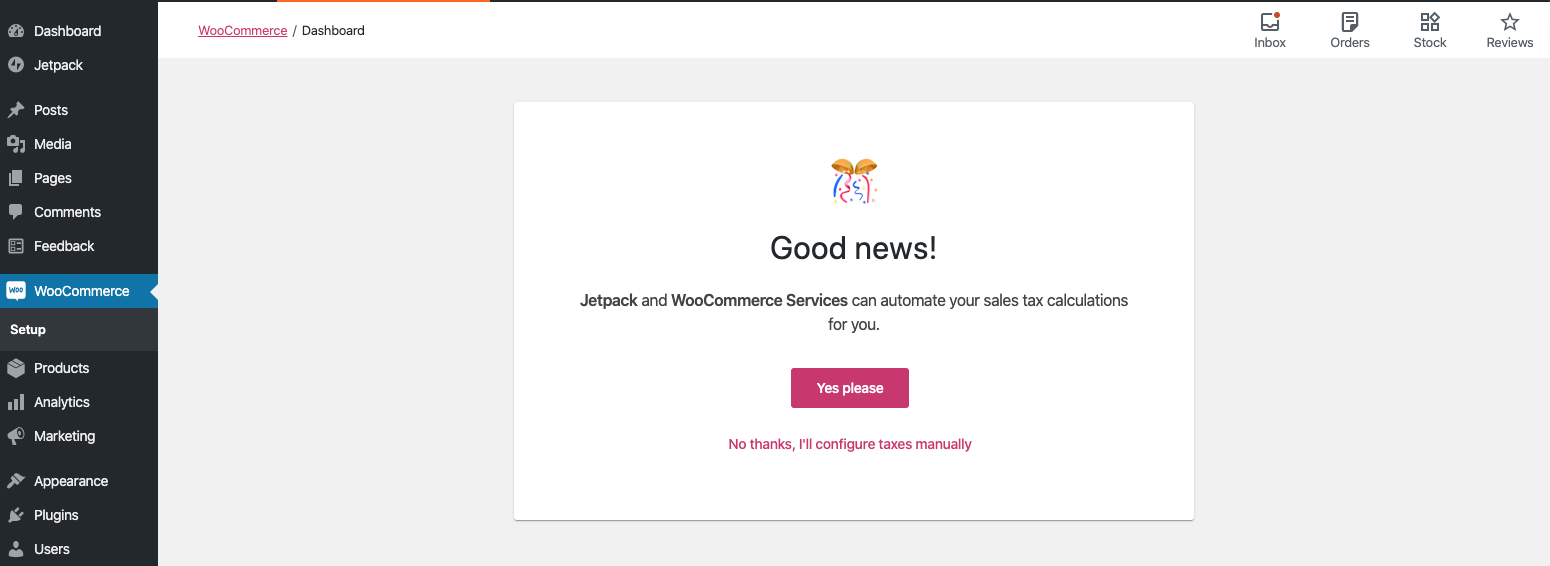
If you successfully connected WordPress.com account, you should see the following:
- Manually set up tax - click on
Set up tax rates manually. The documentation on how to set up tax manually can be found in Setting up Taxes in WooCommerce.
-
Set up paymenttask - you can click on it but skip setting it up by clicking on theDonebutton.
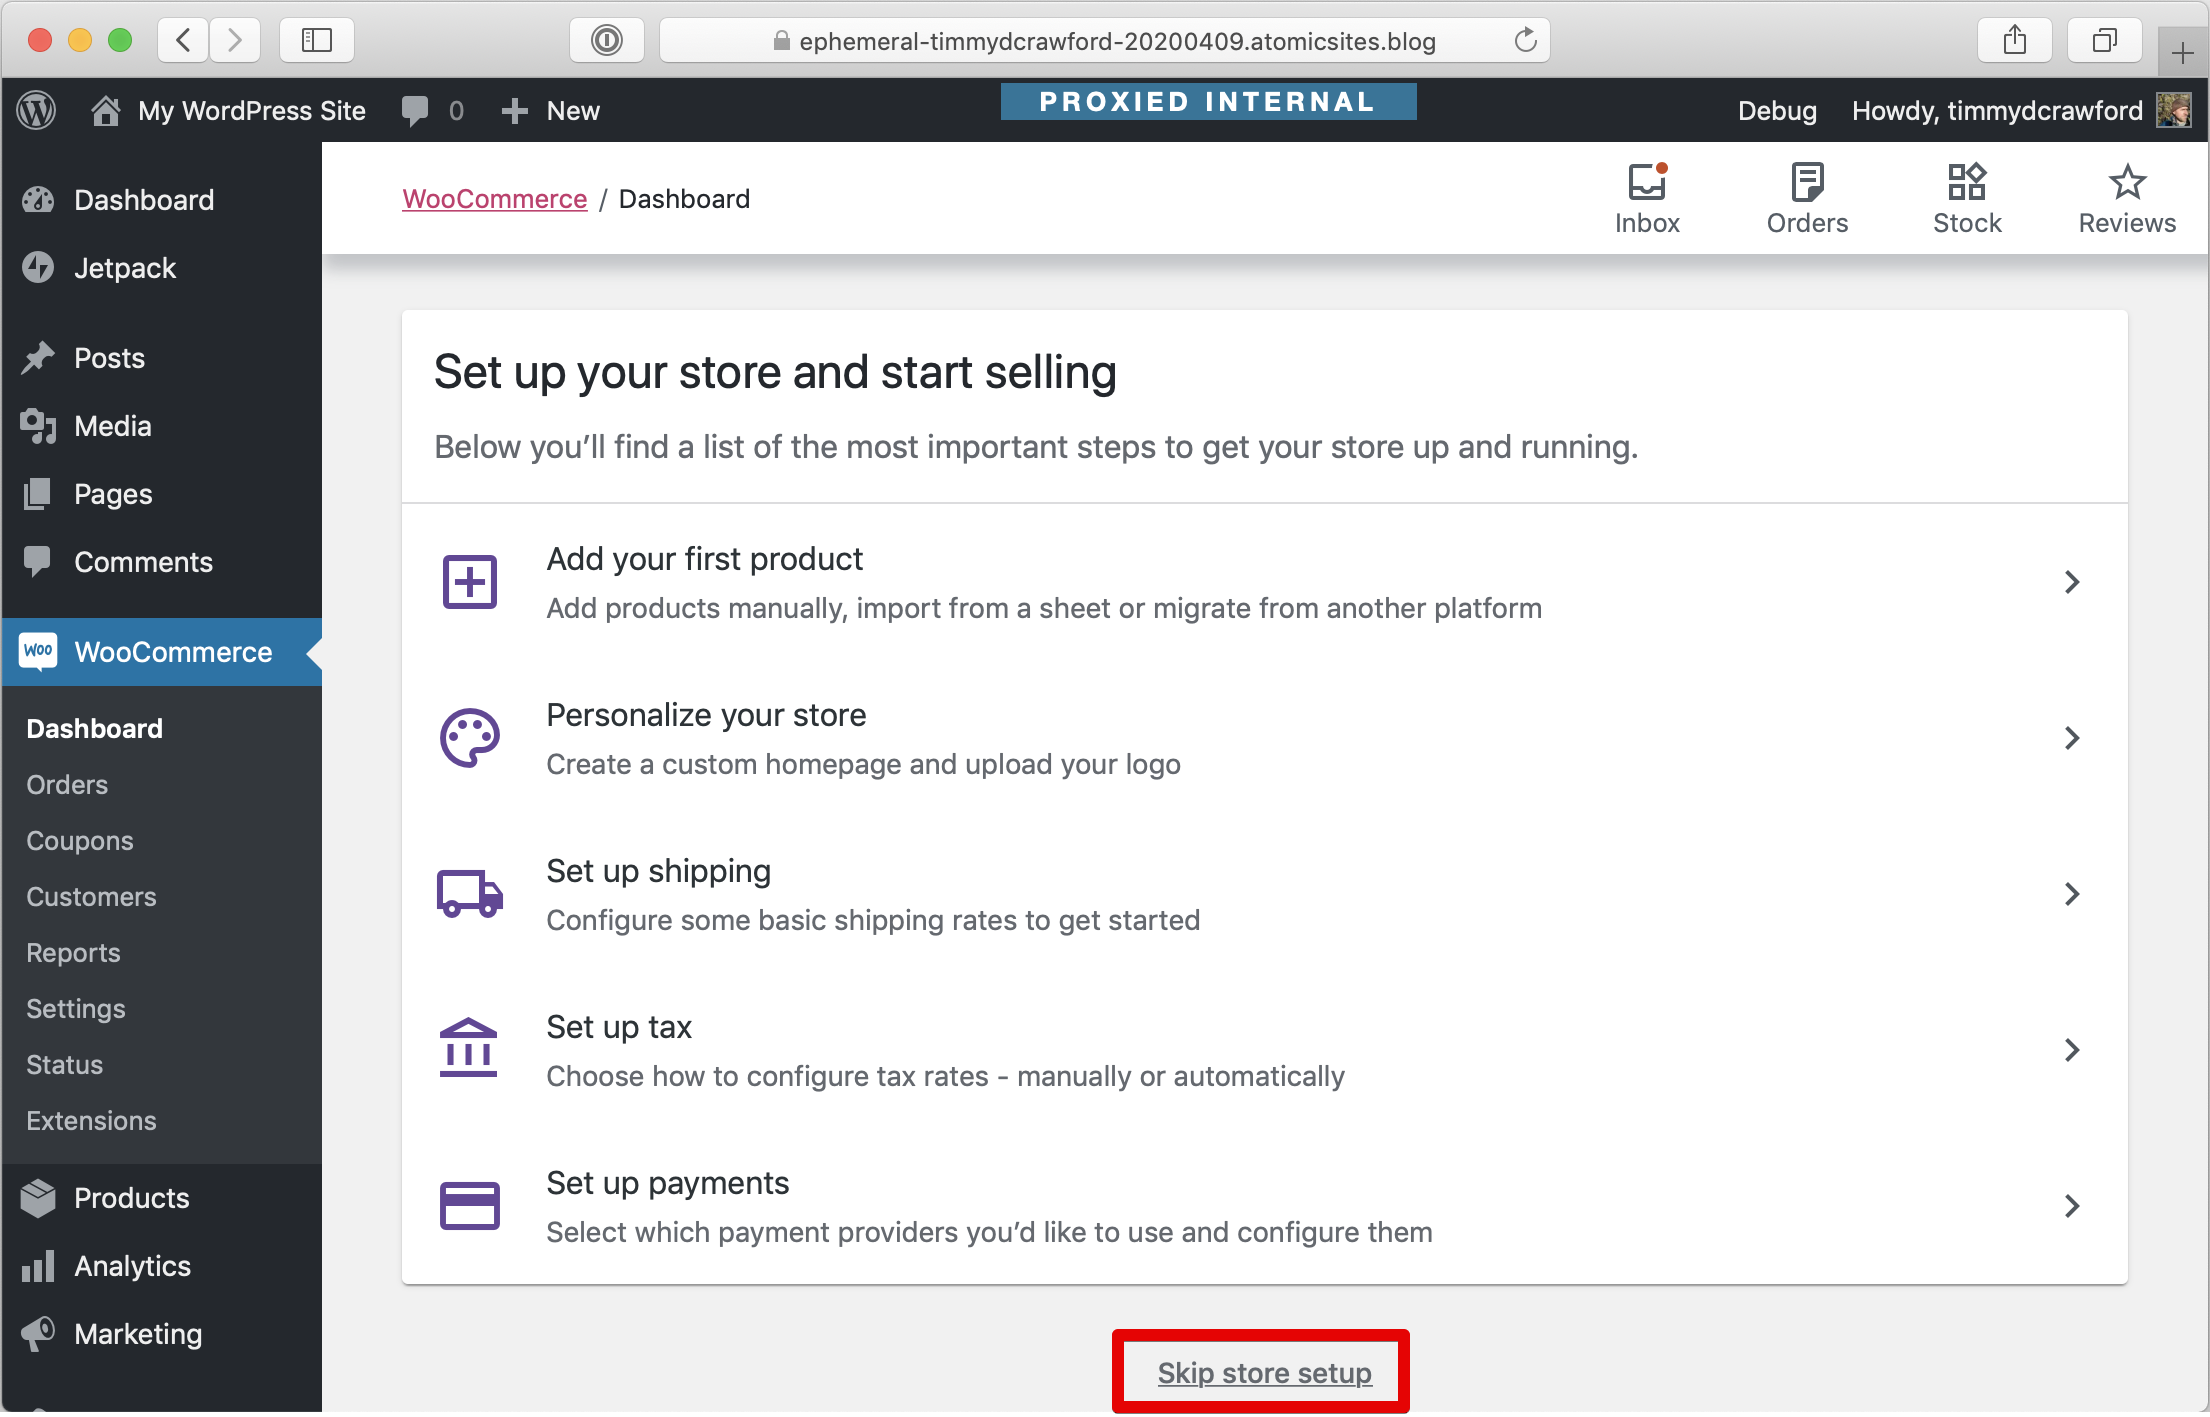
If you are not able to complete some of the tasks but need to move forward to access WooCommerce's settings, click on Skip store setup option:
The onboarding updates in 4.1 also includes a special new flow for stores that sell CBD and Hemp-derived products. This flow is specific to stores located within the United States.
- Load the Onboarding Wizard by visiting
wp-admin?page=wc-setup - You should see the following screen:
- Click "Yes Please".
- On the next page, be sure to enter a United States based address:
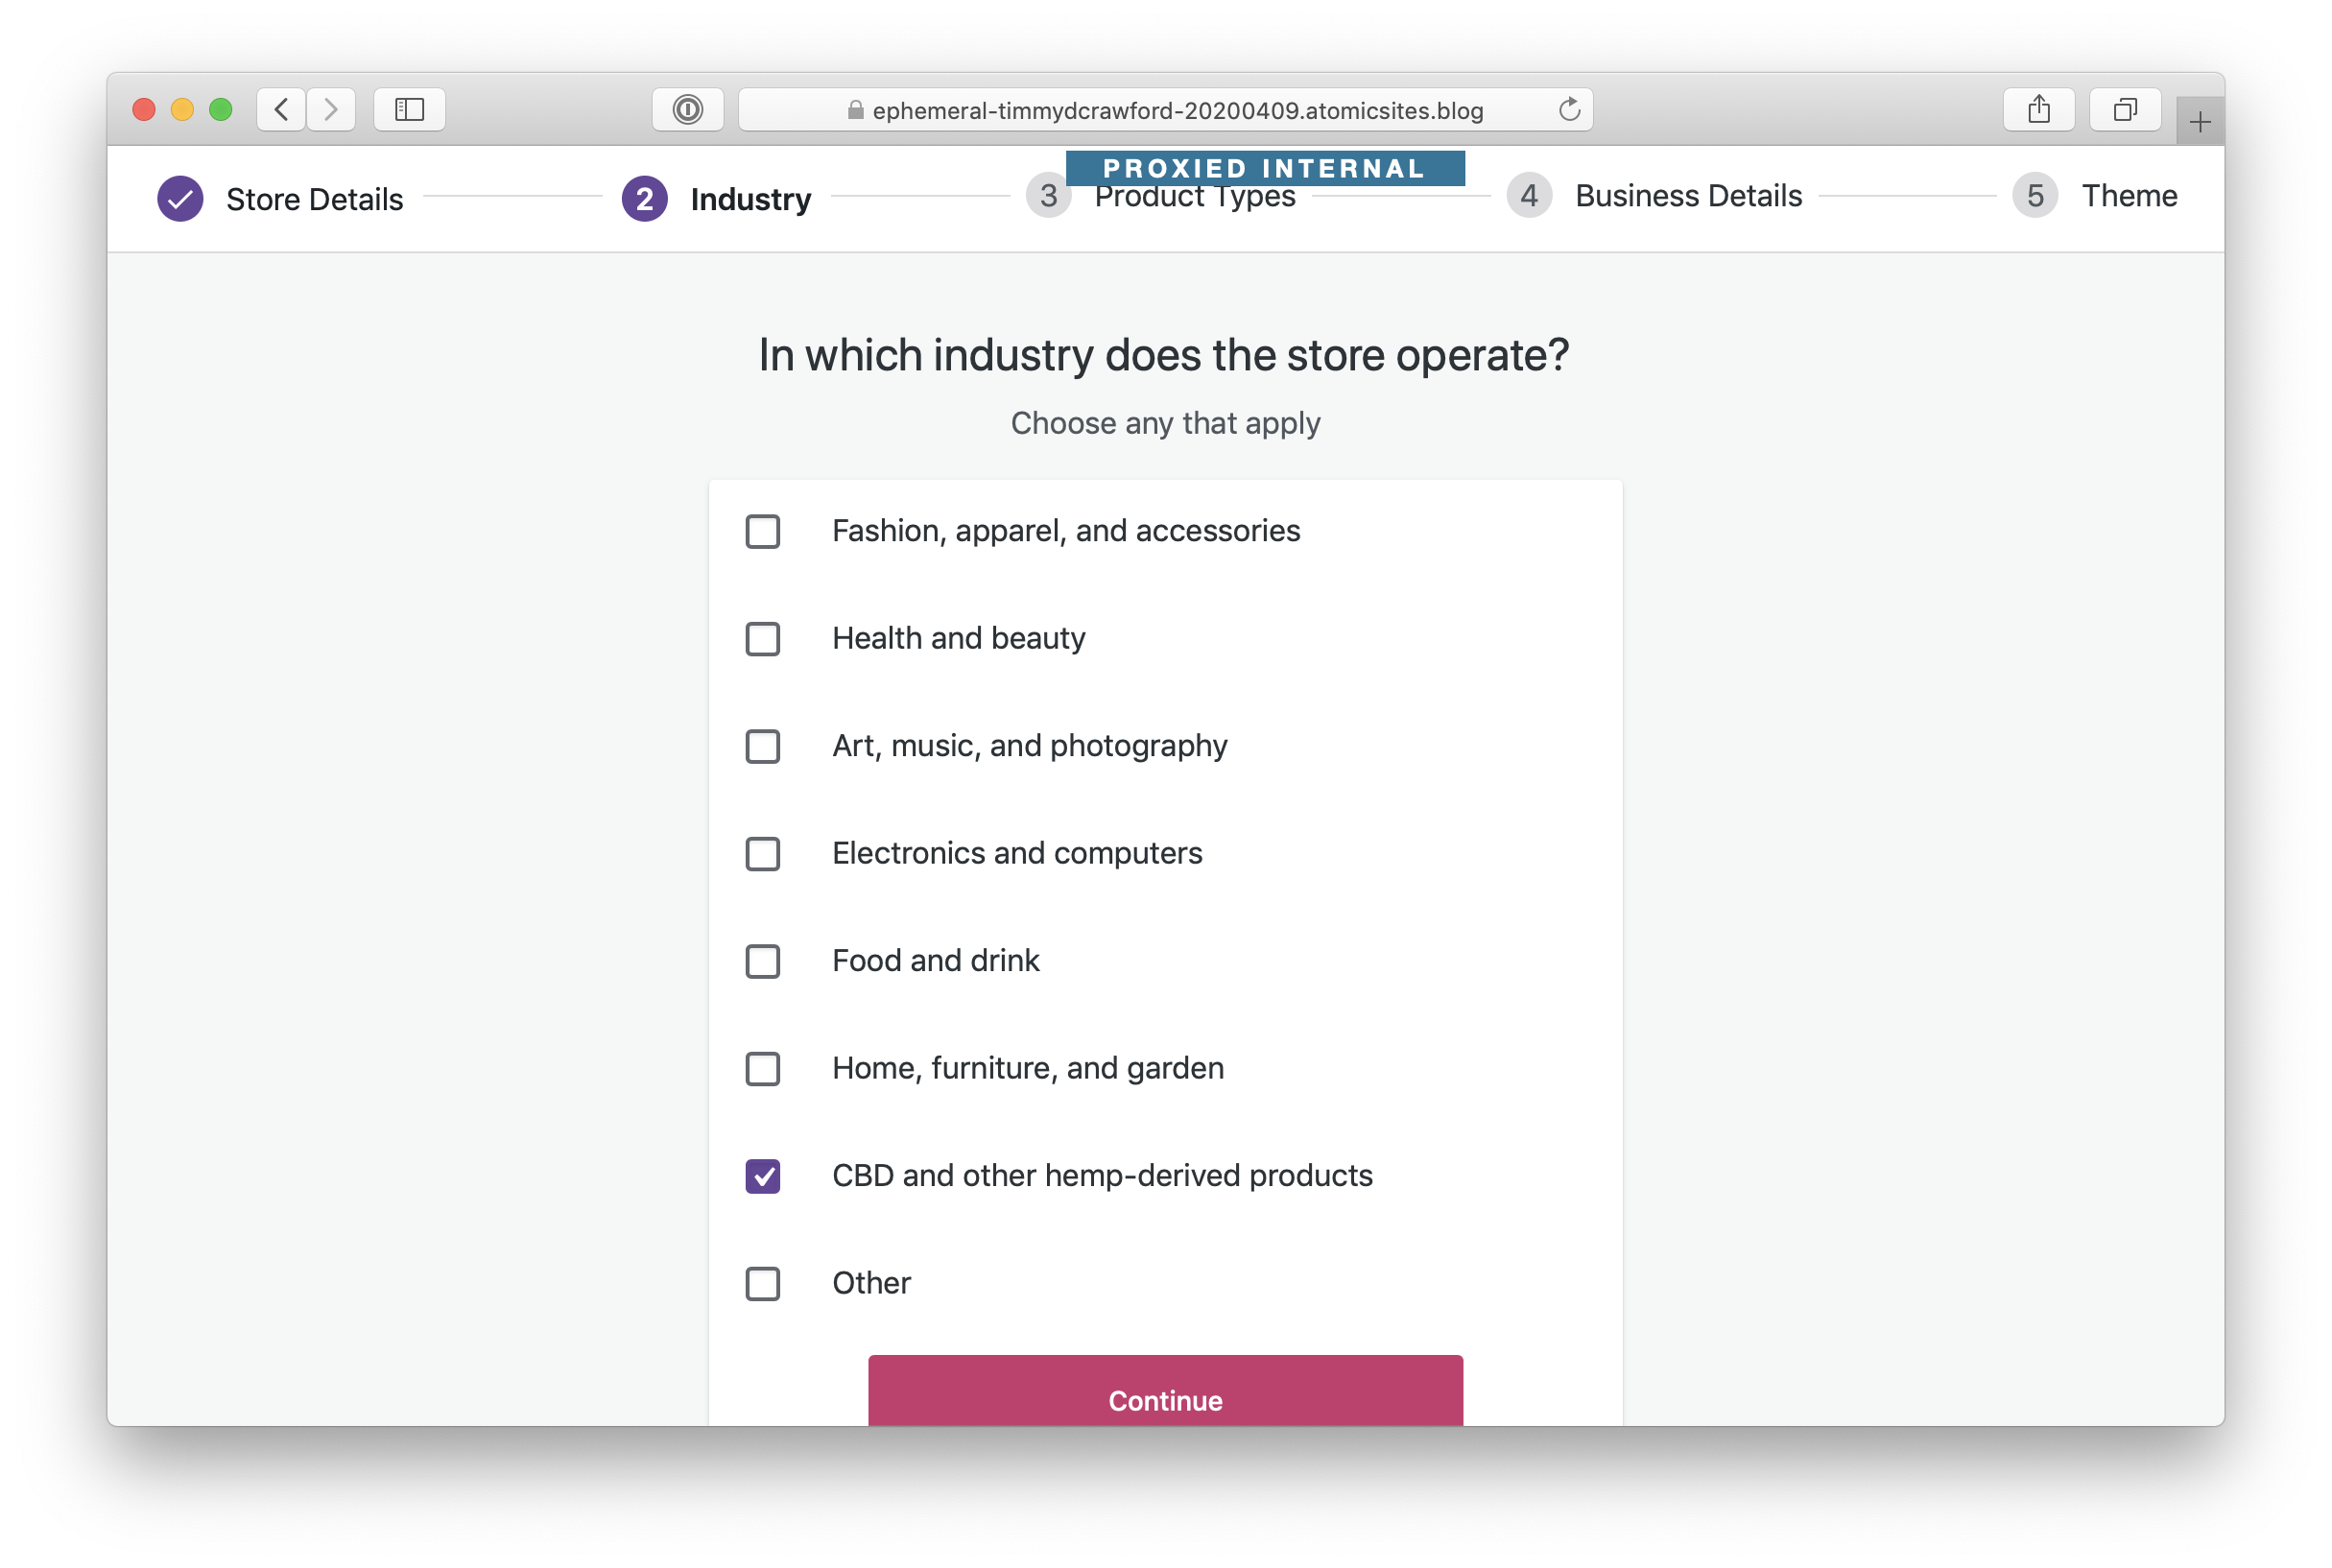
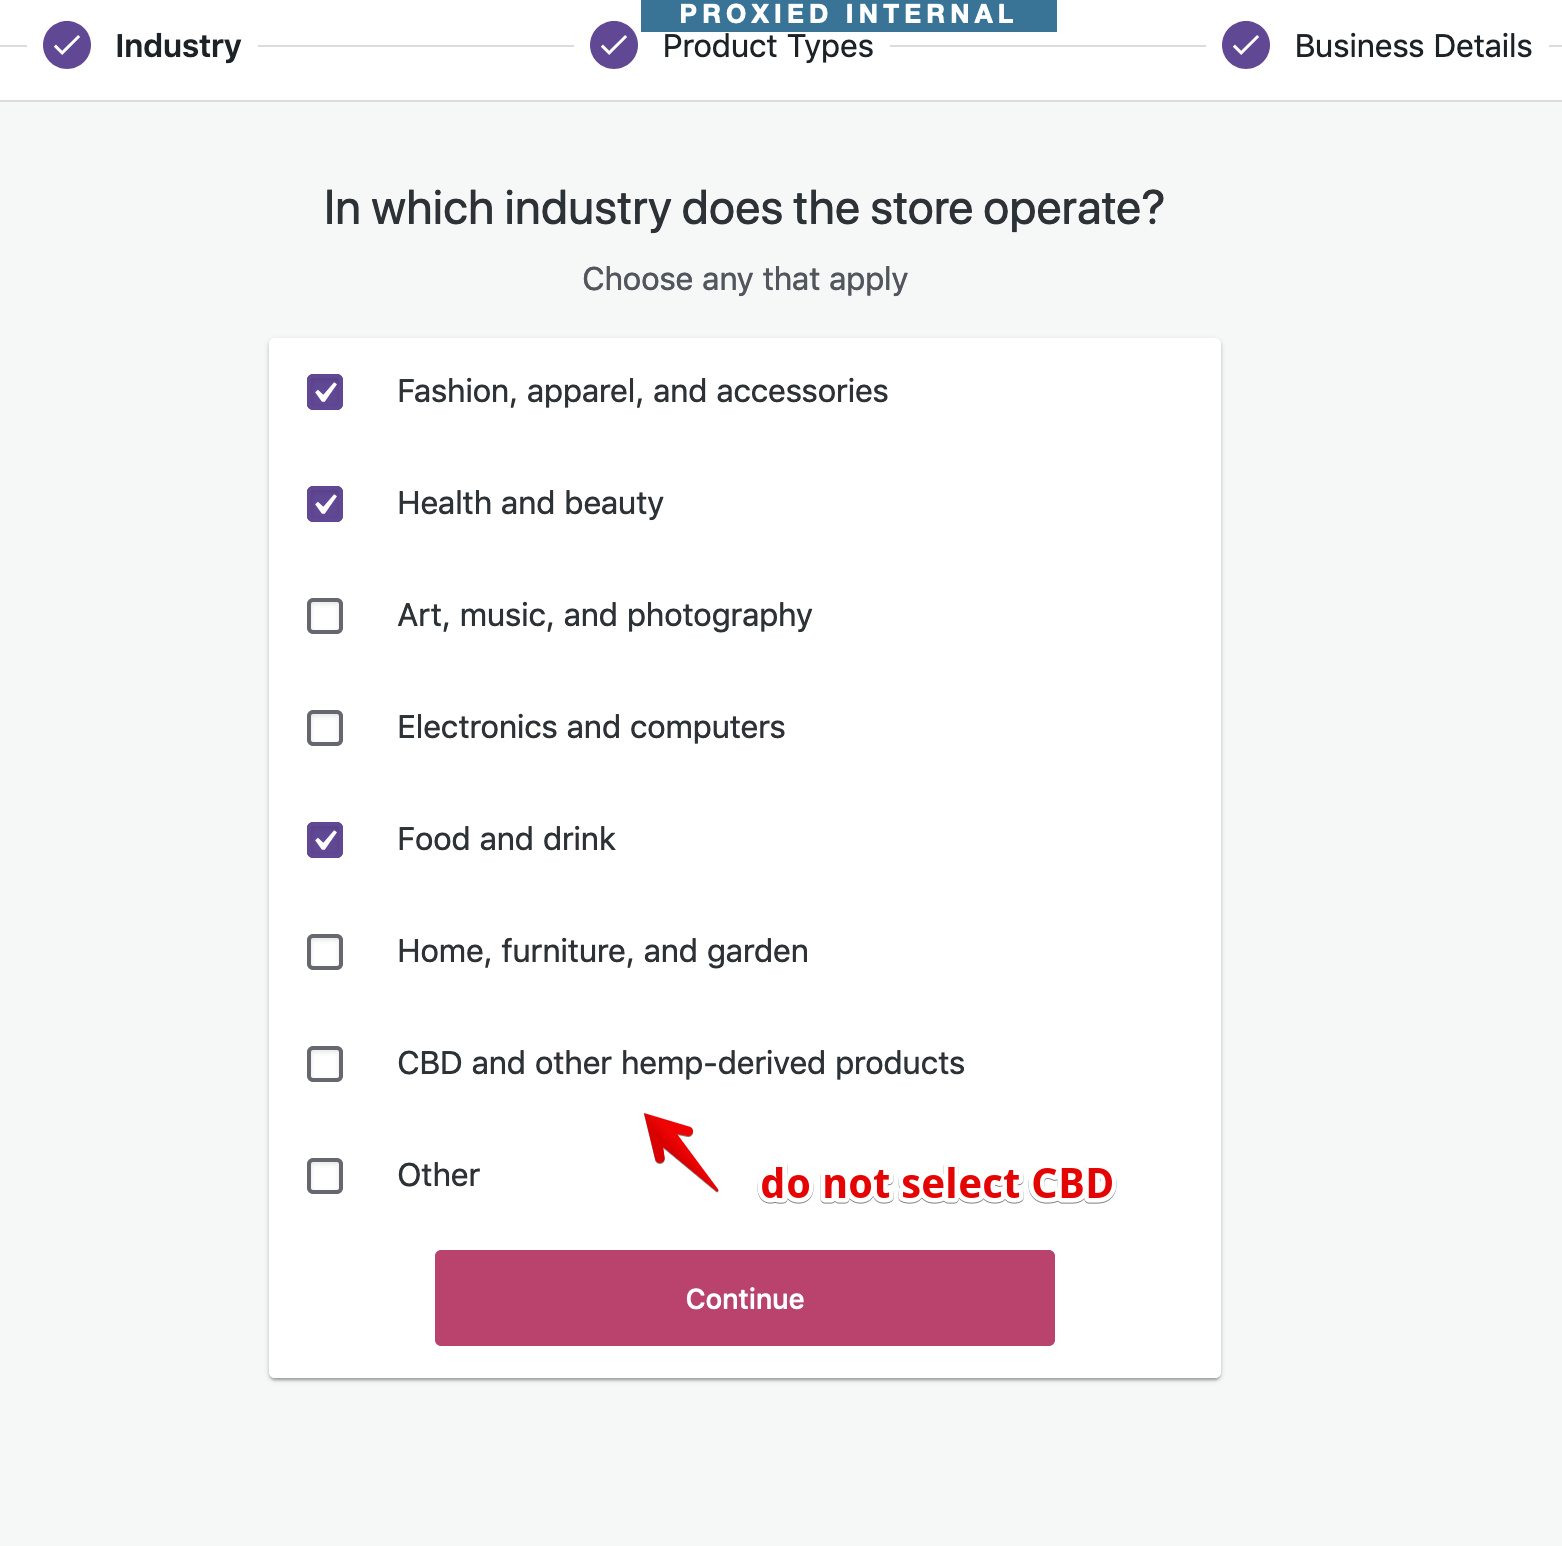
- On the Industry page, you should see "CBD and other hemp-derived products" at the bottom of the list, select that option:
- Finish the balance of the Onboard Wizard Steps ( Product Types, Business Detilas, and Theme ).
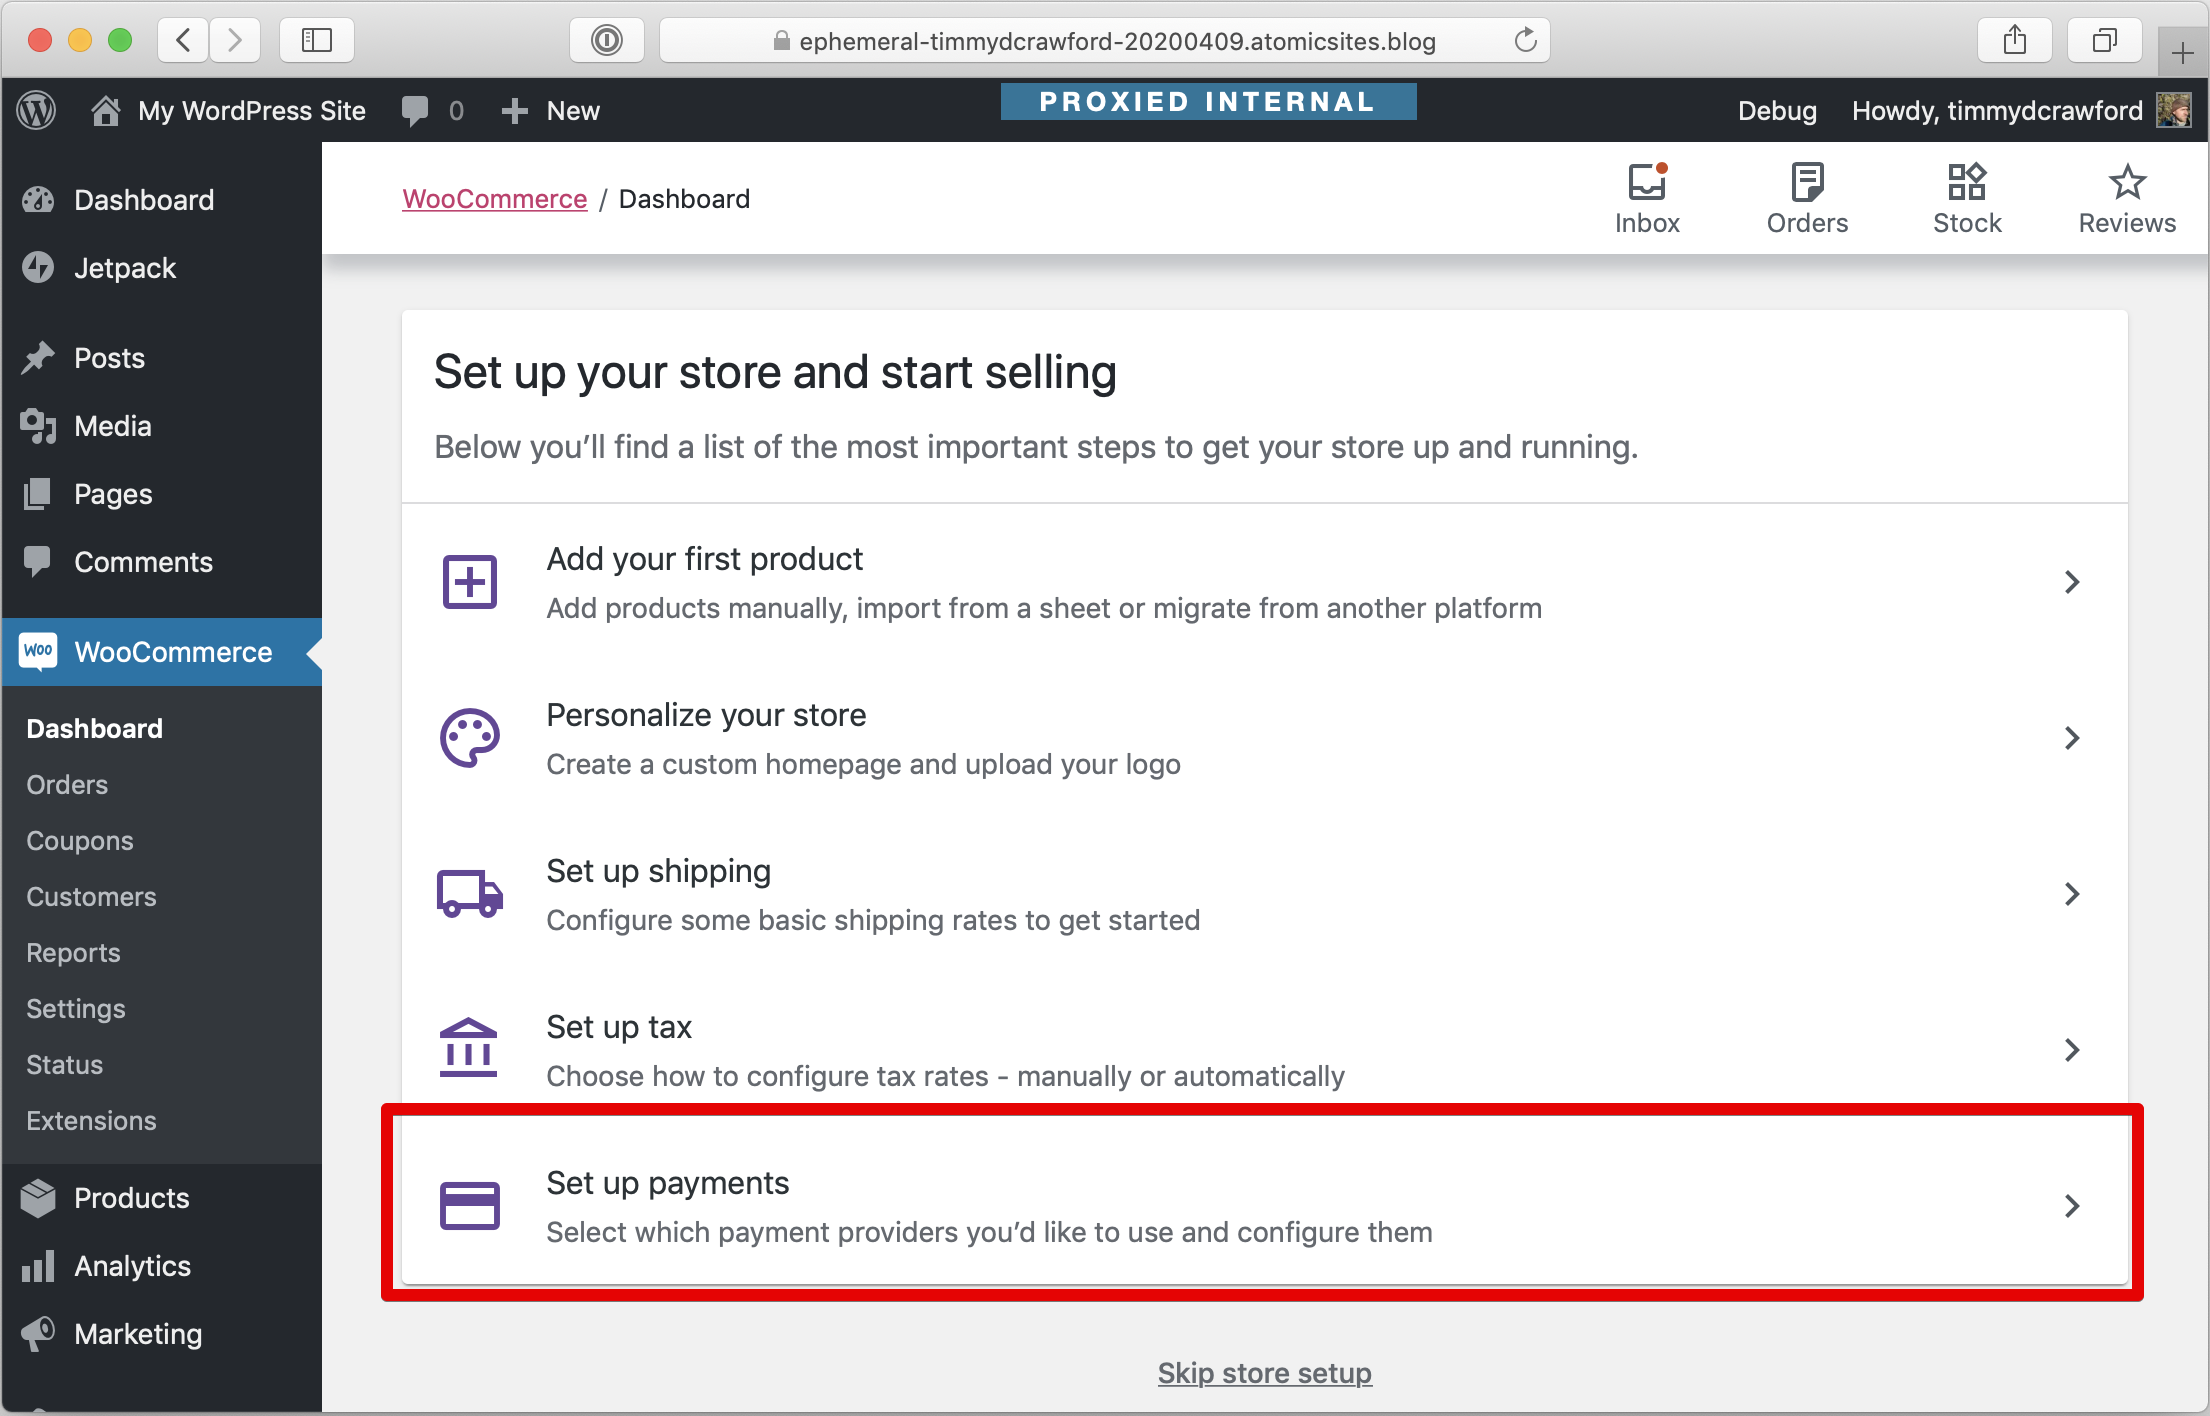
- When you reach the "Setup Checklist", select "Setup Payments" at the bottom of the list:
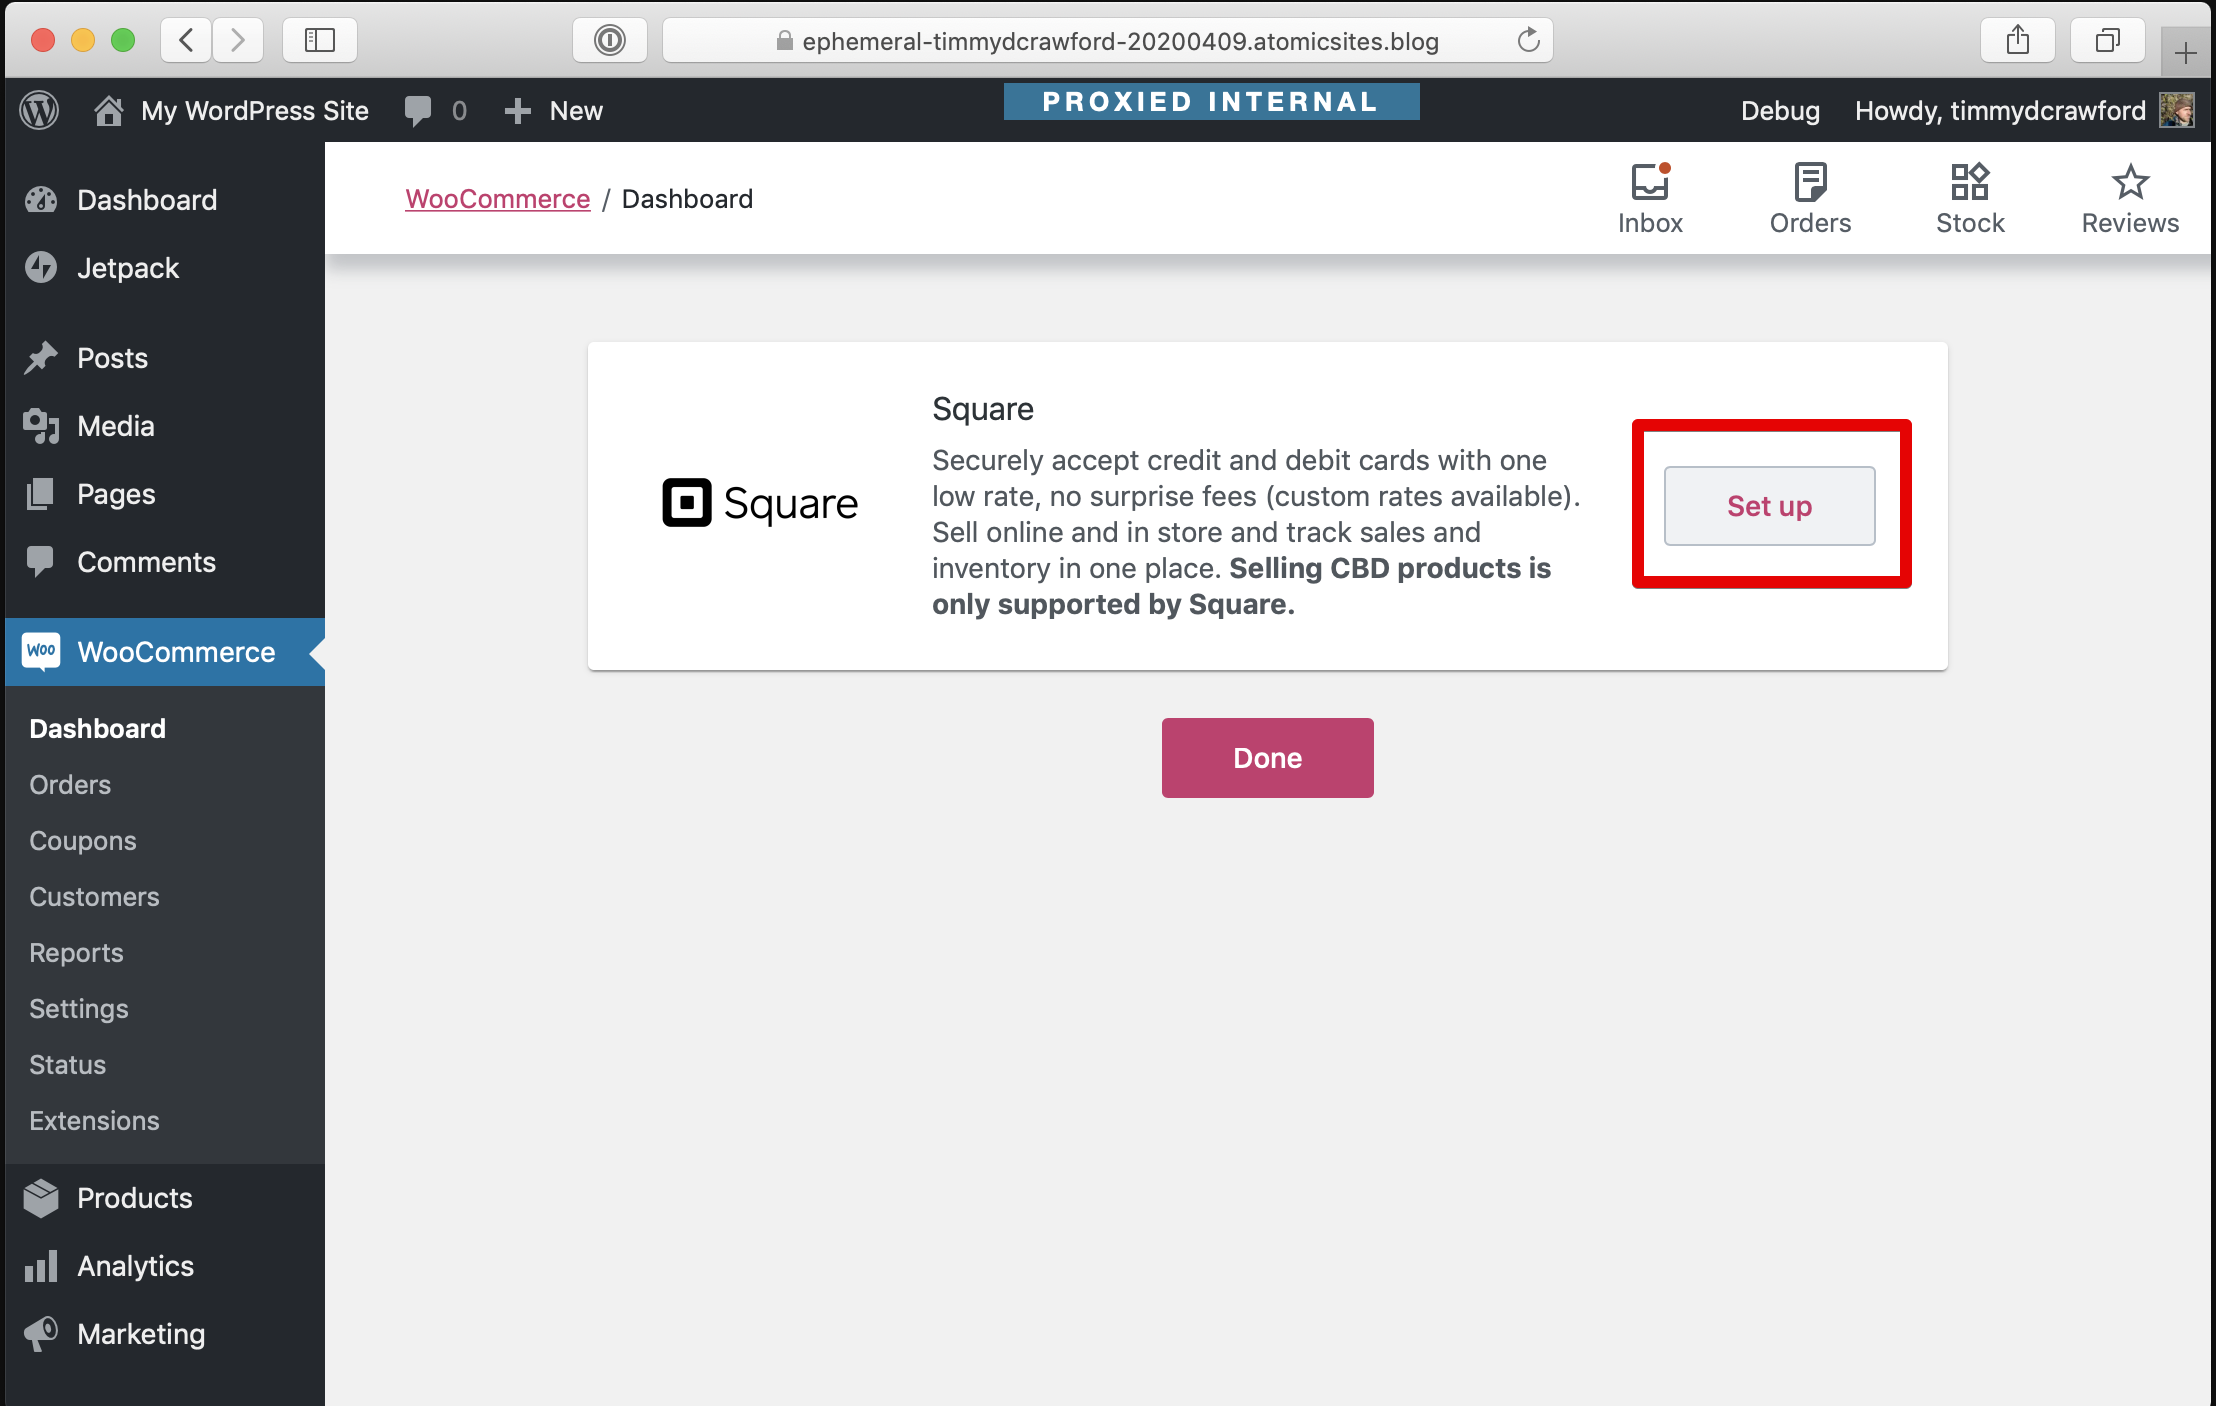
- On the following screen, verify that only the option for Square payements is shown, and click "Set Up" as shown:
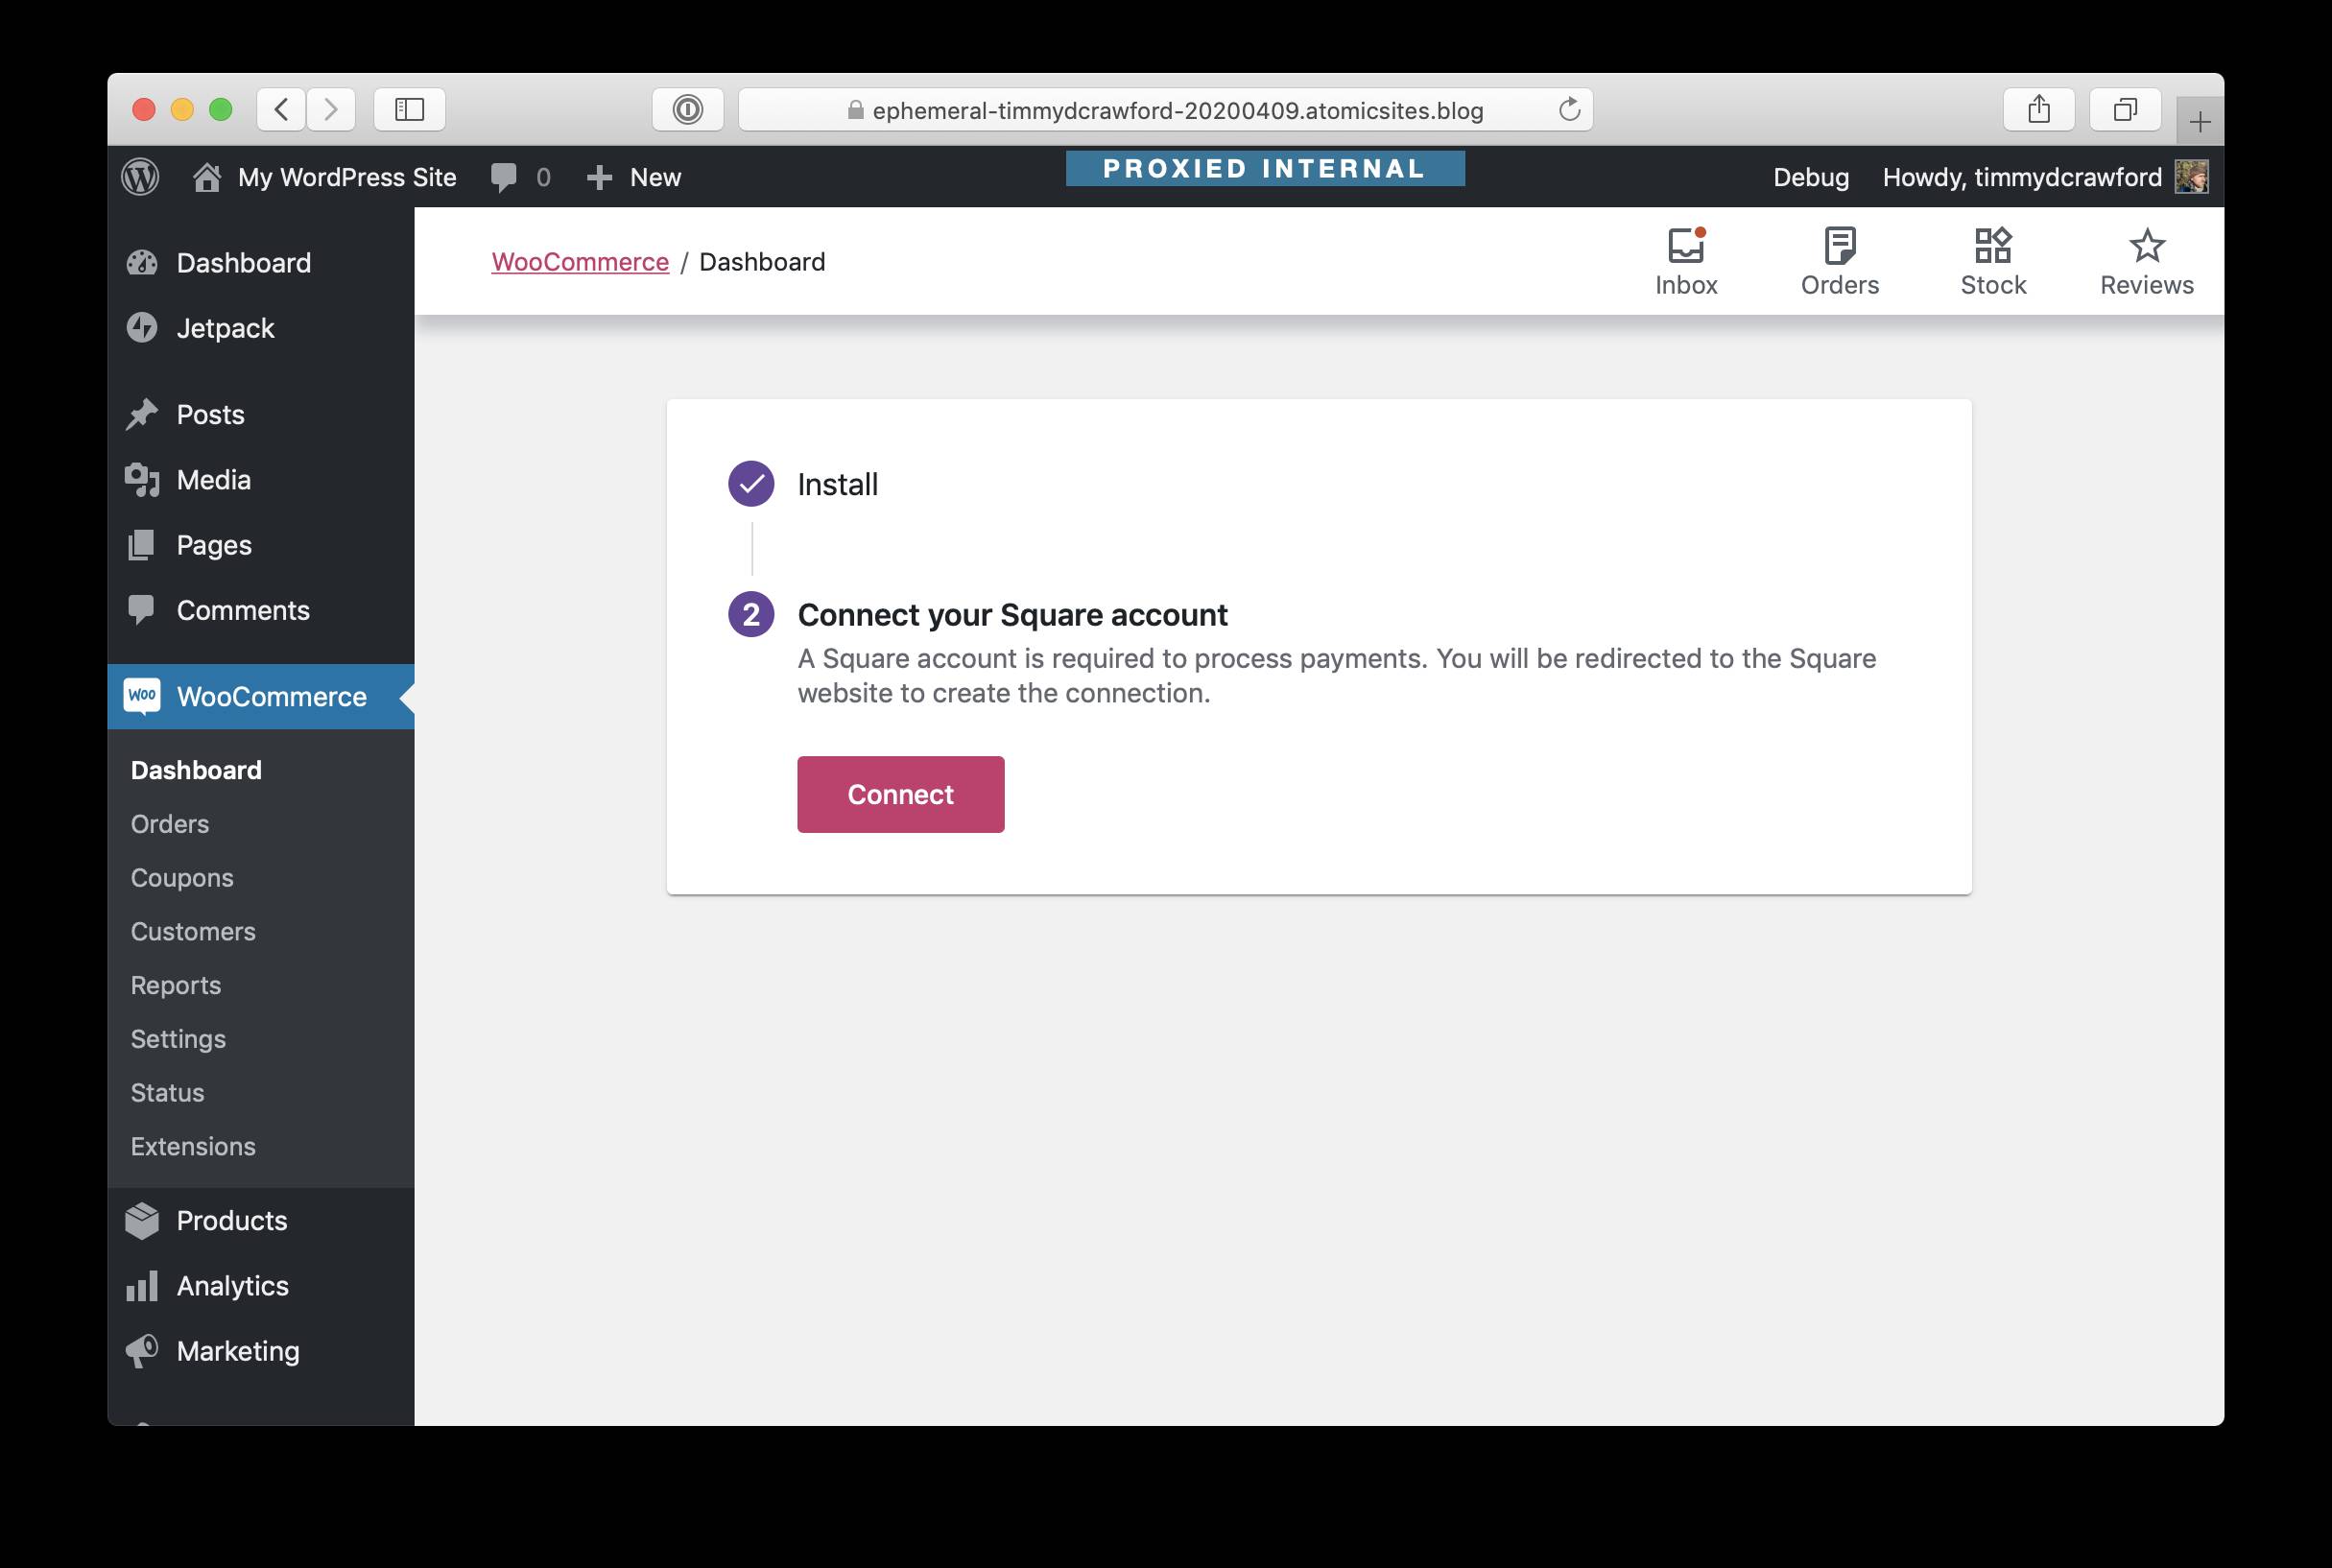
- On the next screen, verify the plugin installs okay. Click on the "connect" button:
- Verify that a new window opens for the Square CBD landing page:

This new feature is currently available to the stores based in the United States only. This test flow requires that you have Jetpack installed and connected. So be sure to install Jetpack prior to doing this, or install it during the Site Profile onboard wizard. These steps here are done with Jetpack already installed, but not connected.
- Load the Onboarding Wizard by visiting
wp-admin?page=wc-setup - You should see the following screen:
- Click "Yes Please".
- On the next page, be sure to enter a United States based address:
- On the Industry page, make sure you do not select CBD:
- Finish the balance of the Onboard Wizard Steps ( Product Types, Business Detilas, and Theme ).
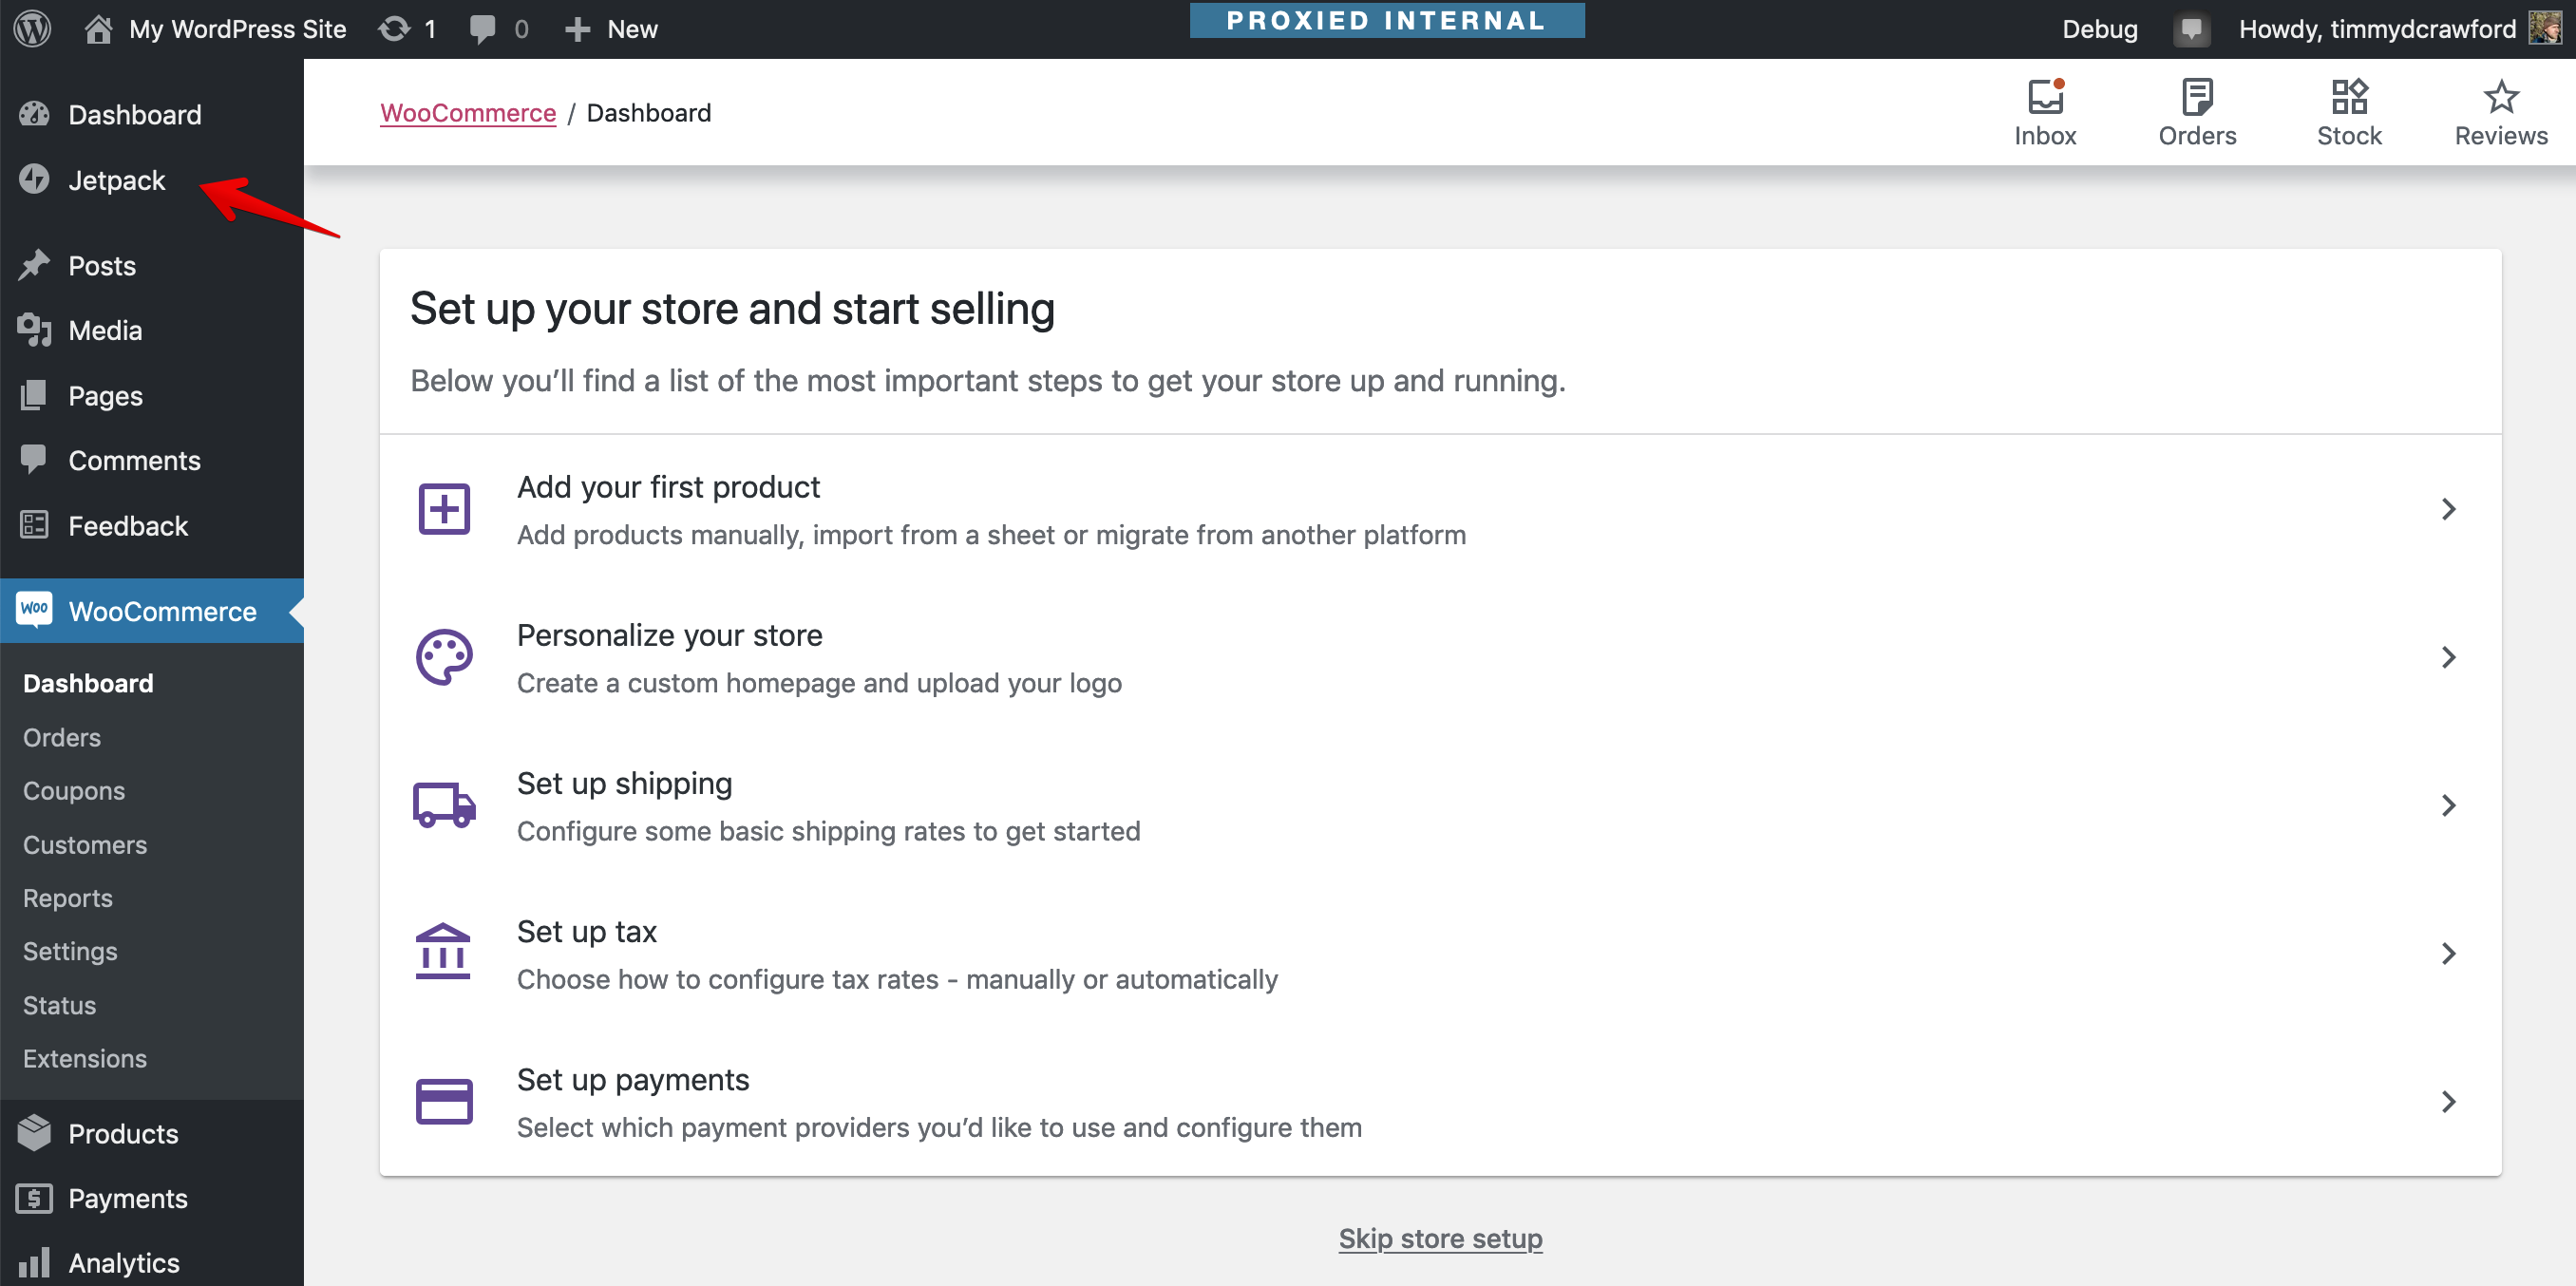
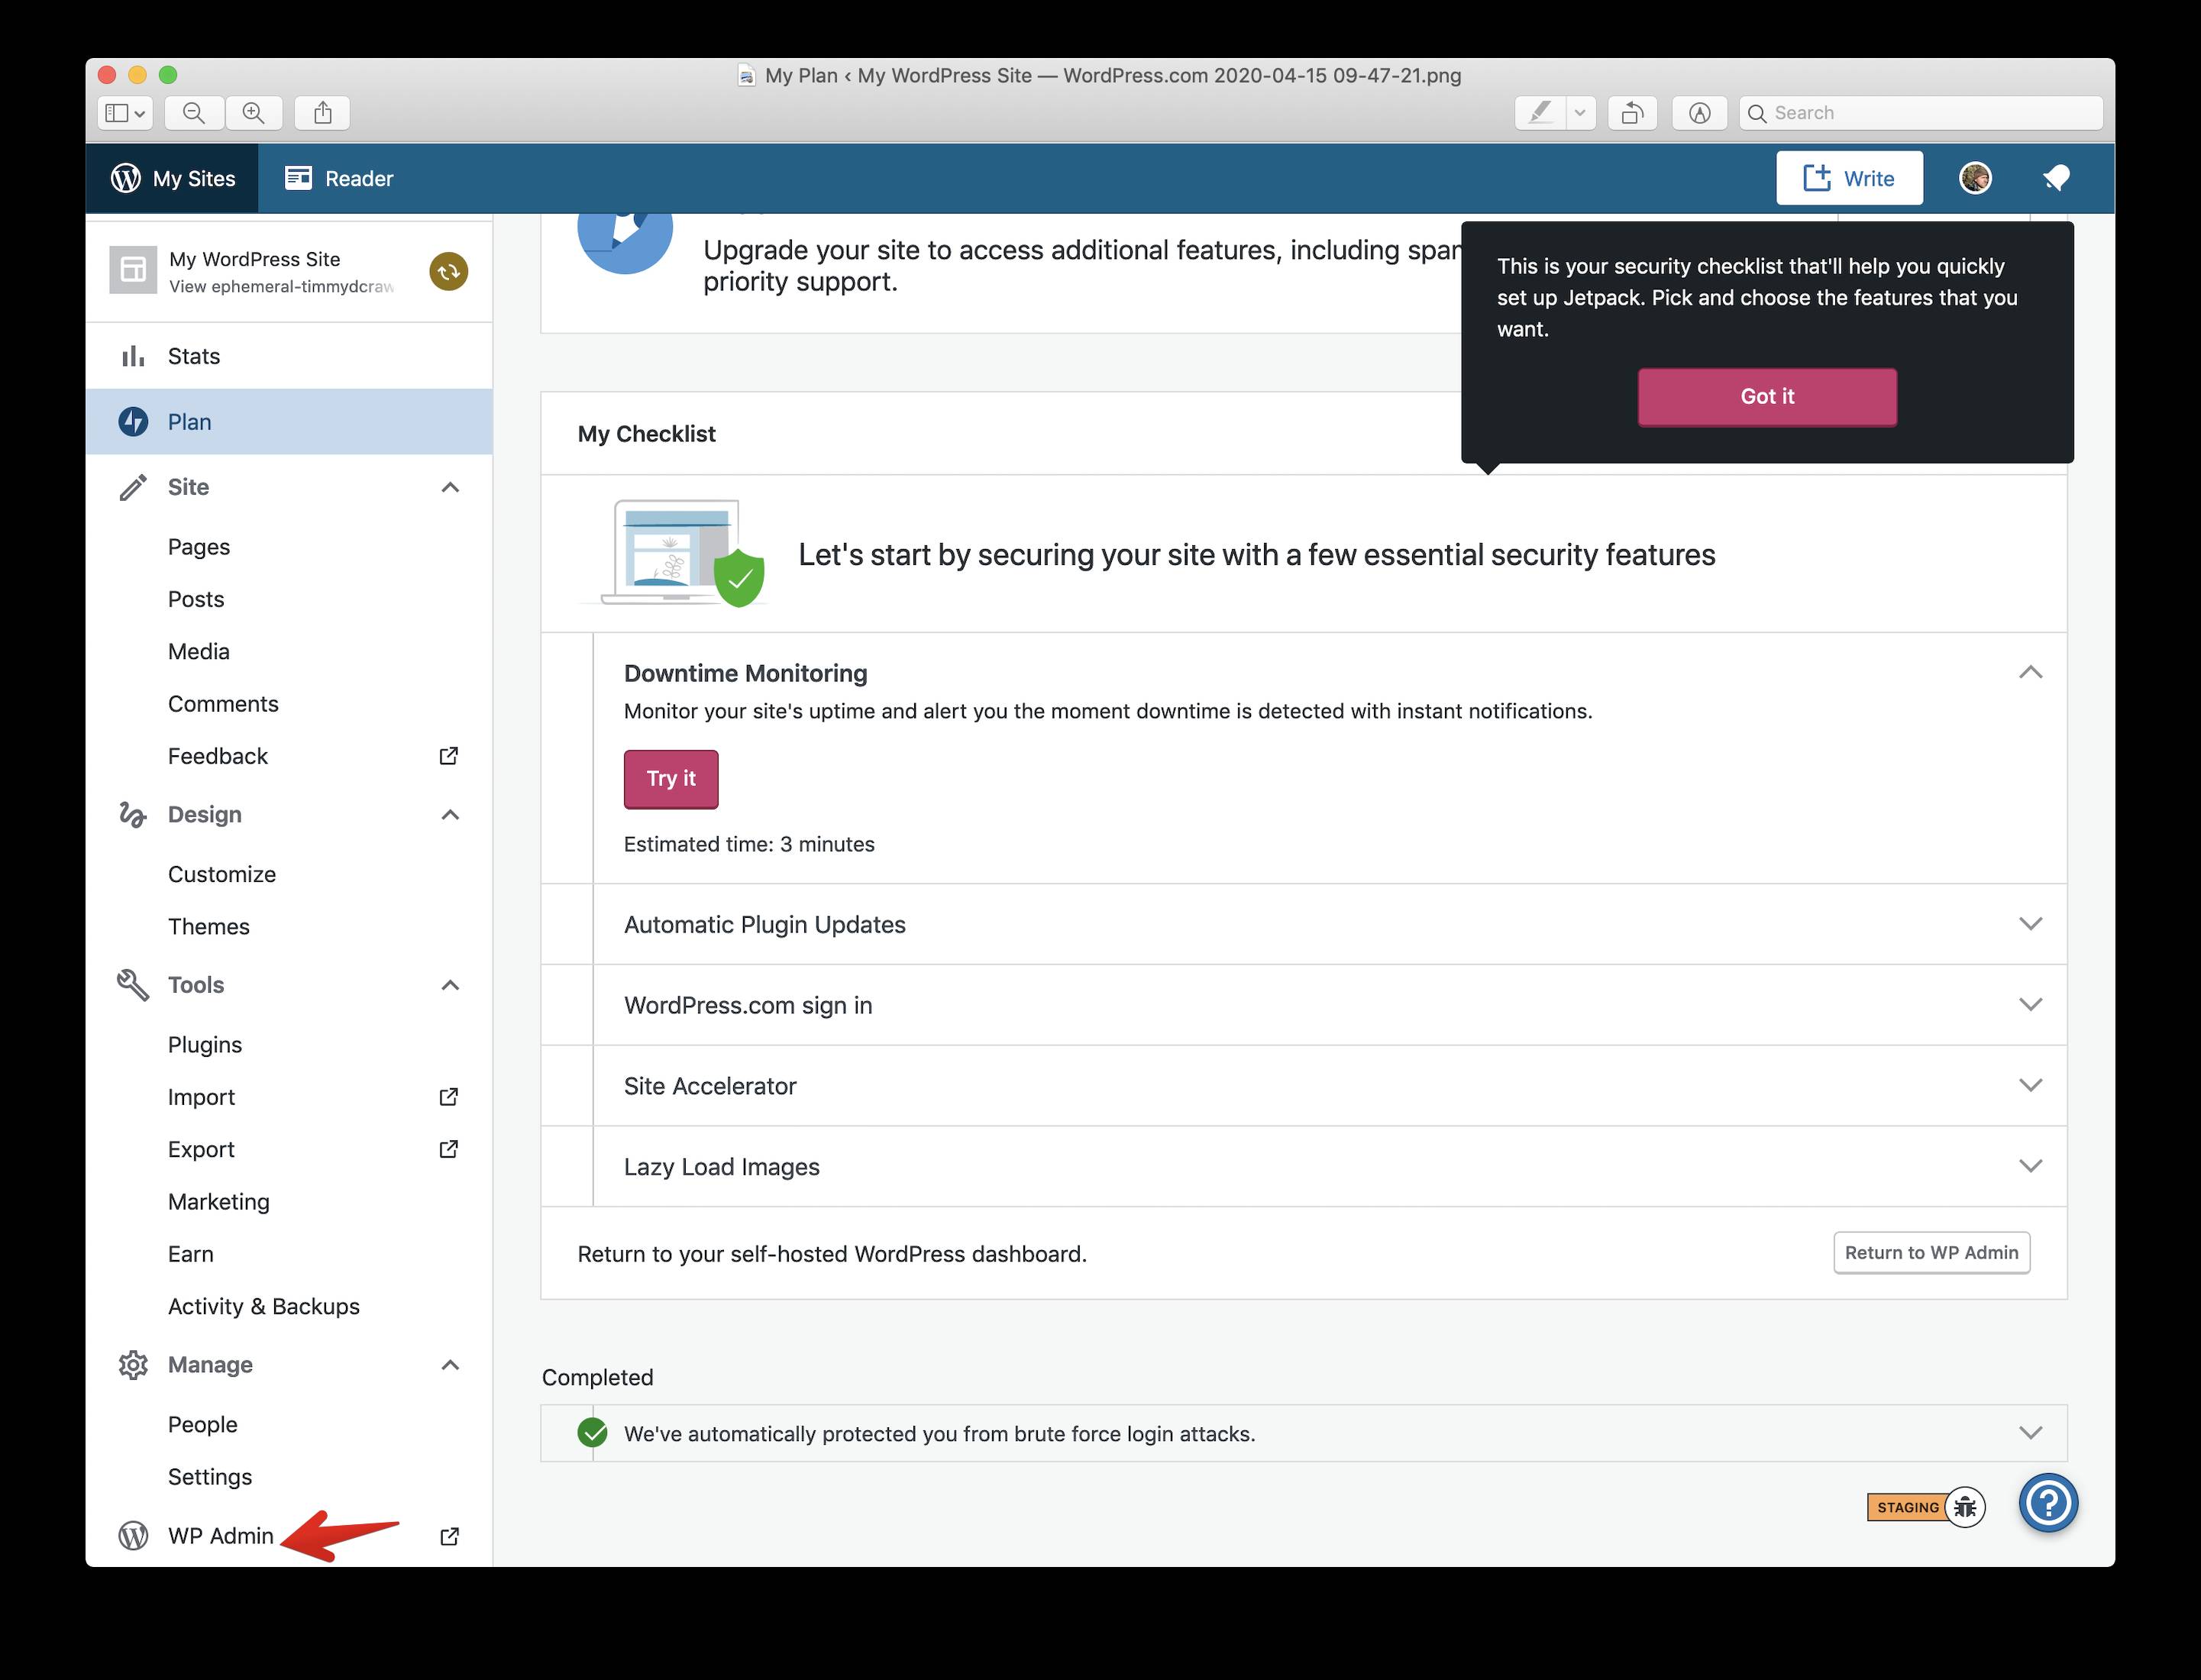
- When you reach the "Setup Checklist" - you need to go connect Jetpack First. Click the Jetpack link on the wp-admin sidebar menu:
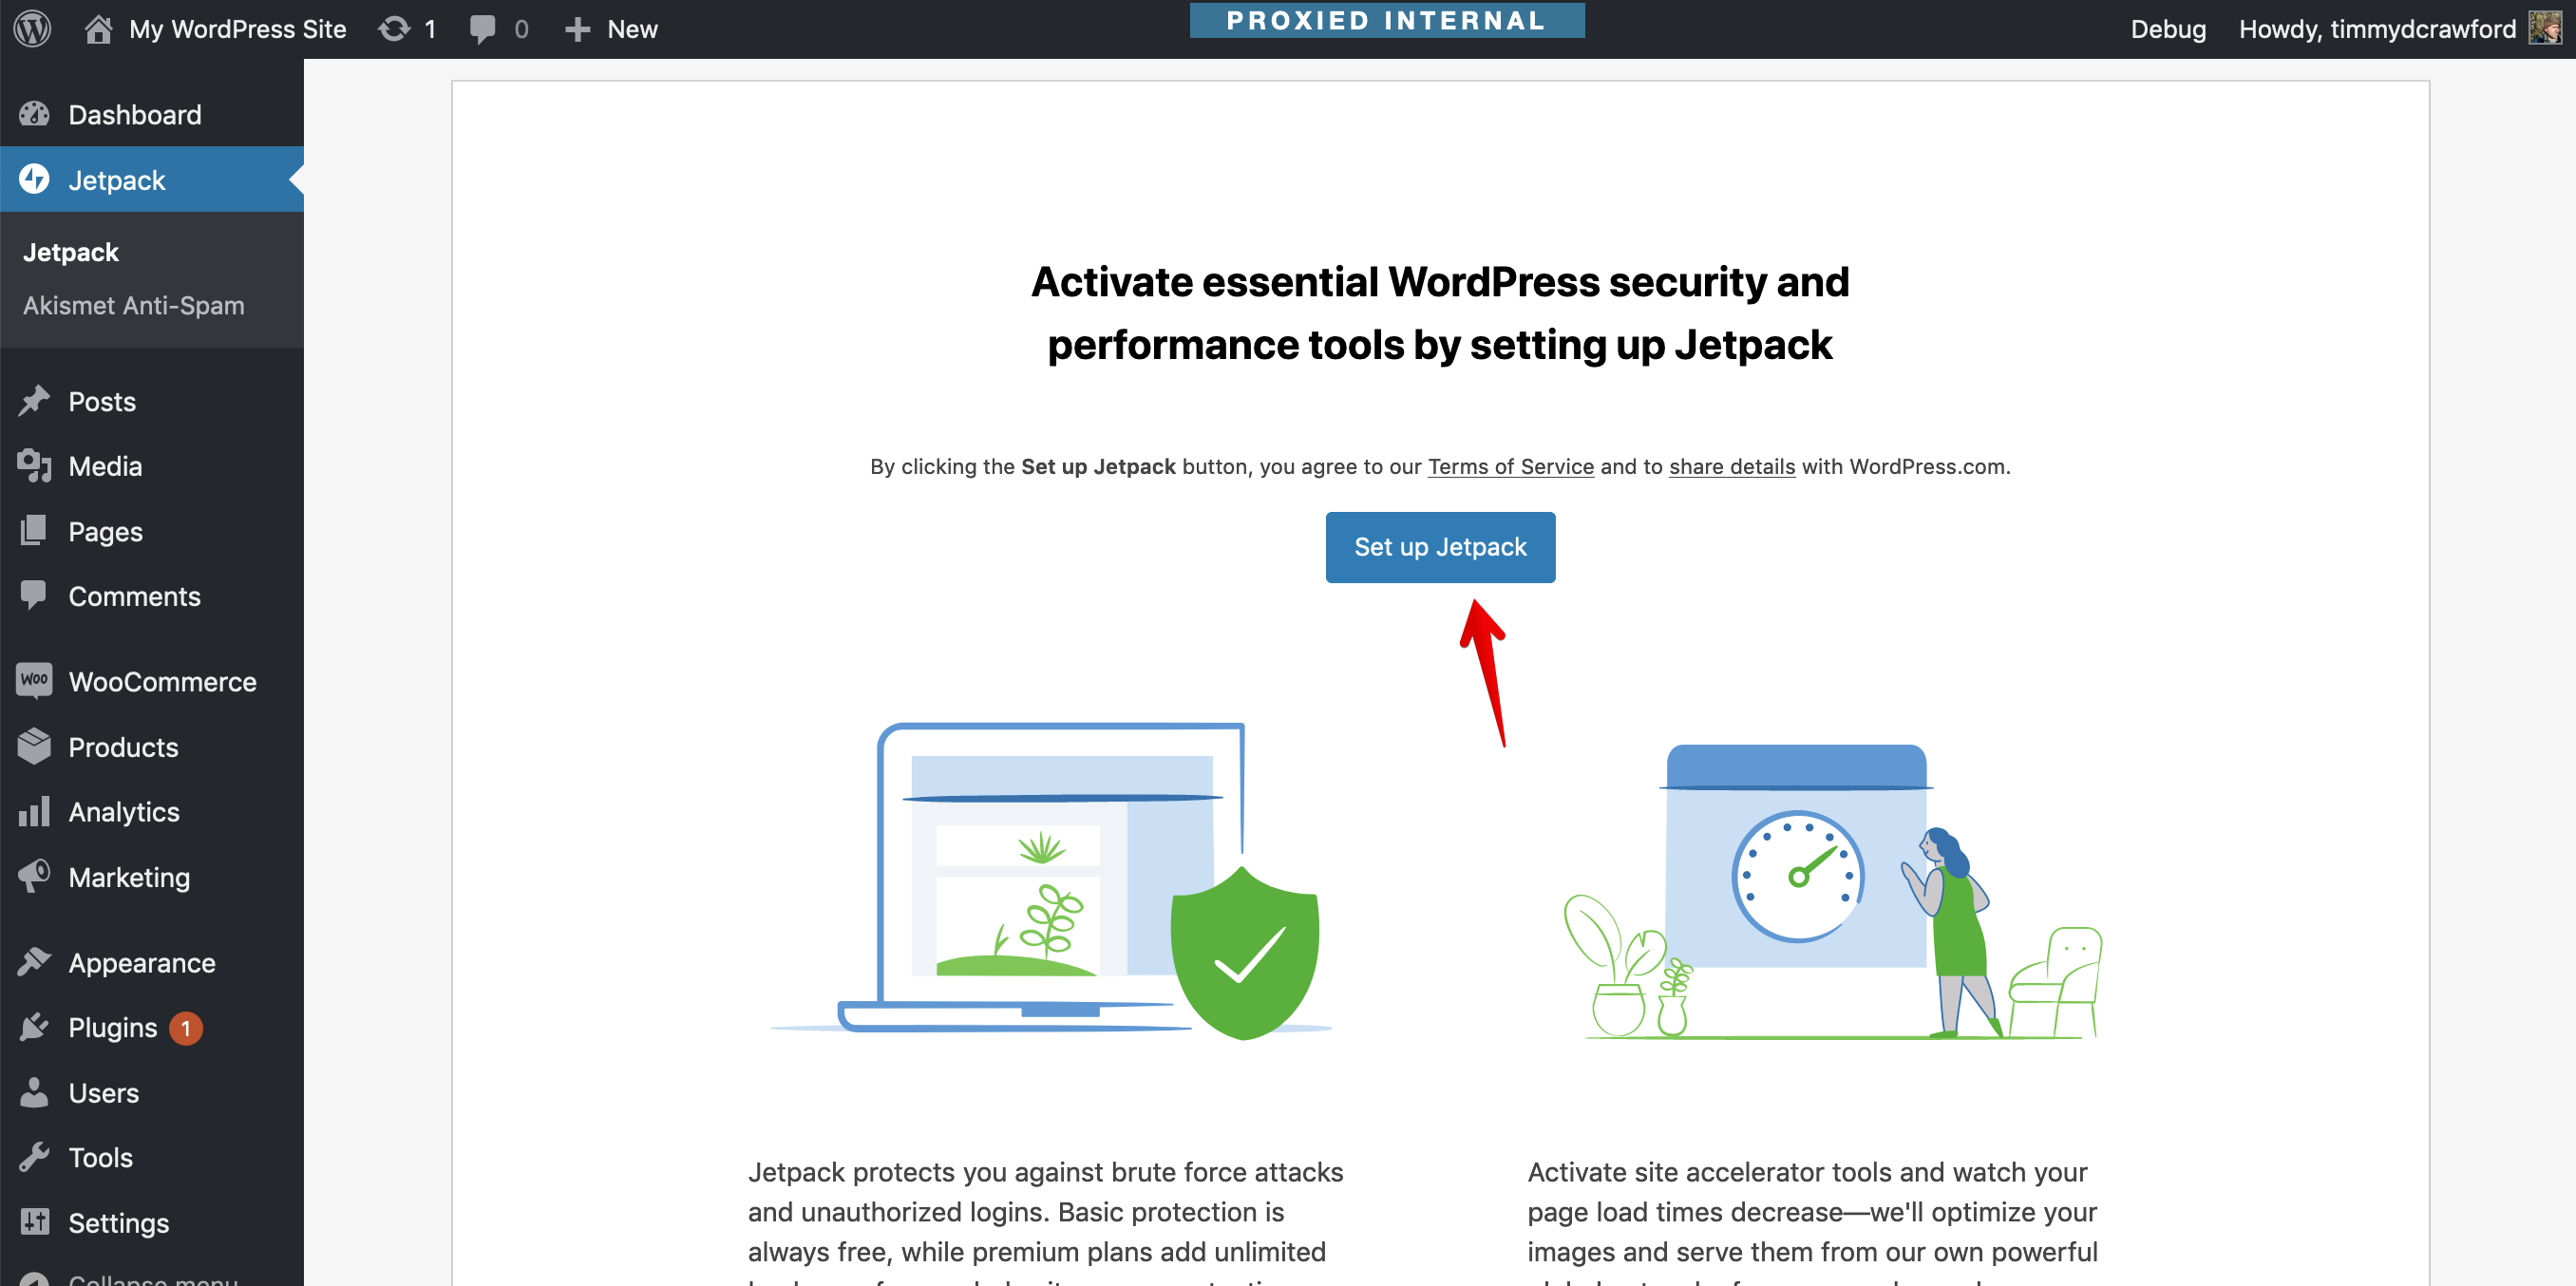
- Next, follow the Jetpack connection flow. The flow depicted here shows what it looks like when already logged in to WordPress.com. Click "Set up Jetpack"
- Follow the connection steps, again this experiene will change if you are not logged into WordPress.com. No need to report bugs in these steps as that is out of scope:
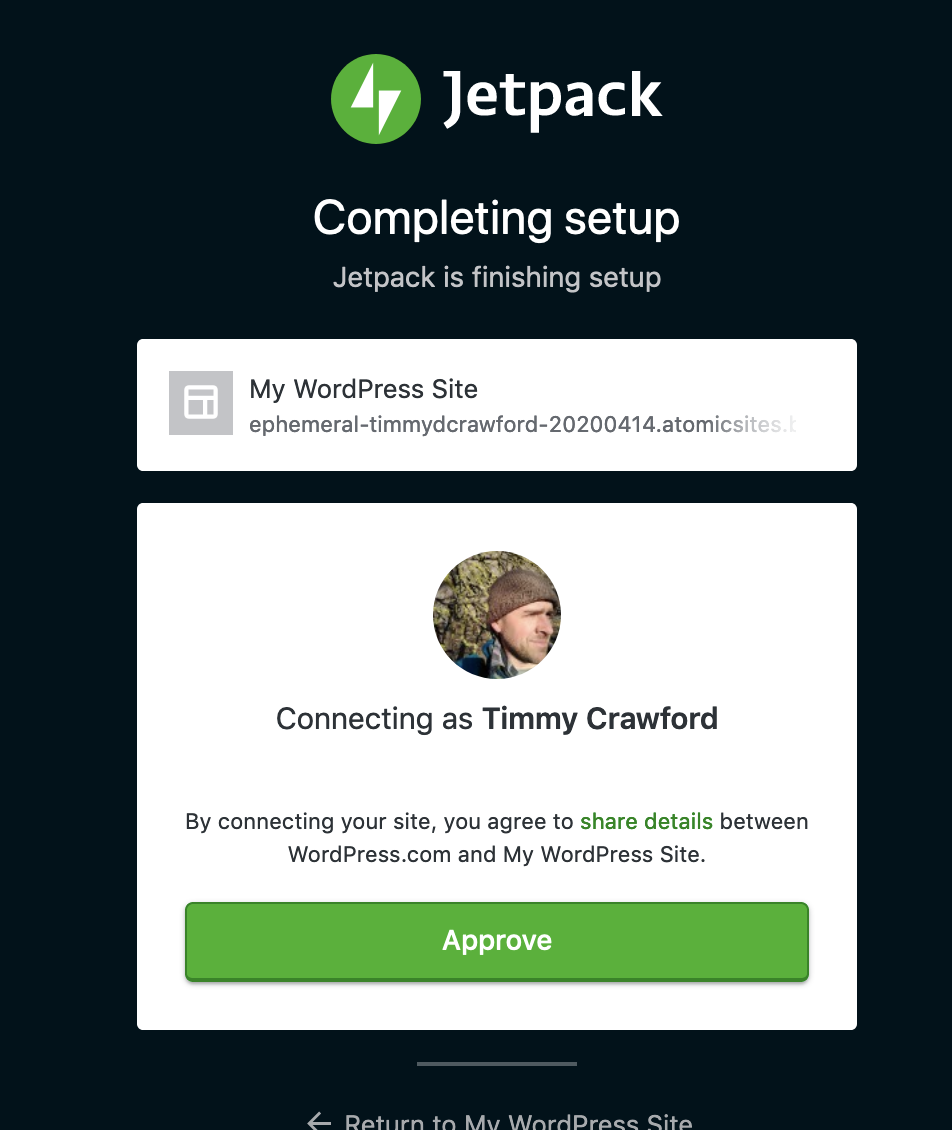
On this screen scroll to the bottom
Select the Free Plan Option
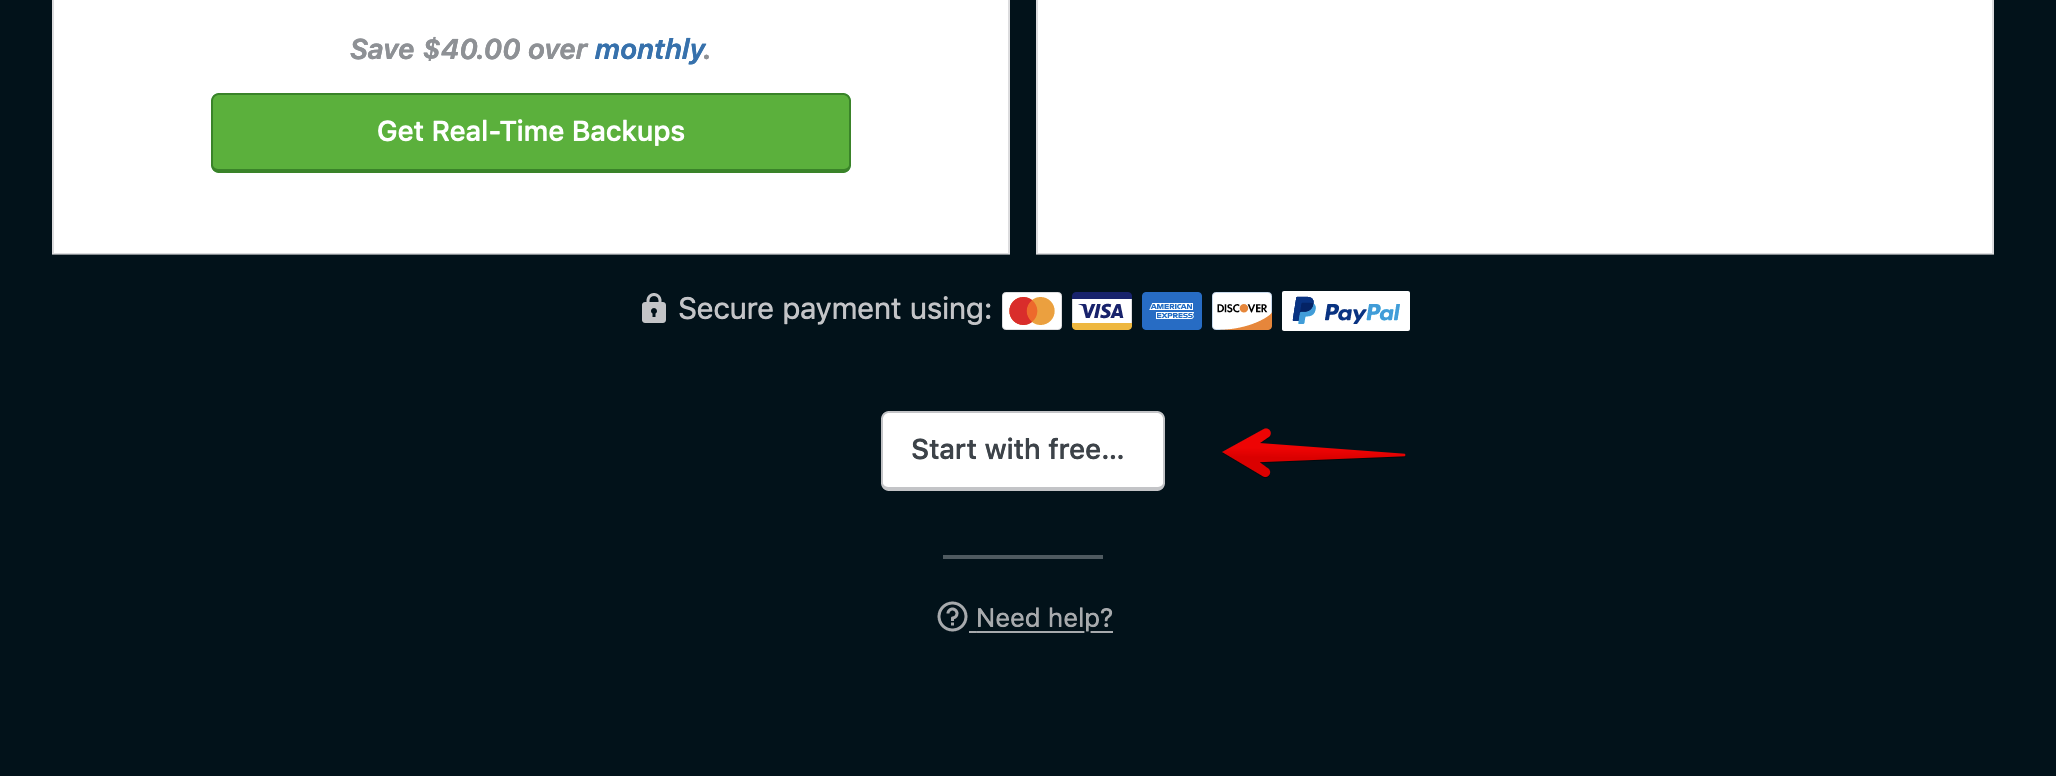
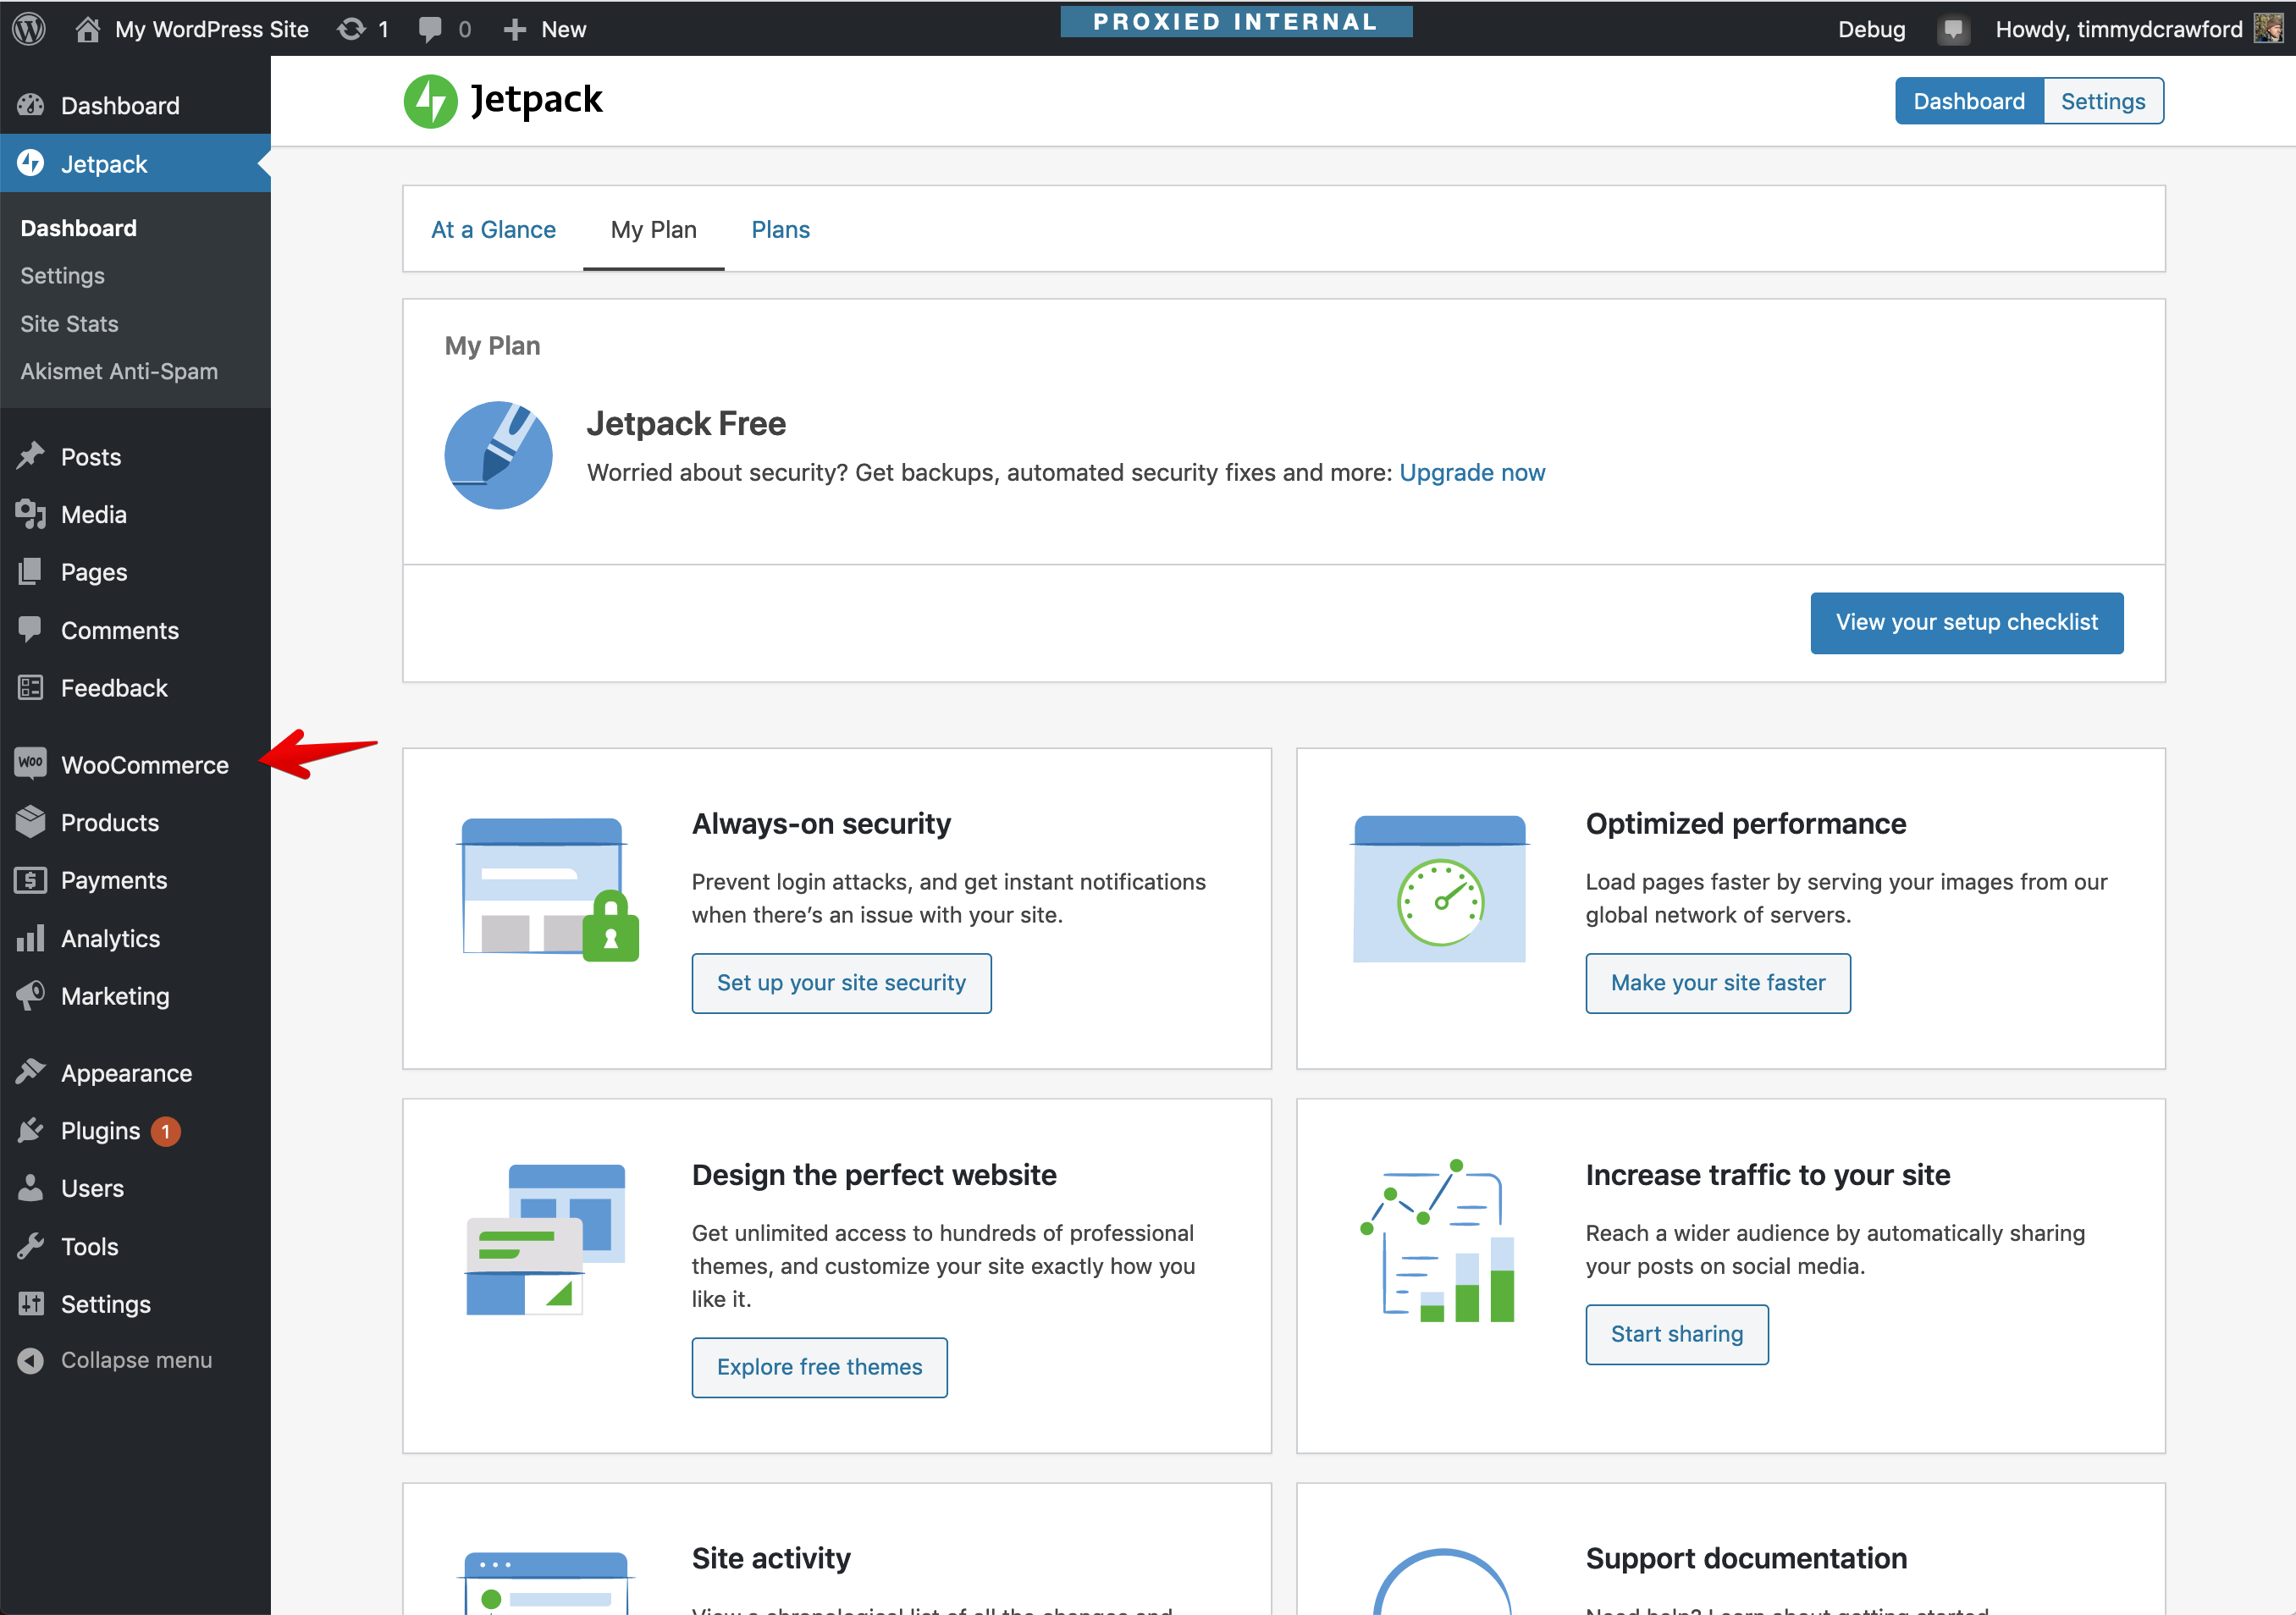
- Now Jetpack is connected, but you will be on WordPress.com, click the wp-admin link in the sidebar to return to your test site:
- This will drop you on the Jetpack page in your wp-admin, navigate back to WooCommerce:
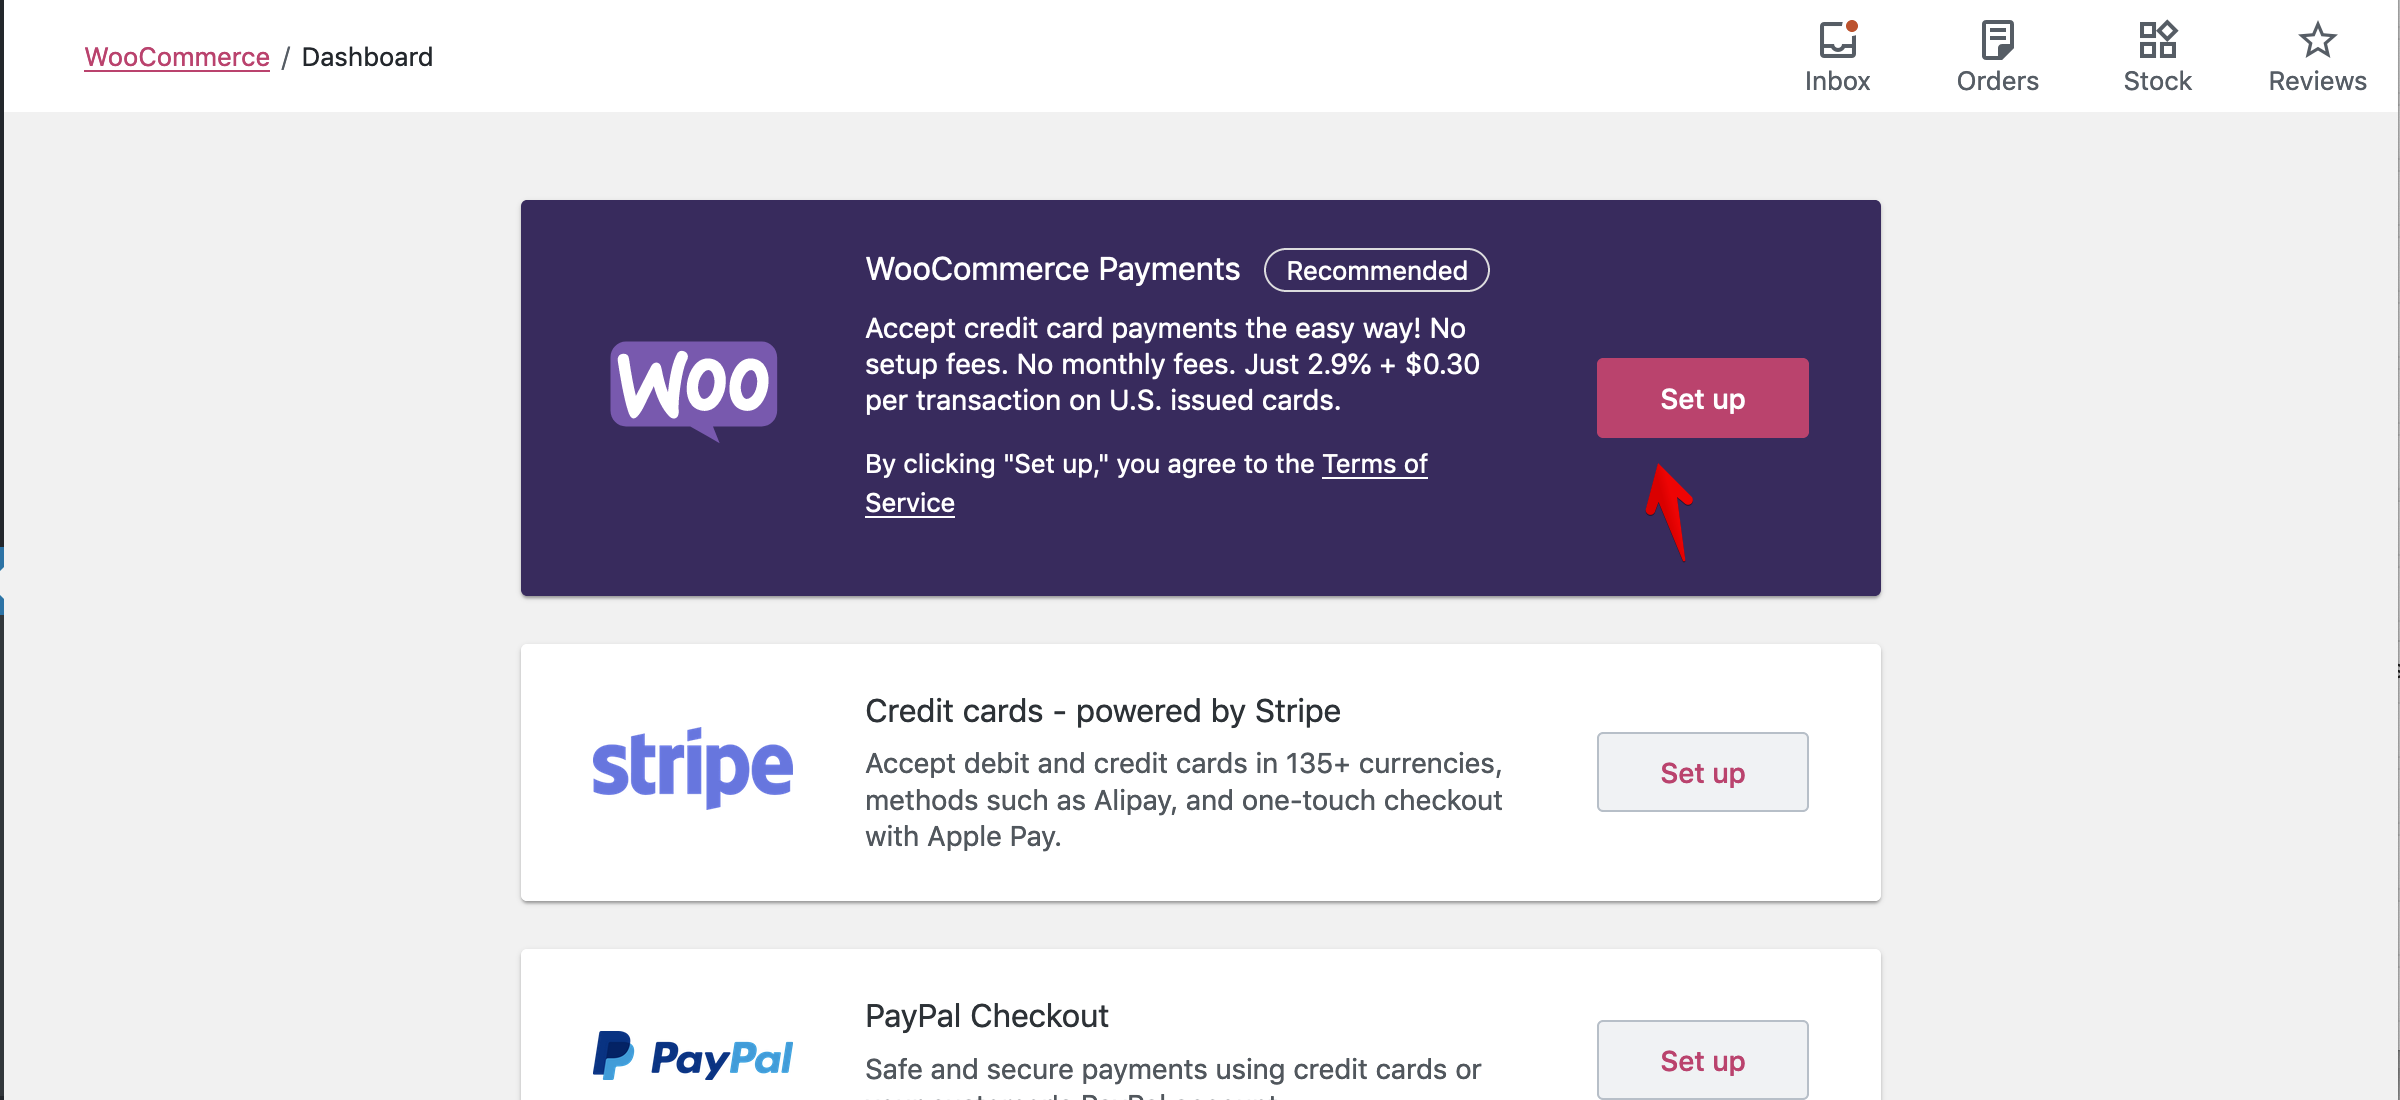
- Click on Setup Payments in the setup checklist:
- Verify you see the option for WooCommerce Payments as pictured here, and click the pink "Set up" button on this card:
- On the subsequent screen, the plugin will be installed and activated for WooCommerce Payments. Verify that works as expected, then click the "Verify details" button:
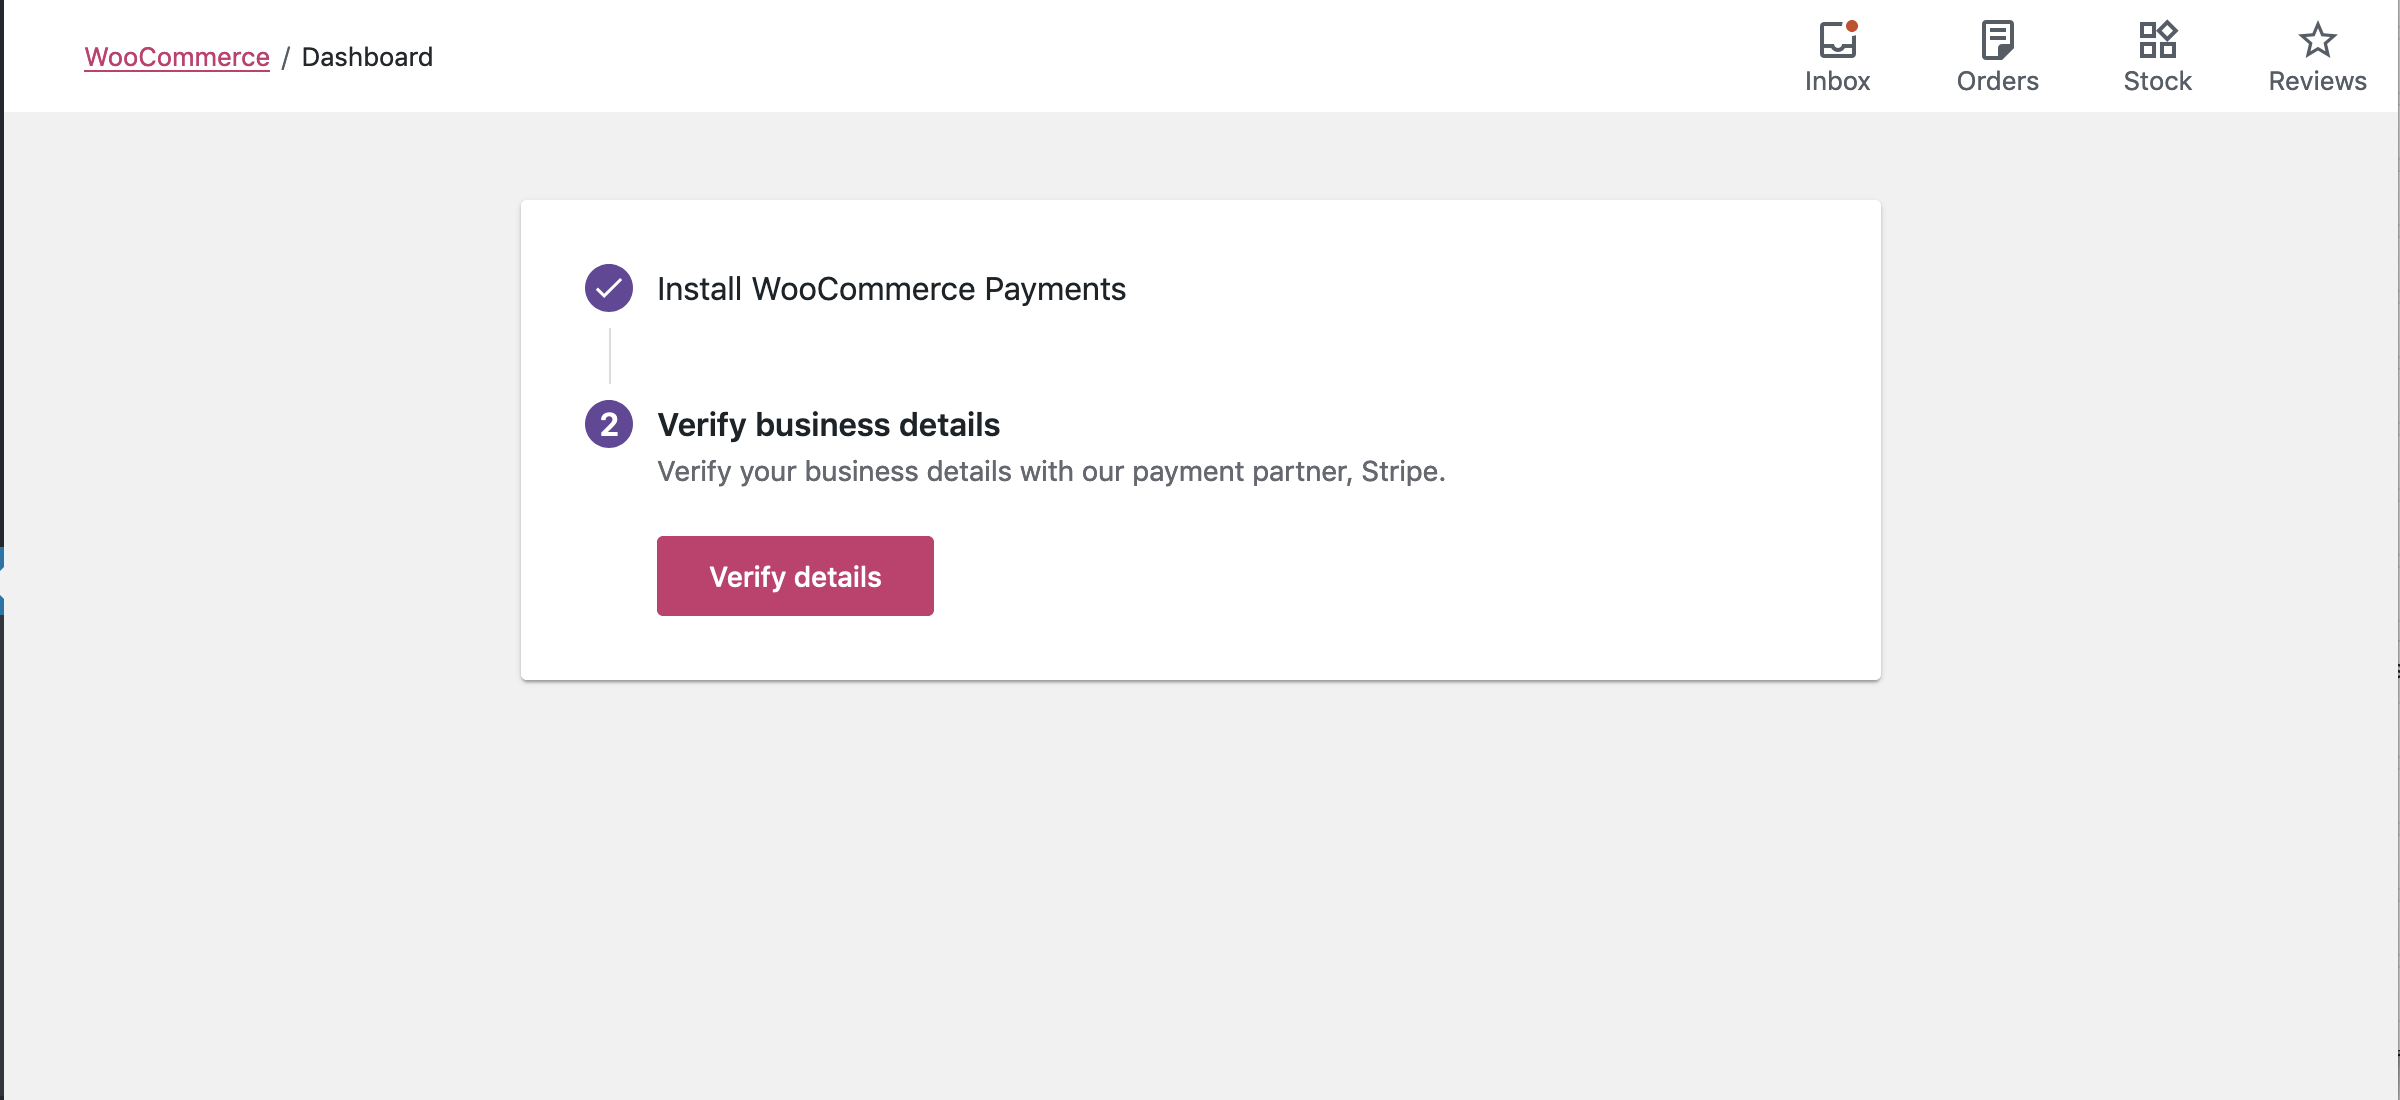
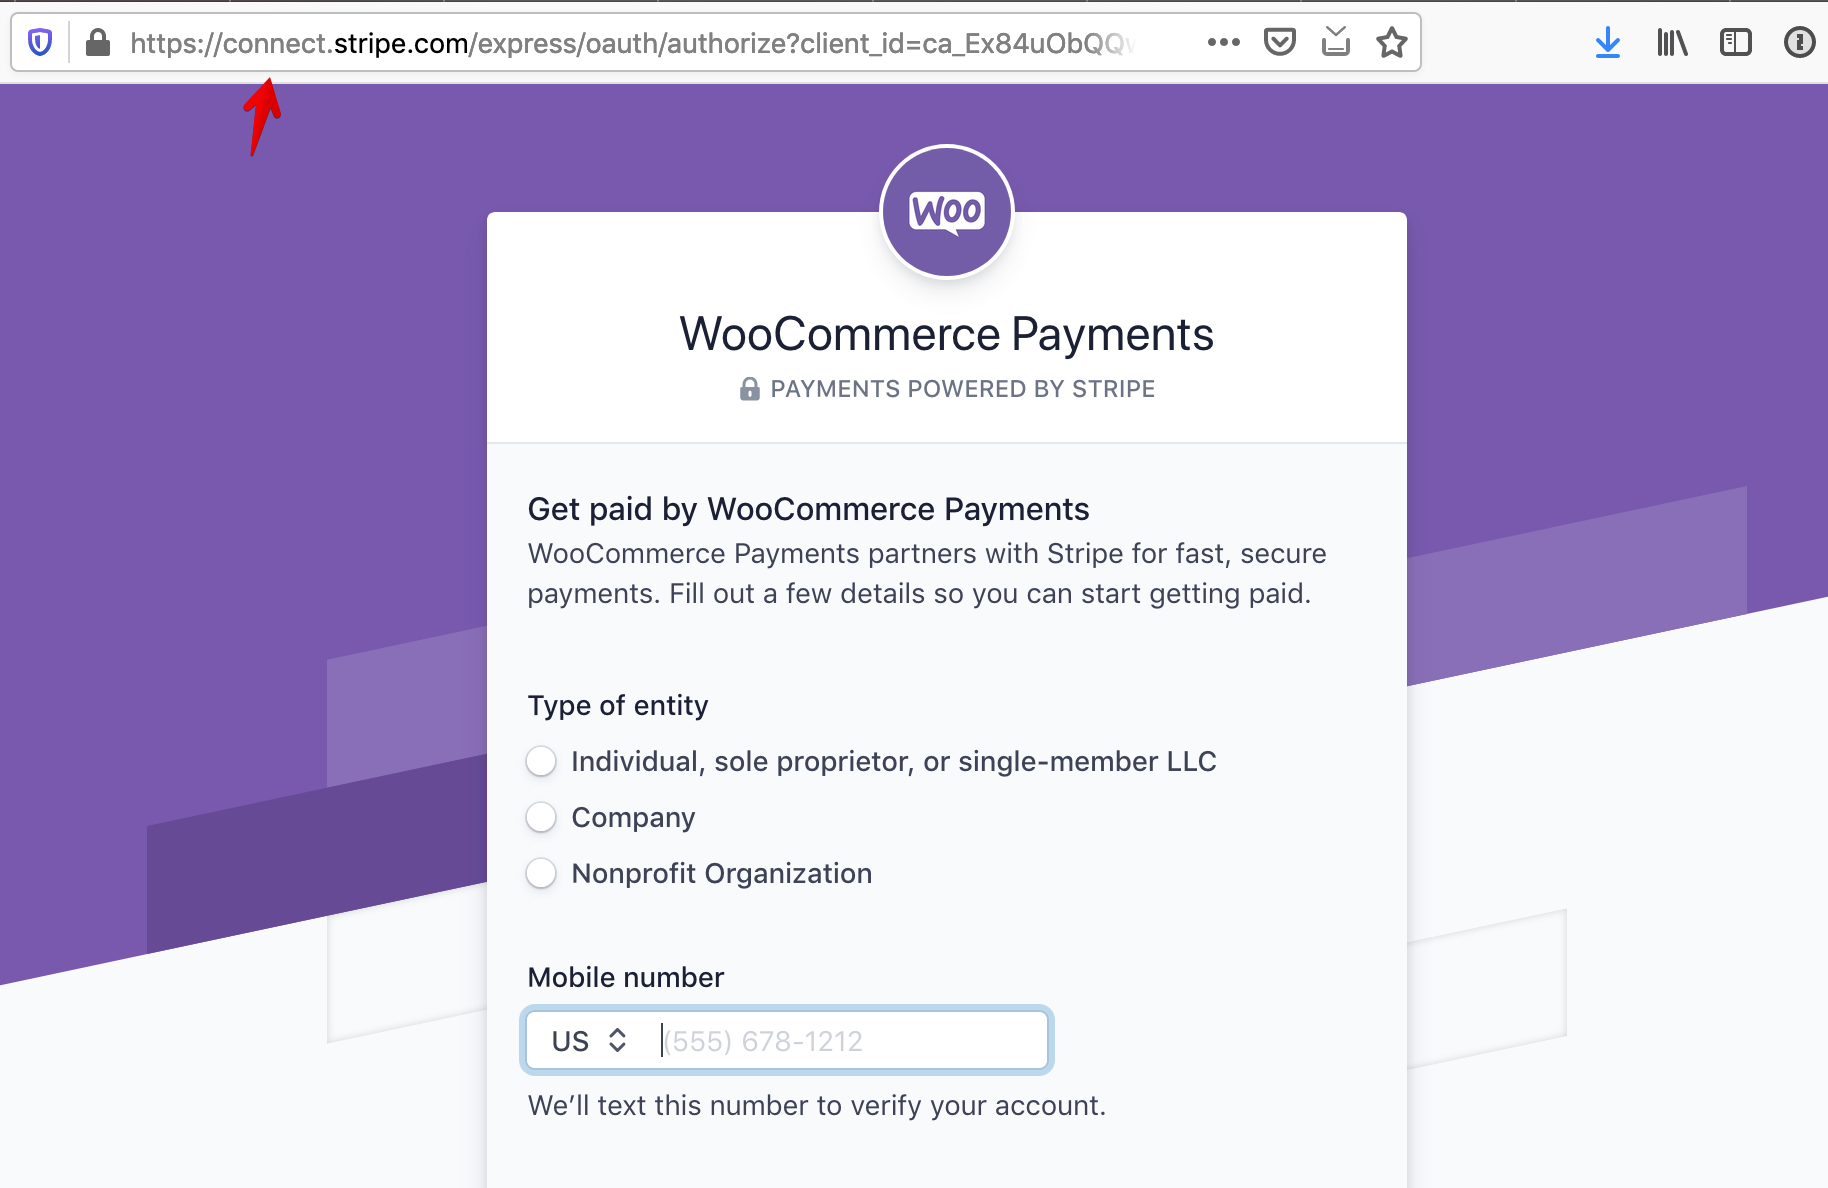
- You should then be redirected to the connect flow as seen below. This concludes testing this part of the setup checklist flow:
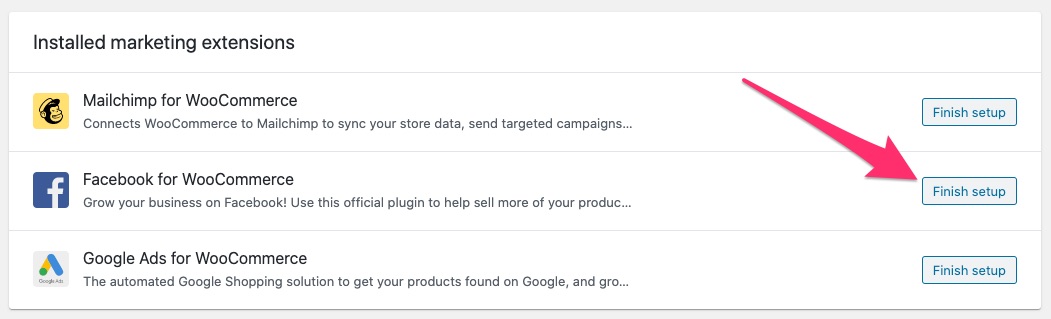
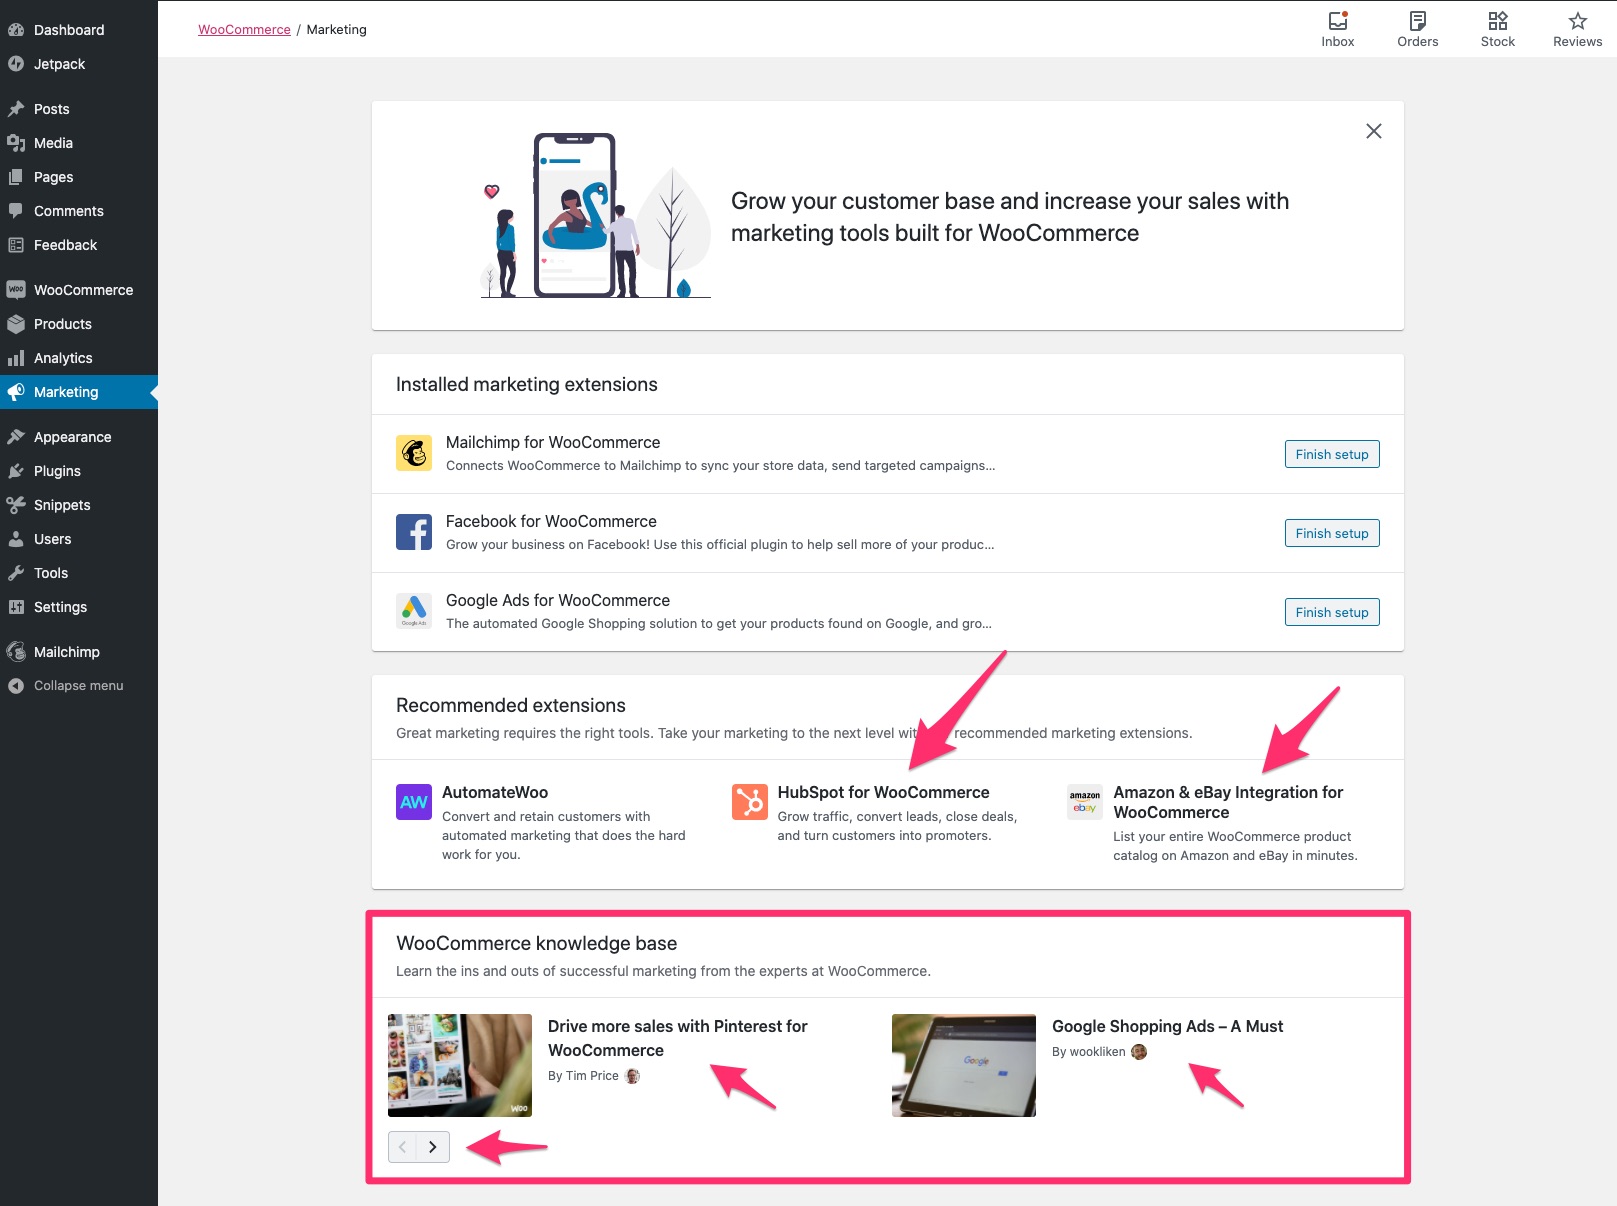
You'll notice the addition of the brand new Marketing section on the sidebar. When you click on it, you should see the following:
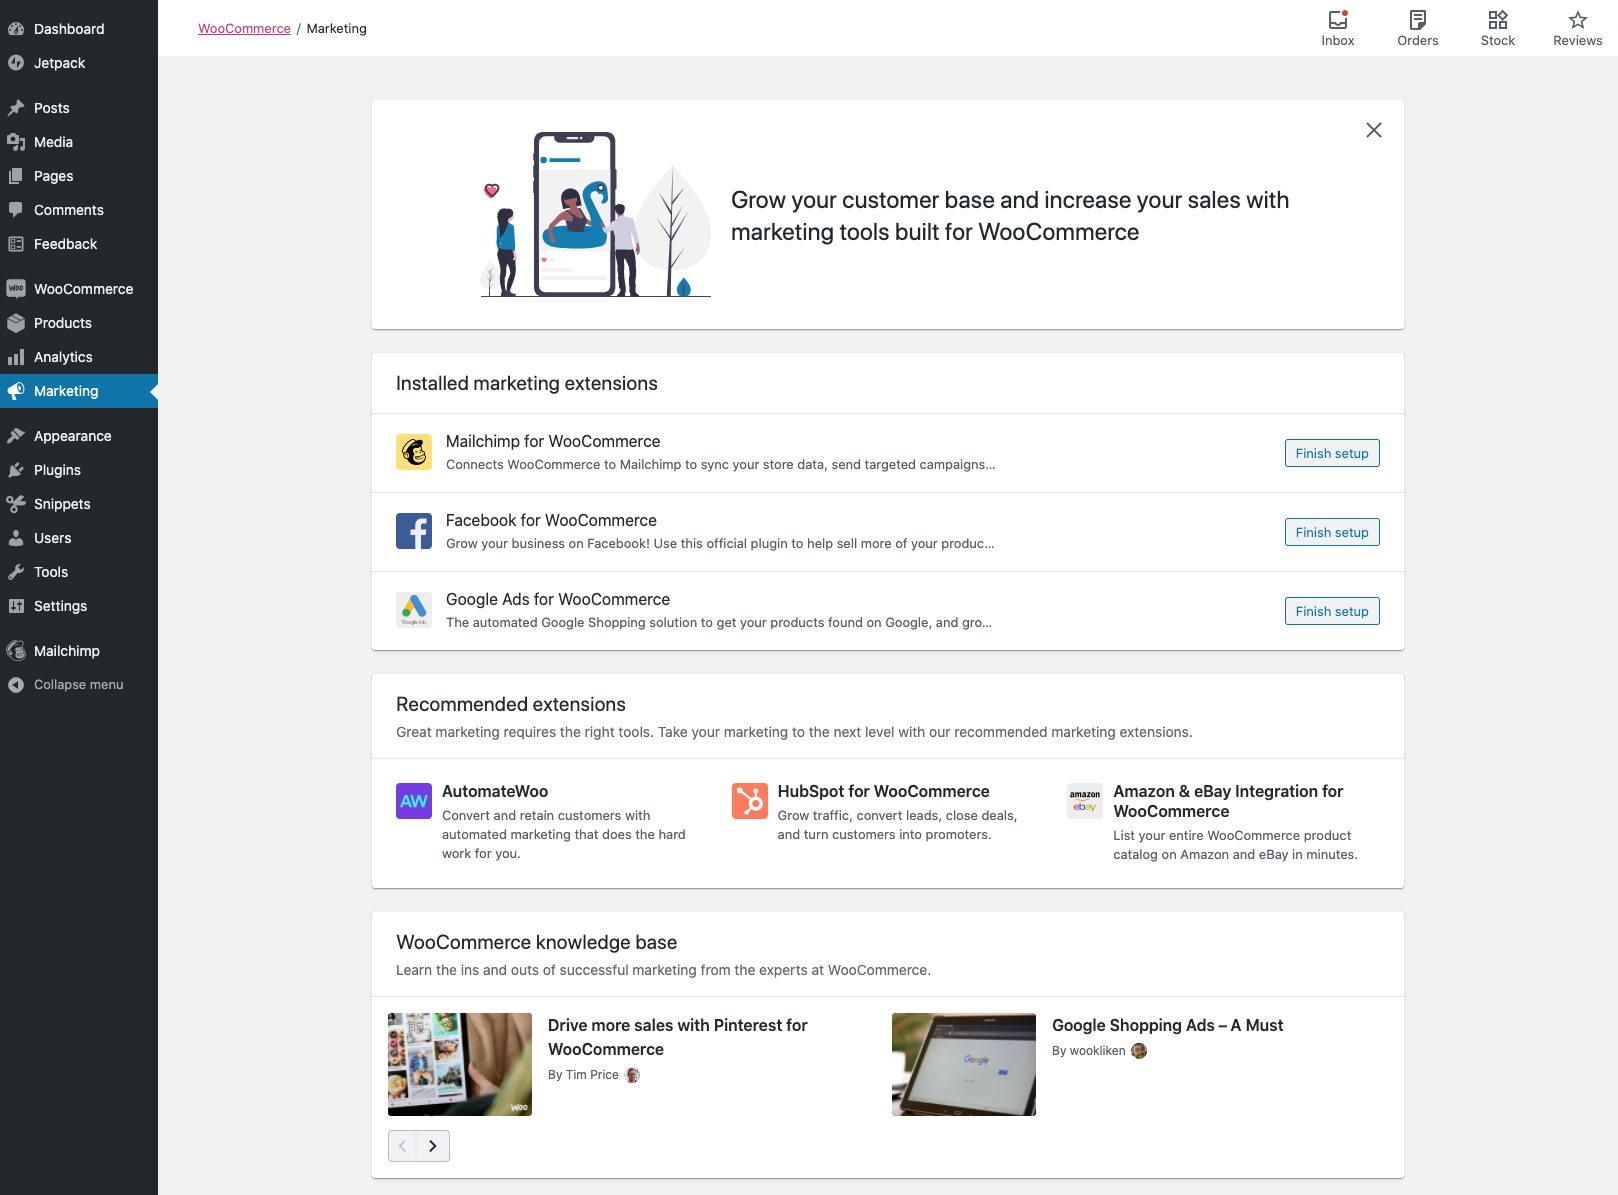
What we want to test here is that the connection to the various marketing services that we offer in this section works.
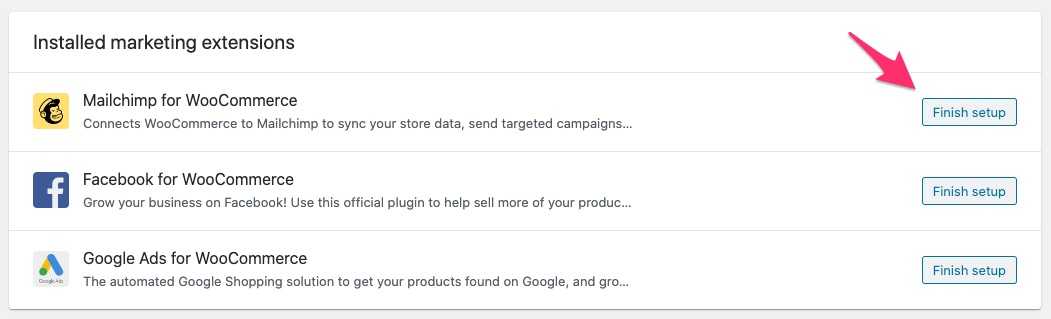
- Mailchimp for WooCommerce:
- Click on
Finish setup:
- Verify that you are redirected to the Mailchimp section and click on the
Connectbutton there:
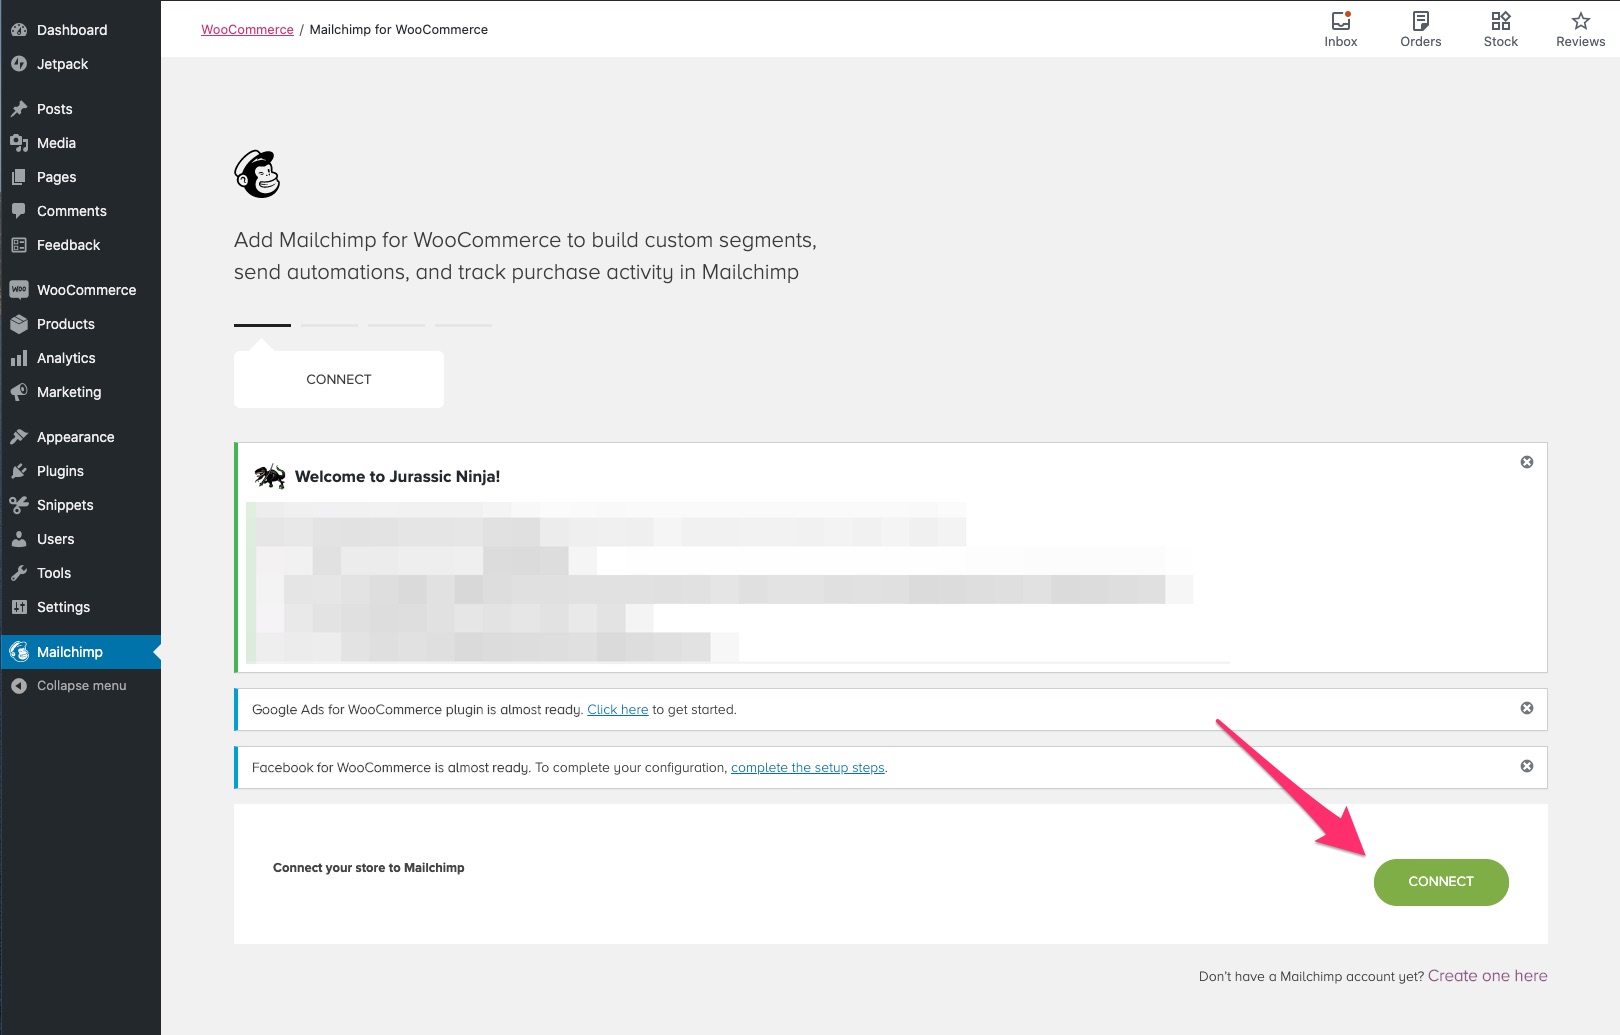
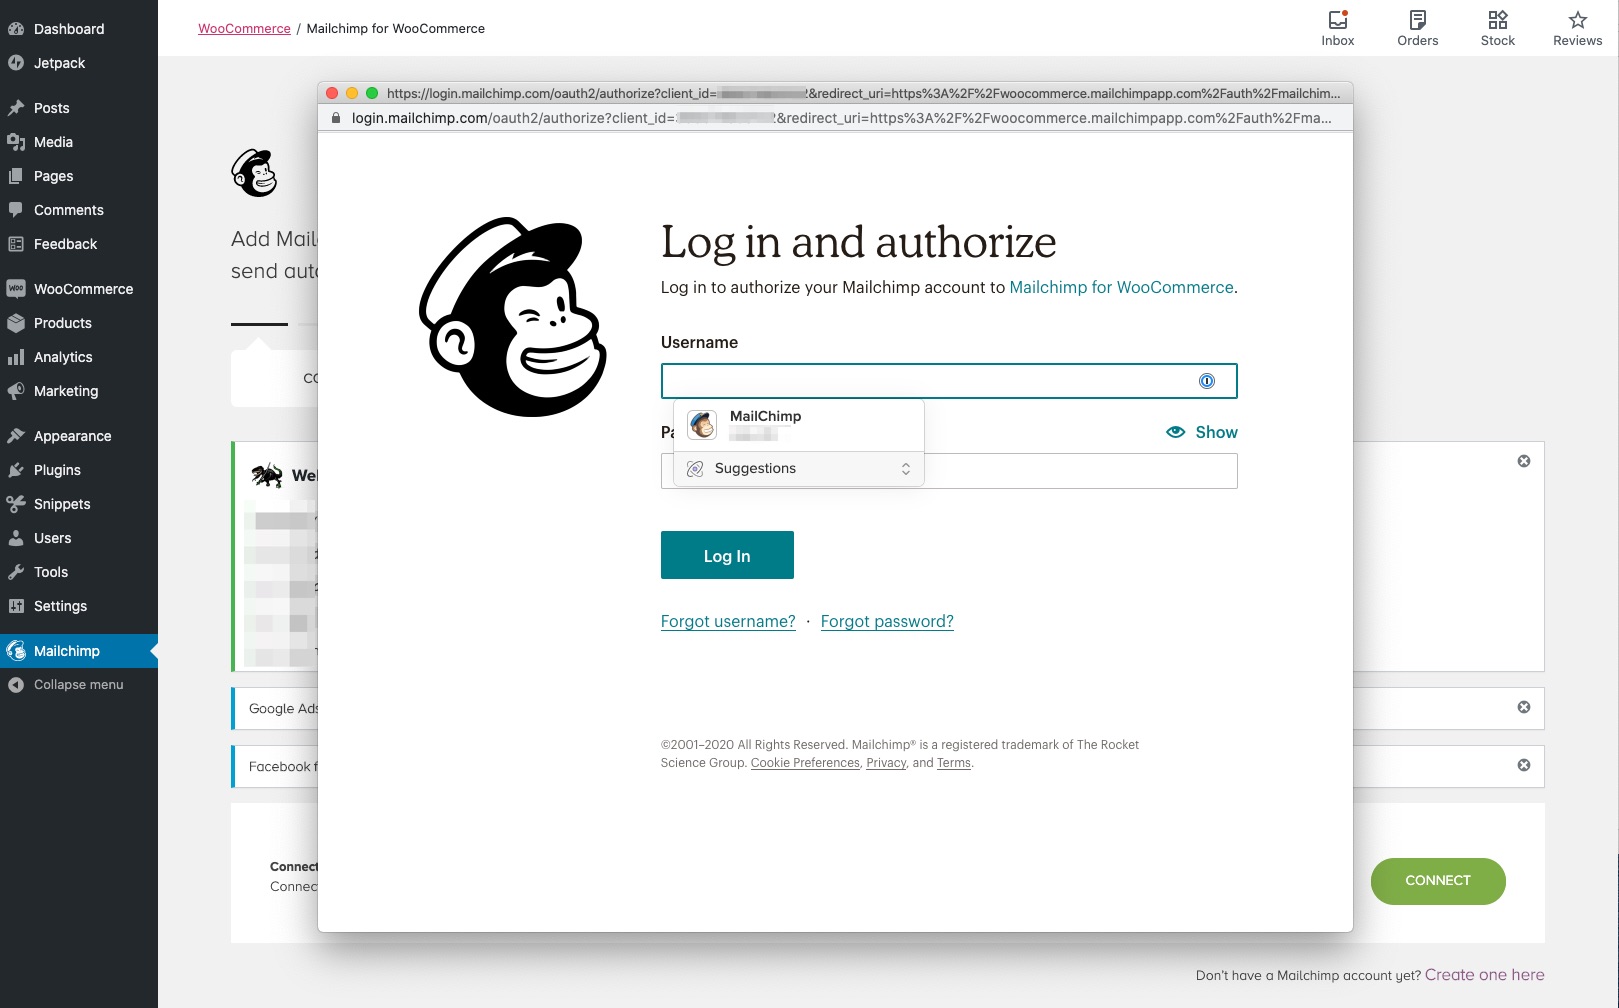
- Verify that you are being presented with the Login pop-up window:
- Facebook for WooCommerce:
- Click on
Finish setup:
- Verify that you are redirected to the Facebook section and click on the
Get startedbutton there:
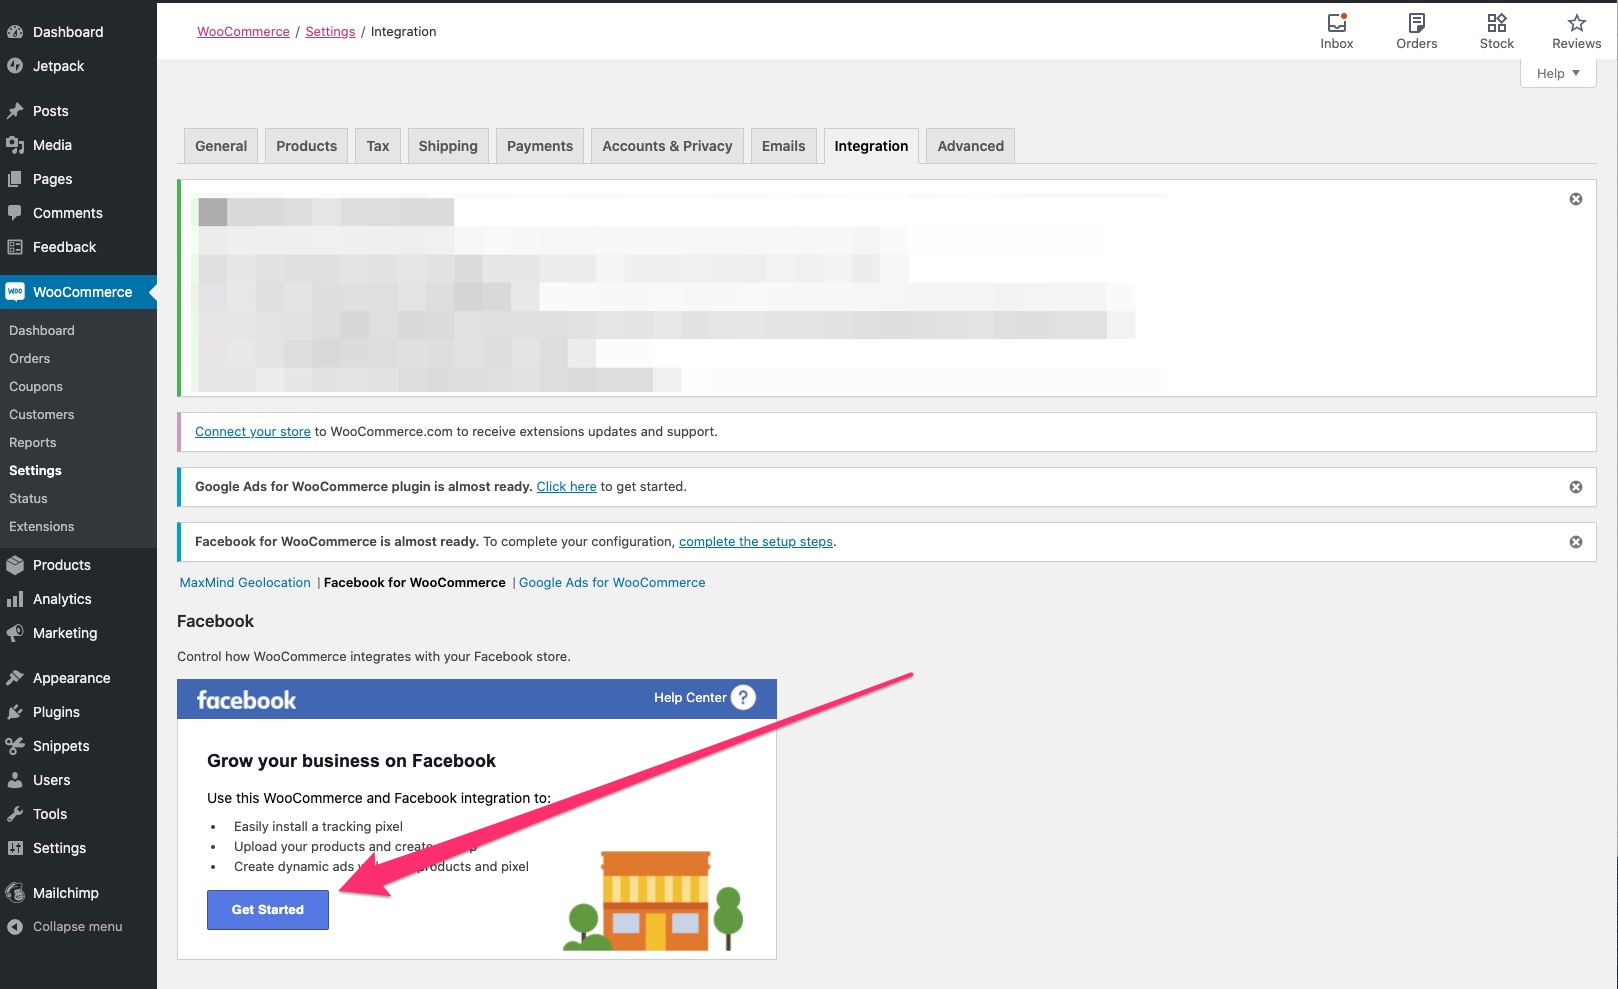
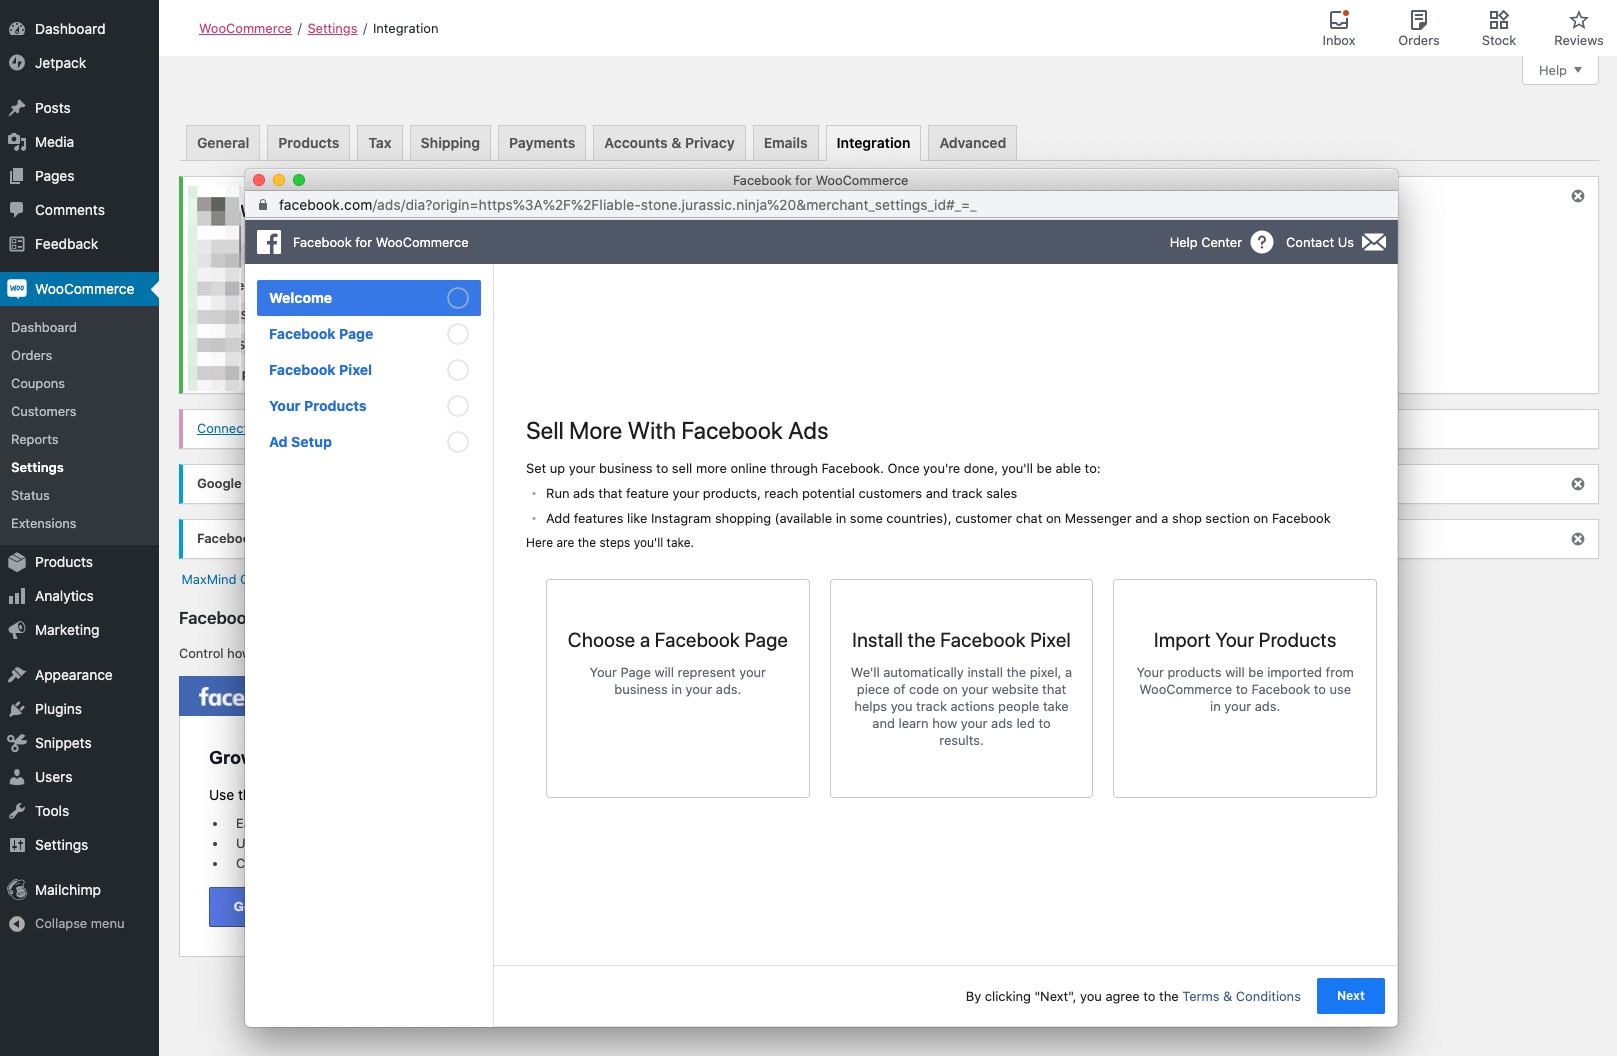
- Verify that you are being presented with the Login pop-up window:
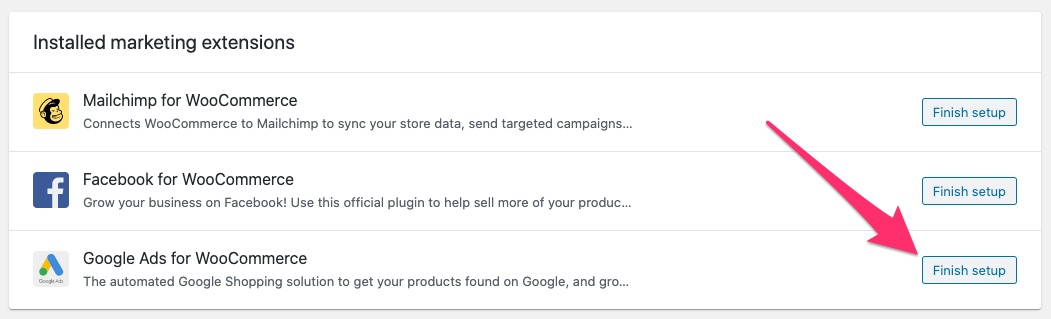
- Google Ads for WooCommerce:
- Click on
Finish setup:
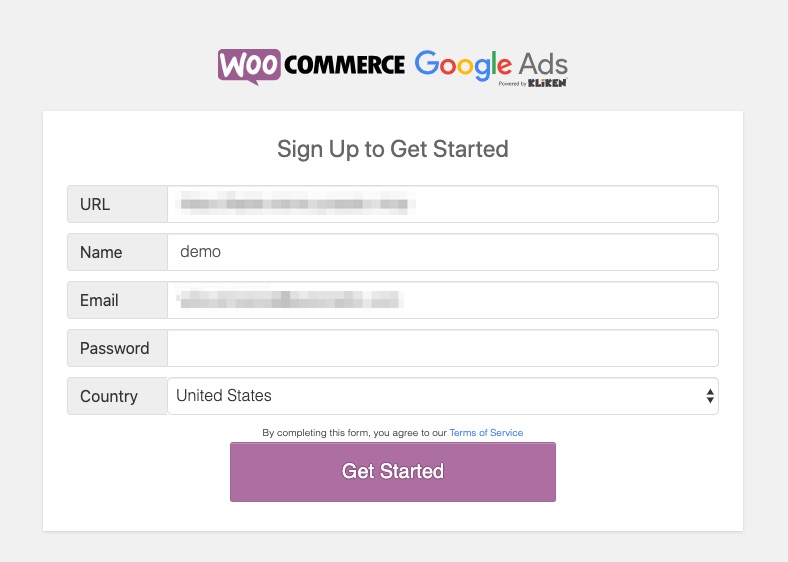
- Verify that you are redirected to the Google Ads section and click on the
Get startedbutton there:
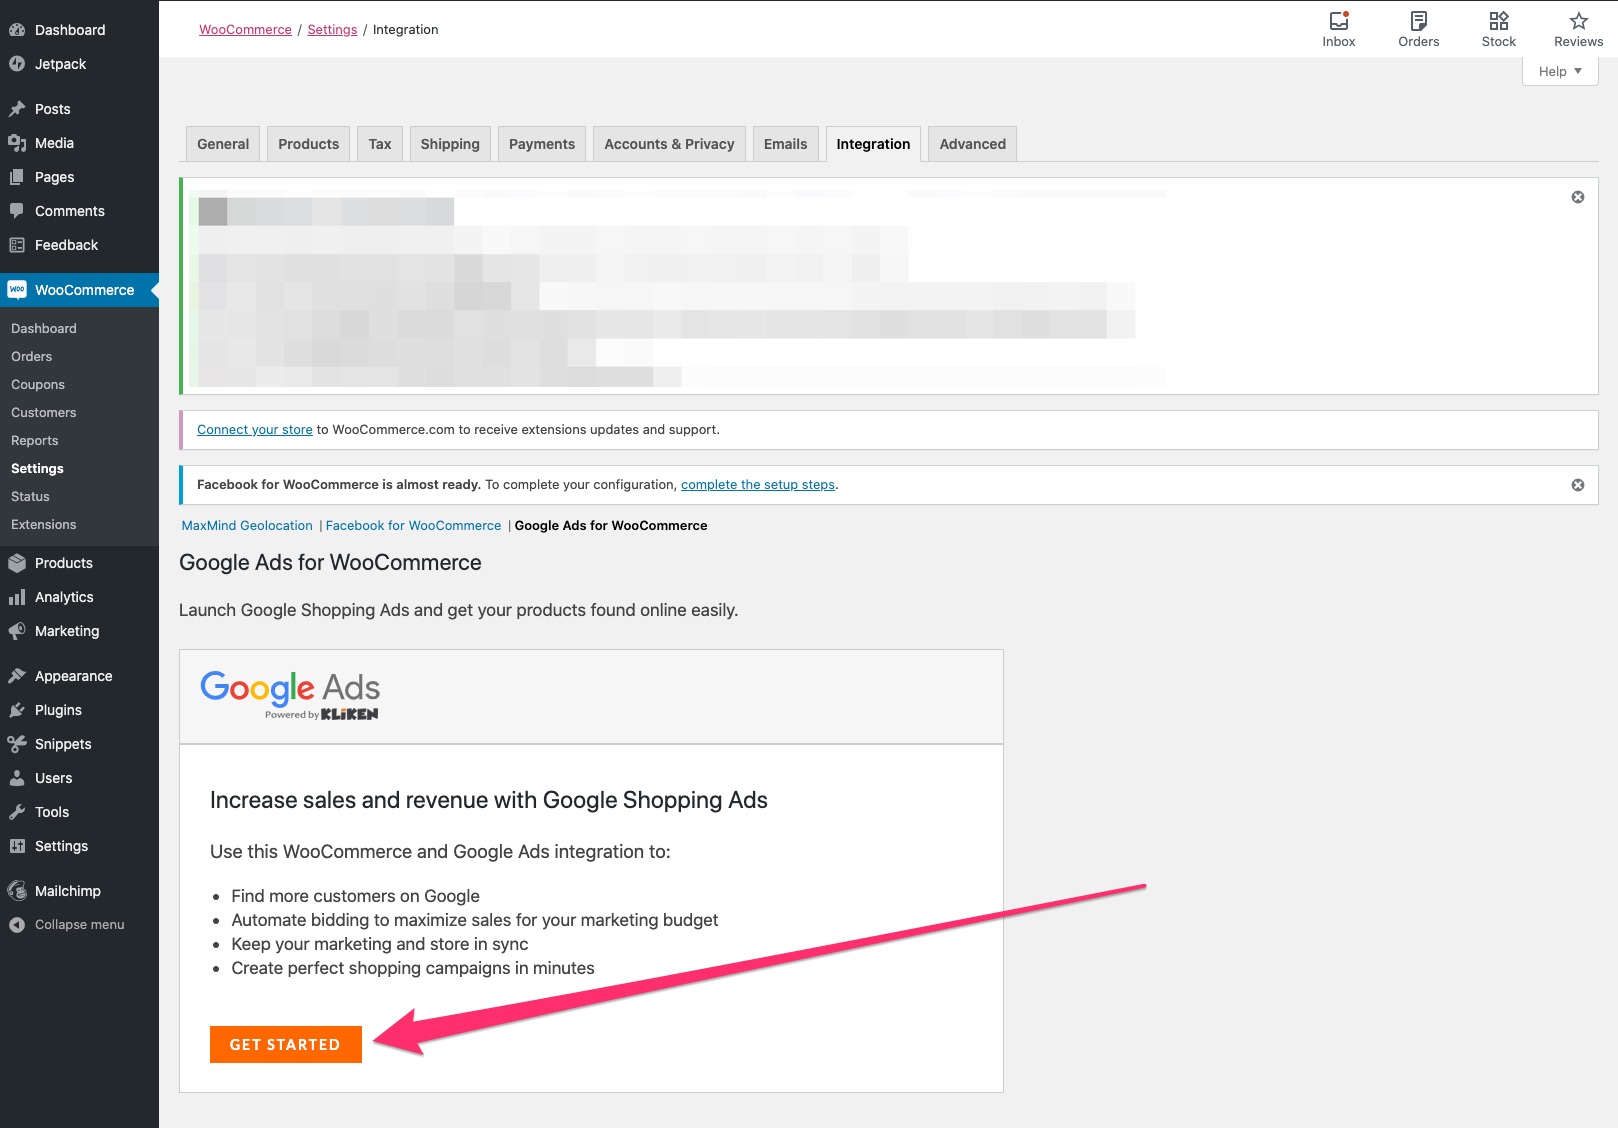
- Verify that you are being presented with the Login pop-up window:
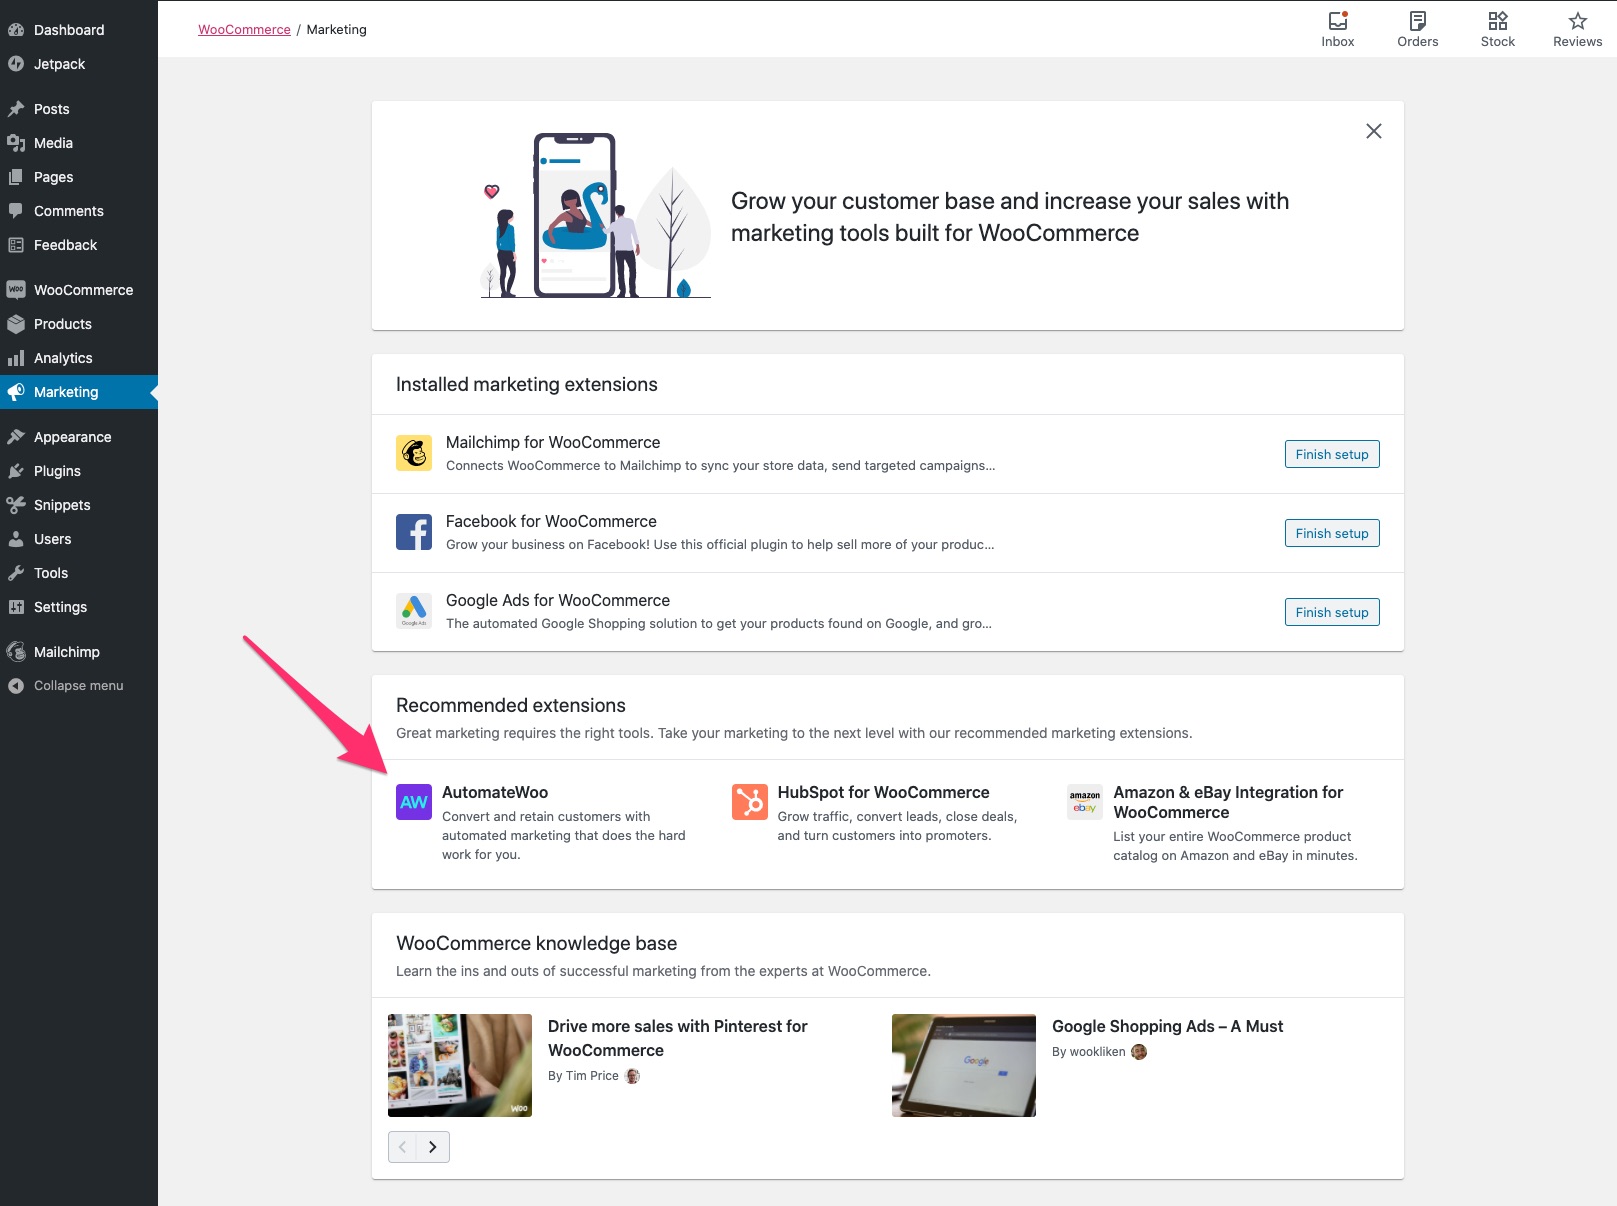
As for the rest of the options available throughout Marketing Hub, click on each of them, and verify that the option to connect/purchase appears. For example, click on AutomateWoo:
Verify that you can see purchase section:
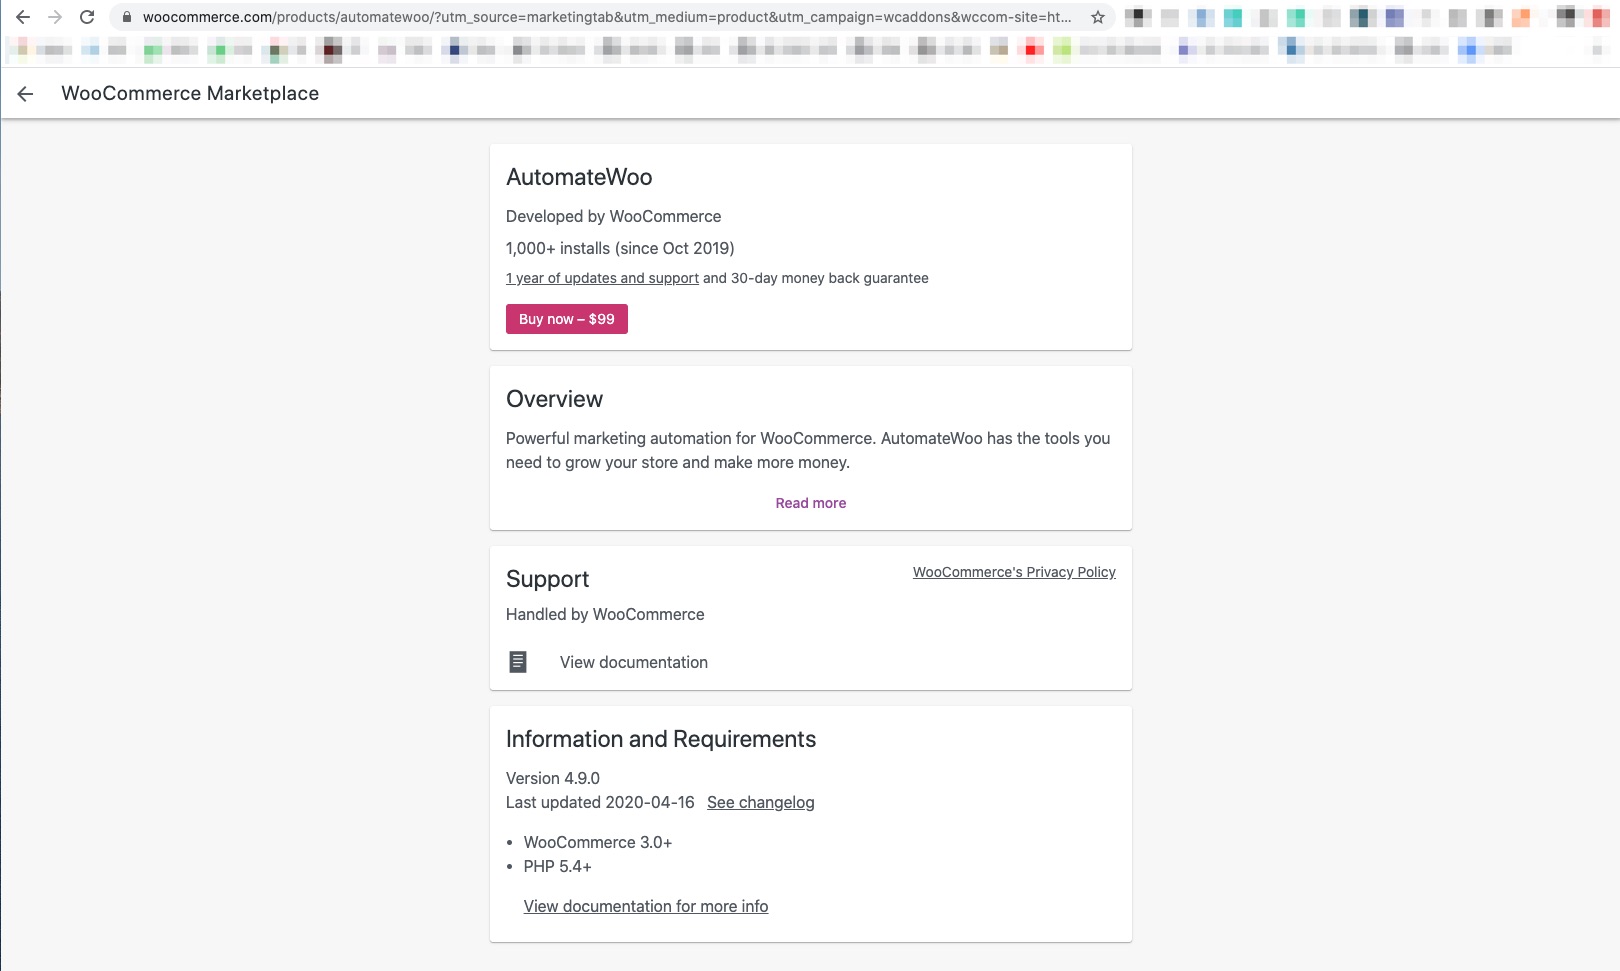
Click through every link on the purchase section screen to confirm that it works.
Repeat the same steps for "HubSpot for WooCommerce" and "Amazon & eBay Integration for WooCommerce". Also, click through every link in the "WooCommerce knowledge base" section to confirm all links work:
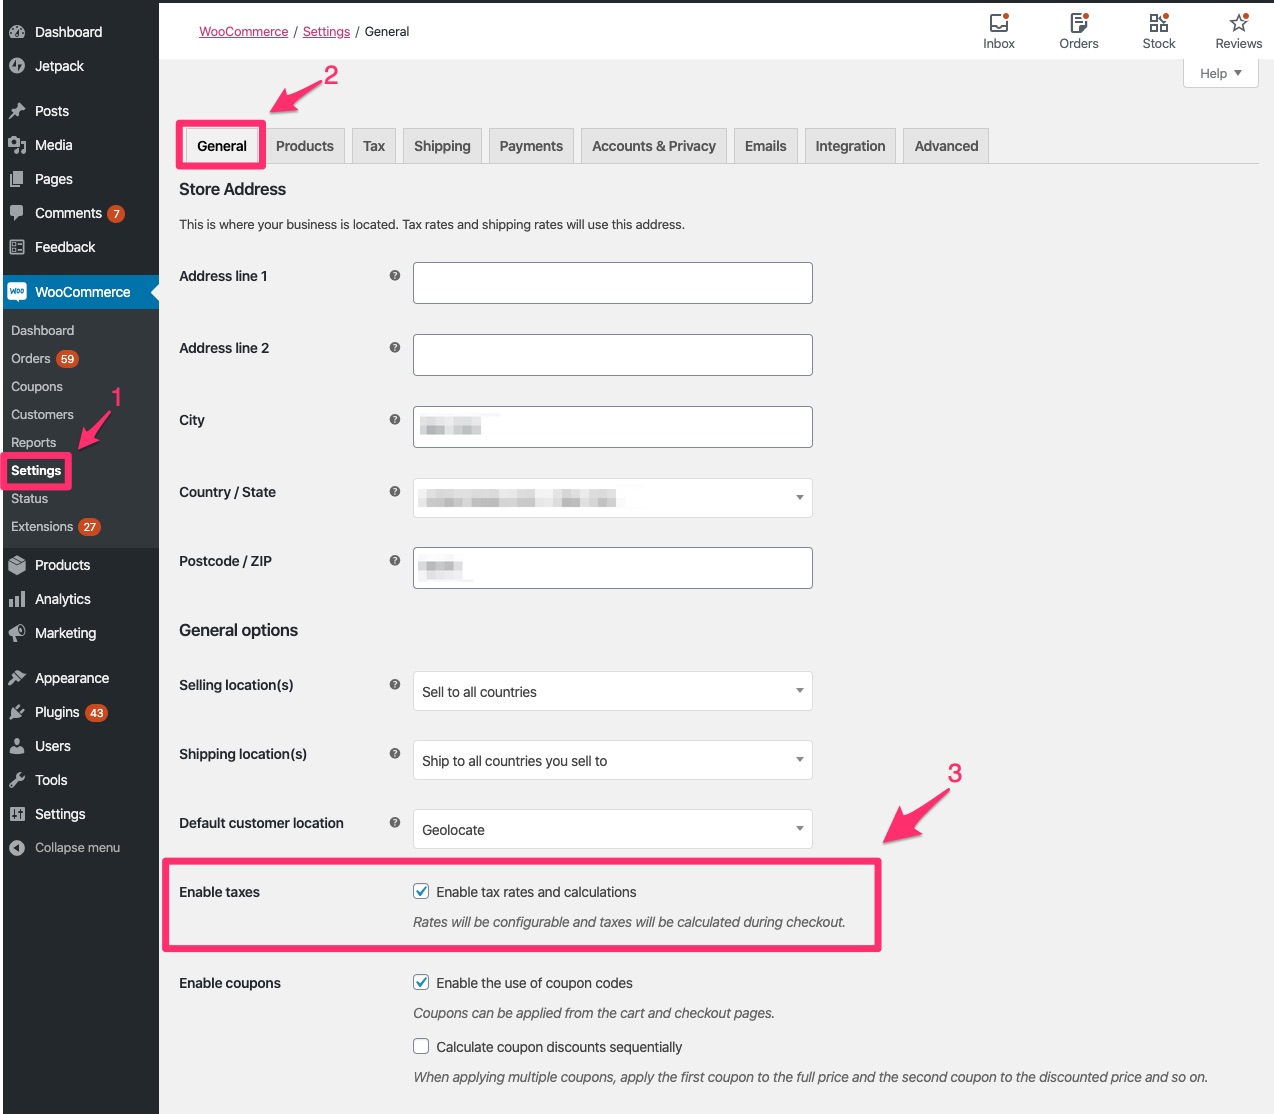
Before you start testing tax calculations, make sure tax calculations are enabled on your site:
Please test the following use cases:
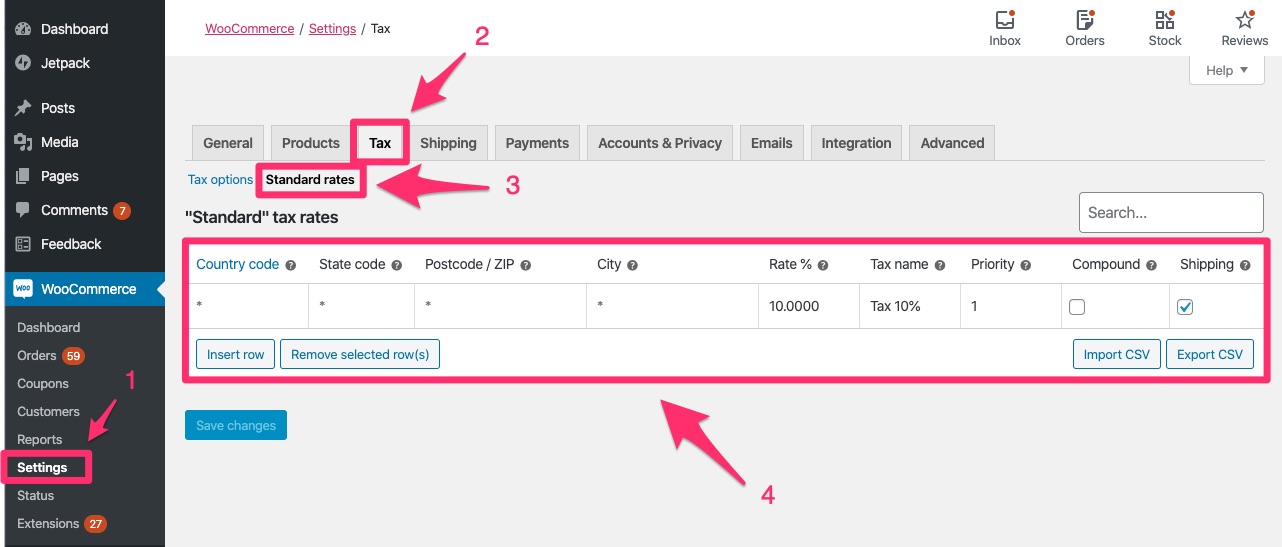
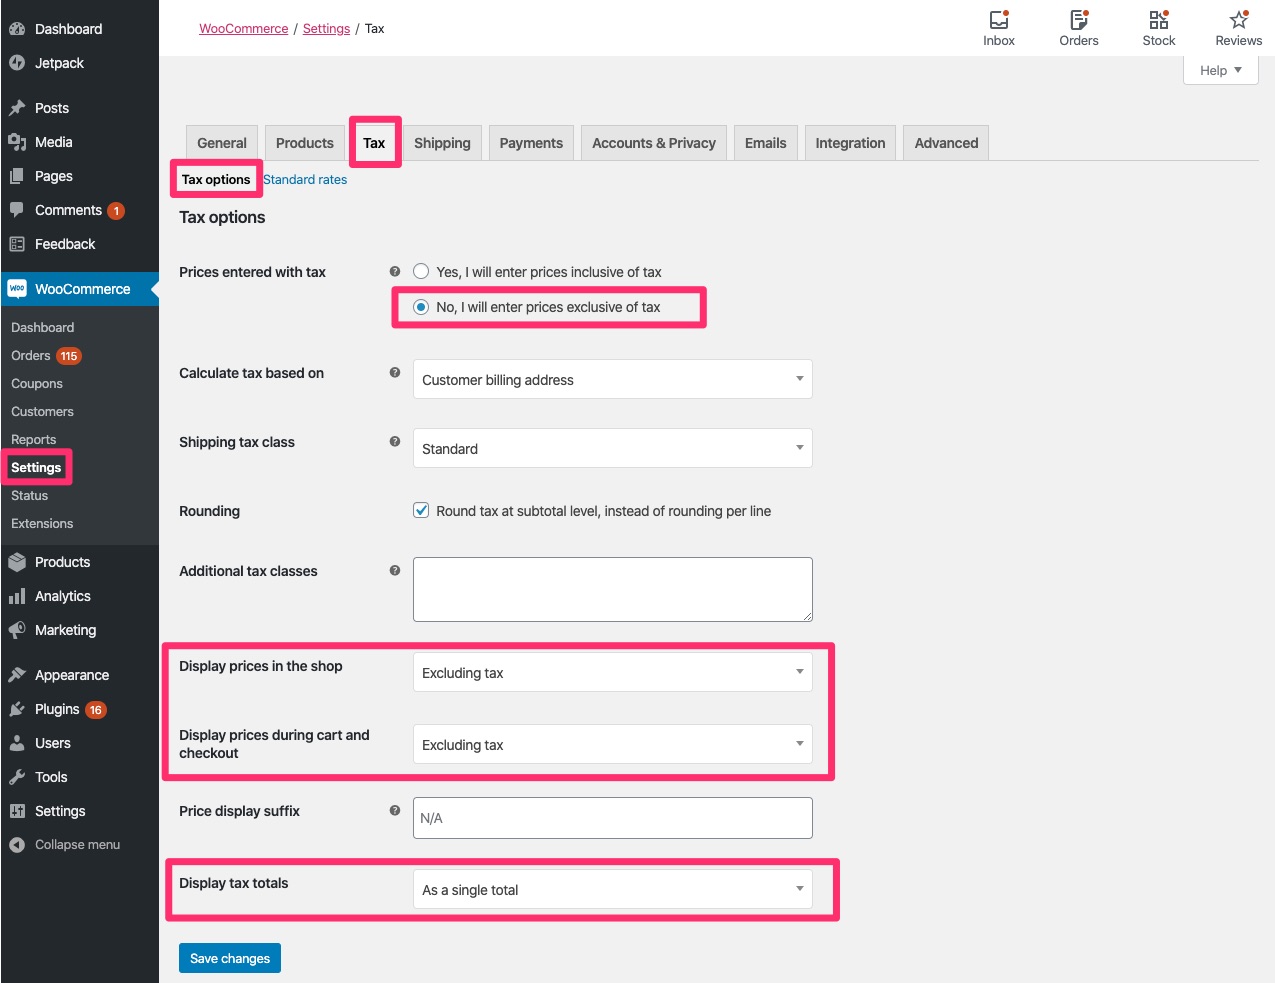
- Configure tax settings as shown below:

- Add 10% tax rate:
-
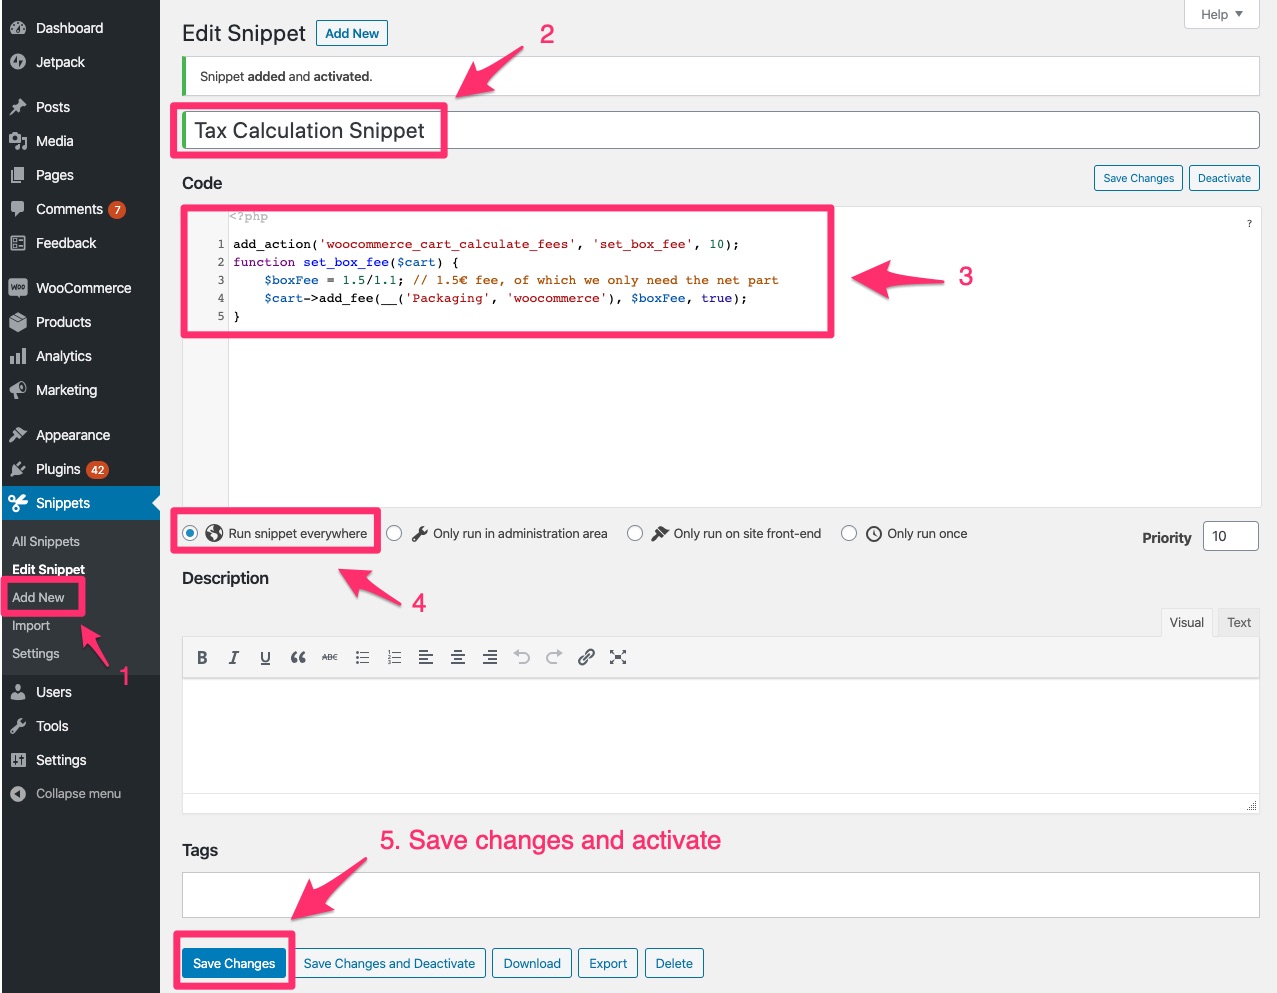
Download and install the Code Snippets plugin;
-
Add the following code snippet to the site using the plugin above (you can also add it directly to your theme's
functions.phpfile):
add_action('woocommerce_cart_calculate_fees', 'set_box_fee', 10);
function set_box_fee($cart) {
    $boxFee = 1.5/1.1; // 1.5€ fee, of which we only need the net part
    $cart->add_fee(__('Packaging', 'woocommerce'), $boxFee, true);
}
Screenshot showing how to add code snippet via Code Snippets plugin is below:
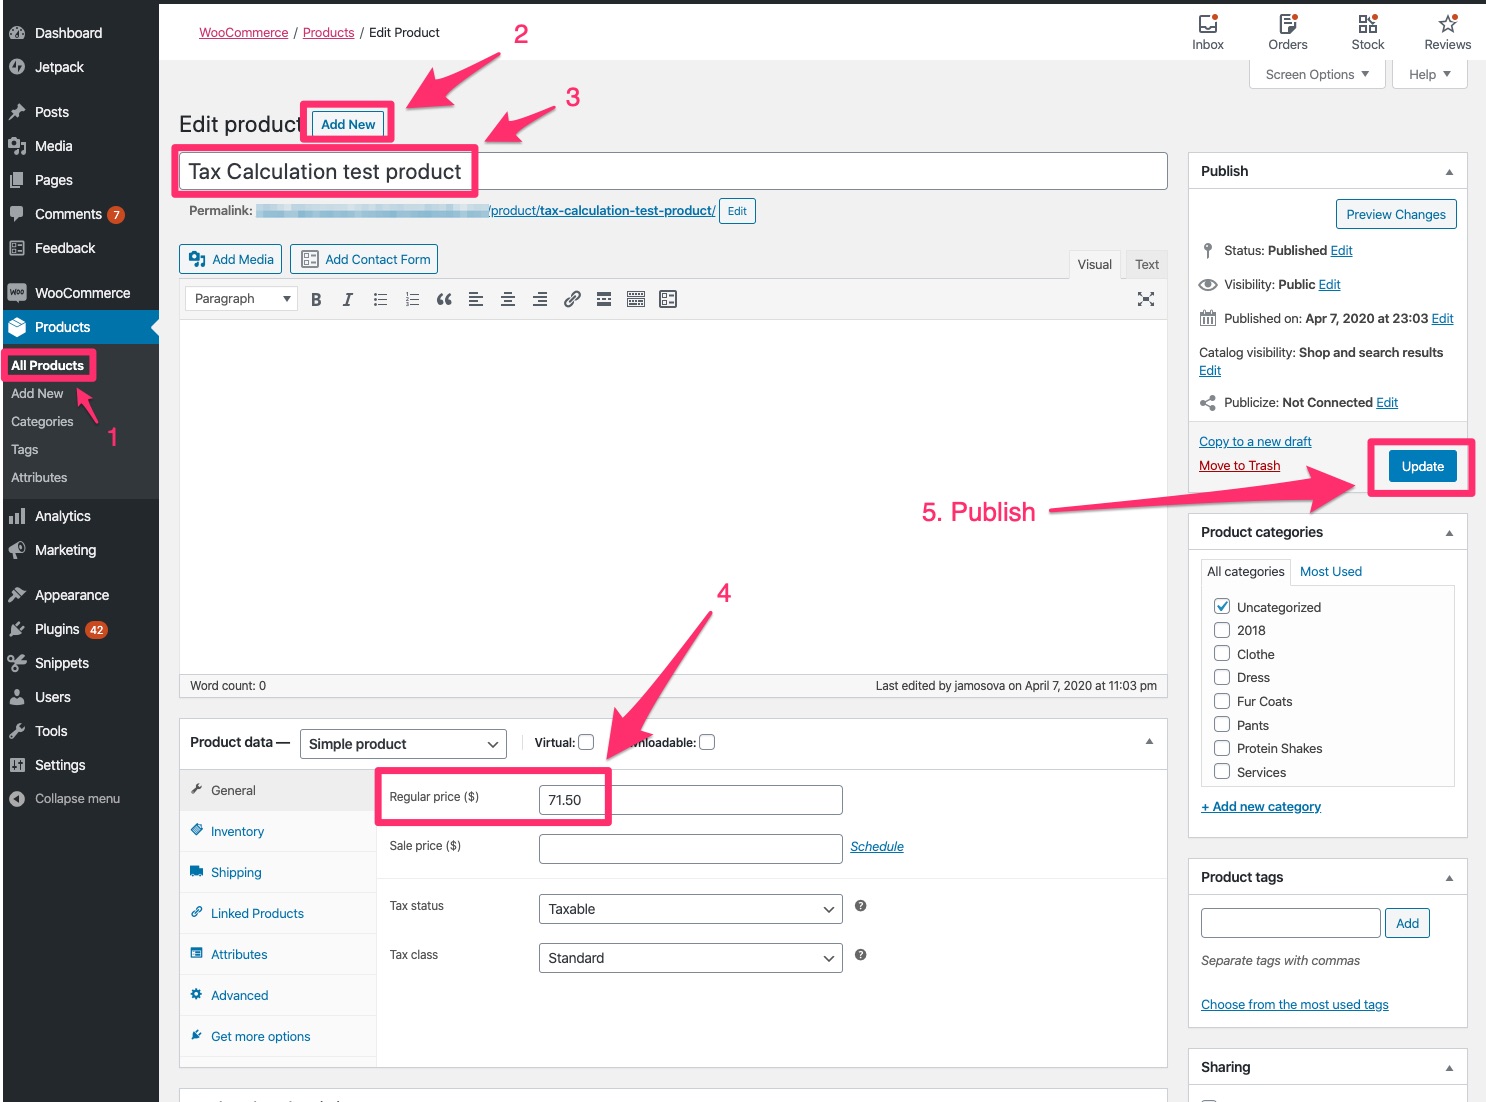
- Create a simple product with a price of $71.50:
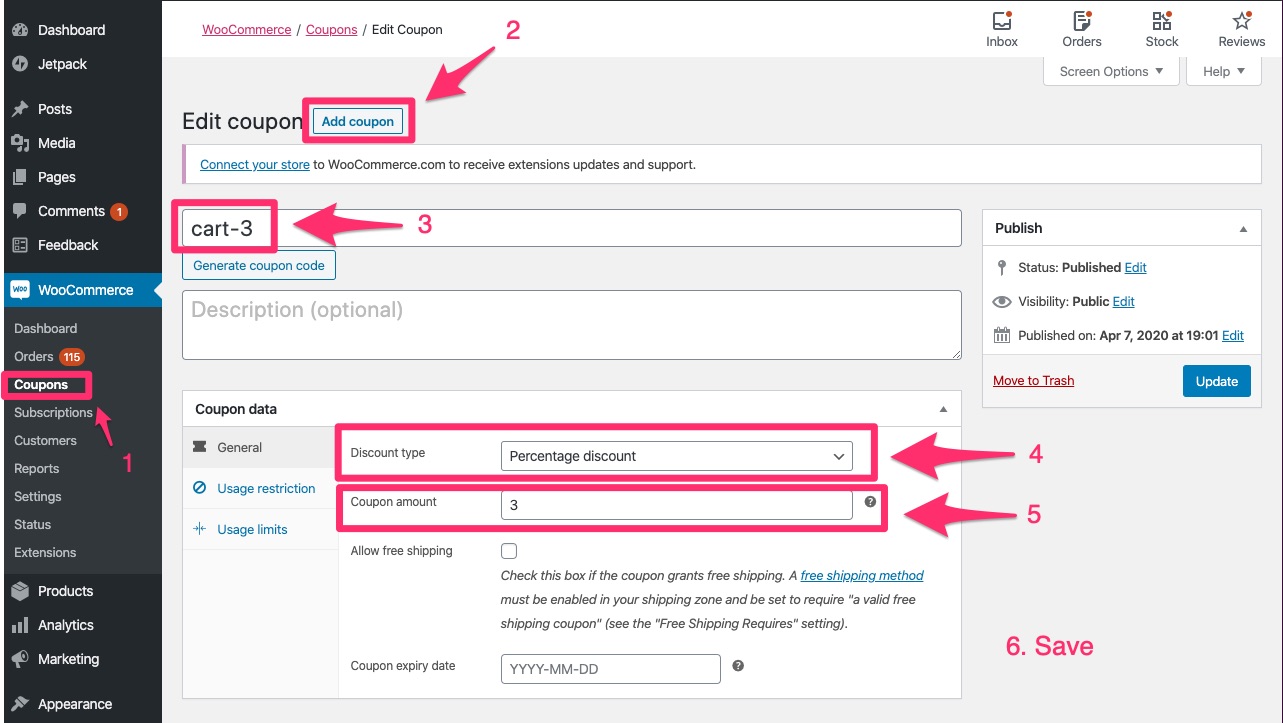
- Create a coupon with a 3% cart discount:
- On the front-end of the site, add the product you created to cart, move to checkout page (no need to actually place an order) and apply a coupon. The product total amount should be 0.86:

- Configure tax settings as shown below:
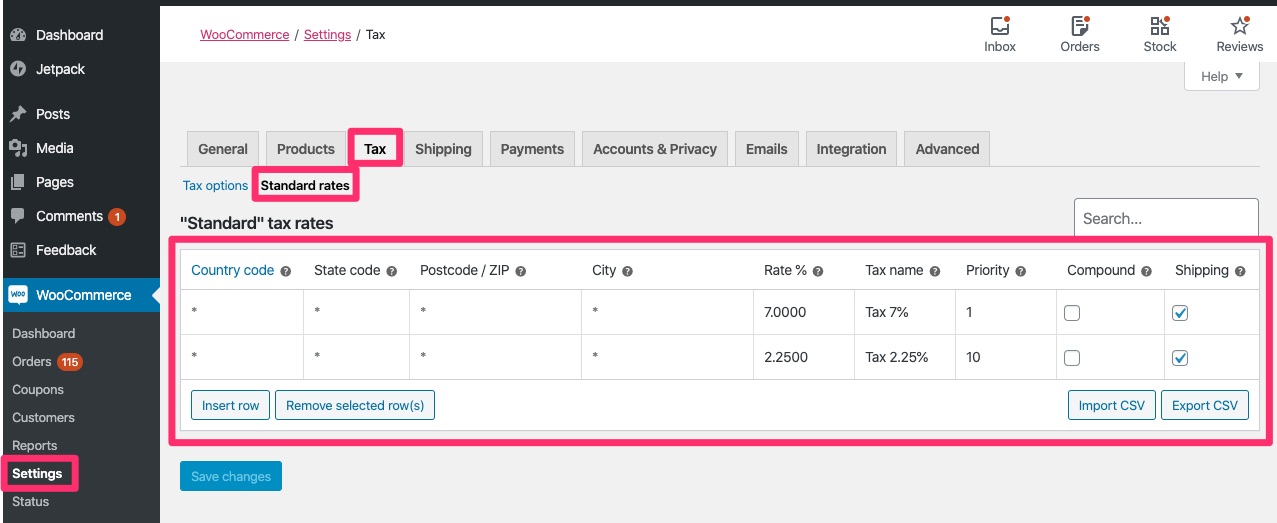
- Add 2 tax rates as follows (note the difference in priority):
-
Create Flat Rate shipping of $10.00;
-
Create a simple product with a price of $22.99;
-
Add product to cart and checkout - verify that the tax on the checkout page is $3.05:
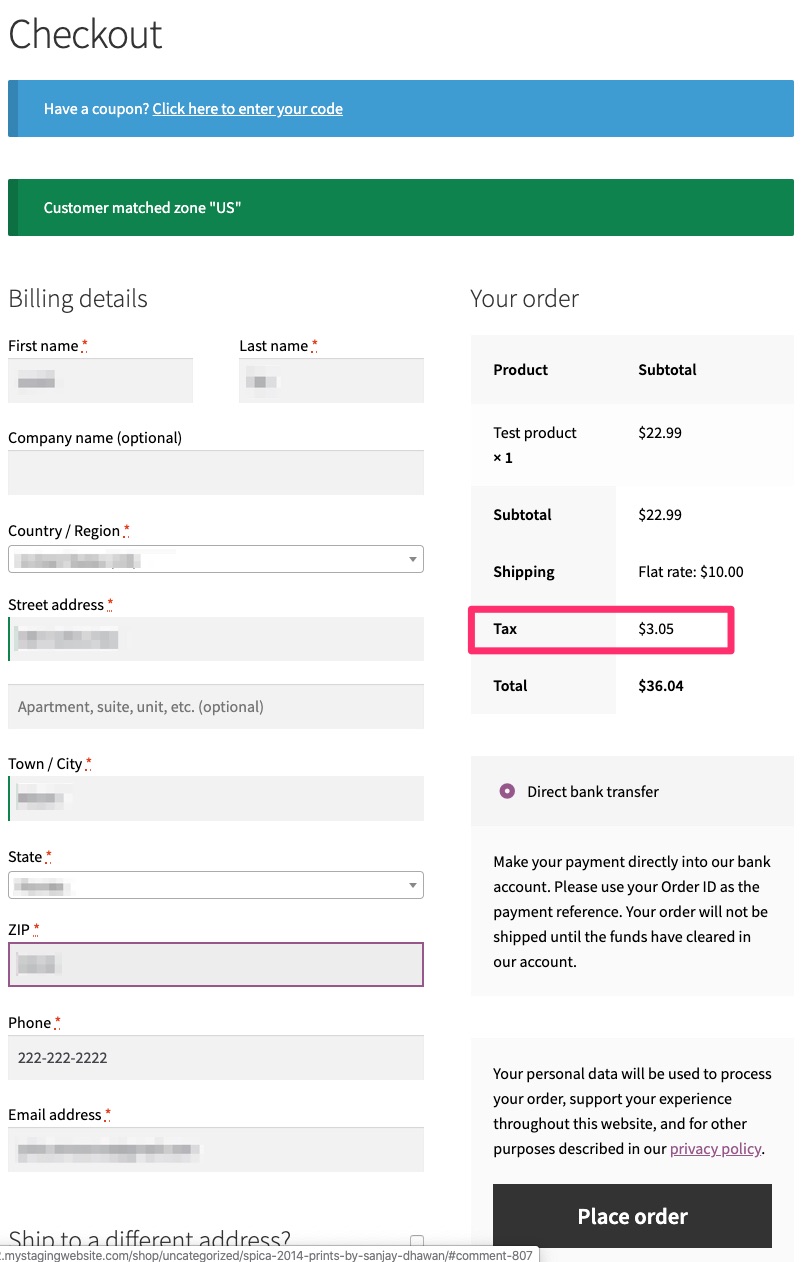
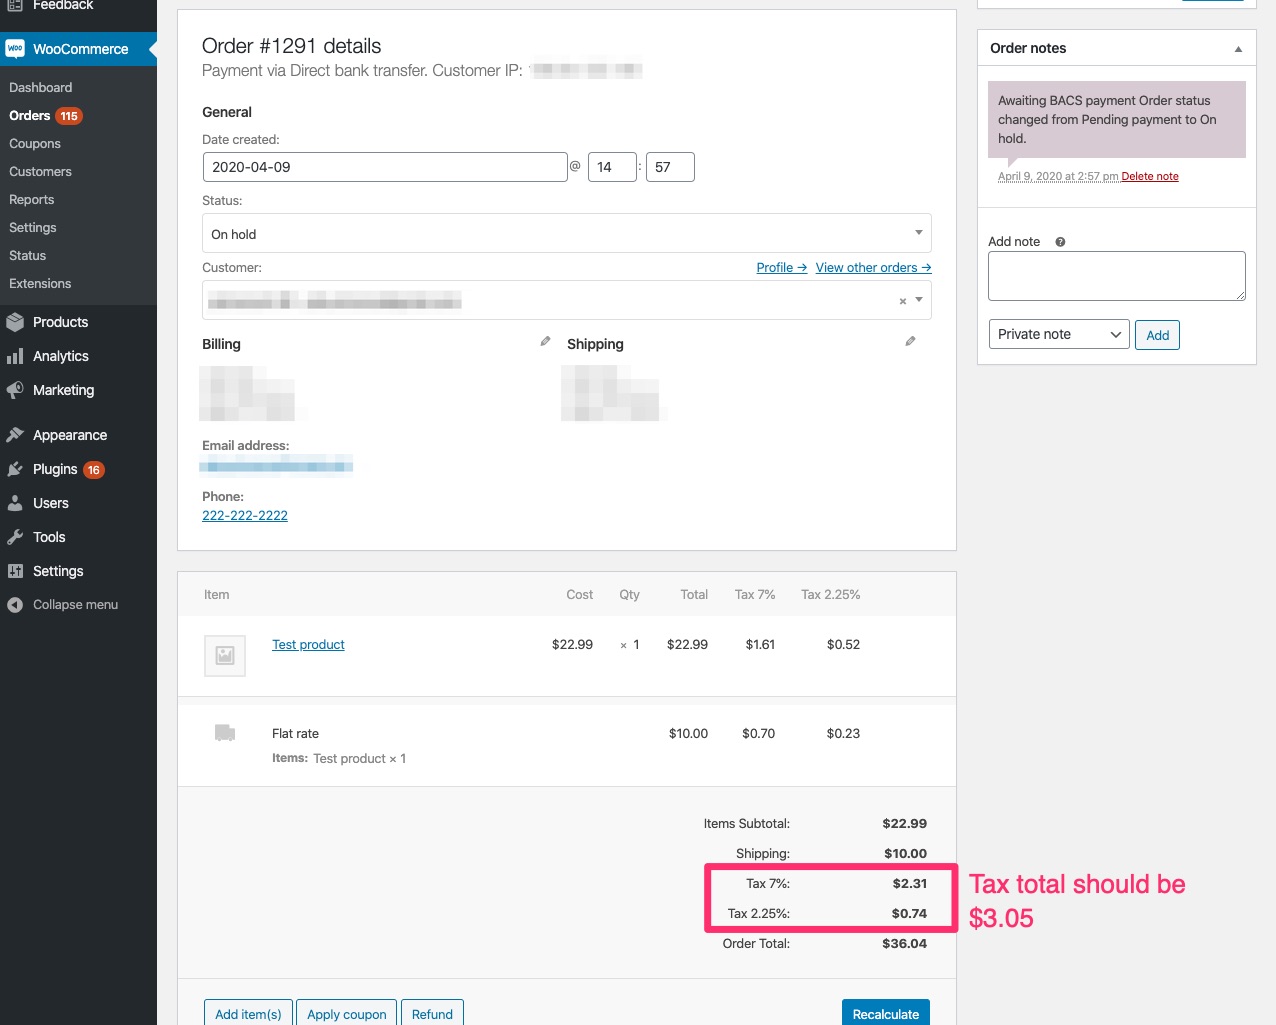
- Place an order and navigate to order page - verify that the tax is still $3.05:
This is the end of testing instructions for WooCommerce 4.1. Thanks for testing!