Release Testing Instructions WooCommerce 6.9
WooCommerce 6.9 includes:
Blocks 8.3.2 #34543
Fix Best Selling Products block ordering (7025)
- Place a test order on a product if you haven't done so already on your store. Make sure you mark this order as complete in WooCommerce > Orders after checkout.
- Create a page and add the best [best_selling_products] shortcode.
- Create a 2nd page and add Best Selling Products block.
- View the 1st page (the one that has the [best_selling_products] shortcode) on the frontend.
- View the 2nd page (the one that has the Best Selling Products block) on the frontend.
- Verify that the sorting of the items in these 2 pages are exactly the same.
Blocks 8.1.0-8.3.1 #34359
Blocks 8.1.0
Update WooCommerce block template descriptions. (6667)
- Activate a block theme, like Twenty Twenty-Two.
- Open the Appearance > Editor (Beta).
- Using the dropdown arrow next to the Template name, select the Browse all templates button.
- Confirm the following updated WooCommerce templates' descriptions:
- Single Product: Displays a single product.
- Product Catalog: Displays your products.
- Products by Category: Displays products filtered by a category.
- Products by Tag: Displays products filtered by a tag.
- Product Search Results: Displays search results for your store.
Add filter URL support to filter blocks when filtering for All Products block. (6642)
For each filter block (by Price, by Attribute, by Stock and Active filters) ensure:
- No regression when used with PHP templates.
- The URL is updated when checking or unchecking filters.
- For filter blocks using the filter button, the URL is updated after clicking the filter button.
- With the updated URL, all selected filters are set correctly after reloading the page. Filter blocks with or without the filter button should work the same.
- Removing the filter from the Active Filters block should update the URL and the corresponding filter block.
Add: Allow choosing between single and multiple sections. (6620)
- Edit a page containing an attribute filter block.
- See no "Attempt block recovery" button for that block.
- Select that attribute filter block, and see the new setting "Allow selecting multiple options?" set to "Multiple by default".
- Switch that setting to Single. See the Query Type setting disappear.
- Switch back to Multiple. Set display style to Dropdown and query type to AND.
- Save the page.
- Visit the page on the front end, and see that we can select multiple attributes.
Prevent Featured Product block from breaking when product is out of stock + hidden from catalog. (6640)
- Add a Featured Product block to a page and save.
- Head to the product and set the product to Out of Stock.
- Under WooCommerce > Settings > Products > Inventory, check the box that says "Hide out of stock items from the catalog".
- Return to the page with your Featured Product block, select it, and select "Edit" to choose a new product to feature.
- Make sure the block can still be edited to choose a new product.
Contrast improvement for checkout error messages when displayed over a theme's dark mode. (6292)
- Use a theme that supports dark mode and enable it, e.g. Eksell. You can do this by going to Appearance > Themes > Make sure Eksell is the active theme > Click 'Customize' in the Eksell theme > Colors > Scroll down to the setting
Enable Dark Mode Color Paletteand check it. - Create a test page and add the checkout block.
- Click on the checkout block and activate the option Style » Dark mode inputs in the sidebar.
- Save that test page and go to the frontend.
- Add a product to the cart and go to the test page with the checkout block.
- Clear all form fields, if they're pre-filled, and click on place order.
- See the error messages with sufficient color contrast.
Before the contrast improvement

After the contrast improvement

Blocks 8.1.0
Remove compatibility notice for Mini Cart block (6803)
- Make sure you have a blocks theme active (like Twenty Twenty-Two).
- Clear the local storage of your browser.
- Add the Mini Cart block to the header template part.
- Don't see compatibility notice.
- Create a new page > Add the Cart block to that page.
- See the compatibility notice as normal.
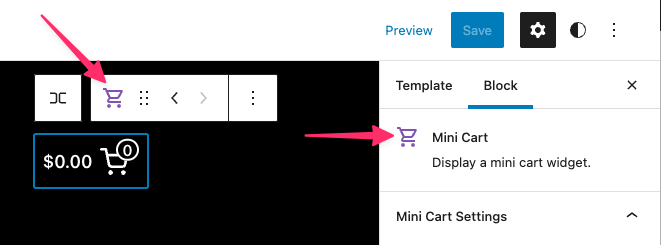
Add new icon for mini cart block (6784)
- Make sure you have a blocks theme active (like Twenty Twenty-Two).
- Navigate to Appearance > Editor (Beta) and add a Mini Cart block somewhere in your site.
- Select the Mini Cart block in the editor and confirm the icon in the inserter and toolbar reflect the changes.
| Before | After |
|---|---|
 |
 |
Fix: Replace DropdownSelector with FormTokenField from Gutenberg (6647)
- Add the Filter Products by Attribute block and the All Products block into a post or page.
- Change the display type of Filter Products by Attribute to
Dropdown. - Ensure the block functions normally.
- Enable the Filter button, and ensure the block functions normally.
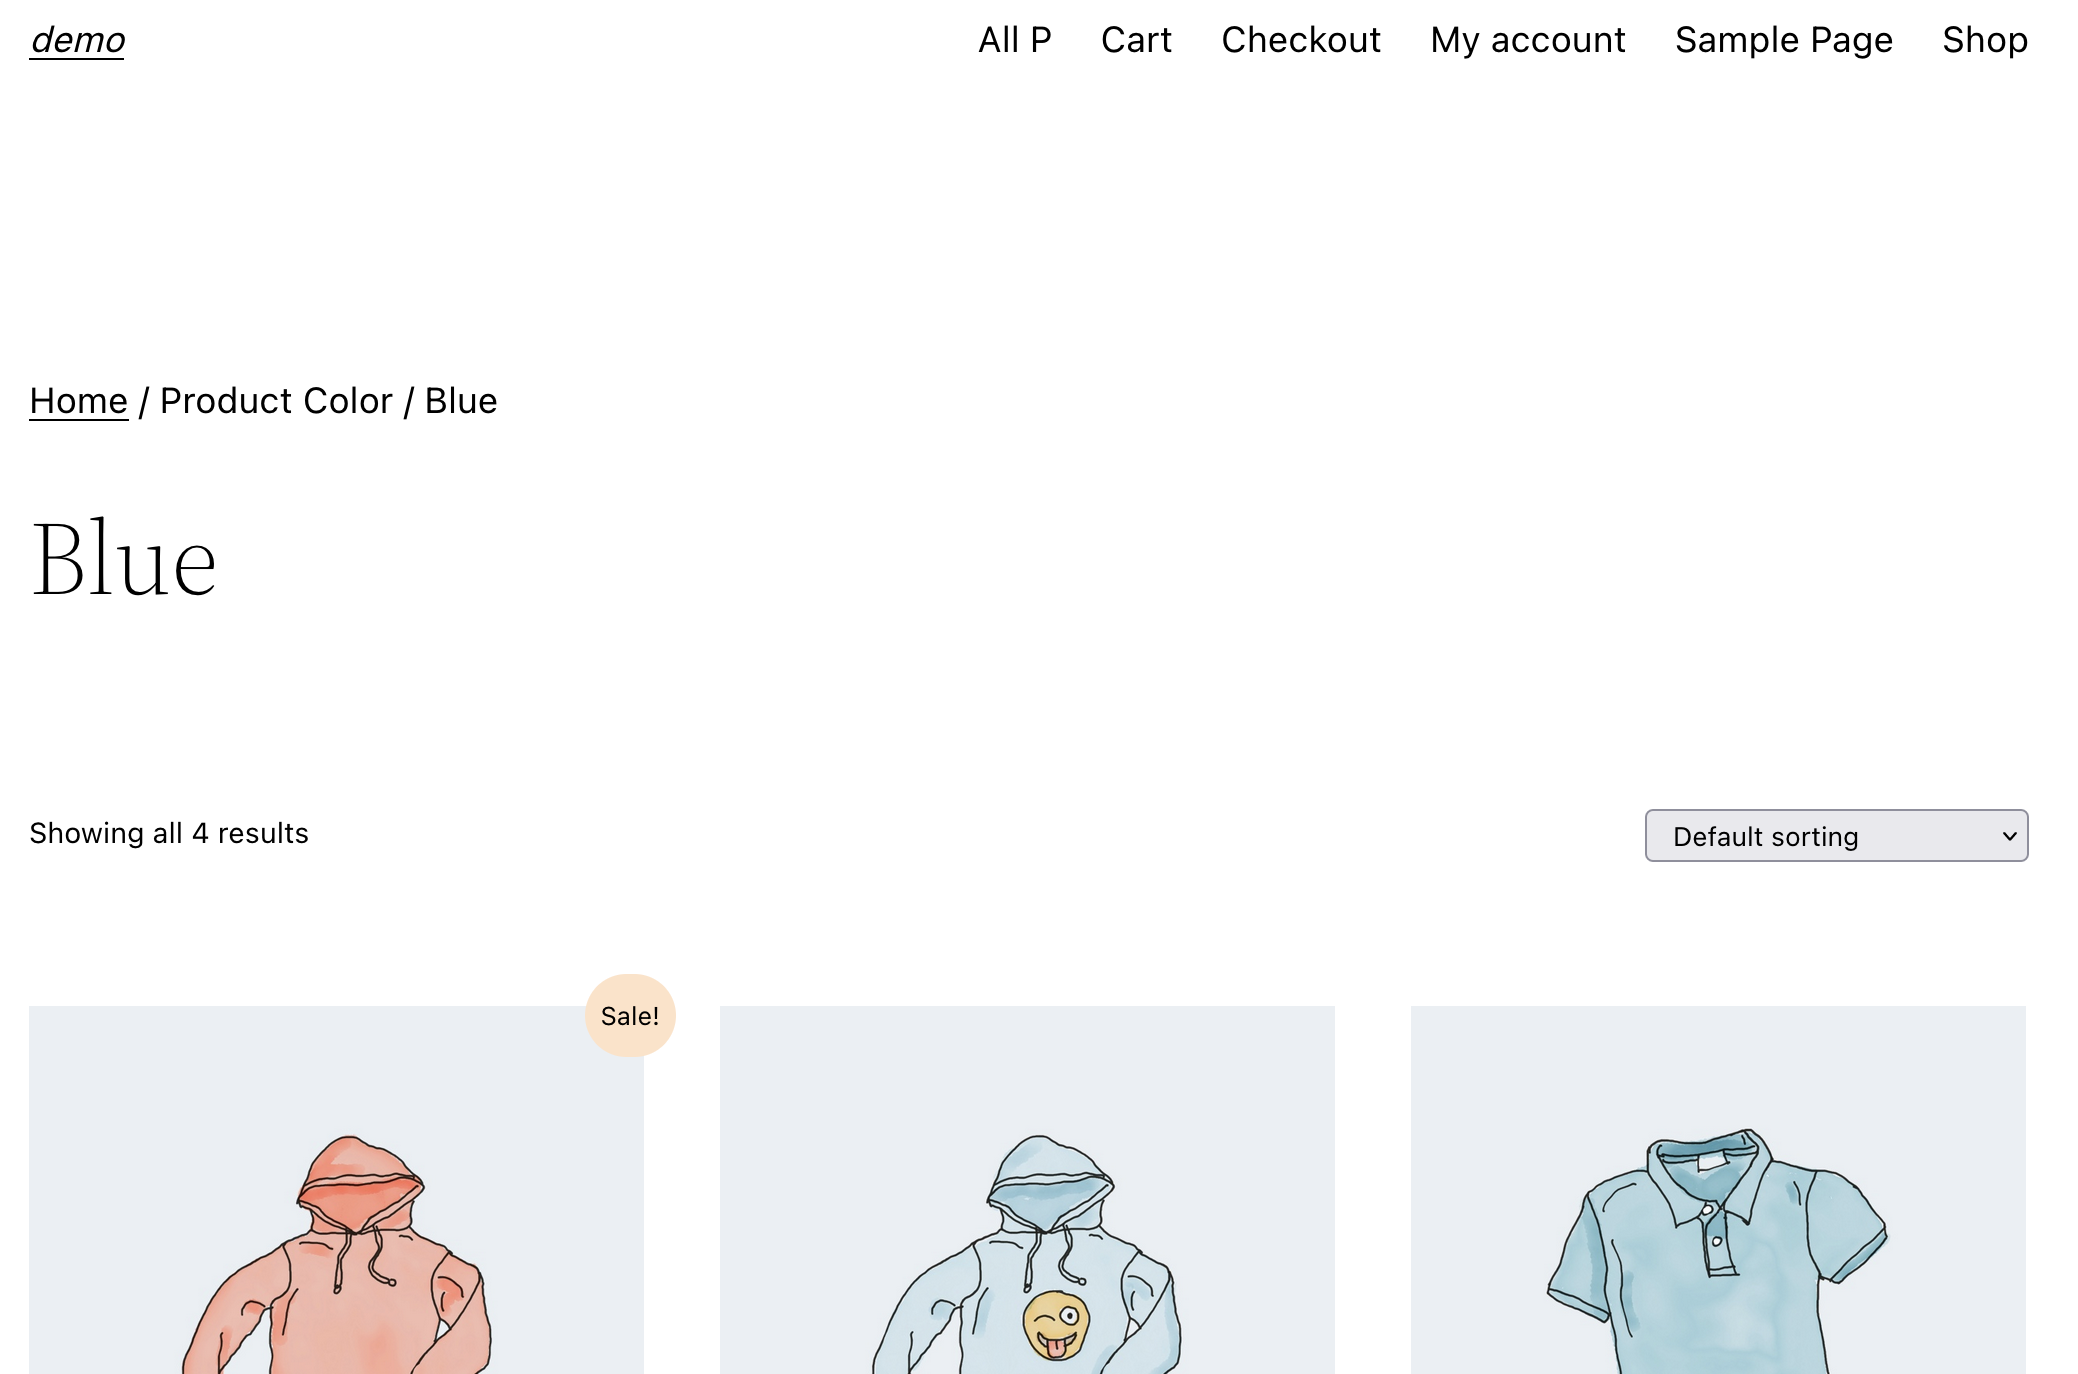
Use the archive-product template to render product attributes pages (6776)
- Make sure you have a blocks theme active (like Twenty Twenty-Two).
- Navigate to
Products>Attributesand edit an existing one or create a new one. - Click the
Enable Archivesoption and save, go back. - Click
Configure termsnext to your attribute. - Hover over one of the terms and click the
Viewlink of one of the attributes. - Check that the page is rendered with a header, a footer, and using a product grid.
| Before | After |
|---|---|
 |
 |
All Products block: Migrate to block.json (6754)
- Add the All Products block to a post or page.
- Verify it works as before in the editor and the frontend and there are no errors.
Start using block.json and convert to TS the Product by Category block (6680)
Test that there are no regressions compared with the previous Products by Category block version.
- Create a page and add a
Products by Categoryblock. - Save the page and check it renders correctly the default config in the frontend.
- Edit the page again and make some changes to the block (hiding some content, changing columns number, ordering, etc.).
- Save the page and check it renders properly with the new config.
Start using block.json and convert to TS the Product Best Sellers block (6683)
Test that there are no regressions compared with the previous Product Best Sellers block version.
- Create a page and add a
Product Best Sellersblock. - Save the page and check it renders correctly the default config in the frontend.
- Edit the page again and make some changes to the block (hiding some content, changing columns number, ordering, etc.).
- Save the page and check it renders properly with the new config.
Select the correct inner button for the "Featured Item" button to update its url (6741)
- Create a new page and add a
Featured Productblock. - Edit the block and select a different product.
- Make sure the button URL on the block is updated to the new product link.
- Duplicate the block and change the new block to a different product.
- Make sure the button URL on the block is updated to the new product link.
- Repeat 1-5 for the
Featured Categoryblock.
Fix: navigate through Mini Cart contents with keyboard (6731)
- In the site editor, add the Mini Cart block to your site header.
- Edit the Mini Cart template part and add an image in the inner contents.
- In the frontend, add some products to the Cart.
- With the keyboard, open the Mini Cart.
- With the Tab key try to navigate to the Mini Cart products.
- Notice you can focus the Mini Cart products inner elements.
Fix: WooCommerce messages don't appear in block themes with Mini Cart block (6728)
- Switch to a block theme (ie: Twenty Twenty-Two), add the Mini Cart block to the header, and go to a product page.
- Add the product to your cart.
- Notice the add to cart success message is shown on the top of the page.
SearchListControl: Fix preserving case of original item (6551)
- Add a “Hand-picked Products” block to your page.
- Type the name of one of your products with the incorrect case (e.g. if you have imported the sample data, type “hOoDiE”.
- Make sure all matching products appear on the list.
- Make sure all items on the list preserve their original case.
| Before | After |
|---|---|
 |
 |
Blocks 8.2.1
Ensure onChange is set for radio buttons in SavedPaymentMethodOptions (6825)
- Install Stripe, set it up so you can use it at Checkout.
- Add items to your cart and go to checkout. Add a credit/debit card via stripe and choose
Save payment information to my account for future purchases. - Check out. Repeat step 2 once more with a different card number. Ensure the new card you use ends in four different numbers than the first one! You can see test cards here: https://stripe.com/docs/testing
- Add items to your cart and go to checkout a third time. This time ensure you can switch between saved cards.

- Check out successfully, and then go to the back end of your site. Go to the orders you made (WooCommerce -> Orders) and for each order check the payment method used (you'll need to follow this through to Stripe), and ensure the card number used matches the one you chose in the Checkout block. (Click the link on the order page)

Blocks 8.3.0
Enable the Cart and Checkout blocks when WooCommerce Blocks is bundled in WooCommerce Core. (6805)
Cart Block:
- In the Cart Block in the editor, ensure the shipping calculator is enabled.
- Enable coupons on your site (WooCommerce -> Settings -> General -> Enable the use of coupon codes) and add one.
- Add two shipping methods for different locations, e.g. two for USA and two for UK.
- Do not add items to your cart.
- Go to the Cart Block and ensure the empty cart is displayed.
- Add items to your cart and revisit the Cart Block.
- Enter your address in the shipping calculator, ensure the correct shipping prices are displayed based on your location.
- Enter a coupon and ensure it works, and the price is modified accordingly.
- Modify the quantities of items in your cart, ensure it works and the prices update properly.
- If you have express payments enabled and working, try checking out from the Cart Block using GPay or Apple pay.
- If you don't, hit proceed to checkout and ensure it works correctly.
Checkout Block:
- Go to WooCommerce -> Settings -> Accounts & Privacy and enable
Allow customers to create an account during checkoutandAllow customers to log into an existing account during checkout. - Go to Checkout Block editor, select contact information block and enable
Allow shoppers to sign up for a user account during checkout. - Enable the Stripe payment method, COD, and cheque.
- Log out of the site then add items to your cart and go to the Checkout Block.
- Check the
create accountbox when entering your details. - Remove the coupon added in the Cart testing steps, and try re-adding it.
- Change shipping methods and ensure the prices update.
- Change address, ensure shipping prices update when the country changes.
- Leave some fields empty on the address form, ensure you get an error.
- Re-fill them and enter an invalid ZIP code. (Set country to UK and enter 234345 as the Postcode). Ensure you see an error at the top of the block.
- Correct the error (A valid one is
SW19 1AAif in UK). - Check out and ensure it works and the order is logged correctly.
- Ensure you received emails relating to your order (if using Local WP you can go to your site -> tools -> mailhog to check this).
Refactor Product Categories block to use block.json. (6875)
WooCommerce Blocks:
- Add Product Categories List block as a widget (Appearance → Widgets)
- Open block settings
- Test block controls, save, and review if it still renders correctly in the frontend
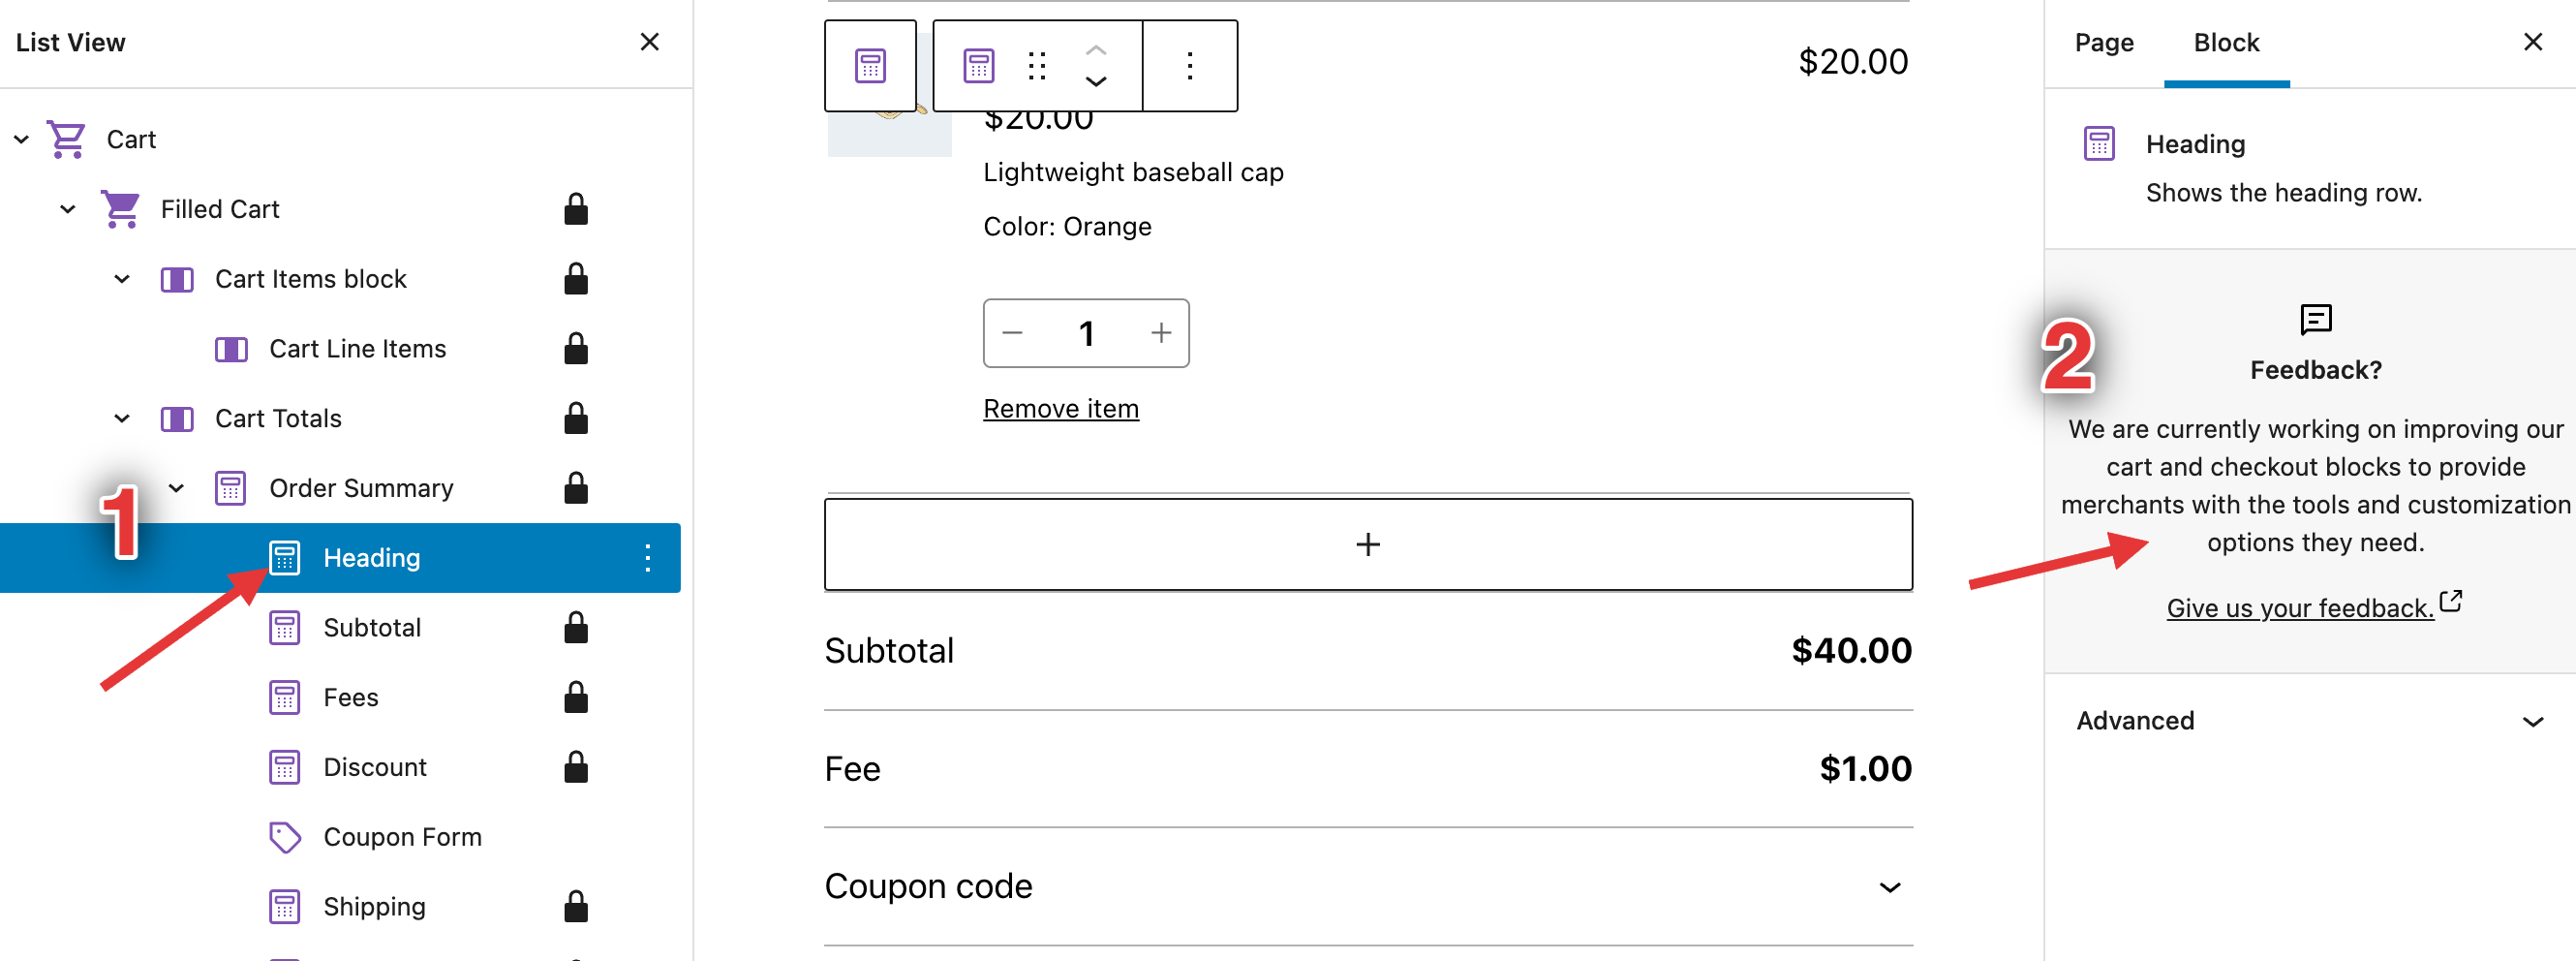
Add feedback box to the Cart & Checkout Inner Blocks in the inspector. (6881)
- Go to the Cart and Checkout editor pages
- Select the Block and each of its inner blocks. You should notice the feedback box in the inspector.
Add notice to Cart and Checkout blocks' inspector controls which links to the list of compatible plugins. (6869)
- Go to the editor, insert the Checkout block.
- Select it, verify you see the notice. Click through each and every inner block and ensure the notice displays for it.
- Dismiss the notice, click back through the inner blocks and ensure the notice is gone. Reload the page, ensure the notice is still gone.
- Go to the editor, insert the Cart block.
- Select it, verify you see the notice. Click through each and every inner block and ensure the notice displays for it.
- Dismiss the notice, click back through the inner blocks and ensure the notice is gone. Reload the page, ensure the notice is still gone.
- Clear local storage again.
- Go back to the Cart and Checkout blocks and ensure the notice is back.
- Create a new page. Add the Checkout Block. Select it and verify the sidebar contains the default warning:
 .
Verify the wording says checkout.
.
Verify the wording says checkout. - Add the Cart Block, ensure the same notice appears but ensure it says cart.
Add the ability to register patterns by adding them under the "patterns" folder and add the new "WooCommerce Filters" pattern. (6861)
- Create a new page with the
All Productsblock. - Open the block inserter, go to the patterns tab, and select the WooCommerce category from the dropdown
- Make sure you see a pattern under that category named:
WooCommerce Filters - Click on it to insert it on the page.
- Check that all 4 filter blocks (by attribute, price, stock, and active filters) are added.
- Complete the filter by attribute by selecting one of them.
- Save the page and make sure all the filters are rendered on the front-end.
Update billing address when shipping address gets change in shipping calculator at Cart block. (6823)
- Add a product to the cart and go to the Cart block.
- Add a new address with a valid zip code in the Shipping calculator, different from what you already used.
- Click on the Update button and wait for the update.
- Proceed to Checkout.
- In the Checkout block, see the new address for shipping being added to the Shipping address.
- Uncheck the checkbox for
Use same address for billing. - Look at the Billing address form and confirm it has the same address which was selected in the shipping calculator.
Blocks 8.3.1
Prevent unnecessarily showing the item names in a shipping package if it's the only package. (6899)
- Set up shipping zones so you have multiple methods for your country (flat rate and free is fine) and a single method for a different country.
- Install the "Multiple Packages for WooCommerce" plugin
- Navigate to WooCommerce -> Settings -> Multiple Packages
- Adjust the settings to work based on "Per Product"
- Add two items that require shipping to your cart.
- Go to the Cart block. Ensure you see the item name listed under each package.
- Remove one of the items, ensure the list of shipping options updates and does not include the item name.
- Change your address to one that only has a single shipping method. Repeat steps 5-7.
- Repeat 5-7 on the Checkout block too.
Blocks 8.0.0 #34021
Enhancement: Footer Template Parts use now <footer> instead of <div> and Header uses <header> instead of <div>. (6596)
- Go to a WooCommerce page and view the source.
- Check the header is wrapped in a
<header>tag, not in a<div>tag. - Check the footer is wrapped in a
<footer>tag, not in a<div>tag.
Enhancement: Replace the ProductTag tax_query field to be the term_id instead of the id. (6585)
- Create a page and add a
Products by Tagblock. - Check that is rendered correctly in the editor.
- Save the page and check that is rendered correctly in the frontend.
Fix: Ensure WooCommerce templates show correct titles. (6452)
- Install and activate the Extendable theme.
- Go to
Appearance → Editor → Browse all templates. - Make sure you have
archive-product.htmlin your theme's templates directory. - Notice the templates shows the correct title and description and not the file name like e.g.
archive-product.html.
Enable WC Customizer panels in customize.php routes also for block themes #34443
With a classic theme (ie: Storefront)
- Verify links to the Customizer are shown in the admin top bar and under Appearance (in the admin sidebar).
- Verify you can access the Customizer normally and modify settings under the WooCommerce panel.
- Verify once you save the settings and reload the page, they are persisted.
With a block theme (ie: Twenty Twenty Two)
- Verify there are no links to the Customizer anywhere: not in the admin top bar neither under Appearance (in the admin sidebar).
- Verify you can access the Customizer if you write (
/wp-admin/customize.phpin the URL bar of your browser). - Verify you can modify settings under the WooCommerce panel.
- Verify once you save the settings and reload the page, they are persisted.
Update product task experiment names to re-run #34495
- Navigate to Tools > WCA Test Helper > Experiments and add
woocommerce_products_task_layout_card_v3to treatment - Go to WooCommerce > Home > Add products
- Observe the Card UI is displayed
- Navigate to Tools > WCA Test Helper > Experiments and add
woocommerce_products_task_layout_card_v3to control andwoocommerce_products_task_layout_stacked_v3to treatment - Go to WooCommerce > Home > Add products
- Observe the Stacked UI is displayed
Revert skip button changes on the OBW pages #34455
- Start with a fresh site
- Start OBW ane make sure skip button has been removed, except from the first page.
Fix store details fails to save store address after navigating back to the tab (34426)
- Use a fresh site
- Install and activate Gutenberg plugins. (Optional. I've confirmed this is not related to Gutenberg)
- Go to OBW
- Choose a Country and enter the Store address.
- Click on Continue button.
- Allow tracking on usage modal
- Navigating back to the "Store Details" tab from the "Industry" tab.
- Observe that the "Store Details" saves the store address.
- Change store address
- Click on the Continue button.
- Navigate back to the "Store Details" tab from the "Industry" tab.
- Observe that the "Store Details" saves the store address.
Update in-app marketplace to display localized strings #34356
- Go to
WooCommerce > Extensions - Observe that Extensions are displayed properly.
- Change the "Site Language" to
Españolon the Setting page - Go back to
WooCommerce > Extensions - Observe that Extensions are displayed in Spanish

Update "Refund Returns" note to display localized strings #34352
- Use a fresh site
- Go to
WooCommerce > Home - Skip OBW
- Observe that
Setup a Refund and Returns Policy page to boost your store's credibility.note is displayed - Change the "Site Language" to
Españolon the Setting page - Go to
Dashboard > Updates - Scroll to page bottom and make sure "Translations (Traducciones)" are all up to updated
- Go to
WooCommerce > Home - Observe that
Connect to WooCommerce.comnote is translated toConfigura una página de política de devoluciones y reembolsos para aumentar la credibilidad de tu tienda..
Fix: Smart shipping defaults bug #34351
- Start with a fresh install.
- Do not initiate OBW yet.
- Go to
WooCommerce -> Settings -> Shipingand create a shipping zone. - Complete OBW and choose a country not that is not one of the US, CA, AU, or GB.
- Navigate to
WooCommerce -> Home - Navigate to
WooCommerce -> Settings -> Shipingand confirm no extra shipping zone exist. - Confirm
woocommerce_admin_created_default_shipping_zonesoption has been created.
Add WC Payments welcome page experiment #34251
Perform the following steps to start meeting all the requirements and have the new Payments menu visible:
-
woocommerce_admin_install_timestampshould be at leastnow-90days in seconds, using1works. -
WooCommerce → Settings → Country must be
US. -
WooCommerce → Settings → Advanced → WooCommerce.com
Enable trackingandShow suggestionsmust be checked. - Use experiment bookmarklet to manually set
treatmentmode.
Toggle the following steps to confirm that every condition is working and show/hide the Payment menu:
- Install WCPay.
- Connect to a WCPay account. You'll need to clear
wcpay_account_dataoption to meet the condition again. - Update
woocommerce_admin_install_timestampto today date. - Choose another WC country.
- Uncheck
Show suggestions. - Filter
woocommerce_allow_marketplace_suggestionsto returnfalse. - Set
wc_calypso_bridge_payments_dismissedoption toyes. - Set experiment to
control.
- Accept the promotion.
- Complete the onboarding process.
- The promotion should be applied, you can check it in Payments → Overview.
- Click on
No thanks - Click on
Just remove WooCommerce Payments - Do it again but check any option and click on
Remove and send feedback - Check Tracks Live View and confirm the events are properly registered with their props.
It should match the following screenshot.

Deploy payments banner in settings page #34326
- Set up a new store in WCPay-available countries such as US
- Open developer console and run
localStorage.setItem( 'debug', 'wc-admin:*' );to set debug for tracks - Make sure "Preserve log" option is checked in developer console
- Install WCPay plugin
- Go to WooCommerce > Settings > Payment
- Observe the payments banner is displayed
- Click on "Get started"
- Make sure it attempts to connect
- Observe
wcadmin_settings_payments_banner_connect_clicktrack is called
Remove WCPay Subscriptions offer page experiment code #34317
-
Ensure your store is eligible to view the WC → Subscriptions experiment page. (see collapsed content for instructions)
See instructions here
1. **Plugin eligibility**: Ensure the following plugins are not installed at all: - WooCommerce Subscriptions - WooCommerce Payments - Sumo Subscriptions - Yith Subscriptions - Subscriptio - Subscriptions For WooCommerce 3. **Store tracking eligibility:** Your store allows tracking. - This checkbox should be checked: **WooCommerce → Settings → Advanced → WooCommerce.com → Enable tracking**. 3. **Store location eligibility:** For the menu item to be displayed your store needs to based in the US. - Go to **WooCommerce > Settings** and make sure your store is set to a US based address. 3. **Store age criteria:** To view the subscription menu item your store will need to have been active for more than 6 months - we're testing this experiment on established stores. If your store doesn't meet this criteria, you can use the following code snippet: - `update_option( 'woocommerce_admin_install_timestamp', strtotime( '-6 month' ) );` - **_or_** change the `woocommerce_admin_install_timestamp` option to `1620866357` (timestamp from ~1 year ago) via the `/wp-admin/options.php` page. 5. **Paid order criteria:** Only stores with at least 1 order in the last 30 days are eligible. If your store doesn't have an order in the last 30 days. Either: 1. Set any existing pending or failed order to processing or completed 3. If you don't have any order at all, you can just manually create one in **WooCommerce > Orders > Add new** and set it to processing or completed status 4.⚠️ **Note:** this order sale query is cached and so you may need to delete the `'woocommerce-wcpay-subscriptions_recent_sales_eligibility'` transient if this criteria failed previously. -
Verify that the WooCommerce > Subscriptions (new) menu item and page is no longer be visible.

Add Facebook Extension to Onboarding #34303
- Skip the Onboarding Wizard.
- Disable "Display suggestions within WooCommerce " in Settings > Advanced > WooCommerce.com.
- Navigate to the Free Features section in the Onboarding Wizard.
- See that Facebook is listed.
- Select Facebook and complete the Onboarding Wizard.
- On the WordPress Plugins page, confirm that Facebook for WooCommerce plugin is installed.
- On the WordPress Plugins page, delete "Facebook for WooCommerce" plugin if it exists.
- On WooCommerce Home, click the Marketing Task (Get more sales).
- See that Facebook for WooCommerce is listed.
- Click "Get Started" button on Facebook for WooCommerce.
- Wait for Install.
- See that Facebook move to "Installed marketing extensions"
- Click "Manage" button.
- See that Facebook for WooCommerce manage page loads.
Fix review shipping option task title #34294
- Start with a fresh install
- Start OBW and choose United States as store country and fill out the "Address" field
- Choose "Physical products"
- Complete the OBW without installing anything from the Business Details tab.
- Go to WooCommerce > Home
- Observe that the shipping task appear with the title
Review shipping optionsunder "Things to do next"
Enhance/34244 update data source poller for i18n #34247
- Use a fresh site
- Go to OBW
- Select a country where WCPay is not supported such as
Afghanistan - Uncheck
Add recommended business features to my sitein the Business details / free features step and finish the steps. - Go to the Setting page
- Change site language to
Español - Go to
Escritorio > Actualizaciones(Dashboard > Updates) - Click on the Update Translations (
Traducciones) button to download WooCommerce translation files. - Go to WooCommerce > Home
- Click on
Configurar pagos(payment) task - Observe plugin descriptions are translated.
- Go back to WooCommerce > Home
- Click on
Consigue más ventas(marketing) task - Observe plugin descriptions are translated.
- Go to OBW > Business details / free features (http://localhost:8888/wp-admin/admin.php?page=wc-admin&path=%2Fsetup-wizard&step=business-details)
- Click on
Detalles del negociotab - Expand the
Añade características de negocios recomendadas para mi sitio - Observe plugin descriptions are translated.
- Go to
Usuarios > Perfil(User > Profile) - Change
Idiomaback to English - Repeat 10~19 and confirm that all texts are in English


Keep the user in the marketing task after installing an extension #34241
- Go to
WooCommerce > Home - Go to "Add sales channels" task
- Click on either one of the "Get Started" buttons under
Recommended marketing extensionssection. - Observe that after the plugin is installed, you're not redirected to other pages.
Add product name and checkboxes for Product details #34214
- Enable the new-product-management-experience feature flag by using the WCA Test Helper (Tools > WCA Test Helper > Features) and refresh the page.
- Enable track logging by running this in your console: localStorage.setItem( 'debug', 'wc-admin:*' );
- Navigate to Products > Add New (MVP)
- Verify that the texts look correct.
- Verify that the help button (next to the checkbox text) and dialog work as expected. It should open on hover and track the event
wcadmin_add_product_learn_moreafter pressingLearn more. - Verify that the event
wcadmin_woocommerce-add-product__checkbox-featuredis recorded after toggling the checkbox. - Verify that the input and checkbox values are being saved correctly.

Add product form buttons and specific product edit page #34211
-
Enable the
new-product-management-experiencefeature flag by using the WCA Test Helper (Tools > WCA Test Helper > Features) and refresh the page. -
Enable track logging by running this in your console:
localStorage.setItem( 'debug', 'wc-admin:*' ); -
Navigate to Products > Add New (MVP) and type something in the name field
-
Click Save draft and a
wcadmin_product_edittrack should fire with some of the product details ( if a brand new product then these product details will beundefined). -
Notice how a notice popped up with Product successfully created and the
pathin the url also changed to the new product id. -
Edit the name again and click Save draft again, it should trigger a track again, this time with the product details defined.
-
Click Preview it should open a new tab with the product preview and the original tab should output a
wcadmin_product_preview_changestrack. -
Click Publish, which should output a
wcadmin_product_updatetrack and also show a notice again Product published. with a View in store link that should open a new tab with a preview and also trigger thewcadmin_product_preview_changestrack. After publish the Publish button should also change to Update, the Save draft button should switch to Switch to draft -
Click the dropdown beside the Update/Publish button and it should contain 3 options. Try each, they each should output their own tracks:
wcadmin_product_publish_and_copy,wcadmin_product_copy, andwcadmin_product_deleteThe two copy actions should create a new product with the- Copytagged on to the name and redirected to it's edit screen (in draft). -
When on an edit screen of a product click Add New (MVP) again, it should reset the form to pristine conditions again.
Kapture.2022-08-08.at.15.26.10.mp4
Update "Add store details" task complete logic #34206
Completes the task via onboarding wizard
- Use a fresh site
- Go to OBW
- Fills out all fields in step 1
- Complete the onboarding wizard
- Observe that "Add store details" task is marked as completed
Completes the task by filling out address fields on the setting page
- Use a fresh site
- Go to OBW
- Skips the onboarding wizard
- Observe that "Add store details" task is not closed
- Click the "Add store details" task
- Fill out the city, country, address1, and post code
- Go back to
WooCommerce > Home - Observe that the "Add store details" task is marked as completed
Clear post cache after updating menu order for products. #34195
- Create/publish some products and assign a category to them
- Head over to WooCommerce > Categories, click on the number next to the category
- Once you are on the category products dashboard, click on the Sorting link at the top
- Drag products to reorder them
- Refresh the page and notice the changes are saved. https://user-images.githubusercontent.com/3696121/131747478-a50fe0aa-e117-48a6-a34e-5fe5fc267090.mp4
Here's how things work without the fix (note how after reordering the products I click on Sorting to refresh the page, and the order reverts to how it was at the start of the video):
withoutfix.mov
And here is how things work with the fix. This time, on refreshing, the new order persists:
withfix.mov
Fix set default homescreen layout after setup task completion or dismissal #34191
Test completion
- Set up a new store
- Complete setup tasklist tasks
- Refresh on WooCommerce > Home
- Observe the homescreen layout is set to two columns

Test dismissal
- Set up a new store
- Hide setup tasklist
- Refresh on WooCommerce > Home
- Observe the homescreen layout is set to two columns

Update/34063 store location skip btn #34176
Make sure woocommerce_allow_tracking option is set to no
- Start with a fresh site.
- Start OBW
- You should see
Skipbutton at the bottom of each step. - Click exclamation mark. A popover should appear with text
manual setup is only recommended for experienced WooCommerce users or developers. - Click
Skipbutton. UsageModal should show up. - Click "No Thanks`
- Confirm
woocommerce_allow_trackingis stillno - Go back to the OBW
- Click
Skipbutton again. - Click
Yes, count me inbutton. - You should be redirected to
WooCommerce -> Home - Confirm
woocommerce_allow_trackingis nowyes
Testing tracks
Set woocommerce_allow_tracking to no
- Go back to OBW again
- Open browser inspector and enable tracks debug.
- Click
Skipbutton on each page and clickYes, count me in - Confirm the track event is recorded.
UsageModal:

Update store location profiler #34153
- Use a fresh site
- Go to OBW
- Observe that the subheading should be
"Tell us where you run your business to help us configure currency, shipping, taxes, and more in a fully automated way."without a tooltip. - And the fields should appear in the order of
Country / Region, Address, Post / Zip Code, City, Email Address. - And the Country/Region is a mandatory field marked with an asterisk
- And the "Continue" button should appear below the fields. But is disabled unless the mandatory field (Country / Region) is completed.
- Completes the mandatory field (Country / Region)
- Observe that the "Continue" button is enabled.
add: store location settings tour #34137
- Start with a fresh install of WooCommerce, optionally complete OBW or not (not a condition to have completed it)
- Go to the task list and click on "You added store details" or "Add store details" in the tasklist (it might be struck through)
- You should be redirected to the WooCommerce settings page, on the general tab and have a spotlight on the store location fields.
- Subsequent visits should not show the spotlight
Add/42 new product page #34115
- Turn on the feature flag by using the plugin woocommerce-admin-test-helper (link here). You will see the option
new-product-management-experienceunderTools > WCA Test Helper > Features. - Refresh the page.
- Verify that a blank page is shown with the title
Add productafter pressing the buttonProducts > Add New (MVP). - Verify that the event
view_new_product_management_experienceis being recorded when viewing theAdd productpage. - Verify that it works as expected using the new navigation too.
Add/33 two column product page layout #34113
- Enable the
new-product-management-experiencefeature flag by using the WCA Test Helper (Tools > WCA Test Helper > Features) - Refresh the page and go to Products > Add New (MVP) and check if the layout matches that of the new design 5sAIeTRd9Yp7nSCT33BAWz-fi-5311%3A202025, fields don't need to match yet as those would be added in the future.
Also note that some of the
onChangefunctions are empty callbacks, this is because the Form component isn't hooked up yet, this relies on https://github.com/woocommerce/woocommerce/pull/34082
Use the default payment suggestions when woocommerce_show_marketplace_suggestions is set to no #34083
- Start with a fresh install and complete OBW without installing any plugins in the business step.
- Set
woocommerce_show_marketplace_suggestionsoption tono - Go to
WooCommerce -> Homeand chooseSet up paymentstask. - Confirm the suggestions are rendered as expected
Fix fatal error when bulk editing sale price to empty value in PHP 8 #34053
- Create two products with a price as follows:

- Try to use bulk edit and LEAVE
ENTER SALE PRICEFIELD EMPTY ( do not type anything there )
- And now try to update

- You should not see this error:
PHP Fatal error: Uncaught TypeError: Unsupported operand types: string - string in /xxxx/xxxx/xxxx/wp-content/plugins/woocommerce/includes/admin/class-wc-admin-post-types.php:968
Fix Tracks event in Review Shipping task #34045
With a new store,
- Select United States as a country.
- Continue through the onboarding wizard without installing free business features.
- On the "Things to do next" task list, choose "Review Shipping Options".
- Complete the spotlight tour on the settings page..
- Navigate to WooCommerce > Home
- See that the "Review Shipping Options" task is completed.7.
- Navigate to WooCommercer > Status > Logs
- Choose the Tracks log for the current date.
- Confirm the Tracks event is in the log:
2022-07-27T13:47:15+00:00 DEBUG wcadmin_extended_tasklist_task_completed
2022-07-27T13:47:15+00:00 DEBUG   - task_name: review-shipping
Update inbox notes to display localized strings when locale changed #34038
Test admin notes
- Use a fresh site
- Go to
WooCommerce > Home - Skip OBW
- Observe that
Connect to WooCommerce.comnote is displayed - Change the "Site Language" to
Españolon the Setting page - Go to
Dashboard > Updates - Scroll to page bottom and make sure "Translations (Traducciones)" are all up to updated
- Go to
WooCommerce > Home - Observe that
Connect to WooCommerce.comnote is translated toConectar con WooCommerce.com.
Test remote inbox notes
- Use a fresh site
- Install and activate WP File Manager plugin.
- In WP Admin, navigate to the WP File Manager page (/wp-admin/admin.php?page=wp_file_manager)
- Using WP File Manager, navigate to
public/wp-content/plugins/woocommerce/src/Admin/RemoteInboxNotifications - Right-click on the
DataSourcePoller.phpfile and selectCode Editor. - Look for this line (you should see a URL) and replace it with https://gist.githubusercontent.com/chihsuan/e2aff67165428d2fd749b68cb7c75e74/raw/50a5adf7250240c6e667966b098d0001ef6c8faa/test_remote_inbox_specs
- Save the change.
- Delete
_transient_woocommerce_admin_remote_inbox_notifications_specsif it exists - Go to WooCommerce > Home
- Skip OBW
- Observer that
We want to know what matters most to younote is displayed. - Change the "Site Language" to
Españolon the Setting page - Go to
WooCommerce > Home - Observer that
We want to know what matters most to younote is translated toQueremos saber qué es lo que más te importa.
Hide the customizer when the active theme is a FSE theme #34022
- Enable
WooCommerce. - Enable the
Storefronttheme. - Check that the
Customizebutton appears on theAppearancemenu and on the menu bar. - Enable a block theme (i.e.
Twentytwentytwo). - Check that the
Customizebutton does not show up on theAppearancemenu or on the menu bar.
Make sure get_current_screen() is available #33990
- Start with a fresh install and finish OBW as usual.
- Add a new page with
All Productsblock. - Open an Incognito window and access the page
- The page should render without an error.
Fix free features is still rendered when no recommendation #33923
- Start with a fresh install
- Start OBW and use the following selections and click Continue
- Store Details.country/region: Afghanistan
- Industry: Food and drink
- Product Types: Physical products
- Business Details[how many products do you plan to display]: 1-10
- Business Details[currently selling else where?]: Yes, on another platform
- Business Details[How many employees do you have]: <10
- Business Details[What's your current annual revenue?]: Up to 3.000
- Business Details[Which platform is the store using?] BigCommerce
- On the
Free featurestab, make a note of the plugins. You should seeMailPoetandGoogle Listings and Adsonly (when Jetpack is already installed). - Open a new tab and install and active the plugins listed on
Free featuresmanually. - Refresh
Free featurestab - Observe that the FreeFeatures tab is not rendered.
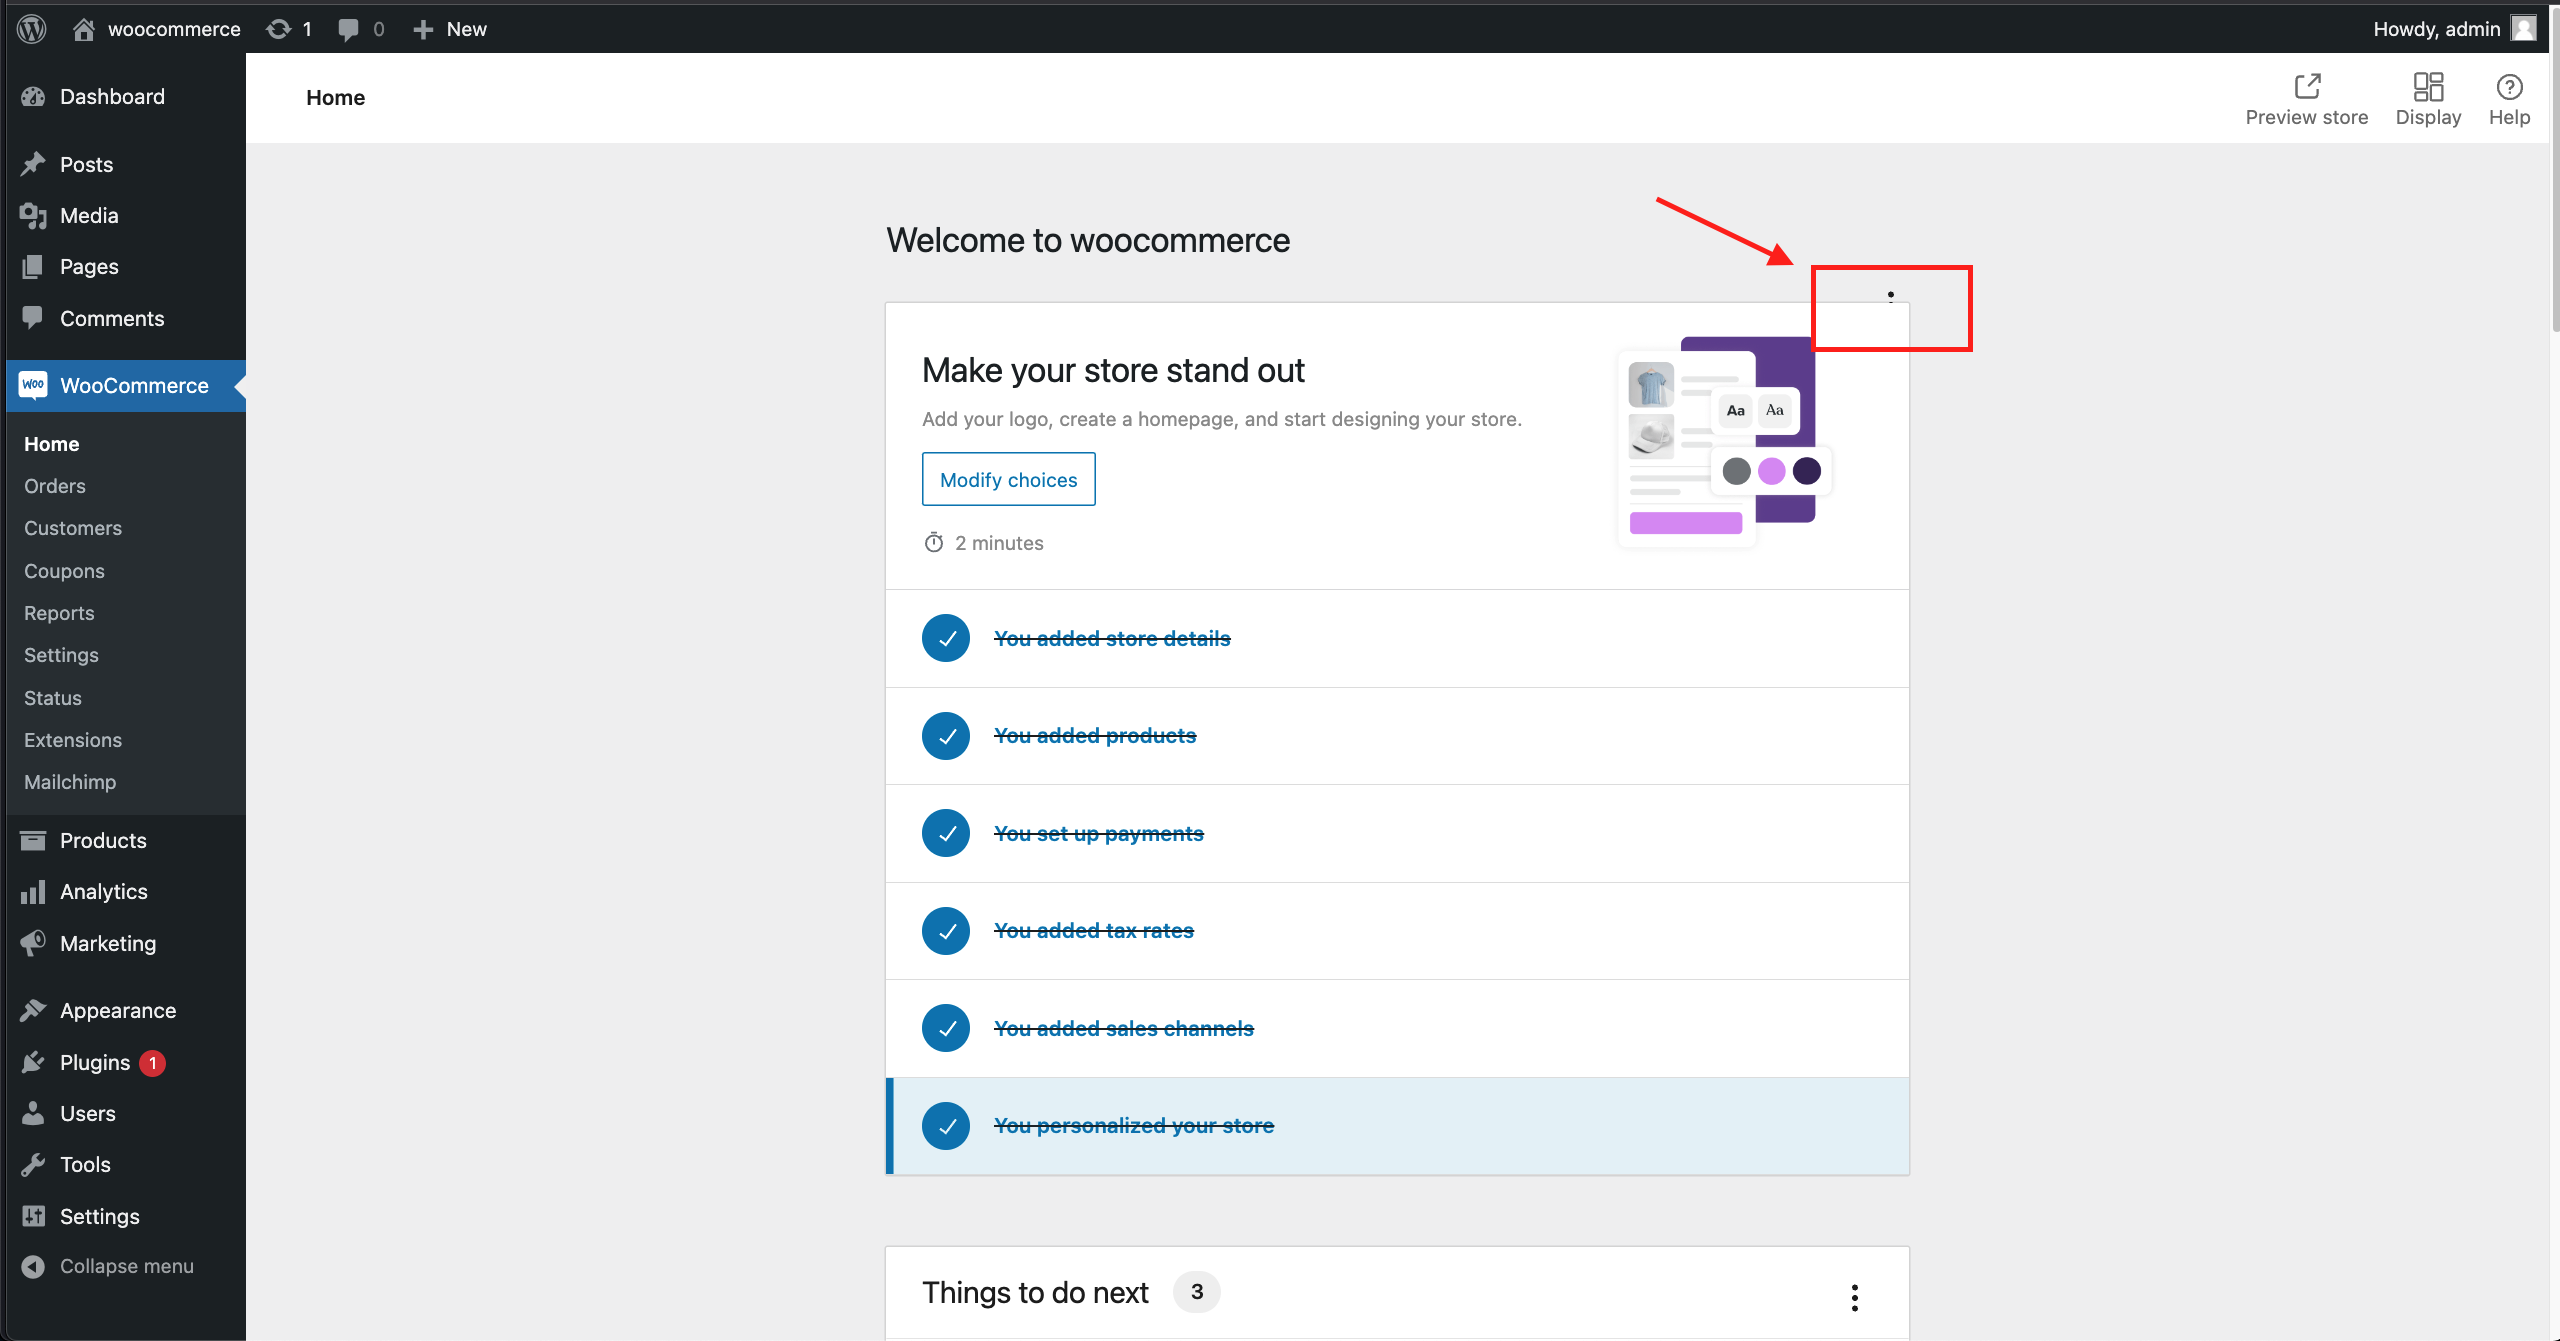
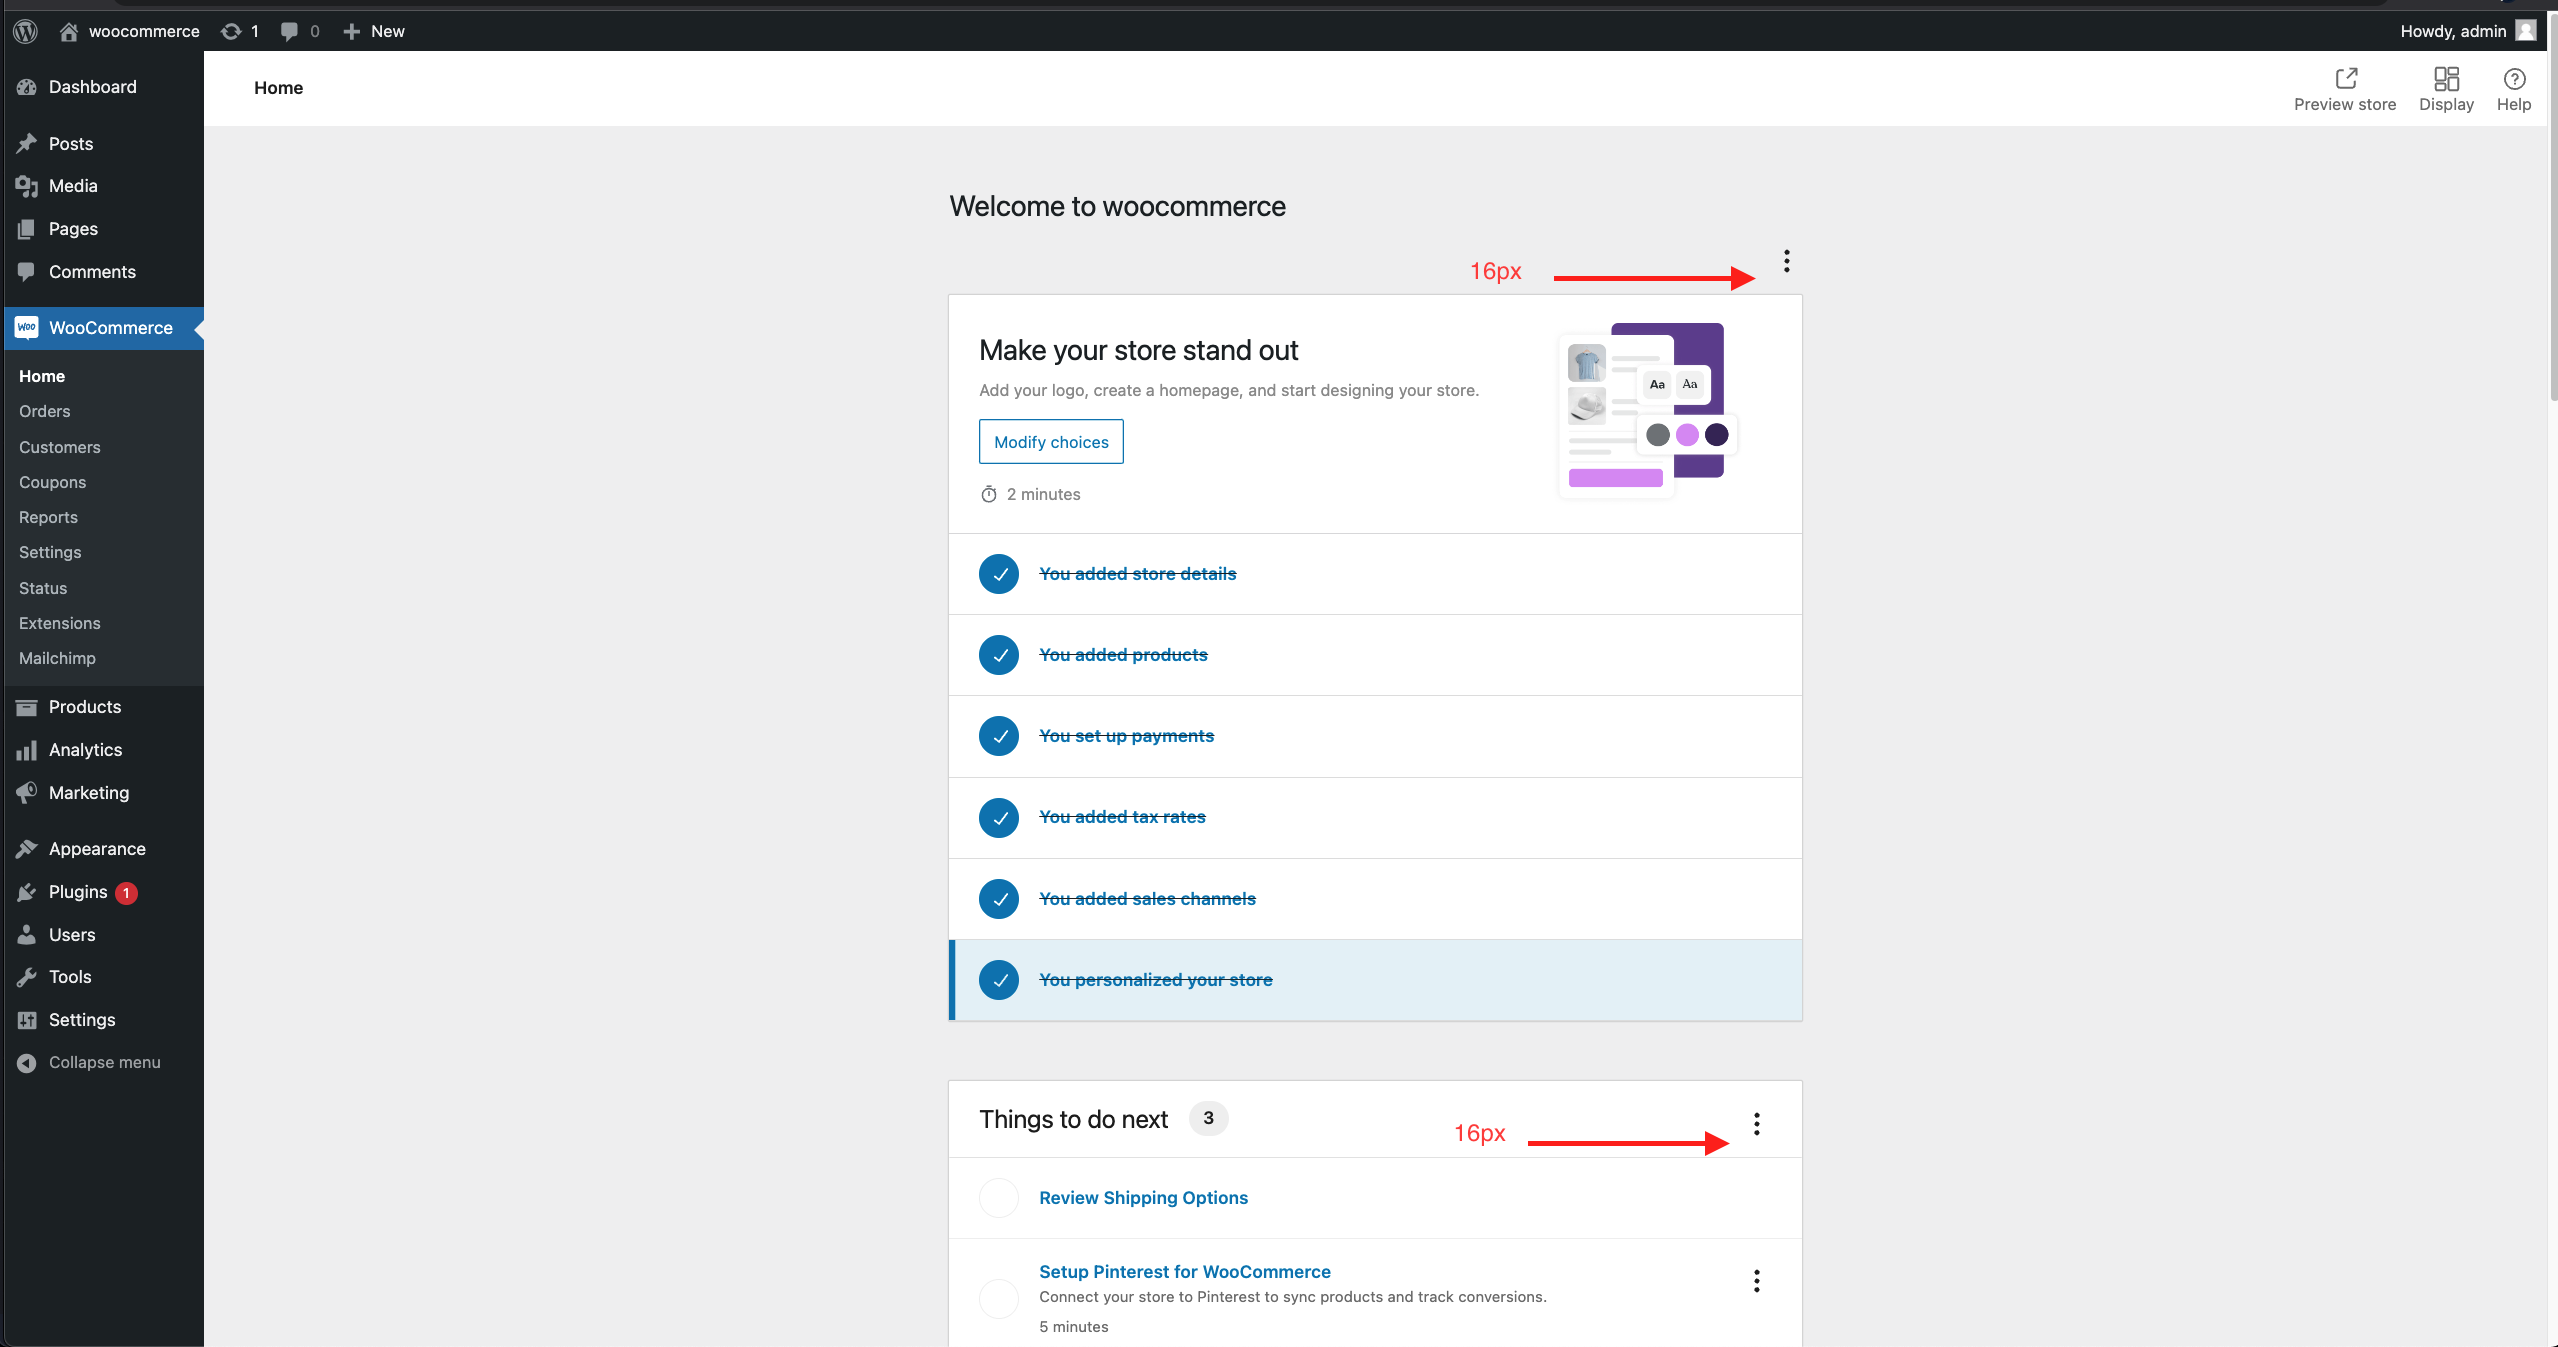
Fix task list overlaps with the Ellipsis menu #33882
- Use a fresh site
- Complete all task
- Click on Ellipsis menu and select "Show the setup task list again"
Before:
After:
JQuery FlexSlider: Fix innerHeight computation #33847
- Install Storefront.
- Create a Product and add multiple images to the product.
- Go to the Product Page.
- Open the device simulation.
- Set iPhone 12 Pro and rotate the device orientation.
- Be sure that the first image of the product, is rendered correctly, and if you click on the page, no element changes height.
I suggest checking the attached video to understand the problem.
178453842-7b2e2f41-b2ca-4239-ac85-24ff6eb93a25.mp4
Fix inconsistent order total on checkout vs manual order page #33812
- Create a percentage based coupon with 10% off.

- Create a standard tax rate

- Apply the following tax settings

- Create a simple product with regular price $120. Save the product.
- Add this product to the cart
- Apply the 10off coupon
- Go to Checkout page and observe the order total to be $108.00
Create an order in WP Admin:
- Create a manual order. Add the same product that was added to the cart.
- Apply the coupon 10off
- Click recalculate.
- You should see the total to be $108.00. Without the fix, the total would be $110.00.
- Remove the product.
- Now repeat steps 1 and 2 but swap 3 & 4.
- Observe the Order total to be $108.00
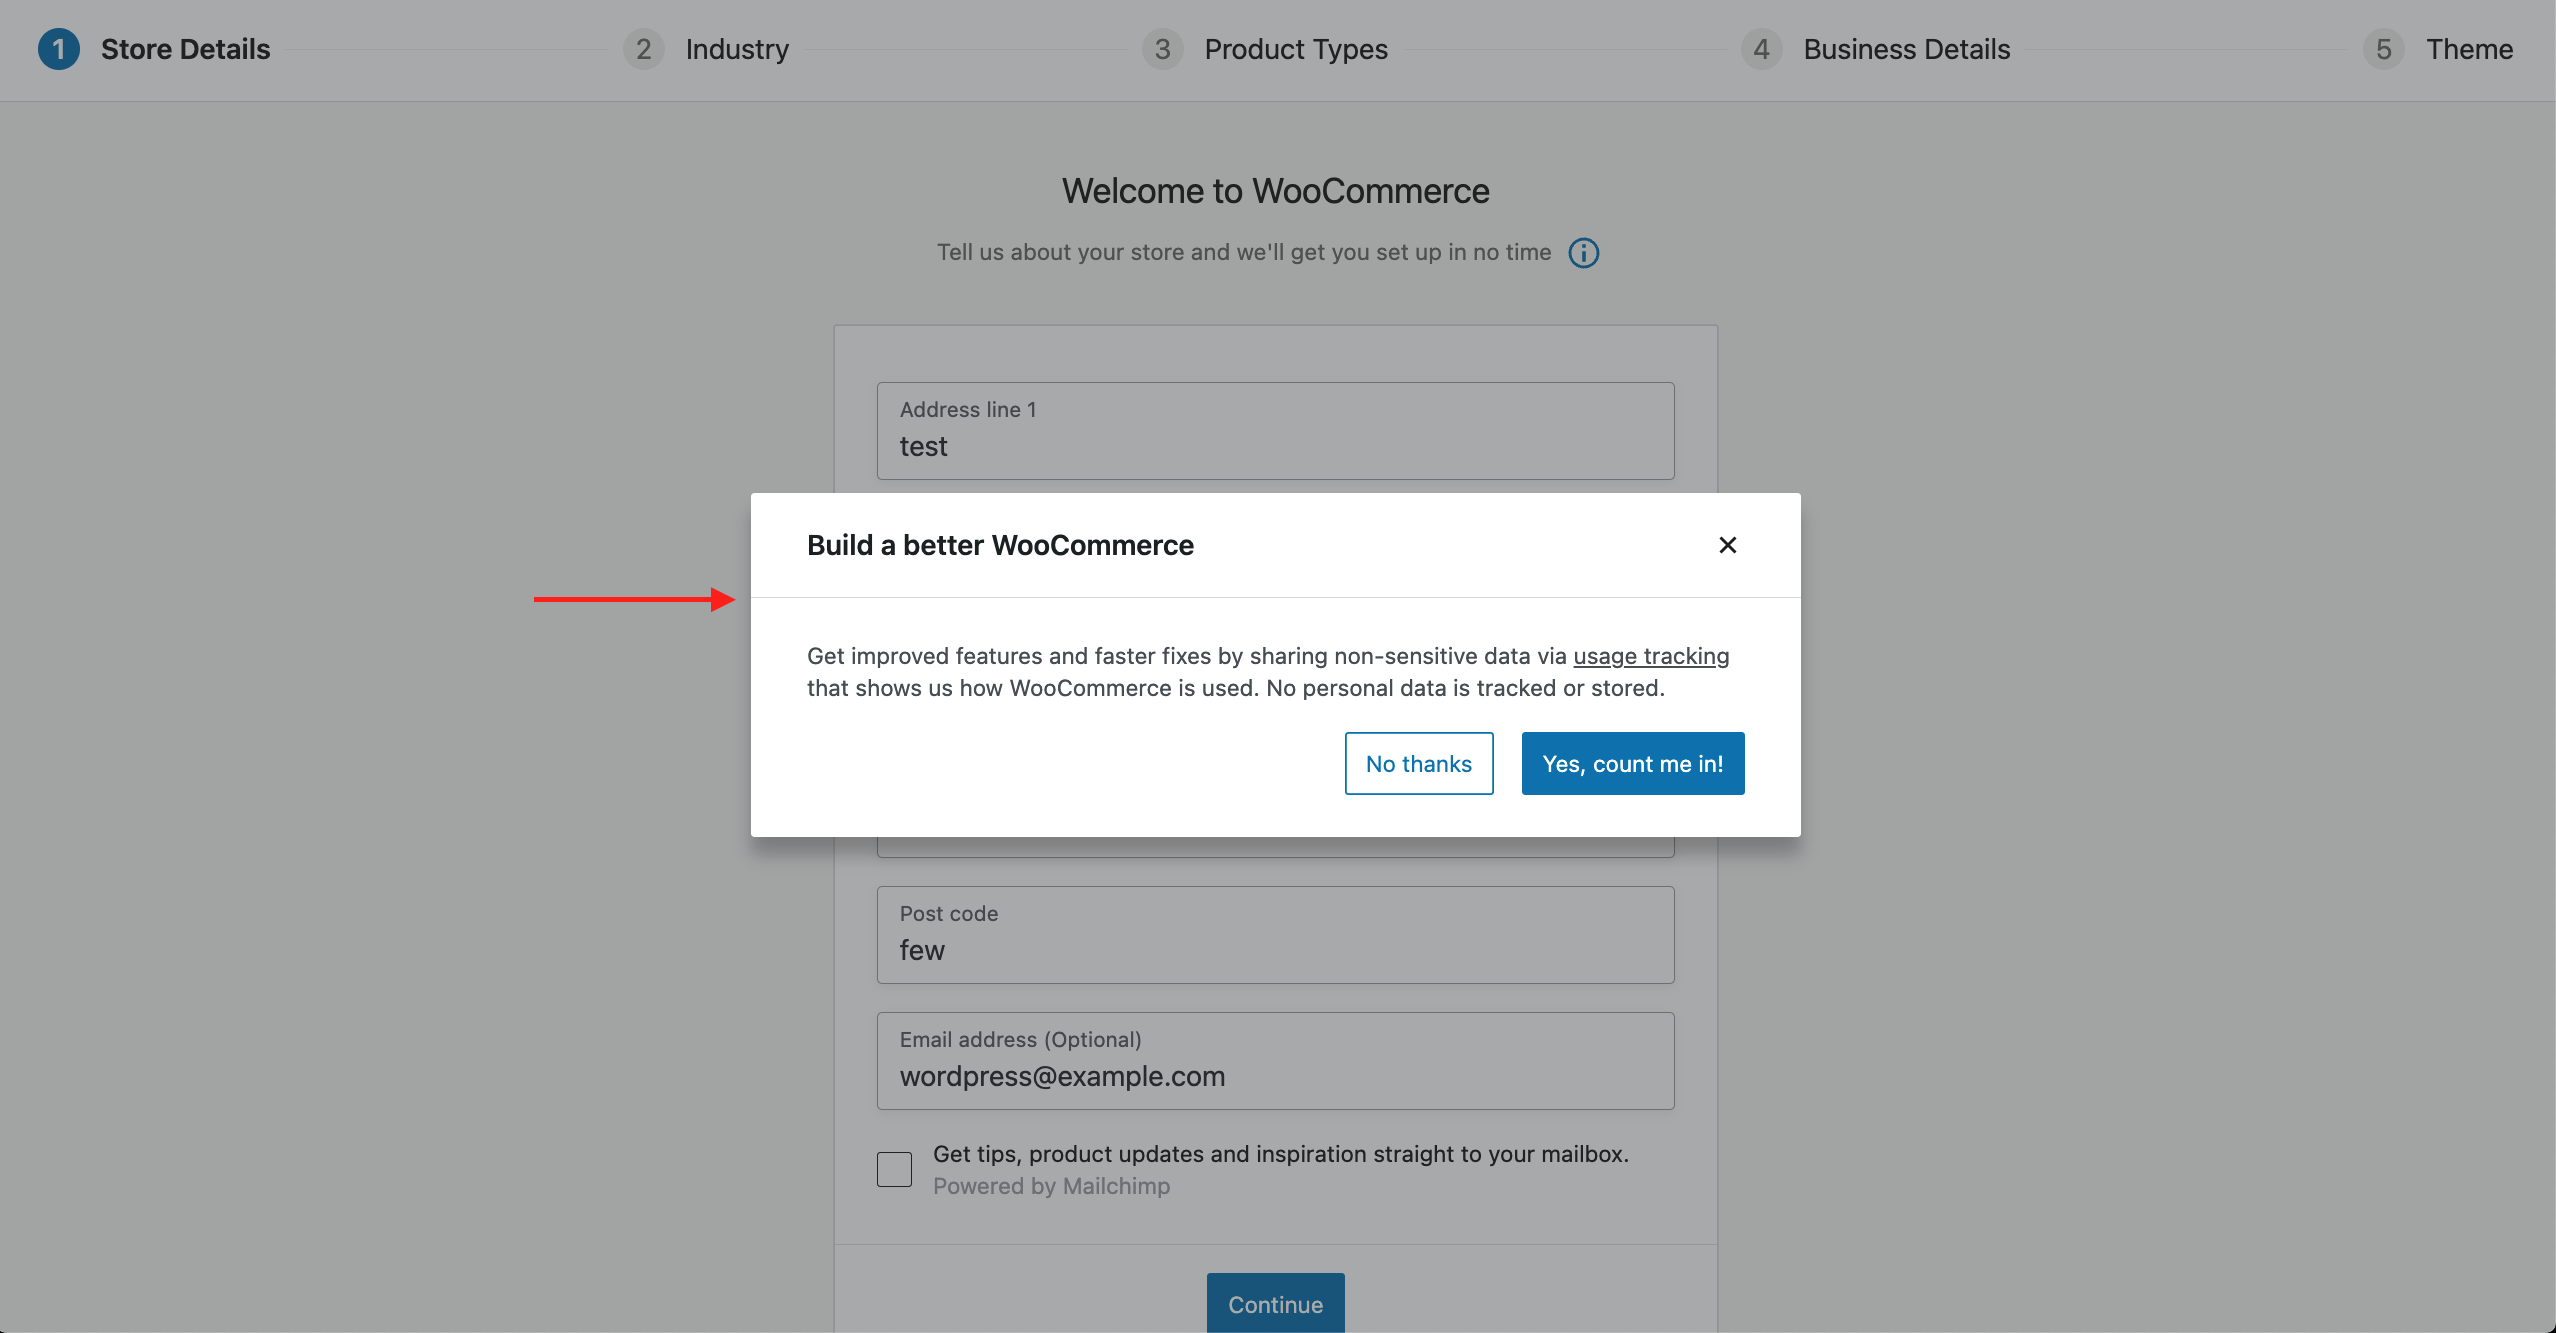
Added the border bottom of the modal's header #33807
- Use a fresh site
- Go to OBW
- Fill out store details
- Click "Continue"
- Observer that the
Build a better WooCommercemodal's header contains a bottom border
Fix/33253 fix order number in notice #33802
- Setup a WooCommerce store with one product
- Navigate to
/wp-admin/edit.php?post_type=shop_order&paged=1&bulk_action=marked_completed&changed=9999 - Check the notice message. The order count will reflect correctly in the notice:

Product creation experience: add more context about product data #33755
- Go to
Products>Add New. - Verify an interrogation sign (
?) icon is visible next to the product type selector, in theProduct dataarea. - Verify that the text in the tooltip looks correct.
| Product type | Text |
|---|---|
simple |
Simple – covers the vast majority of any products you may sell. Simple products are shipped and have no options. For example, a book. |
grouped |
Grouped – a collection of related products that can be purchased individually and only consist of simple products. For example, a set of six drinking glasses. |
external |
External or Affiliate – one that you list and describe on your website but is sold elsewhere. |
variable |
Variable – a product with variations, each of which may have a different SKU, price, stock option, etc. For example, a t-shirt available in different colors and/or sizes. |
- Install this plugin (it will include a product type to the selector).
- Verify that the product type
My producthas been added. - Select it and verify the tooltip shows the text
Product types define available product details and attributes, such as downloadable files and variations. They're also used for analytics and inventory management.
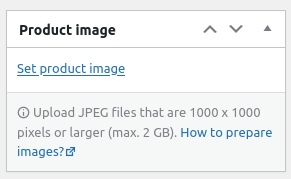
Adding additional instructions around product image upload modal #33660
- Go to WooCommerce -> Products and Create Product
- Observe the extra content in the bottom of the product image metabox.
- Click the new link and ensure it works as expected.
Fix code standards in orders code, and check payment method name instead of title on get order totals #30468
For the code standards fixes
- Open an order in the admin area
- Verify that all the data in the order dettails box is rendered correctly.
- Do some changes in the order.
- Click "Update".
- Verify that the changes are saved correctly.
For the change in get_order_item_totals:
- Install the WP Mail Logging plugin.
- Open an order in the admin area.
- Edit the billing details, change the payment method to "Other", save.
- In the "Order actions" box, run the "Email invoice/order details to customer" action.
- Verify using the WP Mail Logging plugin that the email sent does not contain a "payment method" row in the order details table (without the fix it will contain "Payment method: other").