Release Testing Instructions WooCommerce 7.2
WooCommerce 7.2 includes:
Blocks 8.8.0 Testing instructions
Blocks 8.8.1 Testing instructions
Blocks 8.8.2 Testing instructions
Blocks 8.9.0 Testing instructions
Blocks 8.9.1 Testing instructions
Make qty input box visible when min_qty = max_qty #34282
- Install a plugin that lets you specify min/max product quantities
- Create a simple product with min_qty=max_qty.
- Go add the product page. You will be able to see the quantity input there.
Add category field dropdown field #34400
- Enable the new-product-management-experience feature flag by using the WCA Test Helper (Tools > WCA Test Helper > Features) and refresh the page.
- Create some categories under Product > Categories
- Click the Products > Add New (MVP) button and notice the new category field dropdown.
- Start searching in the dropdown field and make sure your created categories show up
- See if categories are correctly sorted by popularity first and then alphabetical order (popularity is by how many products its being used).
- Select one of the child categories, it should auto select the parents but allow you to un-select the parents
- You should also be able to use your keyboard by using your up and down arrows, currently I have the selected item highlighted by setting it to bold and have closed parents automatically open if they have children.
Fix JS errors when the OBW business step is accessed directly via URL #35045
- Start with a fresh site.
- Access the business directly via http://your-site/wp-admin/admin.php?page=wc-admin&path=%2Fsetup-wizard&step=business-details
- Confirm the page renders without any JS errors.
Select the current new added shipping class #35123
- Go to the Add new product page
- Click on Shipping class dropdown field
- Select Add new shipping class option from the list
- From New shipping class modal form, add a new shipping class name then click Add button.
- When the modal closed the new shipping class added should be shown as the selected value of the Shipping class dropdown.
Screen.Recording.2022-10-17.at.2.20.11.PM.mov
Replace the trash can icon in the attribute list #35133
- Locate a created product with attributes.
- Visit /wp-admin/admin.php?page=wc-admin&path=/product/{productId} replace productId with your id
- A close-small icon should be shown to remove the attribute instead the trash-can icon.

Add/34331 add attributes modal #34999
- Make sure you have the new-product-management-experience feature flag enabled (you can do so using the latest version of the Beta tester within the mono repo).
- Go to Products > Add new (MVP) and fill out some of the initial details like name and price
- Move down to the attributes section and select Add first attribute a Modal should popup
- A initial row should be added with an empty attribute and attribute term field, the attribute term field should be disabled and hitting the remove icon should not do anything.
- Search for a category and select one, the attribute term field should be enabled now and you can search/select attribute terms (note that the attribute term field relies on the API for searching, it's not the smoothest at this point, but this will require separate updates to the SelectControl component, I do have a https://github.com/woocommerce/woocommerce/pull/34949 in flight for this, but it will require some updating).
- You should be able to click + Add another which will add another row, you should be able to delete any of them except for the last one. So if you click + Add another you can remove the first row if you want.
- Once you have added items you can click Add this should add it to the product list, any empty rows should be ignored, this includes rows with a selected attribute, but no terms selected.
Kapture.2022-10-11.at.09.55.37.mp4
Move product action buttons to header menu #35214
- Go to Add new product page or Edit product page
- The action buttons should be shown in the header and not at the bottom of the form
- You should see the action buttons only in those pages

Add manual stock management section to product management experience #35047
- Navigate to Products -> Add new (MVP)
- Toggle off the "Track quantity for this product" setting
- Switch between various stock statuses shown
- Make sure that the stock statuses persist on refresh
- Toggle on the "Track quantity for this product" setting
- Make sure the stock statuses are not shown
Fix 'Invalid payment method' error upon double click 'Delete' #30862 #30884
Prerequisites You'll need to upload and activate the WooCommerce Payments plugin, to be able to add and remove payment methods in the user's account
- Log in with a valid shop user
- Go to My Account > Payment Methods
- Add a Payment method
- On Payment methods table, double click on 'Delete' button 5.Check that the payment method is correctly removed and there are no errors displayed to the user
This the behavior with the fix applied:

Enhance getInputProps to allow passing of non-overridden props #35034
- Navigate to the new product page Products -> Add new (MVP)
- Check that styling for checkboxes is still correct
- Add values to the price and dimension fields, using thousand commas and decimal separators (depending your locale)
- Make sure they are sanitized on blur and persist correctly on save
Show a dismissible snackbar if the server responds an error #35160
- Go to Add new product page
- If you add a new shipping class you should see a placeholder: e.g. Fragile products in the name field of the Shipping Class dialog
- Add a category to the product and then publish it.
- When editing that product and try to add a new shipping class the first time in the shipping class name and slug fields of the Shipping Class dialog should be filled with the name and slug of the first product category.
- If you added that new shipping class with the prefilled category data and try to add a new shipping class again then no prefilled name and slug should happend anymore per product edition.
Screen.Recording.2022-10-19.at.10.03.13.AM.mov
- If you try to add a new shipping class with any of the previous added slugs you should see a snackbar error with this message:
We couldn’t add this shipping class. Try again in a few seconds.
Screen.Recording.2022-10-19.at.10.27.17.AM.mov
Disable product inventory toggle when inventory management is disabled #35059
- Disable stock management at wp-admin/admin.php?page=wc-settings&tab=products§ion=inventory
- Navigate to Products -> Add new (MVP)
- Check that the toggle to enable inventory management is disabled
- Hover the toggle to see the tooltip
- Enable site-wide stock management again
- Make sure the toggle once again works
- Check that hovering the toggle does not display the tooltip
Remove some placeholder values #35267
- Go to Add new product page
- Fields List price, Sale price and SKU should not have placeholder.
Update states.php -> added Senegal Regions #35199
- Verify state list is available on Checkout page after selecting Senegal as shipping destination Country.
Improve the communication around required and optional #35266
- Go the Add new product page
- The only field with (required) hint on the right side of its label should be the Name and the (optional) hit should not be shown for any field
- This also apply to the New shipping class dialog form
Change the product info section title to Product Details #35255
- Go to Add new product page
- Product section title should says
Product details
Update font size and spacing in the tooltip component #35265
- Go to Add new product page
- Click the
?icon on the right side of the checkboxFeature this product - The tooltip message should has
font-size: 13pxandpadding: 16px
Increase the spacing between the shipping box illustration and the dimensions fields #35259
- Go to Add new product page
- In Shipping class section, the space between dimensions and the image should be 40px
Fix the display of letter descenders in the shipping class dropdown menu #35258
- Go to Add new product page
- The Shipping class dropdown should show the selected option correctly displayed with no visible glitches in all browsers.
Add name to select control popover slots #35353
- Make sure you have the
new-product-management-experiencefeature flag enabled (you can do so using the latest version of the Beta tester within the mono repo). - Go to Products > Add new (MVP) and scroll down to the attributes section
- Click Add first attribute and make sure the select control dropdown still shows correctly.
Add product description title in old product editor #35154
- Go to Products > Add New and notice how the long description is wrapped in a panel named Product Description
- Do the same check for editing an existing product
- Now download the Classic Editor plugin and edit an existing post or page and make sure they still look the same.
Update shipping label banner add meta boxes function #35212
We should check if the banner still shows, it would look like this:

- Make sure your store is in the USA and the currency is USD, if you click the Personalize your store task you can add sample products (which will include shippable products)
- Create an order with a shippable product (ex: Hoodie)
- The banner should show up if you are on the edit order page and these criteria are met:
- Jetpack is up to date and you are connected (this includes the user being connected)
- None of the UPS, Fedex, ShippingEasy, or ShipStation shipping plugins are installed
- Your store is in the USA and the currency is USD
- WooCommerce Shipping is not installed or it is installed but the Terms of Service hasn't been accepted (probably easier to just not have it installed)
Add product management description #34961
- Go to the new product management experience
Products -> Add new (MVP) - And add some content to the description field (note there are still some odd quirks around block selection in the editor that are unrelated to this PR)
- Save the content
- Refresh and make sure it works as expected
- Visit the old product edit page for the same product
- Note that content works as expected
Add inventory advanced section #35164
- Enable/disable the stock management for products at
wp-admin/admin.php?page=wc-settings&tab=products§ion=inventory - Under the product page (Products -> Add new (MVP)), click "Advanced" in the inventory section
- Note that when stock management is enabled, the "out of stock" options exist
- Note that in both cases, the limit 1 per purchase checkbox exists
Fix up rich text editor initial selection and add blocks #35286
- Navigate to the new product experience at Products-> Add new (MVP)
- Note that the description editor has the toolbar buttons initially shown
- Check that the toolbar is 40px in height
- Note that the placeholder text is initially shown (
Describe this product...) - Type
/and insert an image or video block - Note that you an insert images via the media library
- Insert a couple of blocks and hover between blocks to see that the block inserter (+ sign and blue line) is shown between blocks
Add create attribute term modal #35131
- Make sure you have the
new-product-management-experiencefeature flag enabled (you can do so using the latest version of the Beta tester within the mono repo). - Go to Products > Add new (MVP) and fill out some of the initial details like name and price
- Scroll down and click Add first attribute in the attributes section
- Select one of the attributes
- Search for a attribute term that doesn't exist yet
- The 'Create "your new attribute term name"' should show as an option
- Click that and another modal should show with the create fields.
- Fill out all the fields and click Add this should create the attribute term and add it as a selected item within the terms field
- With
localStorage.setItem( 'debug', 'wc-admin:*' );run prior, it should show that aproduct_attribute_term_addandproduct_attribute_term_add_successevent has been fired. - Open the modal again and select cancel this shouldn't do anything.
- A user should not be able to click add when the name is removed.
Add filter hook handle_bulk_actions-woocommerce_page_wc-orders #35442
** The WooCommerce Beta Tester plugin hasn't declared compatibility with HPOS, so use it to install the beta, RC or final release and then deactivate the plugin. You should then be able to proceed with the steps below. **
First, in case handy, here is a quick reminder on how to enable HPOS, etc 💡
- If necessary, start by running the WooCommerce ▸ Status ▸ Tools ▸ Create Custom Order Tables tool.
- Then, visit WooCommerce ▸ Settings ▸ Advanced ▸ Features and enable High-Performance Order Storage.
- Next, head on over to WooCommerce ▸ Settings ▸ Advanced ▸ Custom Data Stores and:
- Select Use the WordPress posts table.
- Select Keep the posts table and the orders tables synchronized.
- Start by adding the following snippet to a suitable location, such as a wp-content/mu-plugin file (the goal of this snippet is to simulate how a 3PD might add a custom bulk action for orders):
$add_custom_bulk_action = function ( array $bulk_actions ) {
	return array_merge( $bulk_actions, [ 'custom-bulk-action' => 'Perform Custom Action!' ] );
};

$custom_bulk_action_handler = function ( string $redirect_to, string $action, array $ids ) {
	return $action === 'custom-bulk-action'
		? add_query_arg( 'bulk_action', 'custom-bulk-action-notice', $redirect_to )
		: $redirect_to;
};

$custom_bulk_action_notice = function () {
	if ( isset( $_GET['bulk_action'] ) && 'custom-bulk-action-notice' === $_GET['bulk_action'] ) {
		print '<div class="updated" style="border-left-color: #d7f"><p>Custom Bulk Action Handler Fired</p></div>';
	}
};

add_filter( 'bulk_actions-woocommerce_page_wc-orders', $add_custom_bulk_action );
add_filter( 'handle_bulk_actions-woocommerce_page_wc-orders', $custom_bulk_action_handler, 10, 3 );
add_action( 'admin_notices', $custom_bulk_action_notice );
- With HPOS enabled (and WooCommerce Orders Tables set as the authoritative data store for orders), visit the order list screen. You should see a new bulk action ("Perform Custom Action!"):

- Check the boxes for one or more order rows, select the above bulk action, and click on the "Apply" button. Once the page finishes reloading, you should see an admin notice like the following one:

Fix invalid wcadmin_install_plugin_error event props #35411
- Install Code Snippets and woocommerce-beta-tester
- Create a new snipeet with the following code
function pre_install_plugins( $value ) {
    return array( 'invalid-plugin-slug' );
}

add_filter( 'woocommerce_admin_plugins_pre_install', 'pre_install_plugins', 999 );
- Go to WooCommerce > Home
- Go to marketing task
- Click "Activate" button on Google Listings & Ads
- Visit the WooCommerce->Status->Logs page wp-admin/admin.php?page=wc-status&tab=logs in a new tab
- Select a tracks-* log from the dropdown
- Search the wcadmin_install_plugin_error string
- Observe that all event props are in snake_case like below:
2022-10-31T08:38:13+00:00 DEBUG wcadmin_install_plugin_error
2022-10-31T08:38:13+00:00 DEBUG   - error_message: The requested plugin `invalid-plugin-slug` could not be installed. Plugin API call failed.
2022-10-31T08:38:13+00:00 DEBUG   - api: Plugin not found.
2022-10-31T08:38:13+00:00 DEBUG   - slug: invalid-plugin-slug
- Update the snippets with the following code
function plugins_api_result( $res, $action, $args ) {
	$res->download_link = 'invalid link';
    return $res;
}

add_filter( 'plugins_api_result', 'plugins_api_result', 999, 3 );
- Repeat 4~9 steps
- Observe that all event props are in snake_case like below:
2022-10-31T08:44:41+00:00 DEBUG wcadmin_install_plugin_error
2022-10-31T08:44:41+00:00 DEBUG   - error_message: The requested plugin `google-listings-and-ads` could not be installed.
2022-10-31T08:44:41+00:00 DEBUG   - slug: google-listings-and-ads
2022-10-31T08:44:41+00:00 DEBUG   - api_version: 2.2.0
2022-10-31T08:44:41+00:00 DEBUG   - api_download_link: invalid link
2022-10-31T08:44:41+00:00 DEBUG   - upgrader_skin_message: Downloading installation package from invalid link…,Download failed. A valid URL was not provided.
2022-10-31T08:44:41+00:00 DEBUG   - result:
Product creation experience: shortcut to add variation price #34948
- Go to
Products>Add New. - Add a product name and a description.
- In the
Product datasection selectVariable product. - Go to
Attributesand create (or select) a product attribute to use for variations. - Go to
Variationsand add a few variations (don't modify them). - Press
Save changes. - Verify that a warning is shown with the number of variations without price.

- Press
Add price. A modal like the one below will be visible.

- Verify the currency matches the currency used on the site.
- Add a text (not numbers) and verify that the validation fails. Add a number with multiple decimal points and verify that the error text says:
Please enter a value with one decimal point (%s) without thousand separators. - After adding a valid number the button
OKshould be enabled. - Add a valid number and press
Add prices. - Verify that the
Regular pricefor every variation is set with the number added in the modal. - Verify that the accordion expands after pressing
Edit. - Press
Save changes. The warning should disappear. - Publish the product.
- Add another variation. Press
Save changes. The warning should be shown again. - Now add another value and verify that the new value has been added to the new variation without modifying the other variations' values.
Now create a new product but select Variable subscription instead of Variable product in step 3, and continue with the other steps.
Admin redirects for HPOS URLs #35463
** The WooCommerce Beta Tester plugin hasn't declared compatibility with HPOS, so use it to install the beta, RC or final release and then deactivate the plugin. You should then be able to proceed with the steps below. **
First, in case handy, here is a quick reminder on how to enable HPOS, etc 💡
If necessary, start by running the WooCommerce ▸ Status ▸ Tools ▸ Create Custom Order Tables tool. Then, visit WooCommerce ▸ Settings ▸ Advanced ▸ Features and enable High-Performance Order Storage. Next, head on over to WooCommerce ▸ Settings ▸ Advanced ▸ Custom Data Stores and:
- To test, you will first need to setup HPOS—making the custom order tables authoritative and enabling sync. You will also need a number of test orders to play with: if you don't have any existing order data, consider using a tool like WC Smooth Generator for that.
- Next, visit WooCommerce ‣ Settings ‣ Advanced ‣ Custom Data Stores and change the data store to the WordPress Posts Table.
- Try accessing the HPOS order admin list table at
/wp-admin/admin.php?page=wc-orders: you should be redirected to the equivalent order post screen atwp-admin/edit.php?post_type=shop_order. - Repeat, but use a paged URL such as
wp-admin/edit.php?post_type=shop_order&paged=3: you should be redirected to/wp-admin/edit.php?paged=3&post_type=shop_order(assuming you have at least 3 pages of order data). - Now try accessing the order editor via the HPOS new order screen at
/wp-admin/admin.php?page=wc-orders&action=new: you should be redirected to/wp-admin/post-new.php?post_type=shop_order(simulates manually creating a new order). - Try acessing the order editor for an existing order, using a URL like
https://wordpress.lab/wp-admin/admin.php?page=wc-orders&action=edit&id=123: you should be redirected to/wp-admin/post.php?action=edit&post=123(of course, change 123 to the ID of an actual existing order within your test site).
Now a more advanced test.
- Return to WooCommerce ‣ Settings ‣ Advanced ‣ Custom Data Stores and change the data store to the WooCommerce Orders Tables.
- Visit the order admin list table at
/wc-admin/admin.php?page=wc-ordersand select one or more orders, then perform a bulk action such as changing the order status to Completed.
- You will also need to use your browser's developer tools for this test (if you are using Firefox, I recommend the Network tab with Persist Logs enabled), or some equivalent tool, to capture the initial URL that is created when you do this.
- Typically, it will take the form
/wp-admin/admin.php?page=wc-orders&_wpnonce=ABCDEF&_wp_http_referer=%2Fwp-admin%2Fadmin.php%3Fpage%3Dwc-orders&action=mark_completed&order%5B%5D=1&order%5B%5D=2&action2=mark_completed(but you may also see some extra query parameters in there).
- Go back to WooCommerce ‣ Settings ‣ Advanced ‣ Custom Data Stores and change the data store to the WordPress Posts Table.
- Now try "re-playing" the URL you captured earlier, but change both instances of
mark_completedtomark_processing. An appropriate redirect should take place and the bulk action should be processed, in this case resulting in the two orders being set back to "Processing".
Libyan Dinar not formatted correctly #35395
- Visit WooCommerce ‣ Settings ‣ General.
- The symbol for Libyan Dinars (in the currency selector) should render as
د.ل(previously, it was reversed). - If you select this currency and look at the storefront, you should see the same thing there.

Adding attribute edit modal for products MVP #35269
- Ensure you have at least 2 attributes with options configured.
- Enable new products MVP feature flag
- Go to new products MVP screen
- Click the "add attribute button" at the bottom to open the add modal.
- Add one of the attributes, as well as 1 or two of the associated options.
- Click "Add" button, and ensure the attribute shows up in the attribute table.
- Click "Edit" button on added attribute to open the edit modal.
- Add another option to the attribute and click "update."
- Ensure the UI on the attribute section has updated with that attribute.
- Publish the product, but don't navigate away
- Refresh the page, which should just load the same product.
- Scroll to the bottom and ensure the updated options were persisted.
- Add another attribute with the add modal, but don't publish the product.
- Click "edit" on one of the attributes to open the edit modal.
- Delete the name of the attribute in the top "attribute" field, and select the other from the drop-down.
- It should switch the attribute field and auto populate the terms in the lower drop-down associated with this attribute.
- Similarly, test delete attributes and checking both checkboxes, publish the product, and ensure the changes were persisted.
Remove update store details note #35322
- On a new site, do not complete the onboarding profiler and do not check the checkbox for "Setup for client" during onboarding
- Install a plugin like WP Crontrol
- Under Tools -> Cron Events, run wc_admin_daily
- Make sure the note with a title of "Edit your store details if you need to" has not been added
Add summary field to new product experience #35201
- Visit the new experience (Products-> Add new (MVP))
- Add some content to the summary field
- Publish the product
- Make sure the data persists on refresh
Revert change that auto collapses the short description field #35213
- Go to Products > Add New or edit an existing product
- Scroll down and check if the Product short description is expanded by default.
Remove manage store activity from home screen note #35320
- Install a plugin like WP Crontrol
- Under Tools -> Cron Events, run wc_admin_daily
- Make sure the note with a title of "New! Manage your store activity from the Home screen" has not been added
Remove the first downloadable product note #35318
- Create at least 1 downloadable product
- Install a plugin like WP Crontrol
- Under Tools -> Cron Events, run
wc_admin_daily - Make sure the note with a title of "Learn more about digital/downloadable products" has not been added
[HPOS] Add order data store info to SSR #35487
- Go to WC > Status.
- Scroll down to "Settings".
- Confirm that there is a new row "Order datastore" with the classname for the current order datastore.
- If HPOS is enabled, there should be another row "HPOS data sync enabled" indicating whether data sync has been enabled or not.
- Repeat the above with different configurations of HPOS and data sync (enabled/disabled).
Add/source param to get subscriptions call #35051
Test My subscriptions
- Open WooCommerce > Extensions
- Open the My Subscriptions tab
- Connect to WooCommerce.com
- Update your list of subscriptions
- Confirm that your subscriptions are loaded
- Confirm that other Helper functions that use the WC_Helper_API::get() and url() methods still works normally, e.g. visit the Plugins page and ensure you can activate, deactivate, and view the View Details modal for plugins hosted on WooCommerce.com
Add scheduled sale fields #34538
- Install the WC-Admin Test Helper and enable the new-product-management-experience.
- Go to Products > Add New (MVP).
- Go to the Pricing section.
- Verify that:
- When the toggle is enabled, we show the “From” and “To” date fields.
- By default, once the user flips the toggle, we fill the From field with the current date.
- Clicking the field opens a popover window with a calendar.
- When clicked, the user can enter the date using the keyboard. The user can enter dates using most common formats.
- Dates for the "From" and "To" fields are formatted using the site settings in Settings > General > Date Format.
- The popover uses the date picker component from Gutenberg (sidebar > Status & Visibility > Publish > Immediately).
- If the user selects a date from the calendar, we populate the date field in the popover and the actual From/To field.
- Users can clear the date by removing the contents of the From/To input field.
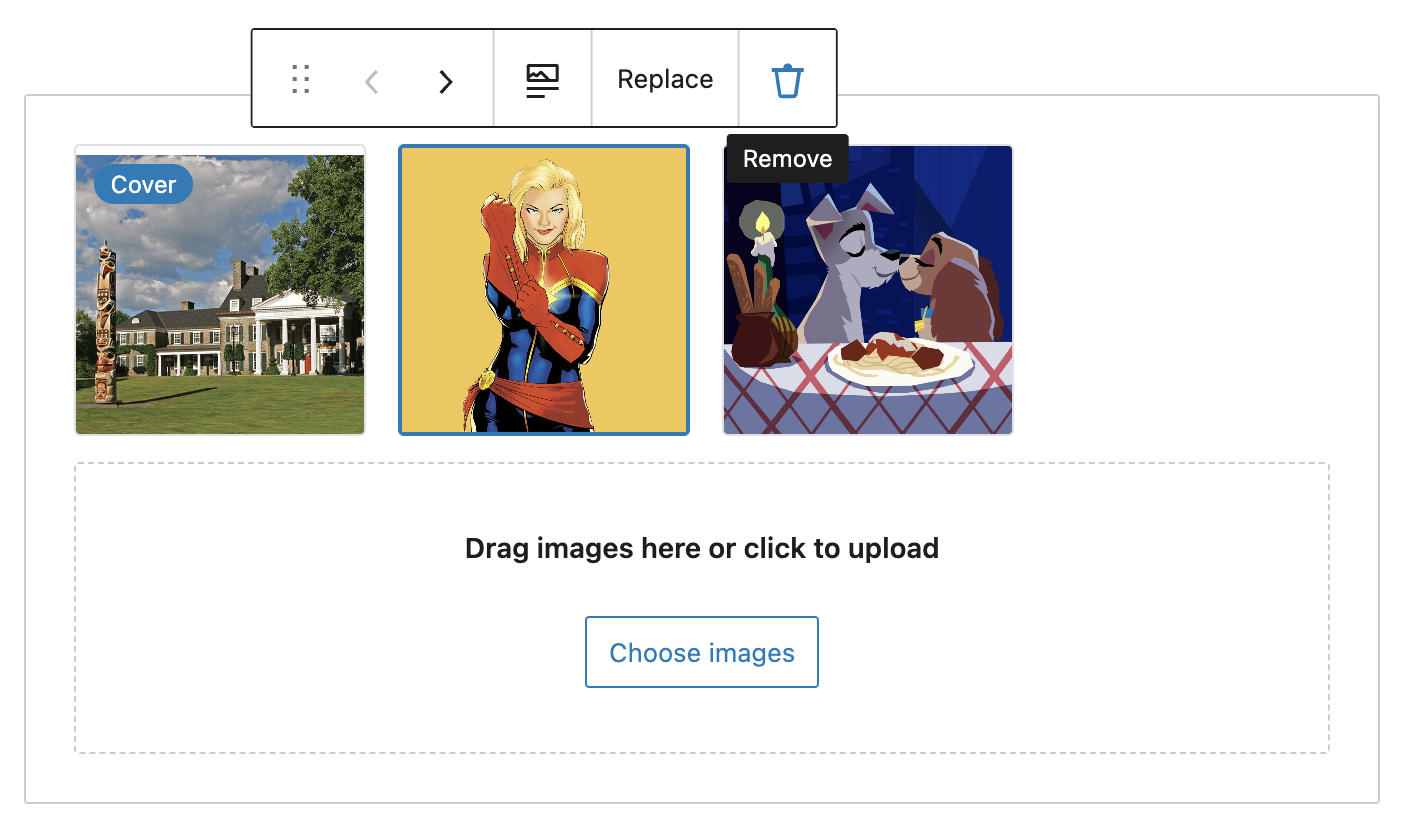
Image Gallery: Update toolbar position and tooltips #35534
- Go to Products > Add new (MVP)
- Add a few images to the image gallery
- Verify that the toolbar appears properly, along with the tooltips
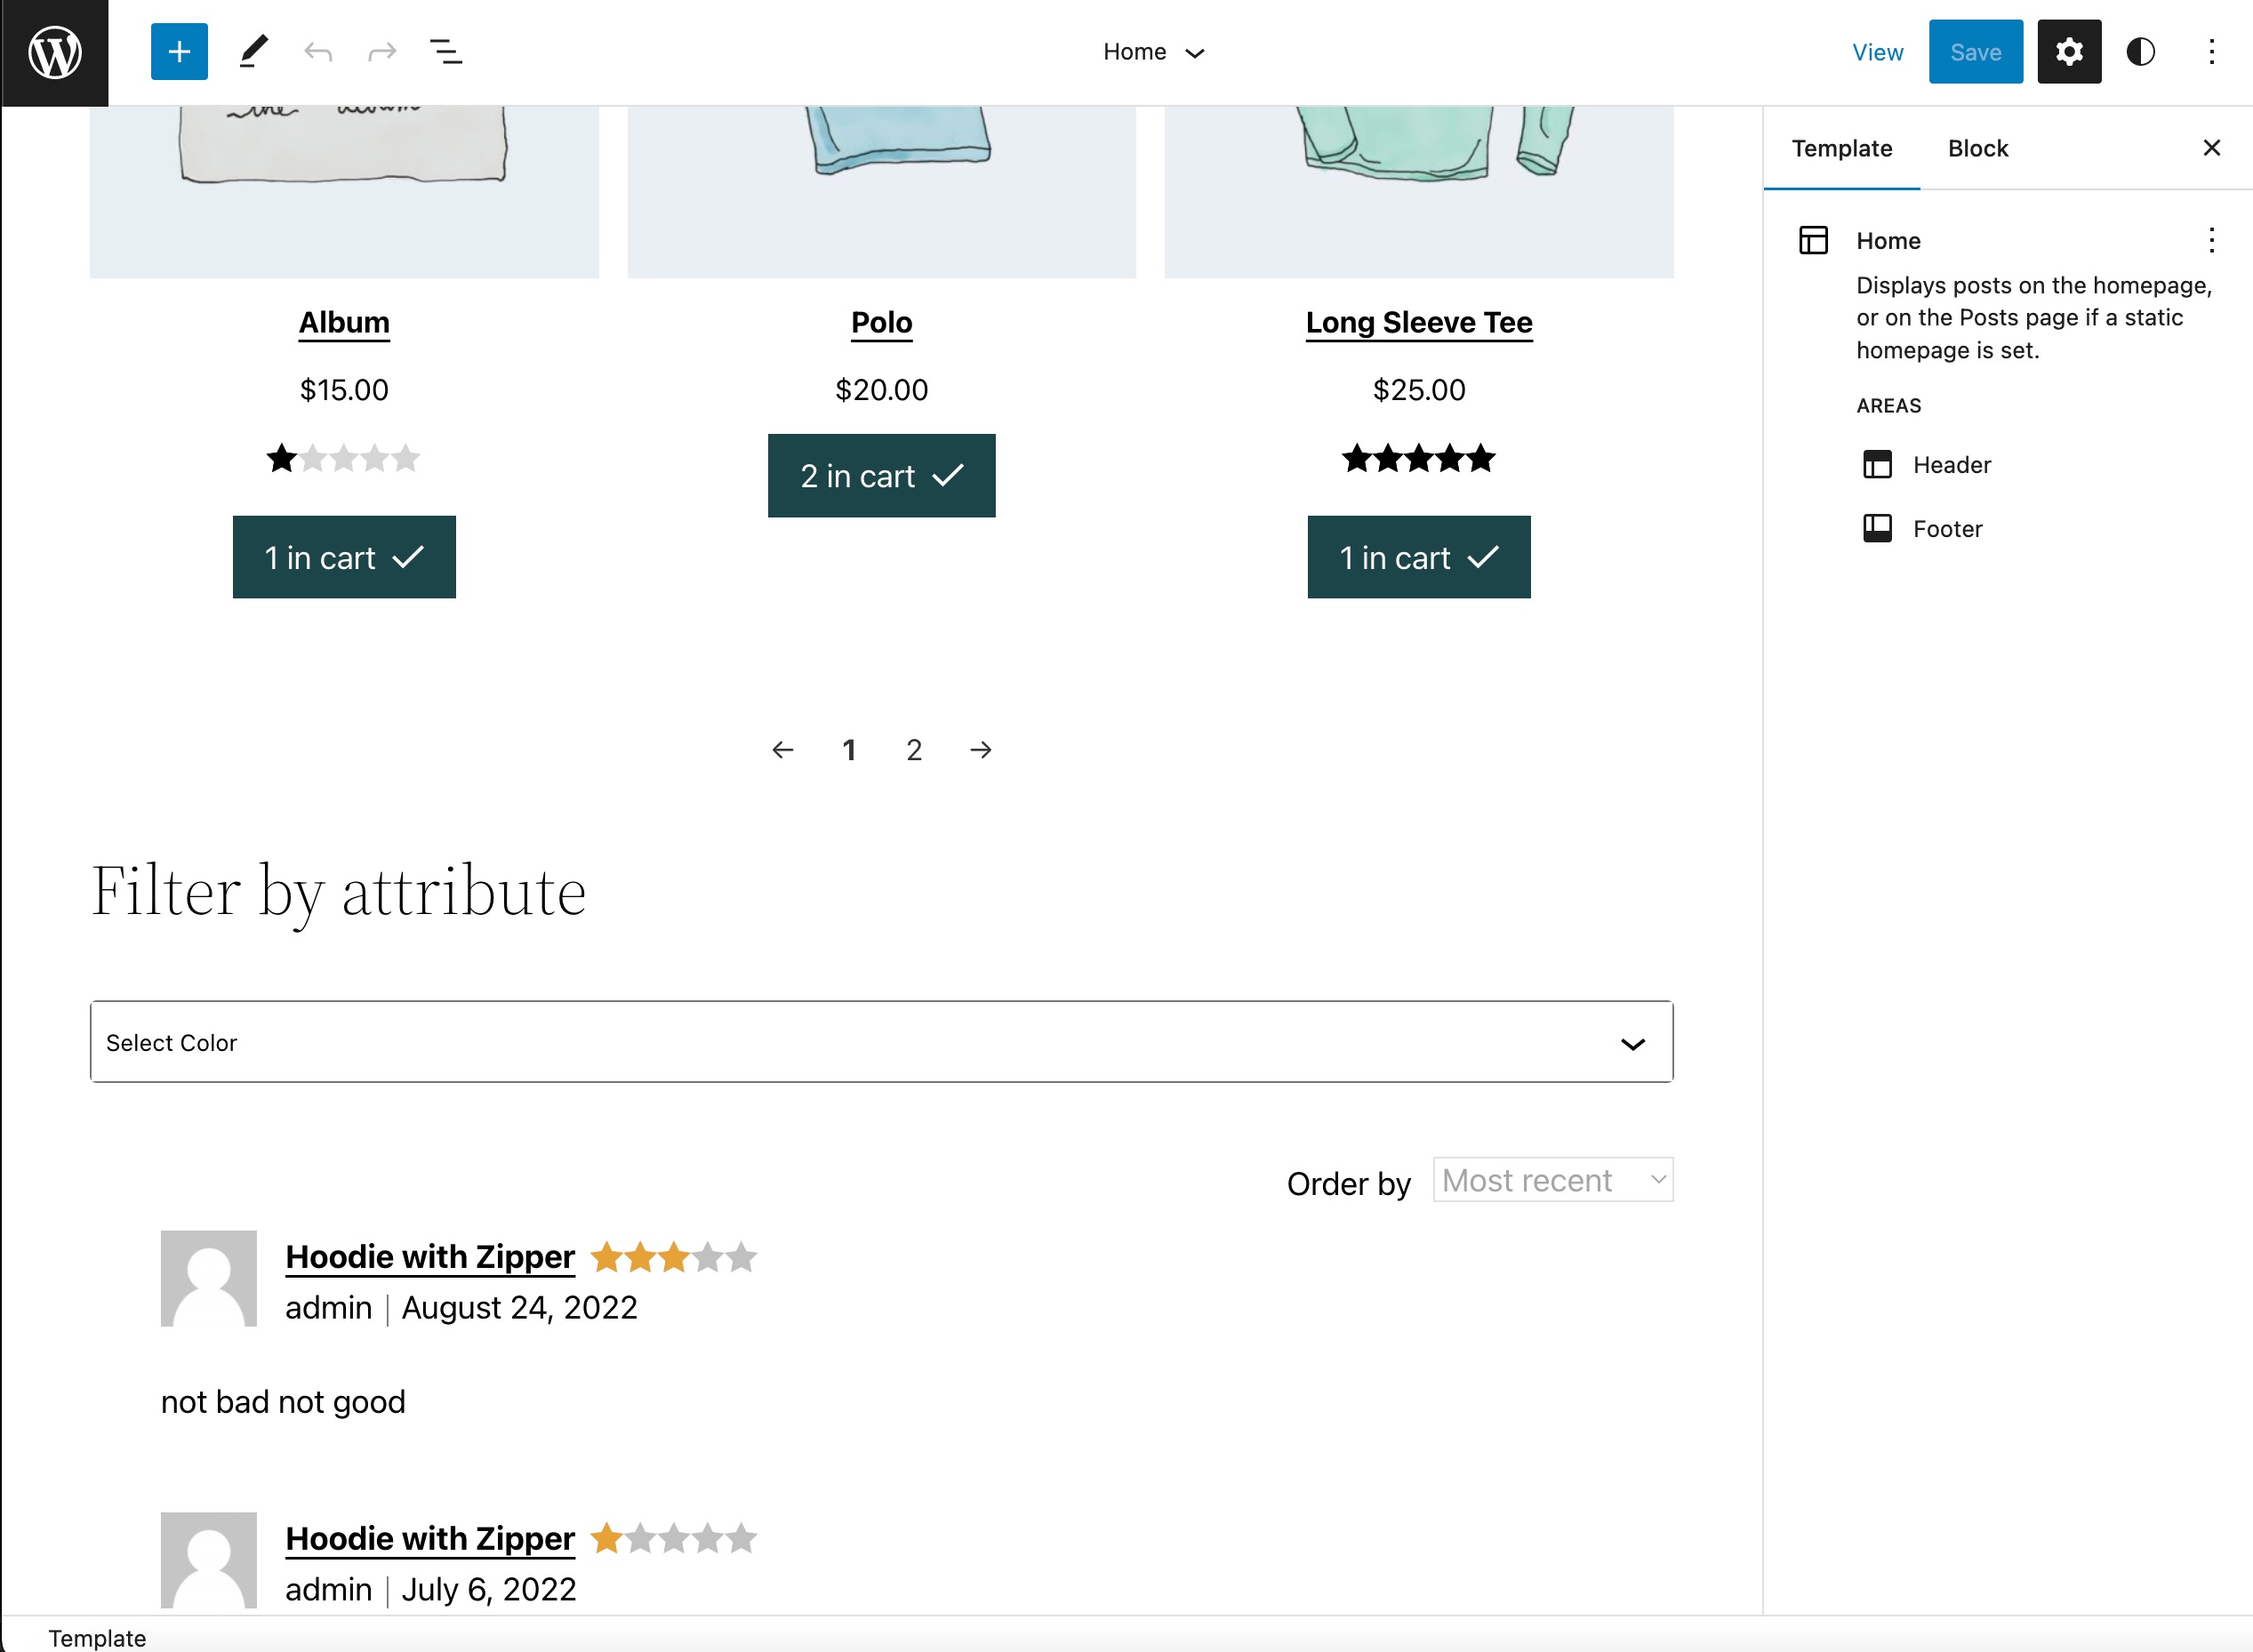
FSE: Fix icon fonts not being loaded in the Site Editor #35532
- Enable WooCommerce and WooCommerce Blocks.
- Enable a block theme, and make sure you have some products with ratings.
- Add the All Products block in the Site Editor.
- Confirm that the 'Rating Star' icon is loading and the same goes for the '1 in cart' icon.
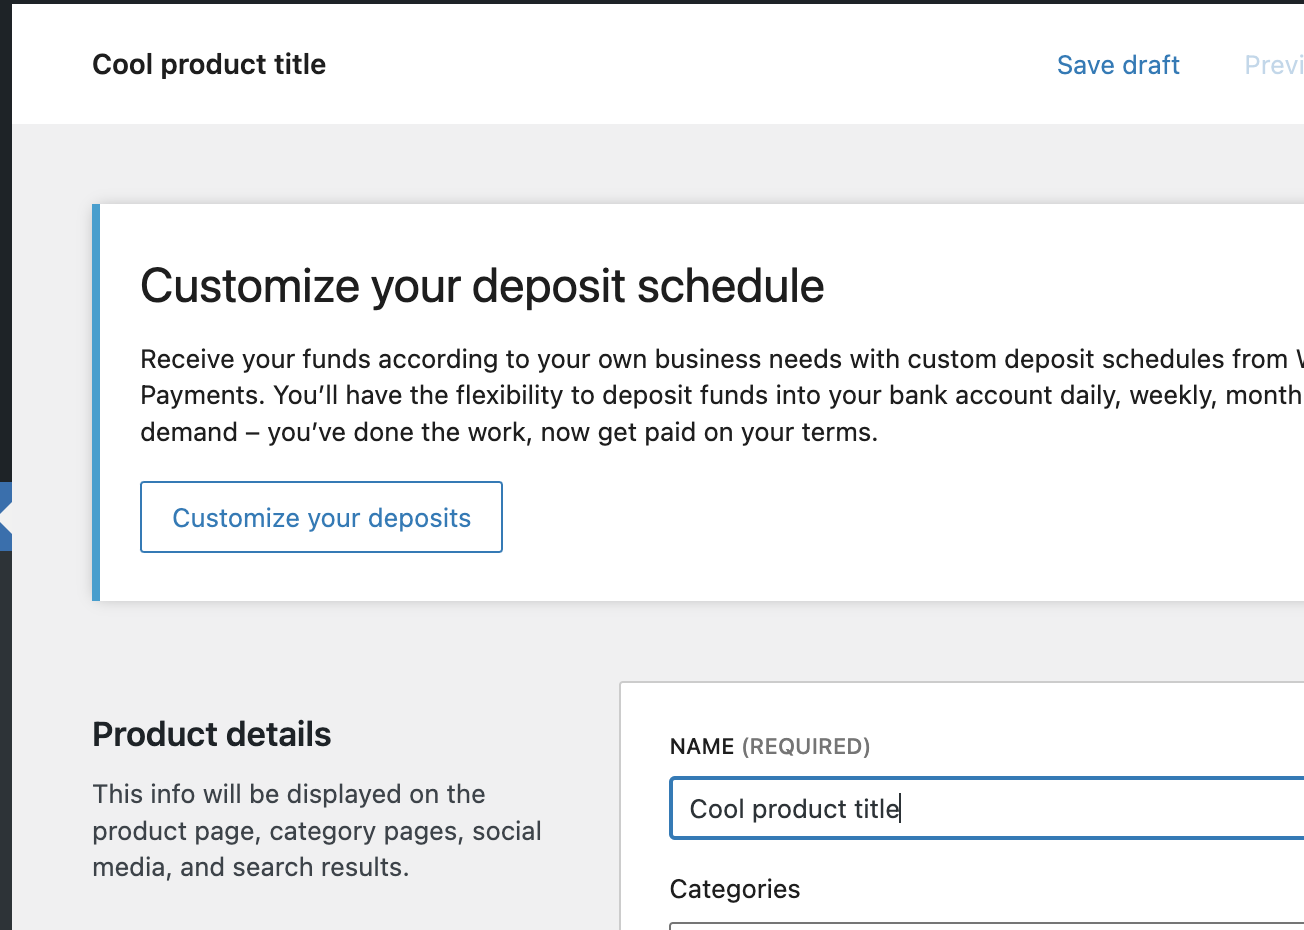
Add product title to header when available #35431
- Navigate to the new product management experience ( Products -> Add new (MVP) ).
- Note that "New product" exists in the header initially
- Type something in the product name field
- Note that the header is updated to reflect this name
- Delete the content from the product name field
- Note that the header reverts to "New product"
- Save the product as a draft or publish
- Remove the content from the product name field
- Note that the previously saved name shows in the header
- Type some content in the product name field
- Note that the header is updated to reflect those changes
Fix bg color that was not covering the full page #35476
- Go to the Add New (MVP) product page
- The gray background should cover the full screen
Add contextual product more menu #35447
- Navigate to the new product management experience ( Add new (MVP) )
- Click the "more" (vertical ellipsis) button in the top right of the header
- Note that each of the links closes the menu
- Note that clicking "Use the classic editor" takes you to the classic editing experience
- Navigate back to the new experience and publish a product
- Click again on "Use the classic editor"
- Note that you are taken to the classic editor for the respective published product
Add product status badge to product form header #35460
- Navigate to the new product management experience ( Products -> Add new (MVP) )
- Note that the initial badge in the header next to the title is "Unsaved"
- Make some changes and click "Save draft"
- Note that the badge is now "Draft"
- Publish the product
- Note that the badge is "In stock"
- Manually set the product to "out of stock" in the inventory section and update
- Note that the badge is "Out of stock"
- Click "Track quantity for this product" and enter a positive quantity number and save
- Note that the badge is "In stock"
- Set the inventory quantity to
0and save - Note that the badge is "Out of stock"
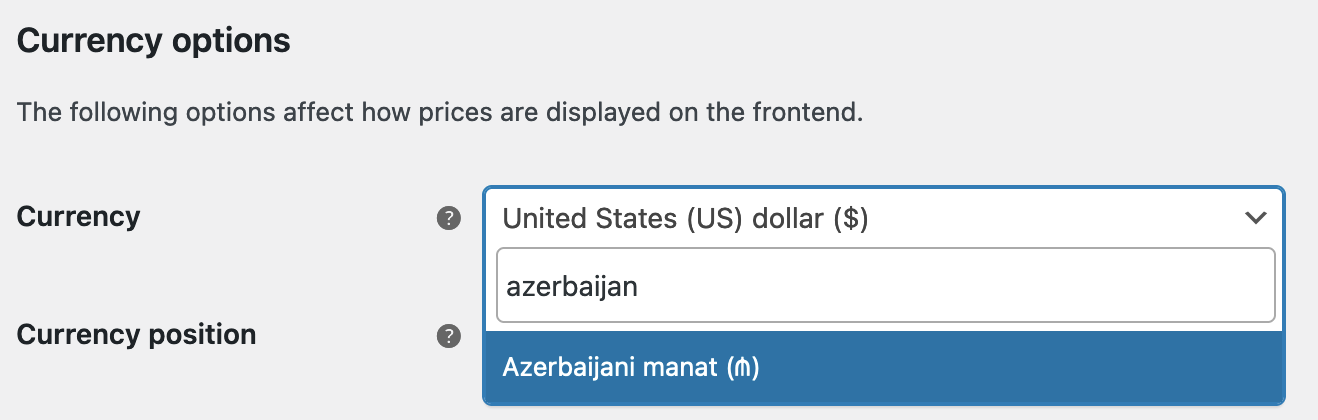
Update the Azerbaijani manat symbol AZN #30605
- Navigate to WooCommerce ▸ Settings ▸ General and update the currency settings so you are using the Azerbaijani Manat. Save.
- Visit the storefront and ensure prices are displayed using the Manat ₼ symbol.
Do not use $_POST directly in validate_checkout #35329
Checkout validation should continue to work as it did previously. More specifically, we should ensure that we are still validating if the custom has agreed to the shop's terms and conditions (since the change touches that check):
- Ensure you have designated a terms and conditions page (via WooCommerce ▸ Settings ▸ Advanced ▸ Page Setup): terms-and-conditions
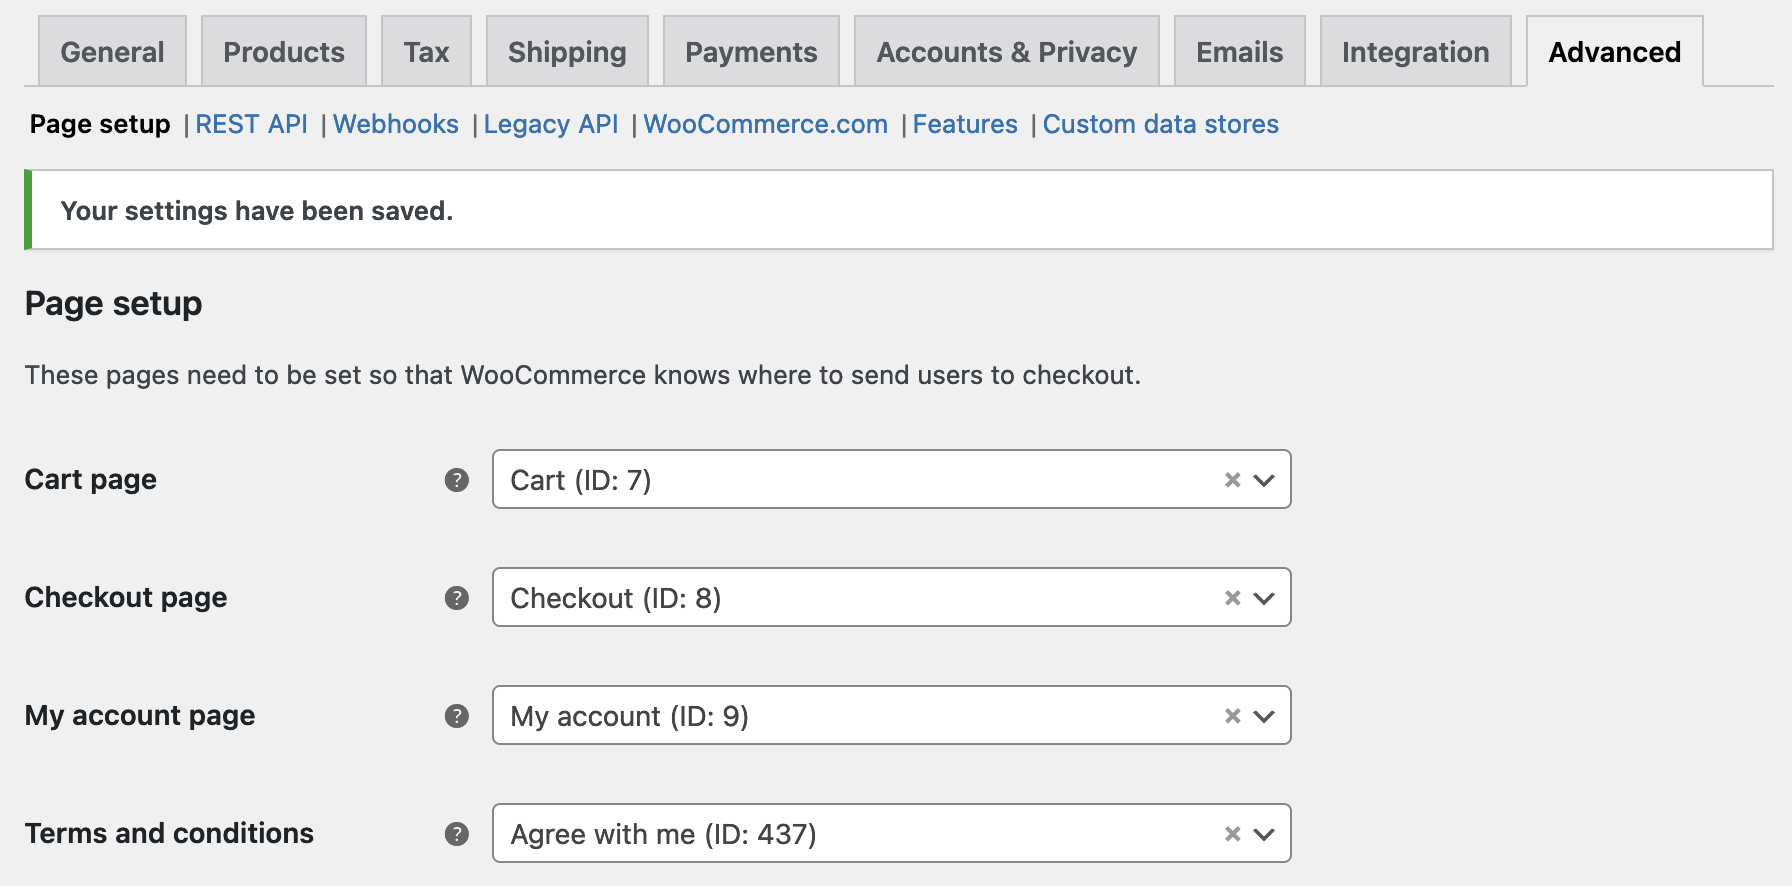
- As a customer, add a product to your cart and attempt to checkout. In the first instance, populate the checkout form correctly but avoid checking the box that indicates you agree with the terms and conditions:

- Consequently, on trying to checkout, you should see a warning as follows:

- Rinse and repeat; except agree to the terms and conditions. If all other fields are correctly populated, you should be able to checkout successfully.
- Repeat again, but try to supply invalid values to other checkout fields (for example, you might provide an invalid postal code) and confirm validation successfully prevents this.
Deploy the stacked layout in the Products Task experiment #35611
On a new install,
- Click "Add Products" from the task list.
- See that the new stacked layout screen is shown (compare to screenshot above).
- Check the accordion functionality works by clicking "View more product types".
- Click the "Physical product" list item.
- See that the "New Product " screen is shown and is pre-filled to a "simple product" type.
Collapse the short description module by default #34619
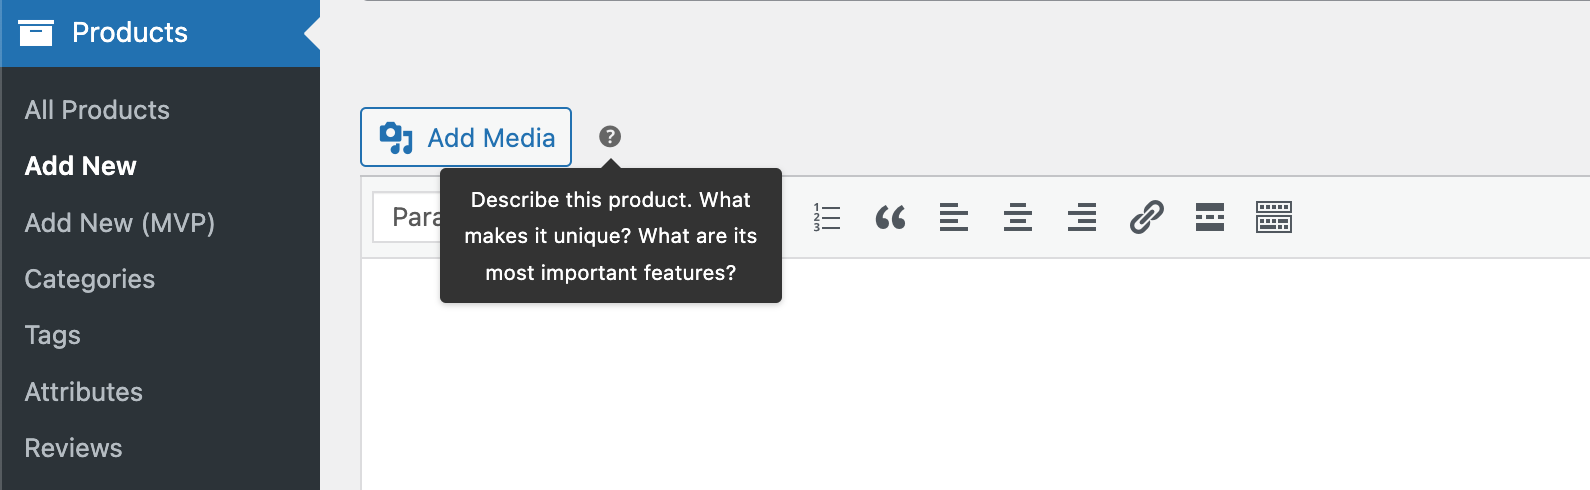
- Visit the
Add newproduct page - When hover the ? icon next to
Add mediabutton a tooltip should show like below:
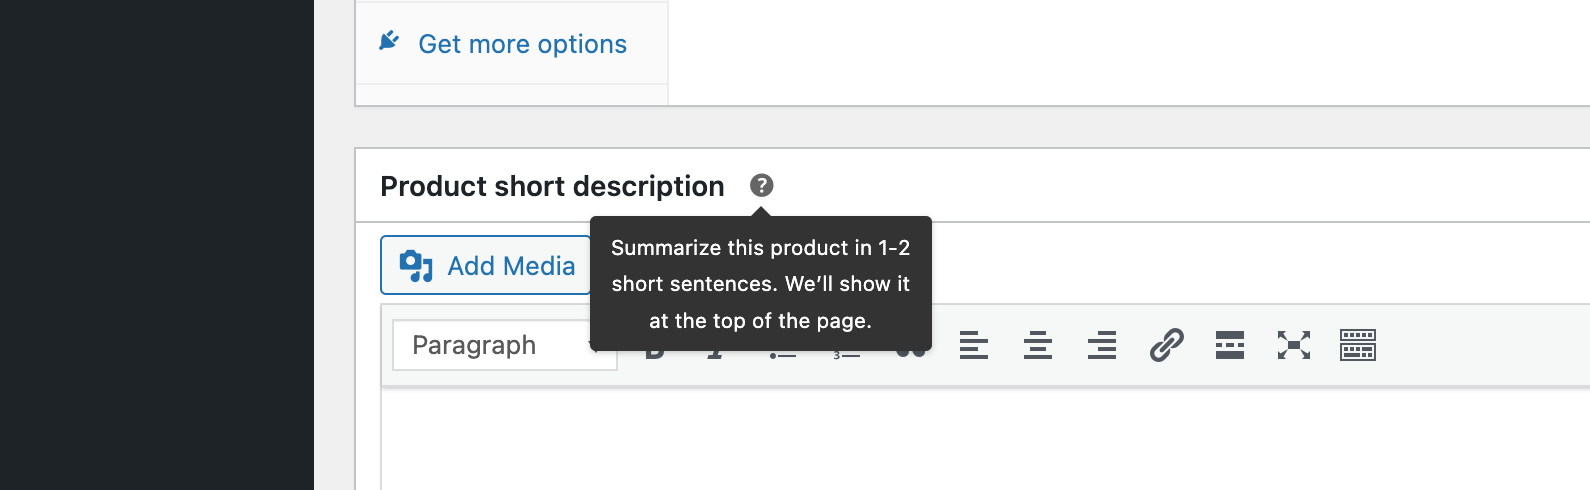
- When hover the ? icon next to panel with title
Product short descriptiona tooltip should show like below:
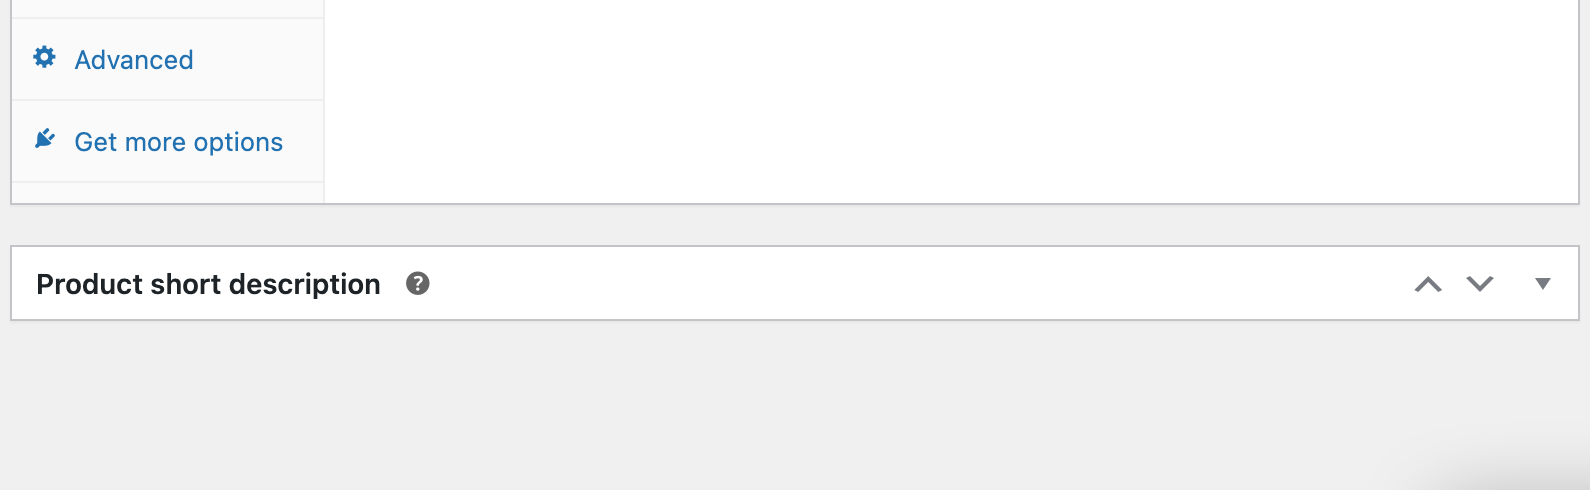
- Every time the page is visited or refreshed the
Product short descriptionpanel should remain collapsed by default.
Analytics: Fix advanced filtering date selection in WordPress 6.1. #35644
- Install WCPay and use the Date filter on the Transactions or Disputes pages.
- Select a date.
- Click again on the date picker. Verify there is no error, and that date selection works properly.
- Activate the filter and verify that the selected dates for the filter are applied properly.
Analytics: Fix custom date range calendar styling in WP 6.1 #35649
- Go to any Analytics page.
- Click on the "Date range" and click "Custom".
- Verify that the calendar styling is fixed.

Fix styling of CES modal #35602
- Make sure you have the new-product-management-experience feature flag enabled (you can do so using the latest version of the Beta tester within the mono repo).
- Create a couple products
- Go to Analytics > Products
- Select Comparison from the Show dropdown
- Select a couple products and click Compare
- A notice should show up that allows you to share feedback, click this.
- Make sure the emoji's show up correctly in a horizontal format.
- Note: that this notice will probably only show up once, once you click Share feedback, in order for it to show again you can delete the woocommerce_ces_shown_for_actions option.
Always output the min and max attributes for the quantity selector. #35767
- Add https://github.com/woocommerce/woocommerce-min-max-quantities.
- Create a simple product with min_qty=max_qty.
- Go add the product page. You will be able to see the quantity input there.
- As a customer, visit the product page. You should be able to purchase the product and the price in the cart should match your expectations.
- Now edit the composite product and set the min and max values to the same value. Save.
- Repeat the process ... of course, you can still specify the type of memory (128KB or 512KB) but can longer specify how much you want. Add to the cart, pricing again should match your expectations (based on the unit cost and the predetermined quantity, etc).