Release Testing Instructions WooCommerce 6.4
WooCommerce 6.4 includes:
- Start with a fresh install.
- Navigate to WooCommerce -> Home to start the OBW.
- Complete a few steps.
- Click any of the previous steps and make some changes.
- Click the next/previous step. You should be prompted by the modal to save your changes. Click the save button.
- Go back to the step and confirm the changes.
- Repeat the step, but click the disregard button for this time.
- Confirm the changes are not saved for this time.
- Make sure the fallback payment suggestions file is used:
- turn off
woocommerce_show_marketplace_suggestionsoption usingwp-cli:wp option set woocommerce_show_marketplace_suggestions no
- turn off
- Go to setup wizard's business details step -> free features tab
- Observe that "Google Listings and Ads plugin" is displayed
- Install and activate Google Listings and Ads plugin (https://woocommerce.com/products/google-listings-and-ads/)
- Go to setup wizard's business details step -> free features tab
- Observe the plugin is NOT present
- Start the onboarding wizard on a fresh install
- Choose a supported country like US
- Install WooCommerce Payments in the Business Details / Free Features step.
- Do not complete the WooCommerce Payments set up.
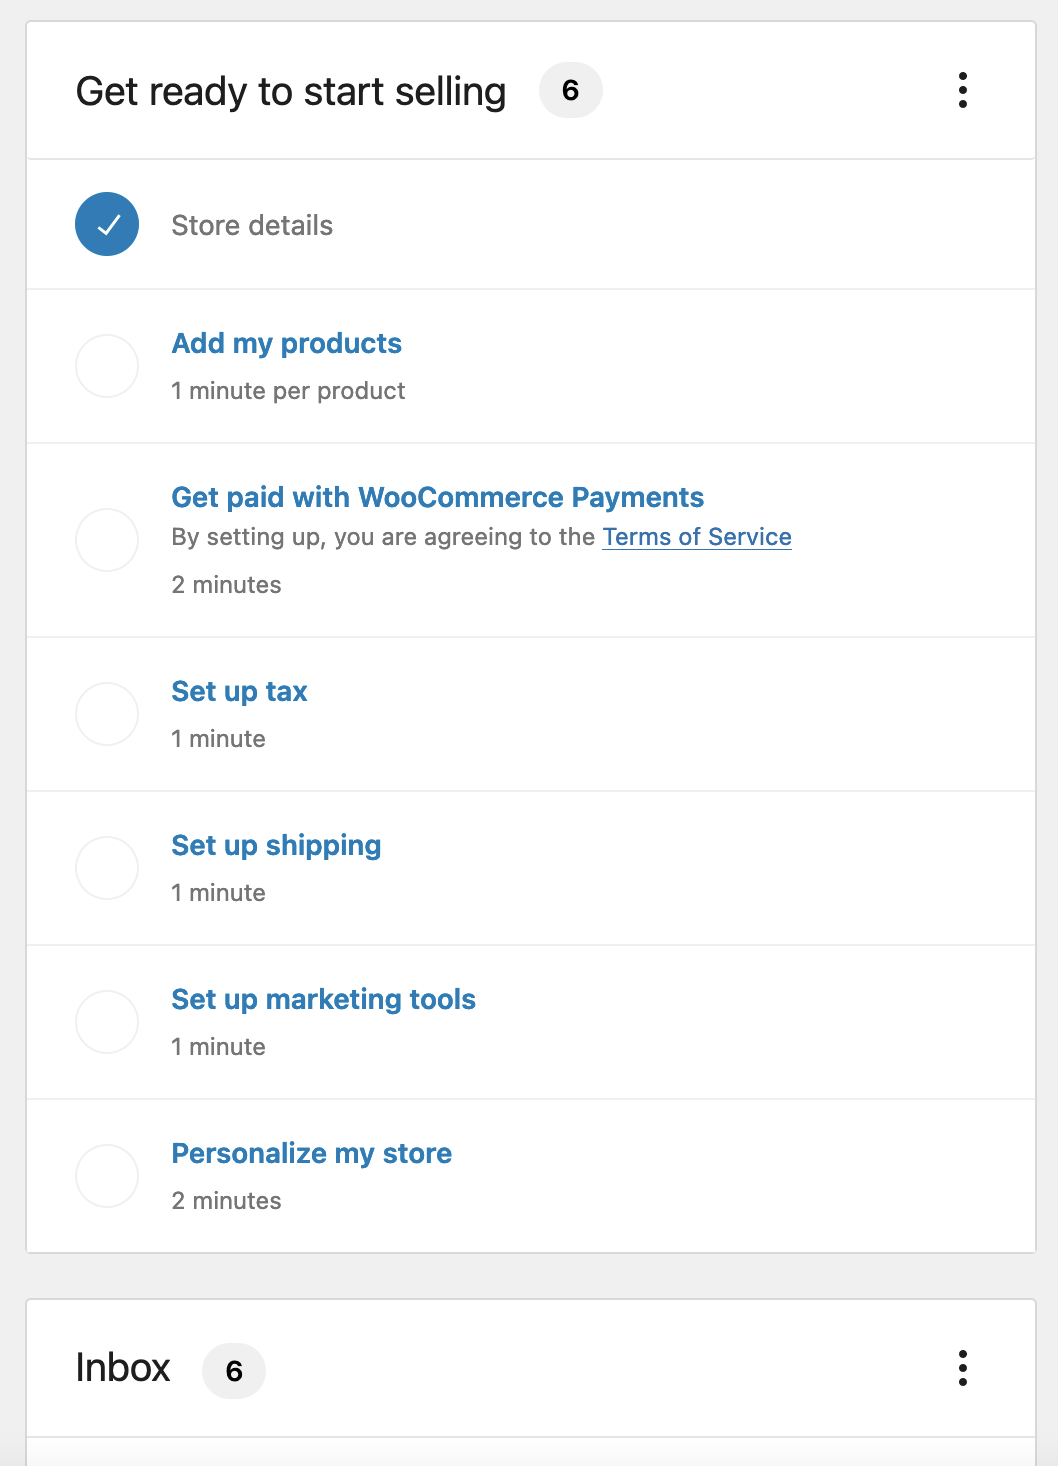
Case 1: WC Pay is not set up
- See that "Get paid with WooCommerce Payments" task is not ticked.
- See that "Setup additional payment providers" is not shown.
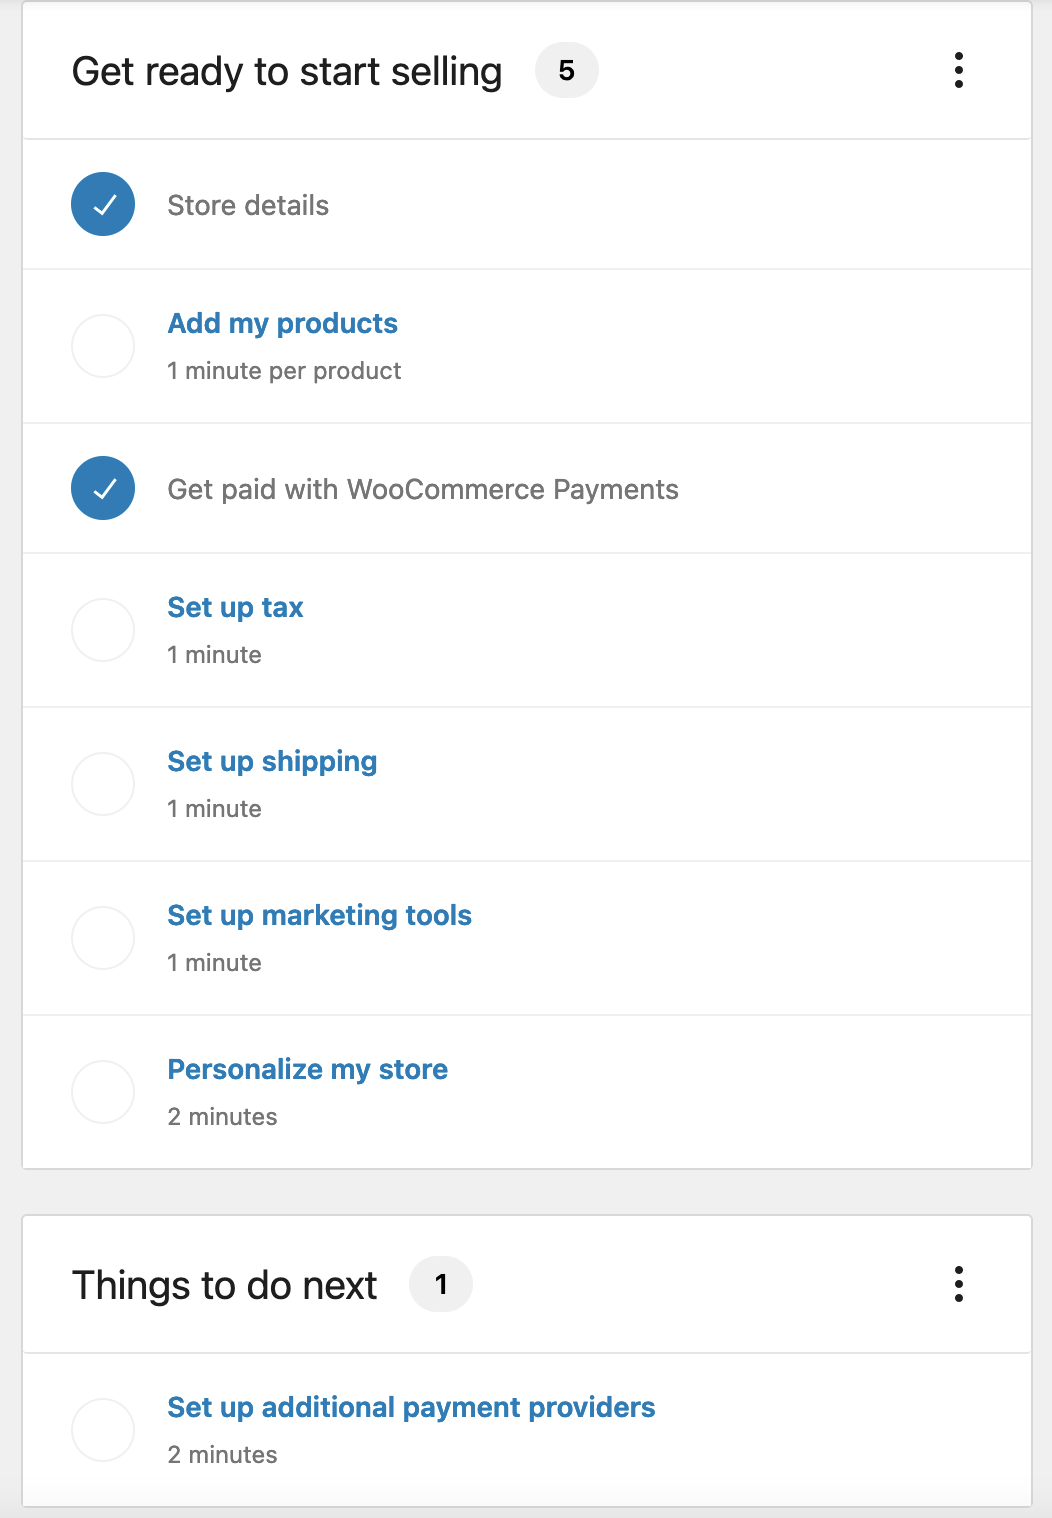
Case 2 WC Pay is set up
- Set up WooCommerce Payments or cheat by adding
return truetosrc/Features/OnboardingTasks/Tasks/WooCommercePayments.phpline 128 - See that "Get paid with WooCommerce Payments" task is ticked.
- See that "Setup additional payment providers" is shown.
- Navigate to
wp-admin/admin.php?page=wc-admin&path=%2Fsetup-wizarddirectly via your browser's address bar - Note that the page content underneath (header, menu, etc) is not shown while the profile wizard is loading
- In your browser's console run
document.body.classList.remove('woocommerce-admin-full-screen'); - This will result in a broken layout, but the important item to note here is that the header title is now "Setup Wizard" instead of "/setup-wizardStoreDetails"
- Navigate to other pages to make sure no regressions have occurred
- Create a test site using JN.
- Start OBW and enter an address that is not in the US.
- Choose "food and drink" from the Industry
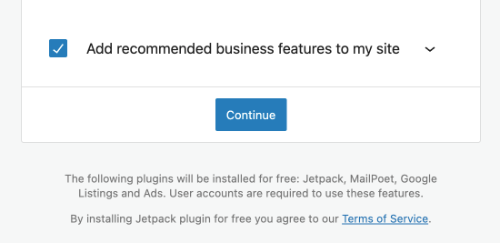
- When you get to the "Business Details", click "Free features".
- Note that "WooCommerce Shipping" is not listed.
- Confirm that the copy under the plugin list says:
By installing Jetpack plugin for free you agree to our Terms of Service..
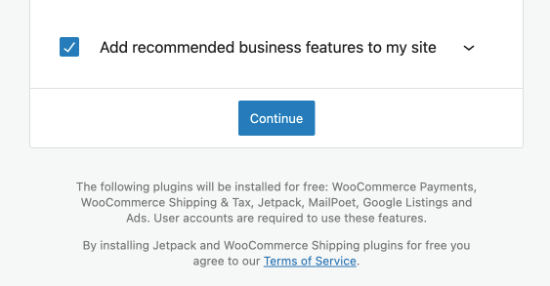
- No go to the first step and select an address in the US.
- Go back to the "Business Details" step and click "Free features".
- The text now should say:
By installing Jetpack and WooCommerce Shipping plugins for free you agree to our Terms of Service.
- Run the tests and confirm that everything is working well.
- Navigate to the store setup wizard theme step
- Choose a new theme
- Note the single success toast notice
Add Global Styles support to the Product Price block. (5950)
- Be sure that you are on
WordPress 5.9. - Install and enable the
Twenty Twenty-Twotheme. - Select Appearance > Editor (beta). On the Editor page click on the
Stylesicon in the top-right corner. - Edit some Global Styles e.g. color & font-size for the Product Price block in the Blocks section.
- Create a new post and add the All Products block.
- The Price component should reflect the changes made in Global Styles.
- Click the Edit icon in the block toolbar. Select the Price block and change its styles in the right sidebar. Click Done & save.
- Ensure the local styles override the Global Styles on the Frontend of your store.
Add Global Styles support to the Add To Cart Button block. (5816)
- Be sure that you are on
WordPress 5.9. - Install and enable the
Twenty Twenty-Twotheme. - Add the
All Productsblock (this block contains theAdd To Cart Button Block) to a post. - Click the Edit icon in the block toolbar. Select the
Add To Cart Button. - On the right sidebar, personalize the styles of the block. Click Done & save.
- View the post on the Frontend and confirm your changes.
- Reset to default using the
Resetbutton from the different sections. - Go to Dashboard and select Appearance > Editor (beta). At the top of the screen, select Home > Browse all templates > Single Post. When the page is loaded, add the
All Productsblock to the page. - On the Editor page click on the
Stylesicon in the top-right corner. - Verify that the
Add To Cart Buttonis shown under theBlockssection. Personalize the block again. - Save your changes.
- Go on the page created earlier and check if all styles are applied correctly.
- Edit your previous post/page again.
- Change the styles again and save your changes.
- Check if these new styles have priority over the global styles from the Site Editor.
Store API - Introduced wc/store/v1 namespace. (5911)
- Smoke test checkout process to highlight any problems with cart/checkout endpoints.
- Smoke test the All Products block to highlight any problems with product endpoints.
- Try accessing old endpoints, for example,
https://store.local/wp-json/wc/store/cart. These should still work. - Try accessing new endpoints, for example,
https://store.local/wp-json/wc/store/v1/cart.
Renamed WooCommerce block templates to more e-commerce related names. (5935)
- Be sure that you are on
WordPress 5.9. - Install and enable the
Twenty Twenty-Twotheme. - Select Appearance > Editor (beta).
- Select the dropdown next to Home and click the "Browse all templates" button.
- Confirm that the WooCommerce block template names appear on the list according to the following table:
| Old Title | New Title |
|---|---|
| Product Archive | Product Catalog |
| Product Tag | Products by Tag |
| Product Category | Products by Category |
| Single Product | no change |
Featured Product block: Add the ability to reset to a previously set custom background image. (5886)
- Add a Featured Product block to a page, post, or template. Select a product that has a product image.
- In the block toolbar, click Replace and add custom background media.
- The button to Reset the image should become available in the block toolbar.
- Clicking the Reset button should remove the custom media.
- The original product image should show again.
Fixed clear cart after payment for block-based themes (Twenty Twenty-Two) 31877
Preparation:
- Activate Twenty Twenty-Two theme.
- Install and setup any payment gateway plugin which does not clear the cart after payment (example: WooCommerce PayFast Gateway)
Prime the persistent cart:
- Login as a customer and add some items to the cart.
- Log out.
- Log back in.
Now to test:
- Your cart should already be populated; go ahead and check out (and be sure to use the noted payment gateway, or one that behaves in a similar fashion).
- After paying, you should be returned to the order-received page.
- Now navigate to the cart page:
- Using earlier code (ie, WooCommerce 6.2.1) you should notice that the cart remains populated ❌
- With this branch, the cart should have been successfully cleared ✅