Release Testing Instructions WooCommerce 6.8
WooCommerce 6.8 includes:
Blocks Release 8.0.0: (download)
Make form components require onChange and have a default value. (https://github.com/woocommerce/woocommerce-blocks/pull/6636)
- Create a new page with
All Products block,Filter Products By Price BlockandFilter Products By Attribute Block. - Go to the
All Productspage, ensure you're able to sort products and filter products by price and attribute. - Add a product to the cart.
- Go to the
Checkout blockpage. - Ensure you're able to use radio controls.
Footer Template Parts use now <footer> instead of <div> and Header uses <header> instead of <div>. (https://github.com/woocommerce/woocommerce-blocks/pull/6596)
- Go to a Woo page and view the source.
- Check the header is wrapped in a
<header>tag, not in a<div>. - Check the footer is wrapped in a
<footer>tag, not in<div>.
Before:

|
After:
|

Replace the ProductTag tax_query field to be the term_id instead of the id. (https://github.com/woocommerce/woocommerce-blocks/pull/6585)
- Create a page and add a
Products by Tag block. - Check that is rendered correctly in the editor.
- Save the page and check that is rendered correctly in the frontend.
Fix: Correctly calculate taxes for local pickups. (https://github.com/woocommerce/woocommerce-blocks/pull/6631)
- Set store address to
123 Test Street, 90210 Beverly Hills, CA, USA - Enable taxes
- Add a "Standard" tax rates in US, CA. Set it to:
10% - Add the following shipping methods: "Flat rate" for $10 and "Local pickup" for free.
- Add a payment option (e.g., Cash on delivery).
- Add a physical product to the cart.
- Use an outside state address on the front-end. (e.g.,
60 29th Street #343, 35005 birmingham, AL, USA) - Go to the
Cart blockand select theLocal pickupshipping method. Check that we have a tax of 10% applied. - Go to the
Checkout blockand select theLocal pickupshipping method. Check that we have a tax of 10% applied. - Place your order. Check on the Order received page that the displayed tax is actually added to the total.
- Go to Edit Order. Check that taxes were applied correctly there as well.
- On Checkout again, select
flat rate, using the same external address, and make sure taxes are not applied.
Fix: Ensure WooCommerce templates show correct titles. (https://github.com/woocommerce/woocommerce-blocks/pull/6452)
| Before | After |
|---|---|
 |
 |
- Go to Appearance → Editor → Browse all templates
- Make sure you have
archive-product.htmlin your theme's templates directory - Notice the
archive-product.htmltemplate shows the correct title and description.
Blocks Release 7.9.0: (download)
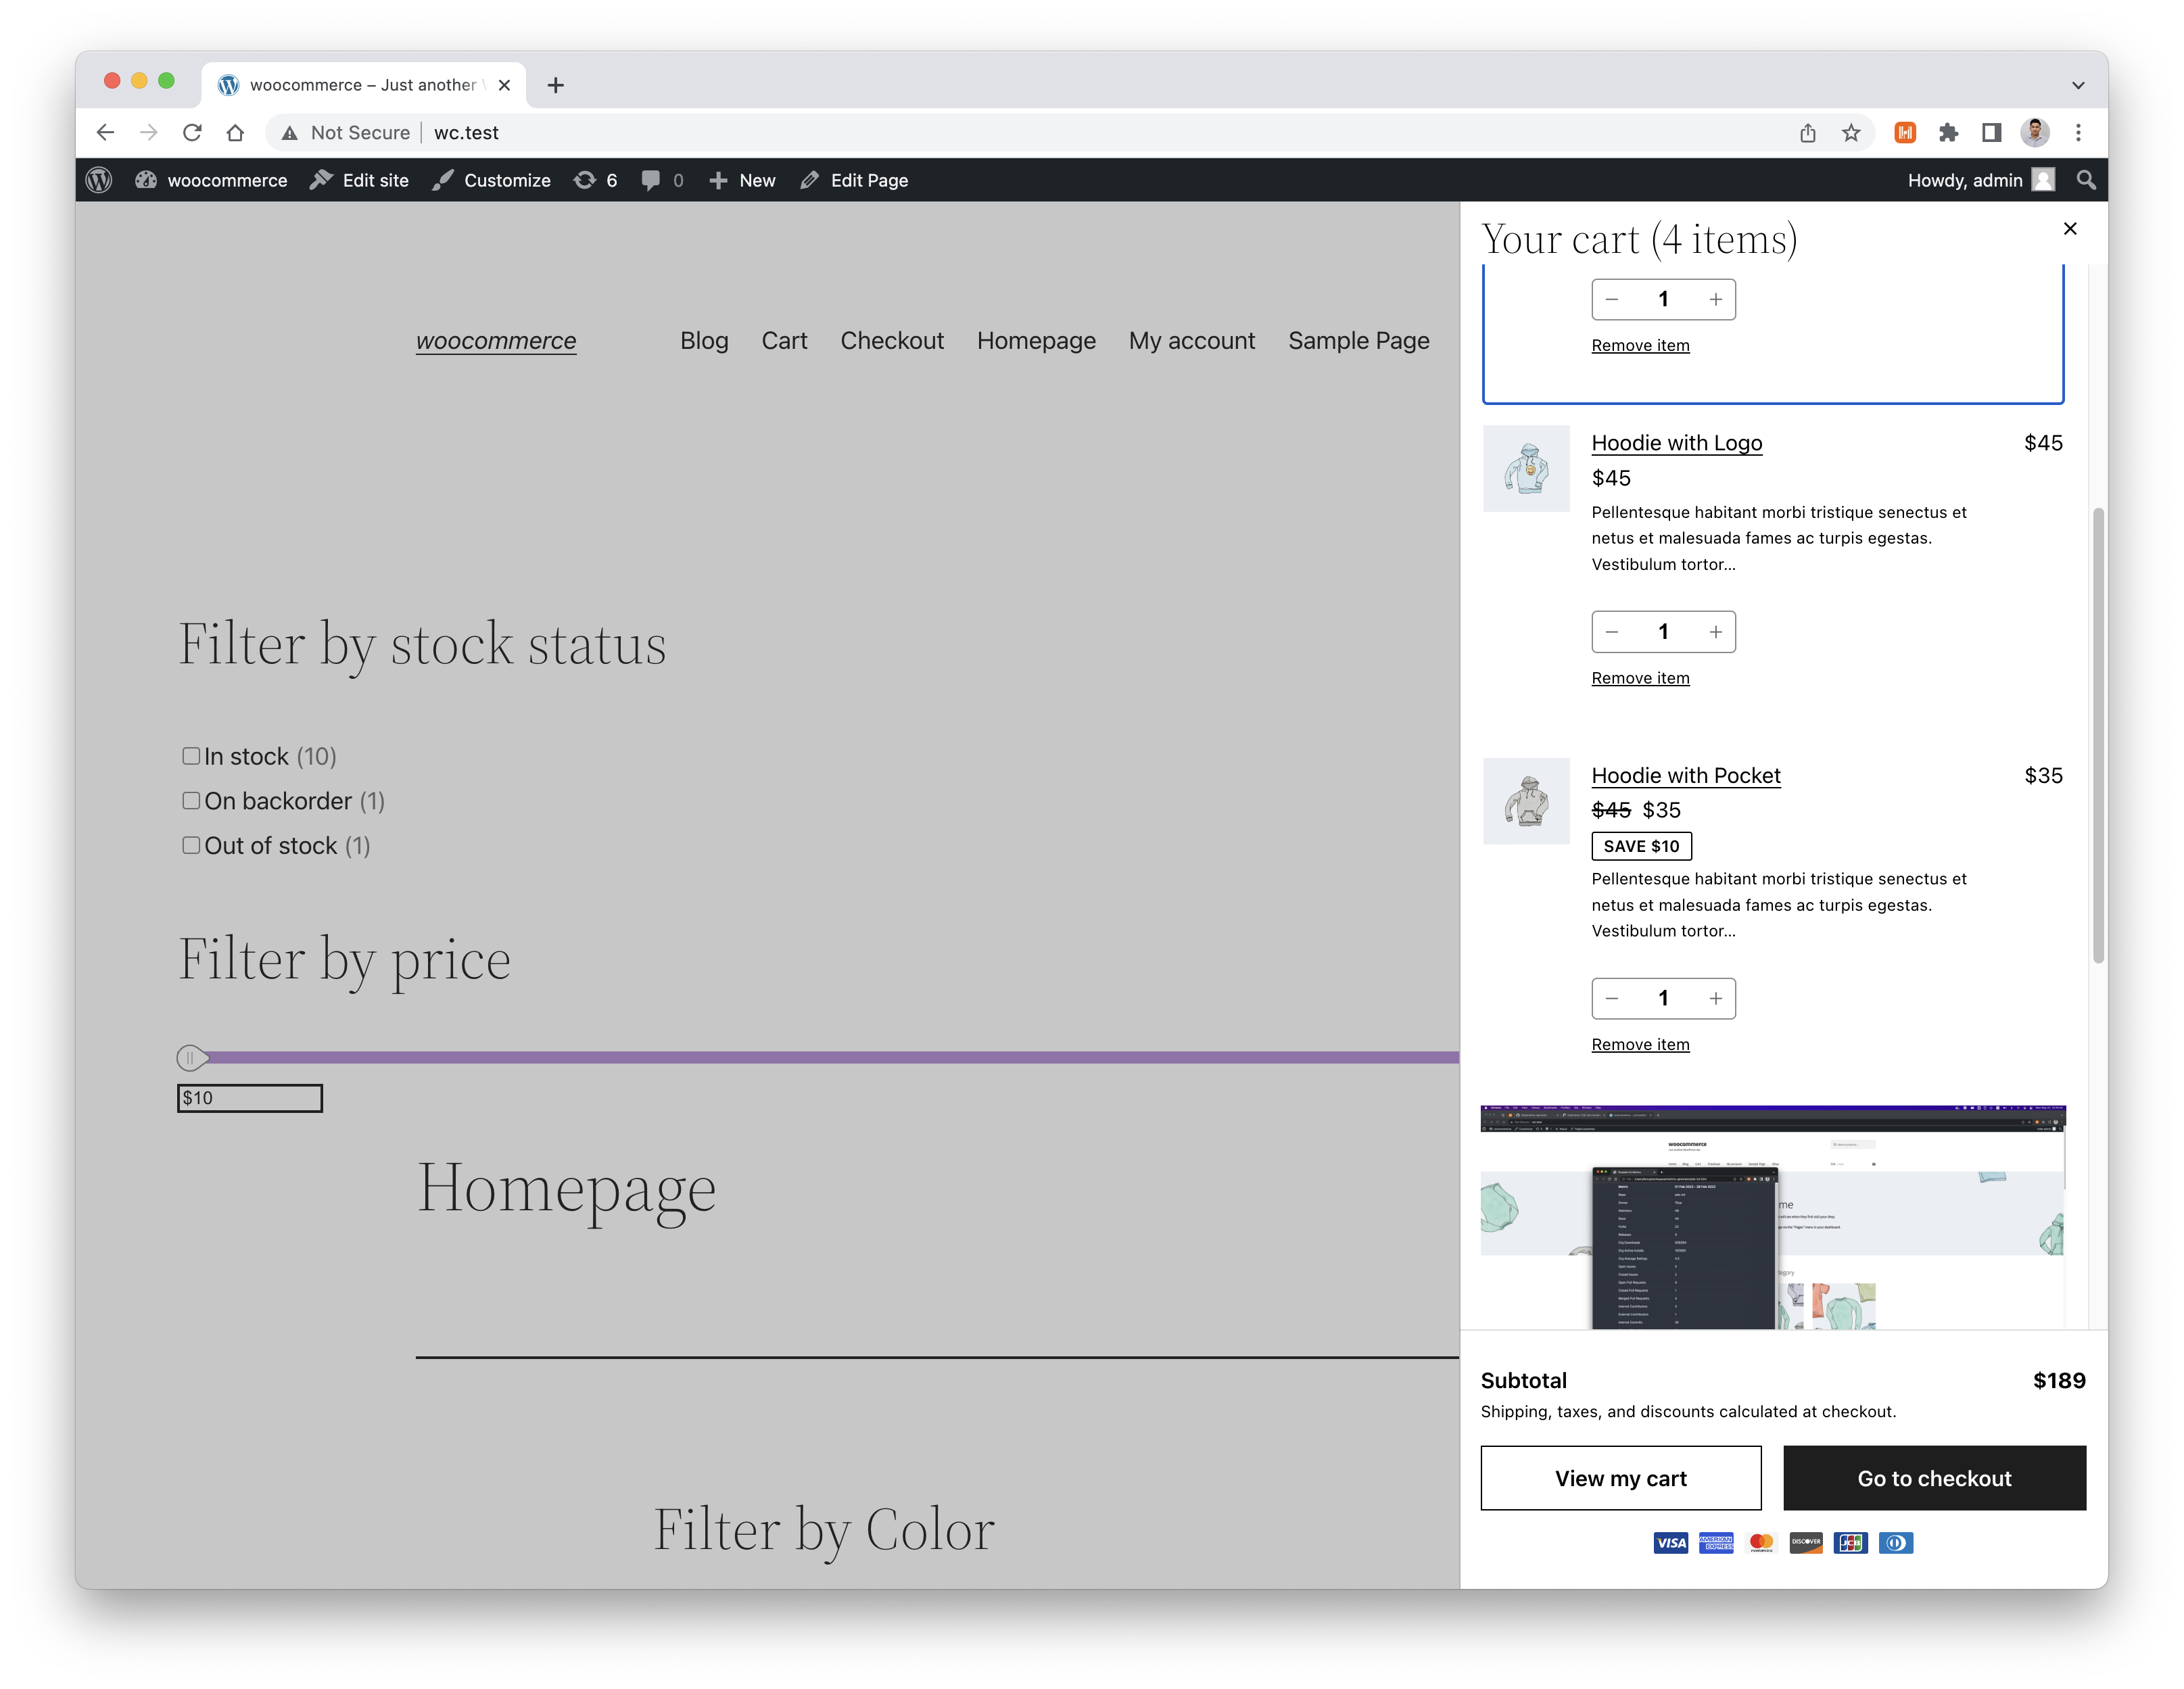
Disable page scroll when Mini Cart drawer is open. (https://github.com/woocommerce/woocommerce-blocks/pull/6532)
- Add the Mini Cart block to a post, page, or in the Site Editor.
- In the frontend, click on the Mini Cart button so the drawer opens.
- Try scrolling the page and verify you can't.
- Close the drawer and verify you can scroll again.
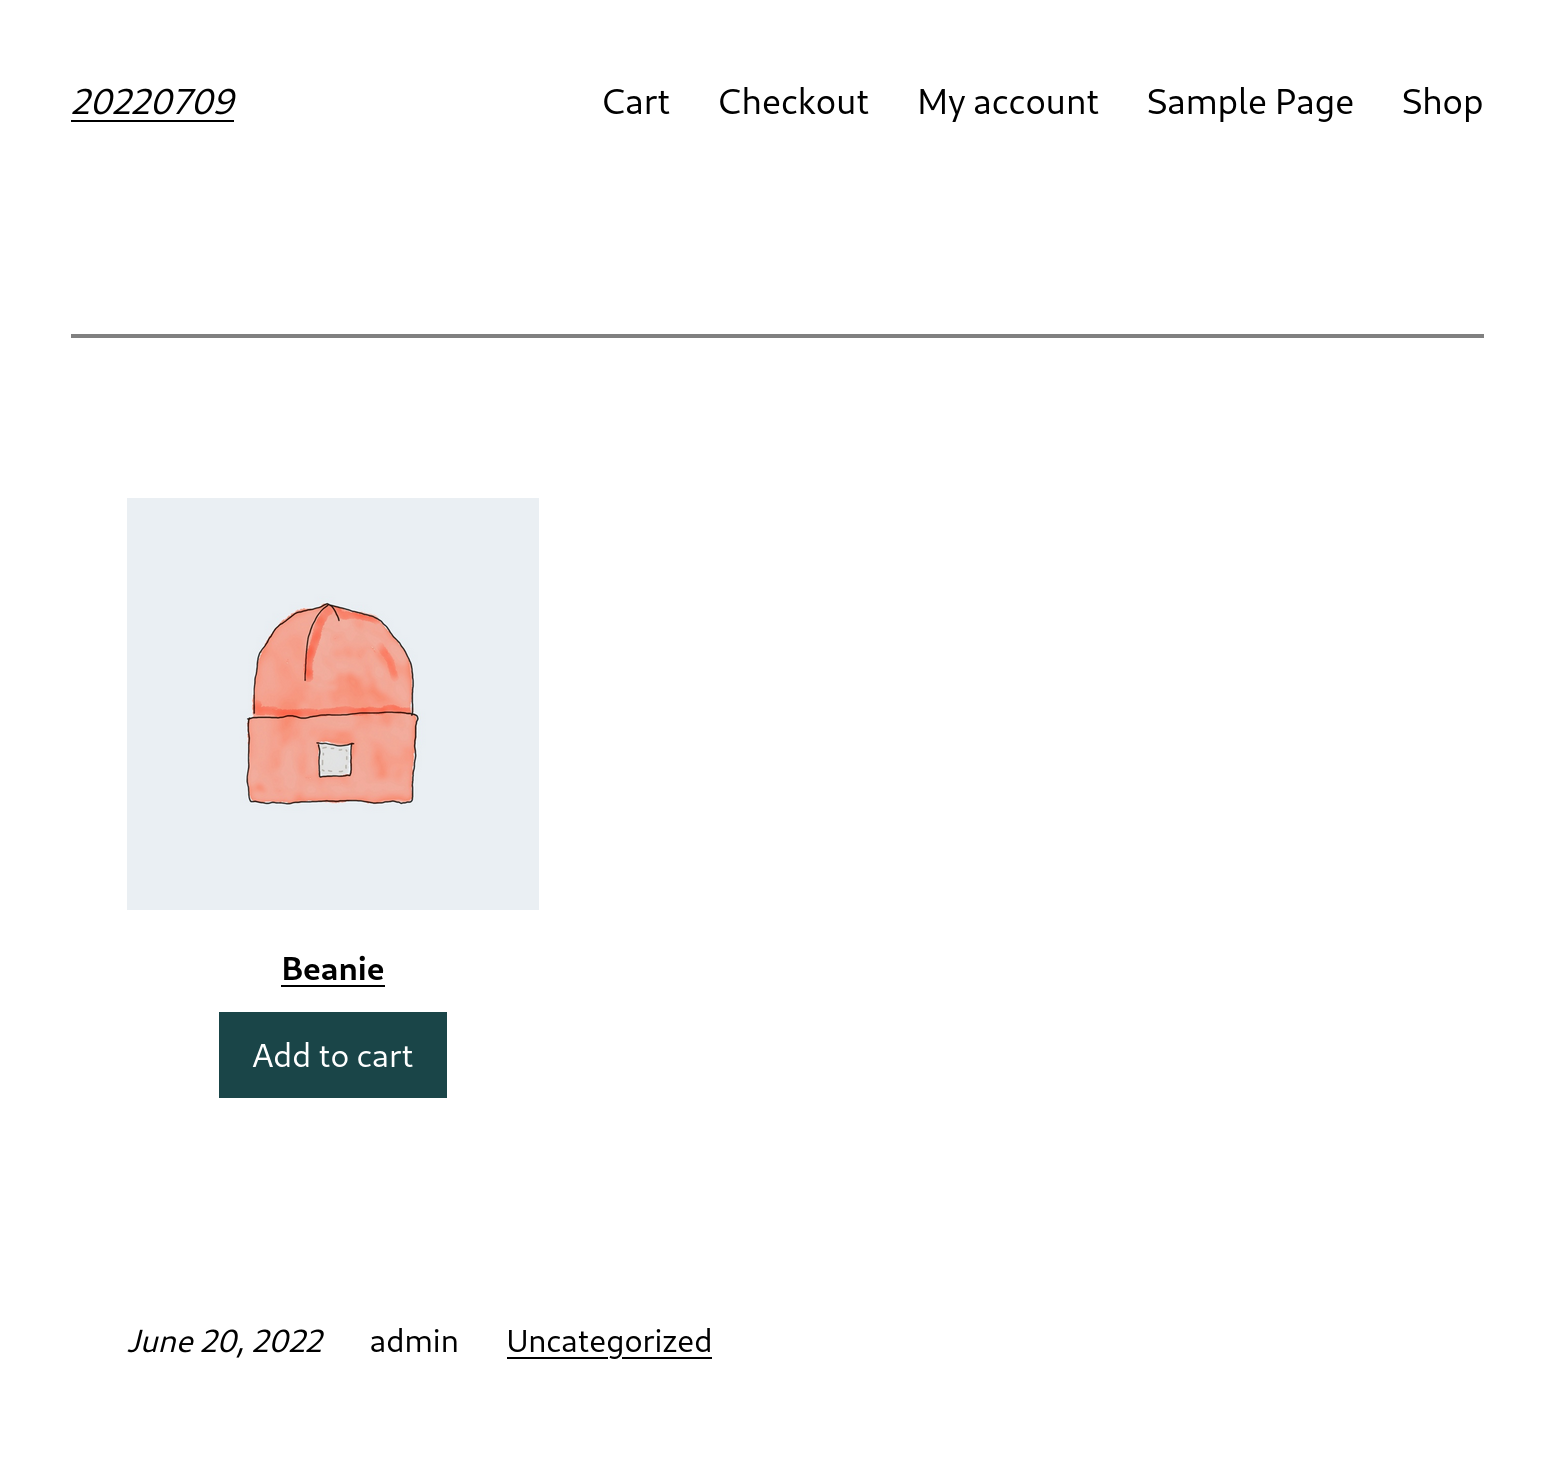
Fix images hidden by default in Product grid blocks. (https://github.com/woocommerce/woocommerce-blocks/pull/6599)
- With WC core 6.5.1 and WC Blocks disabled, add a Handpicked Products block to a post or page.
- Hide the Product price and Product rating using the sidebar toggles.
- Publish the post or page.
- Update to WC core to 6.8.0.
- Verify images are visible by default.
- Verify you can still toggle the images.
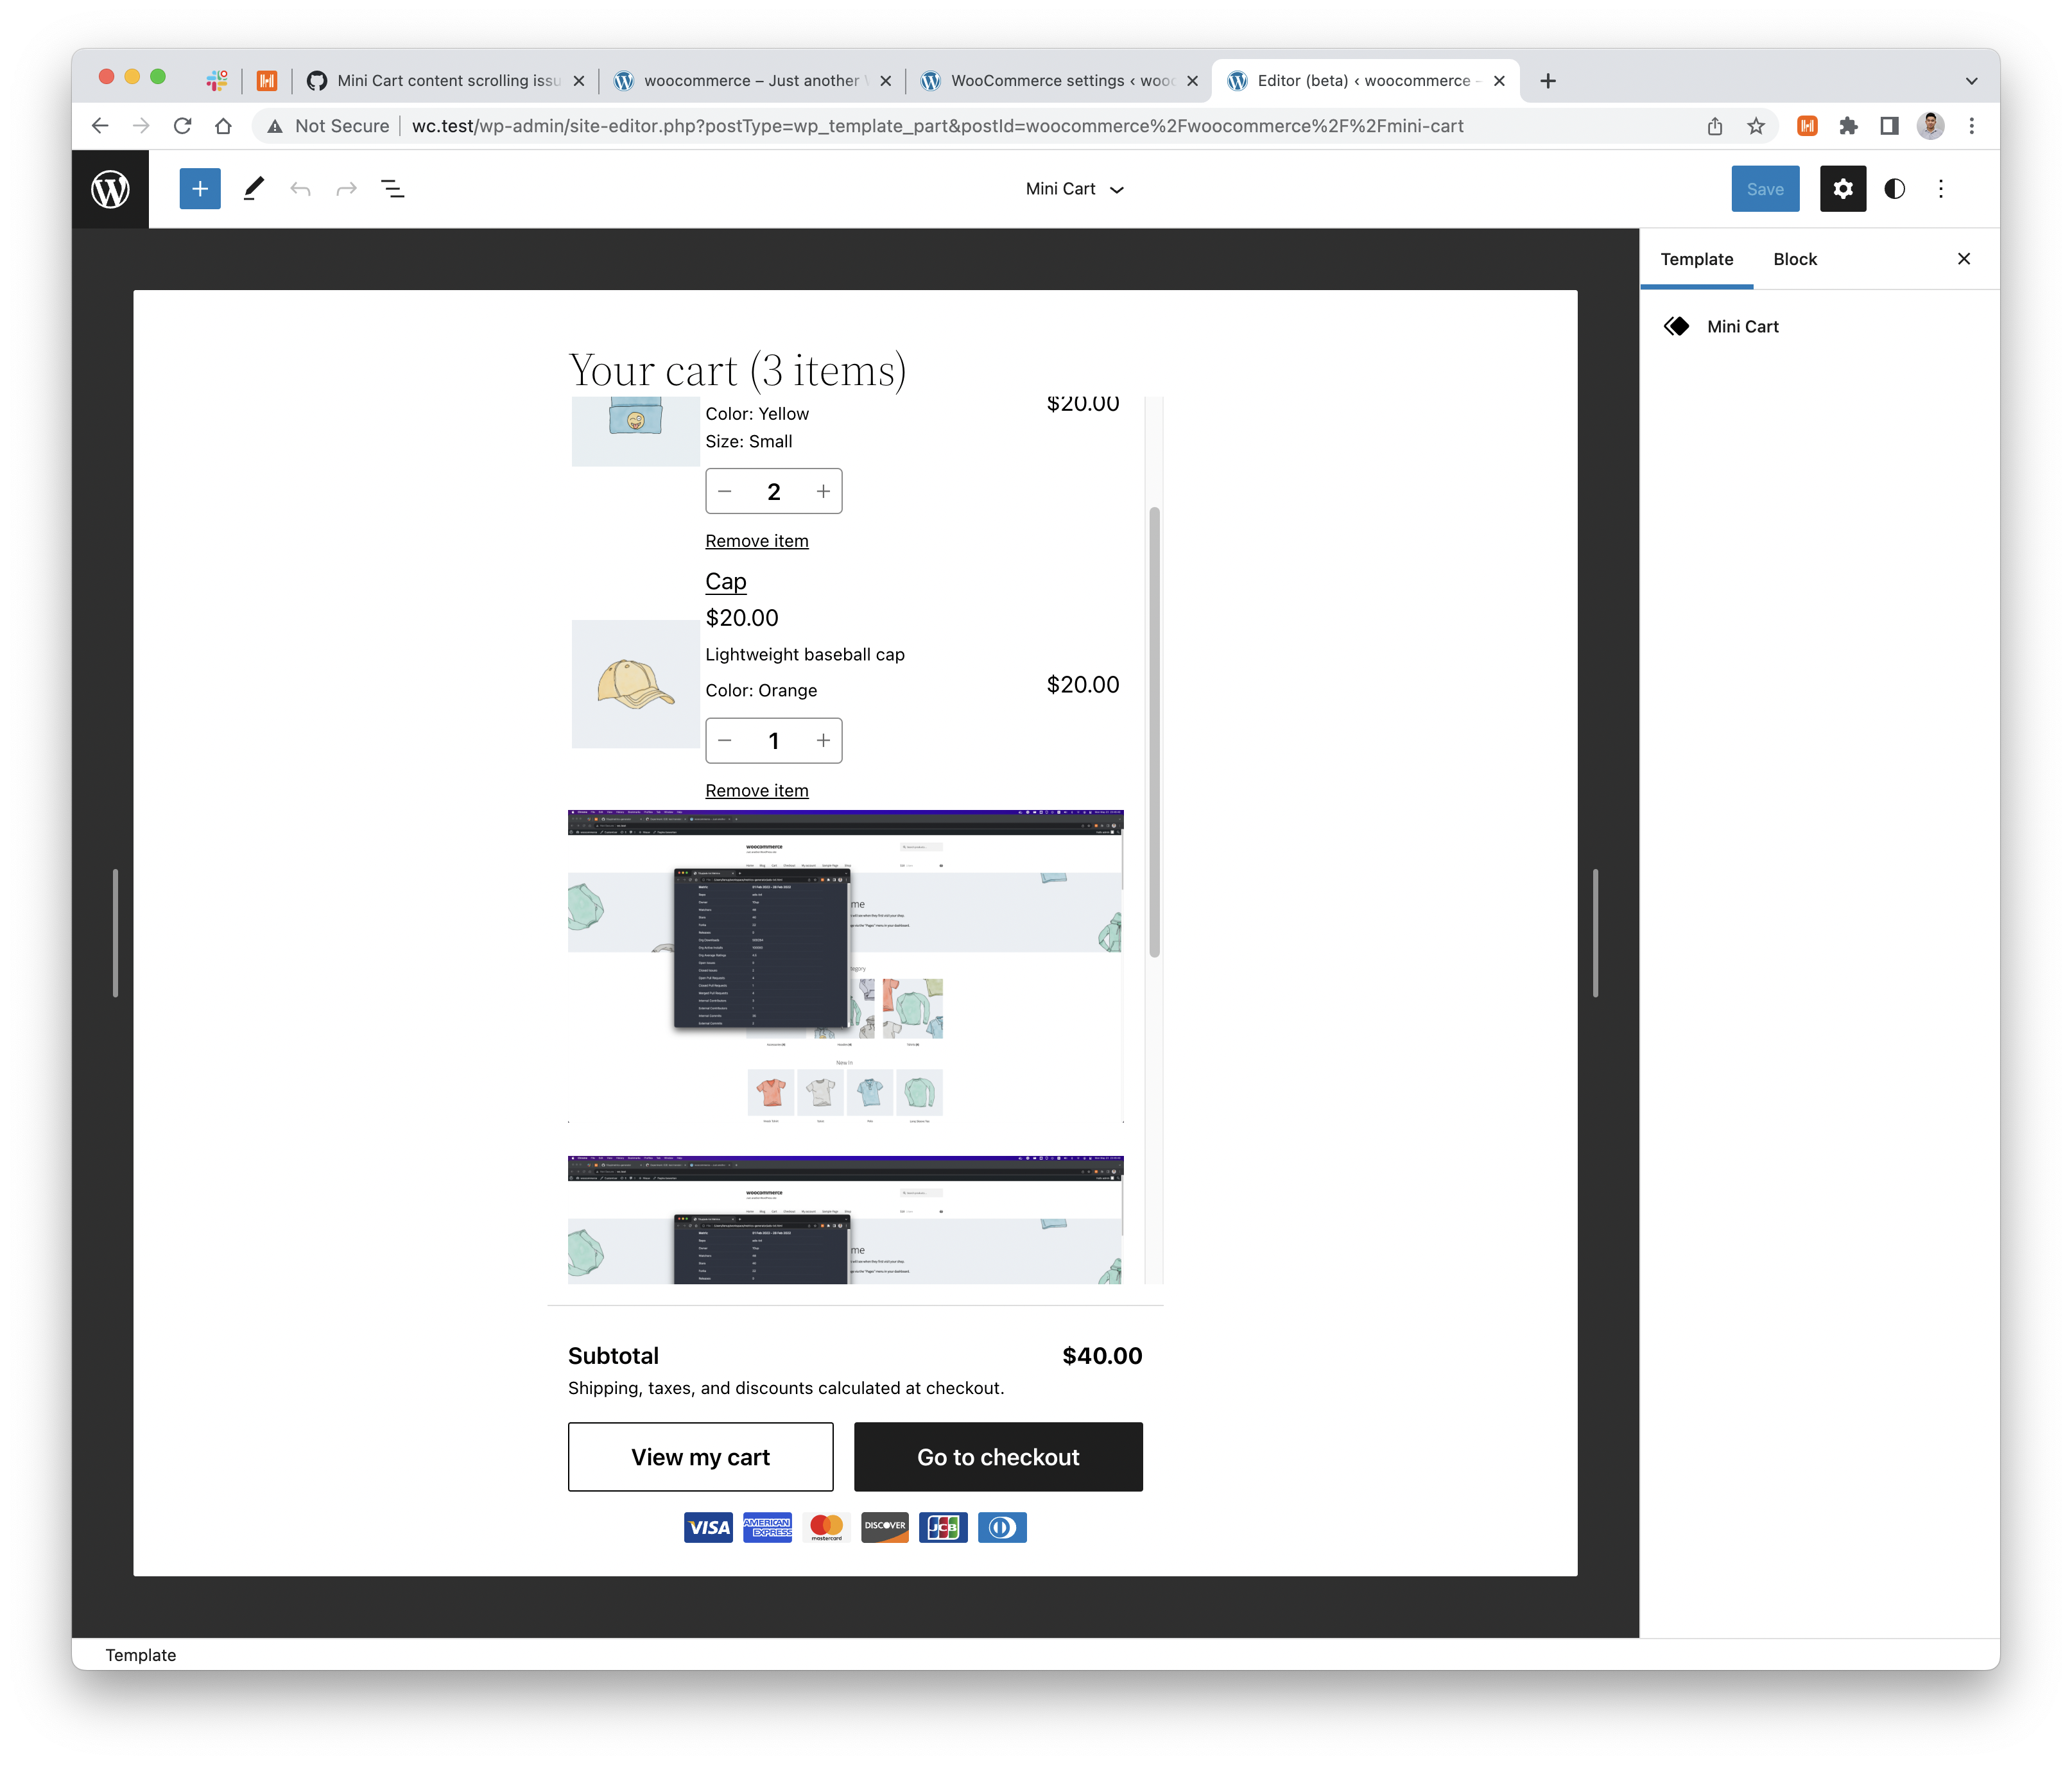
Fix: Scrolling issue of the Filled Mini Cart Contents block. (https://github.com/woocommerce/woocommerce-blocks/pull/6565)
- With a block theme like 2022. Edit the Mini Cart template part.
- Add some blocks to the Mini Cart Items section to make the content overflow.
- See the footer inside the viewport, and the Mini Cart Items block is now scrollable to view the underneath content.
- Save the template.
- On the front end, add a product to the cart then open the Mini Cart.
- See the Mini Cart Items section is scrollable, with the product table on top.
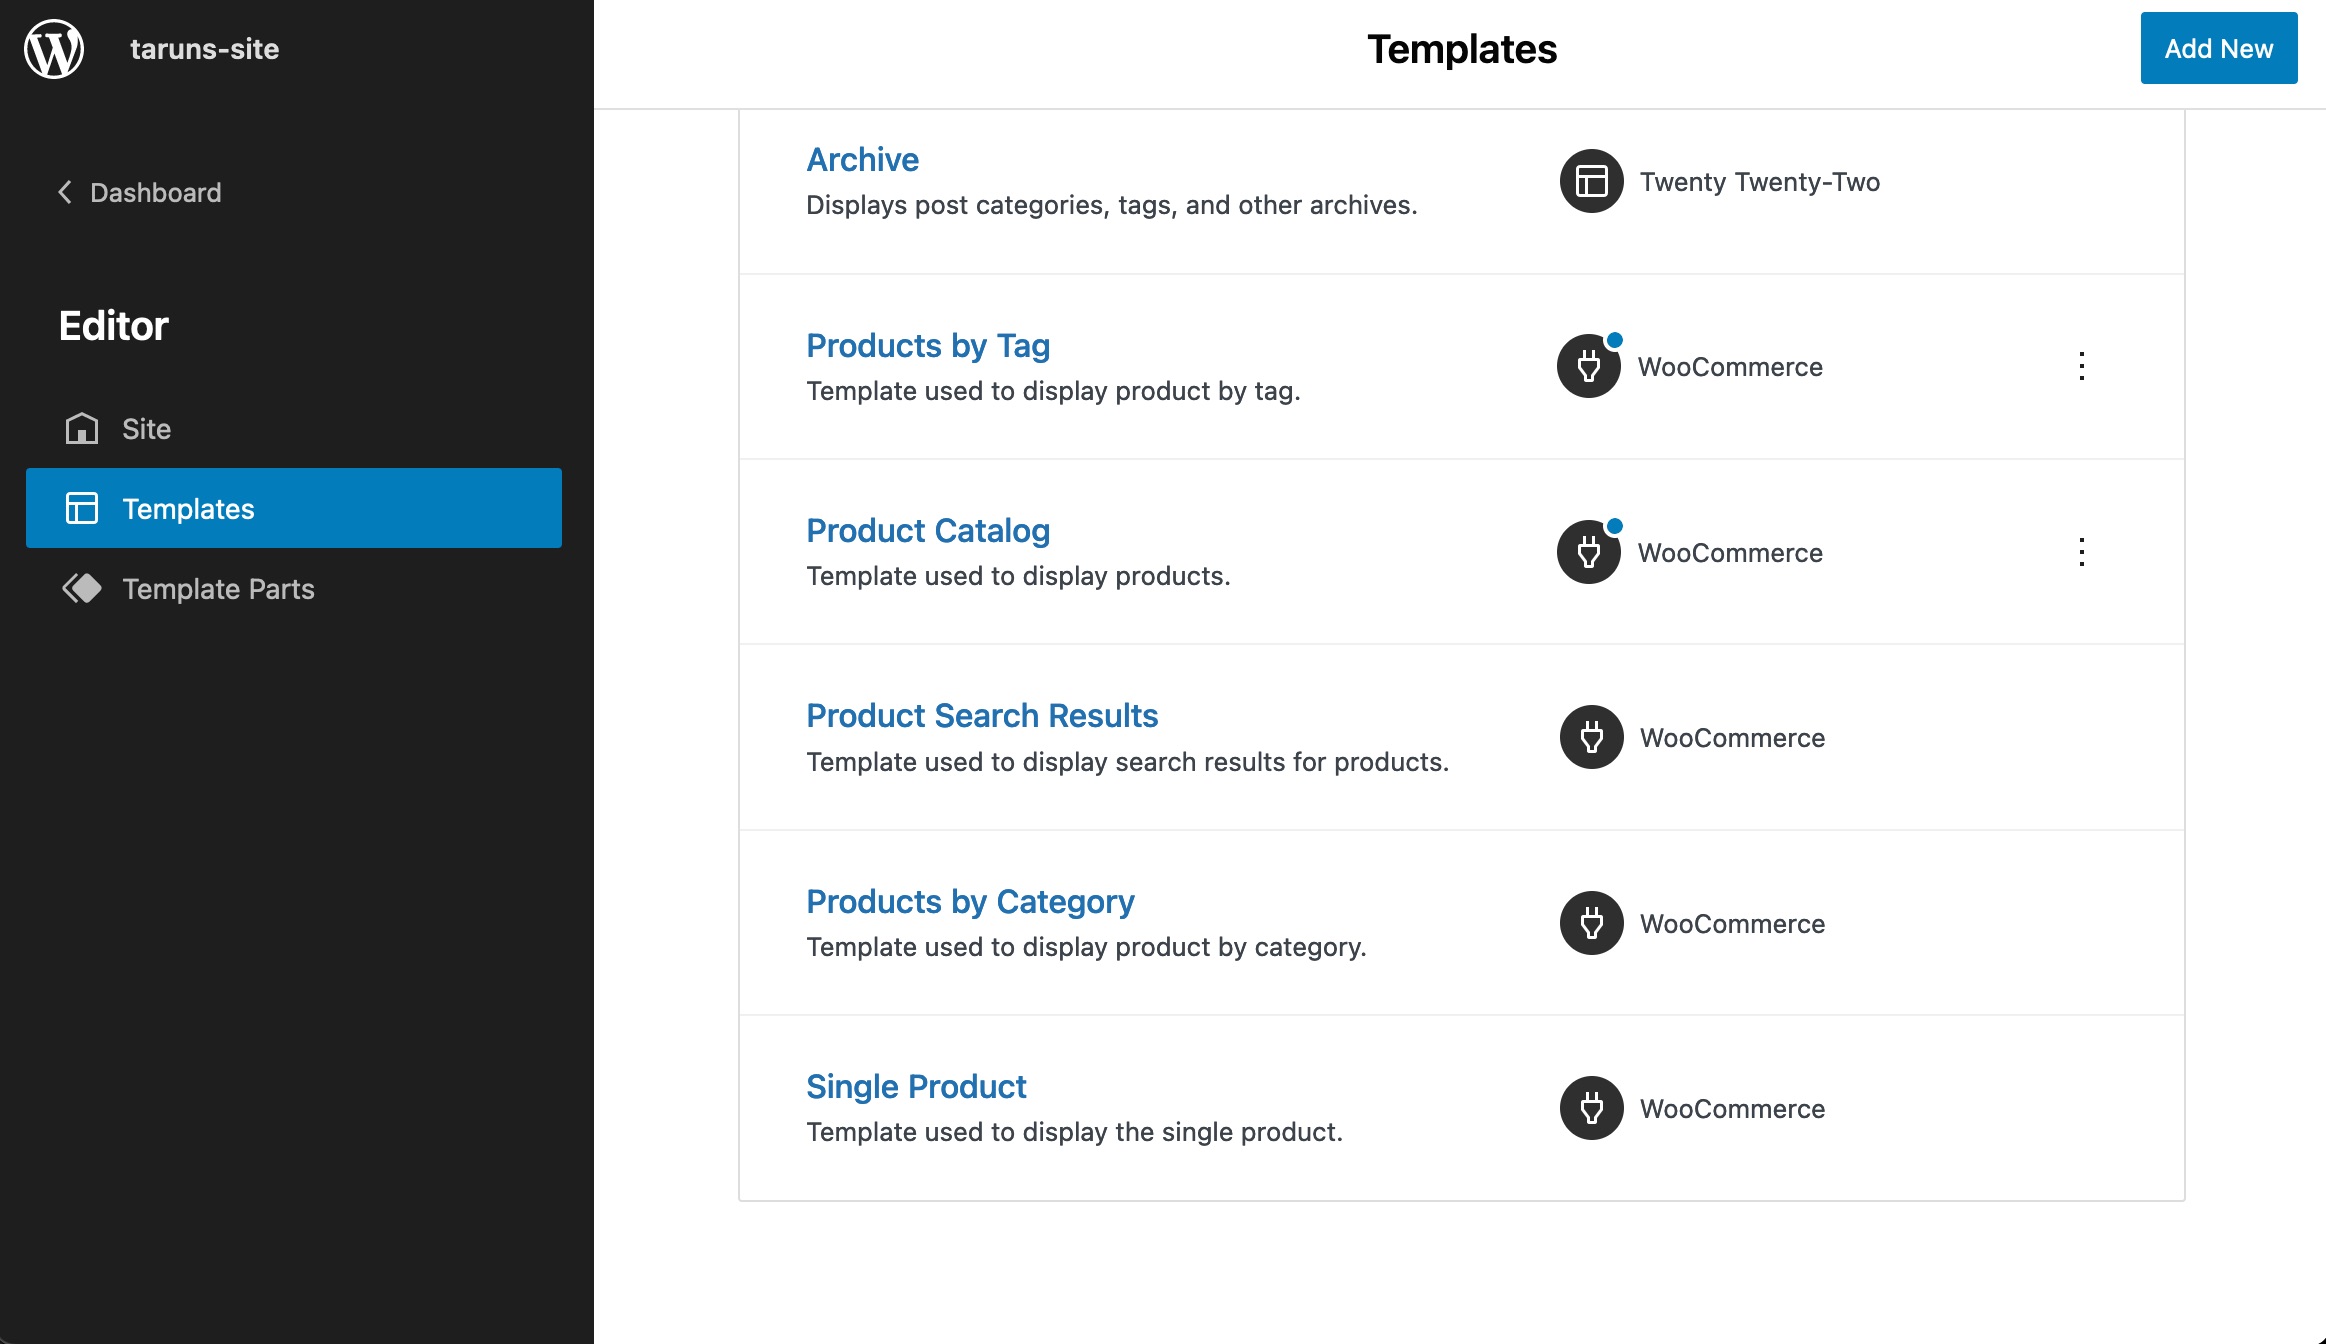
Added descriptions to the FSE WooCommerce Templates in the Editor UI. (https://github.com/woocommerce/woocommerce-blocks/pull/6345)
- Activate a block theme, like Twenty Twenty Two
- Open the Appearance > Editor (Beta)
- Using the dropdown arrow next to the Template name, select the Browse all templates button
- Confirm that all WooCommerce templates have descriptions
- Open a template (like Mini cart)
- make sure you can edit and save the content.
- Activate a block theme, like Twenty Twenty Two
- Make sure there's at least 1 product added
- Run a product search: ?s={keyword}&post_type=product and make sure the products are being displayed correctly in a grid (using the search template, instead of the default one).
- Start with a fresh install, install
WCA Test Helperplugin and enable theshipping-smart-defaultsandshipping-setting-tourfeature flags - Start OBW and choose
United Statesas store country - Choose "Physical products"
- Complete the OBW without installing anything from the
Business Detailstab. - Navigate to WooCommerce -> Settings -> Shipping
- "United States (US)" zone should be created with
Free shippingmethod - There should be a partial tour kit spotlight over the two leftmost columns for step 1 of the tour, and over the rightmost column for step 2 of the tour.
- Check that proceeding through the tour works as expected, and the spotlight should stick to the cells even through resizing or scrolling the window.
- Onboard to WooCommerce from a WCPay eligible country (select United States during setup for the location of your store)
- Install WCPay during the OBW
- Set up WCPay
- Go to WooCommerce Home
- Observe that
Set up additional payment optionstask is displayed.
- Set
woocommerce_show_marketplace_suggestionsoption to false - Go to the home screen and select the "Set up Marketing tools" task
- Install TikTok
- Visit the task again and confirm that the "Manage" button exists
- Click the "Manage" button
- Should be redirected to the TikTok manage page
- Choose a country that WCPay is not supported (try Mexico)
- Go to Woocommerce > Home
- Go to the payment task
- Observe that the section is displayed with the title
Choose a payment providerand the descriptionTo start accepting online payments. - Observe that "see more" link is displayed
- Choose a country that WCPay is supported (United States)
- Go to Woocommerce > Home
- Go to the payment task
- Click "Other payment providers"
- Observe that the section is displayed with the title
Other payment providersand the descriptionTry one of the alternative payment providers. - Observe that "see more" link is displayed
- Choose a country that WCPay is supported (United States)
- Install and set up WCPay
- Go to Woocommerce > Home
- Go to the payment task
- Observe that the section is displayed with the title
Additional payment optionsand the descriptionGive your customers additional choices in ways to pay.. - Observe that "see more" link is displayed
- Use a fresh site
- Skip the onboarding wizard and select not allow to be tracked
- Go to WooCommerce > Home
- Observe that the header task variant (a header progress area and ordered list) is displayed.

- Go to Products > Attributes and add some attributes with terms
- Go to Products > Add New and change the product to Variable product
- Go to the Attributes tab and add the attribute you created in step 2, make sure to select Used for variations and click Save attributes after (you have to add values here)
- Go to the Variations tab and click Go for the Add variation selection.
- It should now show a Default Form Values with a tooltip after (as shown in the screenshot), the tooltip should work as expected
- The tooltip should say:
Choose a default form value if you want a certain variation already selected when a user visits the product page

- Start with a fresh install.
- Complete Onboarding Wizard with a WC Pay eligible country. (try United States)
- Navigate to
WooCommere -> Settings -> Payments - You should see Stripe and Paypal icons when country is the US
- Start with a fresh install
- Complete Onboarding Wizard with a WC Pay eligible country. (try United States)
- Set up WCPay.
- Navigate to
WooCommere -> Settings -> Payments - You should see Klarna, Paypal, Afterpay, Amazon Pay, and Affirm icons when country is the US

- Onboard to WooCommerce from a WCPay eligible country BUT during onboarding opt out from installing WCPay
- Go to Woocmmerce > Home
- Go to payment task
- Observe that the UI matches the design

- Start with a fresh install.
- Skip Onboarding Wizard
- Install
WCA Test Helperplugin and enableshipping-smart-defaultsfeature - Navigate to
WooCommerce -> Homeand click the shipping task. - Complete the store details and click continue
- Complete the shipping rates and click continue
- Try to revisit the store details and shipping rates by clicking them.

Case 1: The store sells physical products and is located in the US, but Jetpack and WooCommerce Shipping are not installed.
- Start with a fresh install and enable the
shipping-smart-defaultsandshipping-setting-tourfeature flags - Start OBW and choose
United Statesas store country - Choose "Physical products"
- Complete the OBW without installing anything from the
Business Detailstab. - Navigate to WooCommerce -> Settings -> Shipping
- "United States (US)" zone should be created with
Free shippingmethod - There should be 3 steps in the tour, covering shipping zones, shipping methods and recommended shipping options
- The tour should not appear again upon revisit or refresh of the page, if you complete the tour
Case 2: The store sells physical products, has Jetpack and WooCommerce Shipping installed and connected, and is located in the US.
- Start with a fresh install and enable the
shipping-smart-defaultsandshipping-setting-tourfeature flags - Start OBW and choose
United Statesas store country - Choose "Physical products"
- Install Jetpack and WooCommerce Shipping from the
Business Detailstab. - Complete the OBW
- Connect and approve Jetpack when prompted.
- Navigate to WooCommerce -> Settings -> Shipping
- "United States (US)" zone should be created with
Free shippingmethod - There should be 3 steps in the tour, with the third one highlighting the WooCommerce Shipping section
- The tour should not appear again upon revisit or refresh of the page, if you complete the tour
Case 3: The store sells physical products, and is not located in US/Canada/Australia/UK (irrelevant if JP is installed or not).
- Start with a fresh install and enable the
shipping-smart-defaultsandshipping-setting-tourfeature flags - Start OBW and choose a country that is not one of the US, Canada, Australia, and UK
- Choose "Physical products"
- Complete the OBW without installing anything from the
Business Detailstab. - Navigate to WooCommerce -> Settings -> Shipping
- "Country-you-chose" zone should be created with
Free shippingmethod - There should be 2 steps in the tour, covering shipping zones and shipping methods
- The tour should not appear again upon revisit or refresh of the page, if you complete the tour
- Start with a fresh install and enable the
shipping-smart-defaultsandshipping-setting-tourfeature flags - Start OBW and choose any country
- Choose "Downloads"
- Complete the OBW without installing anything from the
Business Detailstab. - Navigate to WooCommerce -> Settings -> Shipping
- You should not see any automatically created shipping settings and there should not be a tour
On WC > Settings > Payments, make sure that this text is not untranslated when English is not the selected language:

- Go to WoomCommerce > Home
- Click "store details"
- Observe that you're redirected to the setting page.
- Fill out "Address line 1" and "city"
- Go to WooCommerce > Home
- Observe that "store details" is mark as completed.
- Onboard to WooCommerce from a WCPay eligible country (opt in to install WCPay during the initial onboarding)
- Go to Payments Settings
- The call to action for WCPay inside the table should say
Finish set up - The link at the bottom of the Payment Methods table should say Discover other payment providers
- The Discover other payment providers link should direct the user to the external marketplace (https://woocommerce.com/product-category/woocommerce-extensions/payment-gateways/)

- Onboard to WooCommerce from a country that WCPayments doesn't support
- Go to WooCommerce Home
- Click on the
Set up paymentstask - Click "See more"
- Should redirect to https://woocommerce.com/product-category/woocommerce-extensions/payment-gateways/?utm_source=payments_recommendations

- Check out on fresh site (no preexisting DB entries).
- Skip Onboarding Wizard.
- Go to Product management page and add new product.
- Confirm that the Product Image and Product gallery meta boxes are 2nd and 3rd in line on the right side.
- Onboard to WooCommerce from a country that WCPayments doesn't support
- Go to
WooCommerce Settings > Payments - Scroll down to see the link at the bottom of the page
- The table title should be:
Recommended payment providers - The link copy should say:
Discover other payment providers - The link should direct the user to the external marketplace: https://woocommerce.com/product-category/woocommerce-extensions/payment-gateways/

- Go to OBW and choose a WCPay eligible country
- Opt-in to install WCPay during the initial onboarding
- Go to WooCommerce Home
- Observe that the payment task displays:

- Enable the
shipping-smart-defaultsfeature via WCA Test helper plugin. - Set up a store in US
- Go to WooCommerce > Settings > Shipping
- Wait for "Recommended shipping solutions" to appear and click on "Get started" or "Activate" on WooCommerce Shipping
- When the task is loaded, click on "Set store location"
- Observe the current step is now store location
- Click on "Continue" button
- Observe next step is displayed
- Onboard to WooCommerce from a WCPay eligible country BUT during onboarding opt-out from installing WCPay
- Go to WooCommerce Home
- Click on the payments-related task on the task list
- Observe that the accordion link should say
Other payment providers

- Start with a fresh install.
- Install WCA Test Helper
- Go to
Tools -> WCA Test Helper -> Featuresand enableshipping-smart-defaultsfeature - Skip OBW.
- Go to
WooCommerce -> Homeand confirm the shipping task is shown. Click on it. - Go through each step and confirm the updated design and text copy.
- Click
[Install & Enable]button in step 3. - You should see step 4 to connect your store to Jetpack
- Start with a fresh install.
- Install WCA Test Helper
- Go to
Tools -> WCA Test Helper -> Featuresand enableshipping-smart-defaultsfeature - Start OBW with 'AU', 'CA', or 'GB' country and complete it without installing any additional plugins.
- Go to
WooCommerce -> Homeand confirm the shipping task is shown. Click on it. - Go through each step and confirm the updated design and text copy.
- Click
[Install & Enable]button in step 3. - You should not see step 4 as you're already connected.

 R
R
- Enable the
shipping-smart-defaultsfeature via WCA Test helper. - Set up a store in US
- Go to WooCommerce > Settings > Shipping
- Wait for "Recommended shipping solutions" to appear and click on "Get started" or "Activate" on WooCommerce Shipping
- Observe it gets redirected to step 2 of
admin.php?page=wc-admin&task=shipping-recommendationtask - Click on "Install & enable" and observe
woocommerce-servicesandjetpackplugins are installed - Click on "Connect" on the next step and connect site to WPCOM
- When redirected back, observe the task automatically redirects to
admin.php?page=wc-settings&tab=shipping§ion=woocommerce-services-settings

For each test case, please delete all the shipping zones and woocommerce_admin_created_default_shipping_zones option, or start with a fresh install.
Case 1: The store sells physical products and is located in the US, but JP and WCS are not installed.
- Start with a fresh install
- Start OBW and choose
United Statesas store country - Choose "Physical products"
- Complete the OBW without installing anything from the
Business Detailstab. - Navigate to WooCommerce -> Settings -> Shipping
- "United States (US)" zone should be created with
Free shippingmethod
Case 2: The store sells physical products, has JP and WCS installed and connected, and is located in the US.
- Start with a fresh install
- Start OBW and choose
United Statesas store country - Choose "Physical products"
- Install Jetpack and WooCommerce Shipping from the
Business Detailstab. - Complete the OBW
- Connect and approve Jetpack when prompted.
- Navigate to WooCommerce -> Settings -> Shipping
- "United States (US)" zone should be created with
Free shippingmethod
Case 3: The store sells physical products, and is not located in US/Canada/Australia/UK (irrelevant if JP is installed or not).
- Start with a fresh install
- Start OBW and choose a country that is not one of the US, Canada, Australia, and UK
- Choose "Physical products"
- Complete the OBW without installing anything from the
Business Detailstab. - Navigate to WooCommerce -> Settings -> Shipping
- "Country-you-chose" zone should be created with
Free shippingmethod
- Use a fresh site
- Enable the
shipping-smart-defaultsfeature via WCA Test helper. - Go to OBW
- Set store location to the UK.
- Go to Woocommerce > Home
- Observe that the "Shipping" task is displayed.
- Set store base address to somewhere in OH, USA (eg: 123, Some street, OH, USA, 43001).
- Update Tax Options (WooCommerce > Settings > Tax > Tax options) as below.

- Set up a Tax Rate table for a single State, such as Ohio:

- Add "Shipping Zone" for the USA and add "Local Pickup" shipping method to Shipping Zone (taxable)
- Attempt to purchase any product with an address that doesn't match the location in the tax rate table (i.e. the table is for US > OH, so use an address like Austin, TX 78701)
- Select the "Local Pickup" method and notice the order total amount shown at checkout (which includes taxes), and place the order with the "Direct bank transfer" payment method.
- Go to wp-admin and open the edit order screen of the order we just placed, Press
Recalculate, and make sure the tax is calculated properly.
- Setup store with wcpay installed, then finish steps 1 (onboarding wizard) and 2 (add a product) of task list.
- Go to Wordpress home and click on Woocommerce setup widget which should be at step 3
- Expect to proceed with woocommerce payments setup instead of blank screen
- Install WooCommerce < 6.4, and WooCommerce Admin 3.3.2
- Update WooCommerce to this version
- Should see updated notice message

- Use a fresh site
- Enable the
shipping-smart-defaultsfeature via WCA Test helper.
- Skip OBW
- Go to Woocommerce > Home
- Observe that the "Shipping" task is displayed. (Shipping task name may be different if you're assigned to a tasklist experiment treatment group. It should be
Select how to ship your products,Set up shipping, orAdd shipping costs. )
- Change store location to Australia.
- Go to Woocommerce > Home
- Observe that the "Shipping" task is displayed.
- Go to OBW > product types
- Select "Downloads", and uncheck "Physical products"
- Go to Woocommerce > Home
- Observe that the "Shipping" task is not displayed.
- Update
woocommerce_admin_created_default_shipping_zonesoption to yes. - Go to Woocommerce > Home
- Observe that
Review Shipping Optionstask is displayed. - Click the
Review Shipping Optionstask - Observe that the page is redirected to
Setting > Shipping - Update
woocommerce_admin_reviewed_default_shipping_zonesoption to yes. - Go to Woocommerce > Home
- Observe that
Review Shipping Optionstask is completed
- Use a fresh site
- Enable the
shipping-smart-defaultsfeature via WCA Test helper. - Go to OBW and set store country to a non-US country.
- Go to
Woocommerce > Settings > Shippingtab - Observe that "Woocommerce Shipping" is NOT displayed as a recommended extension
- Change store country to the US.
- Go back to
Woocommerce > Settings > Shippingtab - Observe that "Woocommerce Shipping" is displayed as a recommended extension
- Install and activate
Woocommerce Shipping - Go back to
Woocommerce > Settings > Shippingtab - Observe that "Woocommerce Shipping" is displayed and the CTA button is
Activate. - Install and connect Jetpack.
- Go back to
Woocommerce > Settings > Shippingtab - Observe that "Woocommerce Shipping" is NOT displayed
- Add items to cart and proceed to checkout
- Before clicking 'place order' turn your device offline. Unplug the network cable, turn off wifi or select the offline setting in the network tab of the chrome developer tools under throttle options.
- You should see helpful error instead of blank red notice.

Add sort method to hide hidden columns #31866
- Go to 'Products' in wp-admin
- Click on 'Sorting' (next to 'All', 'Published', 'Trashed', etc.)
- Open 'Screen Options' and disable 1 or more columns
- Drag a product to change order
- See that the table stays the same as without dragging
Fix broken design of Single Product template in block themes and on-sale badge being partially hidden #33511
- Install and activate the Twenty Twenty-Two theme.
- Navigate to the single product page of a product that is on sale.
- Confirm the on-sale badge is fully visible and doesn't overlap with the breadcrumb navigation.
- Create a new product and make sure it has no description, no reviews, and no additional information.
- Visit that product on the Frontend.
- Verify the footer doesn't render on top of the single product template.


- Set currency in wp-admin / Woo Settings
- Ensure store is set to Denmark, and set to use DKK as the currency.
- Check Frontend Displaying in Product, Cart, Checkout. Should show
kras the short symbol
#34054
- Go to Analytics -> Settings
- Open browser inspector
- Refresh
- Observe request to /reports/import/totals