Release Testing Instructions WooCommerce 4.2
WooCommerce 4.2 includes:
- Updates to the existing feature: WooCommerce Admin
- Enhancements:
- Features introduced earlier than 4.2 that we want to test in further in 4.2:
- Other:
In 4.2 the main updates to WooCommerce Admin are backend changes so we are mainly concerned with any regressions to existing functionality.
Therefore we would like to do some testing in 4.2 around the following areas and make sure everything still loads as it should ok.
- Onboarding Wizard - We can use the same steps as for the testing in 4.1 but using 4.2
- WooCommerce Dashboard - We can use the same steps as for the testing in 4.0 but using 4.2
- Analytics - We can use the same steps as for the testing in 4.0 but using 4.2
- Marketplace Hub - We can use the same steps as for the testing in 4.1 but using 4.2
In 4.2 we will be adding back in the flow to connect a WooCommerce site to Jetpack at the end of the onboarding wizard.
To setup properly for this test, please be sure to do the following:
- If Jetpack is installed, please disconnect and deactivate the plugin. For instructions on how to disconnect Jetpack from WordPress.com please see this page and the section titled Disconnect an active Jetpack site, using wp-admin.
- If WooCommerce Services is installed, please deactivate it.
- Launch the Onboarding Wizard by visiting
wp-admin/admin.php?page=wc-admin&reset_profiler=1 - Be sure to use a US-based address, and do not click "CBD" on the industries page. But otherwise select any options you please.
- After selecting a theme, you should see the following screen:

- Click "No thanks"
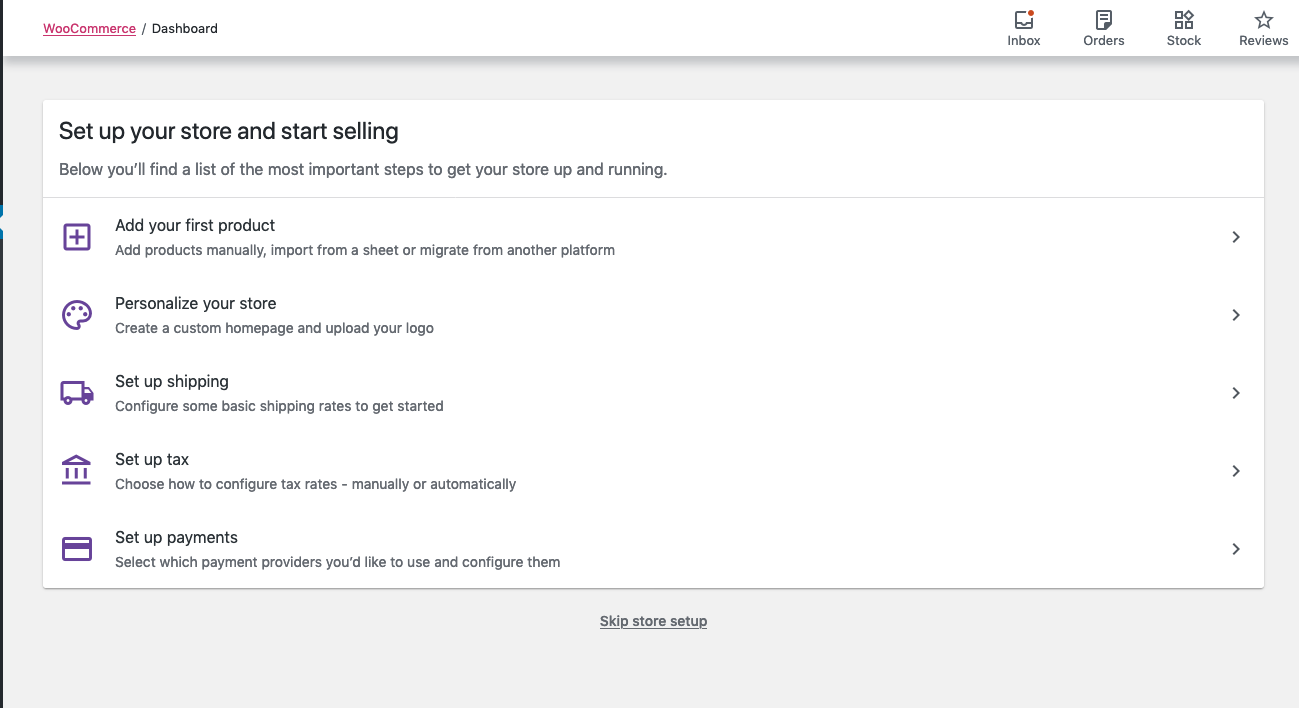
- Verify you are directed to the dashboard and the setup checklist is shown:
Verify you have reset your test site and Jetpack and WooCommerce Services are not active.
- Repeat steps 1-3 above, but on the Jetpack and WooCommerce Services screen, click "Yes please!"
- This flow will redirect you to WordPress.com and depending on your session, you will either need to create a new WordPress.com account, or proceed with the one you are already logged in with.
Please note that sometimes the initial connection will fail, and you will be shown a retry box on the following screen, just click retry, and there is no need to report this sort of issue:
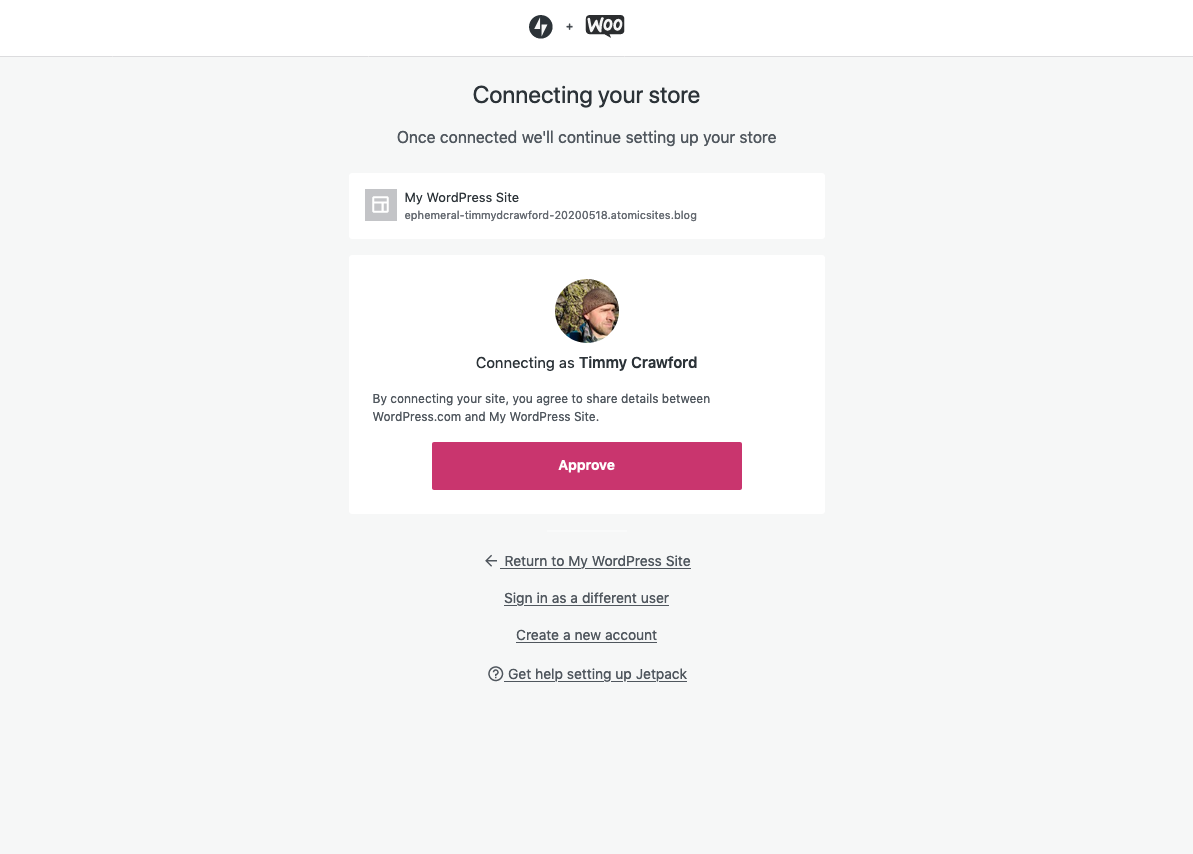
- Once you see a screen like the above, click "Approve", and verify you are redirected back to the WooCommerce Dashboard with the setup checklist shown.
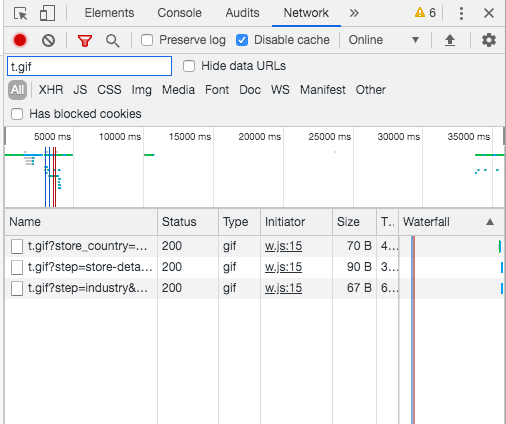
- Open your browser's developer tools (Chrome Instructions, Safari Instructions) and open the network tab and search for
t.gif
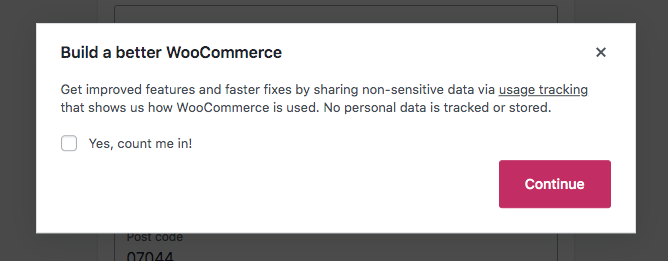
- After filing in store details on the first of the Onboarding Wizard, you will see this confirmation modal.
-
Continue on and check that no further requests for t.gif are made after the checkbox is unticked.
-
Also check that requests for t.gif ARE made after the checkbox is ticked.
In 4.2 we made some changes for addresses in Ghana adding the Regions and making the Postcode / Zip optional.
Add a product to your cart and go to checkout.
Select Ghana as your Country/Region on the checkout billing details.
You should see a list of Ghana Regions appear
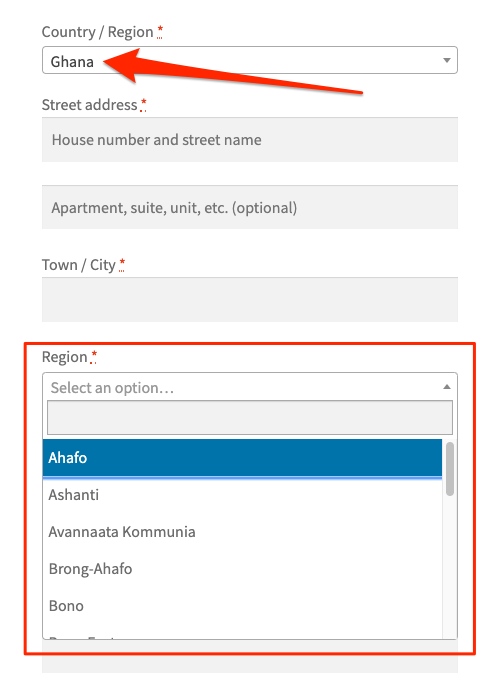
You should also see the Postcode / Zip field become optional.
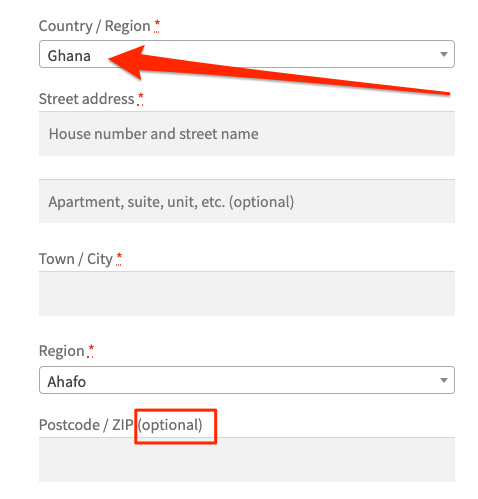
Please test around this.
An example Ghana address if needed
1234 Quartey Papafio Ave, Accra, Greater Accra, Ghana
In 4.2 we made some changes for addresses in Mozambique adding the Provinces.
Add a product to your cart and go to checkout.
Select Ghana as your Country/Region on the checkout billing details.
You should see a list of Mozambique Provinces appear.
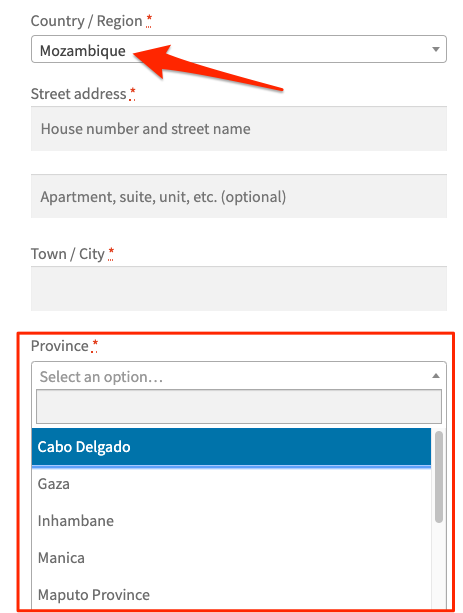
Please test around this.
An example Mozambique address if needed
12345 Av. Marginal, Maputo, Maputo, Mozambique
- Create a new site, and activate and connect Jetpack
- Follow the instructions here to enable WooCommerce Payments Developer Mode https://docs.woocommerce.com/document/payments/testing/dev-mode/#section-1
- As an alternative to editing wp-config.php, the line can be added in a new snippet after installing and activating the “Code Snippets” plugin
- Follow the instructions here to confirm Developer Mode is active and set up a test account https://docs.woocommerce.com/document/payments/testing/dev-mode/#section-3
- Note: You cannot re-use a site for this. It must be a fresh site. Once established, WooCommerce Payments account information is hard-wired to a site on Automattic servers. While it is possible to break that connection, it requires a manual step by Automattic engineers.
- Navigate to wp-admin > Payments > Settings
- Verify you can toggle Enable WooCommerce Payments to off.
- Verify after doing so that WooCommerce Payments is no longer available as a payment option on checkout
- Verify you can toggle Enable WooCommerce Payments to on.
- Verify after doing so that WooCommerce Payments is again available in checkout. In checkout, WooCommerce Payments appears as follows:
- Verify after doing so that WooCommerce Payments is again available in checkout. In checkout, WooCommerce Payments appears as follows:
- Verify that the View and edit account details link takes you to a hosted account details page on stripe.com and that it includes a return link (in the header) to your site settings
- Verify that your Account status is presented and shows all is complete
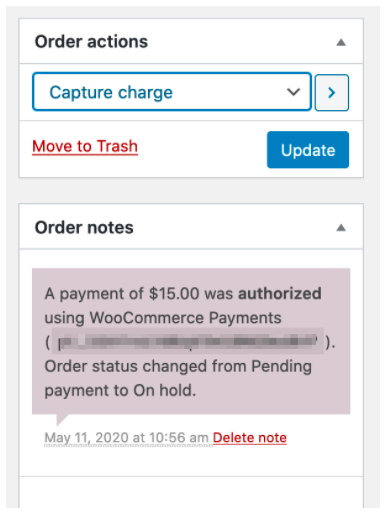
- With Manual capture unchecked (the default), complete a test purchase using WooCommerce Payments. Toggle Manual Capture to checked and complete another purchase. Toggle it back to Manual Capture unchecked.
- For a test card, use 4242 4242 4242 4242 with exp 12/23 and CVC 123
- You’ll validate that the transactions were captured vs authorized in a later test.

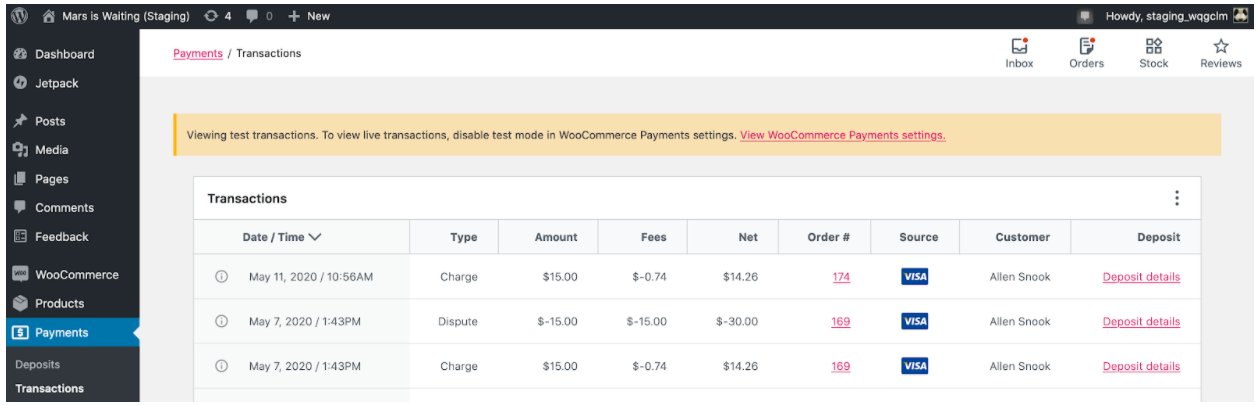
- Navigate to wp-admin > Payments > Transactions
- Verify you see your test purchases in the list, except for any authorization only orders which should NOT appear (yet)
- Navigate to wp-admin > WooCommerce > Orders
- Capture the funds for the authorization only order (for that order, under Order Options, choose Capture Charge and then Update)
should update to
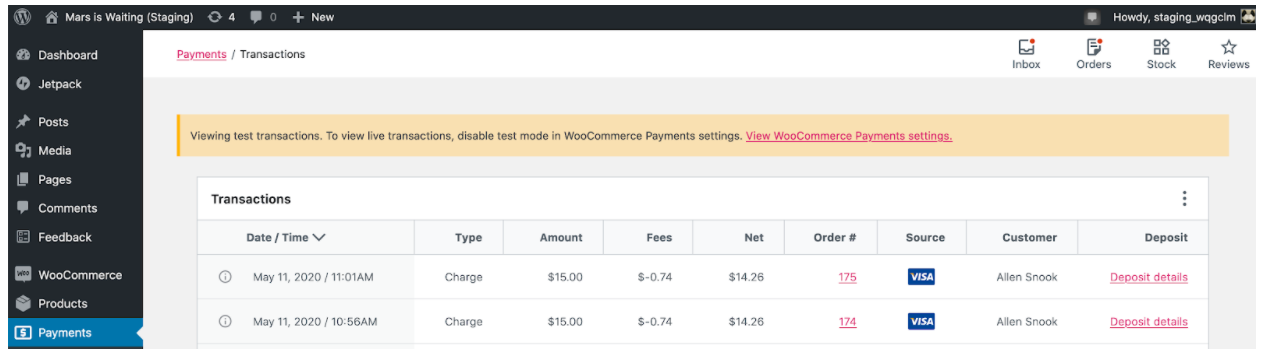
- Navigate to wp-admin > Payments > Transactions
- Verify you see your test purchases in the list, including the order you just captured
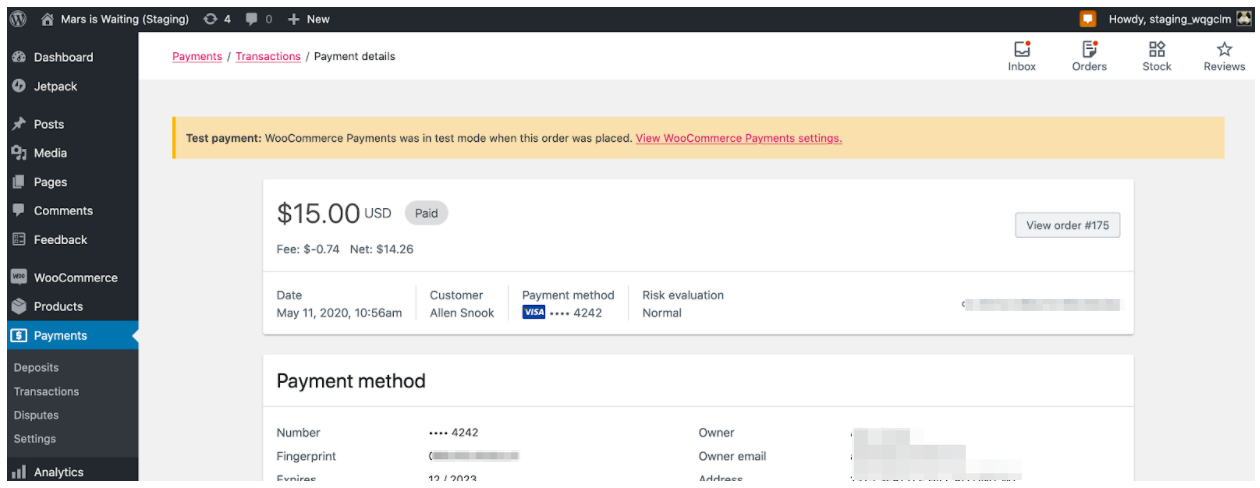
- Click anywhere on any transaction row (except the Deposit details link) and verify you can view details for it, e.g.
- Click anywhere on any transaction row (except the Deposit details link) and verify you can view details for it, e.g.
 should update to
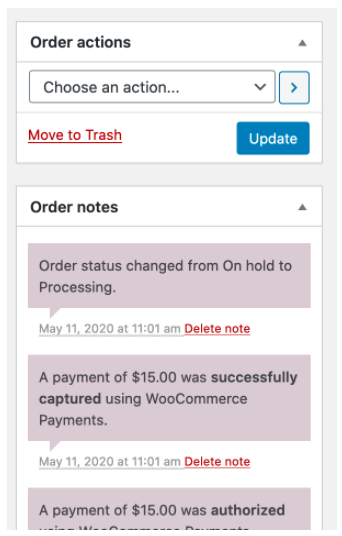
- Repeat checkout as above, but use test card 4000 0000 0000 0259 12/23 123 to have the transaction immediately flagged as fraudulent
- Navigate to wp-admin > Payments > Disputes and ensure the transaction appears there
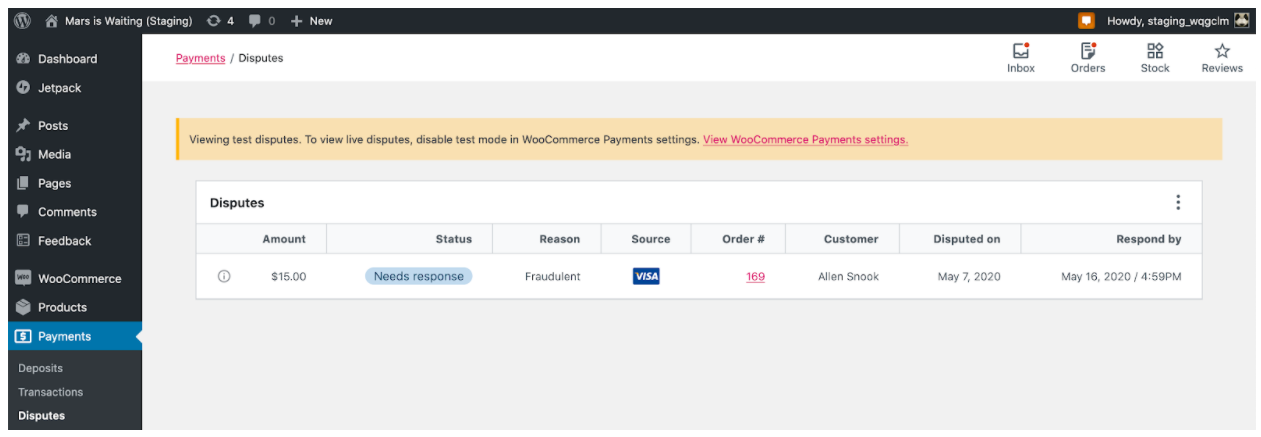
- Repeat the above transaction if desired to get more disputes in the list view
- Verify you can click anywhere on a dispute row (except the order number link) to navigate to a detail view, e.g
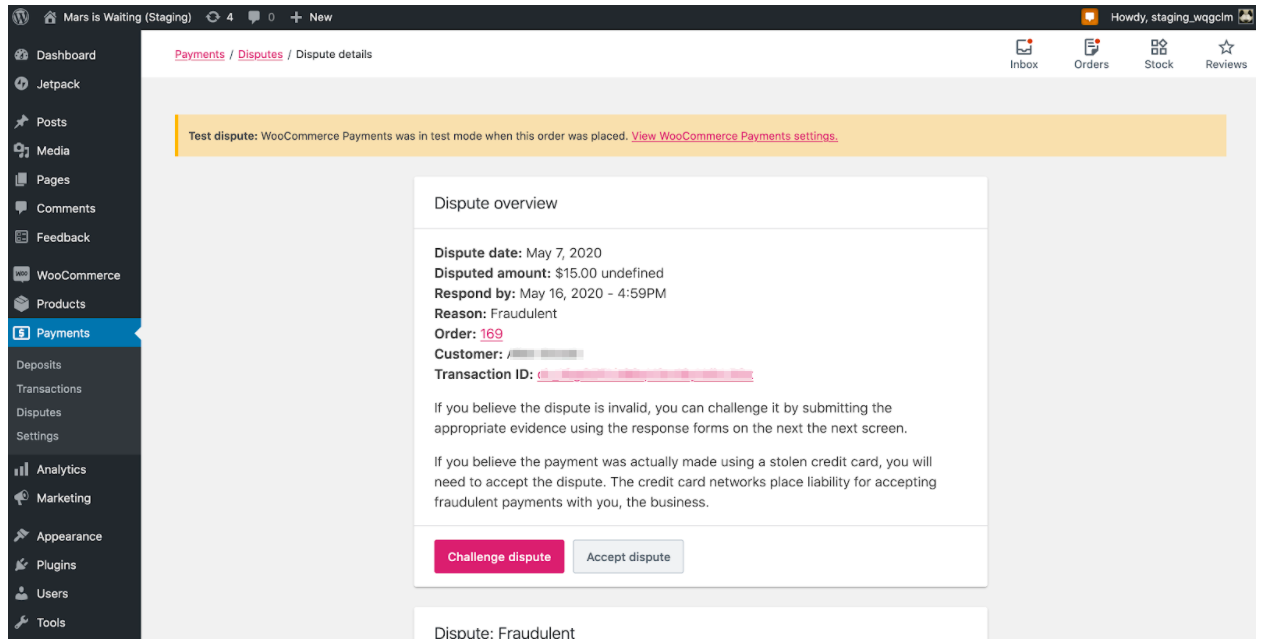
- Verify you can click the Accept dispute button to accept the dispute and that the status is updated to “Lost” in the list, e.g.:

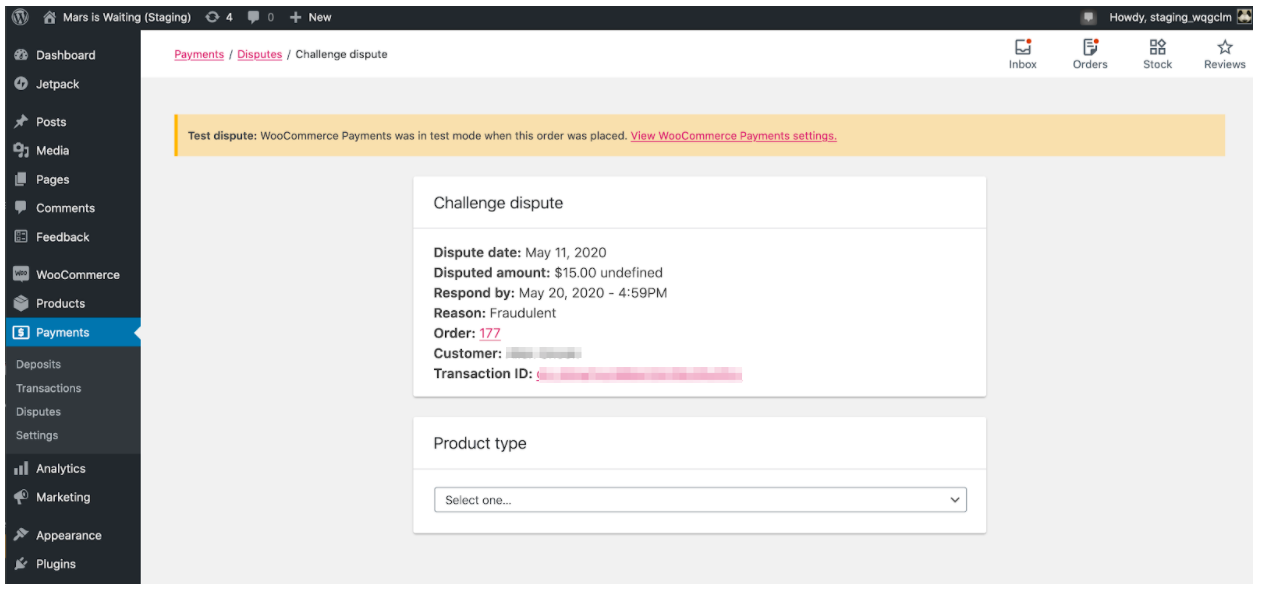
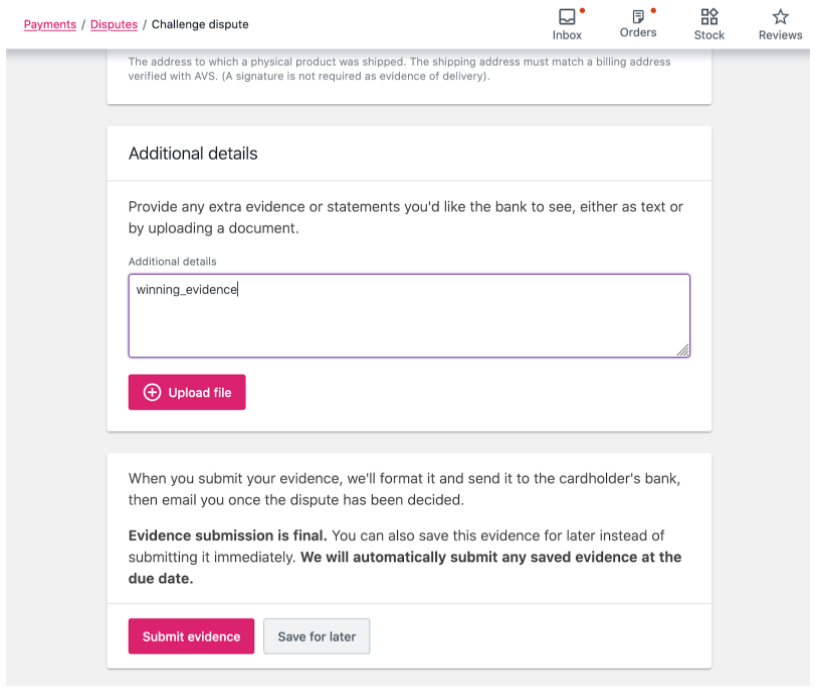
- Repeat the process above as needed to get another disputed transaction to work with. This time click on the Challenge dispute button to see the evidence form, e.g.
- Complete the form. If you enter “winning_evidence” here, you’ll win the dispute:
- Won disputes look like this:
- If you enter “losing_evidence” instead, you’ll lose the dispute

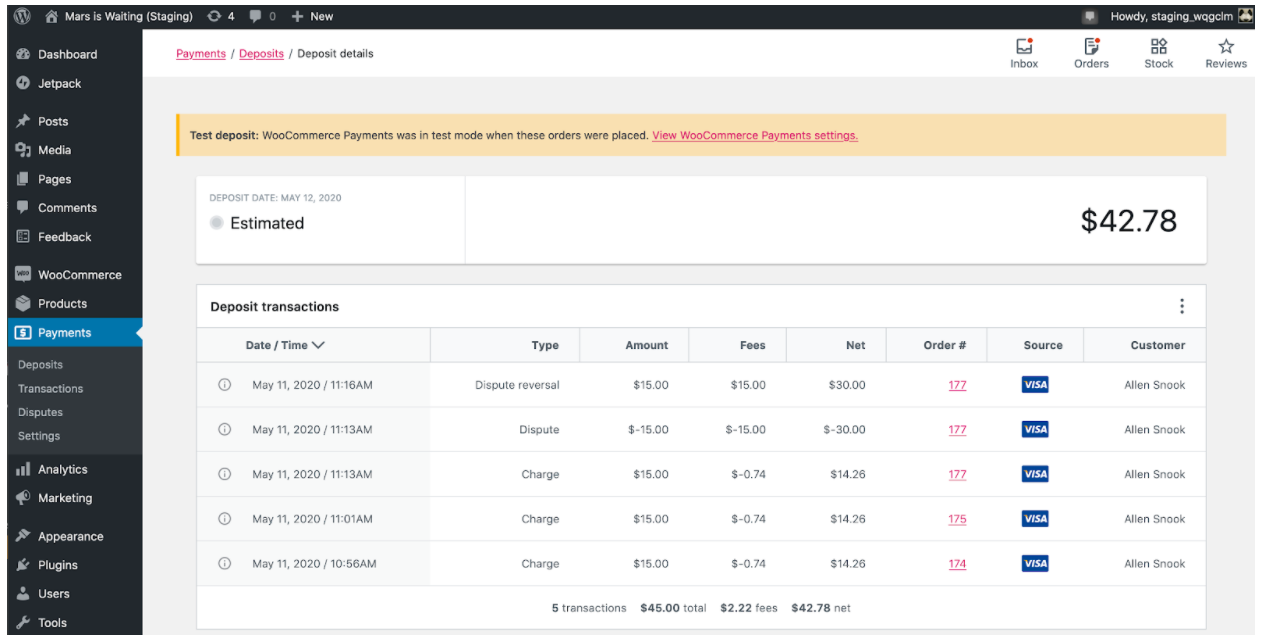
- Navigate to wp-admin > Payments > Deposits
- Ensure you see a list of deposits (you should have at least one)
- Verify you can click anywhere on a deposit row to see details for that deposit

This simplifies WooCommerce Services Installation/Activation on order detail page for relevant sites.
Set up:
- Install WooCommerce 4.1+
- Set up site so prompt will appear:
- WooCommerce Services plugin must not be installed
- Install and activate Jetpack plugin and connect site to Jetpack
- Set store address to the United States
- (for example:
Automattic Inc.60 29th Street #343San Francisco, CA 94110United States of America)
- (for example:
- Set store currency to U.S. dollars
To test:
- Create an order for a shippable product
- Open the order detail screen from orders list (WooCommerce > Orders)
- Prompt should appear

- Prompt should be dismissible by pushing the 'x'
- Click
Create shipping labelto install/activate WooCommerce Services and open the shipping label purchase flow.
Instructions can be found here here on the Storefront wiki