Repository navigation
Getting Started
Traccar Scope brings vehicle locations, trip history, telemetry, and reports together in your browser. Use the same application address on a phone, tablet, or computer.
- Open the application URL supplied by your administrator, then choose Sign in with your Traccar Scope username and password.
- Check the connection status. On a phone it appears in the top bar. On a wide screen, choose the information icon in the map toolbar. Traccar API: ok indicates that the app can reach the tracking service.
- Open Devices. On a phone, use the bottom navigation or tap the device name at the top.
- Use a device's checkbox to show or hide its map data. Choose its name to select the device for inspection.
Your application sign-in and the shared Traccar connection settings serve different purposes. Administrators manage application accounts under Settings → Users and Groups. Your device and vehicle permissions determine what you can see.
- Open Trips. On a phone, choose Expand if you want more room.
- Expand a year and month, then choose a day. The day's trips appear directly underneath it in the same panel.
- Choose a trip to highlight its route and load its details. Scroll below that day's trip rows to reach tags and notes.
- Choose the graph icon beside a day to graph that day, or beside a trip to graph that trip.
- Under Data elements, check a numeric field to draw it. Close the graph to return to the workspace.
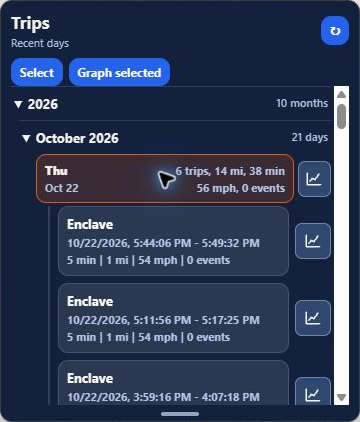
The former History navigator and separate Trips window are now combined into Trips. See Trips for selecting several days or individual trips together.
The bottom navigation has Map, Devices, Trips, and More. Expand gives the sheet the workspace; Reduce restores the shared map/list view; Map returns to the map with a small status strip. Details and longer tools scroll within their own content area.
Follow the illustrated Mobile guide for navigation, status, graphs, settings, and closing tools.
- Map and vehicle status
- Inspect a route point
- Trips, tags, and notes
- Telemetry graphs
- Reports
- Settings and vehicle setup
- Vehicle Catalog
- Named Places and track markers
- Trip Tags
- Troubleshooting
Screenshots omit or cover account details, device identities, and private locations. Available fields and tools depend on your installation and account.