Repository navigation
History and Trips
Trips combines the former History navigator and separate trip window. The hierarchy is year → month → day → trips; opening a day reveals its trips in place.
- On a wide screen, use the floating Trips panel. On a phone, choose Trips in the bottom navigation.
- Expand the year and month you need. Older months load when opened; a failed month offers Retry.
- Choose a day to expand or collapse its trips. The day summary shows trip count, distance, duration, maximum speed, and event count.
- Choose a trip row to display its route and load its metadata. Its highlight distinguishes it from the other trips.
- Scroll below the day's trip rows for the selected trip's tags, notes, and any detected events.
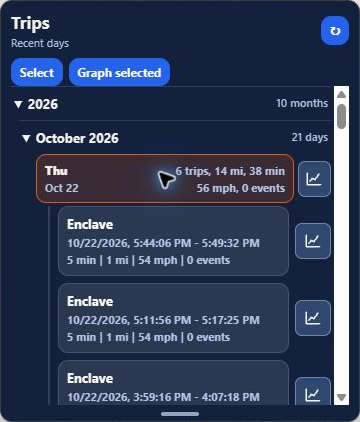
Use the refresh icon beside Trips to reload history. On a phone, use Expand for the full list and Map to return to the route; Reduce restores the shared view. On a wide screen, drag the heading to move Trips or its lower resize handle to change its height.
Each day has its own graph icon beside its summary. Each trip also has a graph icon. These open telemetry for that specific day or trip.
To combine days and individual trips:
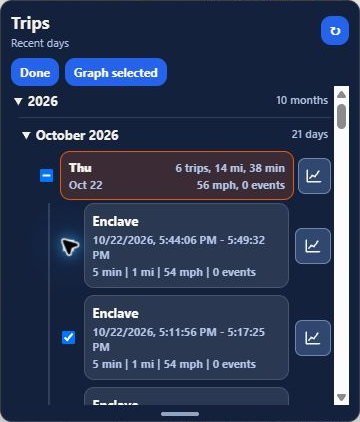
- Choose Select to reveal day and trip checkboxes.
- Check a day to include all its trips, or expand a day and check individual trips. You can combine choices across days.
- A partially checked day indicates that only some of its trips are included. Adjust its trip checkboxes as needed.
- Choose Graph selected to open the combined selection.
- Choose Done to leave selection mode.
See Telemetry graphs for fields, zoom, export, and sharing.
A trip row identifies its vehicle, start and end times, duration, distance, maximum speed, and event count. Selecting the row also selects its route on the map.
Notifications shows stored events for the current range or day. Selected-trip details can also show detected events. Labels such as traccar and calculated distinguish their sources. On a phone, reach Notifications through More → Notifications.
- Select a trip and wait for its metadata to load.
- Scroll beneath that day's trip list.
- To attach an existing label, choose it under Add Tag, then choose Add.
- Enter context in Trip Notes, then choose Save Notes.
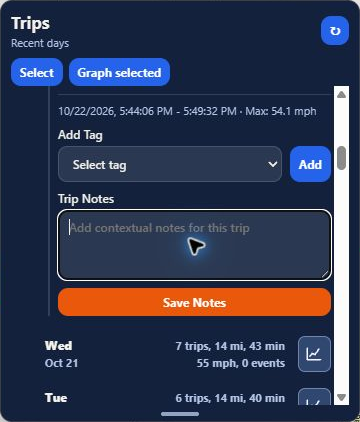
Choose Save Notes before leaving an edited note. Administrators create reusable labels in Settings → Trip Tags, with an optional vehicle scope and color. See Trip Tags for that workflow.